
AI agents are the part of automation that most people skip because they assume it's too technical. It isn't.
An agent isn't magic. It's a workflow that can think. It receives input, decides what to do, takes action, and reports back, all without you touching a thing.
That's the difference between a regular automation and an agent. A standard workflow follows a fixed script, while an agent makes decisions along the way.
Here's how to build an agent from scratch in n8n.
This tutorial walks through a basic agent with three components: a trigger, a language model, and a tool. Think of it like a worker who listens for instructions, thinks about what to do, and then goes and does it.
The trigger starts the whole chain. The model is the brain. The tool is the hands.
We're going to build this step by step, testing as we go. That's important; don't try to build the whole thing and test at the end. Build one piece, confirm it works, then add the next.
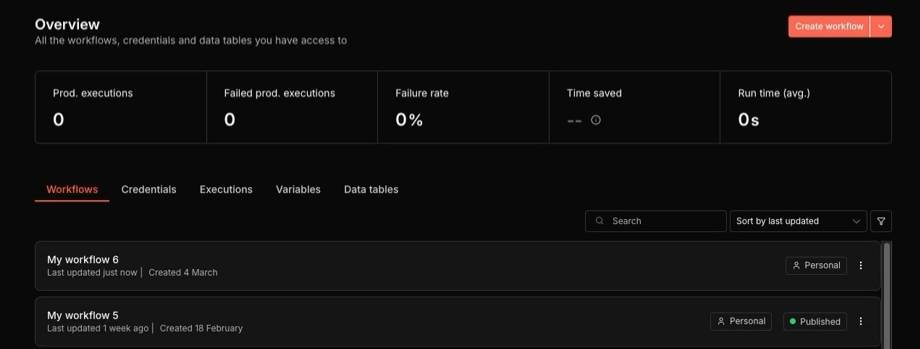
Open your n8n account and navigate to the home screen. You'll see your existing workflows listed here. Create a new one by clicking "Create workflow."
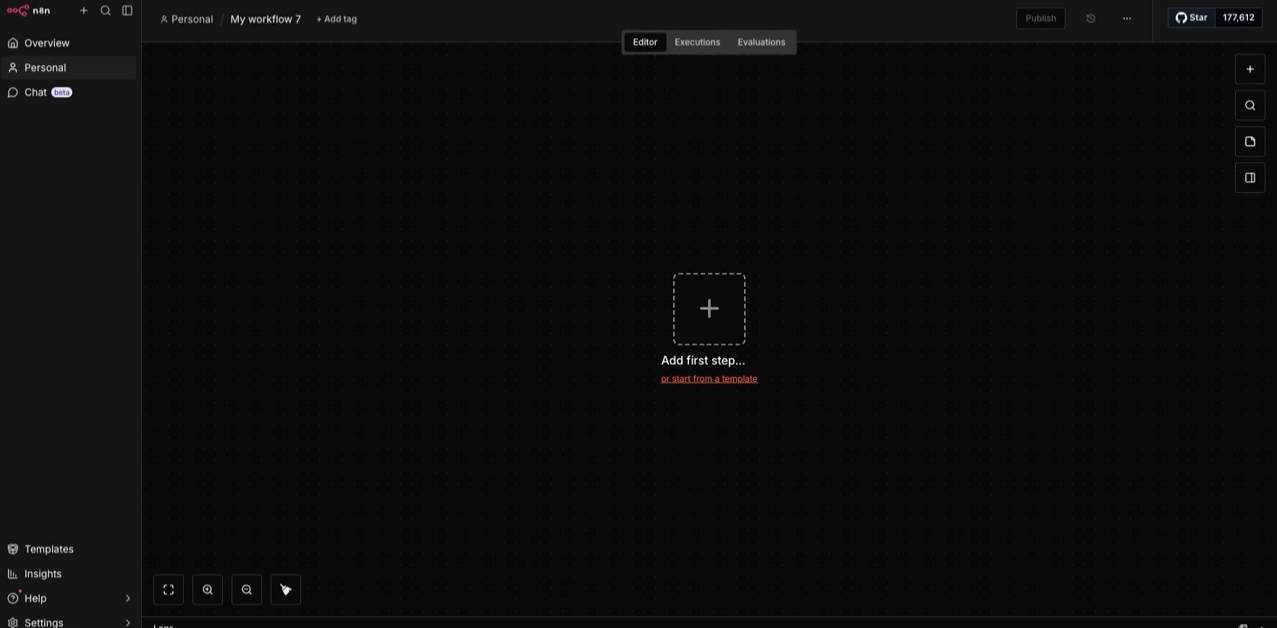
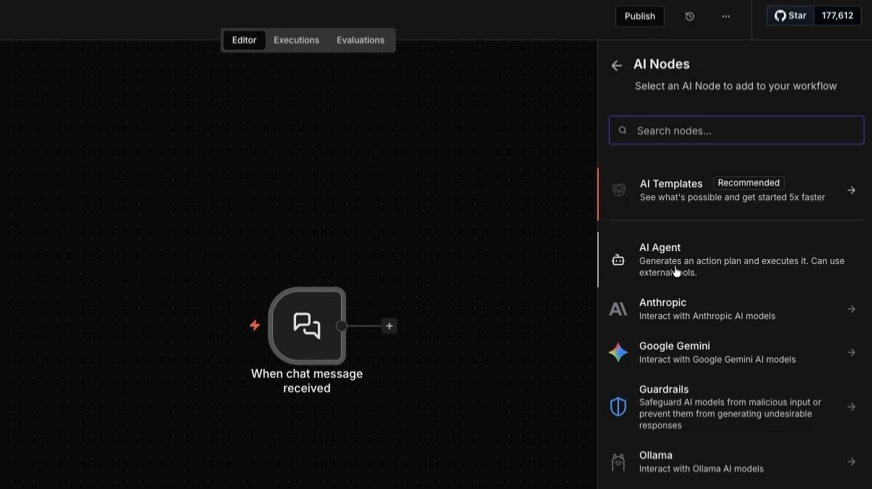
You'll land on a blank canvas. This is your workspace. Everything gets built here, node by node. Click the plus sign to add your first step.
Then, you'll see a list of triggers. For this build, select "On chat message."
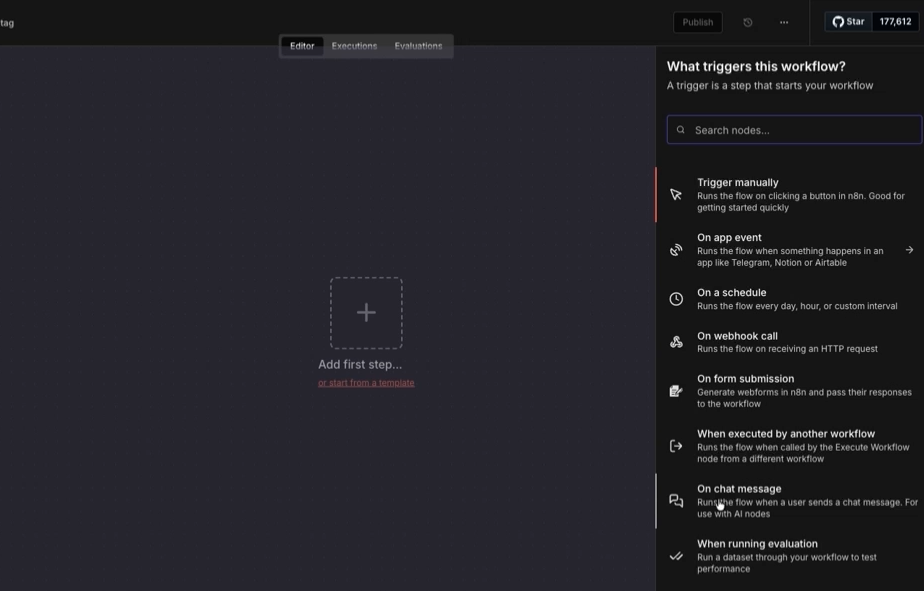
This means the agent will activate whenever someone sends it a message to your n8n chatbot, which you can publish to the web so it’s available to the public.
If you’d like, you can also trigger your AI agent to start running based on specific events in your apps, like a new file being uploaded to Google Drive or a deal being marked closed/won in your CRM.
Once your trigger is in place, click the plus sign to the right of the trigger to add the next node.
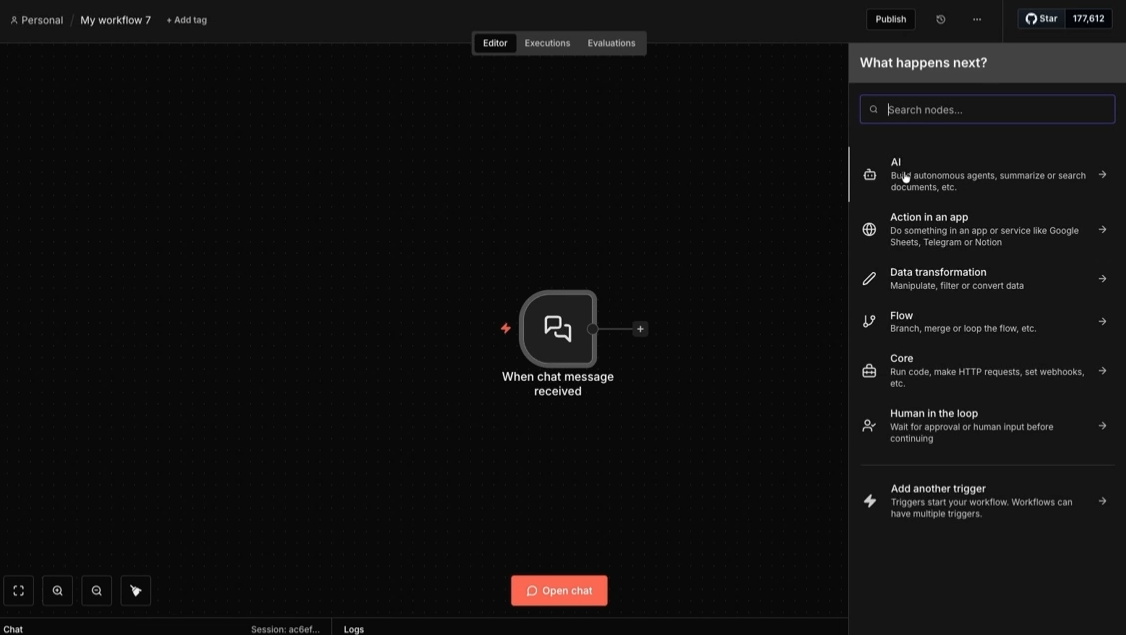
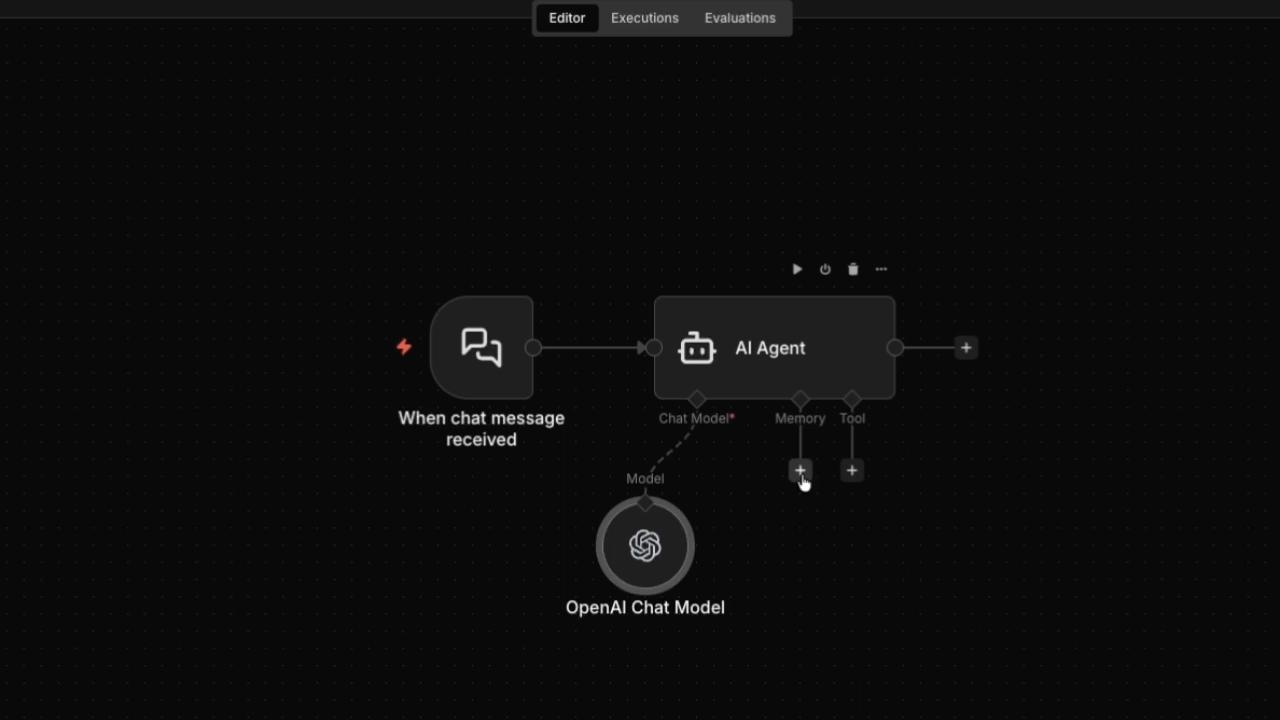
Select the AI category, then choose "AI agent."
This node is the core of everything. It's what turns a regular automation into something that can reason and act.
Now you need to give the agent a brain. Click the plus sign under "Chat model" to connect a large language model. This is what the agent uses to understand instructions and decide what to do.
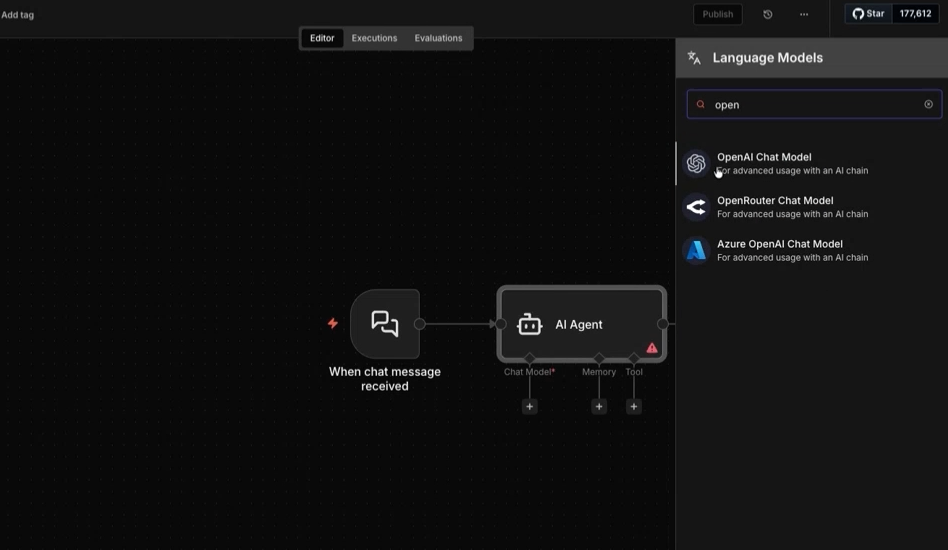
You have options here. OpenAI, Anthropic, and others are all available. For this walkthrough, you can select any model that you have access to, and provide your API credentials.

You can learn to create developer accounts and API keys for popular API platforms in our tutorials:
• Create Gemini API key (free)
• Create Anthropic (Claude) API key
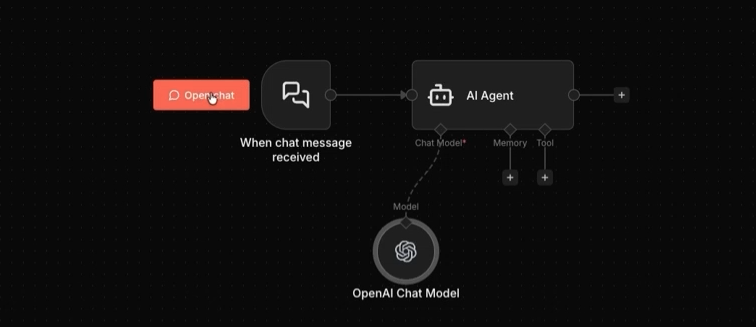
Once connected, your canvas should show two nodes: the chat trigger and the AI agent with a model attached. That's enough to test.
Run a test to pull some data into your basic workflow. Click on “Open Chat” to open the chat interface.
Then, type a simple query, like "Are you a real person?" In the “Output” section, you’ll see the AI’s answer.
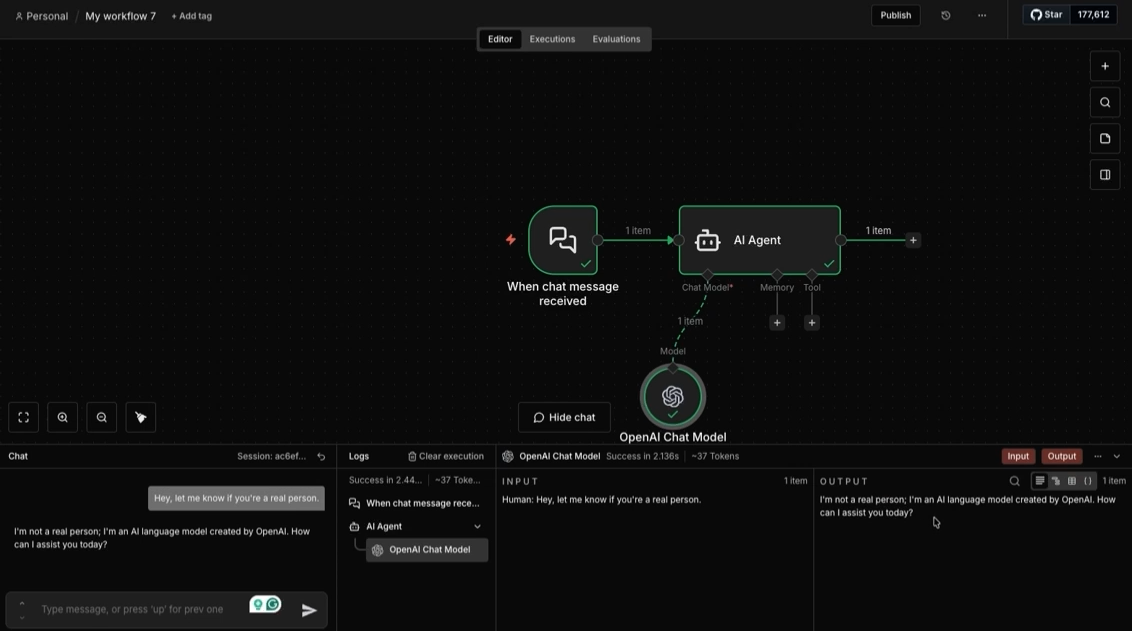
If the agent responds, your basic setup is complete. Both your query and the AI’s response are logged and can be sent to other apps.
Without memory, each message is treated as if it's the first one. The agent has no context for what was said before. That's fine for simple tasks, but it quickly becomes a problem for anything conversational.
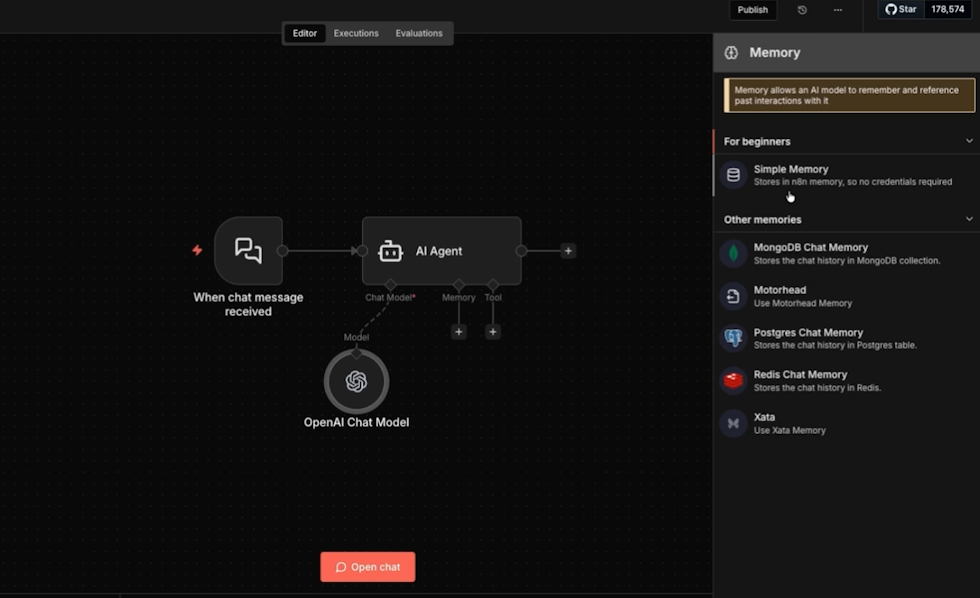
To fix this, add a memory node. Click the plus sign under the memory section of the AI agent.
There are several options for memory, but the easiest approach is to select "Simple memory." This keeps track of the conversation as it goes without requiring a third-party database app.
When you configure this node, you'll see two key settings: session ID and context window length.
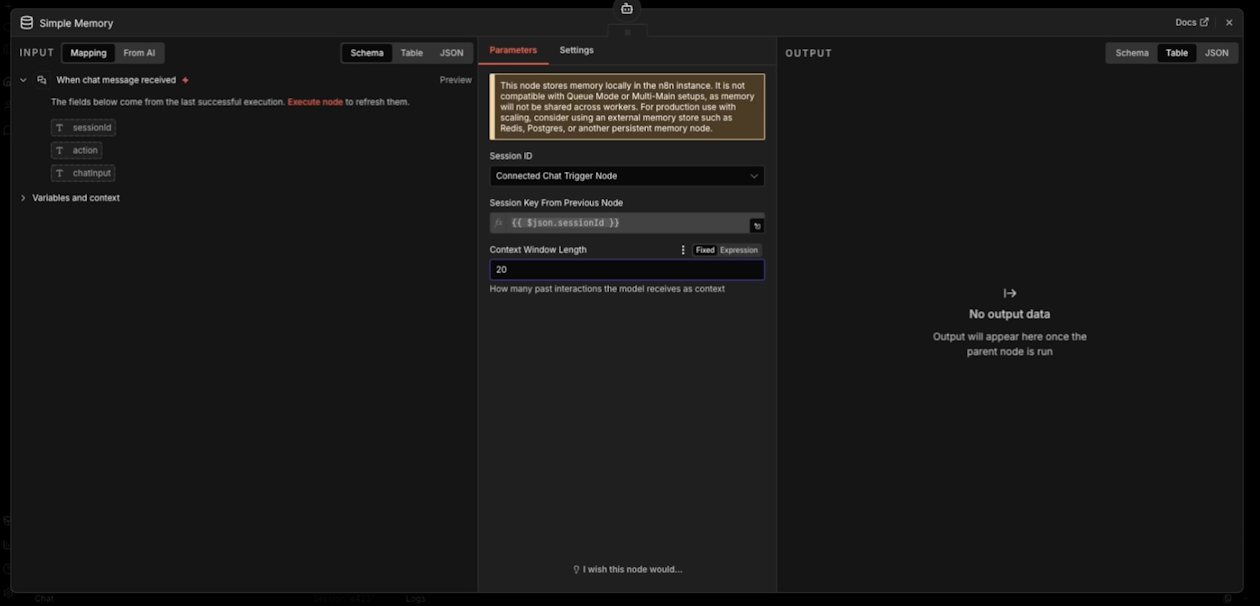
The session ID keeps track of each unique conversation. You can leave it to its default.
The context window controls how many past messages the agent remembers. You’ll likely want to set this to a higher number, like 20. That's enough to handle most real-world conversations without overloading the model.
Now the agent remembers what's been said. It can refer back to earlier parts of the conversation, catch context from previous messages, and give better answers as a result.
Memory makes the agent smarter. Tools make it useful.
A tool is what the agent uses to take action in the world. It connects the agent's output to something real: a Slack message, a Gmail draft, a record in your CRM.
Without a tool, the agent just talks. With one, it does things.
To add a tool, click the plus sign under the tools section of the AI agent. Select the app you want to connect. Slack is a good first example.
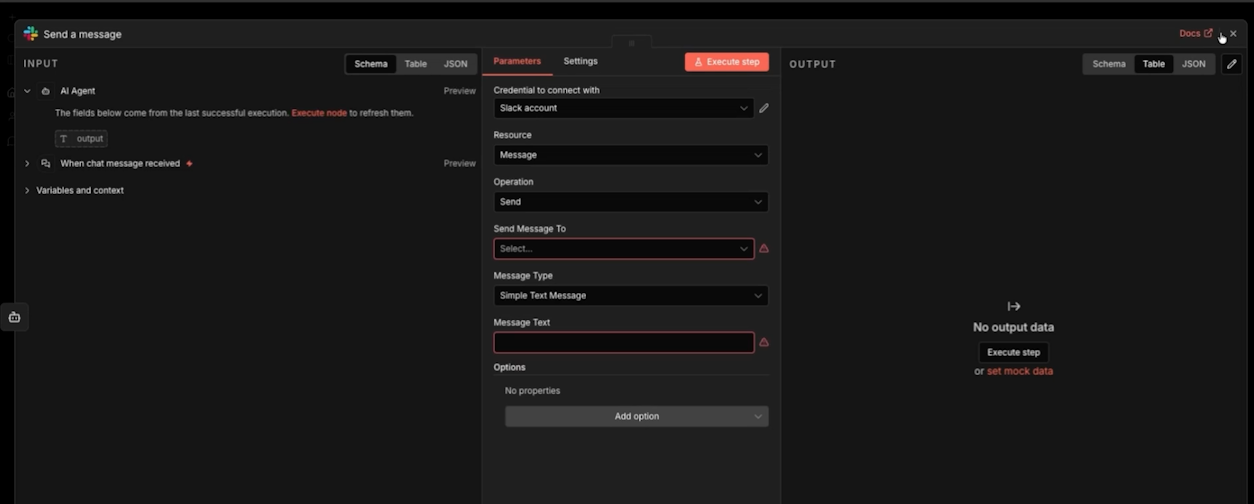
Configure it to send a message. You'll set the channel or user, choose simple text, and map the agent's output to the message field. When the agent finishes processing, it fires off a Slack notification automatically, without you involved.
This is where the value becomes real. The agent handles the conversation, figures out what matters, and routes the output to wherever it needs to go.
• The trigger starts the workflow
• The model handles reasoning
• Memory keeps context across the conversation
• The tool delivers the output
Every agent you build follows this same structure. The use cases change. The logic doesn't.
A basic chat agent that notifies you in Slack is just the beginning. The same framework supports lead qualification, customer service routing, internal help desks, document processing, and more. Any time a human is currently reading something, deciding what it means, and taking a next step, an agent can do that instead.
That's the point. You're not building software for its own sake. You're replacing manual work with something that runs on its own.
If you're not sure where to start in your own business, that's exactly what we help with at XRAY. We work with teams to identify the highest-value automation opportunities and build the systems to act on them. Book a free consultation today to get started.

.pptx.png)

