
Modern AI and automation tools give us a wide range of options for making our workday easier.
ChatGPT is useful for writing and analysis. Zapier automates work across thousands of apps. But these tools can do more than work in parallel – they can work together.
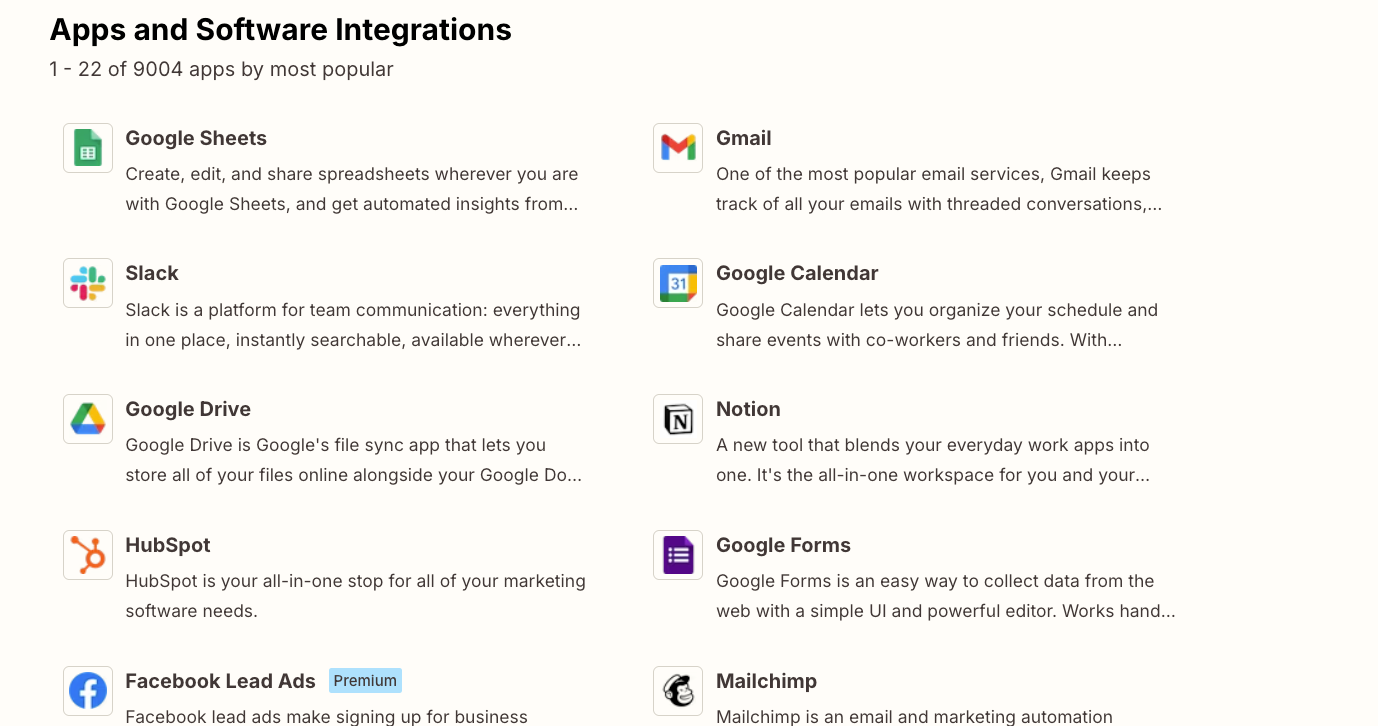
Zapier MCP connects ChatGPT directly to Gmail, Google Sheets, Notion, HubSpot, and over 8,000 other integrated apps. This transforms ChatGPT from a text interface into an assistant that reads emails, updates spreadsheets, and manages tasks across your entire software stack.
The result: ChatGPT stops being a chatbot. It becomes a tool that gets real work done.
In this guide, we’ll show you how to set up Zapier MCP and connect ChatGPT to any app you need.
First, let's clarify what "MCP" means.
MCP stands for Model Context Protocol. It's a standard way for AI tools like ChatGPT or Claude to connect directly to your other software using their APIs. MCP was developed by Anthropic, who recently donated it to the Linux Foundation to make it an open standard for everyone to use.
When you create an MCP server in Zapier, that allows ChatGPT to connect to Zapier and access its functionality – which, in turn, lets ChatGPT connect to the thousands of apps already integrated with Zapier.
If you want to access your web apps from ChatGPT, using a Zapier MCP server is the fastest, easiest way to do it.
There are three basic steps to creating your own Zapier MCP server and connecting it to ChatGPT.
• First, you create your server with Zapier MCP, and add all the apps you want to use.
• Second, you connect that server to your ChatGPT account.
• Finally, you select your Zapier integration in ChatGPT, and ask it to automate any app you want.
Let’s dive into the details for each of these steps.
To get started, you need to create a Zapier MCP server. You'll need a Zapier account if you don't have one already.
The good news: there’s a free plan available, and MCP servers are included in all plans. No additional subscription is necessary. Instead, Zapier MCP just uses tasks from your Zapier plan.
You can learn more about pricing (and see how many tasks are included with each plan) on Zapier’s pricing page.
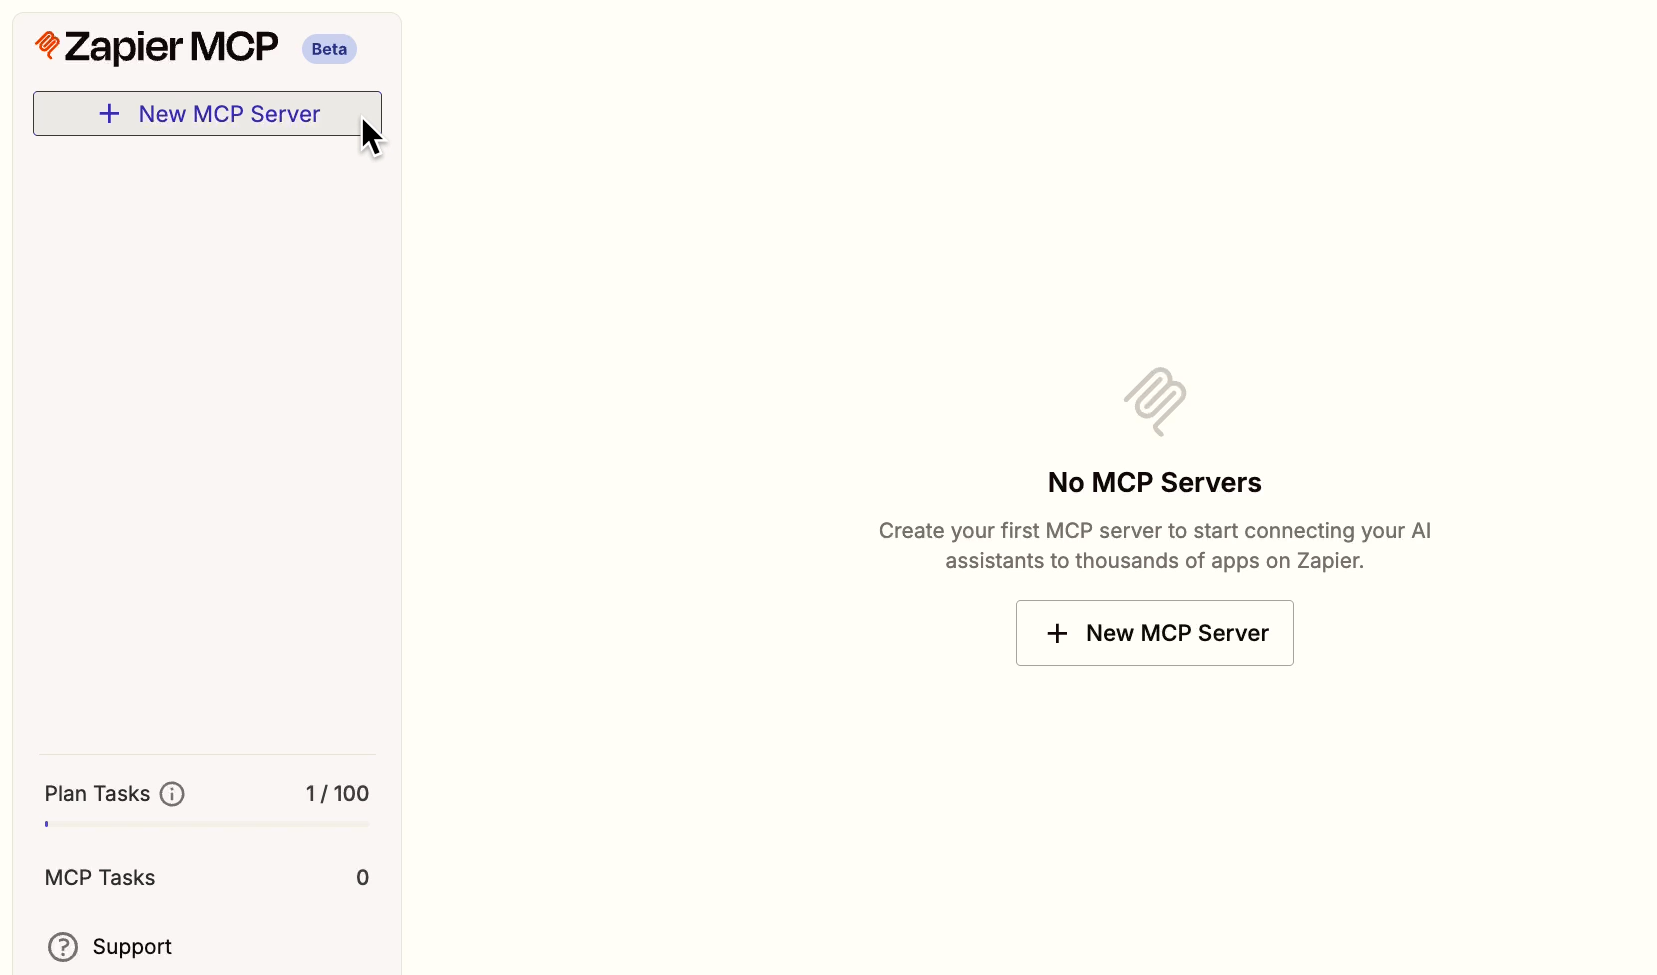
Once you've signed up and signed in to Zapier, go to mcp.zapier.com.
Click "New MCP Server" in the left hand menu.
You'll then need to choose your 'client'. The 'client' is the AI tool that you want to integrate with Zapier.
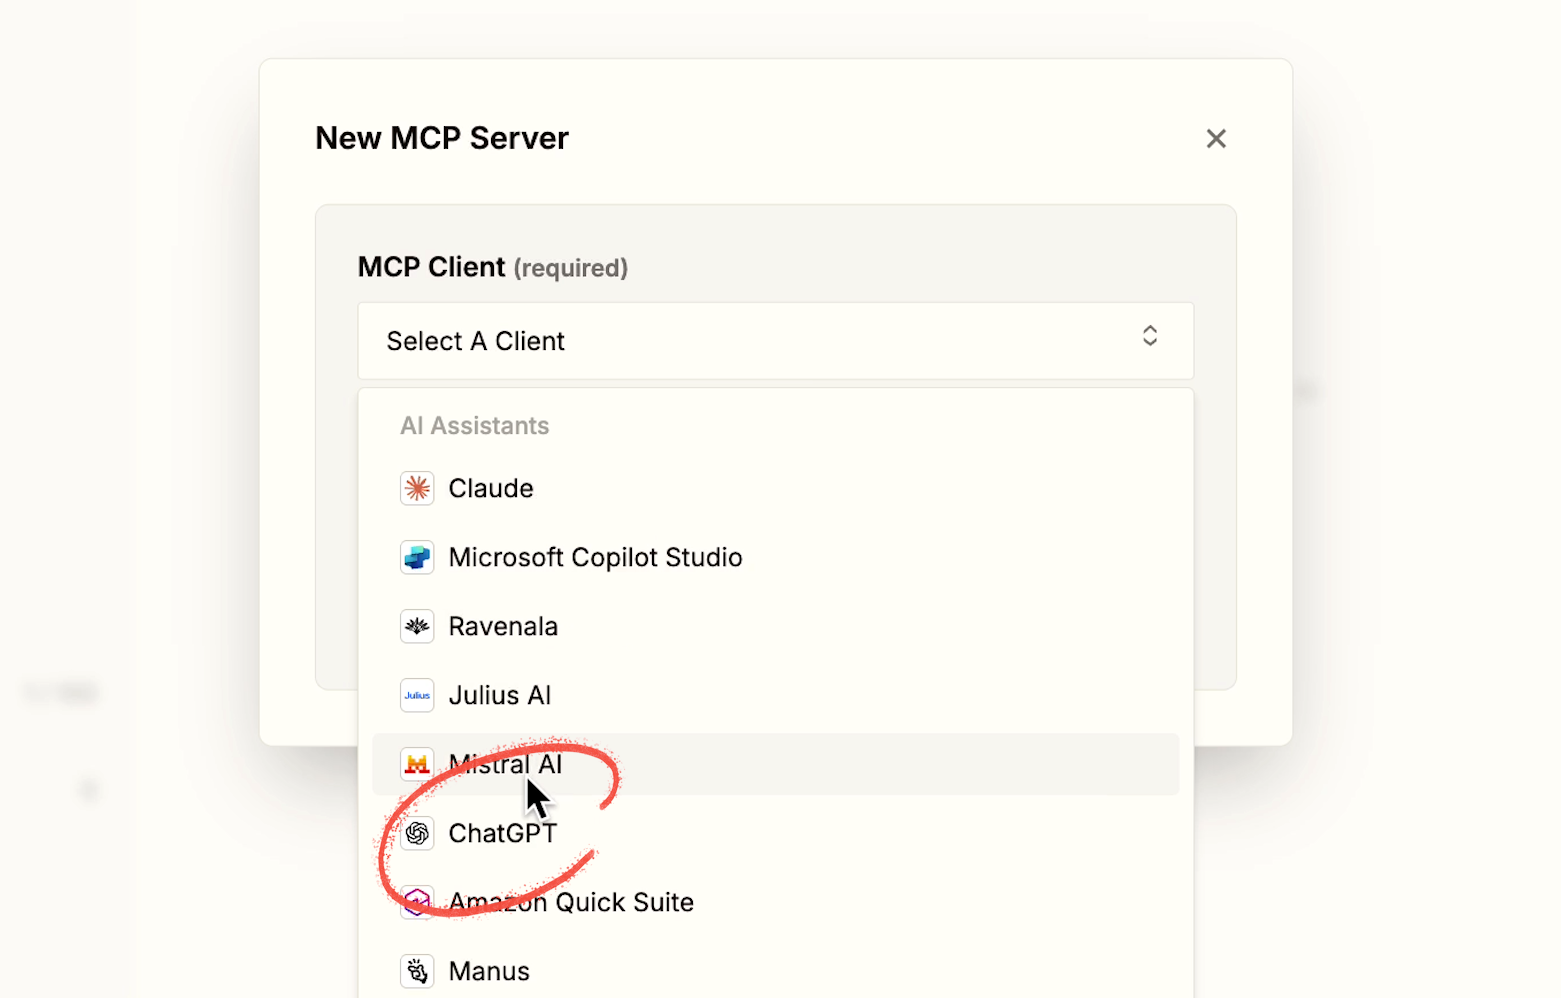
For this example, we're using ChatGPT – but there are several other options available, like Claude, Microsoft Copilot, and Cursor.
You can give your server a unique name, or just stick with the automatically generated default name.
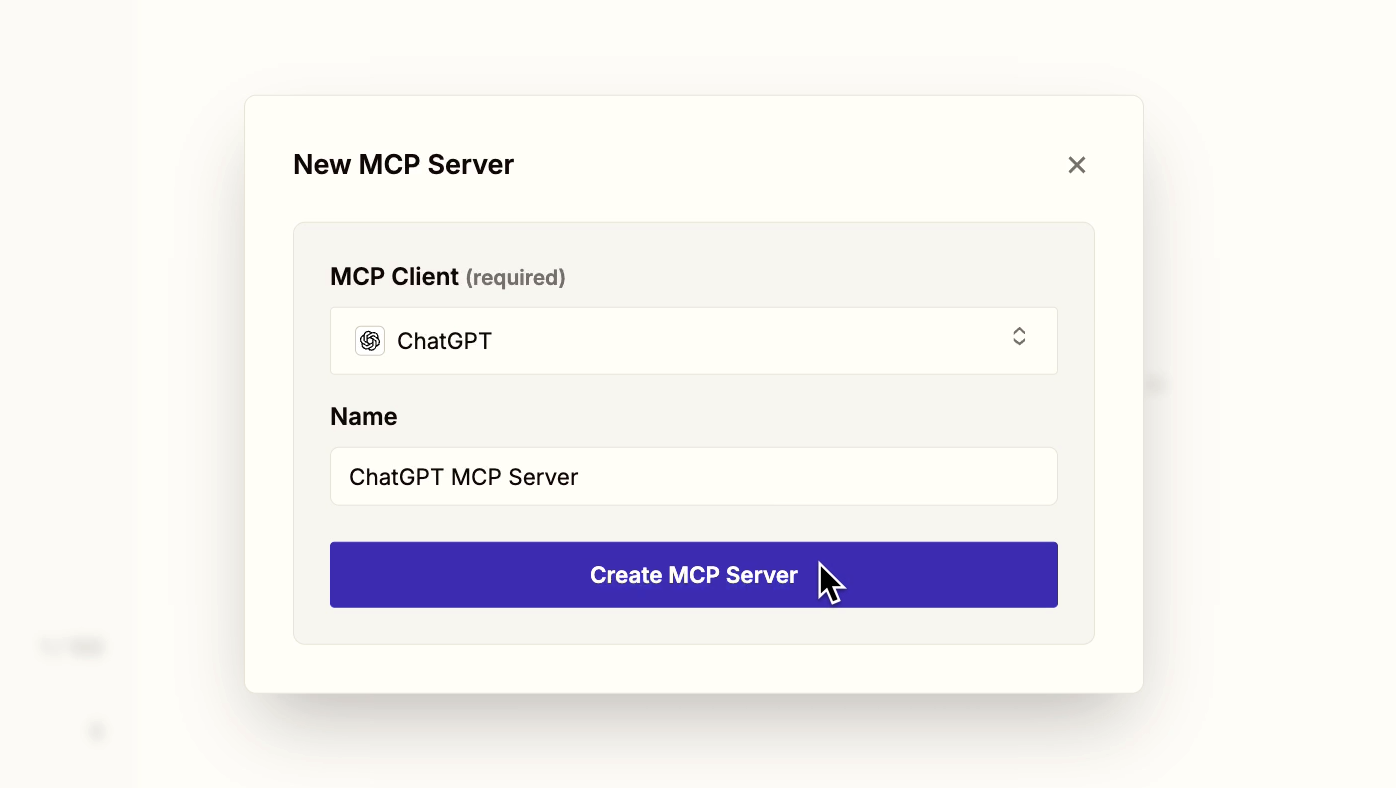
Then, click "Create MCP Server" to finish the initial setup.
Now, you can add "tools" to your MCP server. "Tools" are the apps and actions that your server can access among Zapier's library of over 8,000 integrations.
By adding tools, your MCP server and ChatGPT will be able to view and manage your Hubspot account, or your Notion workspace, or your Airtable bases, or basically any web app you want.
To add new abilities to your server, click "Add tool".
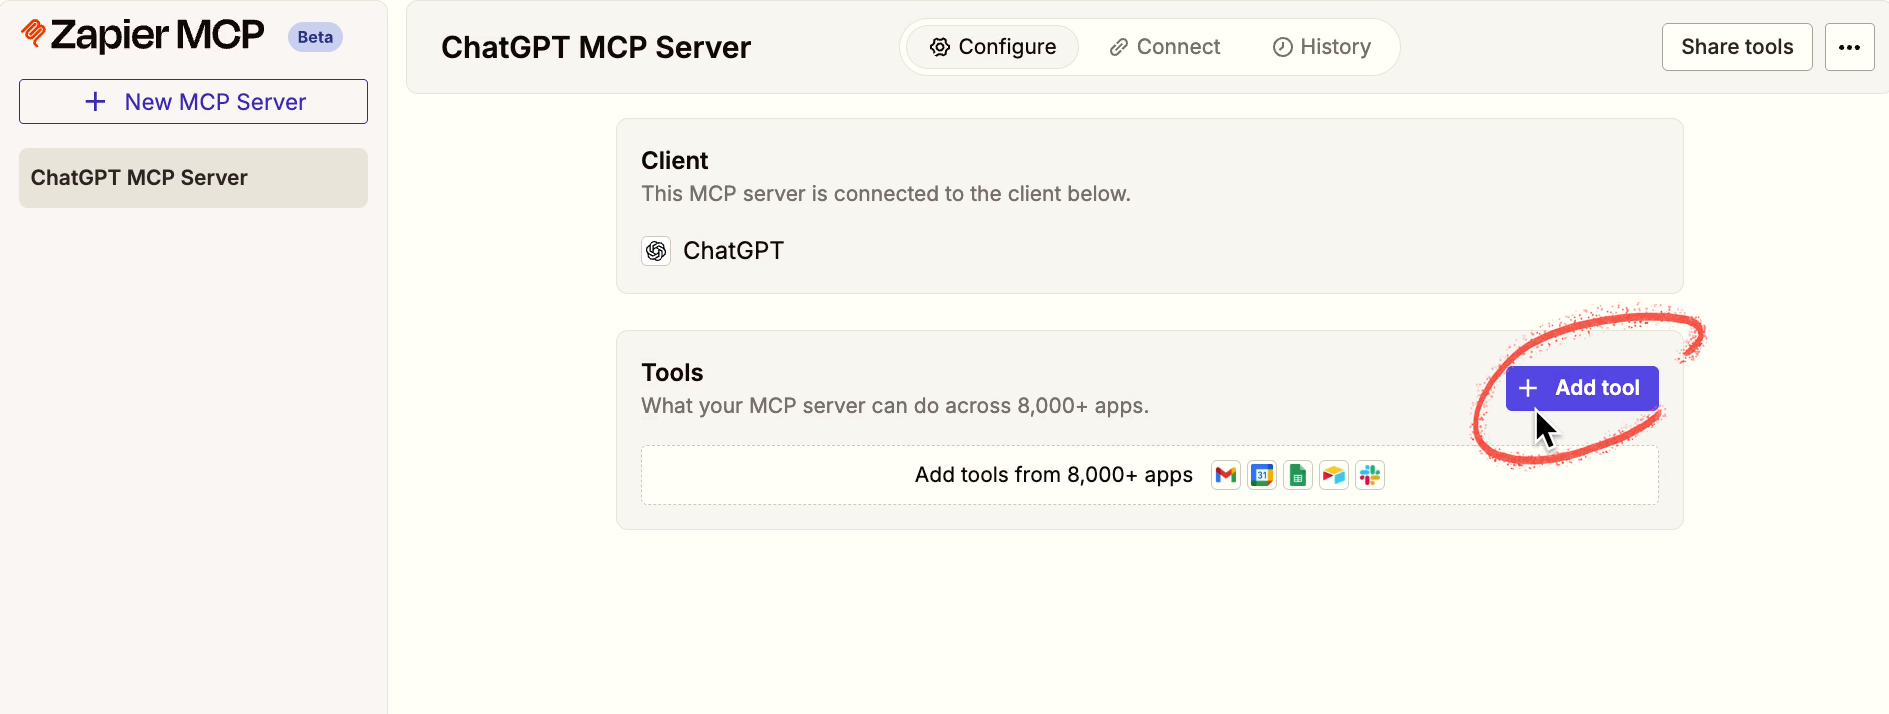
Then, select the app you want to use. For instance, we'll use Gmail.
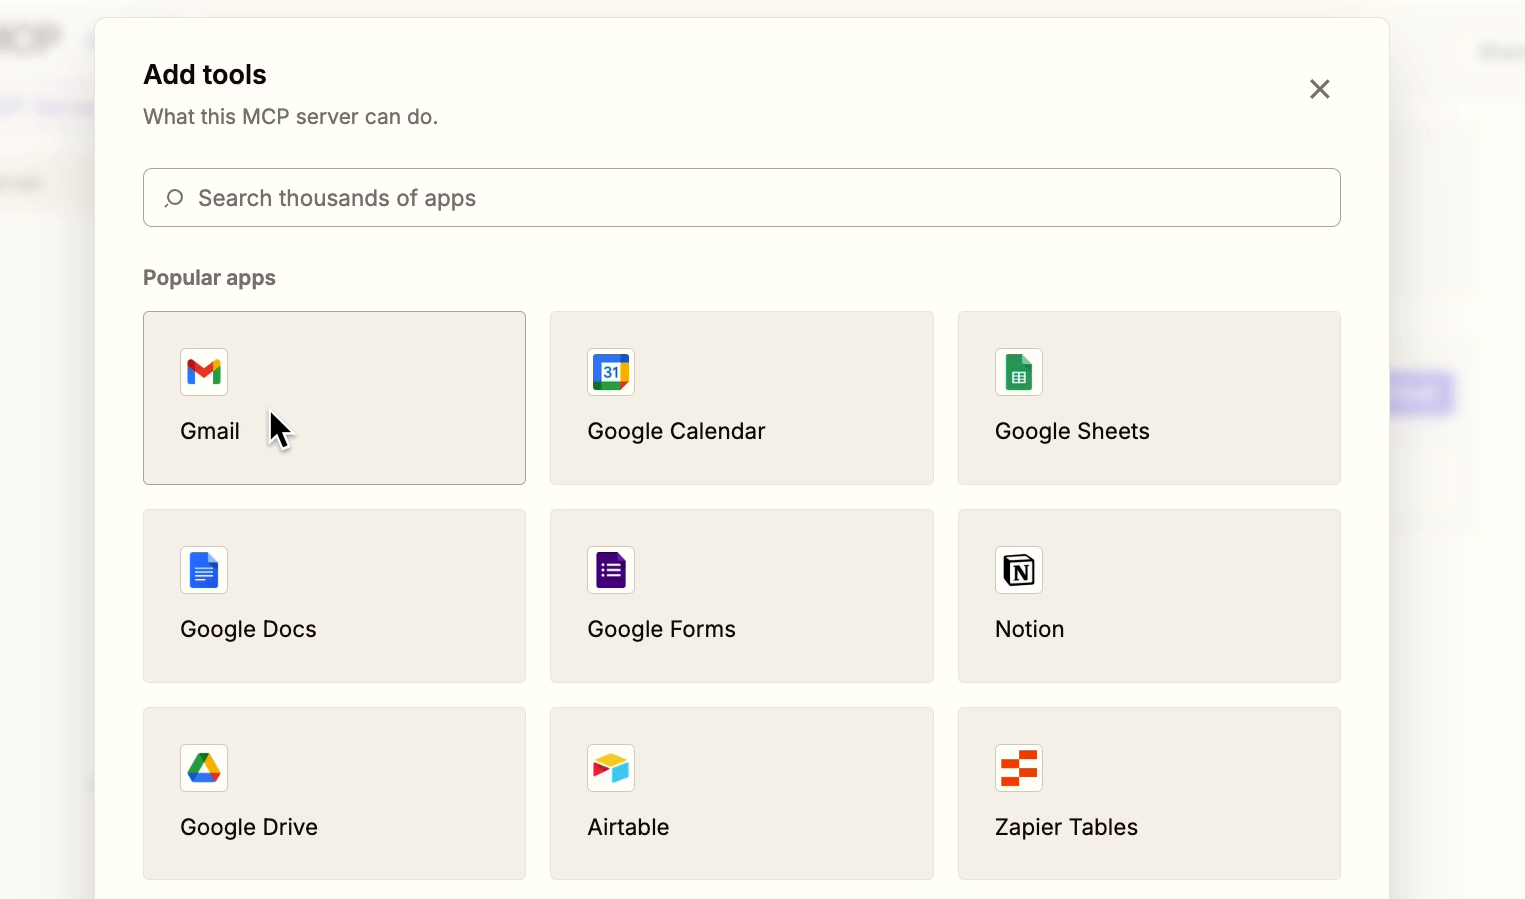
Note that if it's your first time adding an app to the server, you'll need to sign in with your account for that app and authorize Zapier to access it.
For each app, you can pick specific actions to enable. There are always going to be several options to choose from. In Gmail, for example, there are actions for finding emails, adding labels, drafting emails, and a lot more.
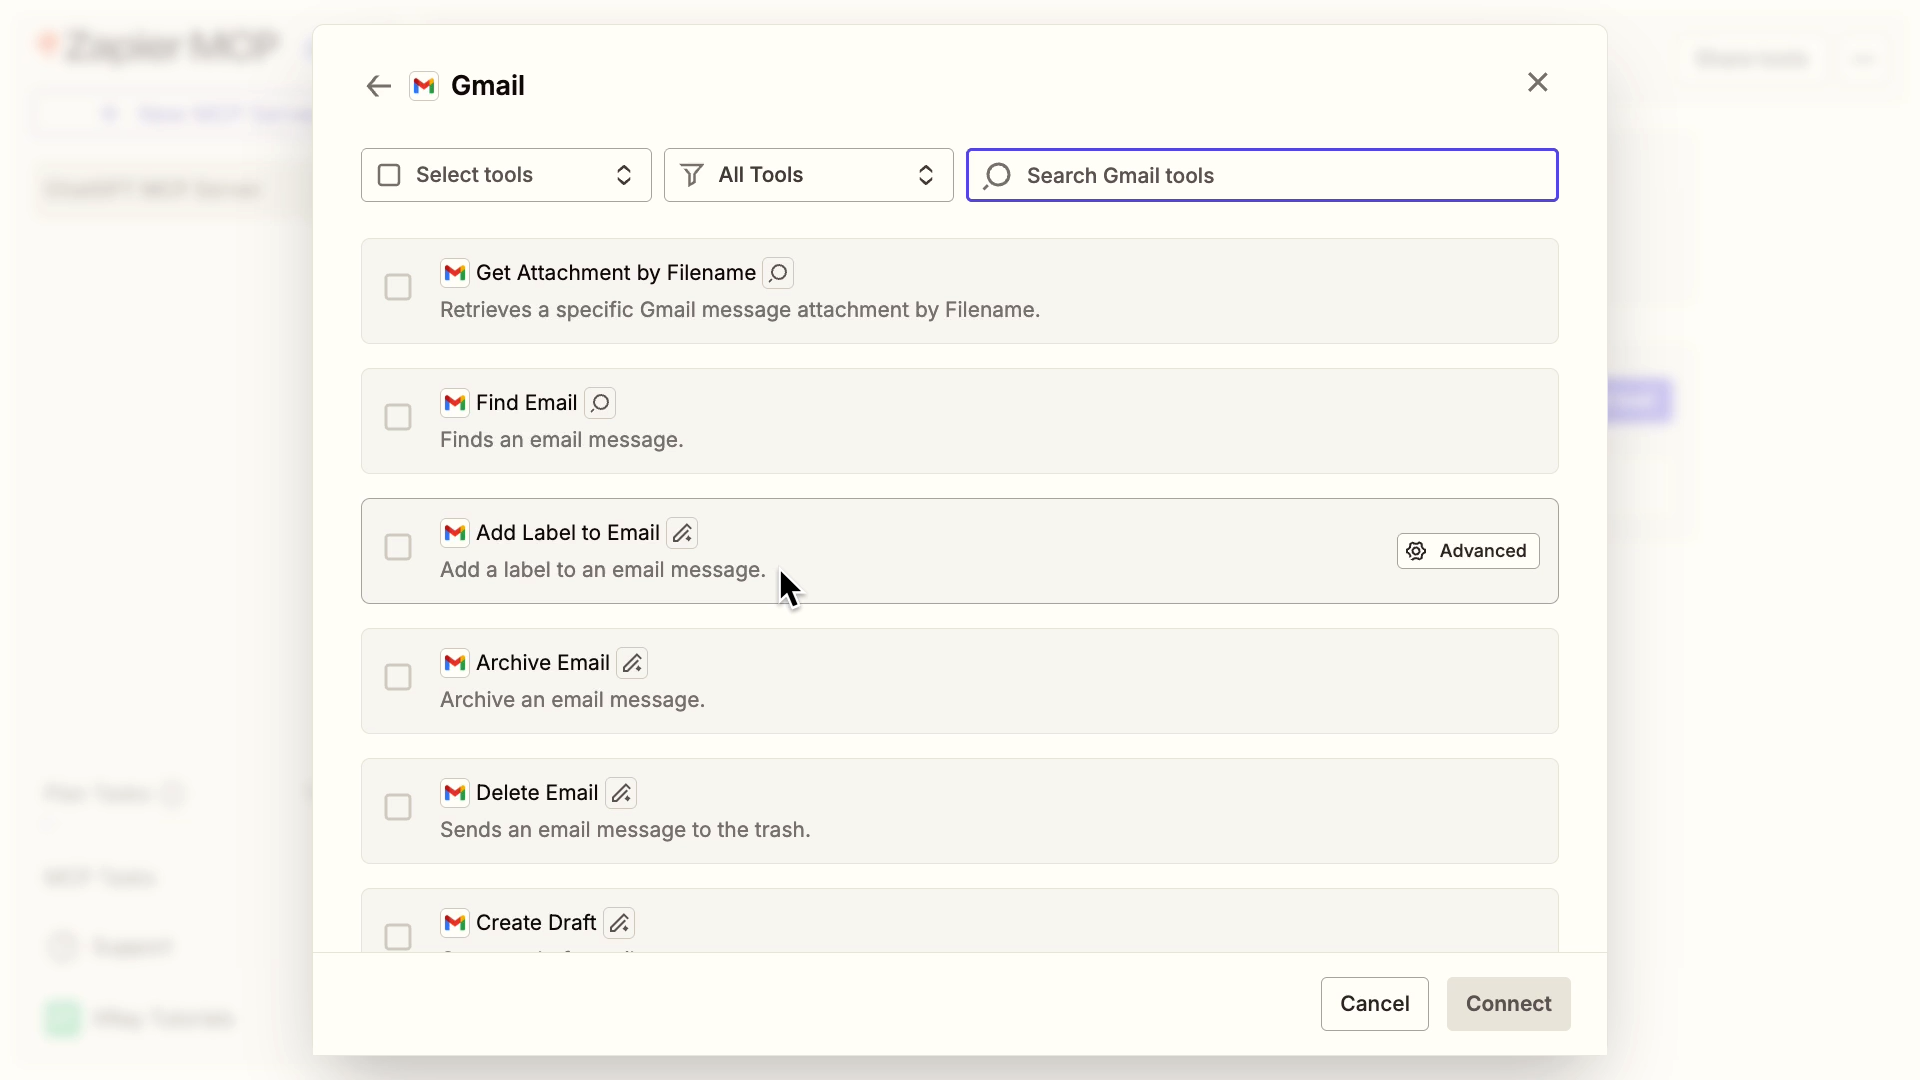
As you can see, you get a long list of granular options to choose from.
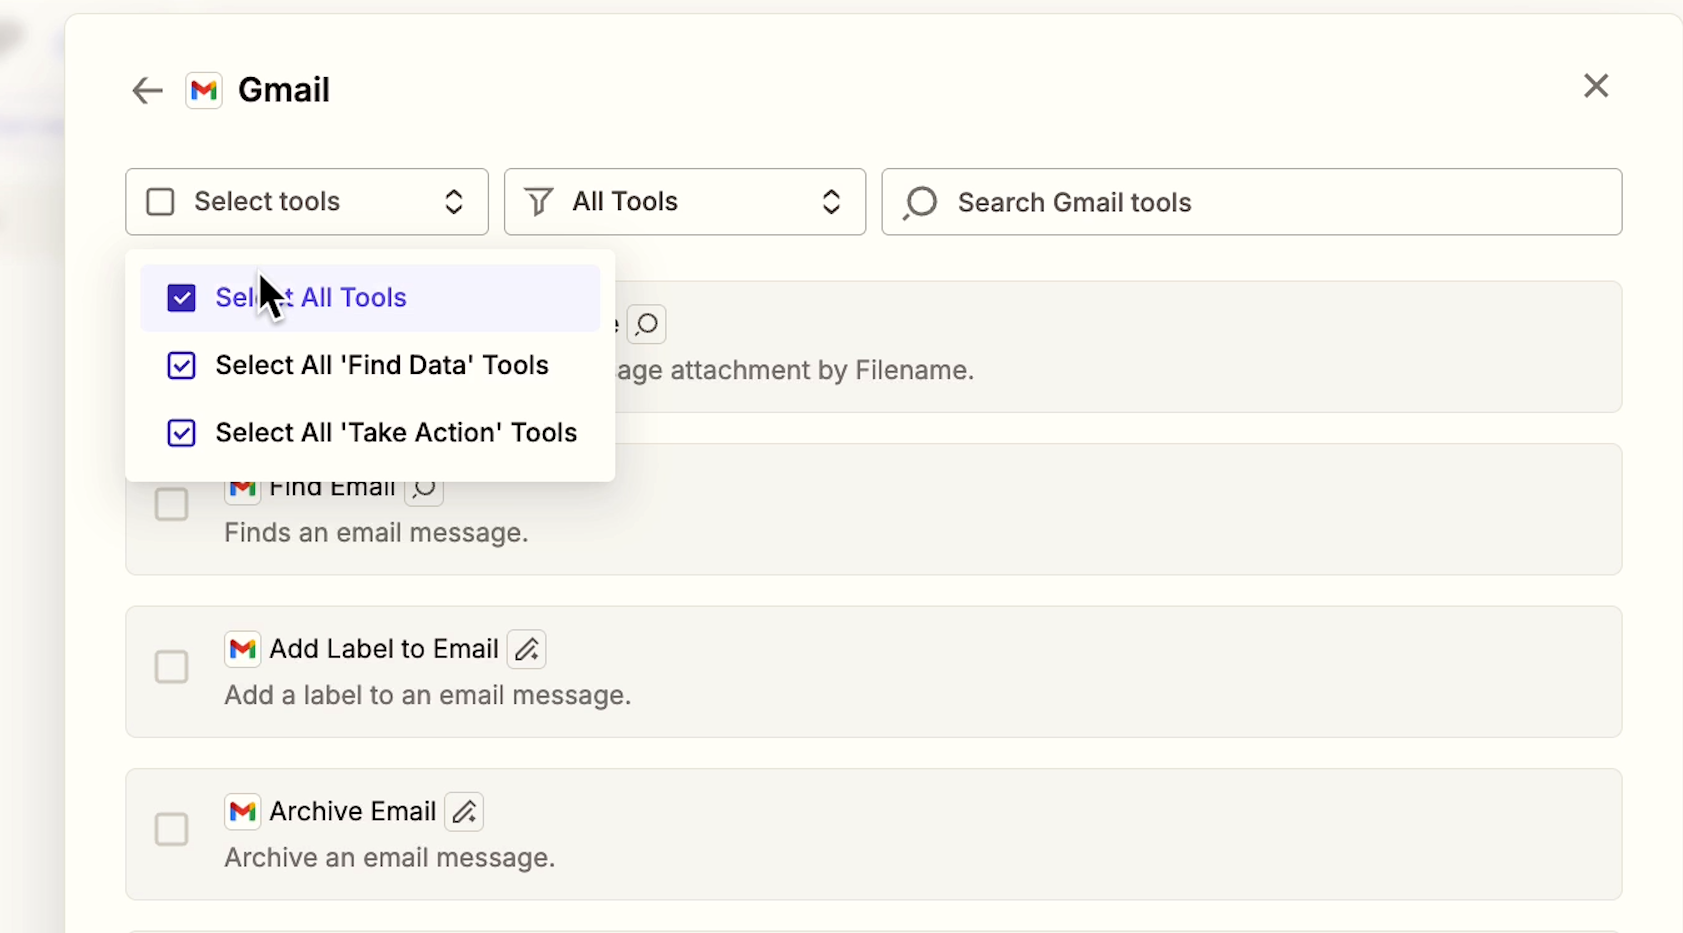
If you want to save time, you can click on the "Select tools" dropdown in the top left to select them all at once.
However, we'd encourage a bit of caution here. Putting every action in at once is a time saver, but it's often best to leave out any of the "delete" tools. To leave out a tool, just uncheck it.
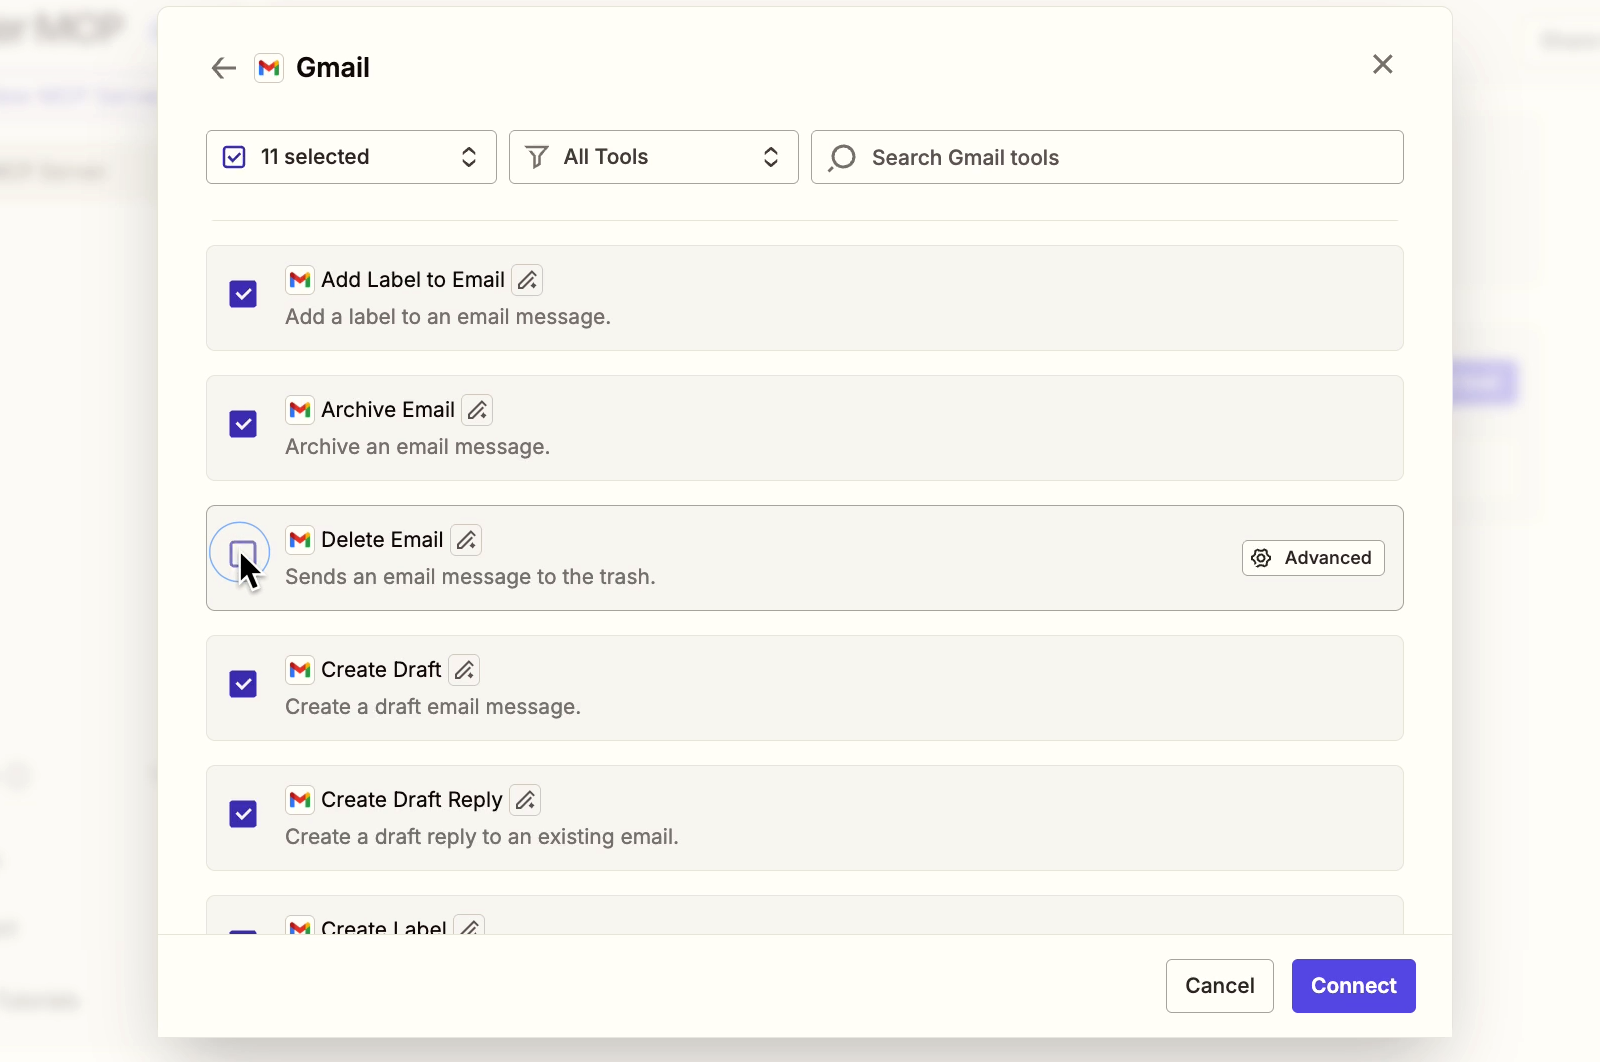
When you're using Zapier MCP, ChatGPT will typically ask for confirmation before deleting anything. But to play it safe, you can make sure that the AI doesn't have that capability in the first place.
Once you've selected all the tools you want for your app, click "Connect".
Repeat that same process for all of the apps and actions you want to include.
For this example, we'll also add tools for Google Sheets – once again, leaving out the "delete" options.
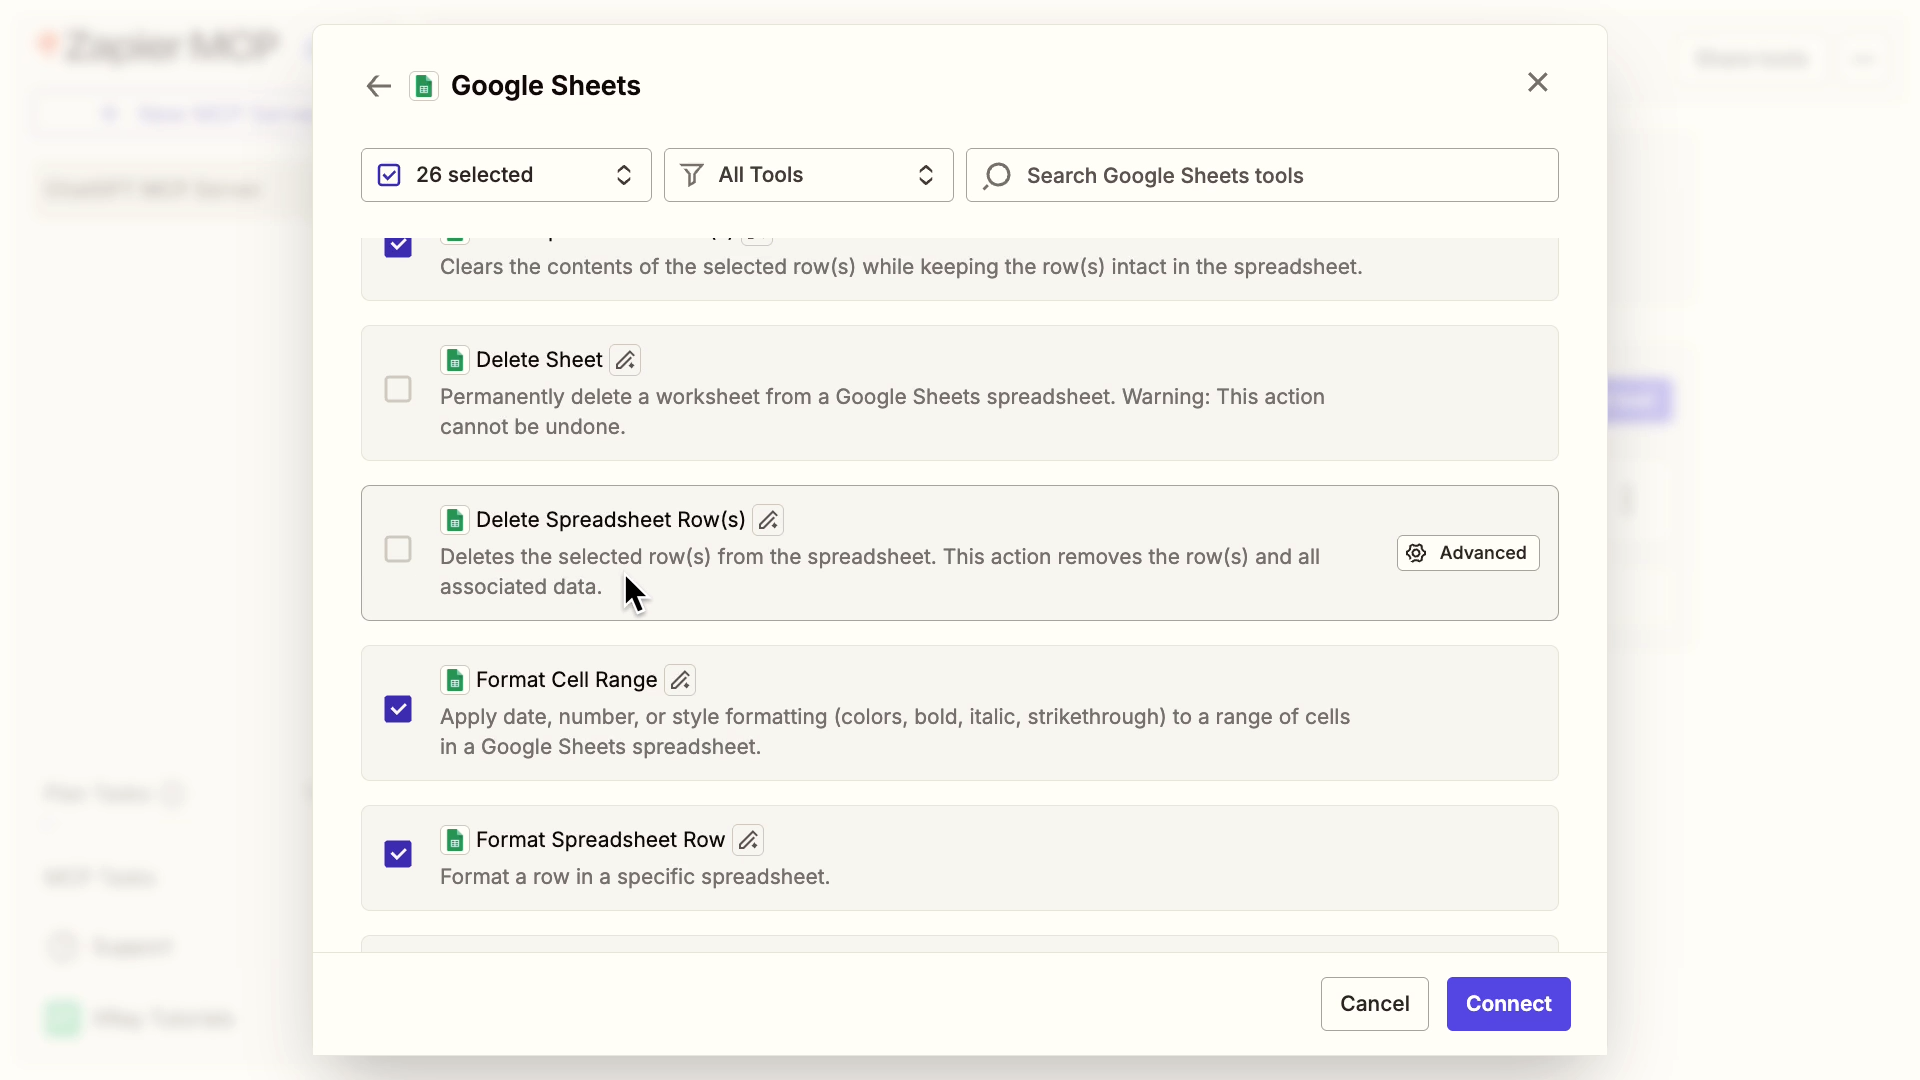
With these two apps, we can make ChatGPT into an assistant that helps us view and manage email, and log the data in Sheets.

You can use this link to quickly copy our tool bundle if you’d like.
Once you've added all the tools you want, proceed to the "Connect" tab.
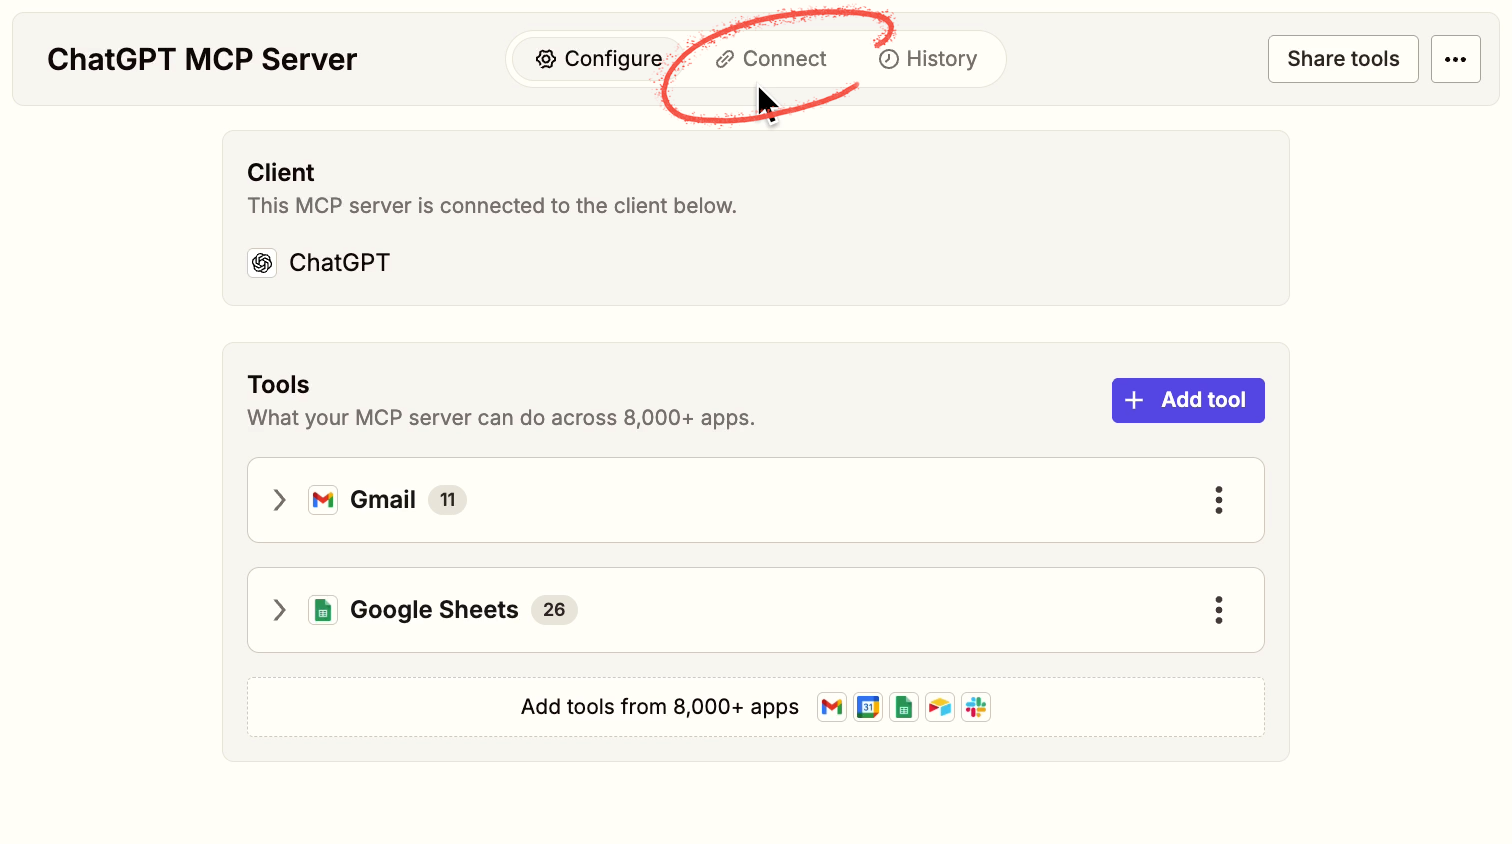
In the Connect tab, we're going to connect this server to the client – ChatGPT.
When you’re using ChatGPT with Zapier MCP, Zapier will show you this warning that you need to enable “Developer mode” in ChatGPT.
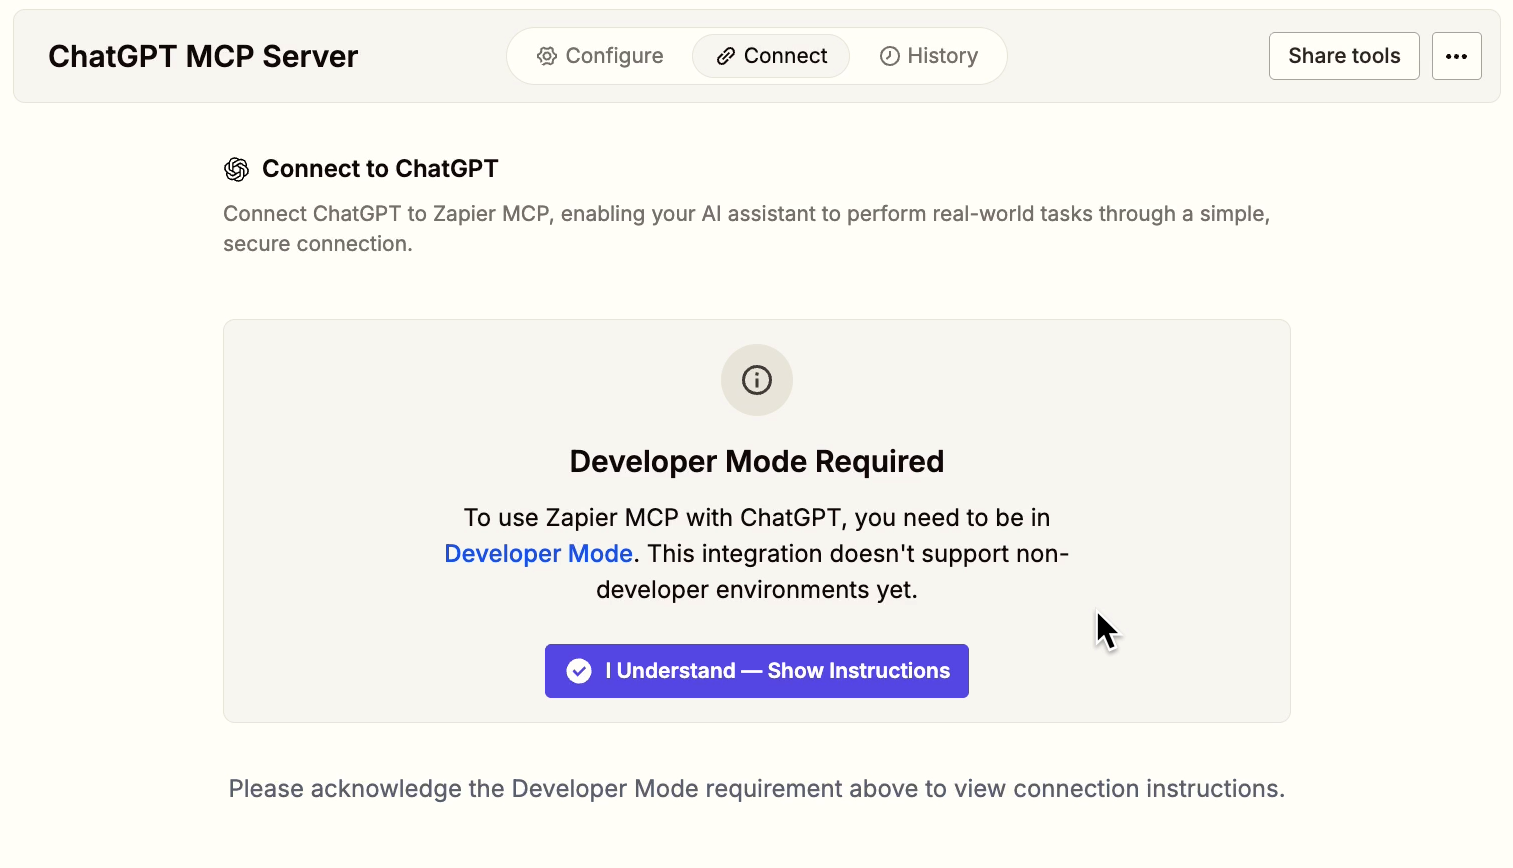
Acknowledge the warning and proceed. Next, you'll see helpful setup instructions and resources.
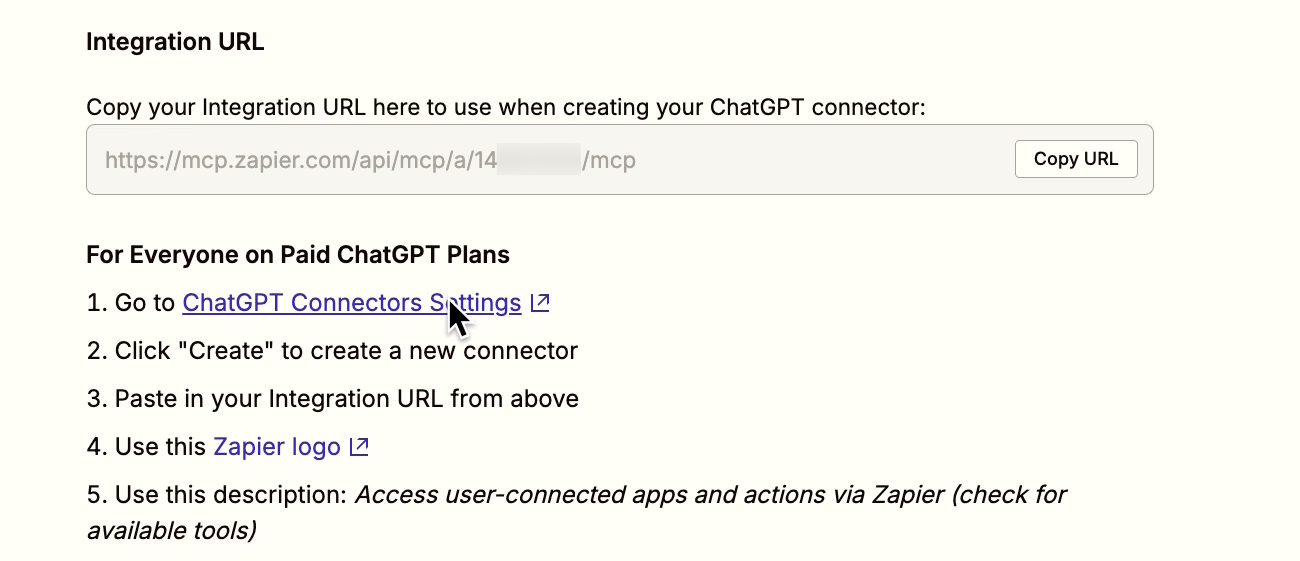
First, you need to copy your server URL from Zapier MCP.

Then, open up the link to go to ChatGPT.
Once in ChatGPT, make sure you've enabled developer mode.
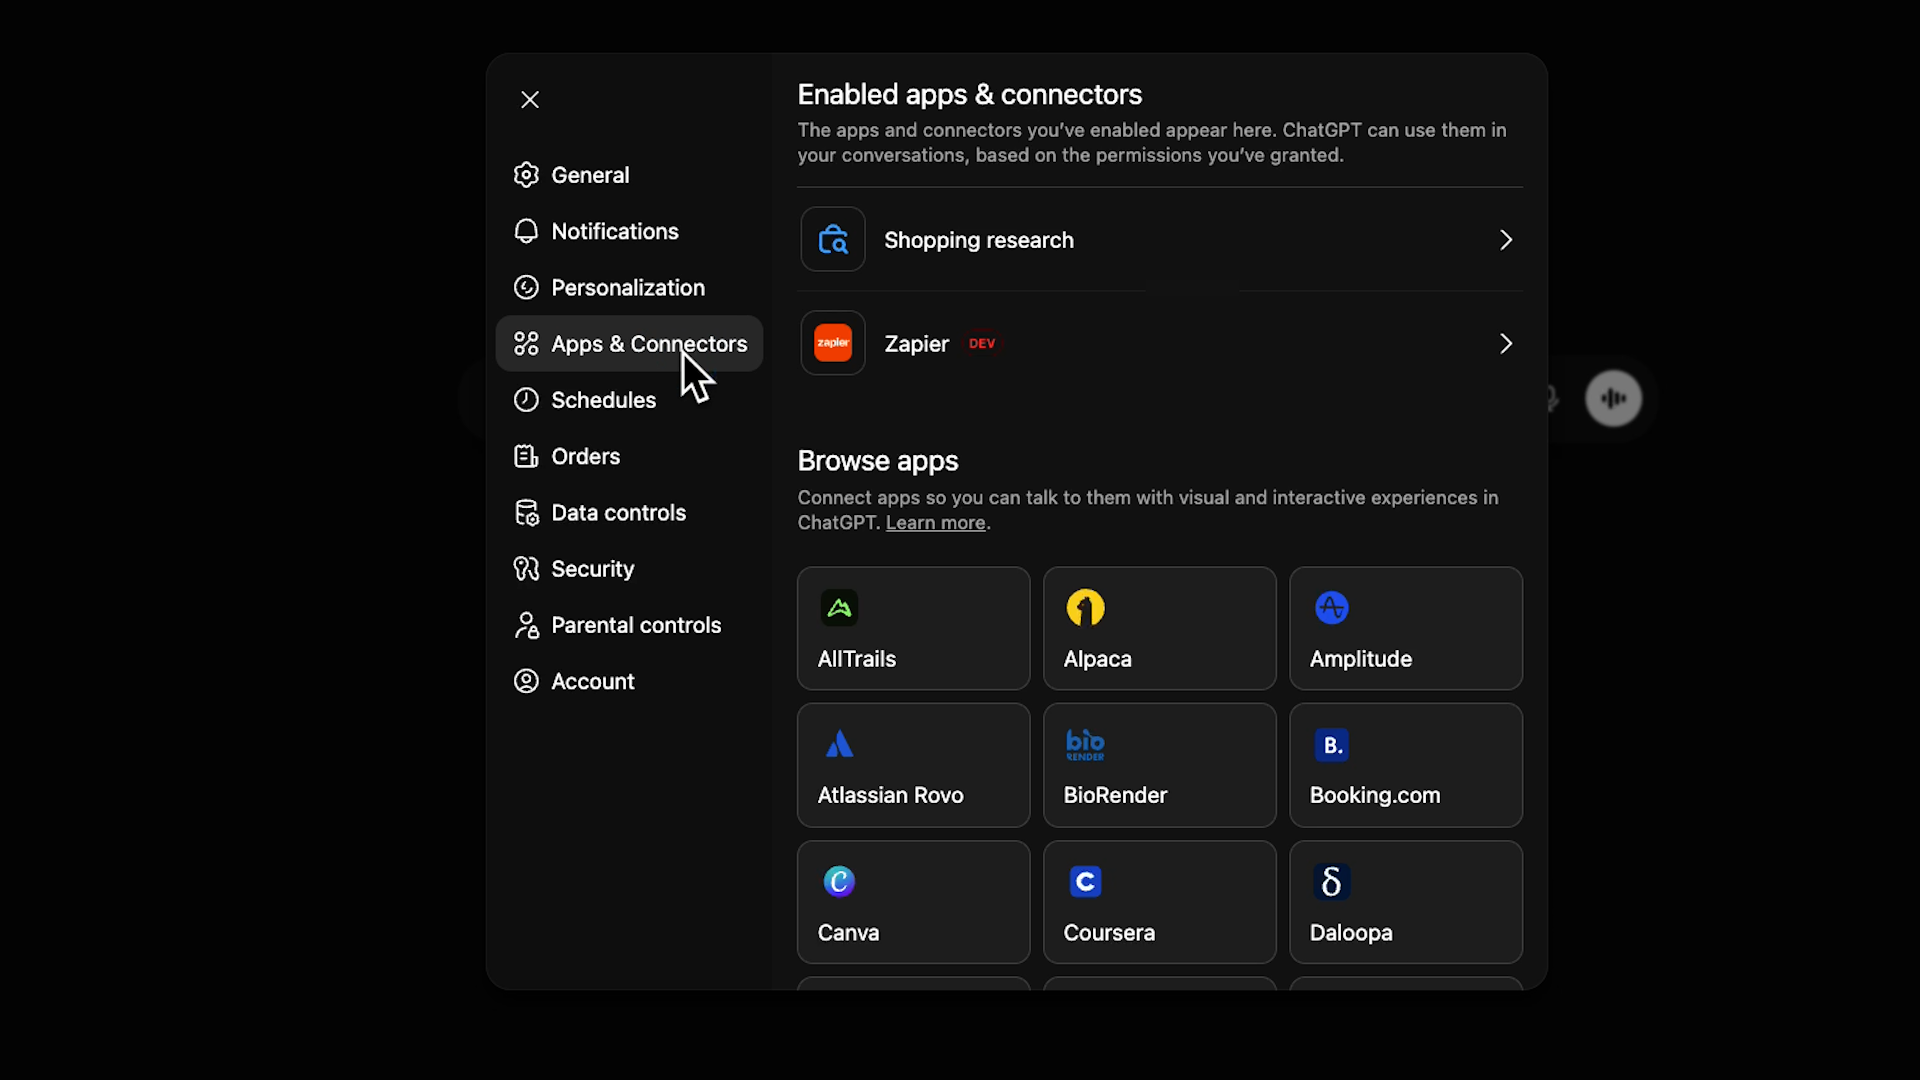
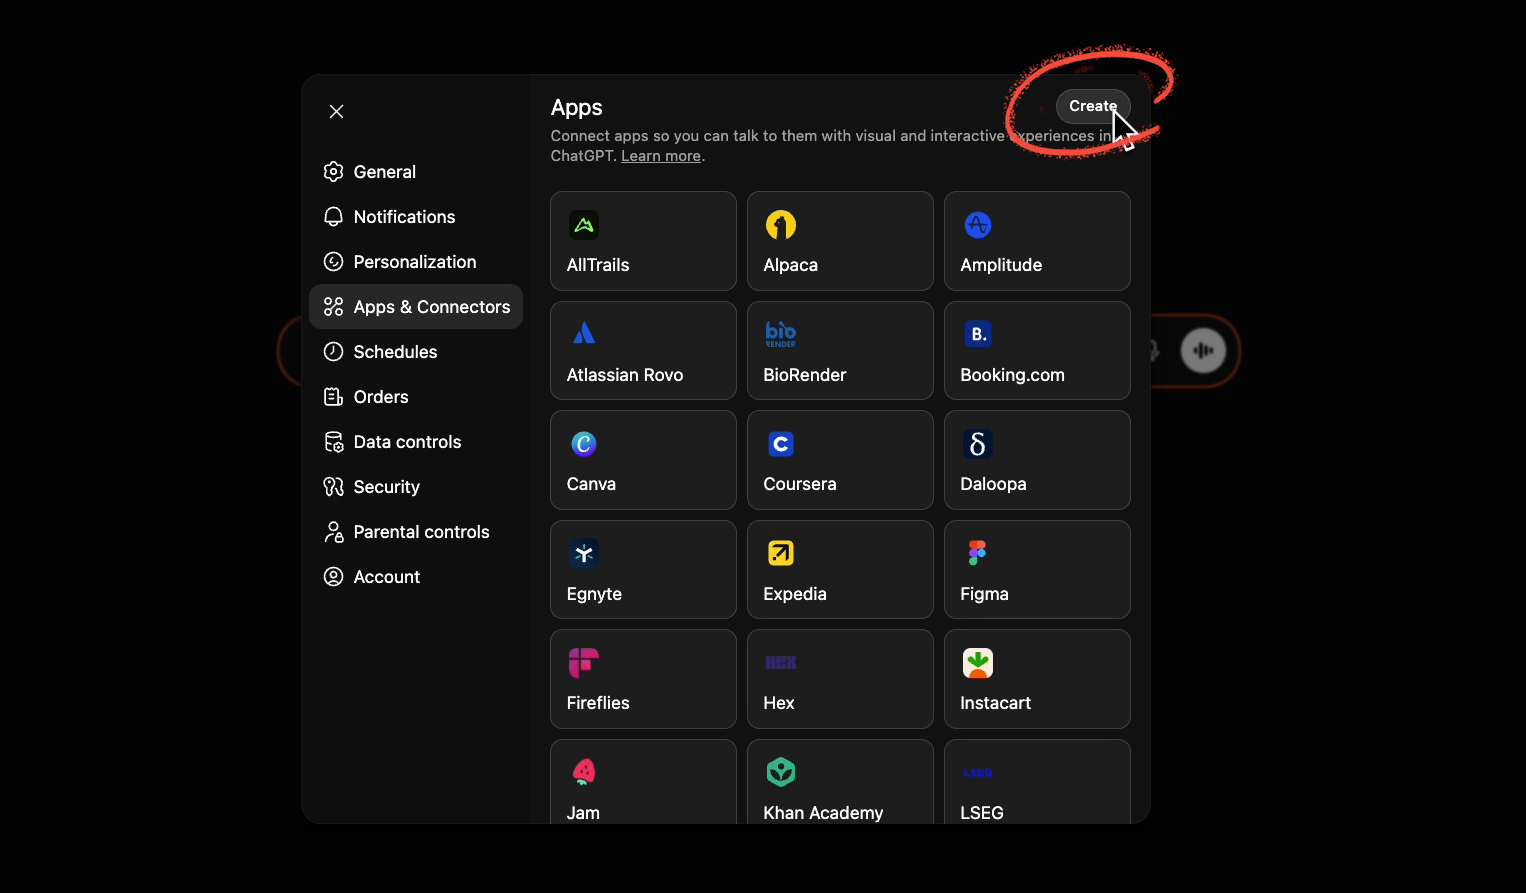
Click on your profile in the bottom left corner and choose settings.

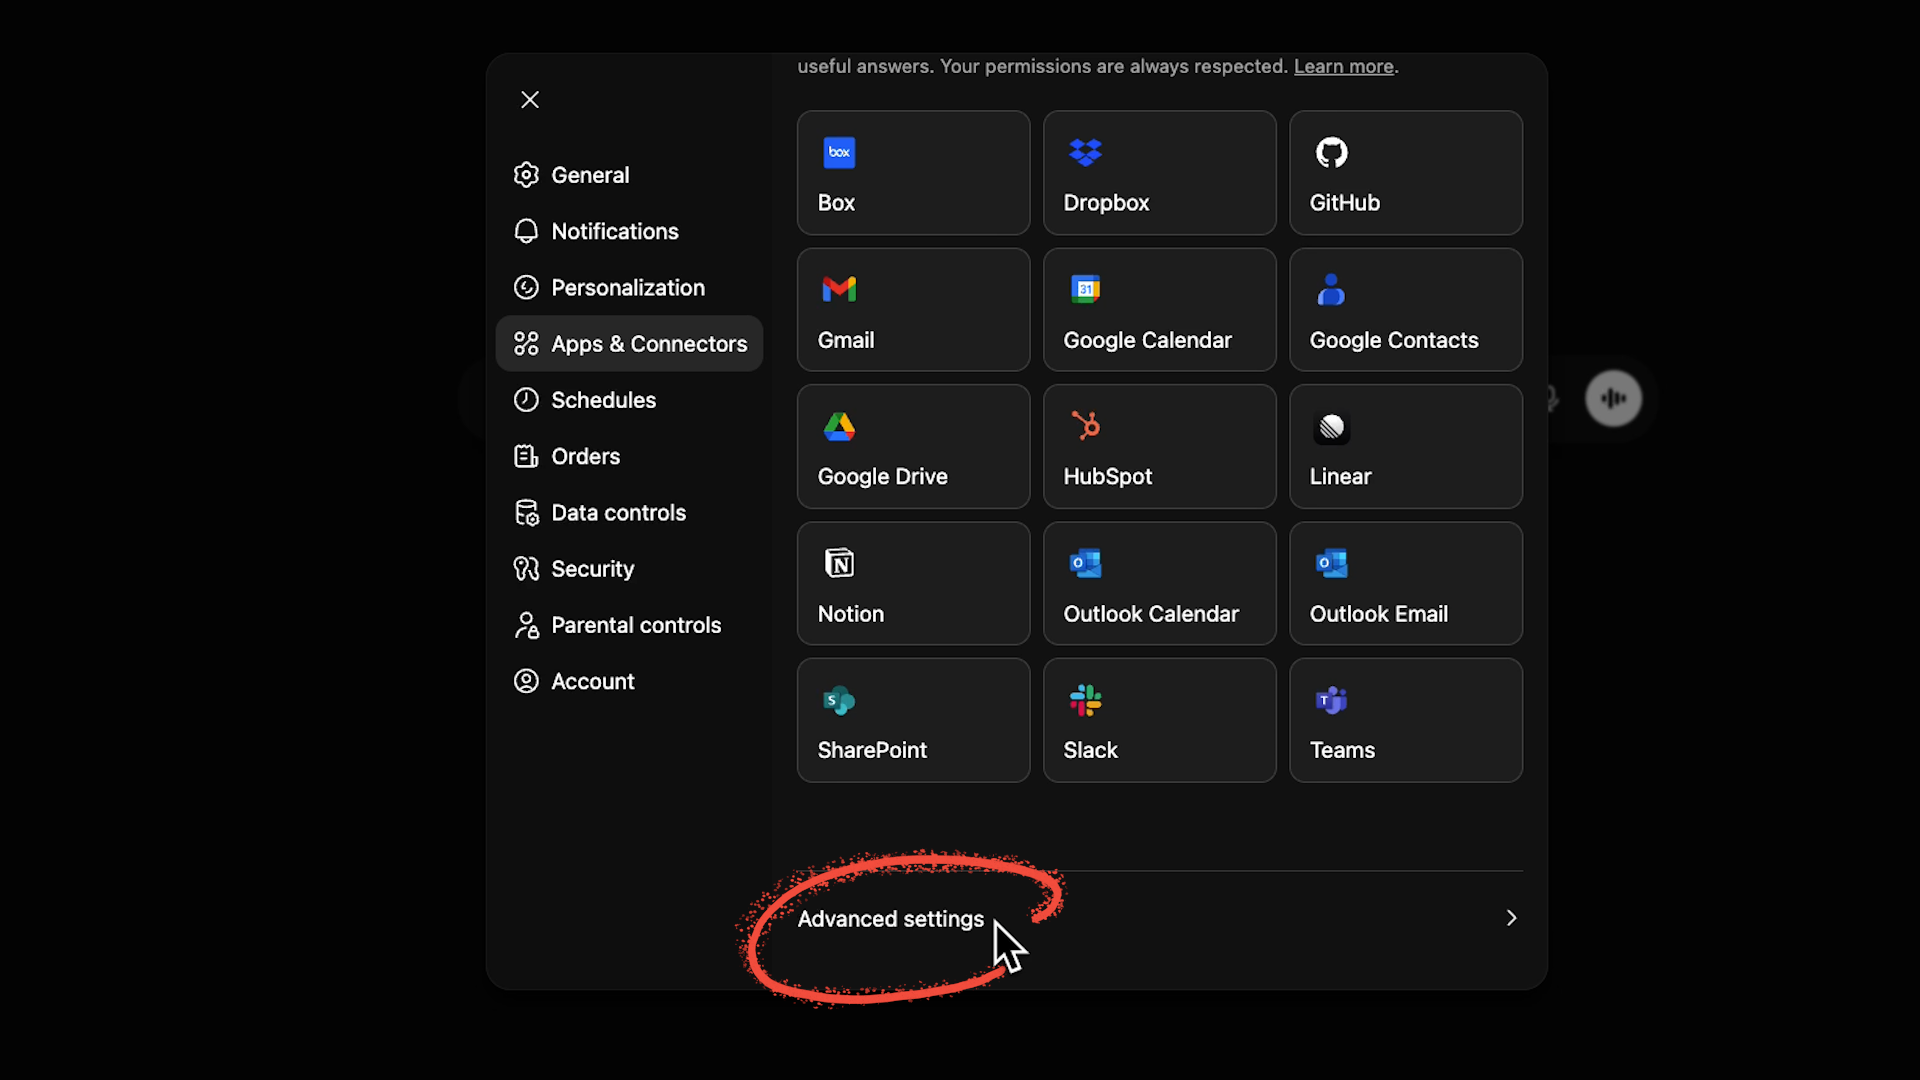
Then select Apps & connectors.
Scroll all the way down, and select "advanced settings".
Then, toggle on "Developer mode".
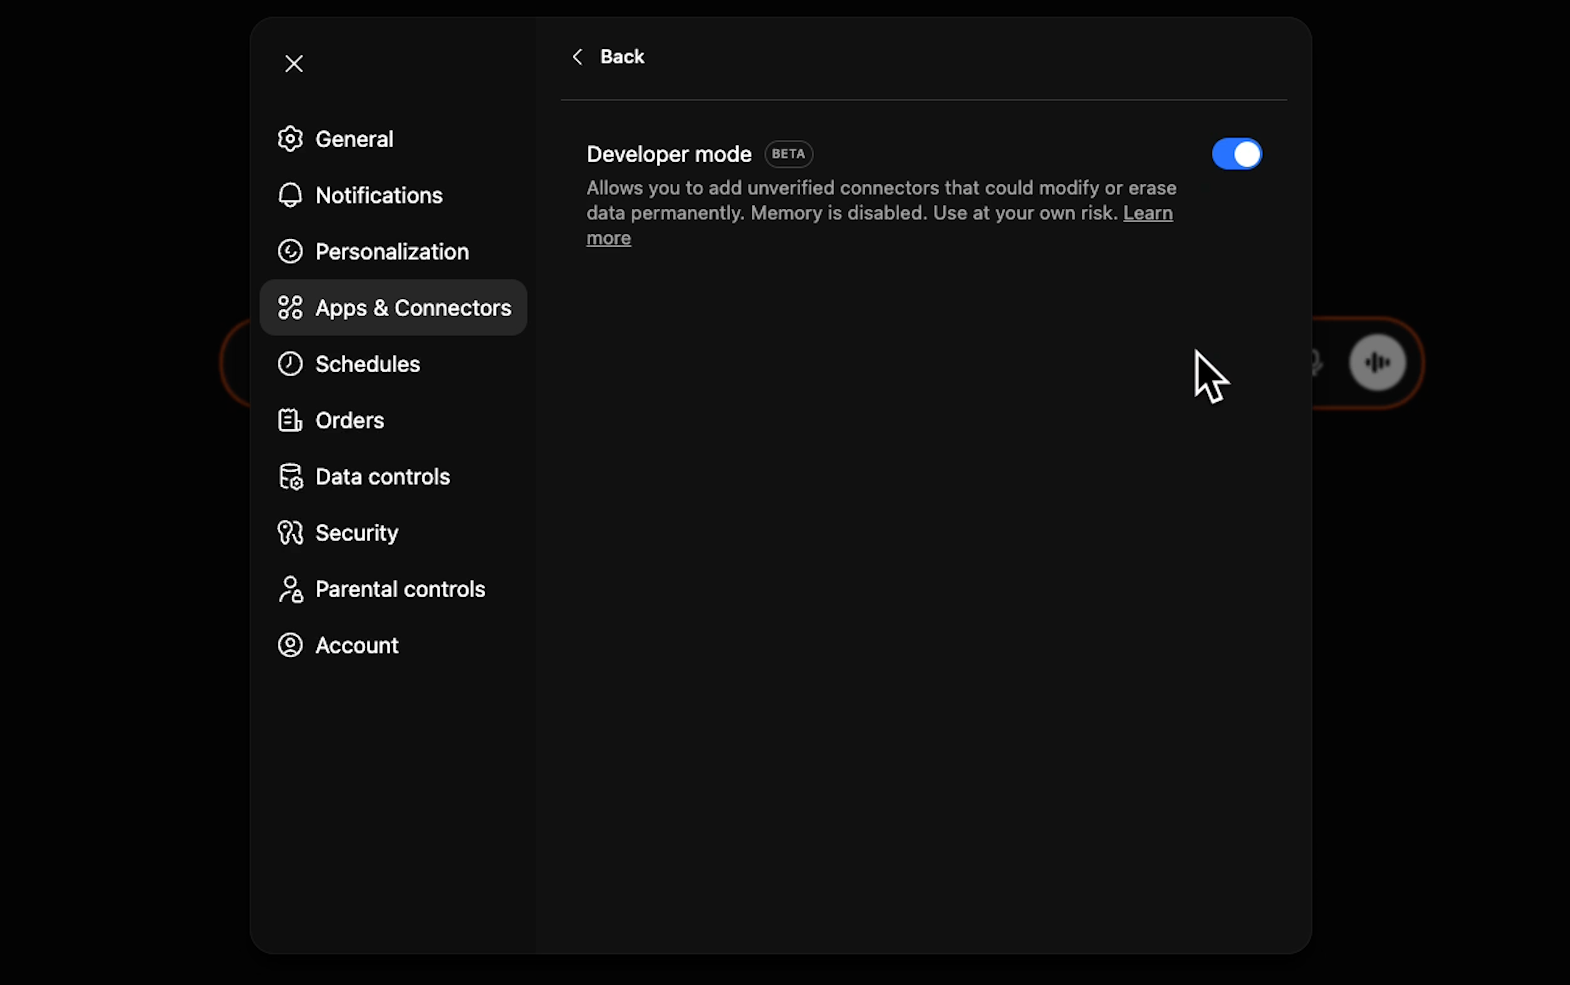
With dev mode enabled, you can now create a new integration. However, you will need a ChatGPT Plus subscription to actually save and use it.
You can create a new integration under "Apps and Connectors" in the settings. Click the “Create” button in the top right corner.
Name your connection 'Zapier', and use Zapier's provided logo and description, and paste in your server’s URL.
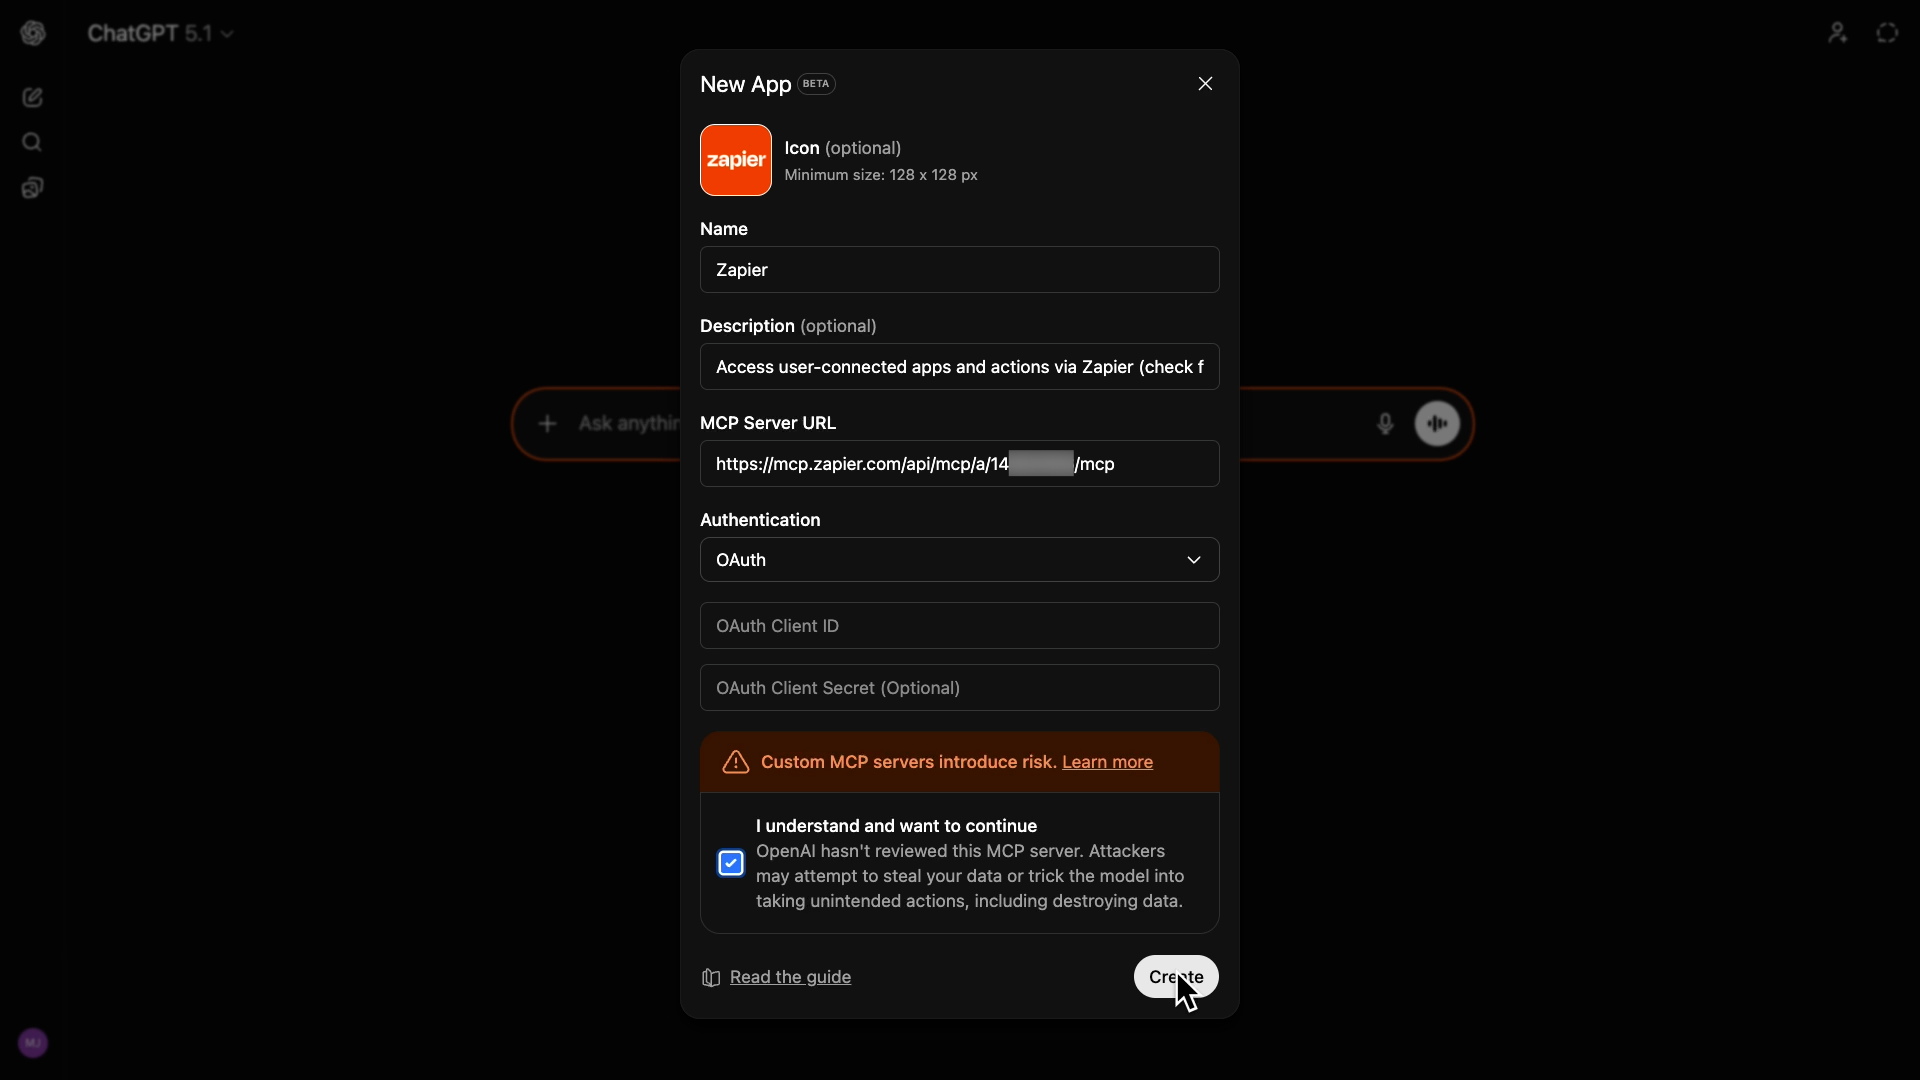
Select OAuth as the authentication type. You don't need to enter anything into the Client ID or secret fields – you can just leave them blank.
Finally, check the box to say you accept the risks. Integrations like this can directly access your ChatGPT account, so you should only use trusted MCP servers, like those created by Zapier.
Click “Create” to finish up.
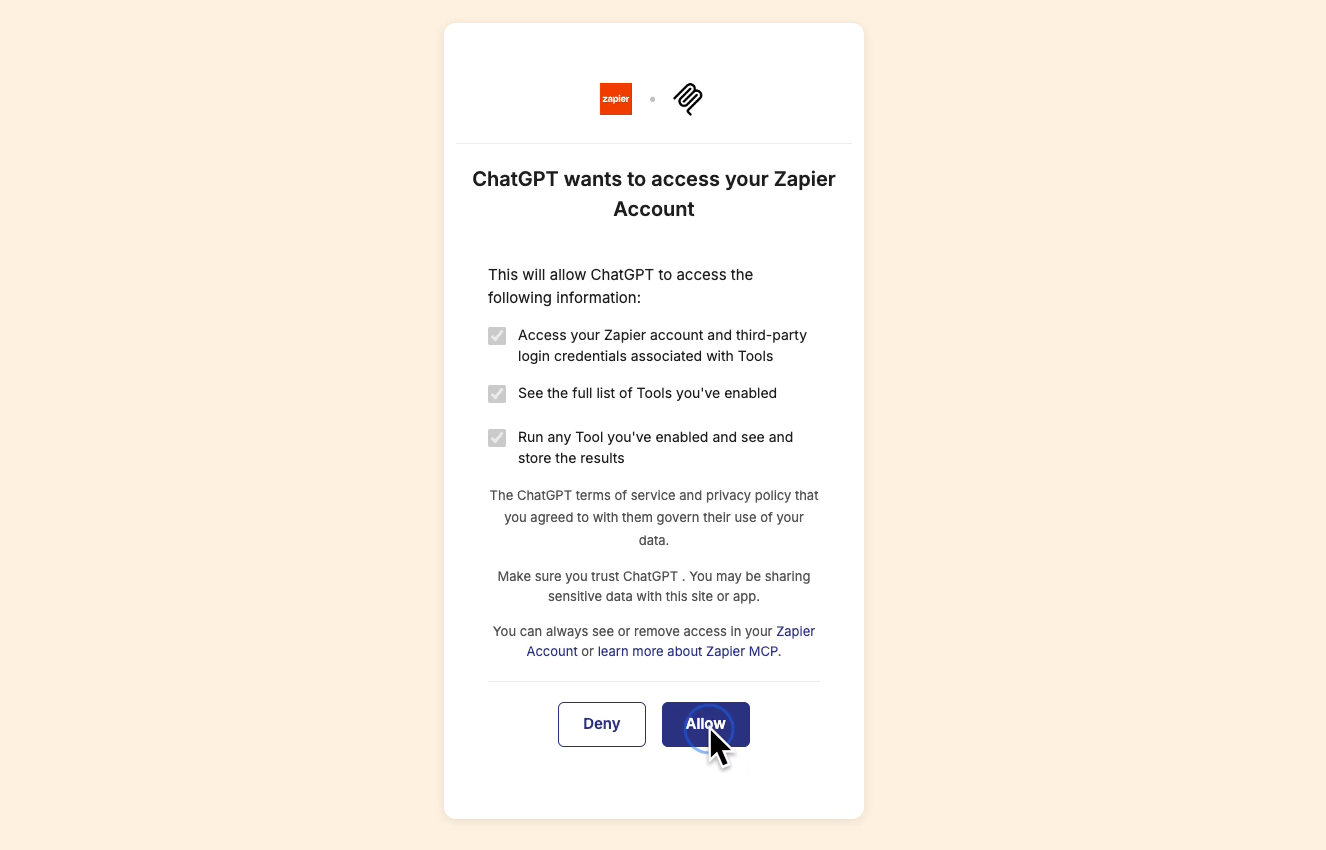
You'll then be redirected to Zapier to approve access for ChatGPT. Click "Allow".
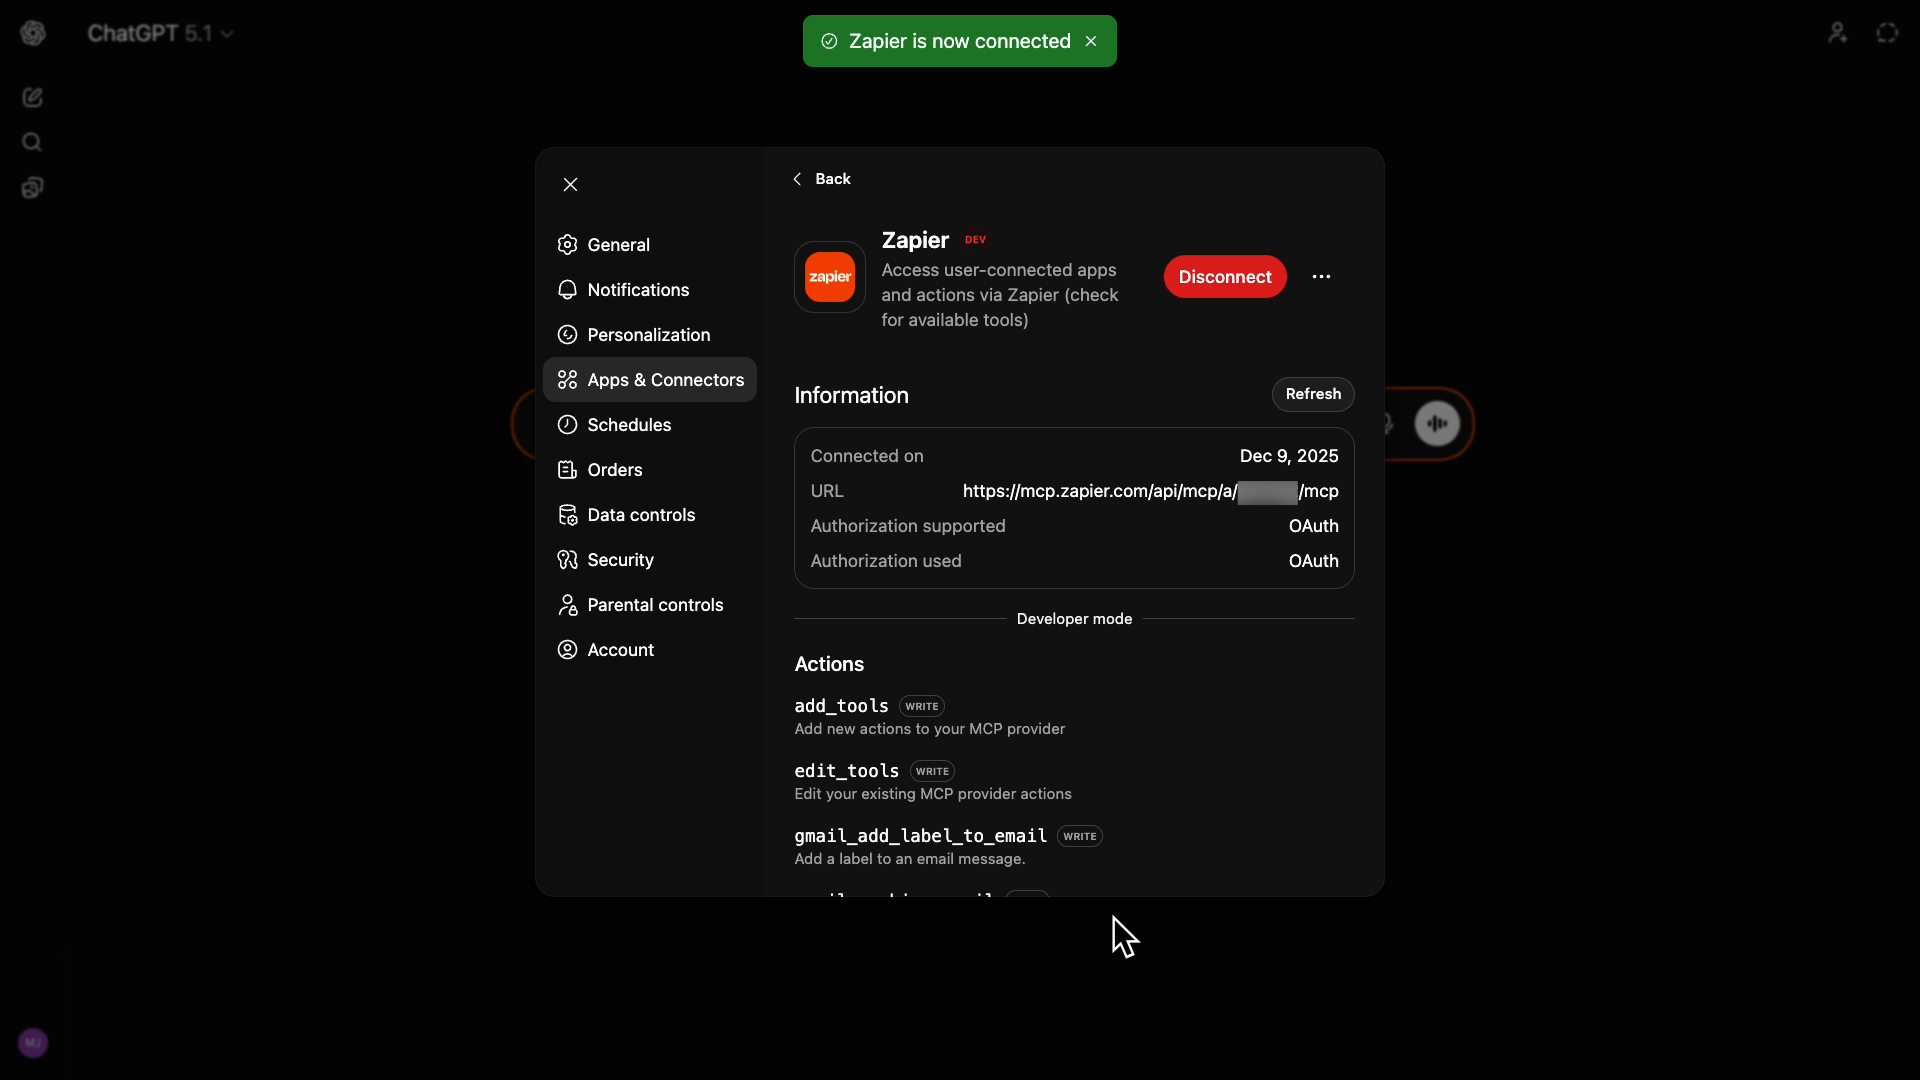
Your Zapier MCP server is now ready to use in ChatGPT.
If you're running into issues with your Zapier MCP setup, or if you want help building more complex workflows, XRAY Hourly offers 1-on-1 support from low-code experts.
Schedule collaborative building sessions to get the job done and learn how it all works in the process. To get started and book time, just go to hourly.xray.tech.
Now, let's test this MCP server and see what it can do.
To use the Zapier integration, start a new chat. Make sure you’re still in developer mode.
Click the plus button on the left of the chat window, and scroll down to the new "Zapier" connection.
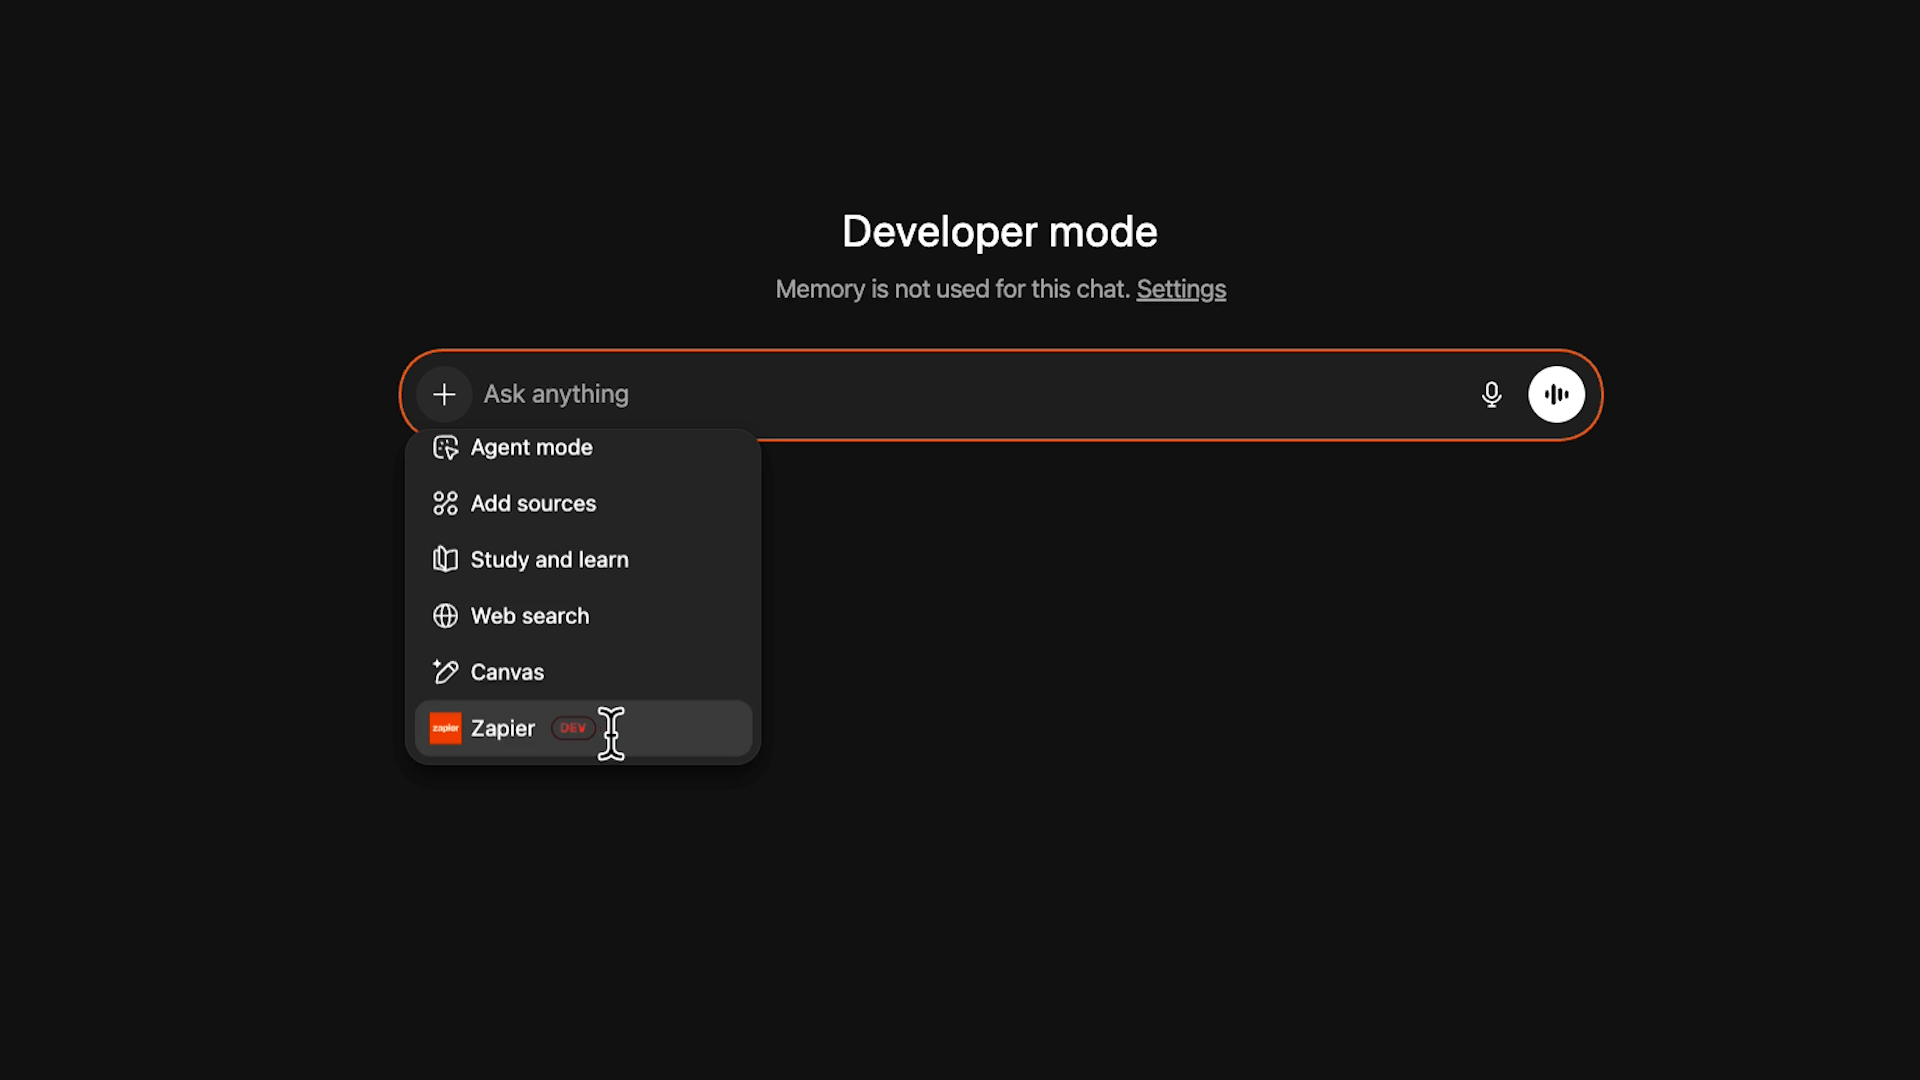
Now ChatGPT will use Zapier tools to access your authorized apps when appropriate.
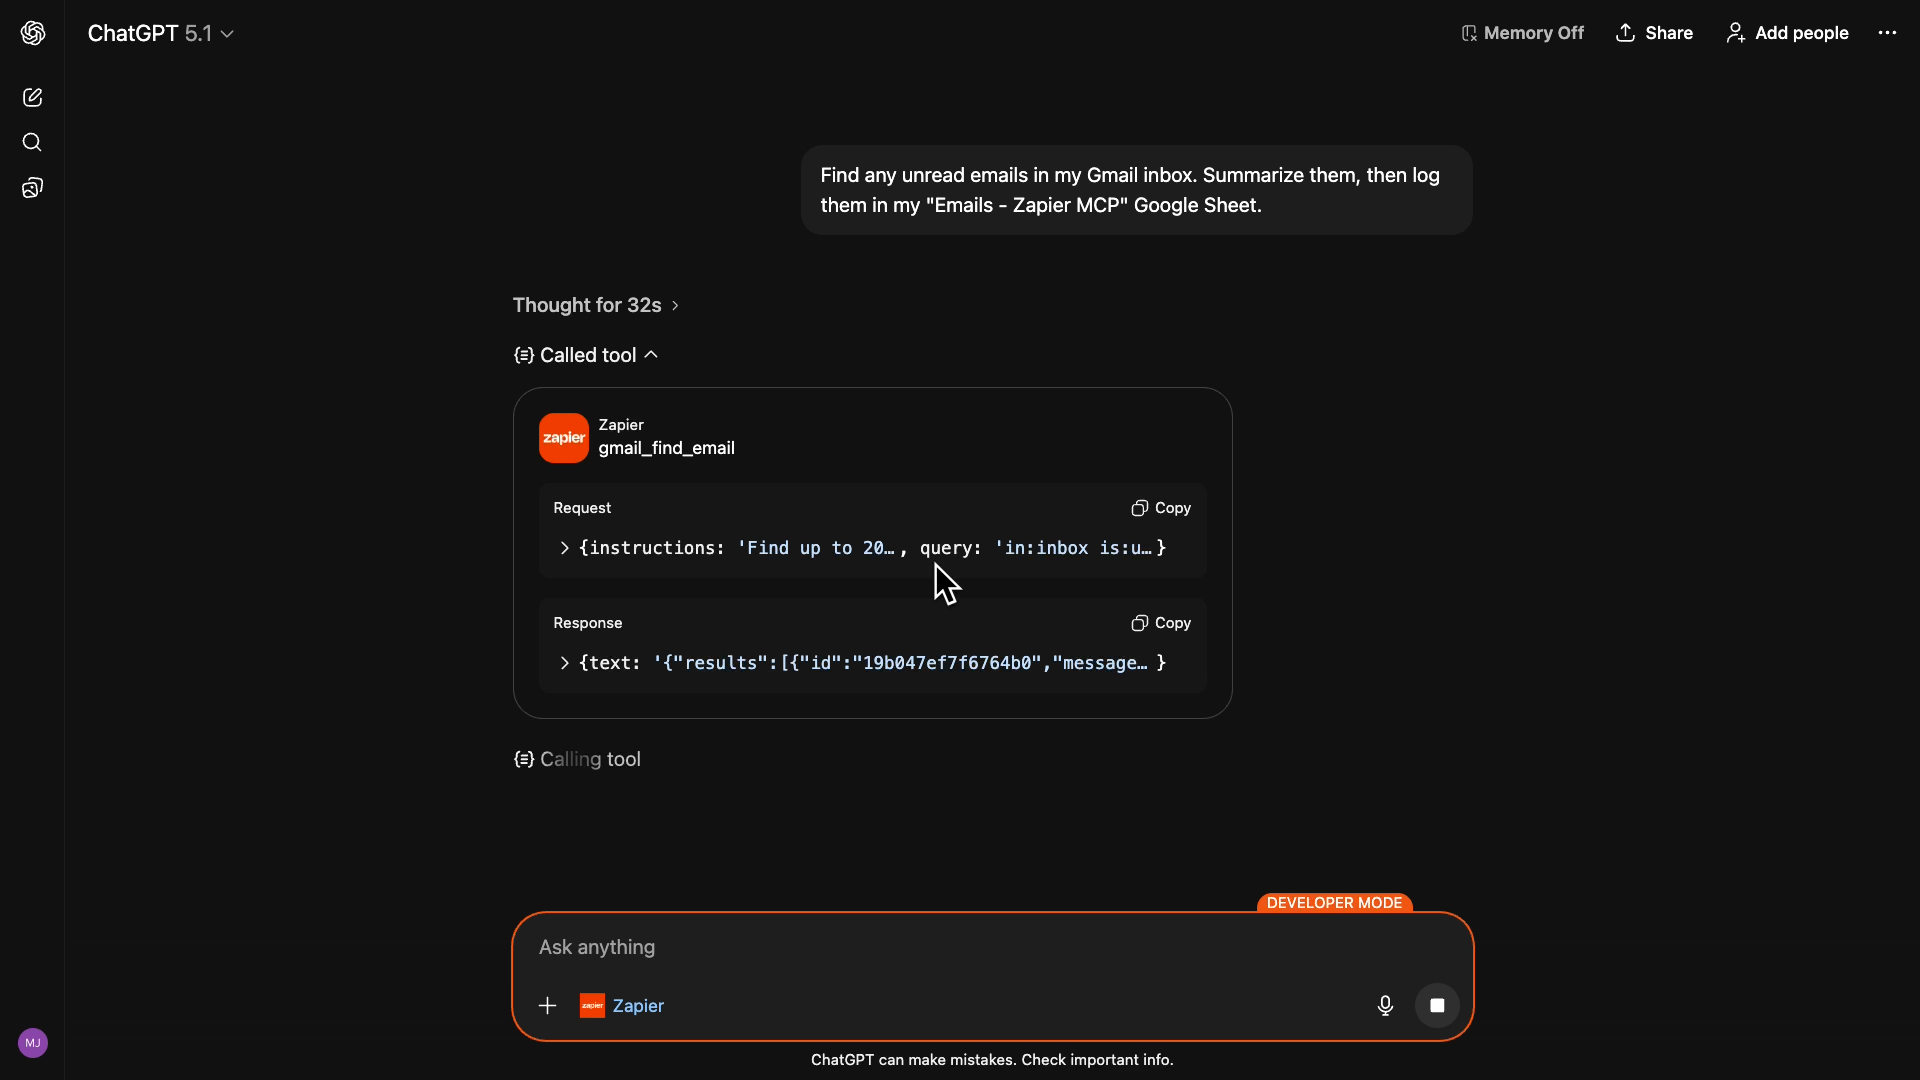
Here's a simple request we’ll send to ChatGPT to test it out:
"Find any unread emails in my Gmail inbox. Summarize them, then log them in my 'Emails - Zapier MCP' Google Sheet."
When using a Zapier MCP server in ChatGPT, make sure to mention the apps when you want to access them. The AI is generally good at filling in the blanks, but it might miss the cue if you just say "email" and "spreadsheet".
Once you send the prompt, ChatGPT instantly gets to work. When it’s using thinking mode, it will show what it’s doing and pondering every step of the way.
For instance, you can see when it accesses different tools via Zapier.
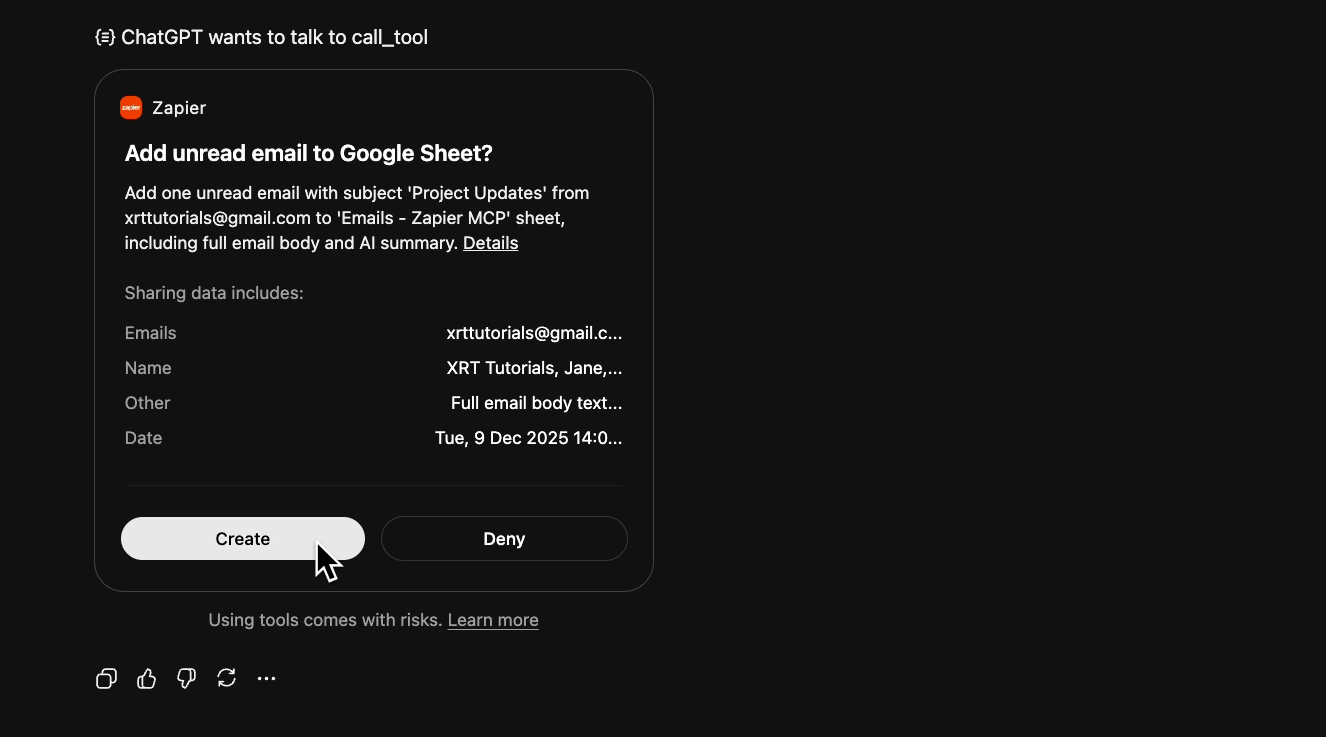
Zapier MCP in ChatGPT will typically ask for approval before doing anything like creating, updating, or deleting data.
For instance, it asks for confirmation before actually creating the new row in Google Sheets.
However, it will usually run searches all on its own.
After a little while, it finishes the task. When we check Google Sheets, we can see the data logged for the email – and we didn't even need to map any of that data.
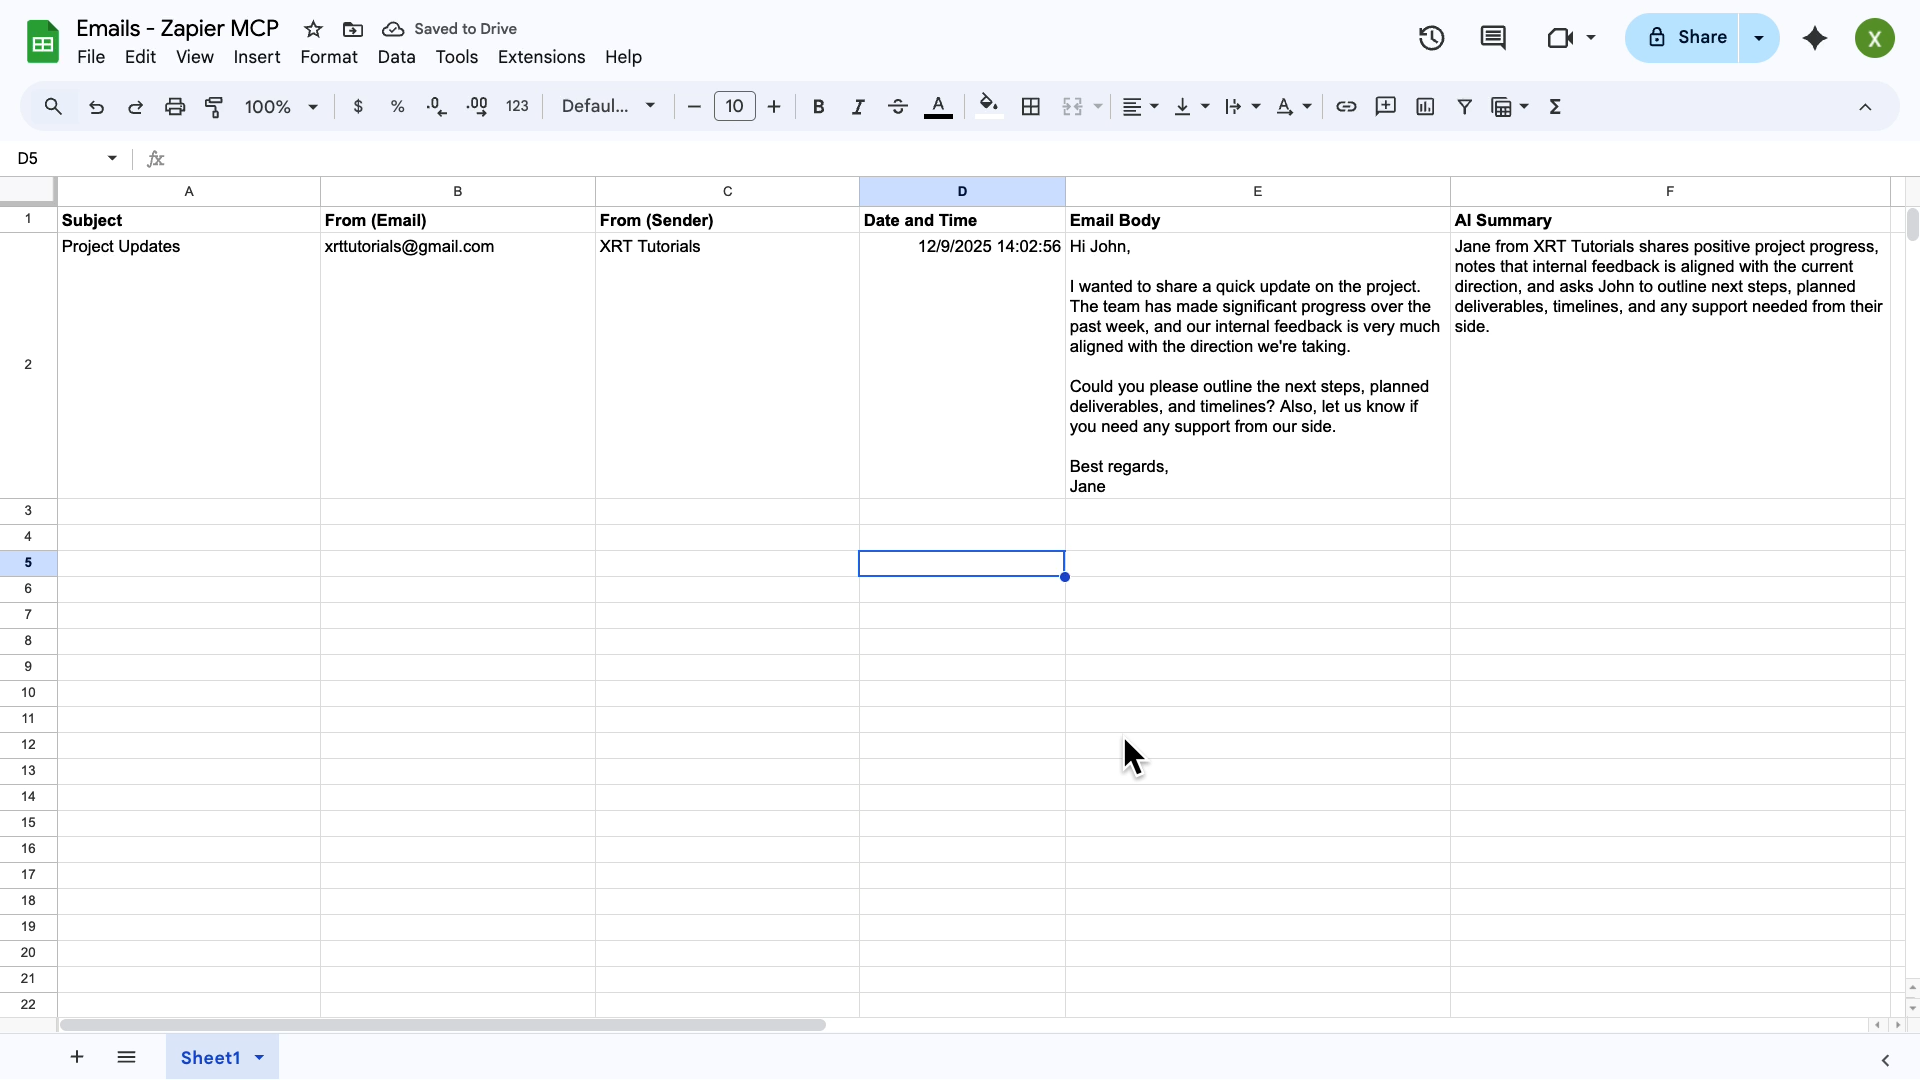
ChatGPT knew where the information should go without specific directions.
This is what makes Zapier MCP so useful.
Traditional Zaps are great for automating well-defined workflows. But when you're working with an ambiguous process, or when you have one-off tasks to run, Zapier MCP lets you connect to AI tools like ChatGPT for greater flexibility.
Just now, we asked it to log unread emails. Later, we might ask it to rank the emails logged in Sheets from most to least urgent. There are endless possibilities here.
When you use Zapier MCP, ChatGPT becomes a versatile, powerful assistant with direct access to any app you want to use.
You've just connected ChatGPT to your entire software stack.
Now you can ask ChatGPT to handle tasks that used to require jumping between apps, copying data, and remembering where you left off. The same setup works with Claude – our guide on connecting Zapier MCP to Claude walks through each step.
Want to build automations that run without you asking? The XRAY blog has hundreds of tutorials on Zapier, n8n, and other automation platforms. Every guide is practical, tested, and designed to save you actual time.

.pptx.png)
.pptx.png)
