
n8n is one of the fastest growing automation providers available. Their advanced technical options and extensive support for AI tools make them one of the best options for experienced low-code builders.
But for beginners, getting started with n8n can be a little tricky.
That’s why we’ve put together this n8n crash course. Anyone can follow along with this simple workflow using free apps.
In under 10 minutes, you’ll have your first n8n automation complete.
For our example in this tutorial, we’ll walk you through building a simple workflow for summarizing and sharing articles in an RSS feed.
Here’s how it works:
• The automation starts whenever a new item appears in an RSS feed
• The article is sent to Gemini AI for a free summary
• Gemini’s summary is sent to a Discord channel

This is the basic structure that most automations follow: a trigger to kick things off, and one or more automated actions that move and transform data between apps.
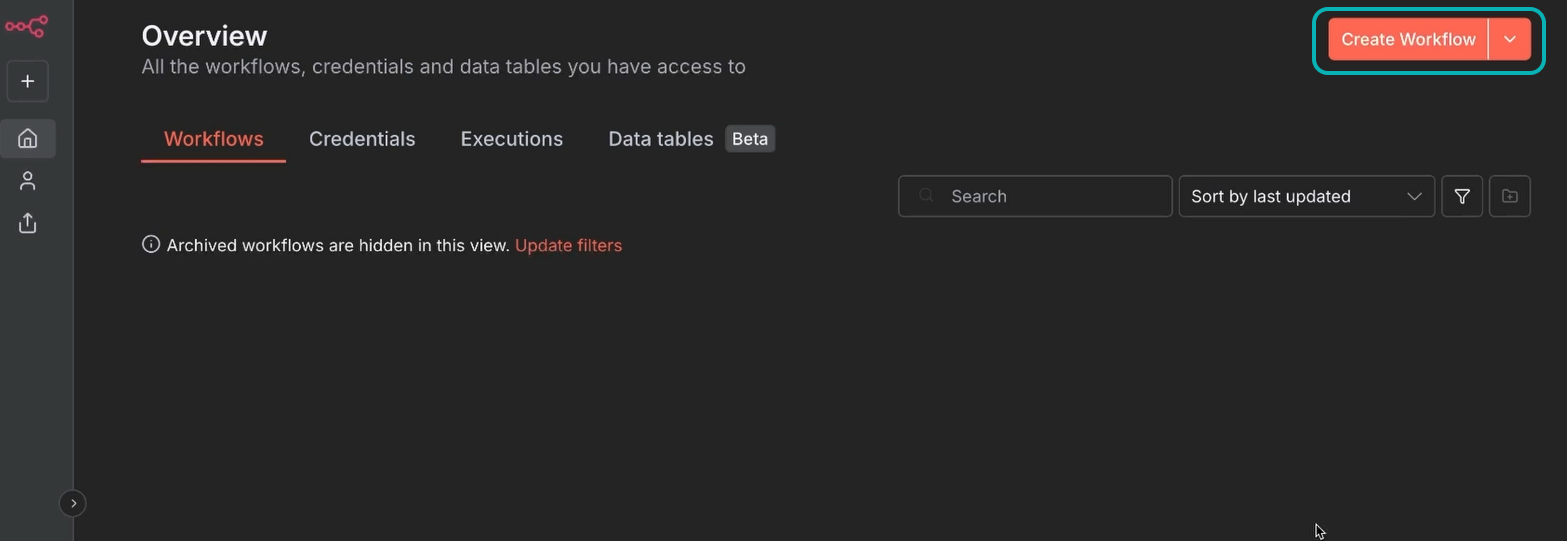
To begin, create your free account log in to n8n cloud at https://n8n.io/
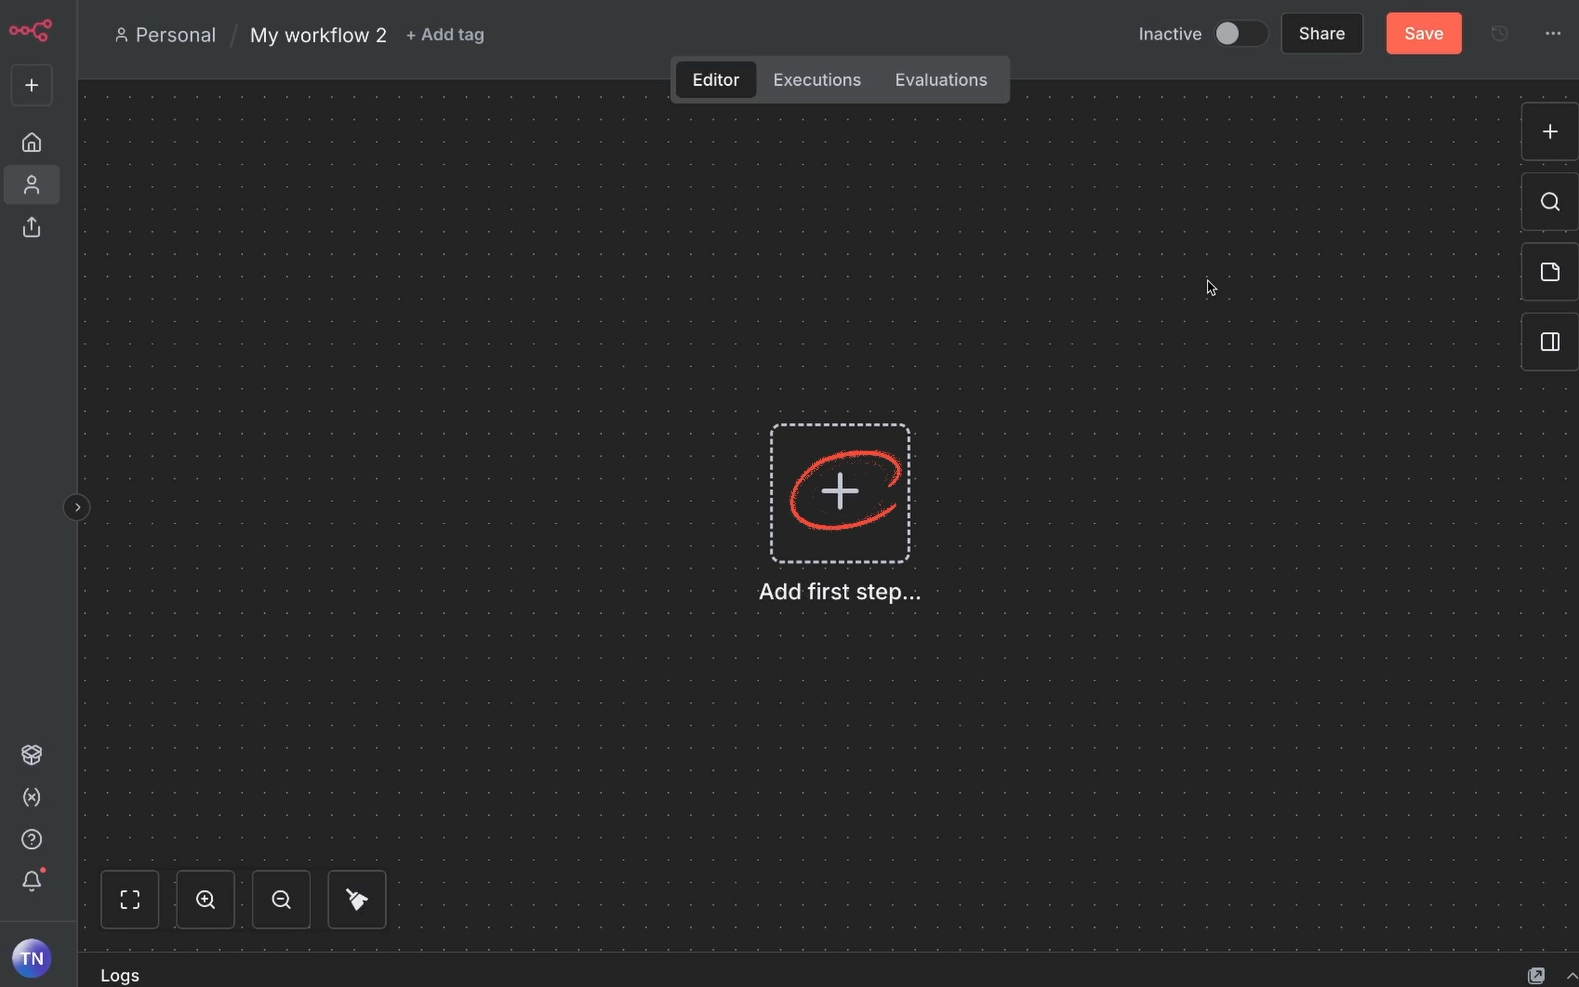
Create a new workflow.
Click on the plus button to add a trigger to your workflow.
There are several trigger options to choose from. For instance you can choose to trigger your automation manually at the click of a button, run it on a schedule, launch it with webhook, and more.
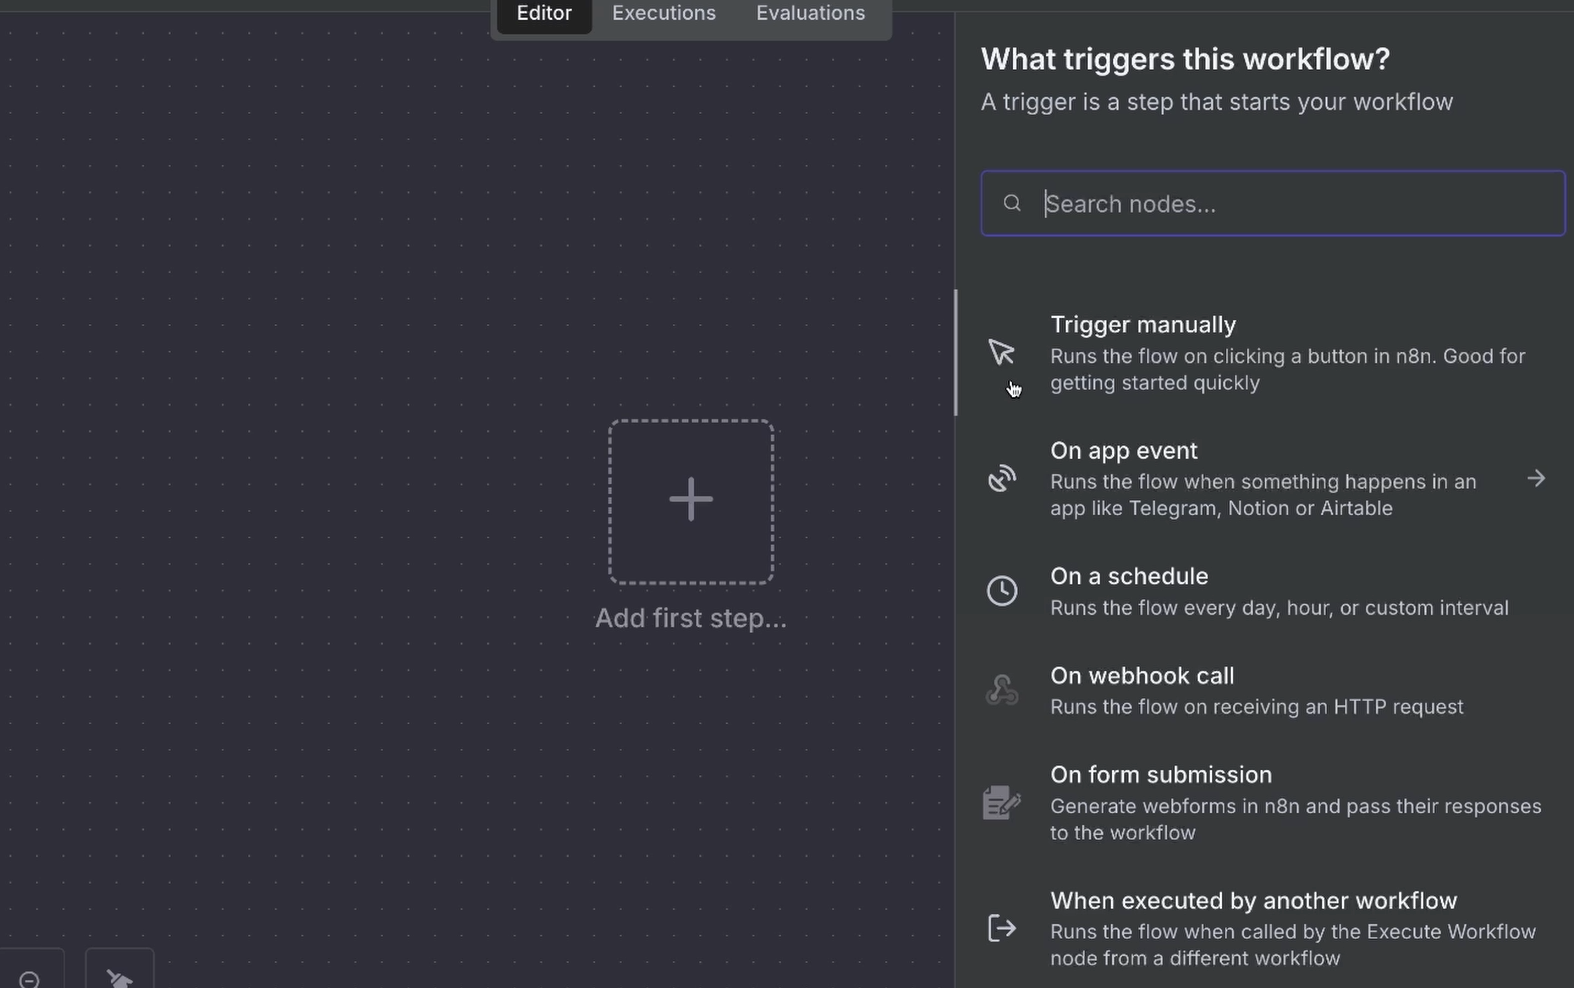
For our example, we’ll choose “On app event”. This will make your automation run when a specific event occurs in your chosen app.
Next, search for the app "RSS" and select the RSS trigger from the results.
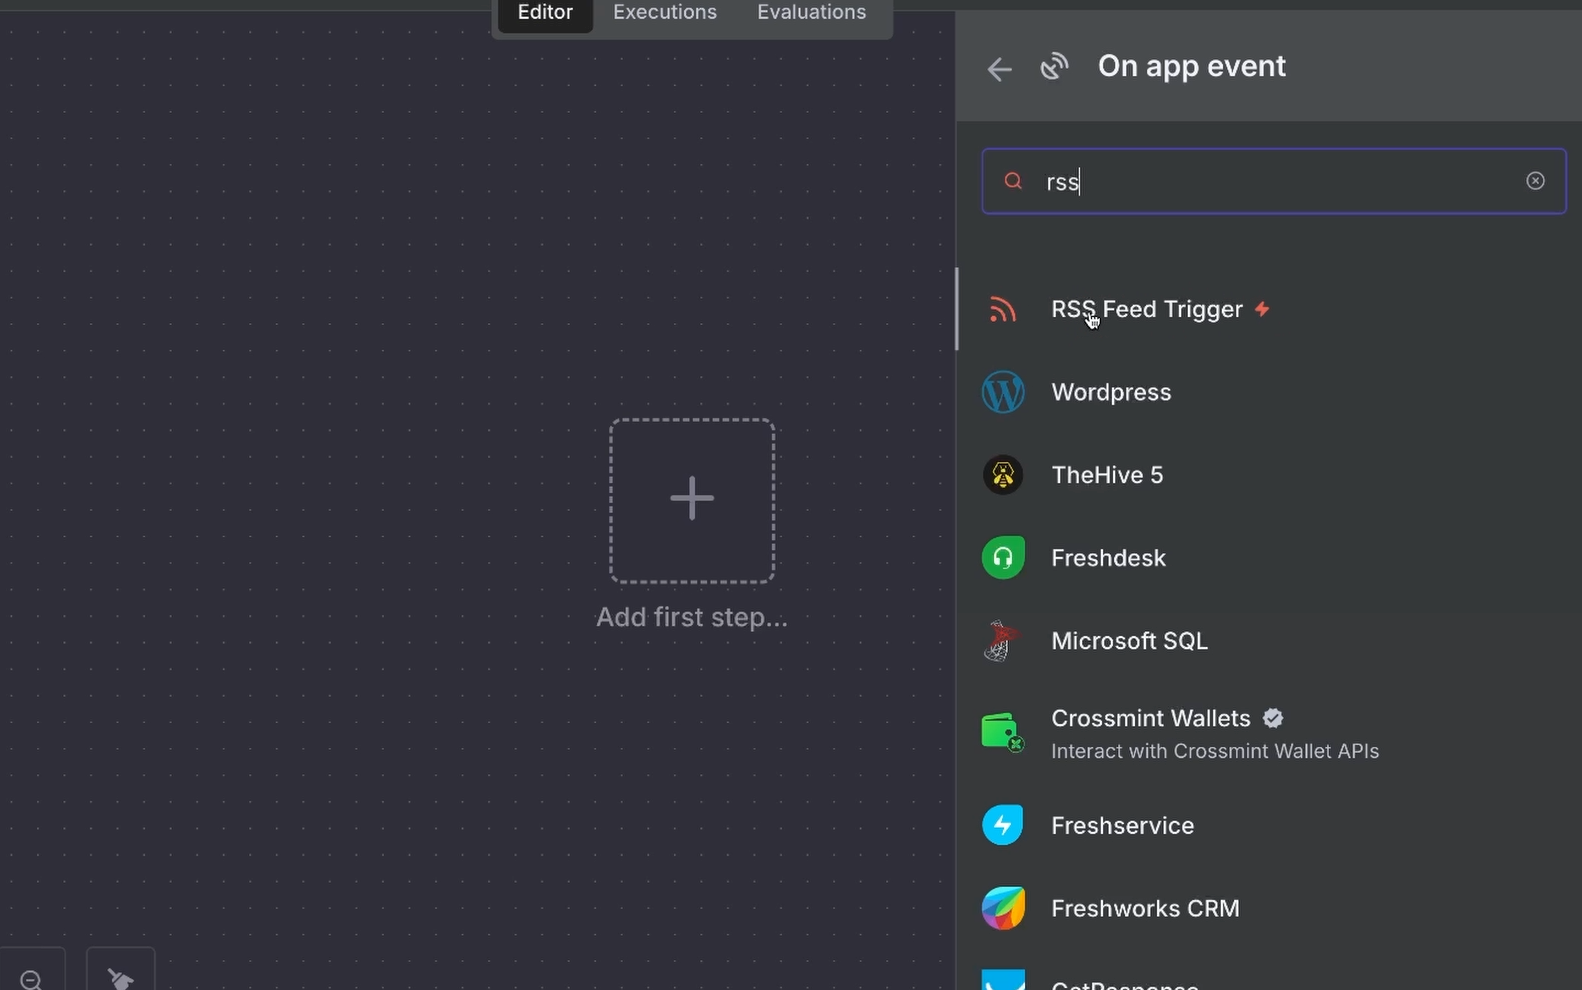
Most triggers require you to connect an account to tell n8n where to look for data. However, the RSS trigger is simple: no account is needed.
You just need to specify how often n8n should check for updates and provide the RSS link.
For this example, we'll use the Verge’s RSS feed (https://www.theverge.com/rss/index.xml), but you can use any RSS you want.
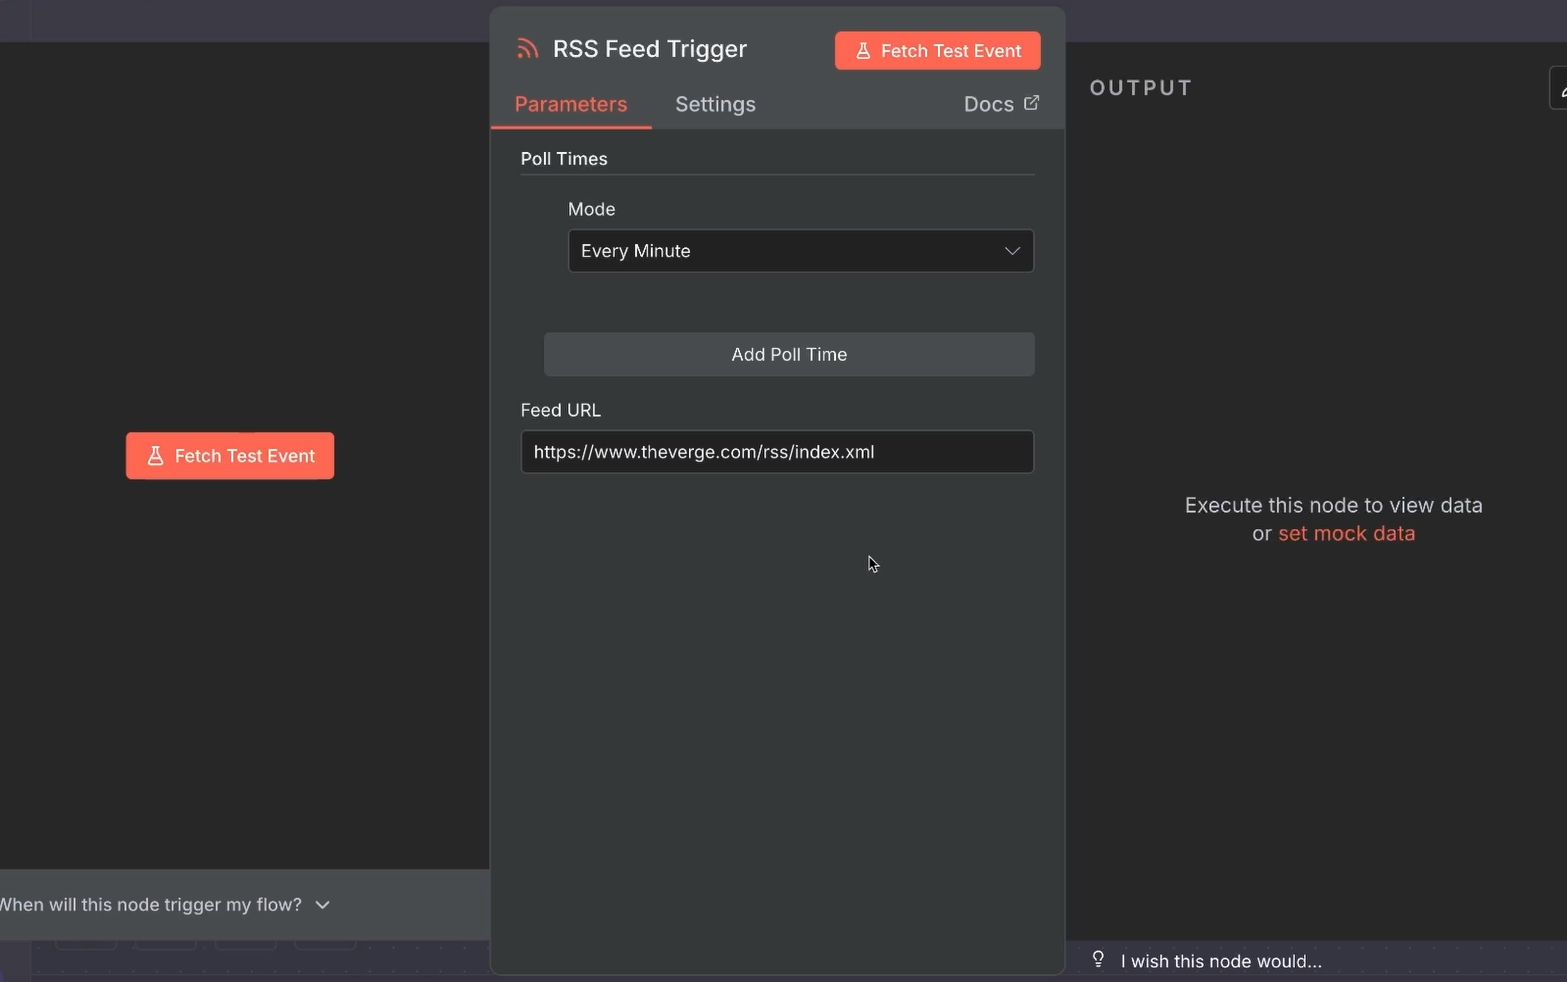
To ensure your trigger is set up correctly, click “Fetch Test Event”. This will retrieve a recent article from the RSS feed.
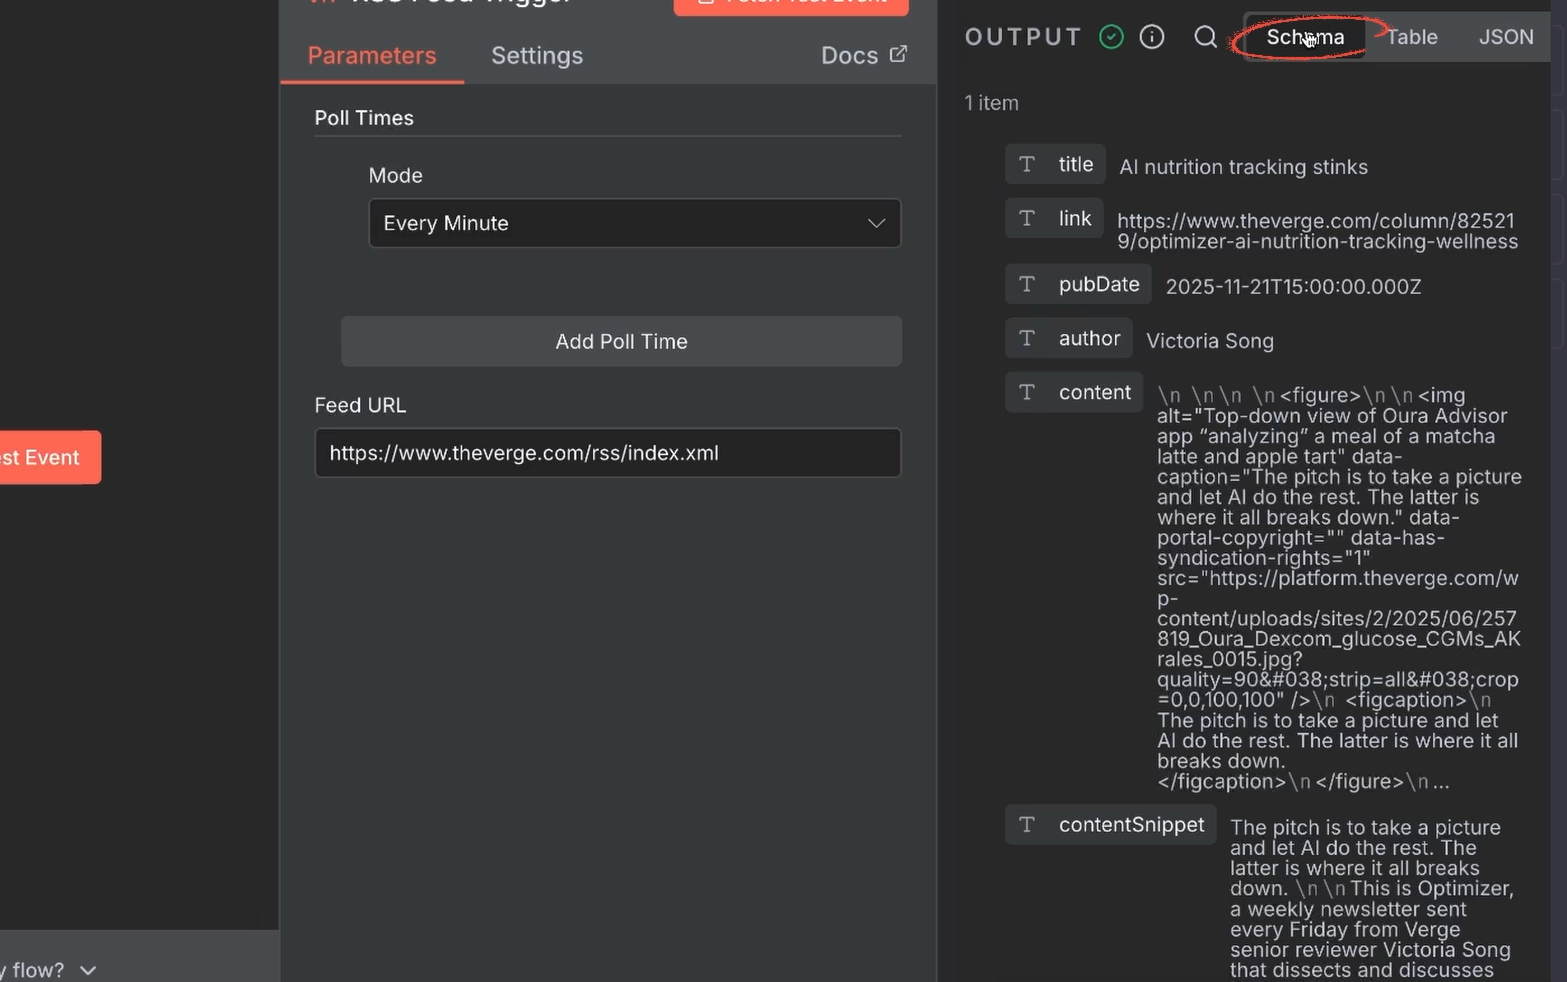
You can click “Schema” to easily view the data broken up into simple key/value pairs.
The power of n8n is that all this retrieved data can now be sent to other apps in the subsequent steps.
Now that we have the article data, let’s send it to Gemini for a summary. We're using Gemini because it offers free API access, making it accessible for anyone to follow along.
If you don't already have one, you'll need a Gemini API Key to connect to n8n. We’ll summarize the steps here, but you can also check out this post for a detailed tutorial for getting started with the Gemini API.
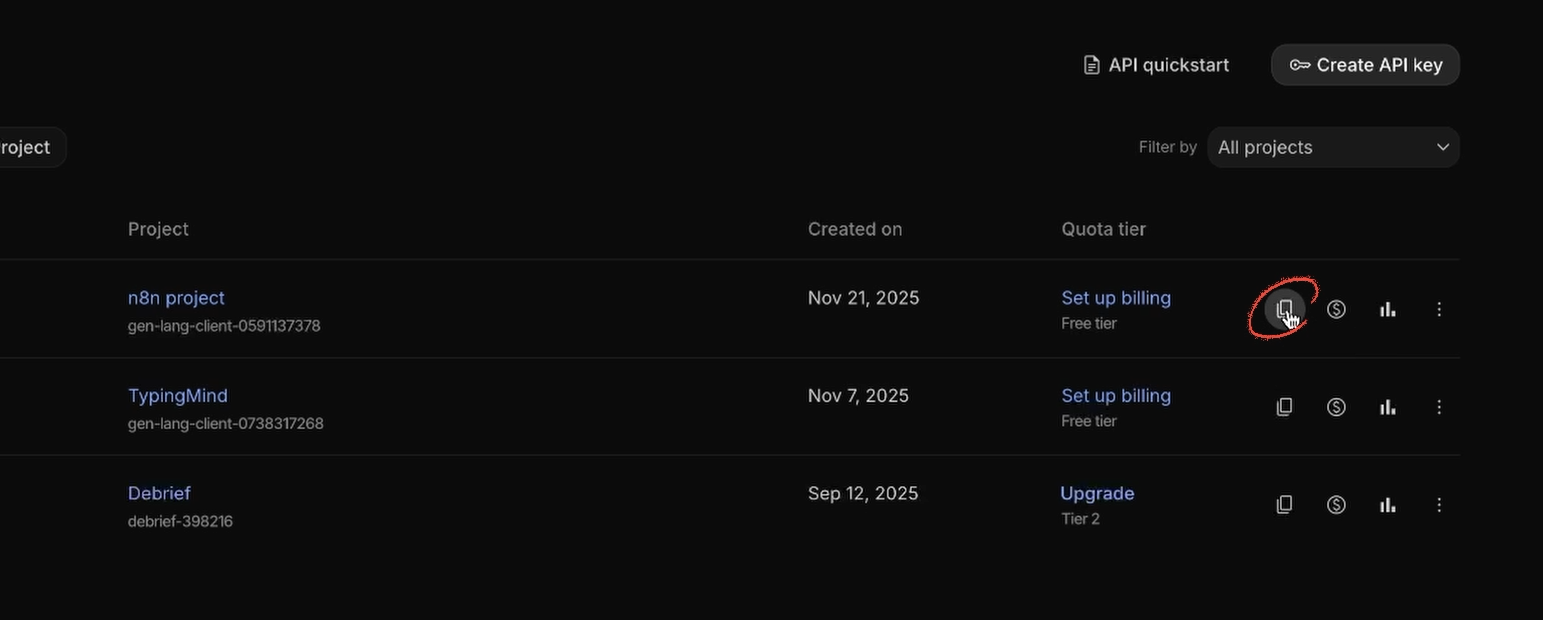
1. Go to aistudio.google.com and sign in.
2. Click “Get an API key”.
3. Create your API key.
4. Copy it.
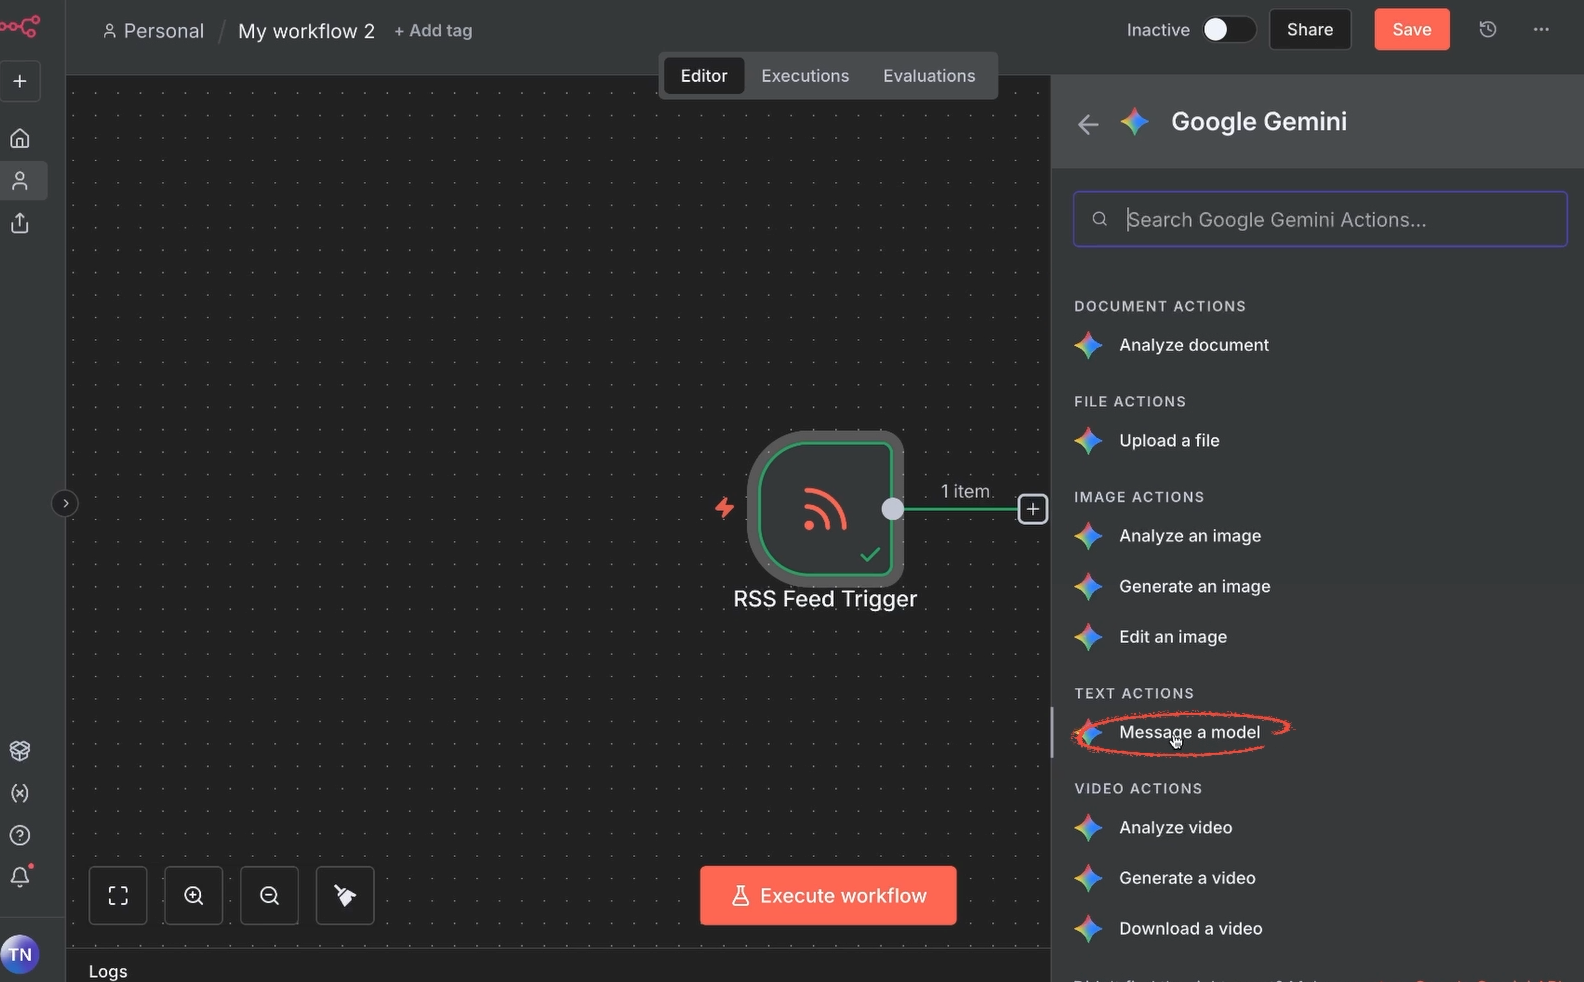
Close the trigger window and click the plus button to Add an action.

Choose “AI”, and select “Gemini”.
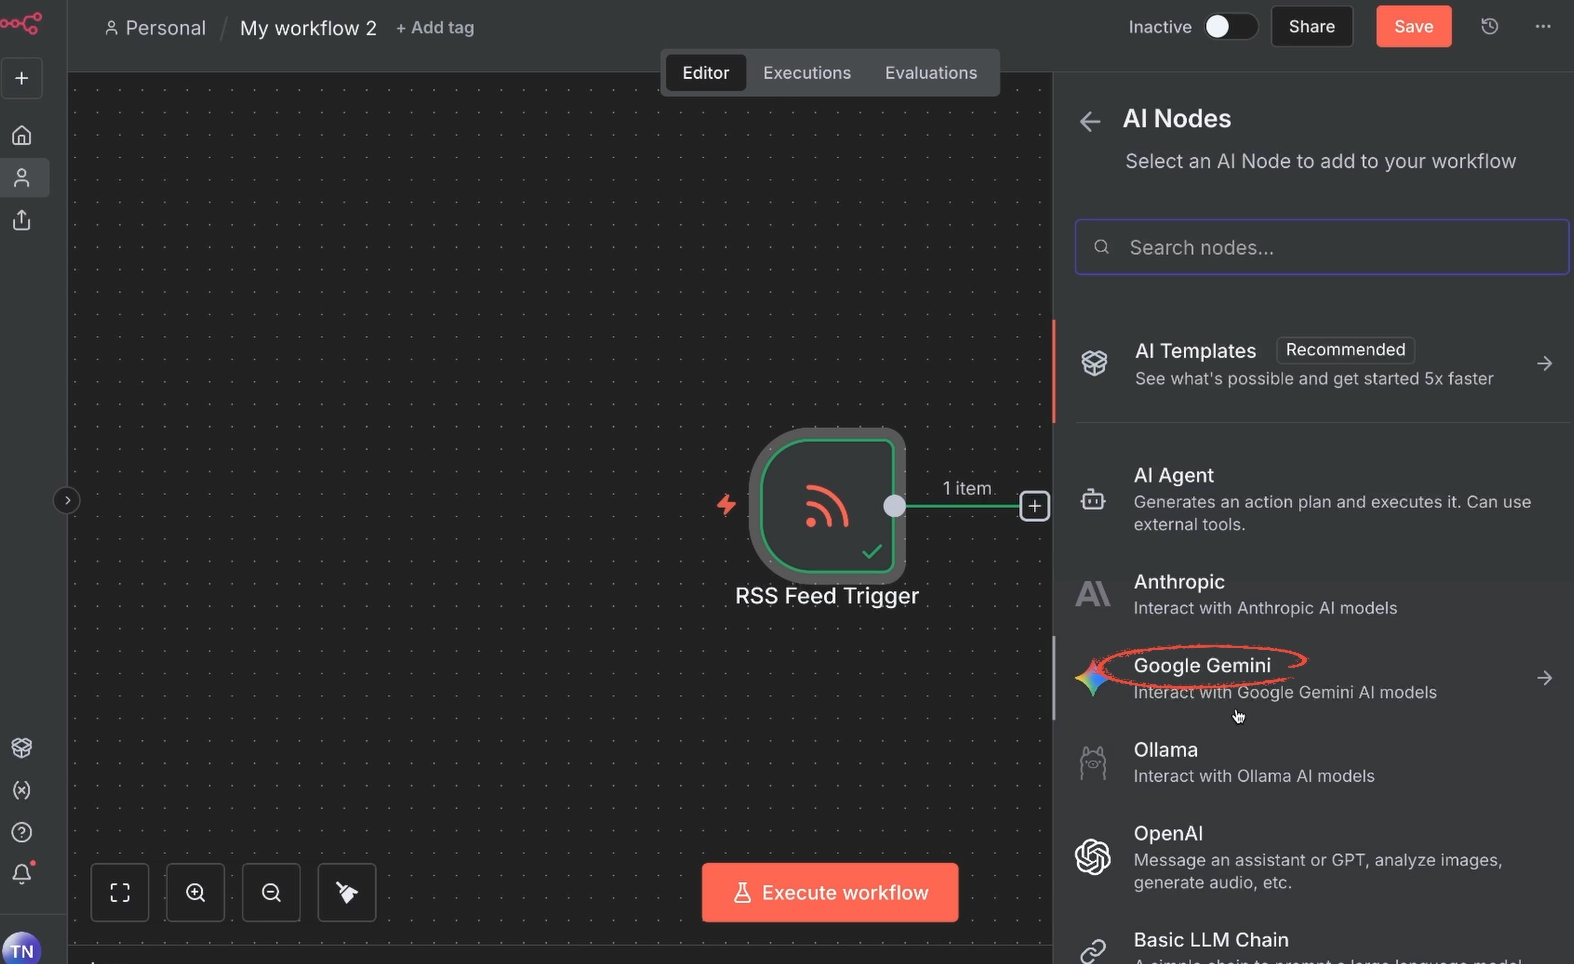
Then, pick “Message a model”.
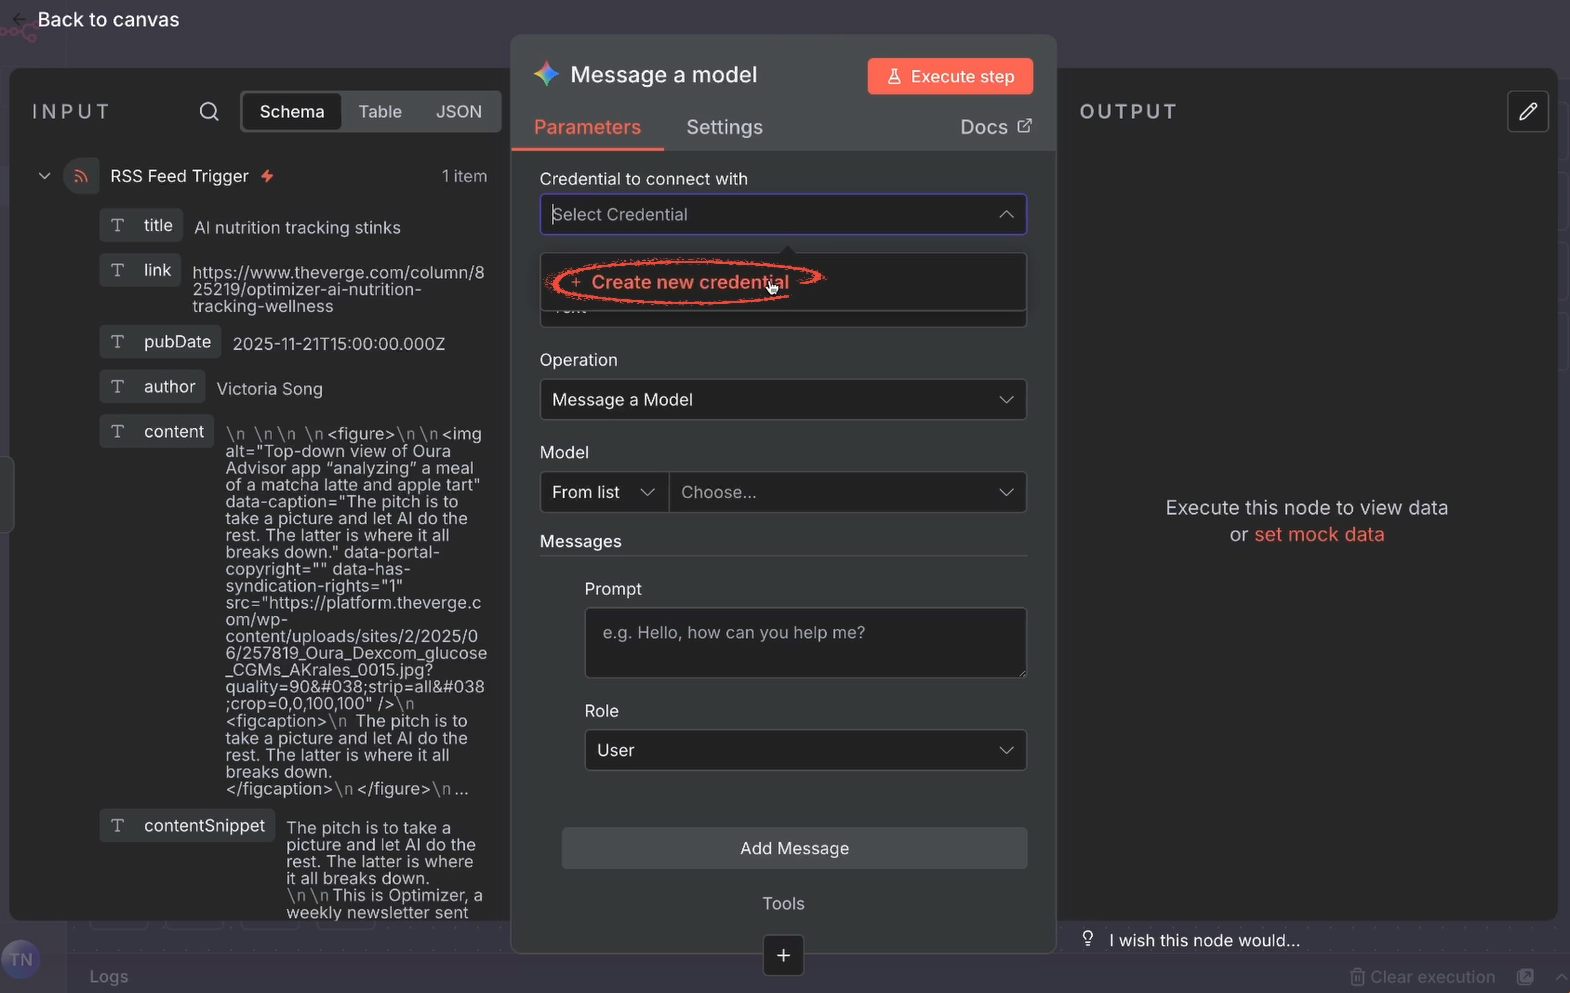
Configuring actions in n8n usually follows a similar process: you typically need to sign in with a credential and fill in each of the required fields.
For Gemini, that means entering an API key, picking a model, and composing a prompt using data from the previous steps.
If this is your first time connecting to Gemini, you'll need to Create a new credential.
Paste in the API key you copied earlier, rename your connection (for instance, "Gemini API"), and click “Save”.
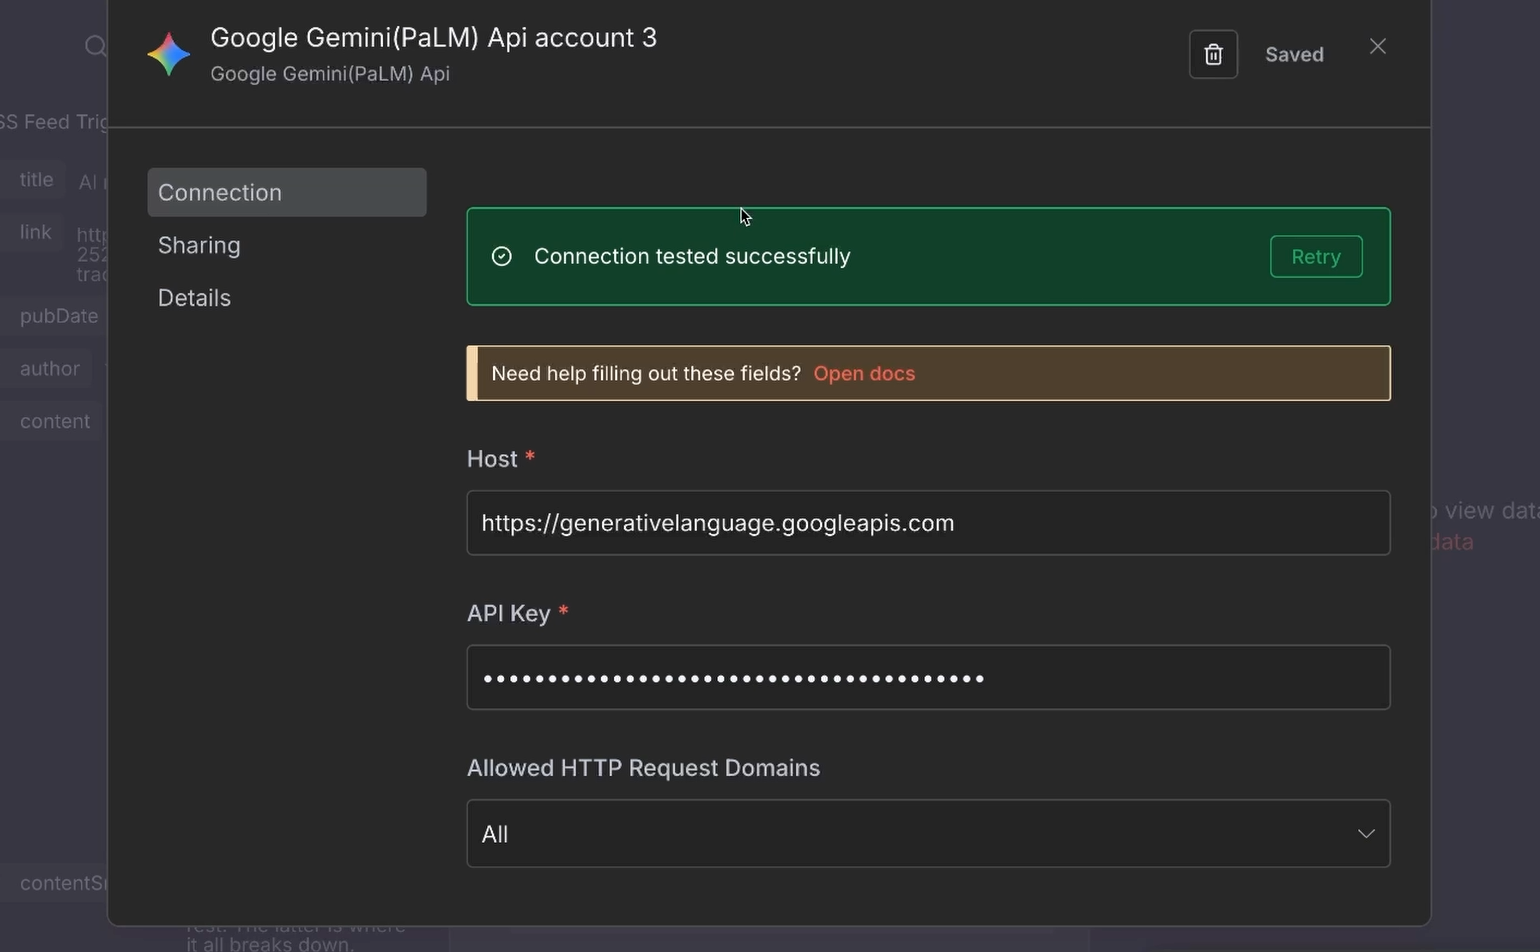
The connection will be instantly tested and should show you are all set.
Next, we'll fill in the required information for the prompt.
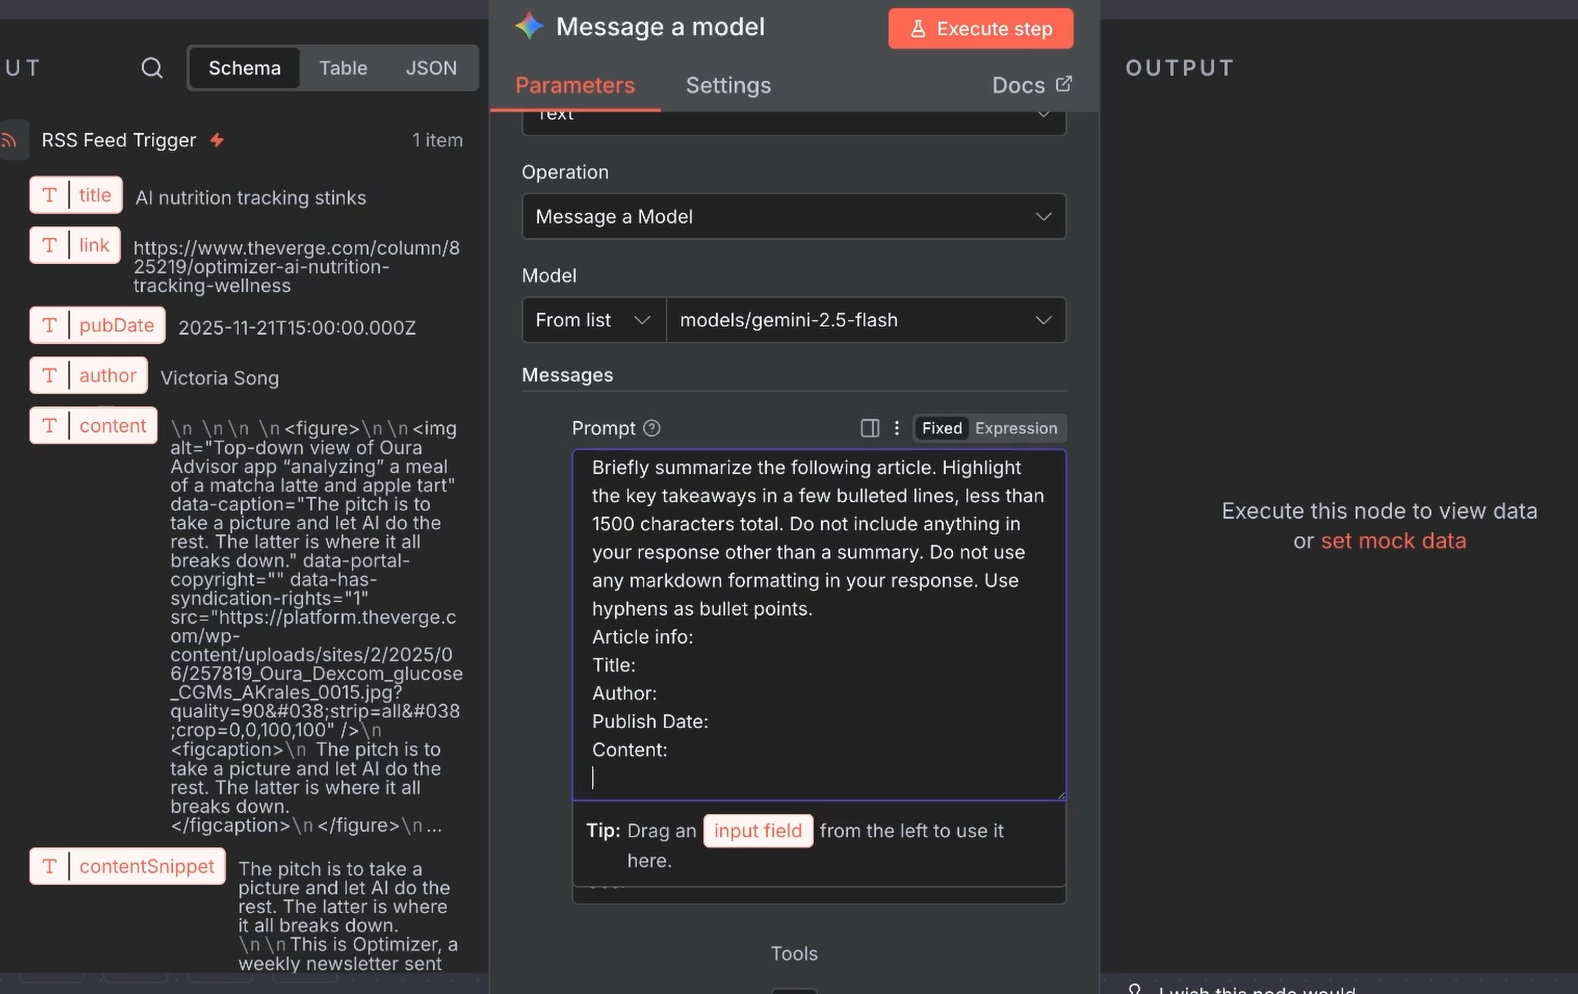
Pick a model: Select any model you want, such as 2.5 Flash.
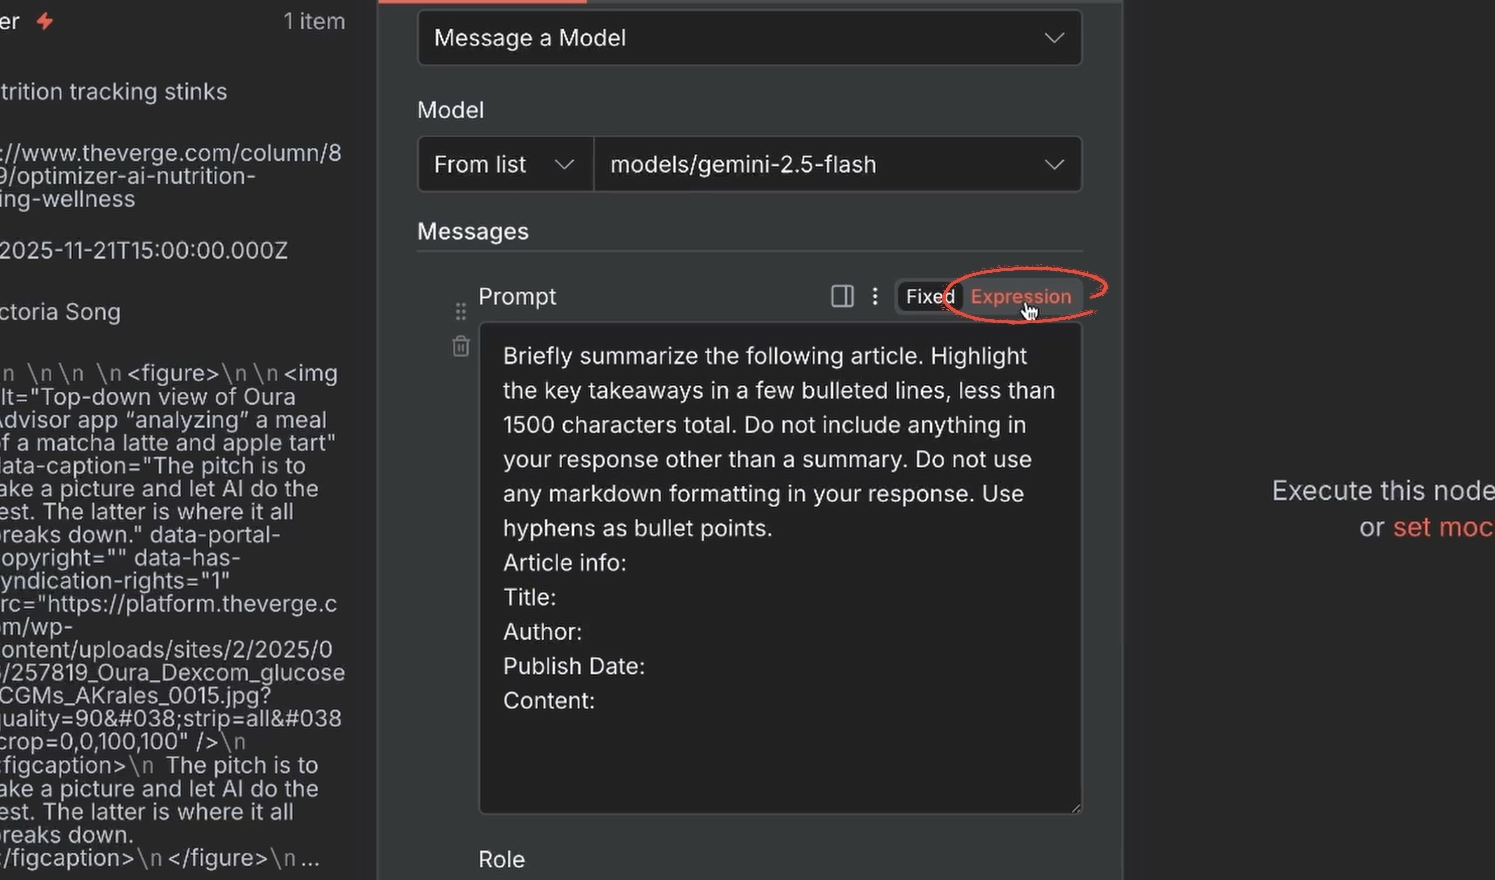
Compose a prompt: The prompt is the instruction you give to the AI. Here is an example prompt we’ve written, designed to extract a clean, concise summary that fits the Discord character limit:
Briefly summarize the following article. Highlight the key takeaways in a few bulleted lines, less than 1500 characters total. Do not include anything in your response other than a summary. Do not use any markdown formatting in your response. Use hyphens as bullet points.
Article info:
Title:
Author:
Publish Date:
Content:
This is where you harness the true power of an automation tool like n8n: the ability to move and transform data. The “Input” window on the left side shows all the data retrieved in the previous RSS trigger step.
Switch the text field from “Fixed” to “Expression” to let it accept JavaScript.
Then, you can simply drag and drop these variables into your prompt fields to include them. We will include variables for the article's:
• Title
• Author
• Publish Date
• Content (the full article body)
These are dynamic variables. This means that every new item in the RSS feed will automatically insert its own title, content, and so on. You only need to configure this step once.
Our prompt is ready, so let’s test it! Click “Execute Step” and wait for the AI response. You can view the summary in the “Output” window.
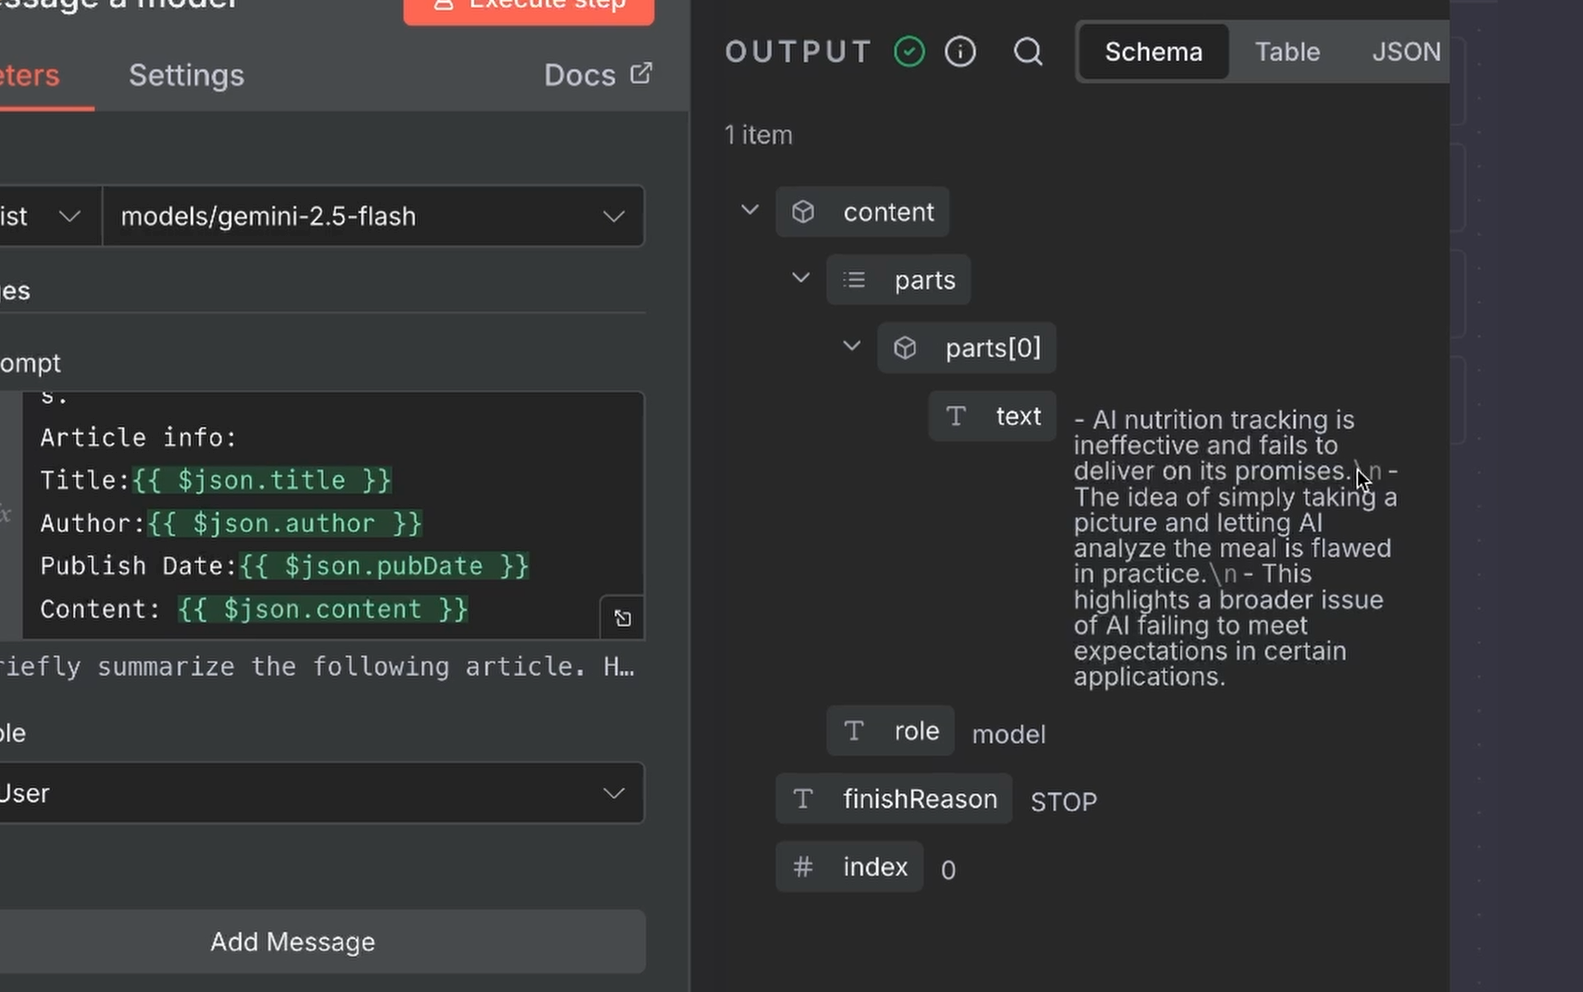
If it looks good, you're set to send this output wherever you want.
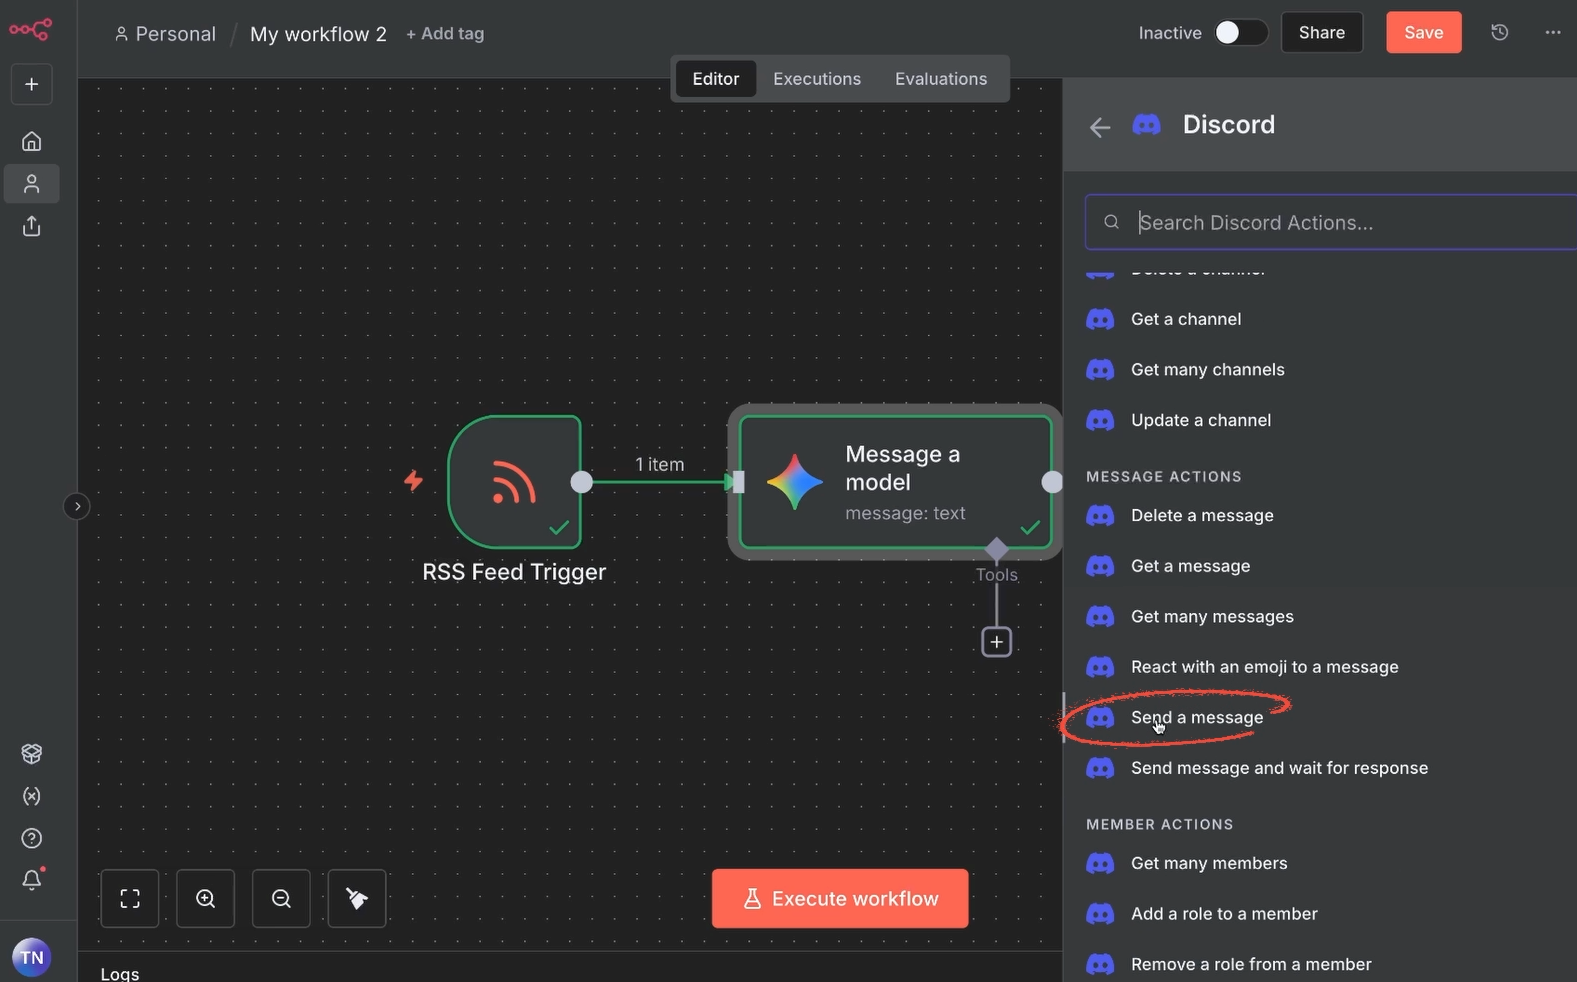
Our final step is to send the AI summary and article info to Discord.
Add another action to the automation. Search for “Discord” and pick “Send a message”.
For the connection type, choose “Webhook”. This will allow you to send a Discord message with n8n without needing to enter your Discord account information.
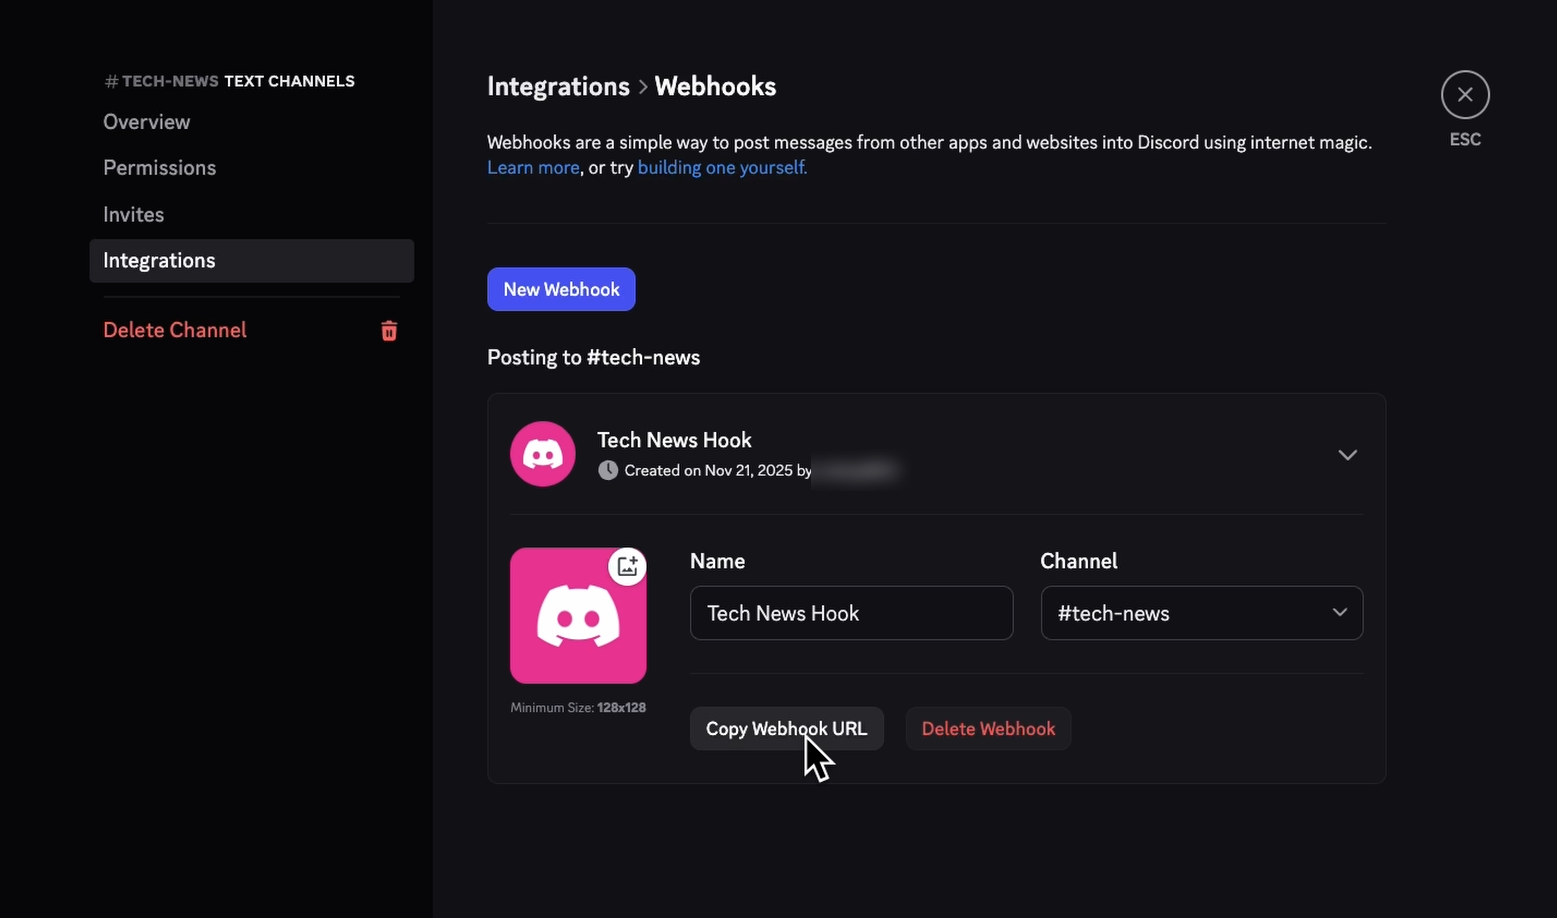
To create a webhook in Discord:
1. In the Discord app, open up the channel settings for a channel you own.
2. Select “Integrations”.
3. Create a webhook and give it a unique name.
4. Copy the webhook URL.
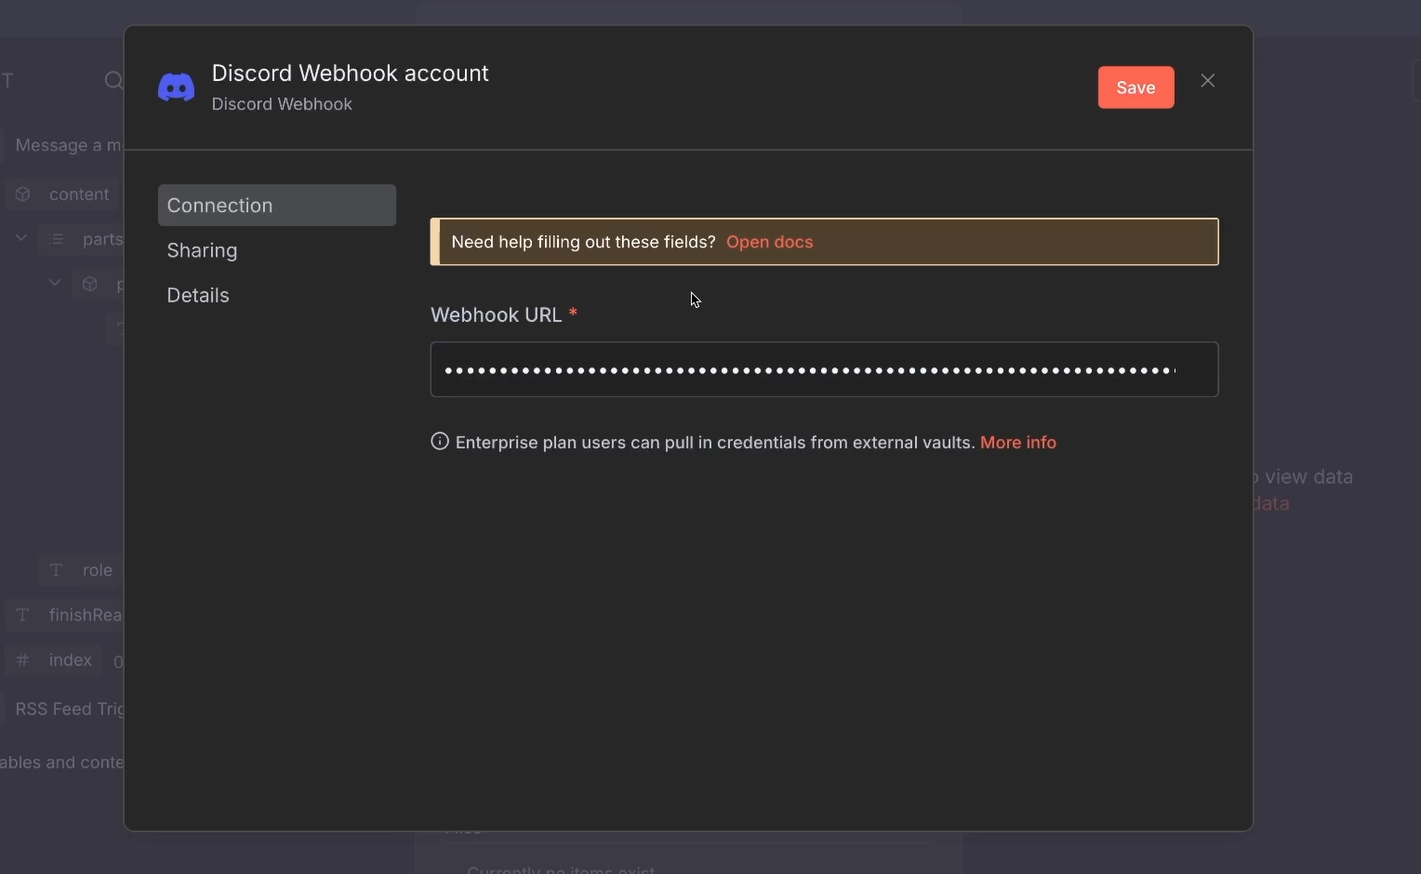
5. Create a new credential in n8n, paste the webhook URL, and save the connection.
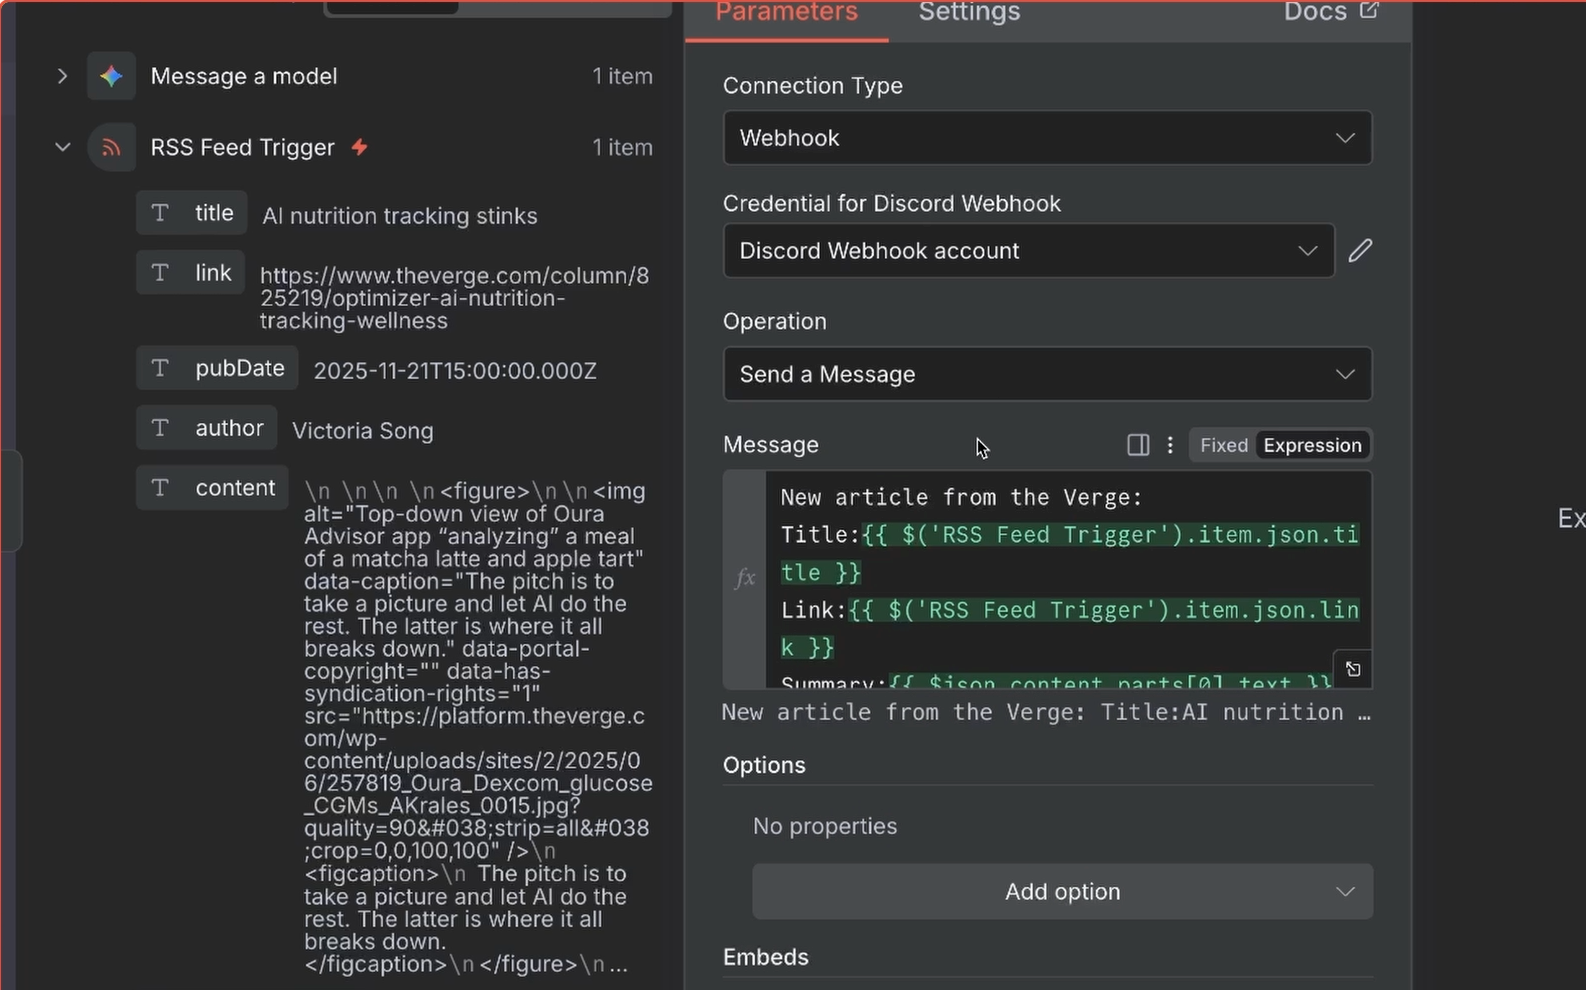
The message is easy to configure – the webhook already determines the channel. You just need to compose the message content.
We’ll write a simple message that includes:
• The article title and link from the RSS trigger.
• The summary from the Gemini AI step.
Here’s an example structure for the message:
New article from the Verge:
Title: (Insert Title Variable Here)
Link: (Insert Link Variable Here)
Summary: (Insert Gemini Summary Variable Here)
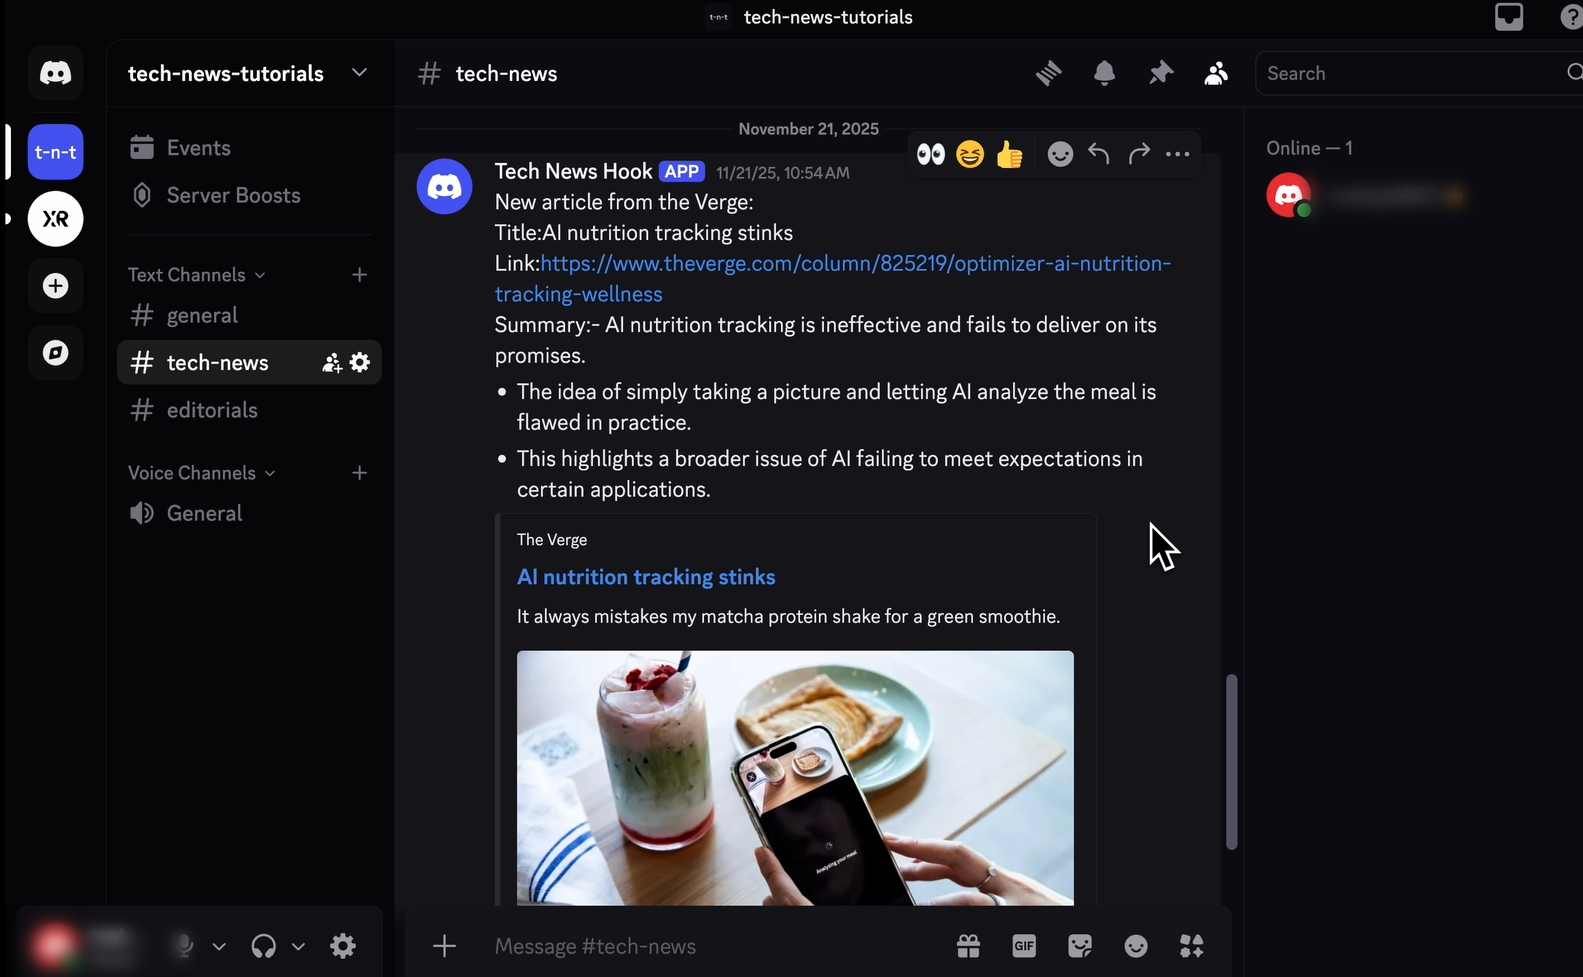
Let’s give this final step a test! Click “Execute step”. The output will show that the message was sent.
You can also check your Discord channel to see the message. It should be neatly formatted with all the correct data.
Congratulations! This simple n8n automation is now complete. Make sure to save your work and then Activate the automation.
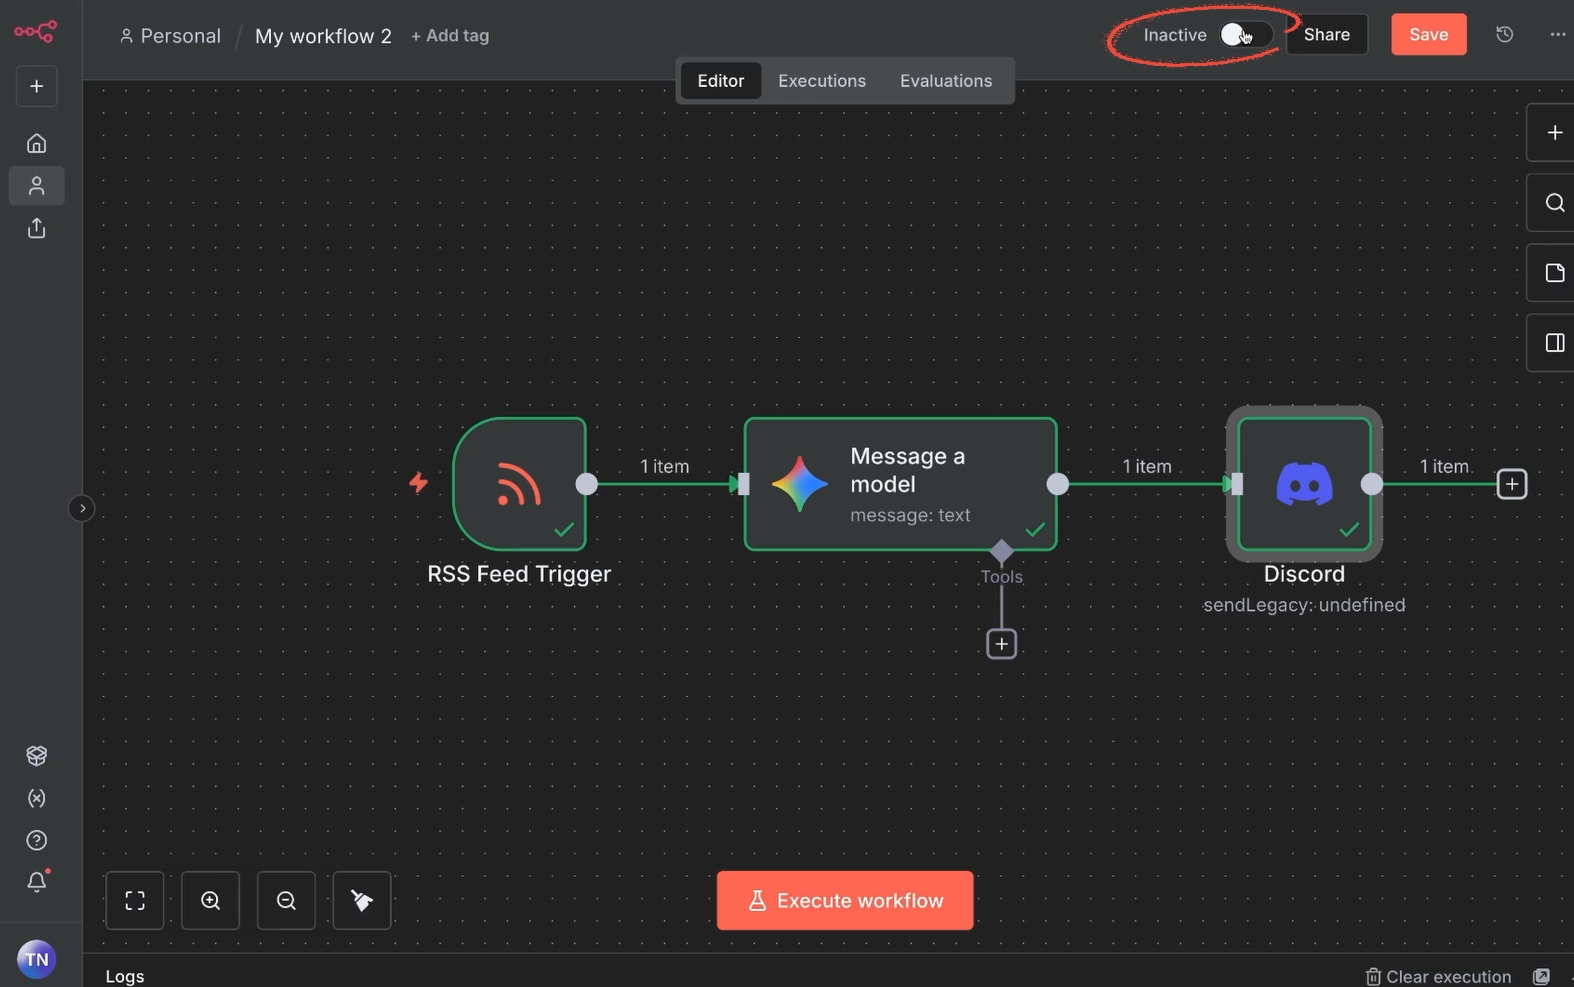
It will now run on its own whenever a new item appears in the RSS feed.
And that’s all there is to it. You’ve built your first automation in n8n.
As noted earlier, n8n can get very complex. Even connecting apps can be quite tricky.
If you need some help getting your automations set up, go to hourly.xray.tech. We’ll match you with a vetted low-code expert for one-on-one collaborative building sessions. There’s no long-term commitment. Just flexible, hourly support when you need it.


.pptx.png)
.pptx.png)