
A single automation stuck in a loop can burn through your whole Claude API balance overnight. A spend limit stops that from happening, and setting one takes about two minutes.
This guide walks through both kinds of limits in Claude Console: one for your whole organization and one for each workspace.
Here’s a quick overview of how it works. Read on for a detailed walkthrough with screenshots.
Claude Console is Anthropic's developer platform at platform.claude.com. It's where you manage API access to send requests from your own app, an automation tool like Zapier or n8n, or a coding agent like Cursor or Zed.
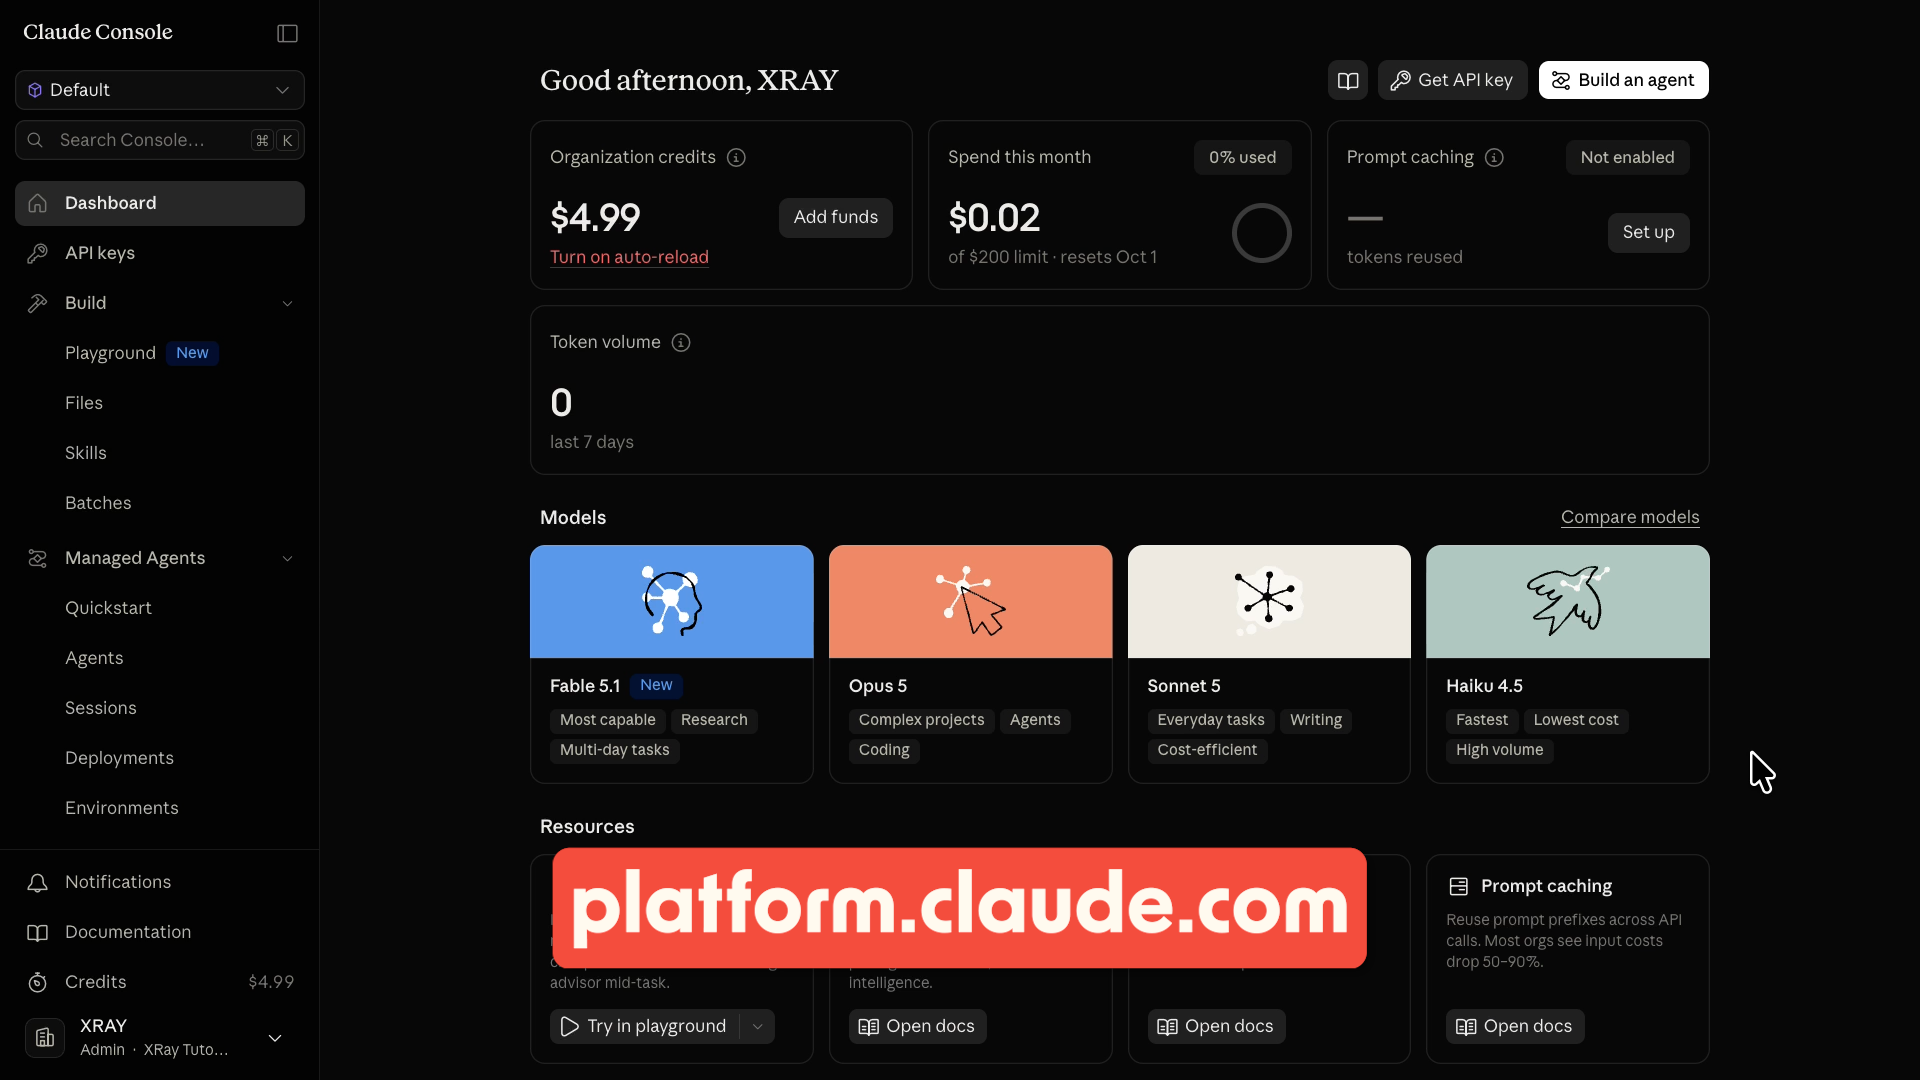
It's a separate product from the Claude app you chat in. Limits you set in the Console apply only to API usage.
Your organization limit is the ceiling for every workspace and every API key you own. Set this one first.
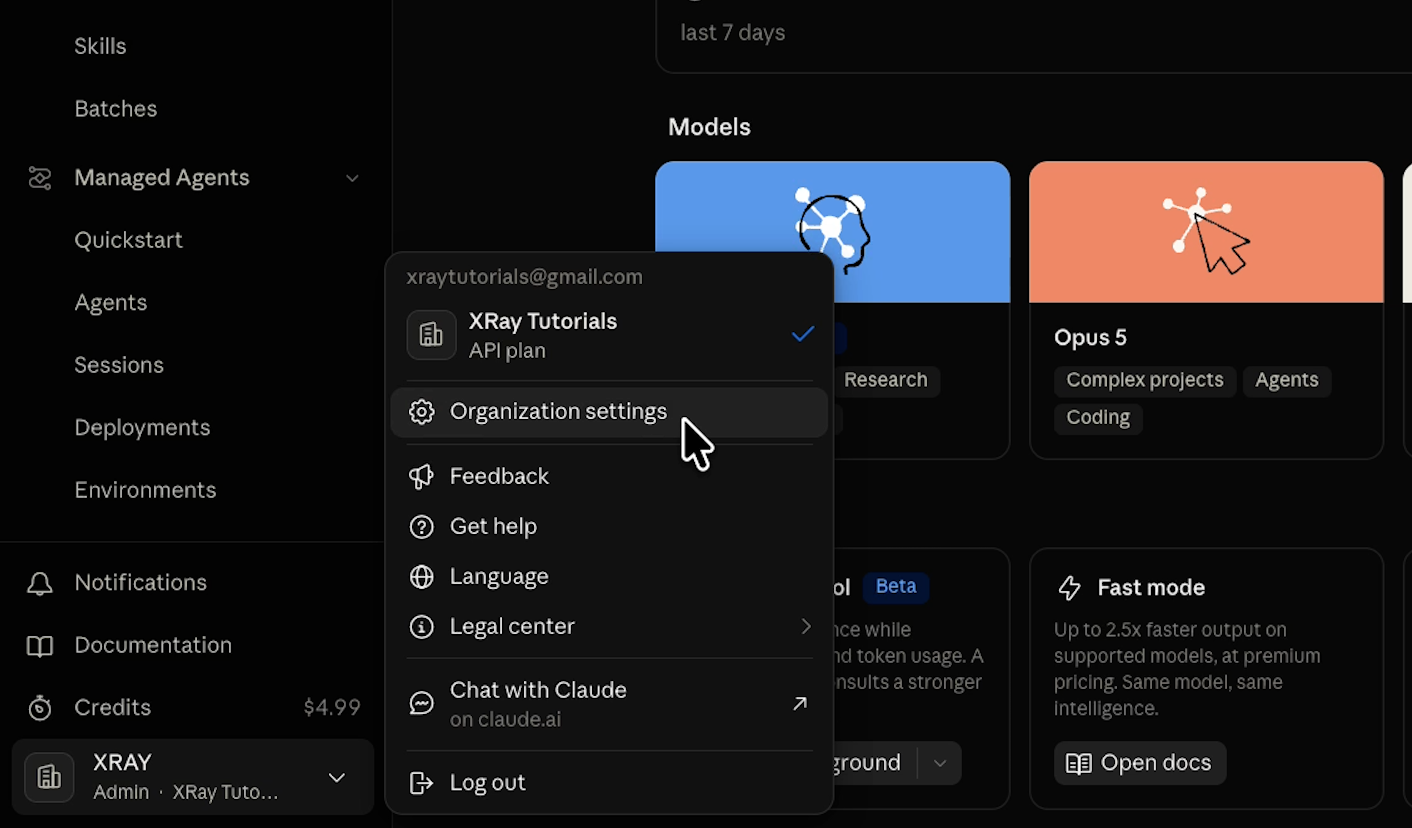
Log in to platform.claude.com, click on your organization name in the bottom left, and choose Organization settings.
Click on “Billing”, and scroll down to Spend limits.
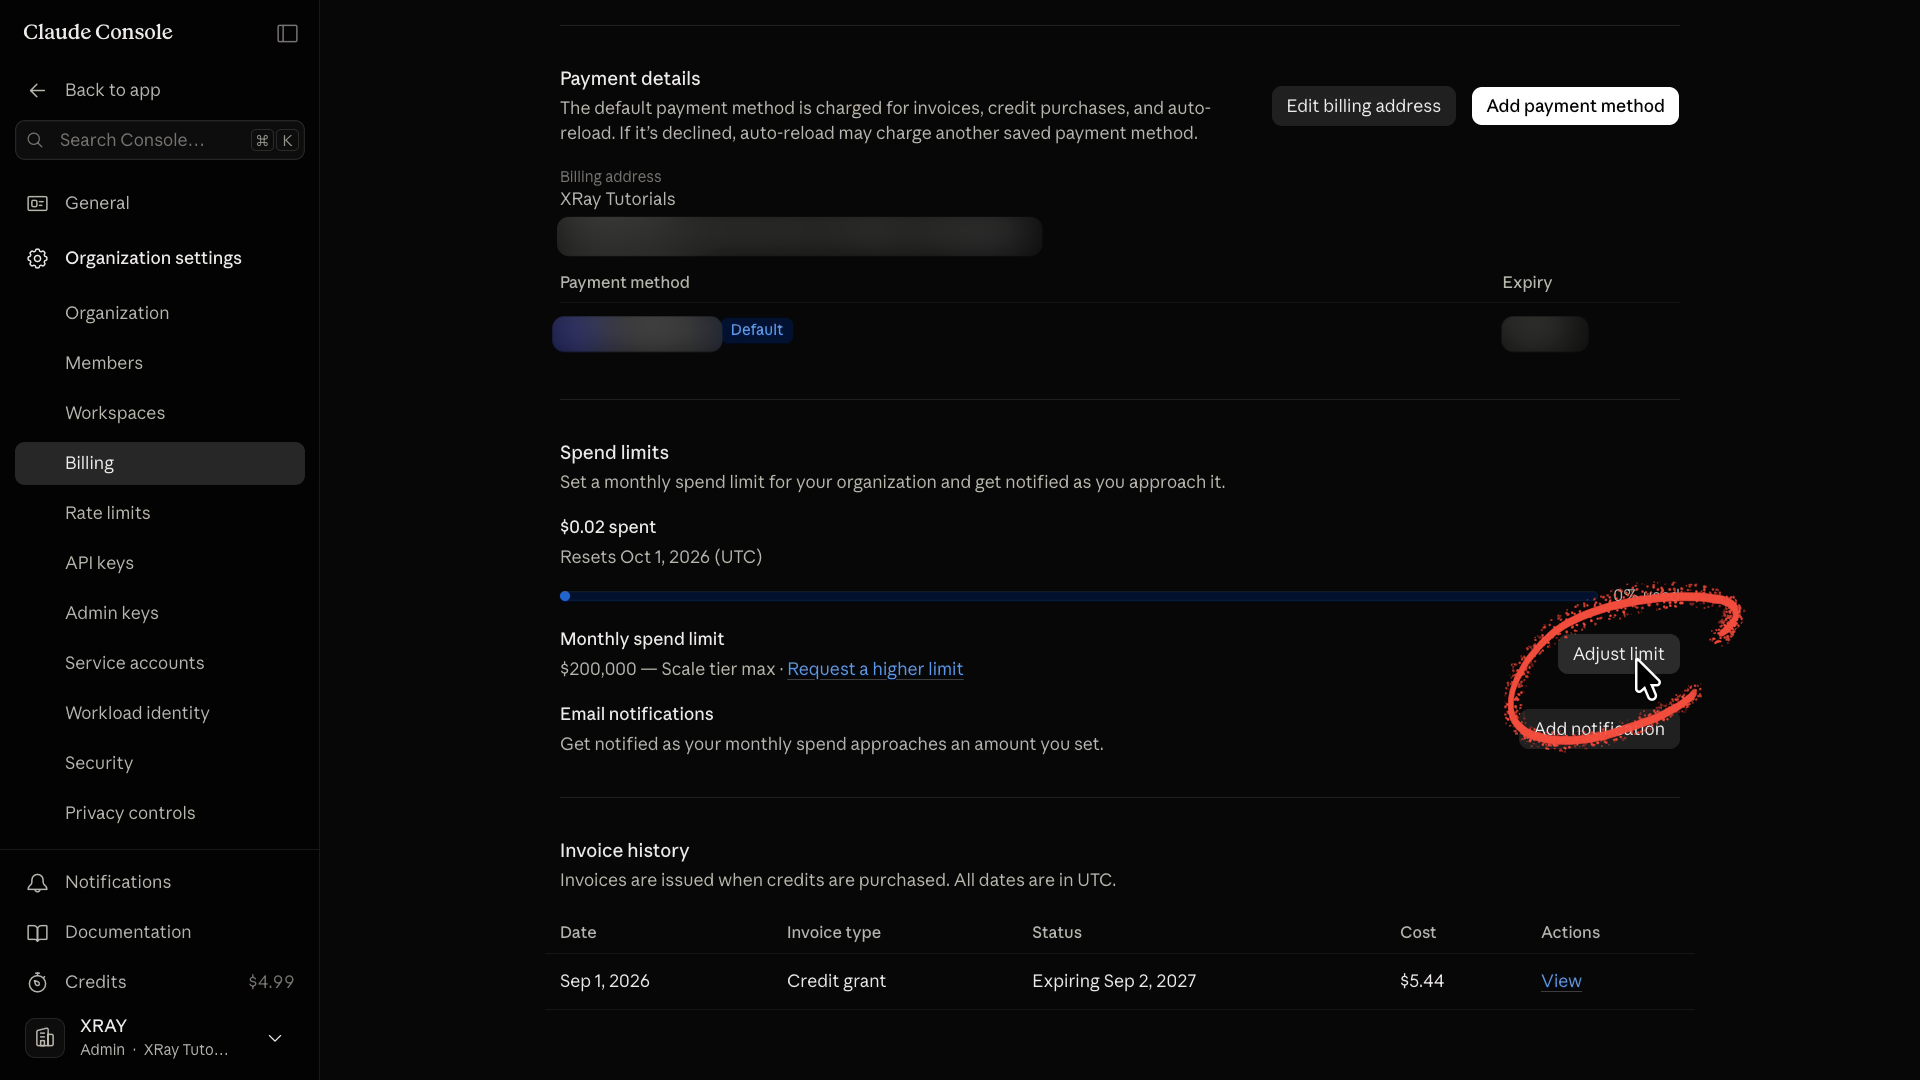
Click Adjust limit. If you've never set one before, that button reads Set limit instead.
Enter whatever amount you’re comfortable spending in a month and click “Update limit”. We set ours to $200.
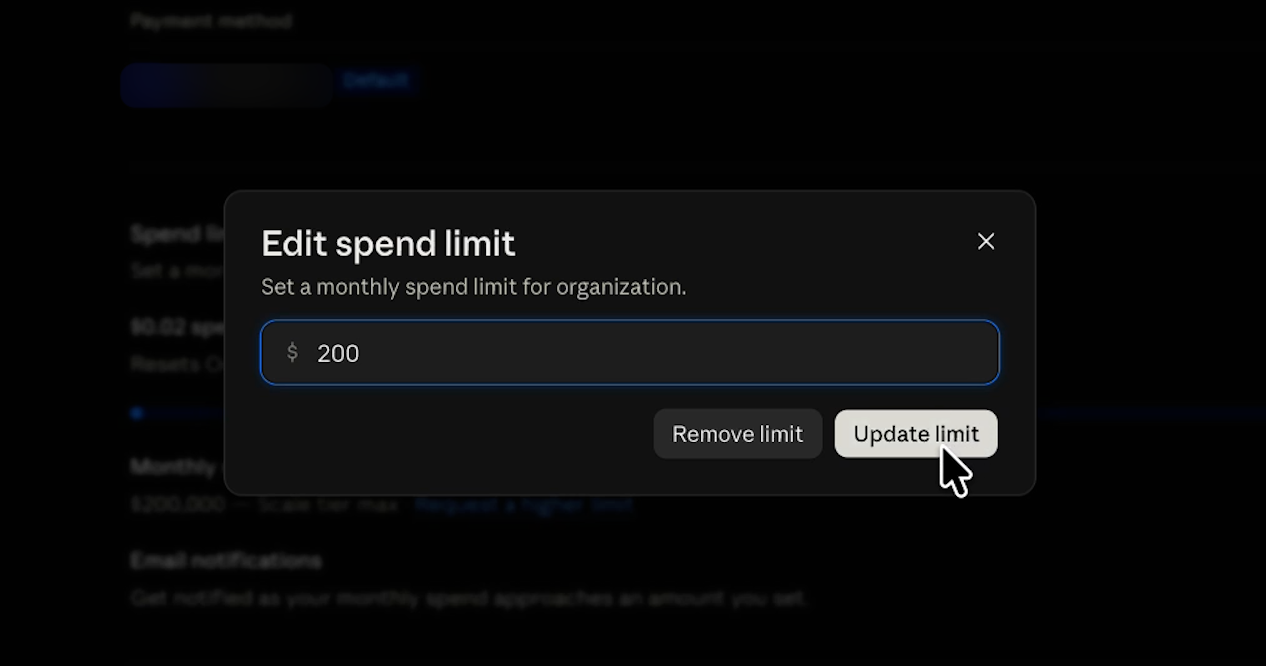
Now we could load $500 or $1,000 of credits into the account, and it still won't spend more than $200 this month.
A limit stops out-of-control spending. A notification tells you it's getting close, so you can check what's running before anything shuts off.
Click Add notification.
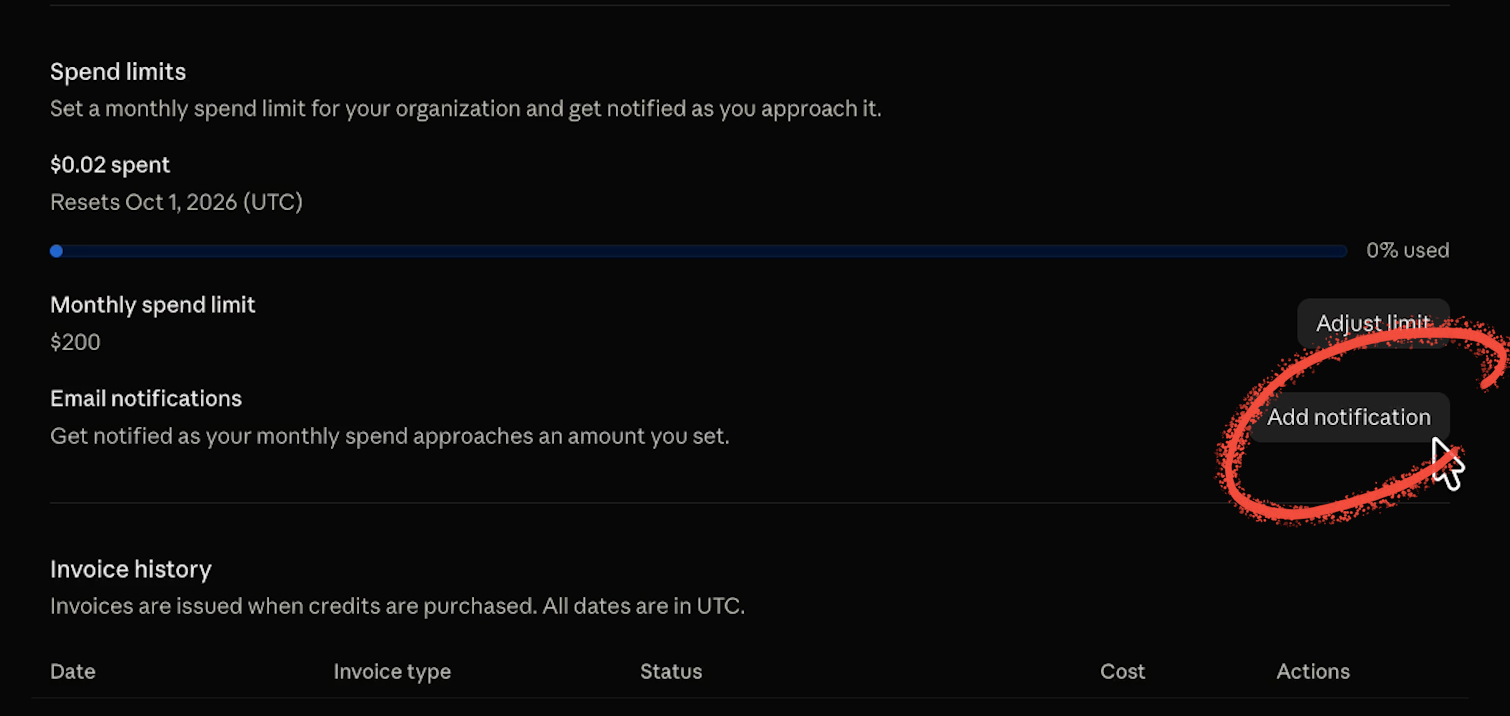
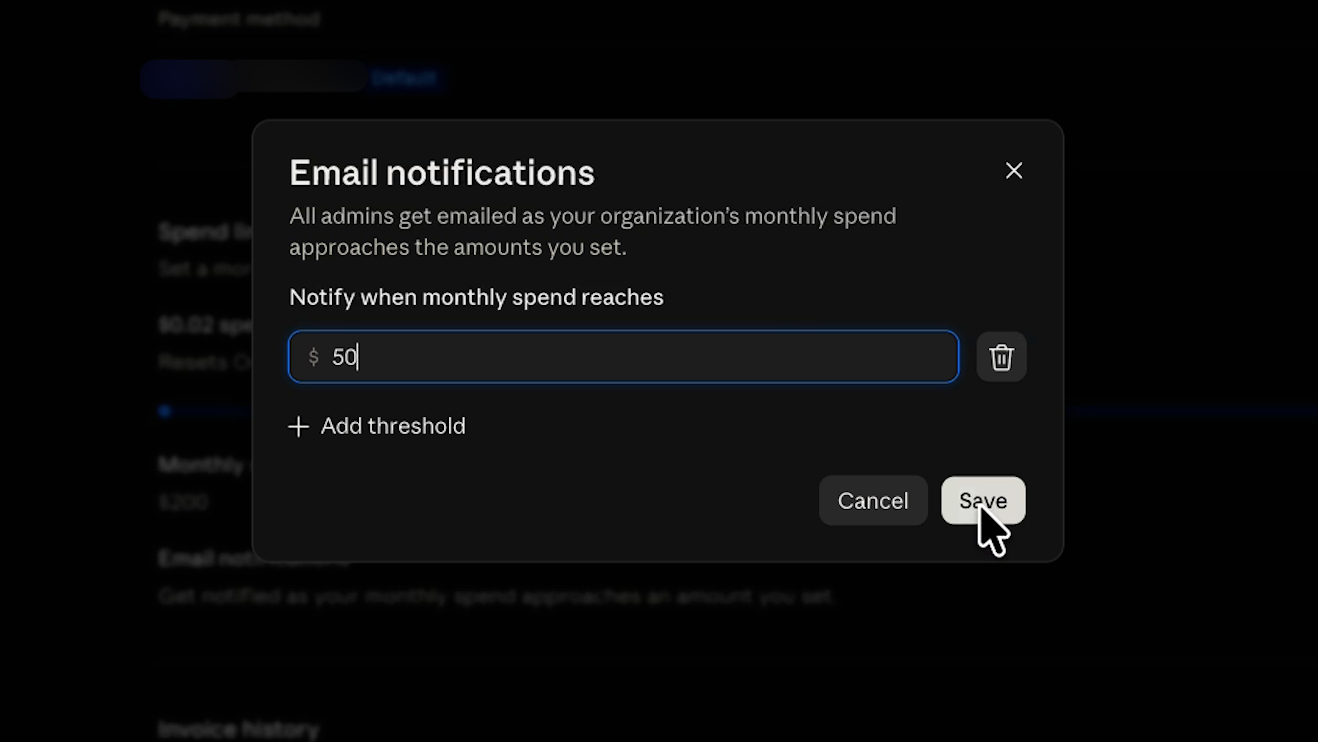
Click “Add Threshold”, enter an amount, and save. We set ours at $50, so we get a heads-up at a quarter of our limit.
Workspace limits give each project its own budget inside your organization limit. This is the protection that actually matters for automations, because it keeps one runaway workflow from eating the budget for everything else.
Go back to the dashboard and open any workspace except Default. You can't set a separate limit on the Default workspace – it always follows your organization limit.
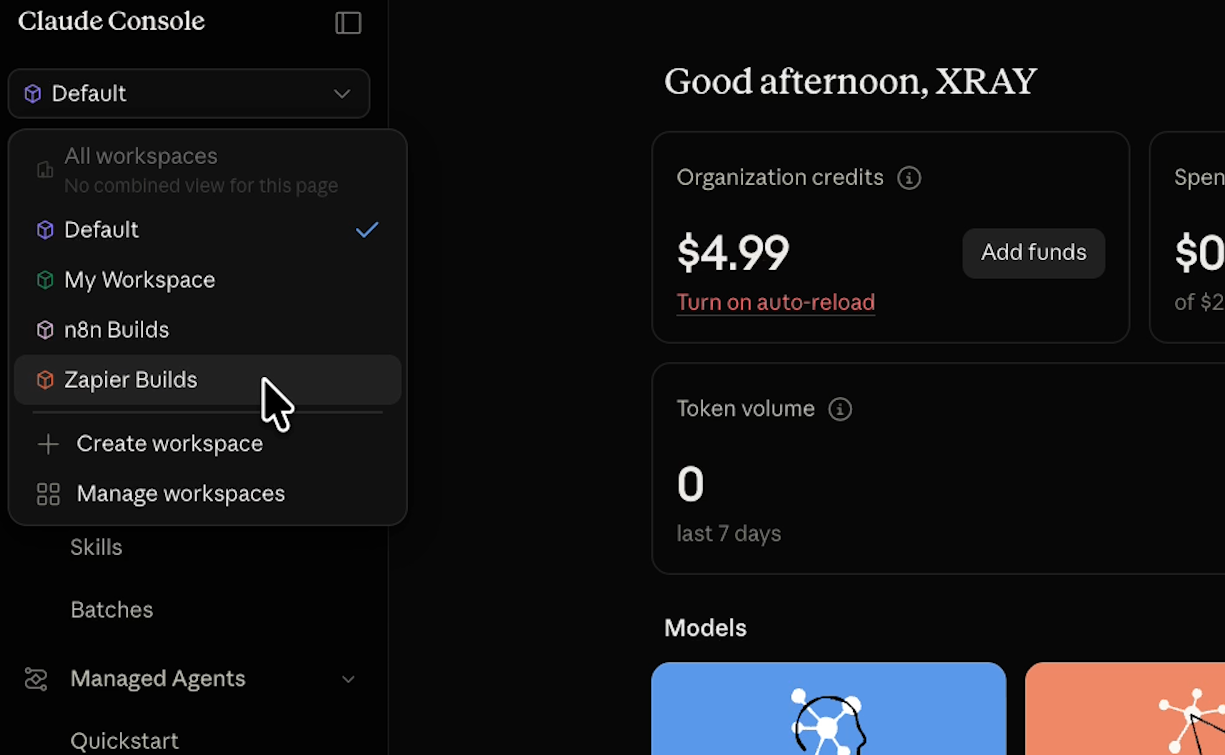
Click Spend limits under Manage.
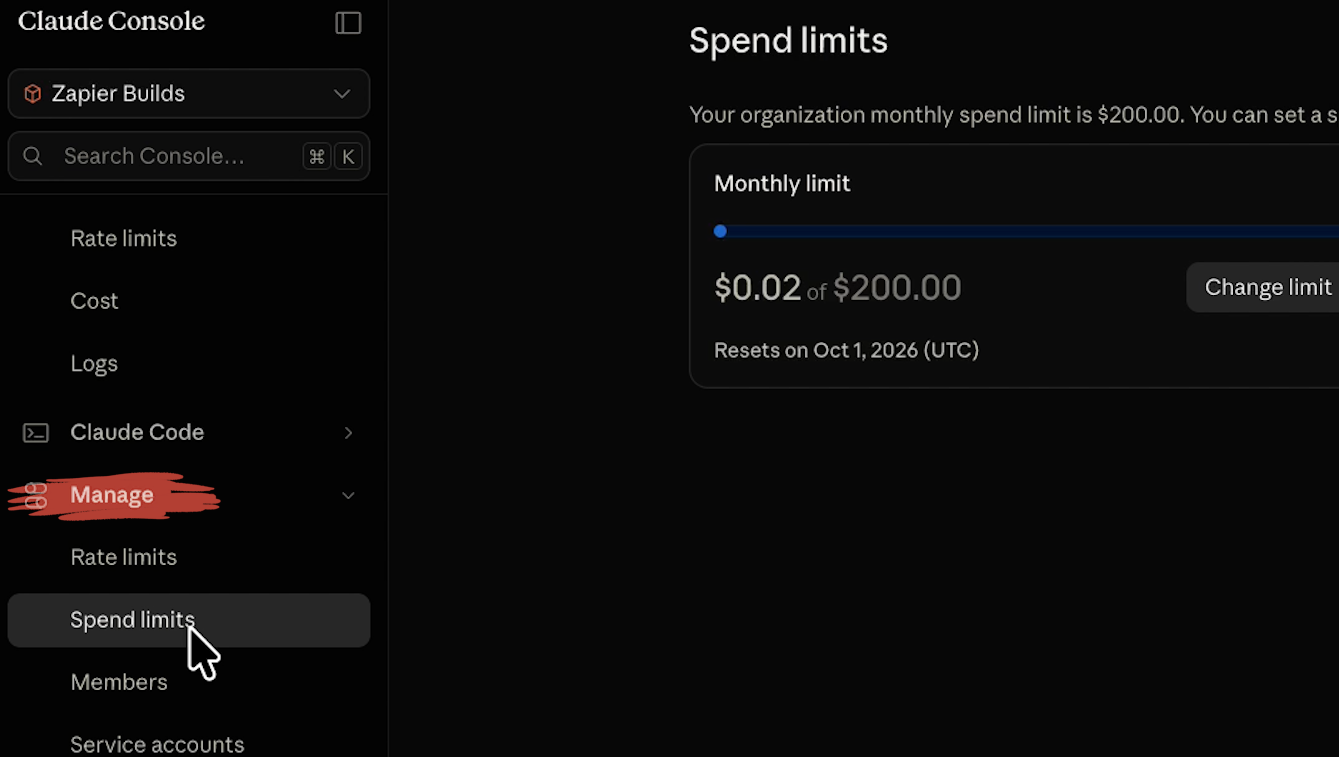
Select “Change limit”, and enter an amount. The number starts at your organization limit, and you can set it to anything lower.
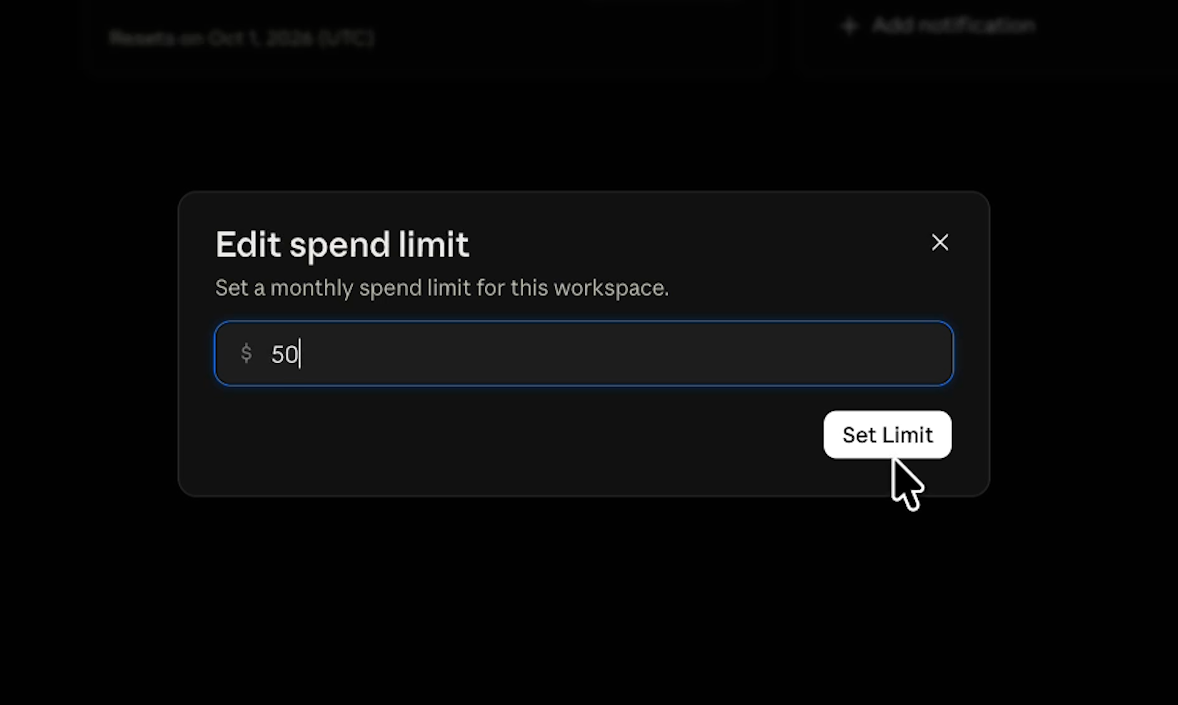
We capped our Zapier workspace at $50 and our n8n workspace at $30. Now a rogue automation stuck in a loop can't drain the account overnight, no matter how many credits are sitting in it.
When you reach a spend limit, API requests stop until the first of next month (00:00 UTC). Every call returns an error, and automatic retries won't get through. The only way back in sooner is to raise the limit.
That's why the number matters in both directions:
Too high, and a broken workflow can run up a real bill before you notice.
Too low, and your working automations go offline for the rest of the month.
Set each workspace limit a bit above what that project normally spends, and let the notification catch anything unusual well before the cap.
On your billing page you'll see something like "Scale tier, max $200,000."
That's your usage tier, and it's completely separate from the limits you just set.
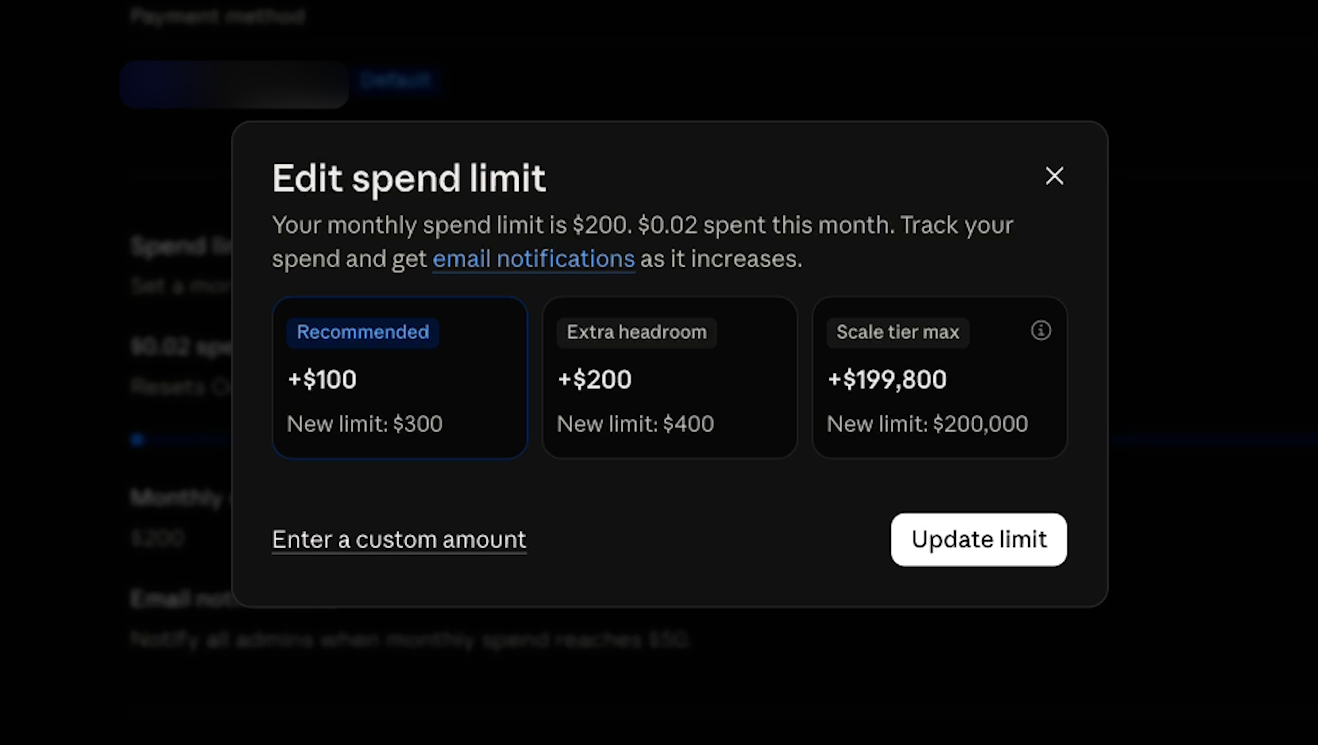
Think of your usage tier as a credit line: the most Anthropic will let your account spend in a month if you wanted it to.
There are currently three main tiers:
• Start: up to $500 a month.
• Build: up to $1,000 a month.
• Scale: up to $200,000 a month.
Brand-new accounts can start below $500 while Anthropic builds up some history on you. You move up automatically as you use the API and keep your account in good standing.
Don't worry if your tier number is uncomfortably large. The lower number always takes precedence, so a $200 spend limit holds even on a $200,000 tier.
Spend limits protect the budget. Building an AI workflow that's worth the spend is the harder part.
That's what we help with at XRAY. Reserve time with one of our hand-picked experts at xray.tech/hourly and work through your own build with them, live, so you learn it as you go. There's no retainer and no long-term commitment. Just book the time you need.