
One access token is all your tools need to call AI models on Hugging Face. That token is how Zapier, n8n, Make, or your own code talks to the Hugging Face hub.
So many model providers publish there that you can switch between their models without opening a separate account, and paying a separate bill, for every one.
Creating it takes about a minute.
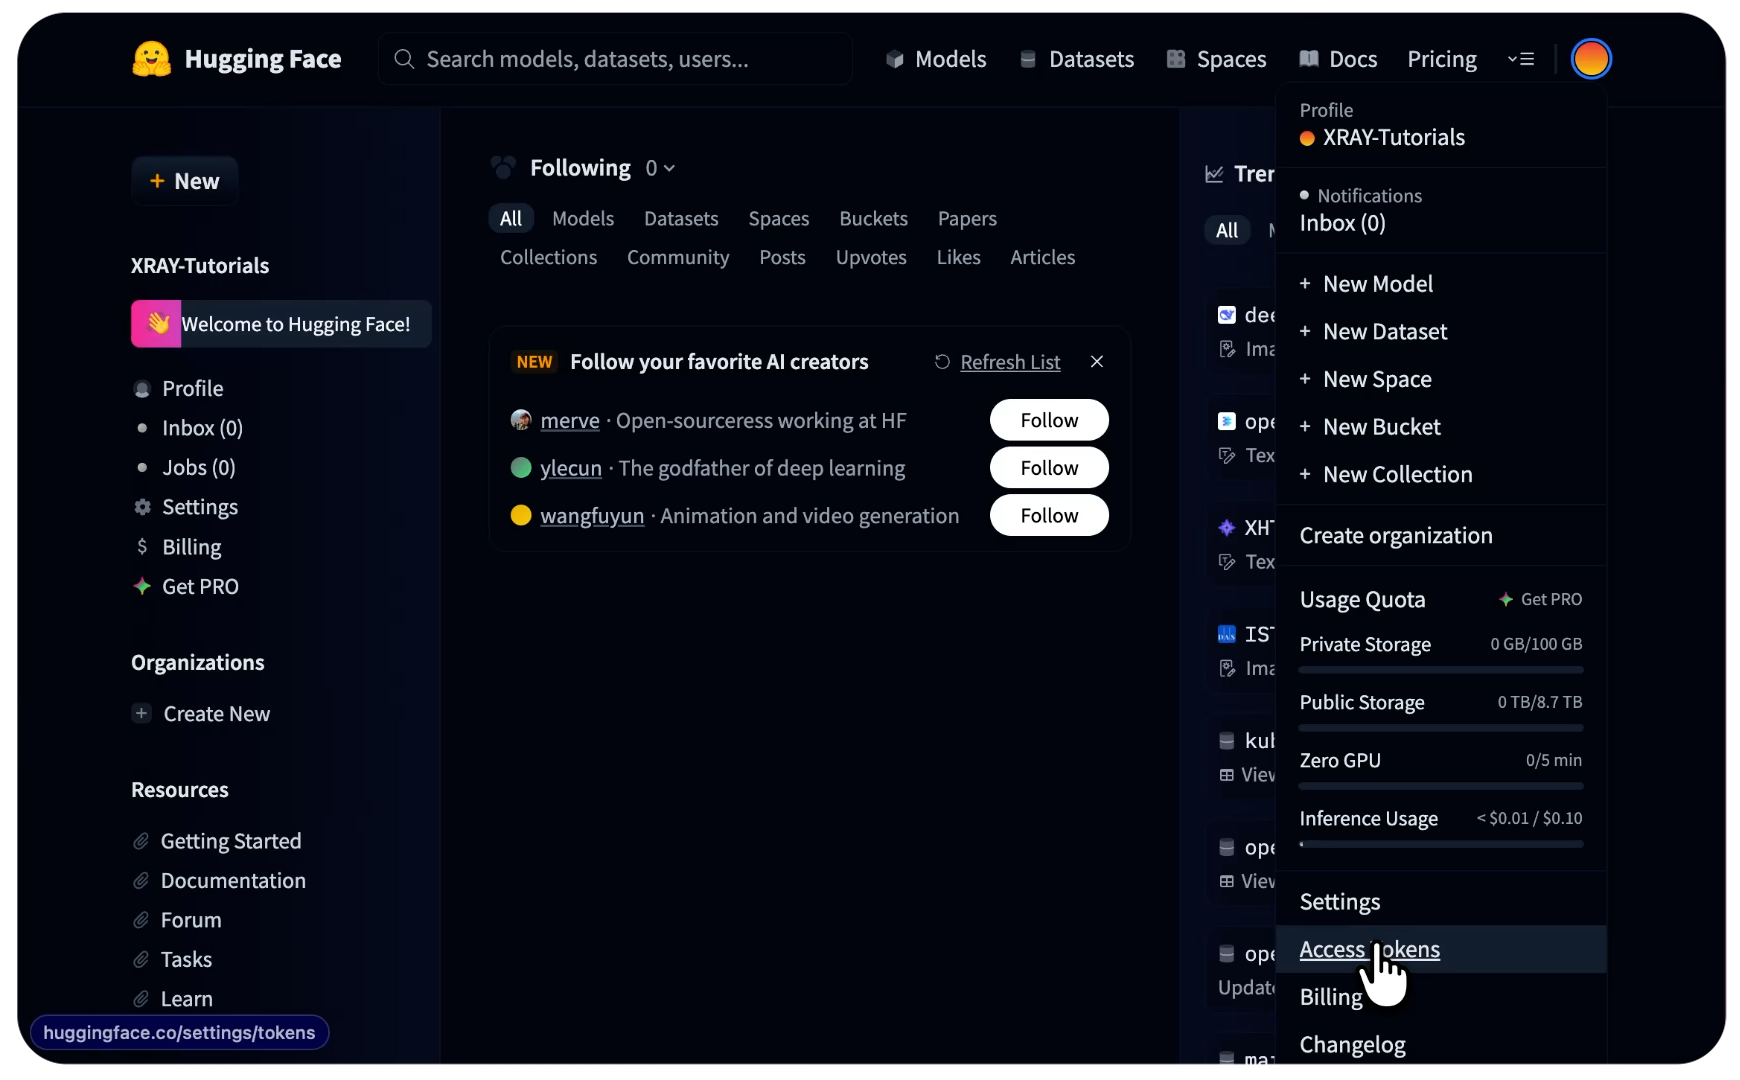
Log in to Hugging Face, click your profile avatar in the top-right corner, and choose Access Tokens from the dropdown.
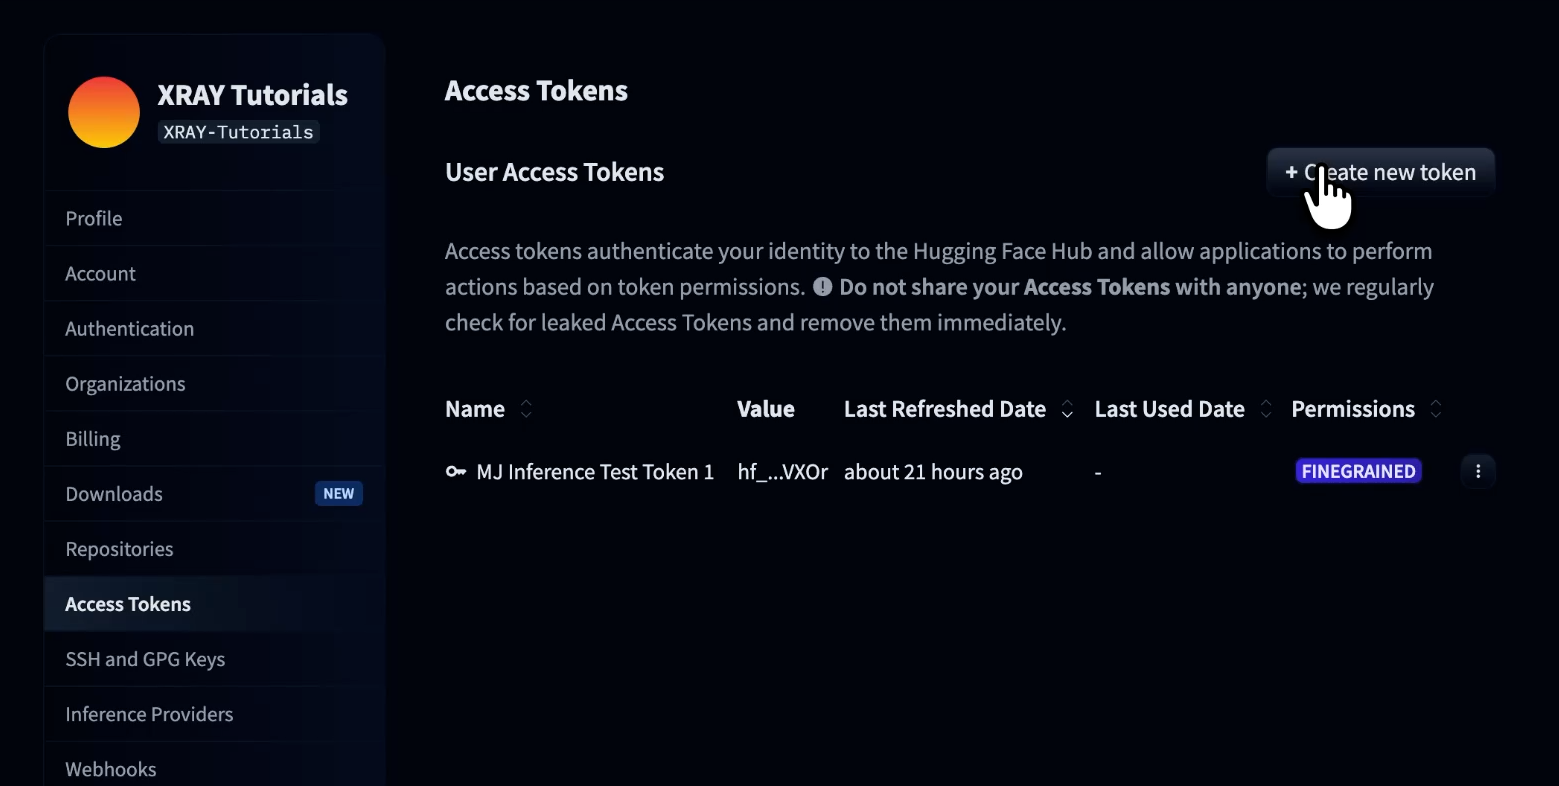
That opens the token management page at huggingface.co/settings/tokens. Click Create new token.
The first setting on the form is the token type, and it's an important choice. Hugging Face prints the warning right under the selector: this cannot be changed after token creation.
You get three options.
• Fine-grained. This is the default. You pick exactly which permissions the token gets, and you can edit them after the token exists.
• Read. This token gets read access, and its permissions are locked once it's created.
• Write. This token gets read and write access, and its permissions are locked too.
Leave it on Fine-grained. It's the only type that gives the token exactly the access it needs, and the only one you can adjust later without starting over.
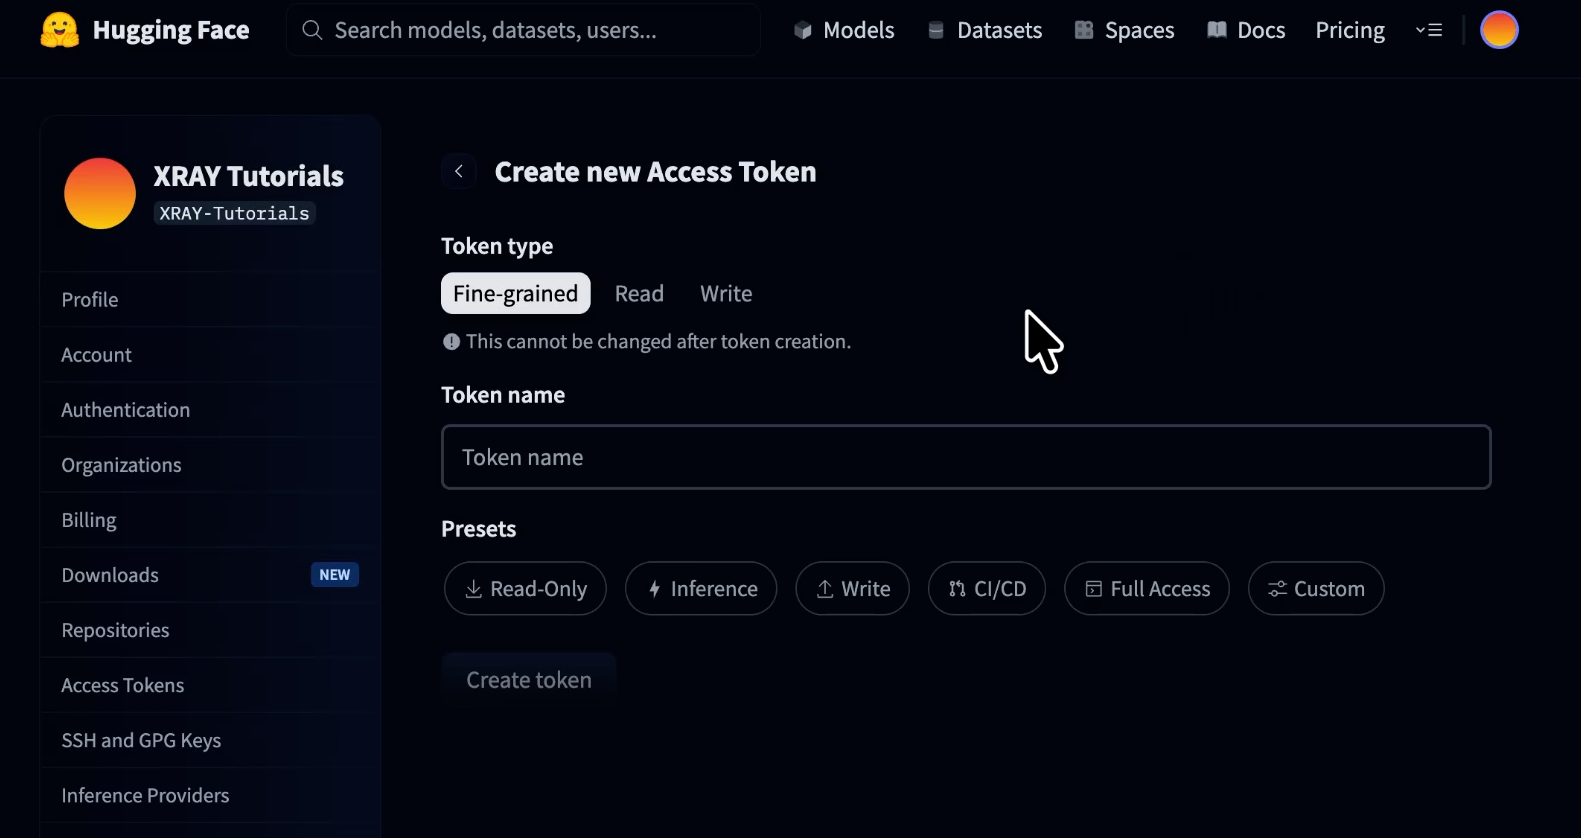
Click the Token name field and type a name you'll recognize months from now. Naming it after the tool or project that uses it, like "zapier-meeting-notes," tells you exactly what will break if you ever delete it.
Below the name you'll see a row of Presets: Read-Only, Inference, Write, CI/CD, Full Access, and Custom. Don't confuse these with the token types above them. Every preset is a shortcut that ticks a common set of boxes in the permission list, and the token you end up with is still fine-grained.
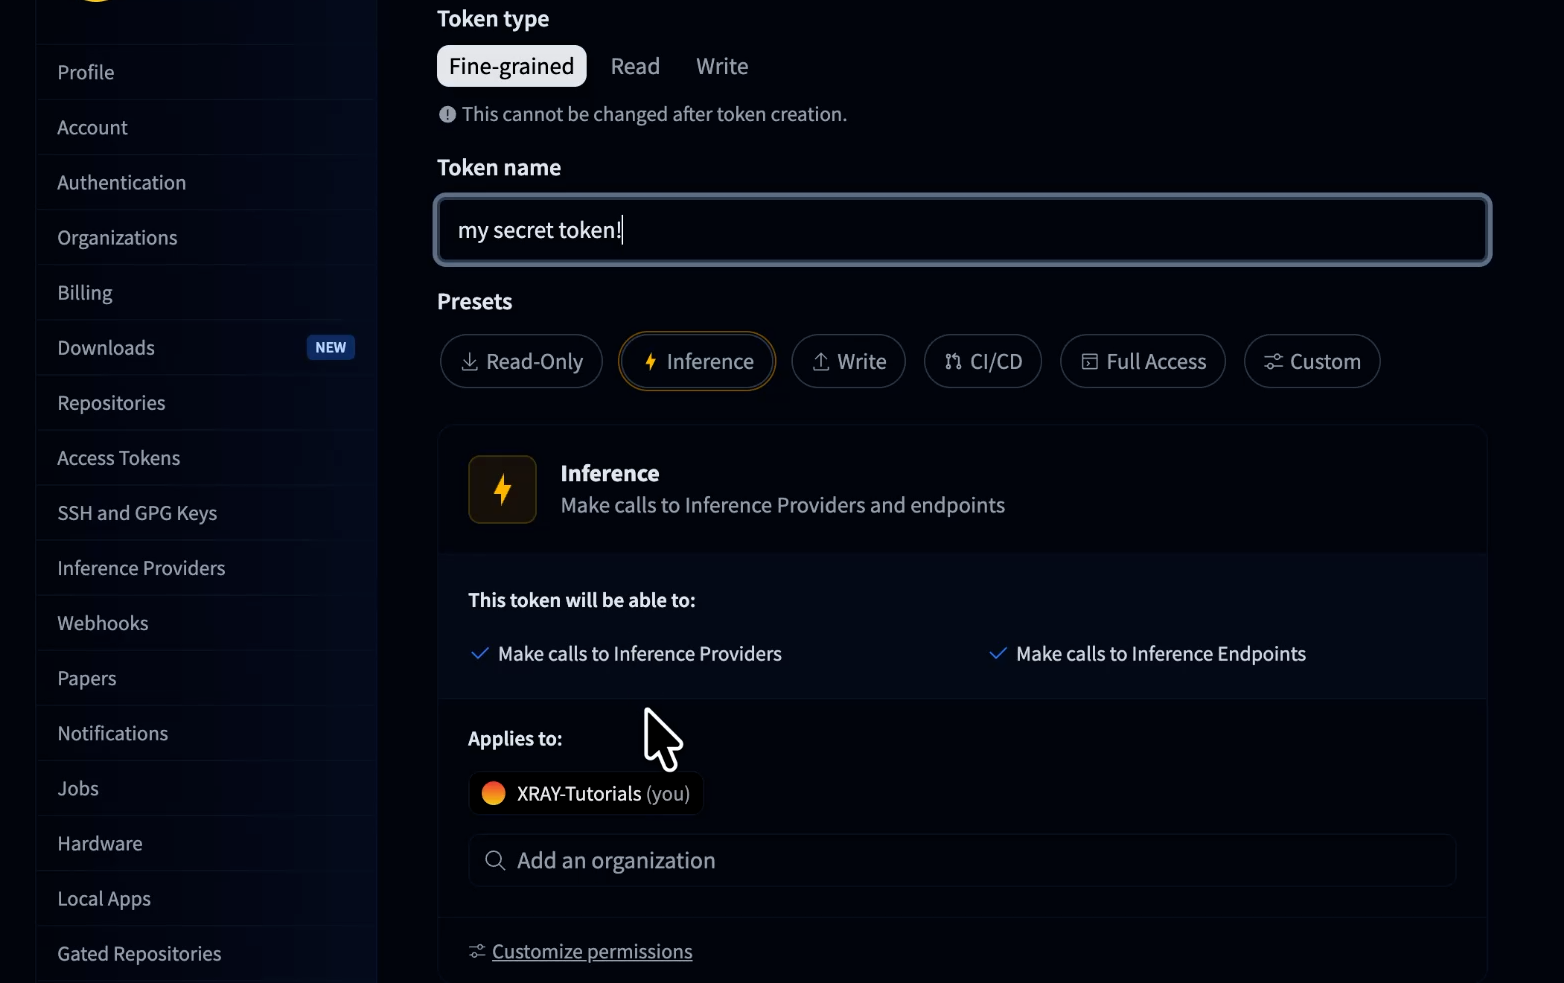
Choose Inference. That preset switches on the two permissions you need to call models: Make calls to Inference Providers and Make calls to your Inference Endpoints. In plain terms, your token can now send requests to AI models through Hugging Face.
A token scoped to one job does far less damage if it ever leaks, so start narrow and widen it when you have a reason to. Because the preset only filled in checkboxes, widening it later is a quick edit.
Last, check Applies to. Your own user account should be selected, and if the token belongs to your team's organization on Hugging Face, pick that organization instead.
Click Create token, and a dialog titled Save your Access Token appears with your full token, which starts with hf_. Click the Copy button next to it and paste it wherever you need it. If you aren't ready to use it yet, store it in a credential manager like 1Password.
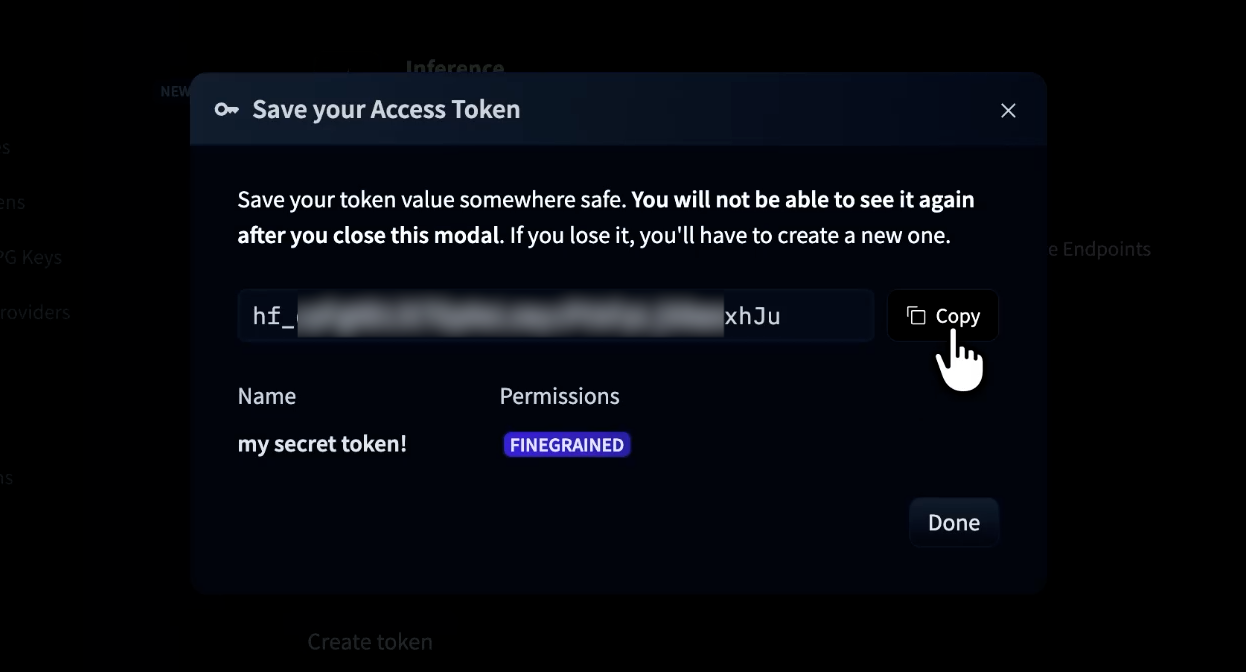
Once you click Done, Hugging Face never shows that string again, and a lost token means creating a new one from scratch.
A token calls models, and model calls cost money. Free accounts get a very small monthly allowance for Hugging Face's Inference Providers, and anything past it is paid from credits you buy.
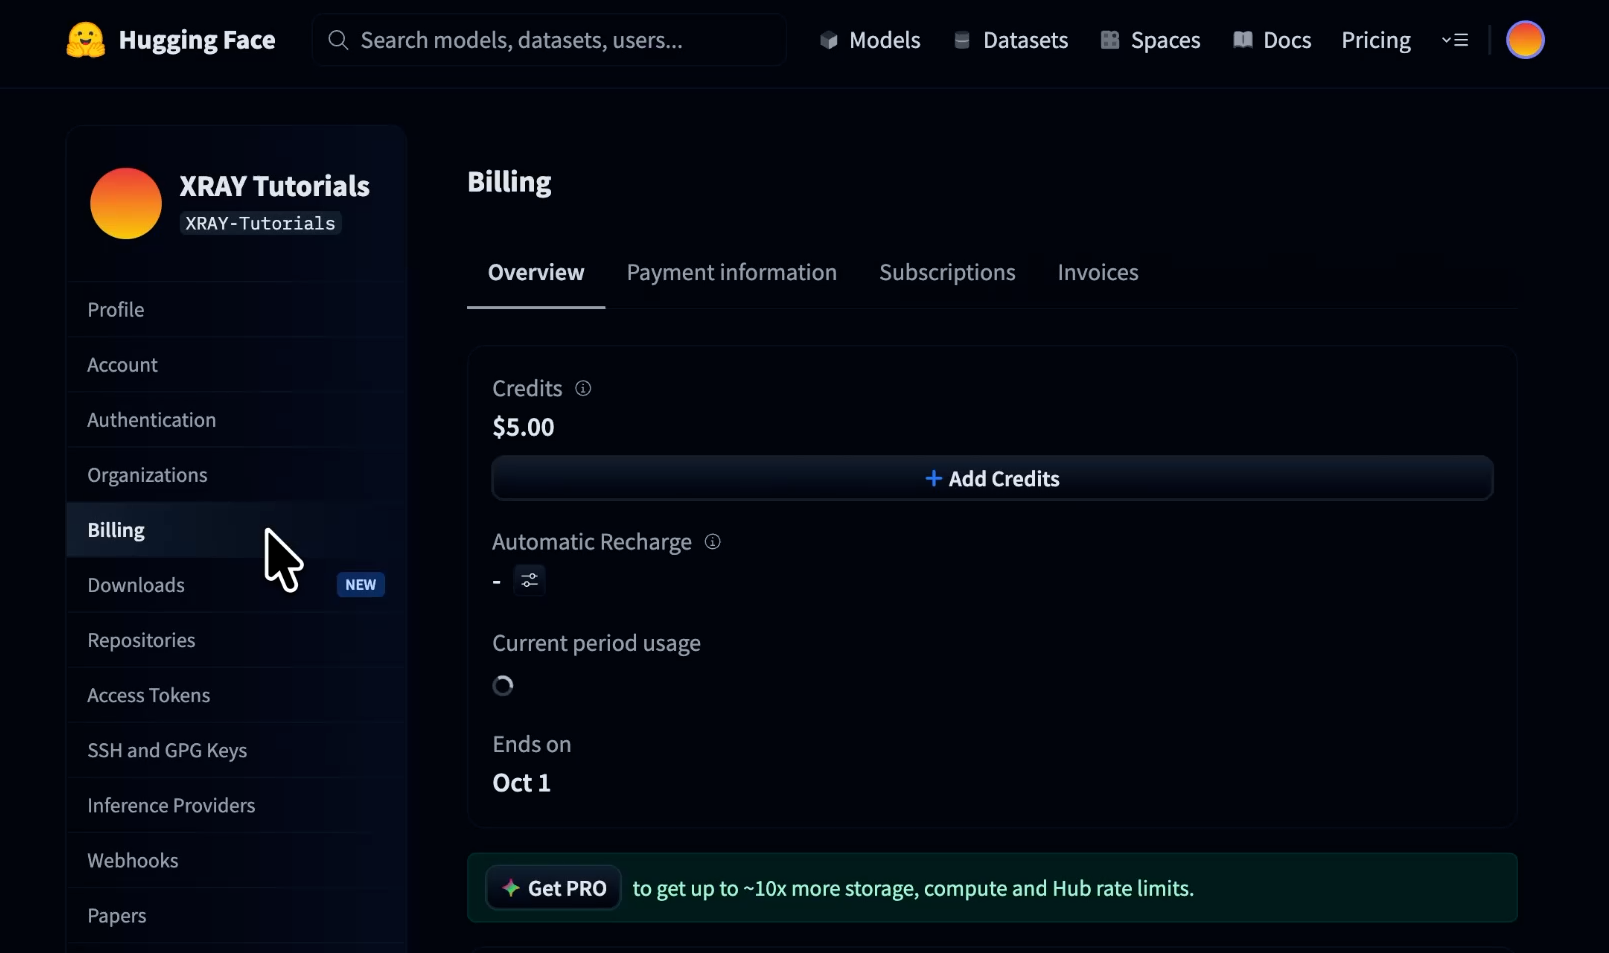
Go to Billing in your settings, choose to add credits, and pick an amount. Start small. A few dollars covers a lot of requests, and there's no reason to load several hundred dollars before you know what you'll actually use.
Before you connect the token to anything important, prove it works. The fastest test is one request from your terminal to Hugging Face's chat completions endpoint, the address that takes a prompt and sends back a model's reply.
Our test took a meeting transcript saved in a file called transcript.md, sent it to gpt-oss-120b (OpenAI's open-weight model), and asked for the action items. Your token goes in the Authorization header as a bearer token. Here's the exact command we ran:
cd ~/hf-transcript && curl -s https://router.huggingface.co/v1/chat/completions \
-H "Authorization: Bearer hf_YOUR_TOKEN" \
-H 'Content-Type: application/json' \
-d "$(jq -n --rawfile t transcript.md \
'{model:"openai/gpt-oss-120b",
messages:[{role:"user",content:("Give me action items from this transcript: "+$t)}]}')" \
| jq -r '.choices[0].message.content'
Swap hf_YOUR_TOKEN for the token you just copied. The command moves into the folder that holds transcript.md (called “hf-transcript”), uses jq (a small command-line tool for working with JSON) to pack the transcript into the request, and then uses jq again to print only the model's reply instead of the full raw response.
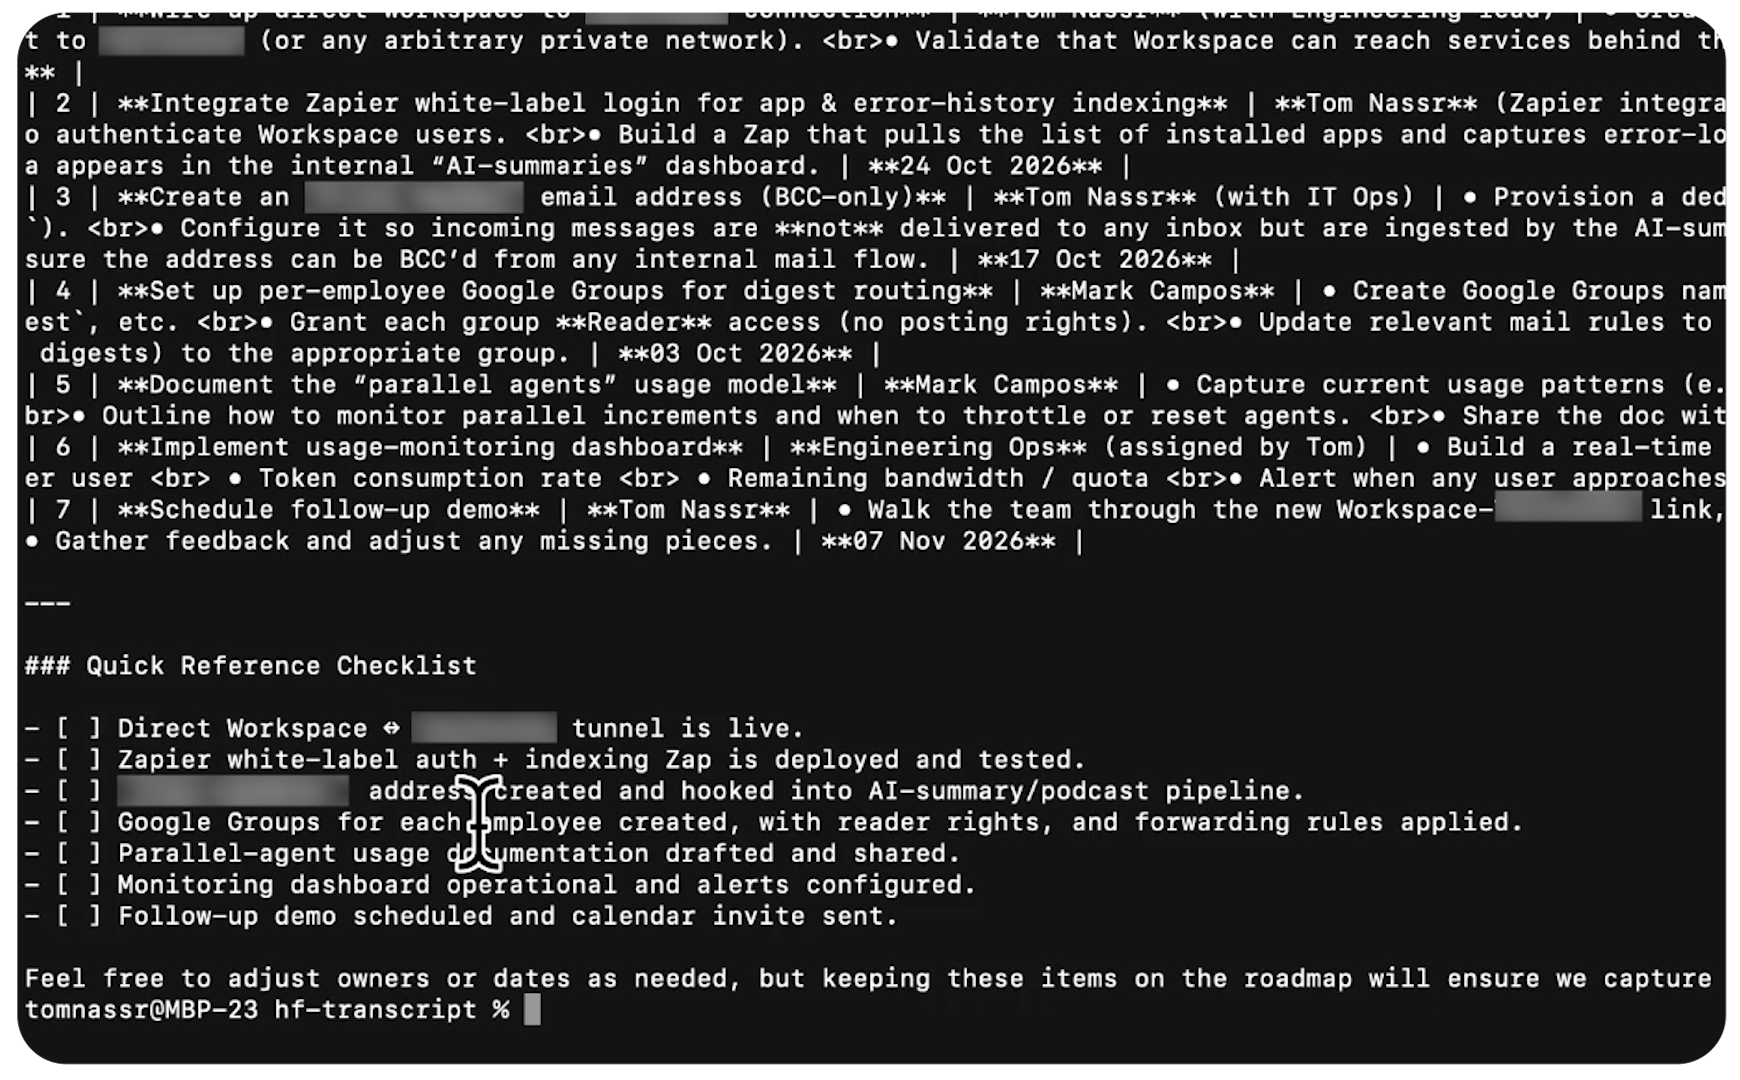
Within seconds, the action items came back with a quick reference checklist at the bottom. That reply is your proof: the request reached Hugging Face, and the model answered.
Pulling action items out of a meeting is exactly the kind of work you should stop doing by hand. A model now handles the extraction, and your job is deciding what happens to the list.
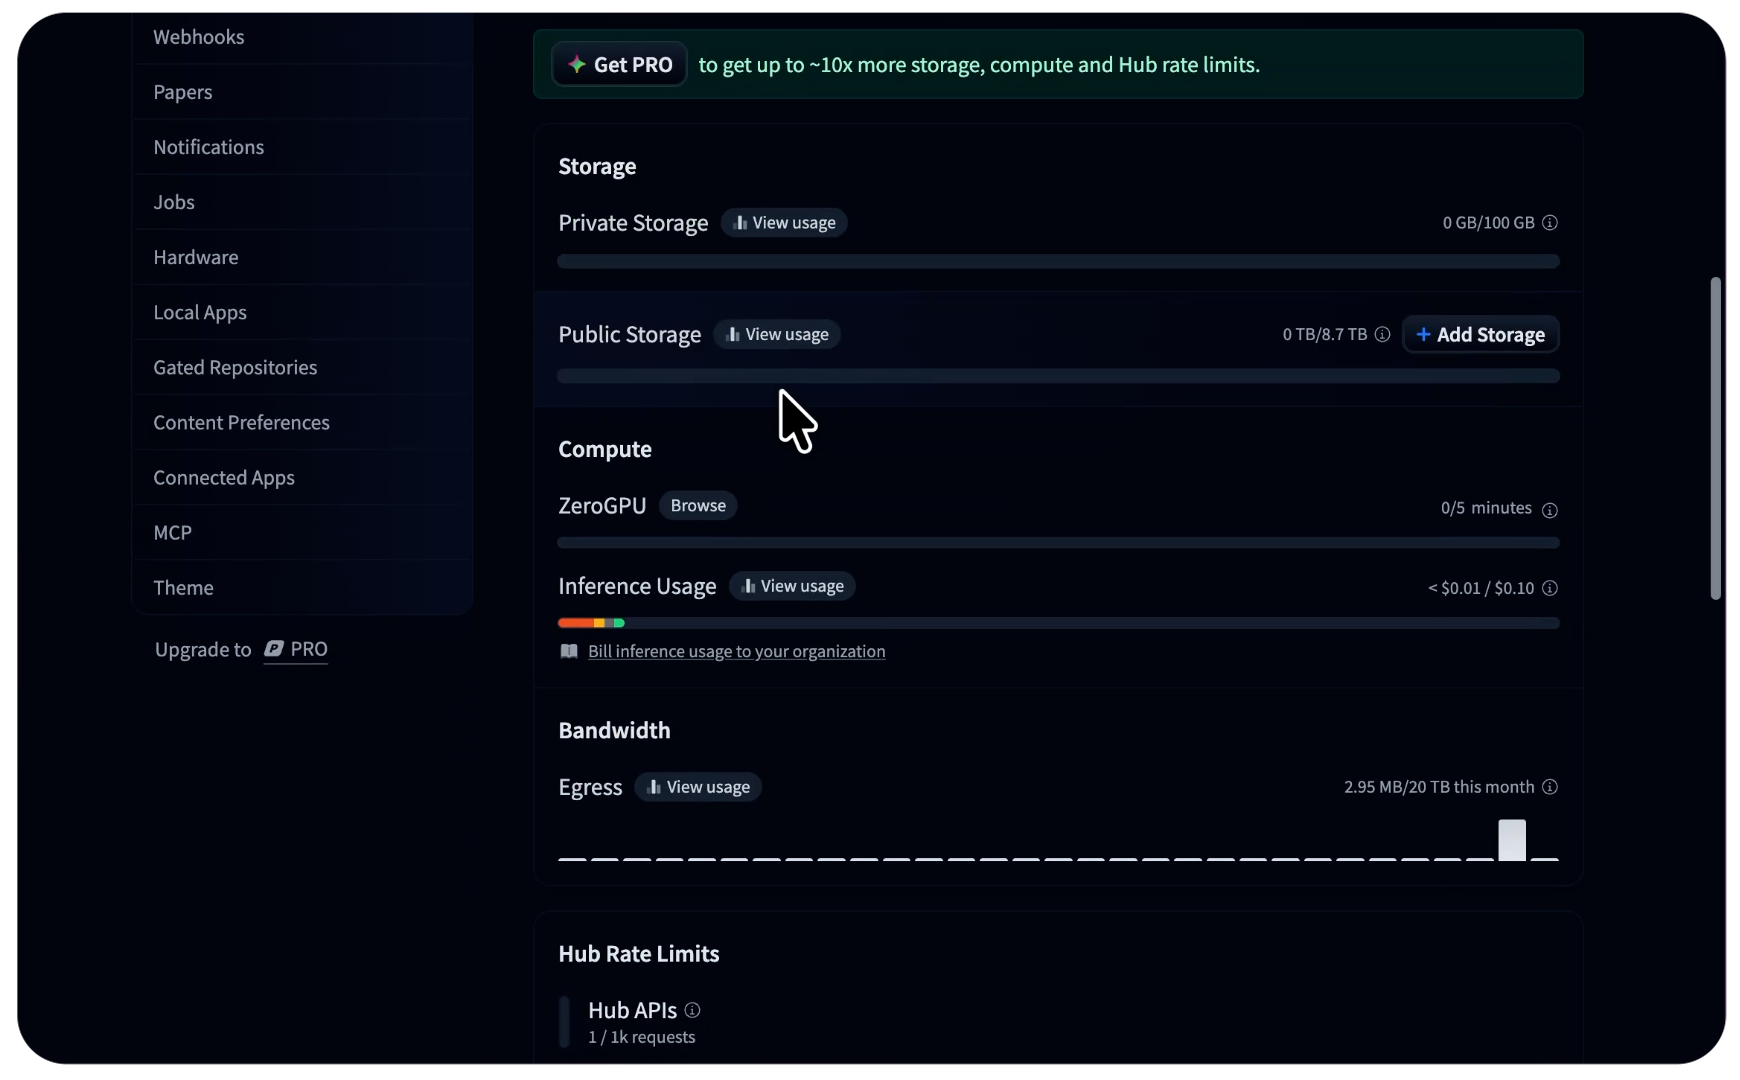
Head back to Billing to check your spend. That entire request cost less than a penny.
Open your usage view and you'll see the inference you've used, which models you called, the number of requests you sent, and the accrued cost. Check it after your first few real runs, because a request that costs a fraction of a cent adds up once a workflow fires it a hundred times a day.
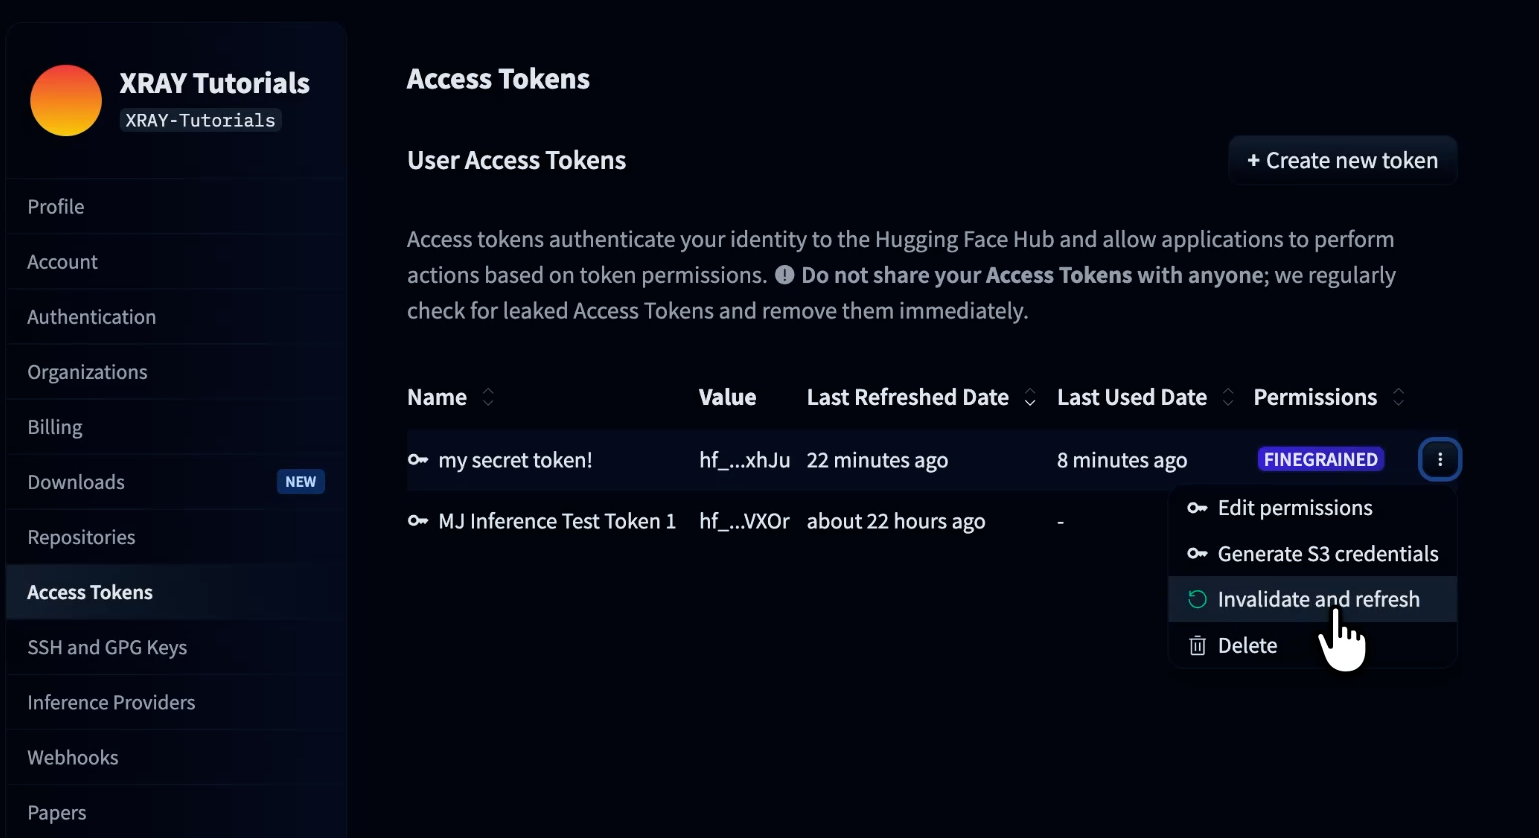
Treat any token that has appeared on a screen, in a recording, or in a shared doc as public. Ours showed up in a video, so we replaced it right away.
On the access tokens page, click the three dots next to the token and pick one of two options.
• Invalidate and refresh. The old string stops working and you get a new one to copy into wherever the old one lived.
• Delete. The token is removed entirely, and anything still using it stops working.
A fine-grained token's permissions can change any time, whichever preset you started from. Open the token's menu, click Edit permissions, and choose which repositories, webhooks, collections, discussions, and other parts of Hugging Face the token can reach.
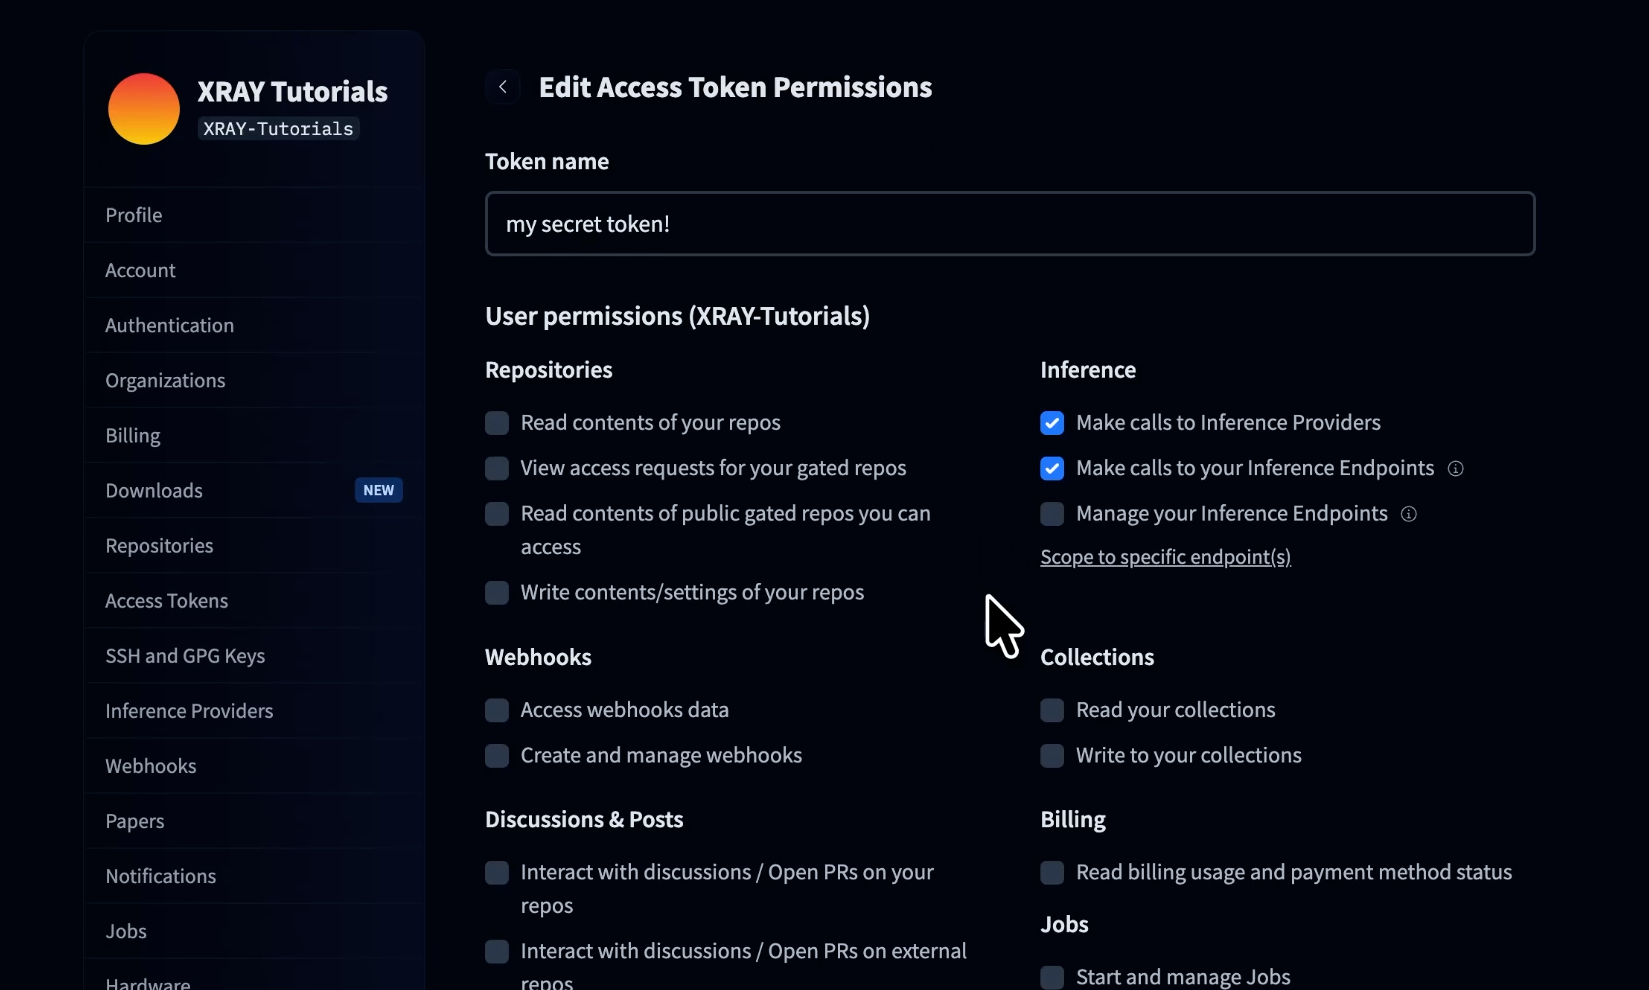
That matters because a Hugging Face token isn't only for models. Depending on what you enable, it can also reach the rest of the platform, from repositories to community features and notifications, so grant only what the tool using it needs.
Read and Write tokens don't get that option. Their permissions are fixed, so if you created one and need something different, create a new fine-grained token instead.
Picking the right model for the job, and wiring it into a workflow that touches real customer data, takes more thought than a copy and paste.
That's the part we help with at XRAY. Reserve time with one of our experts at xray.tech/hourly and work through your own build with them, live. Reservations start at a four-hour block, you bring the project you're stuck on, and you learn how it works while you build it.
One credential now connects your tools to whatever model does the job best, with one account and one bill behind it. So find the work you're still doing by hand, like the summaries, the sorting, and the action items you pull out of every meeting, and send it to a model. Your job is to tell the model what you need, not to make the raw material yourself.