
Every time you copy a doc into ChatGPT, you're adding several manual steps to a process that could be handled automatically. You open the file, select everything, paste it into a chat, and then paste the answer back where it belongs.
Connect ChatGPT to your Google Drive and that loop disappears. ChatGPT can open a doc, summarize it, pull out the numbers you need, and edit the file directly, all from a single prompt.
Setup only takes a couple of minutes. But before you dive in and start editing your Docs with ChatGPT, it's crucial to check the permissions first to make sure nothing is edited – or deleted – without your approval.
We'll start by connecting Drive, then set it up so ChatGPT checks with you before it changes anything.
Here's the whole process at a glance. Read on for the details and screenshots behind each step.
• Plan: ChatGPT Plus or higher.
• Connect: click Plugins, find Google Drive, click +, switch off every Google plugin except Drive, and click Continue to Google twice.
• Authorize: choose your Google account, click Continue, check Select all, and click Continue.
• Restrict access & add safeguards: open Settings > Plugins > Google Drive > Permission and choose Allow read-only tools.
• Use Drive in ChatGPT: in a new chat, type @ and select Google Drive, or tell ChatGPT to use Drive in plain language.
• Approve: click See details on every edit request before you click Allow once, and deny any request to delete a file.
You'll need a ChatGPT Plus plan or higher. The Google Drive plugin isn't available on the free tier.
1. Sign in to ChatGPT and click Plugins in the left sidebar.
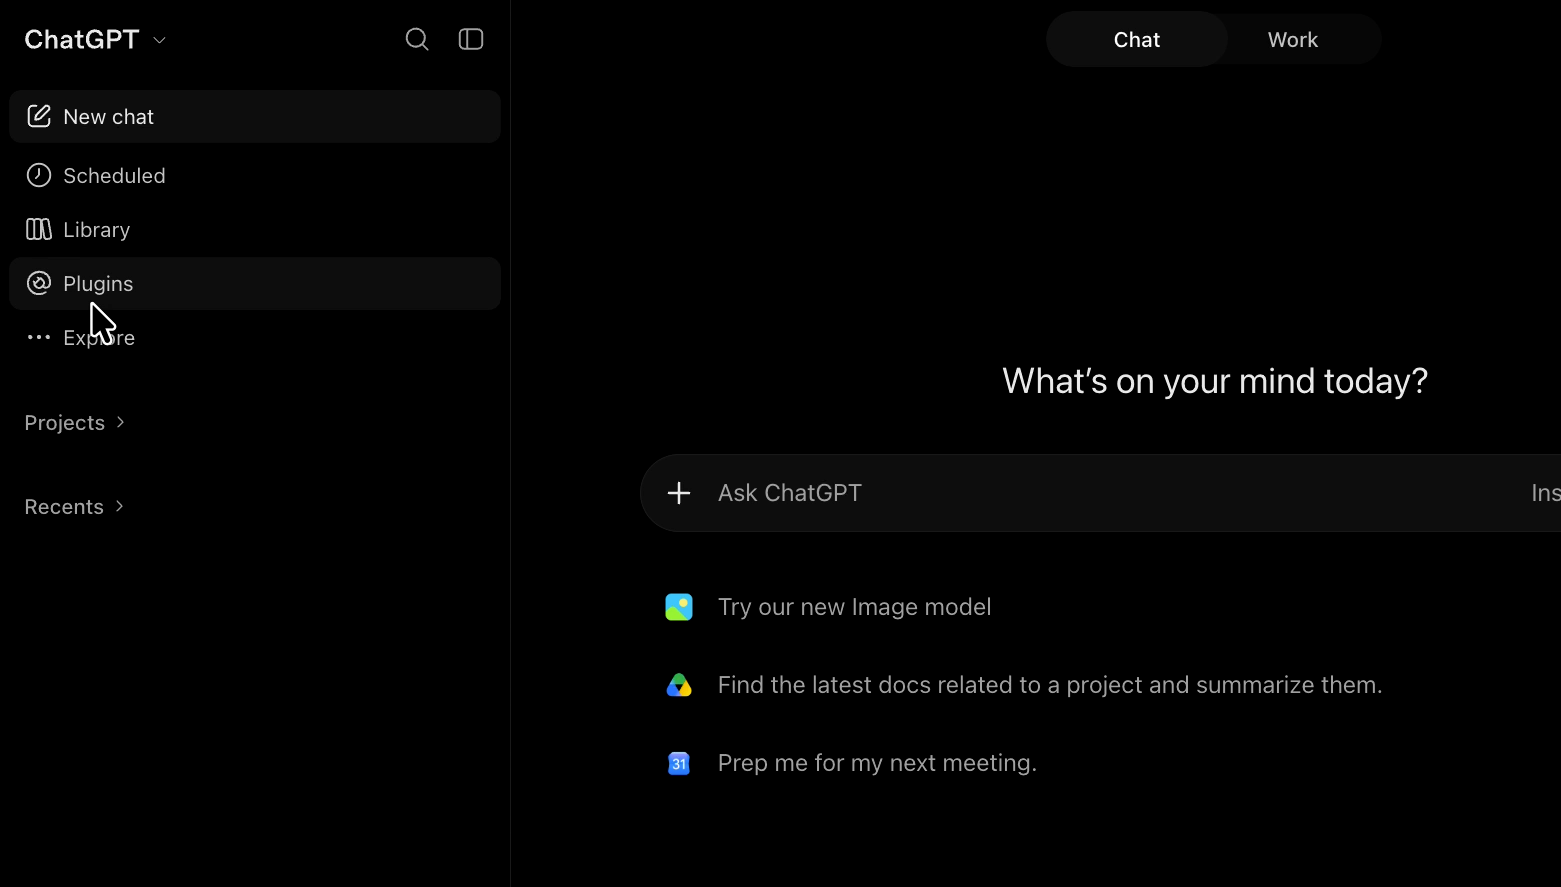
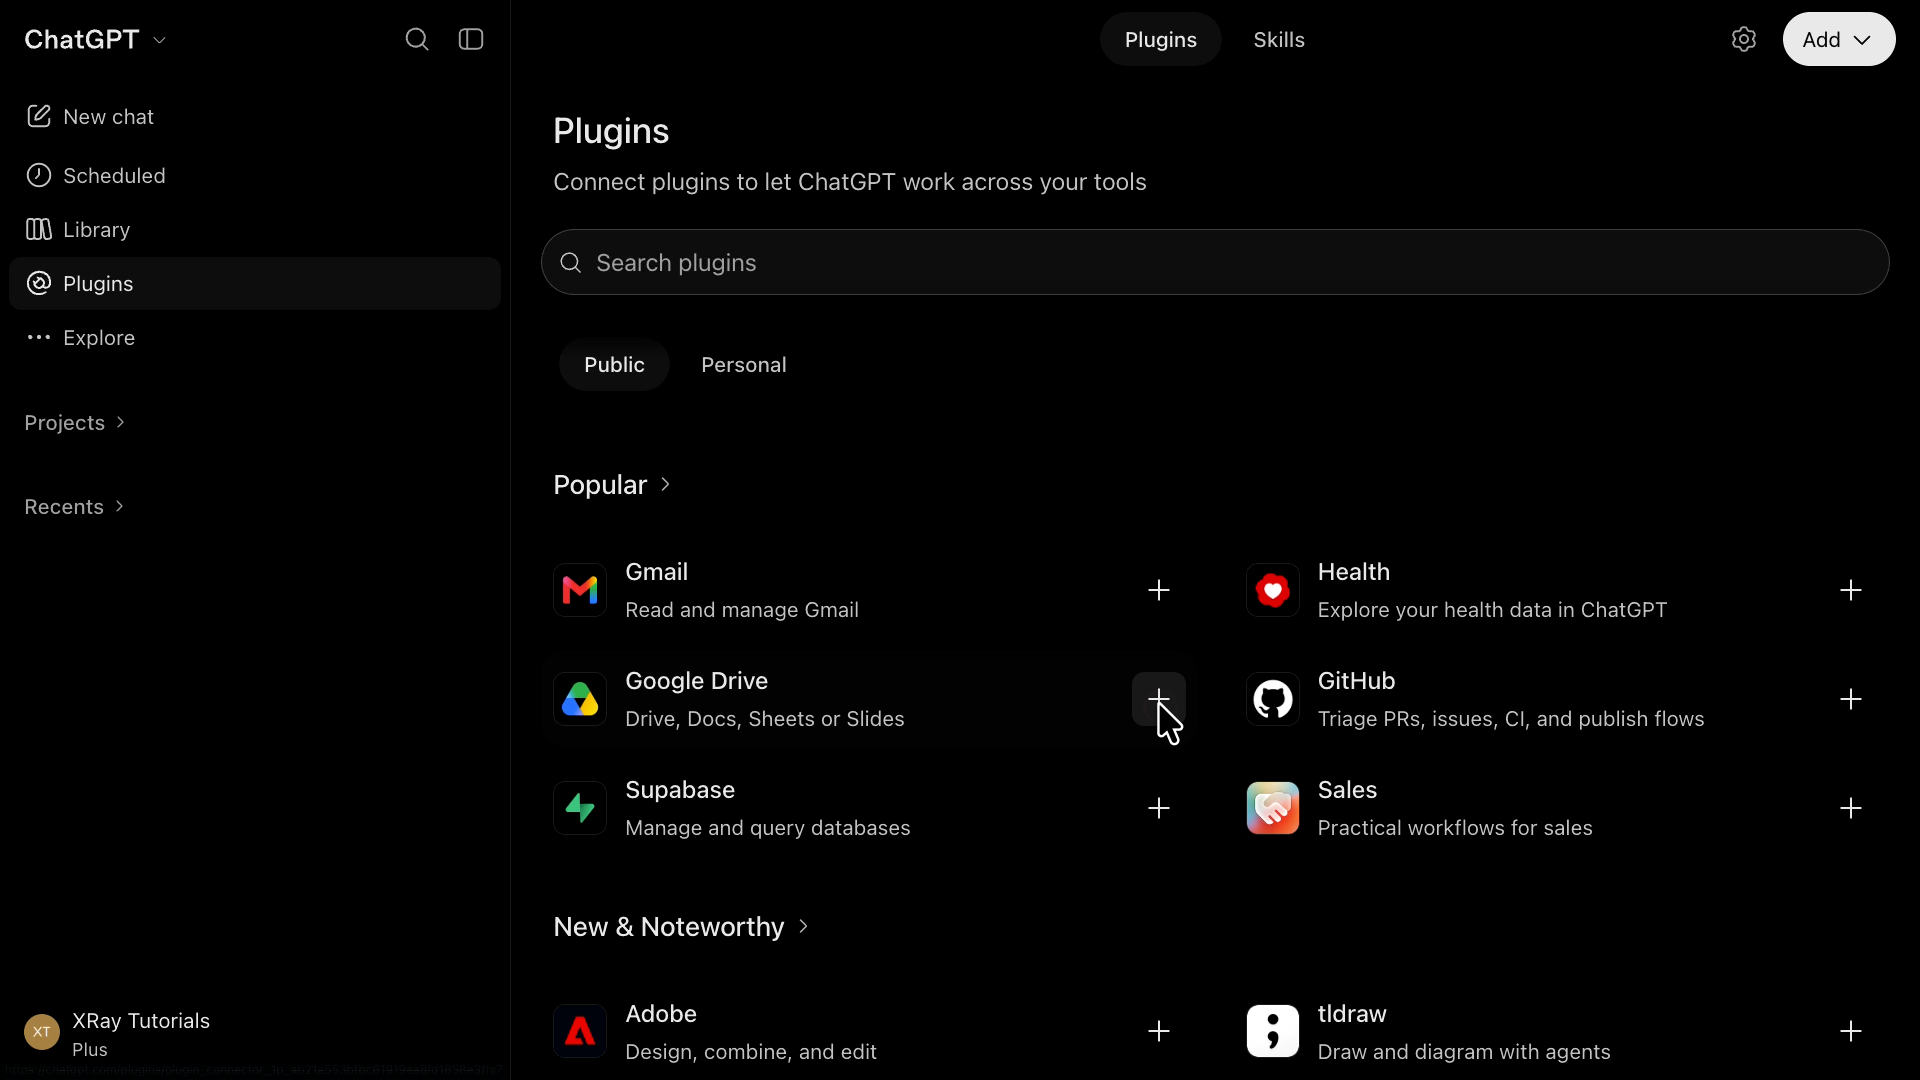
2. Find Google Drive under the Popular section, or type "drive" into the search bar. Click the + button on the Google Drive card.
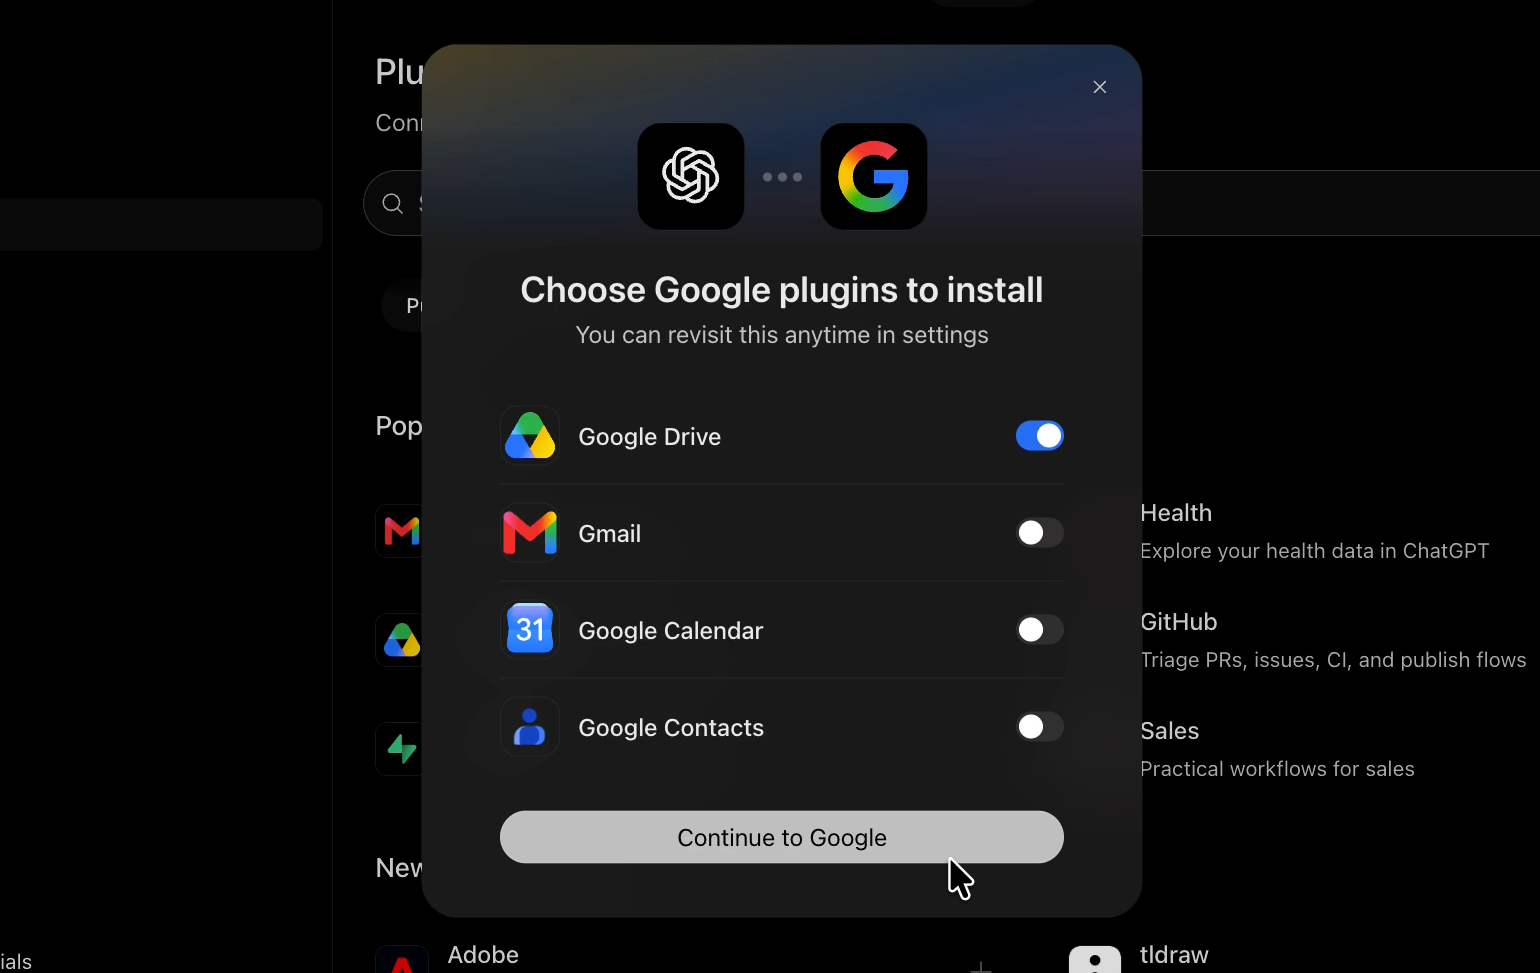
3. A prompt titled Choose Google plugins to install appears, with Google Drive, Gmail, Google Calendar, and Google Contacts all switched on by default. Toggle off everything except Google Drive, then click Continue to Google. Connecting only the app you need keeps ChatGPT's access narrow, and you can add the other Google plugins later if you want them.
4. ChatGPT shows a notice reminding you to select all permissions so the plugin works correctly. Click Continue to Google again.
5. Choose the Google account you want to connect to.
6. On the Sign in to OpenAI screen, click Continue.
7. On the OpenAI wants access to your Google Account page, check the Select all box. Scroll down and click Continue.
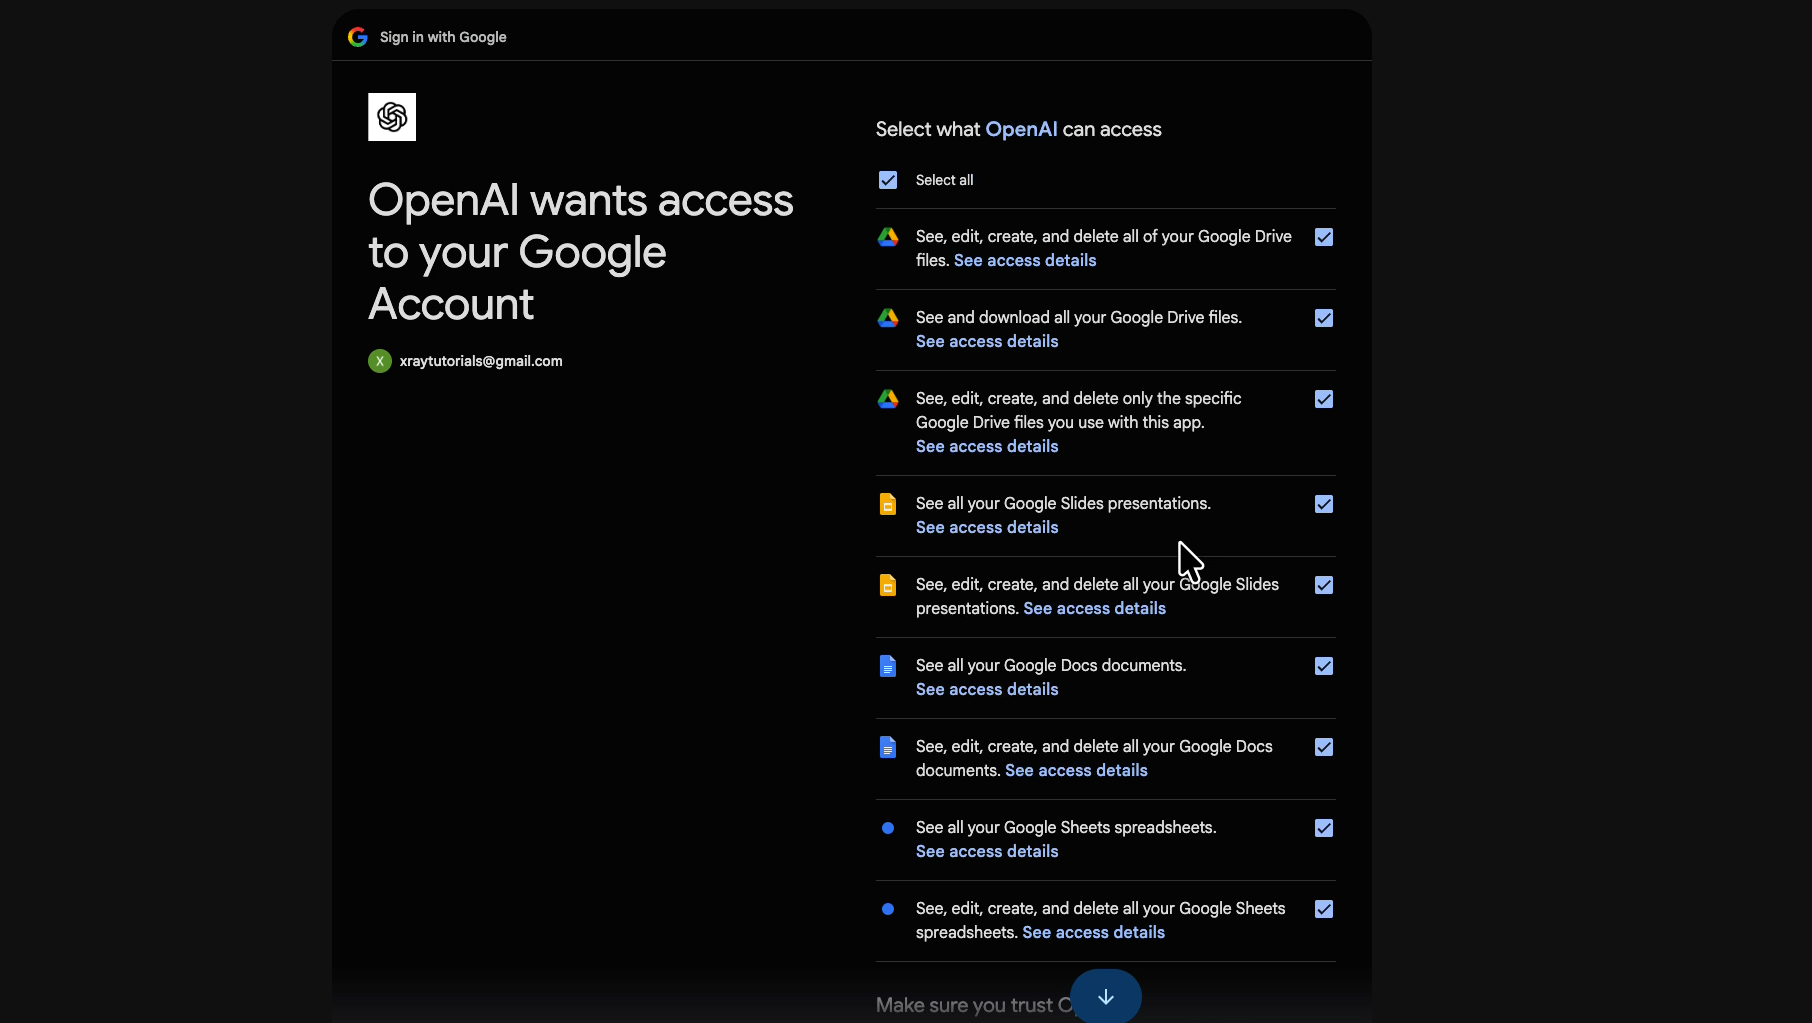
Google sends you back to ChatGPT, and the plugin is connected.
Bear in mind – with one click, you've given ChatGPT permission to view, edit, create, and delete files across Drive, Docs, Sheets, and Slides.
The plugin needs that access to do its job, but it's also a real risk if ChatGPT gets something wrong – which is why we'll cover permissions next.
Click the Settings gear icon and select Plugins to see everything you've installed.
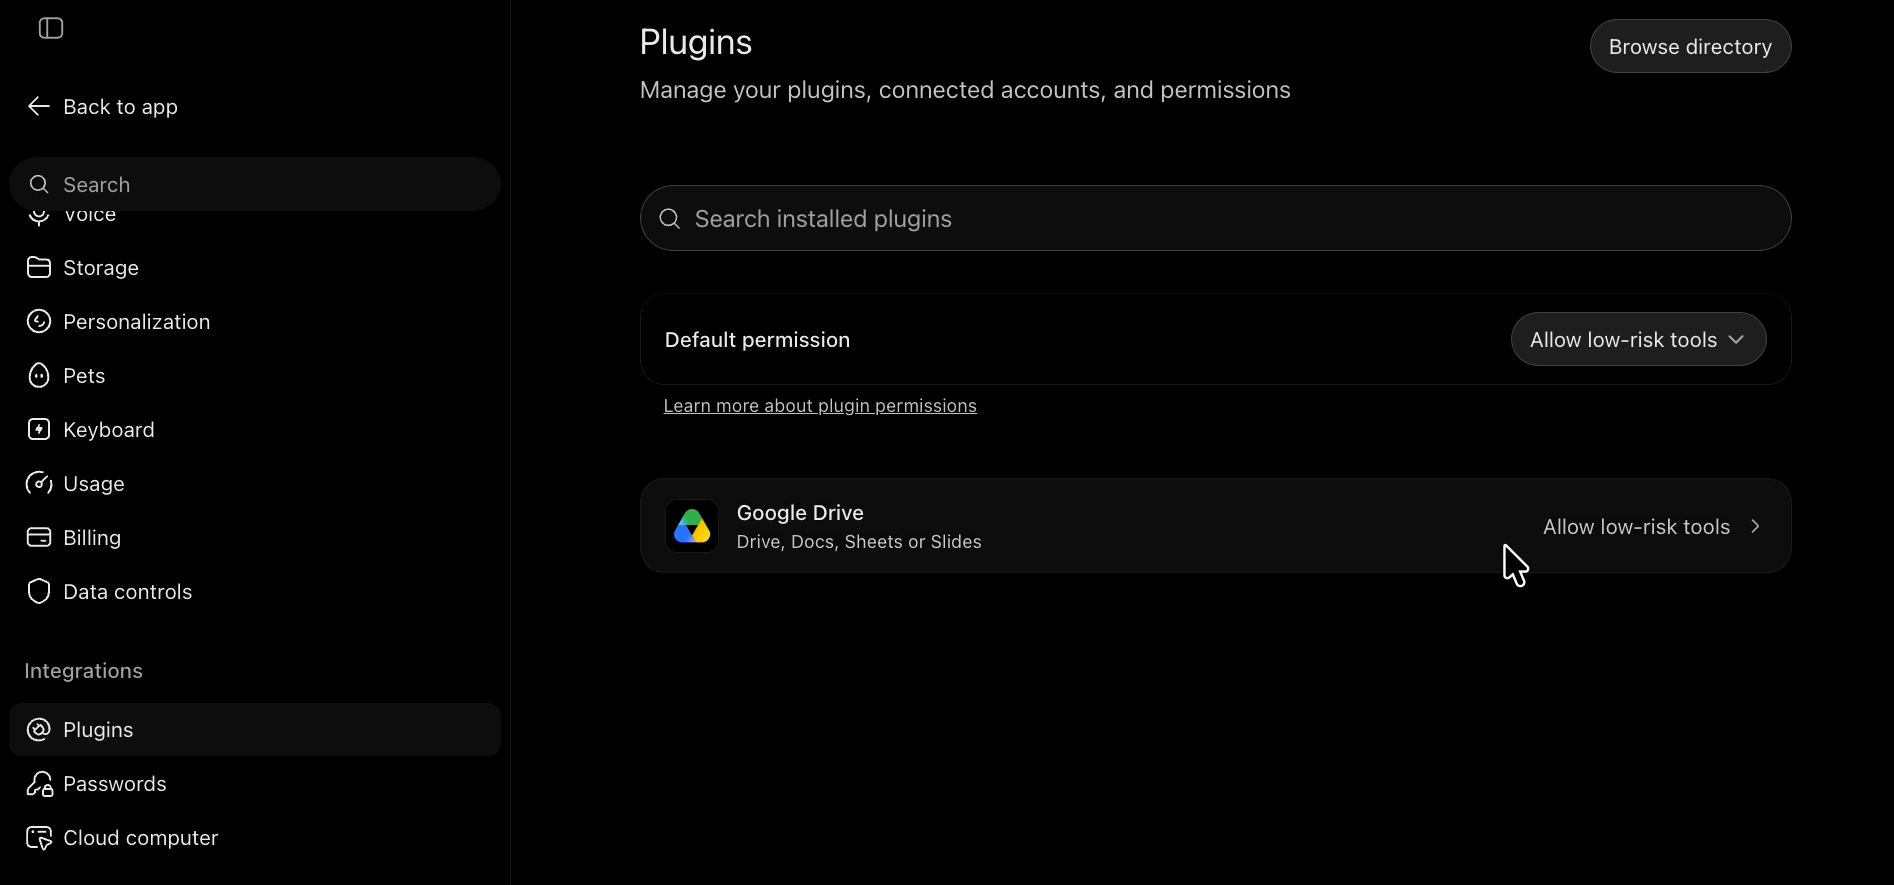
Click Google Drive to open its detail page, which lists the plugin's skills and tools. You can also connect additional Google accounts from here.
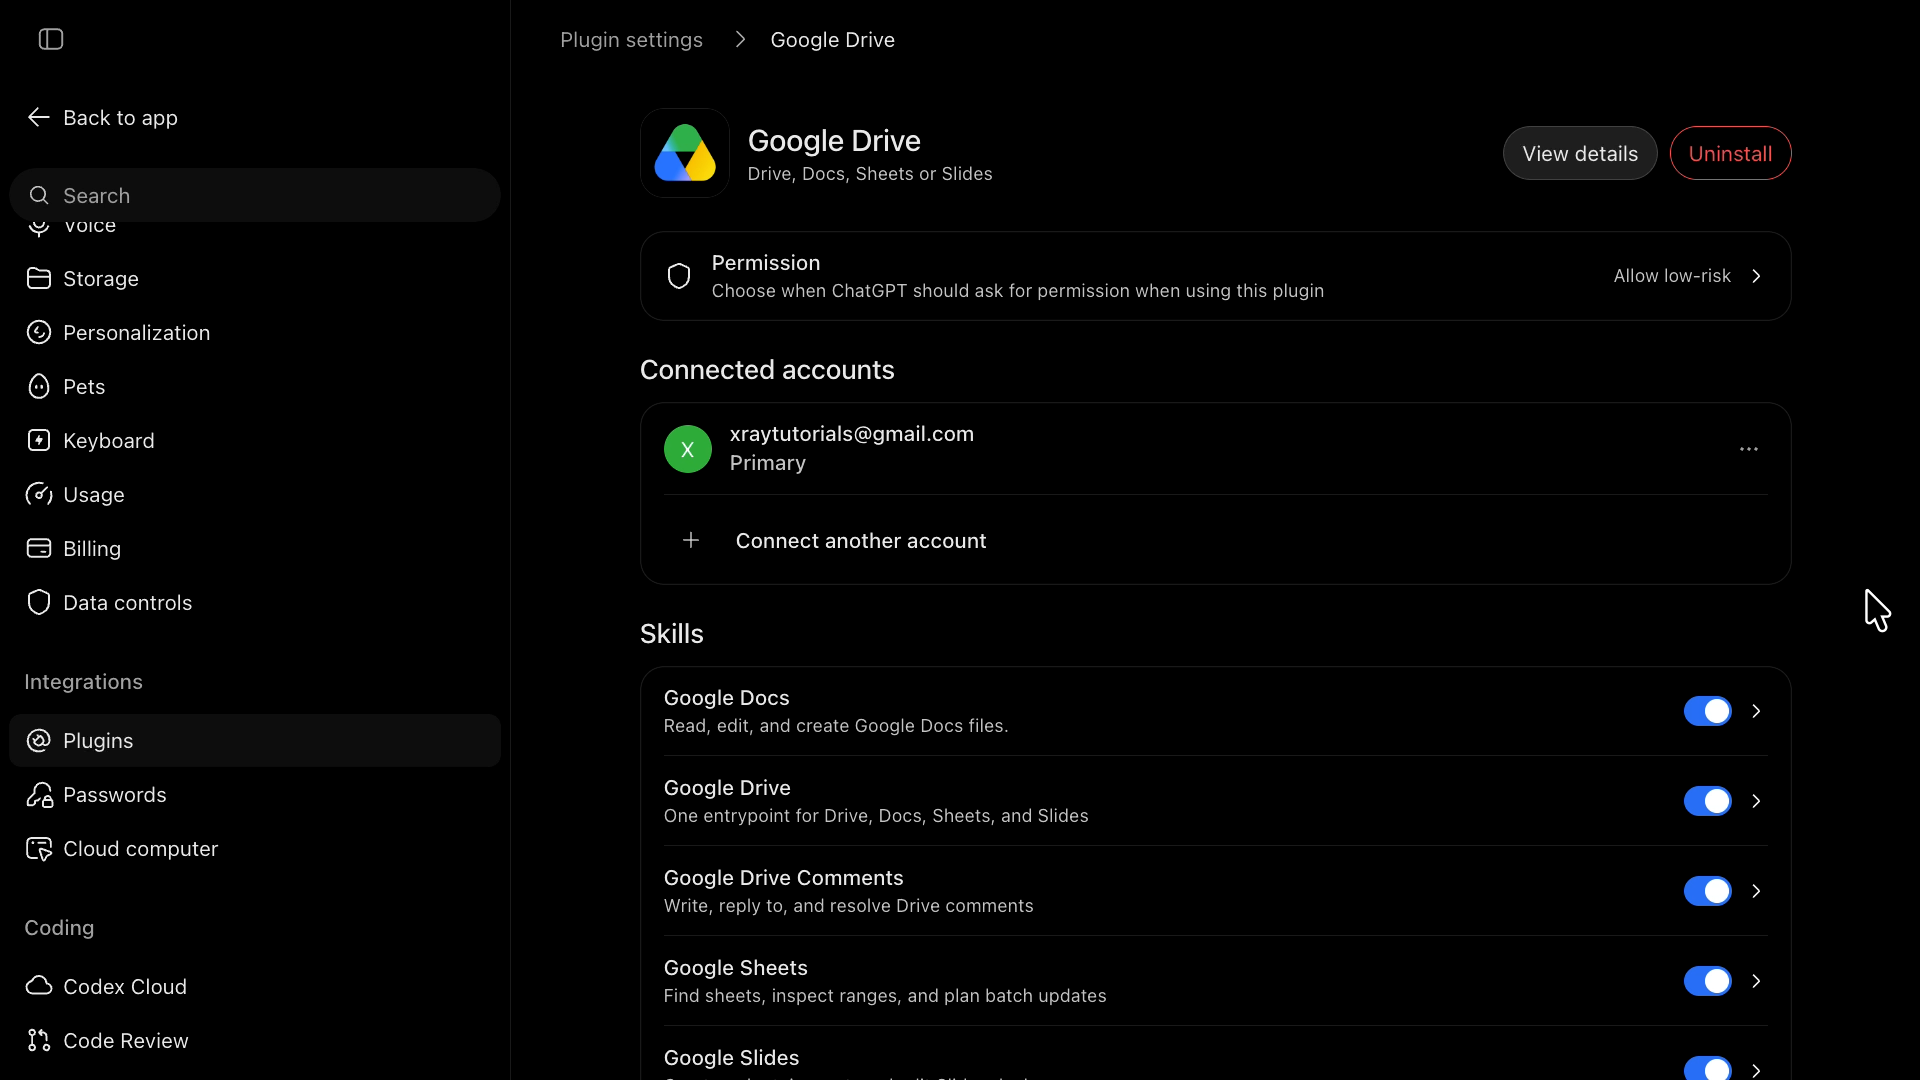
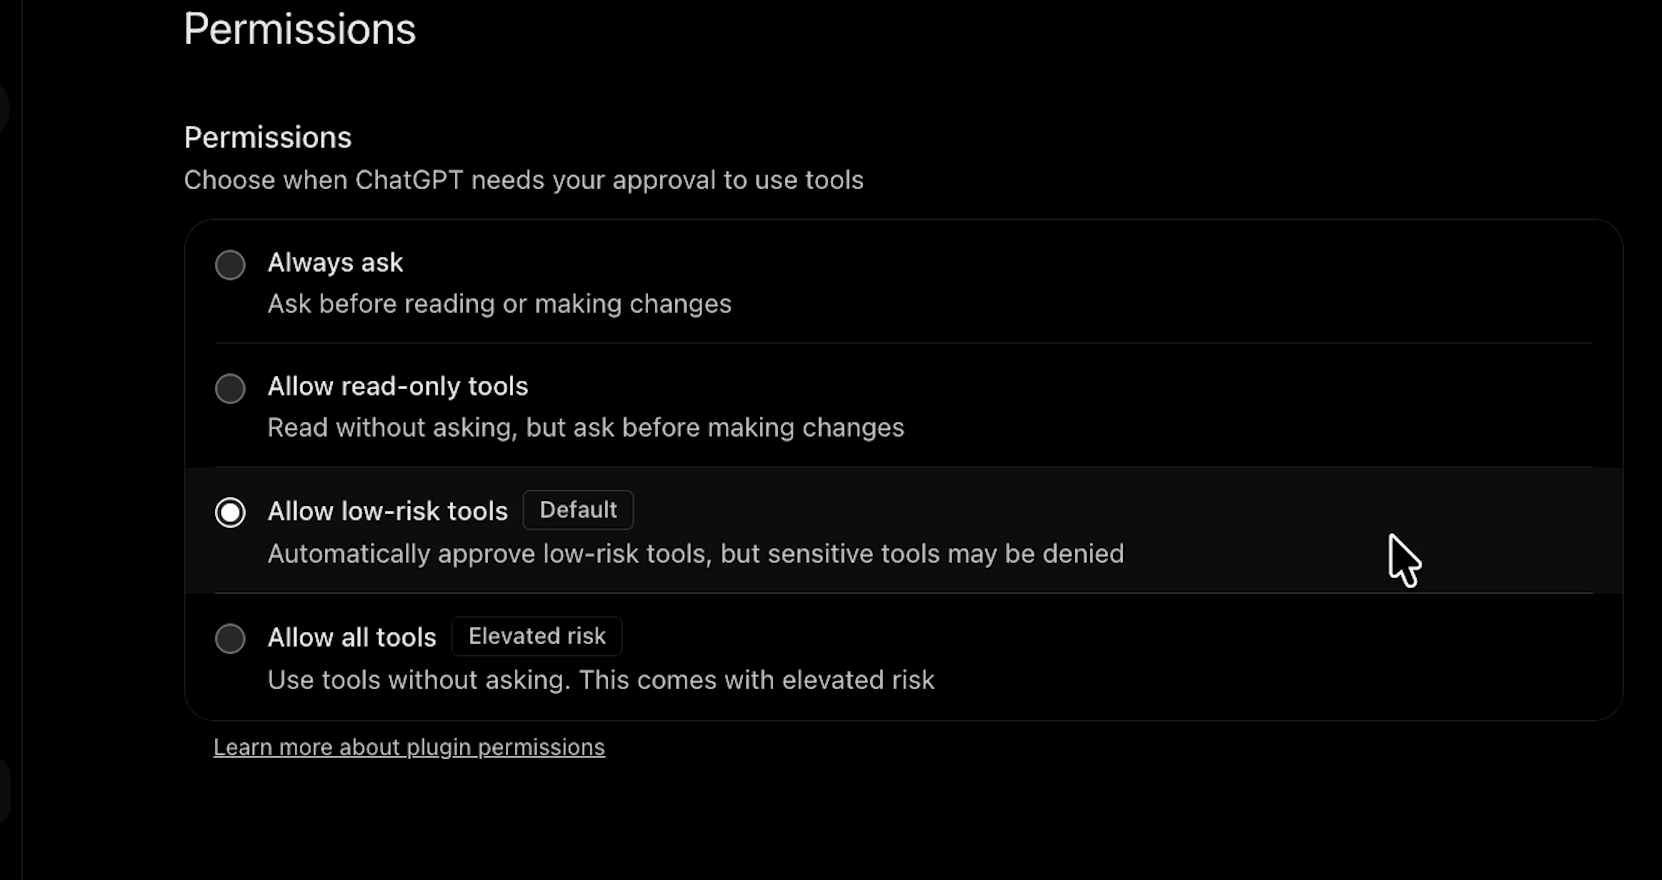
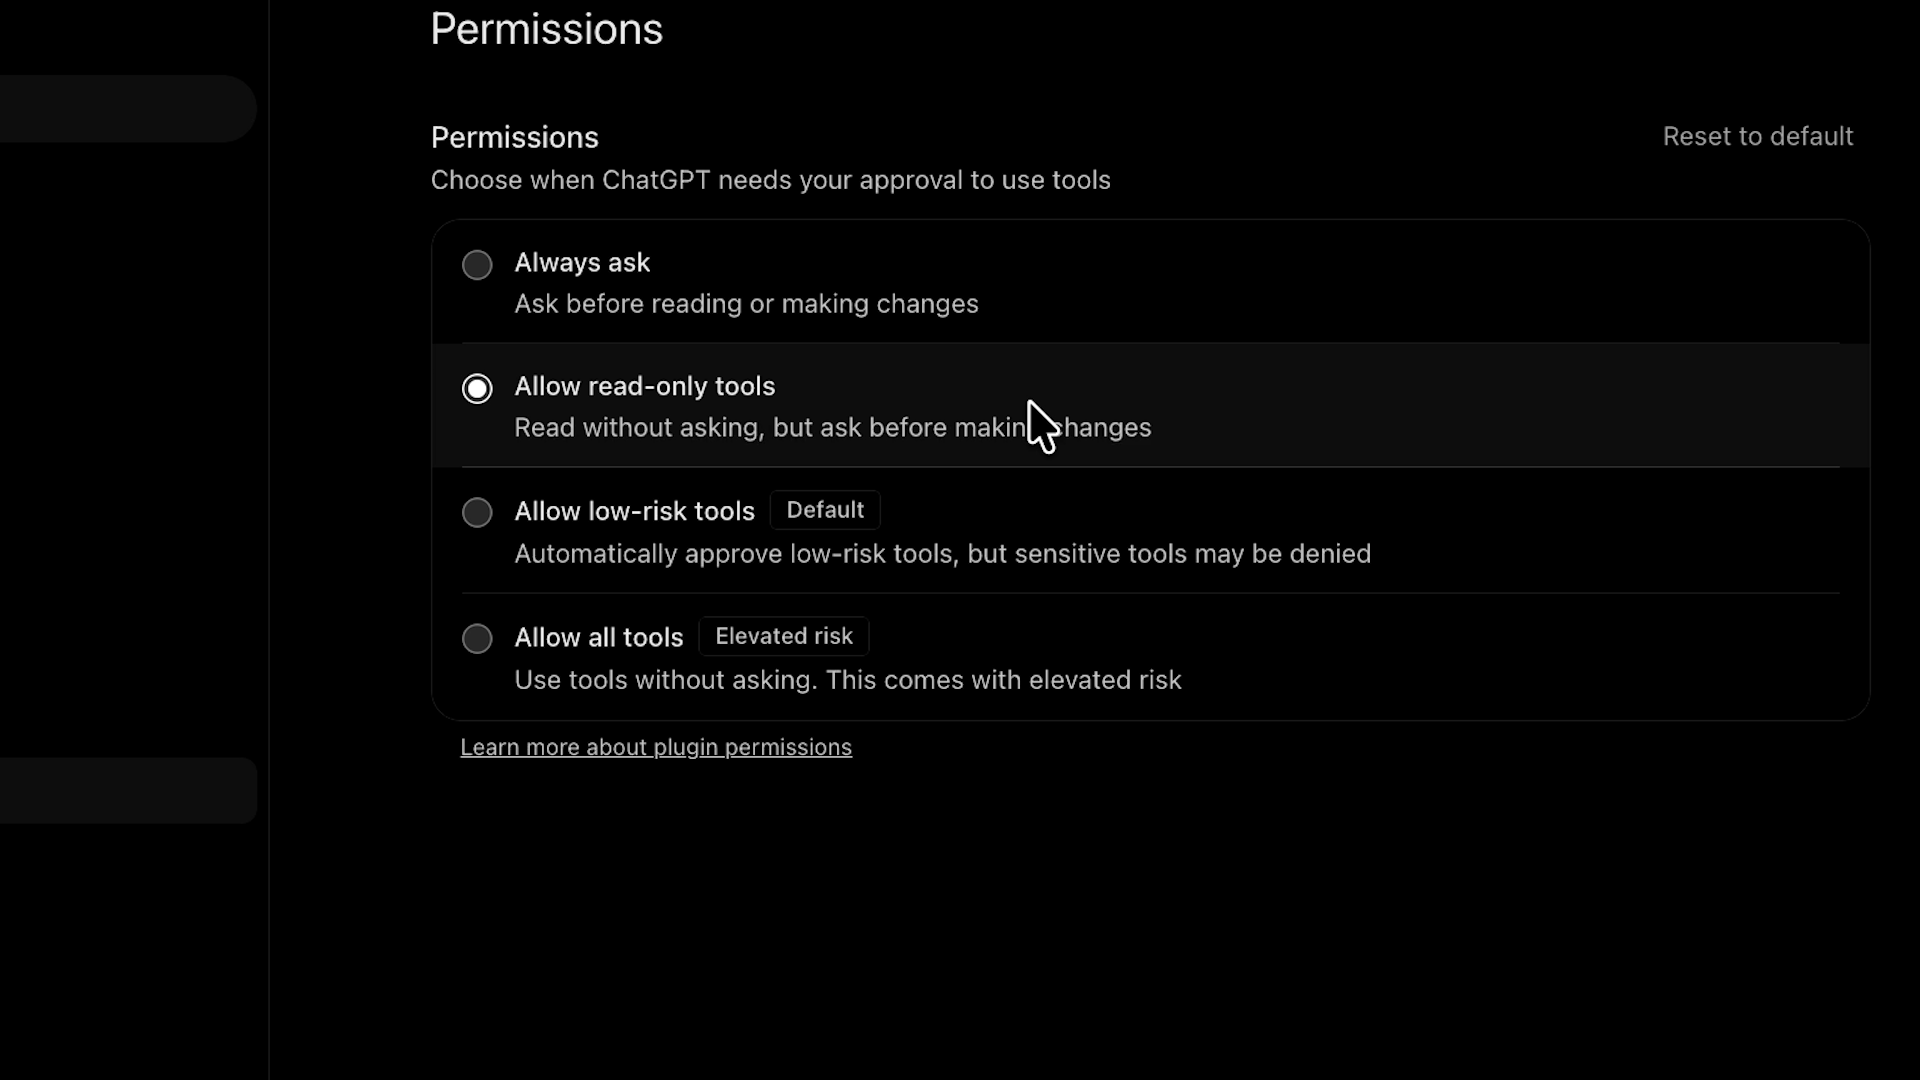
Select Permission. You get four choices, and each one applies to every Drive tool at once.
• Always ask: ChatGPT asks for approval before reading any file or making any change.
• Allow read-only tools: ChatGPT reads files on its own, but asks you to confirm before it creates, updates, or deletes anything.
• Allow low-risk tools: ChatGPT approves basic actions automatically and asks for sign-off on sensitive operations.
• Allow all tools: ChatGPT runs every file tool on its own, with no confirmation at all.
That's much coarser control than you get in Claude, where every tool has its own setting. For instance you can block a delete tool completely while letting read tools run freely, and setting update tools to "needs approval".
ChatGPT doesn't offer that, so the one setting you pick here has to cover deletion too.
Choose Allow read-only tools. ChatGPT can search and read your Drive whenever it needs to, but it has to stop and ask before it changes a single file.
Approving every edit adds a click to each request. When the alternative is an important file getting overwritten or trashed, that click is well worth it.
This setting also gives you a safeguard against deletion. If ChatGPT ever asks to delete a file, you can simply deny it with a click.
Allow low-risk tools is more convenient, and may be a fair choice once you've watched ChatGPT handle your files for a while. Keep in mind that ChatGPT decides what counts as low risk, and it still makes mistakes. A low-risk setting is no guarantee it will steer clear of something like a deletion.
If you're using ChatGPT and Drive for work, we'd strongly recommend avoiding this option, and sticking with Allow Read-only.
Skip Allow all tools entirely. Letting ChatGPT act completely on its own inside your Drive is asking for trouble.
Open a new chat, type @, and select the Google Drive plugin so ChatGPT knows to use it.
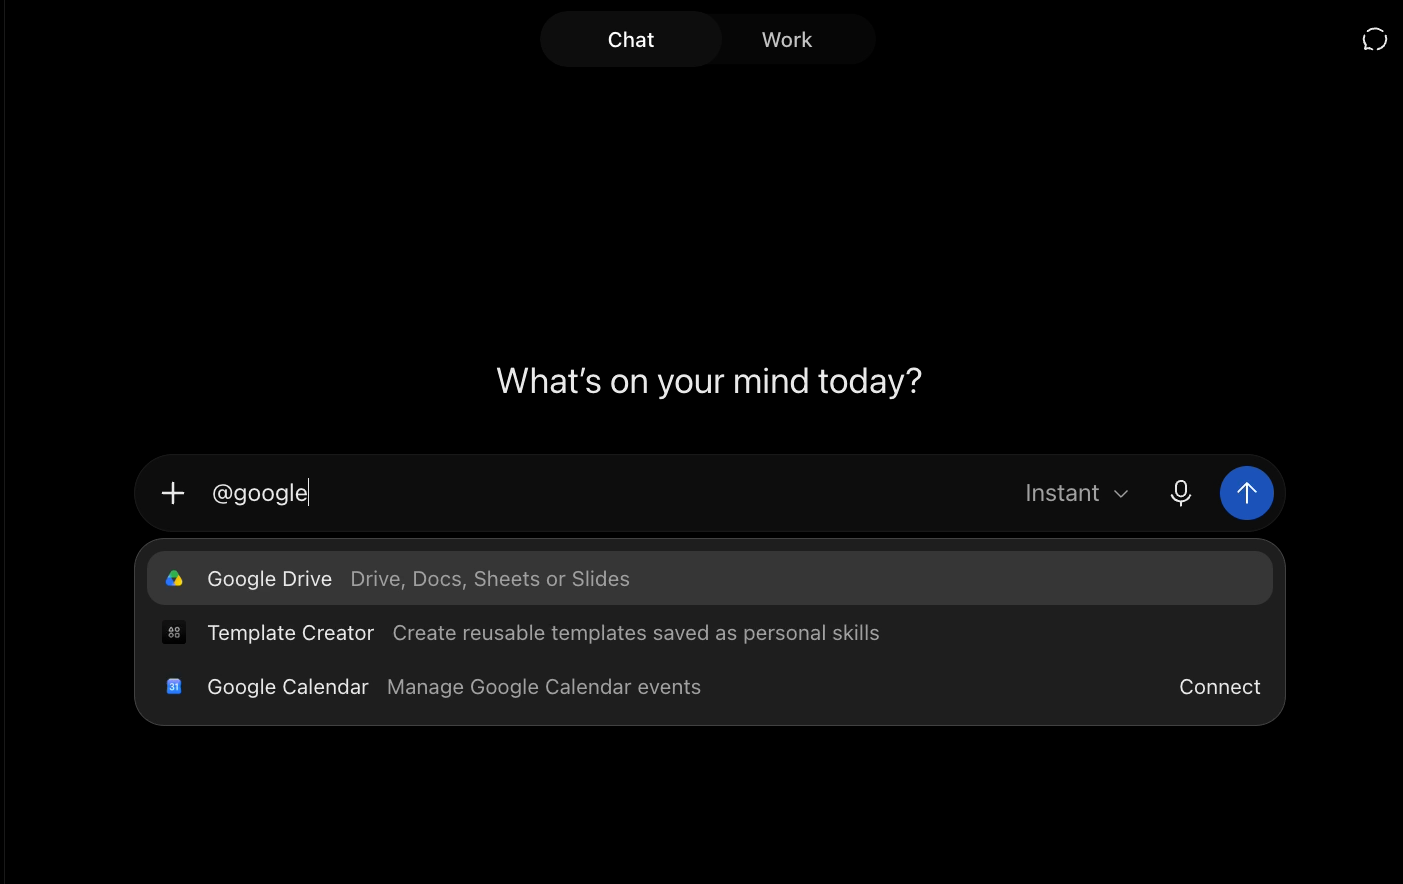
If you'd prefer, you can also just tell ChatGPT to use Drive in your prompt in plain language.
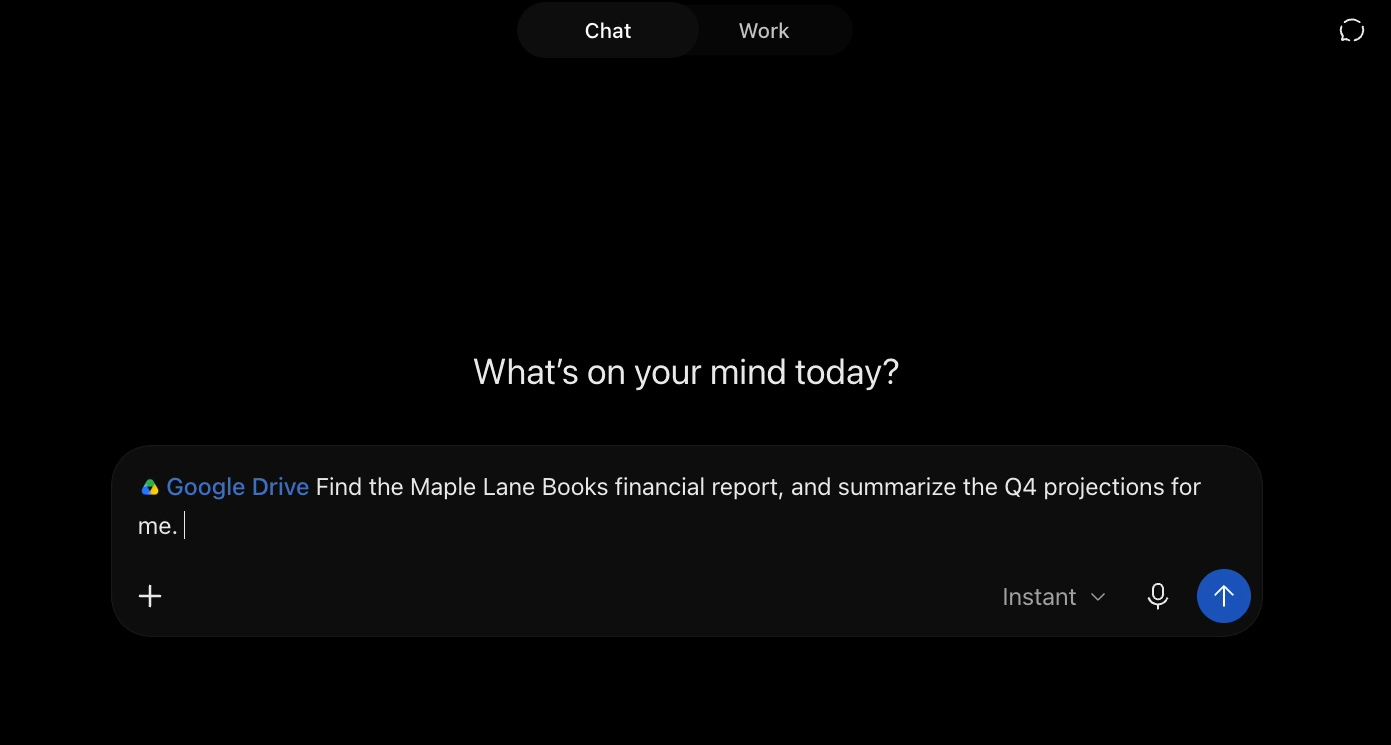
Then ask for something you'd normally do by hand. We asked ChatGPT to review a report in our Drive and pull out the Q4 projections. After a short wait, the answer came back in a detailed chart, pulled straight from the doc without us ever opening the file.
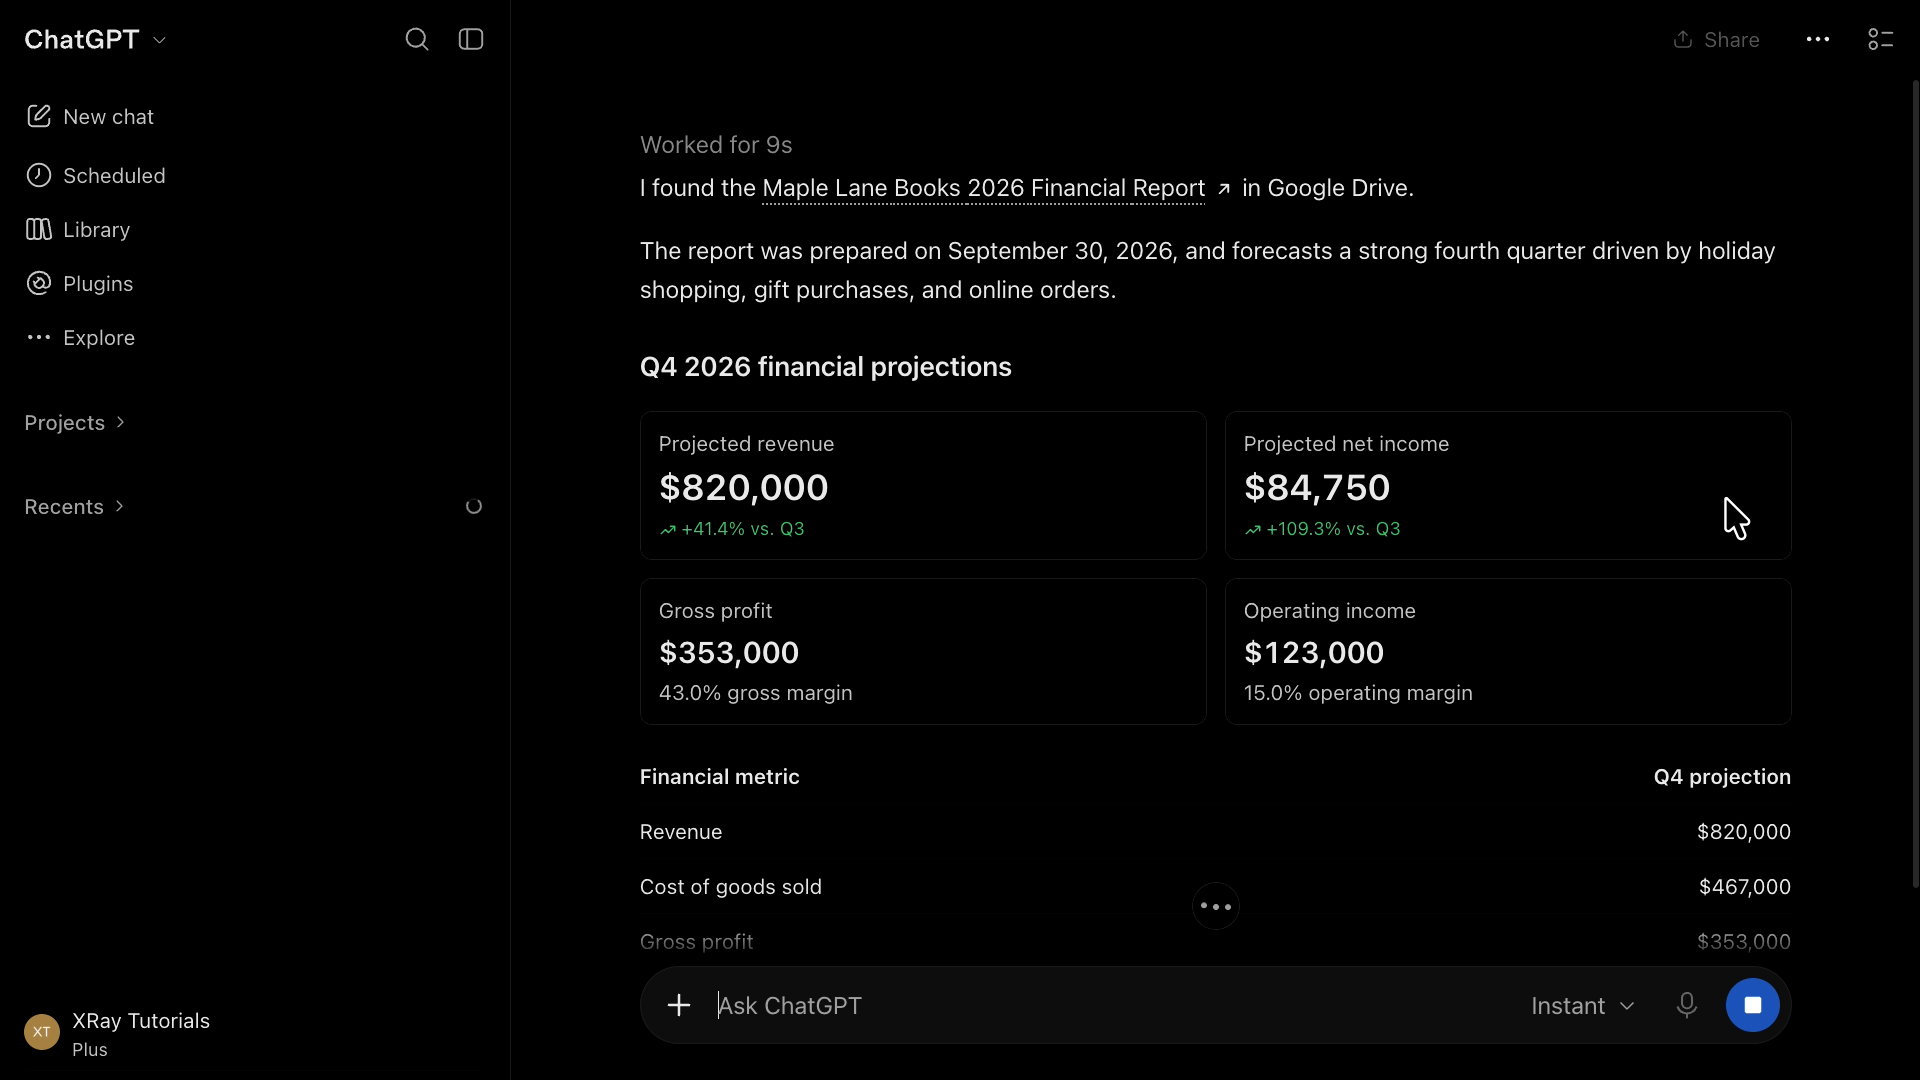
Since this was a read-only task, ChatGPT ran it automatically – no pause to ask for our approval.
Next, we tested out a write action. We asked it to add a brief summary to the start of the report. Because we chose Allow read-only tools, ChatGPT stopped and asked before it touched the file.
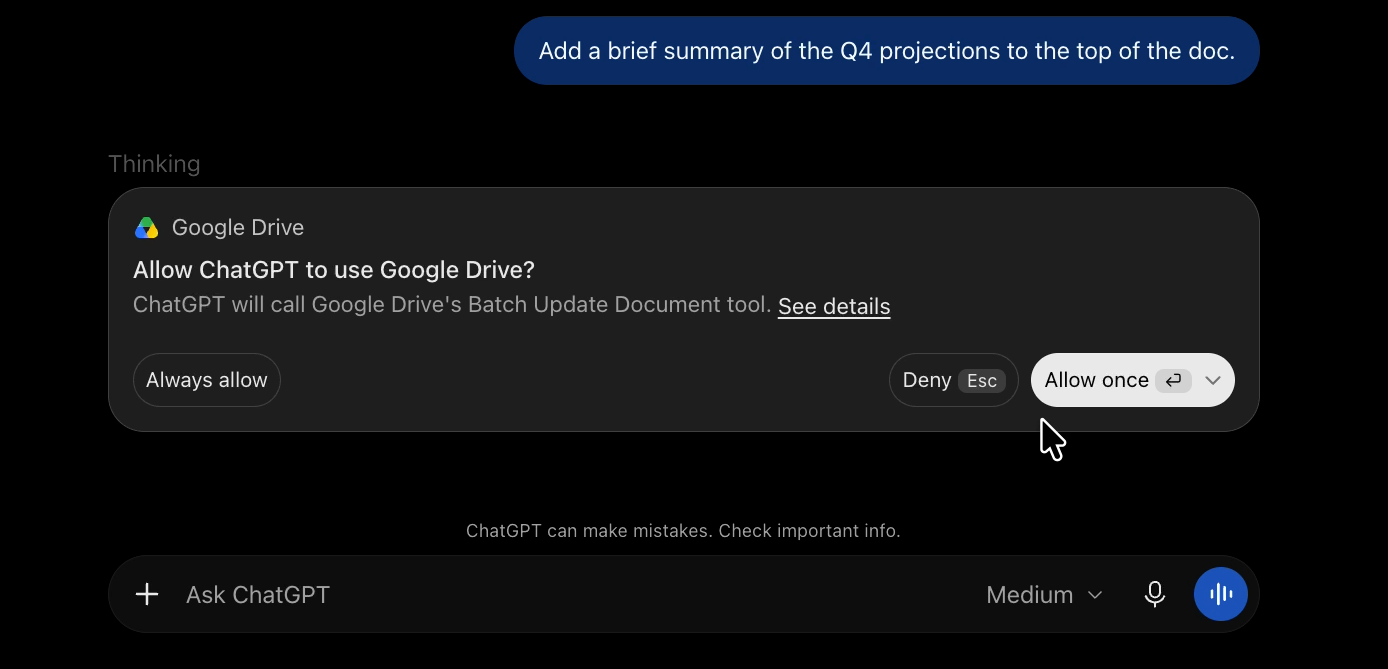
The approval prompt shows you exactly what ChatGPT is about to do. Click See details to view the code it's going to run, and check the Requests section for the exact text it plans to add to the doc.
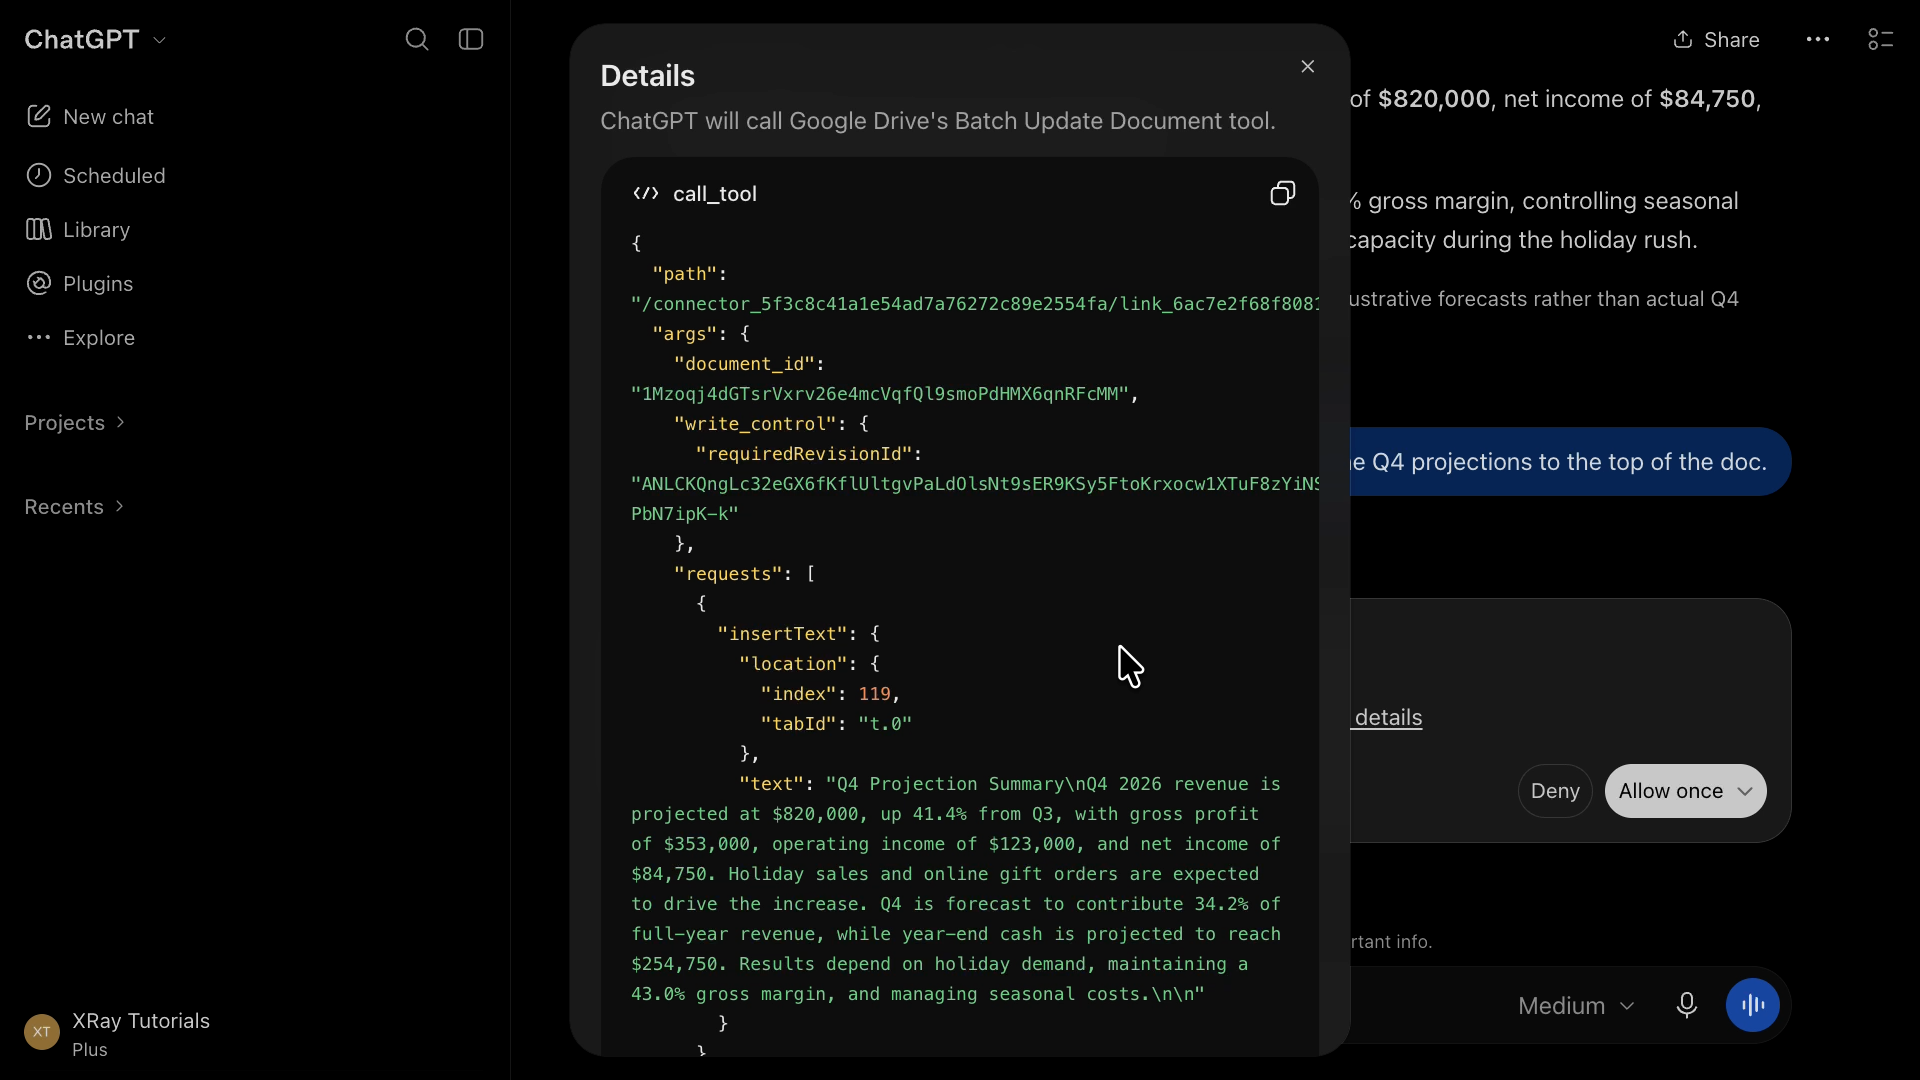
If everything looks right, click Allow once.
ChatGPT makes the edit, gives you a quick rundown of what it changed, and shows the updated doc right in the chat.
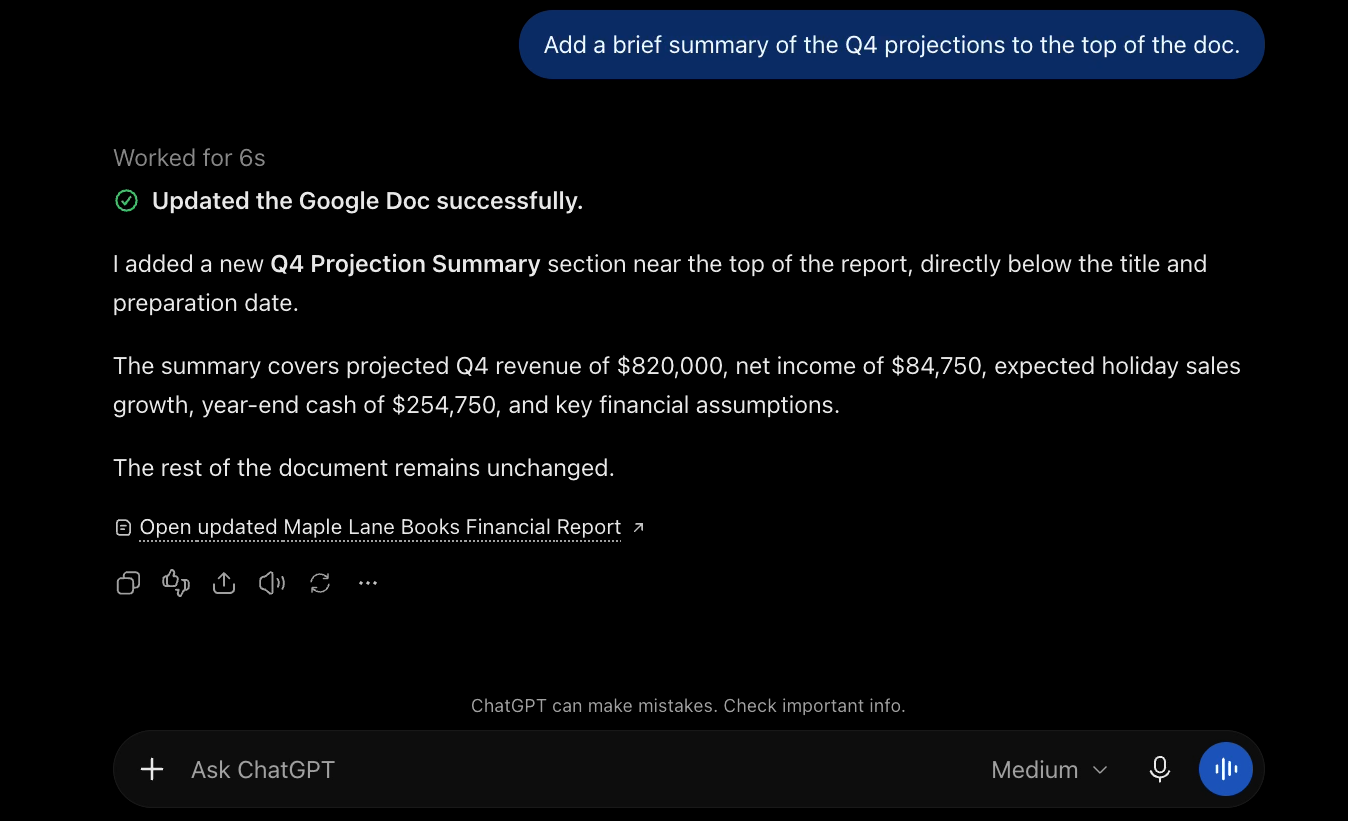
That's the oversight you want from any AI working in your files. You know what it's going to do before it does it.
Connecting Drive is the easy part. The harder question is which jobs AI can handle by itself and which still need a person to sign off, and that question gets bigger once a whole team is involved.
That's the work we do at XRAY. We build AI workflows that keep people in the loop, and we help organizations set up the governance around them, so you get the speed without losing track of what the AI is actually doing.
Reserve time with an XRAY expert and work through your own project one on one. There's no retainer and no long-term commitment, so you book the time you need.
We also offer AI training for your organization, so your whole team can discover a better way to work with the latest tools available. Go to grants.xray.tech to learn more and explore options for state-funded training reimbursements.
Now pick the doc you copy and paste from most often, and ask ChatGPT to do that job for you. You're not there to move text between tabs. You're there to decide what happens to it.