
Zapier is the most connected no-code automation provider available. With over 8,000 integrated apps, Zapier makes it easy for anyone to automate work in the apps they use every day.
In this guide, we’ll show you how to get started and build your first AI-powered Zap in about 5 minutes.
Zapier is a no-code automation provider.
It lets you connect your web apps together, so when an event happens in one app, automatic actions occur in other apps.
You can learn more and sign up for Zapier here.
For example, you could build a workflow – or “Zap” – that consists of three easy steps:
• Start whenever a new document is uploaded to a Drive folder
• Send the document to AI for a summary
• Send the summary in a Slack message
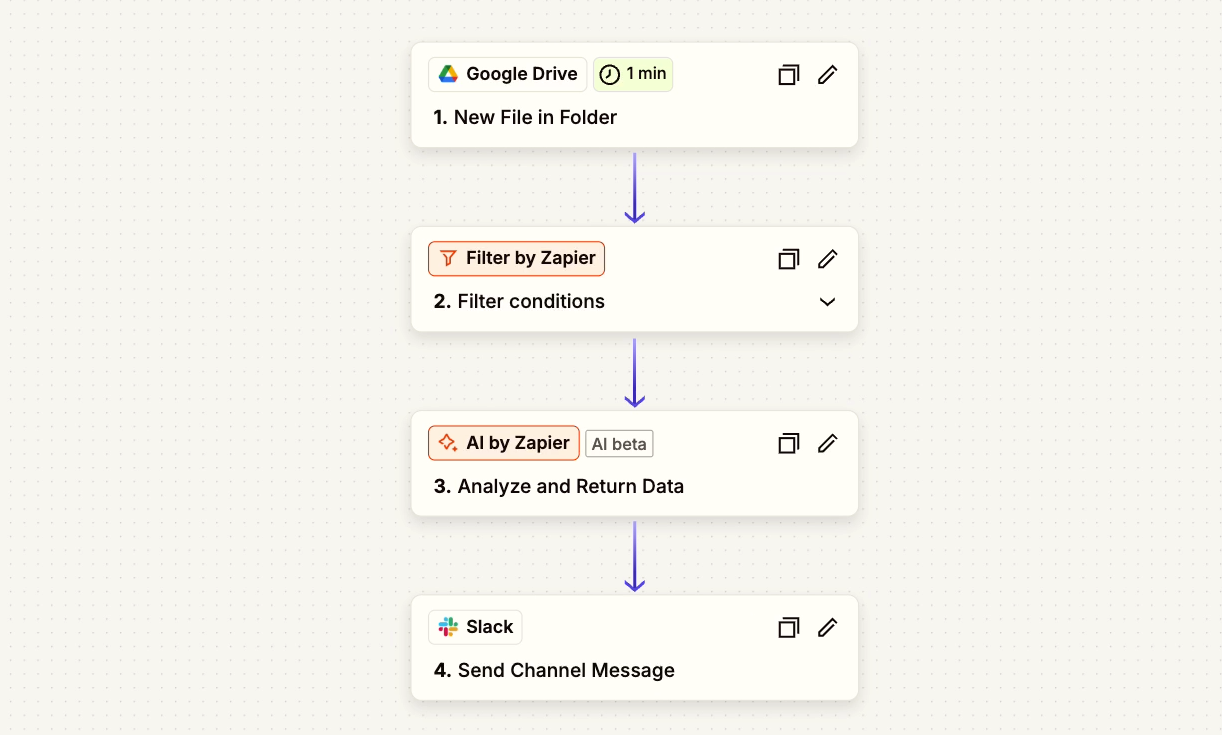
That’s the example we’re going to demonstrate in this guide (along with an optional filter step). However, even if you don’t usually use these specific apps, there’s nothing to worry about.
These same techniques will work for the 8,000-plus other apps that Zapier connects to, like Hubspot, Salesforce, Microsoft Teams, Shopify, and Mailchimp, just to name a few.
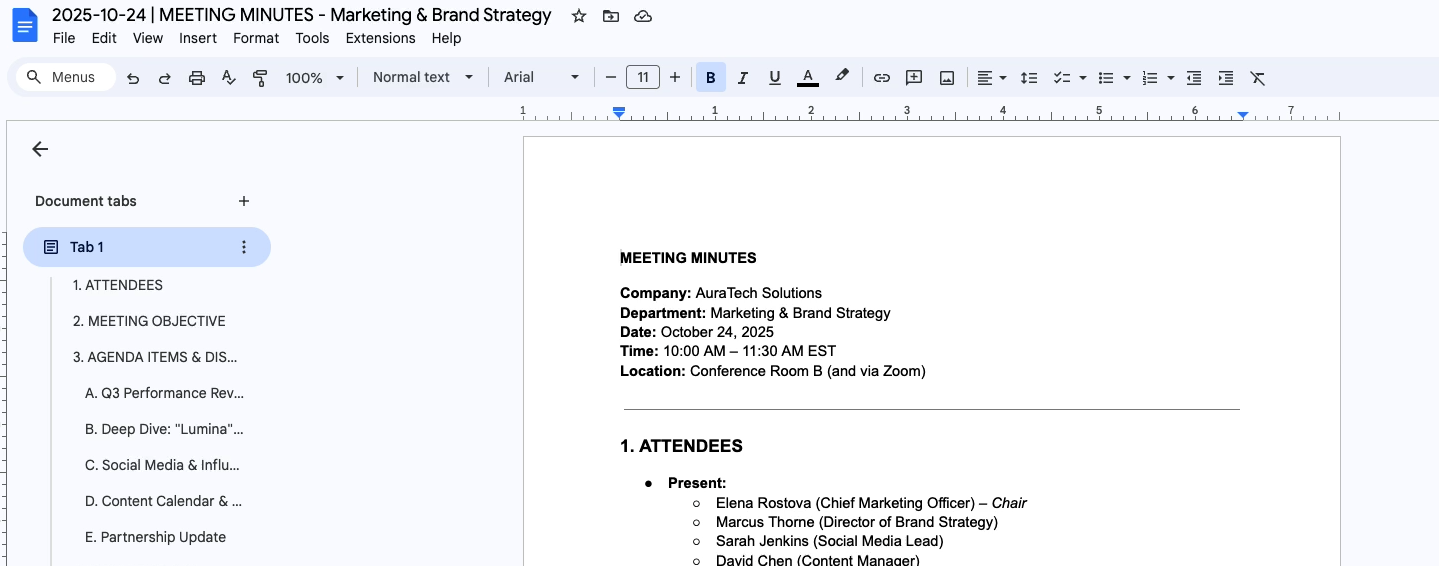
Before building anything, make sure you have test data you can use – a sample version of the data or documents you want to automate in Zapier. In this case, you’ll need to have a document ready to go in Drive, like ours pictured below.
We’d also recommend creating a unique folder to use for the Zap.
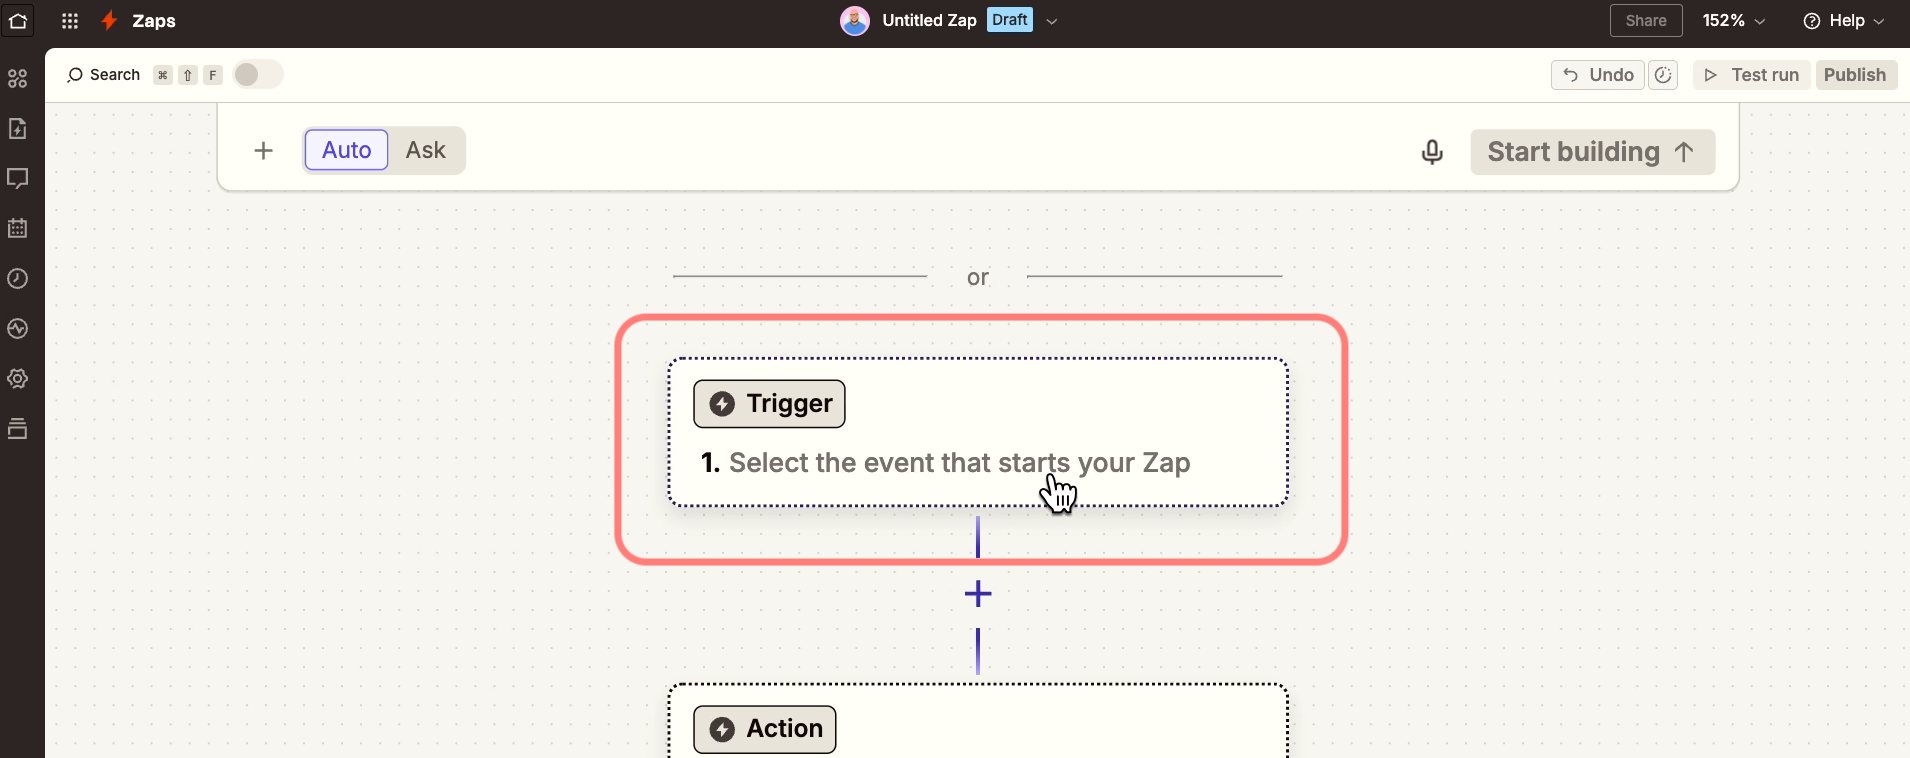
With your test data ready, log in to Zapier and create a new Zap.
Every Zap needs to start with a trigger. That’s the event that prompts the automation to run. Click on “Trigger” to add one to your Zap.
Then, choose the app where your trigger event will occur. For our example, that will be in Google Drive.
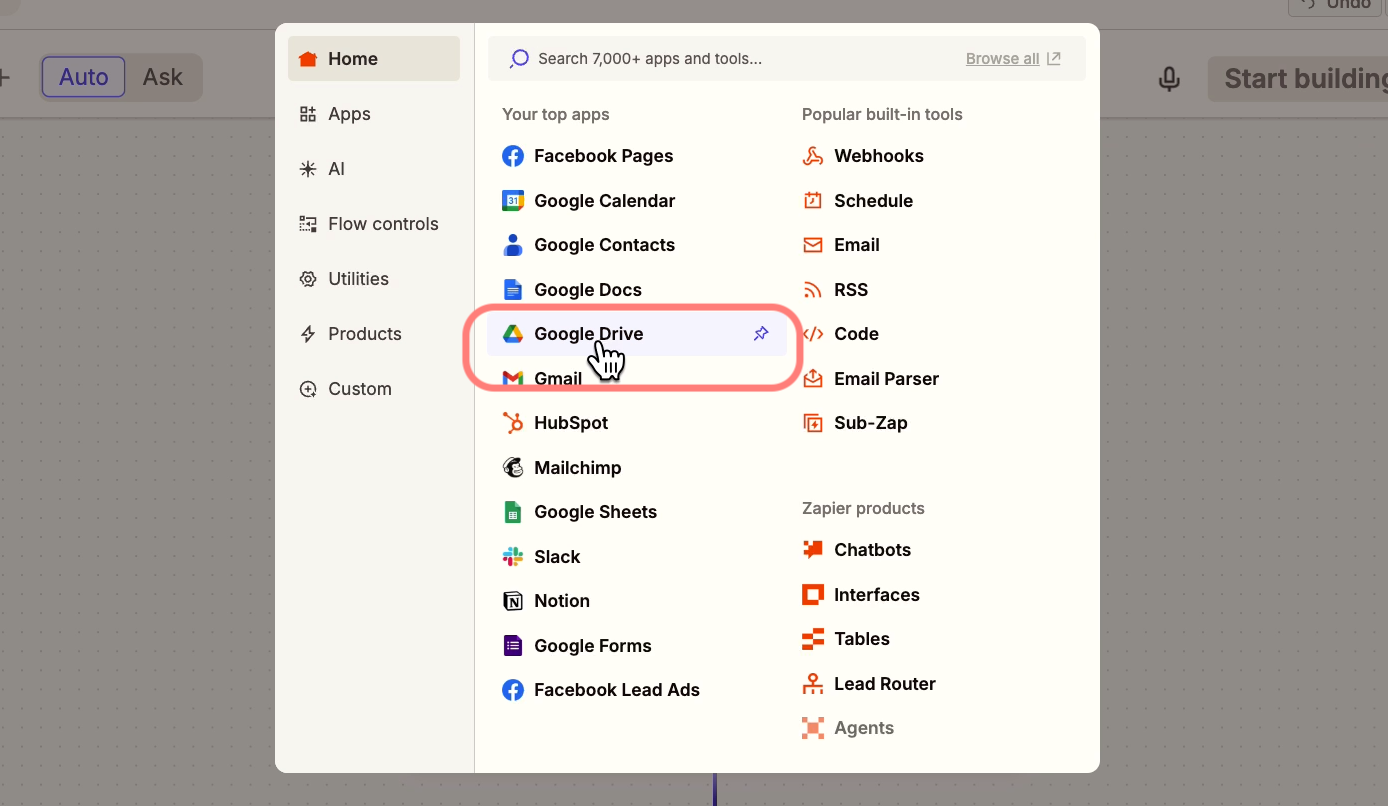
Then, select the specific event your Zap should trigger on – in this case, that’s “New file in Folder”.
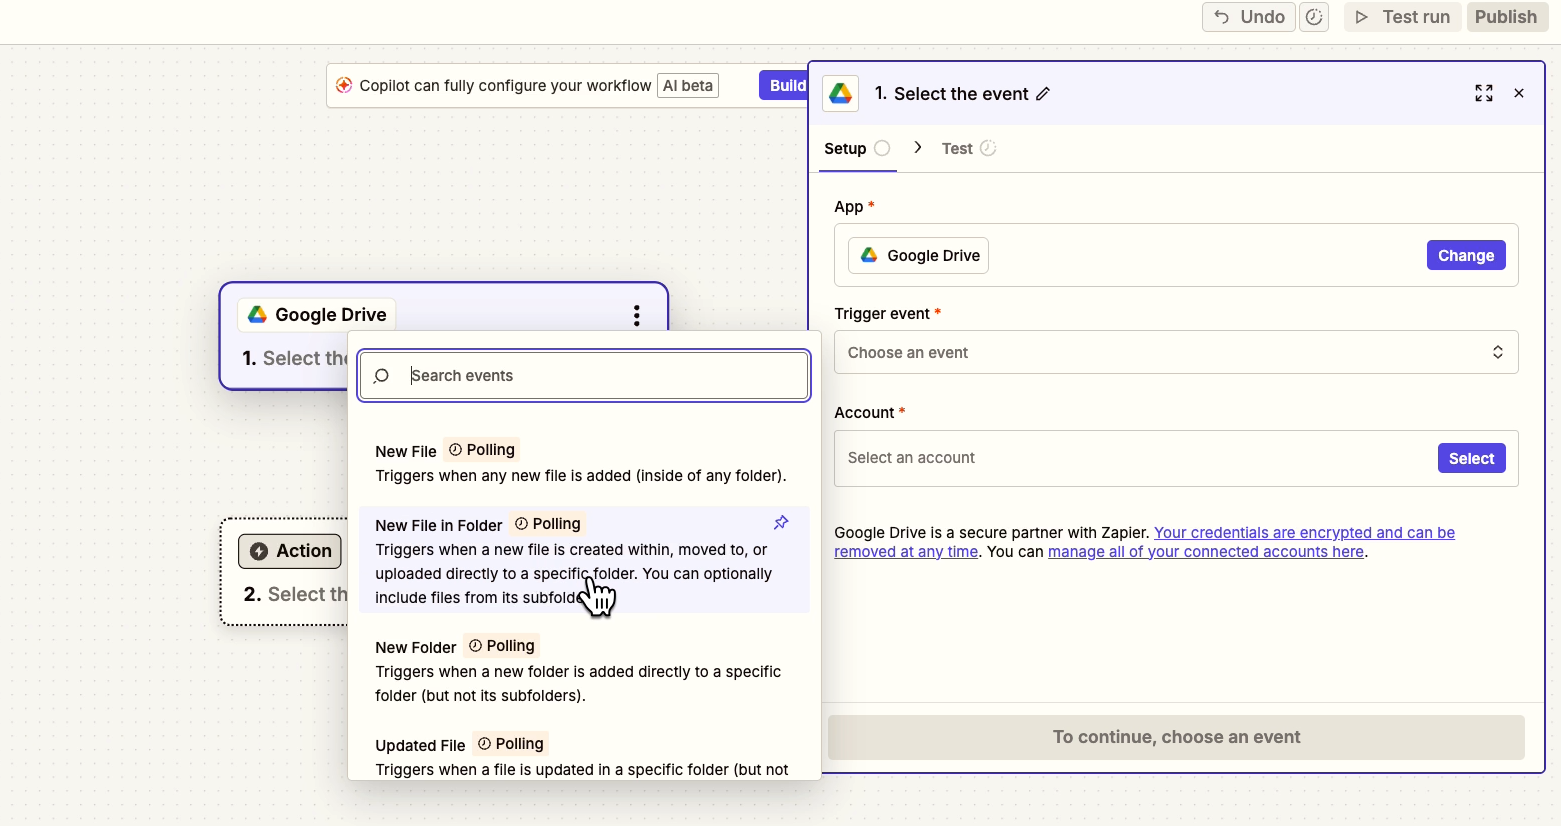
Note that for nearly every app that you use in Zapier, you’ll need to connect your own account. When you add a new account, Zapier will walk you through the instructions. In most cases, like with Google Drive, you’ll just need to sign in to your account and allow Zapier the access it requests.
Once you’ve connected an account for the trigger, continue to Configuration.
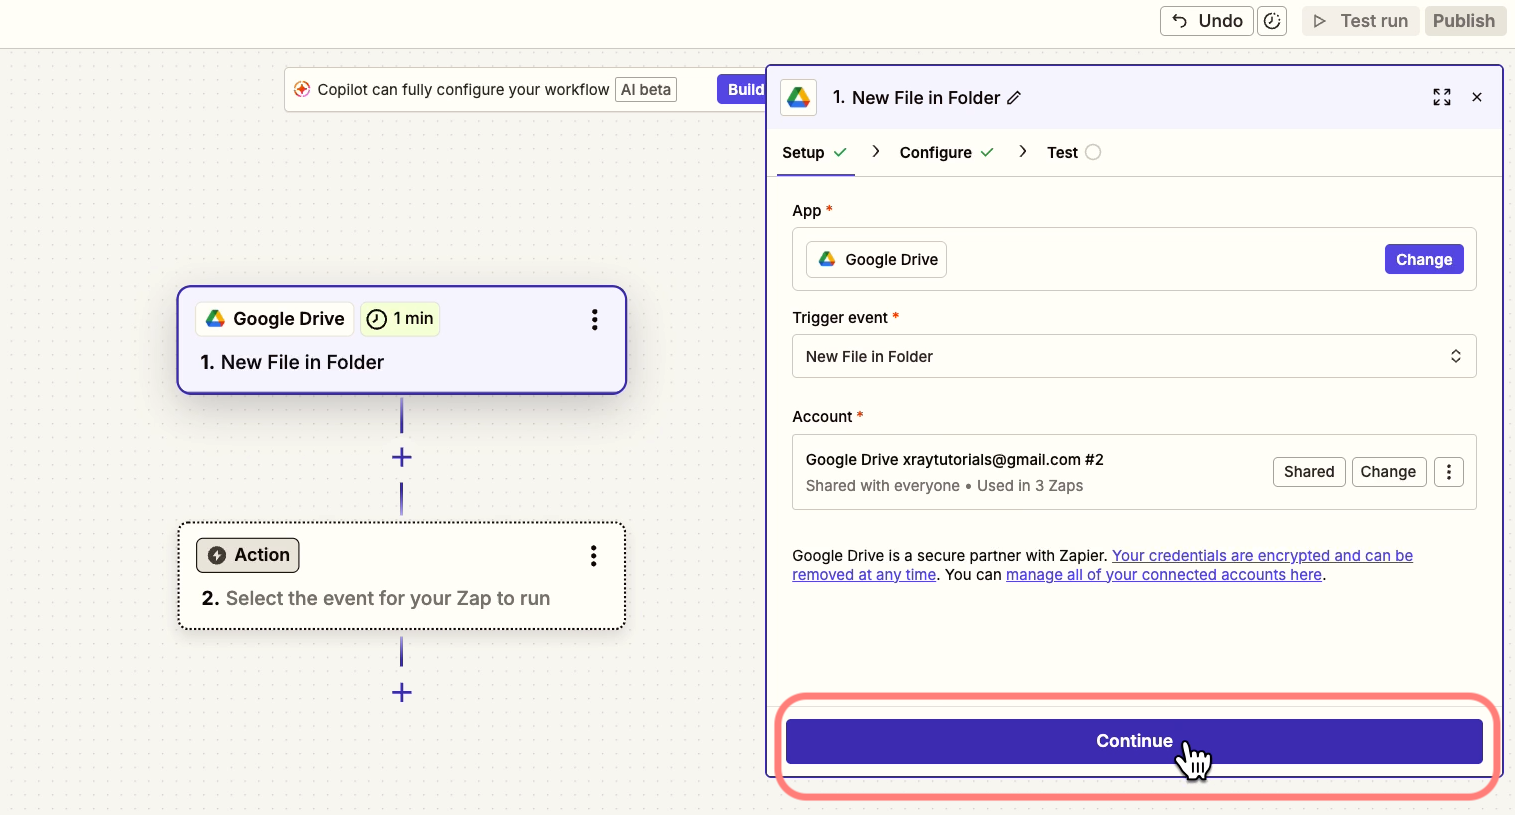
When you configure a trigger, you just need to tell the trigger what data it’s looking for.
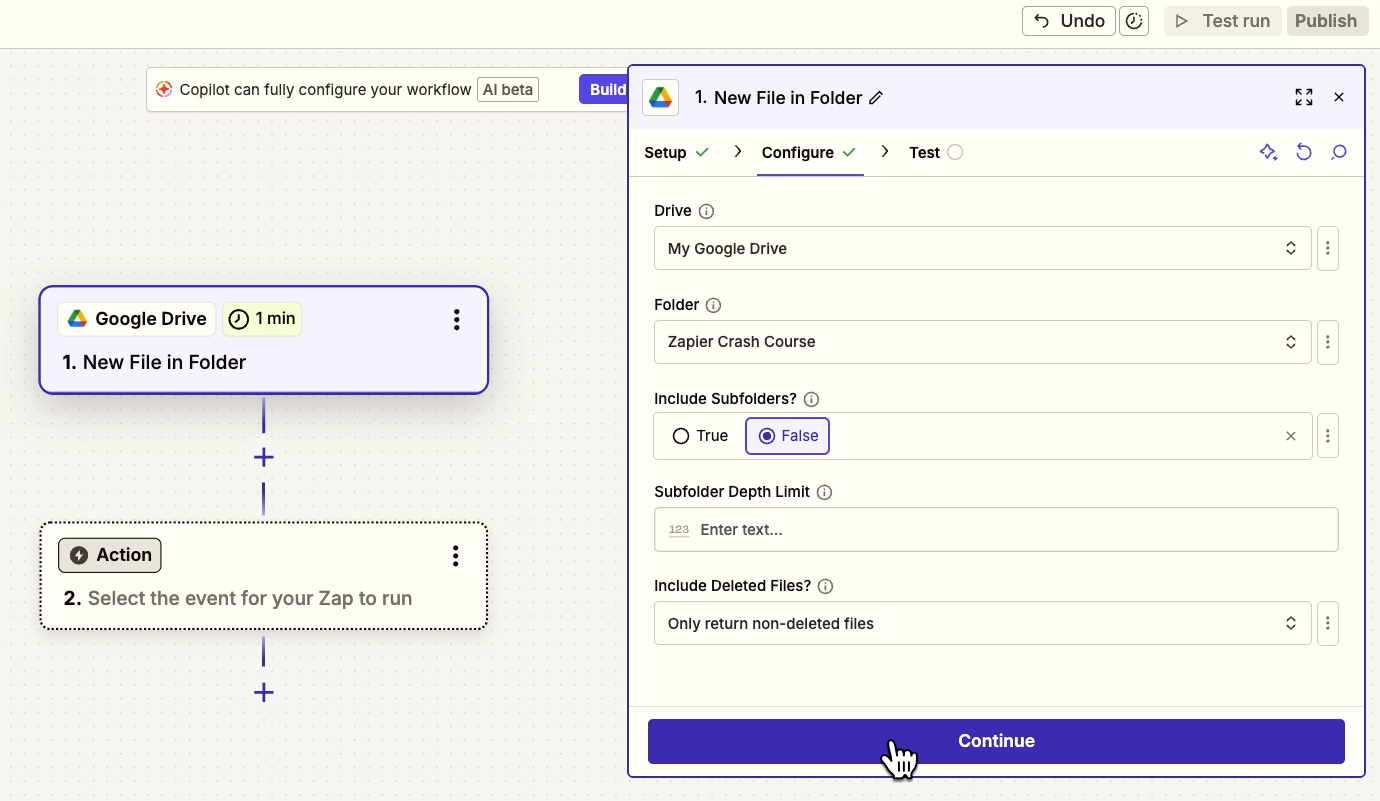
With Google Drive, that means specifying the Drive and Folder to watch.
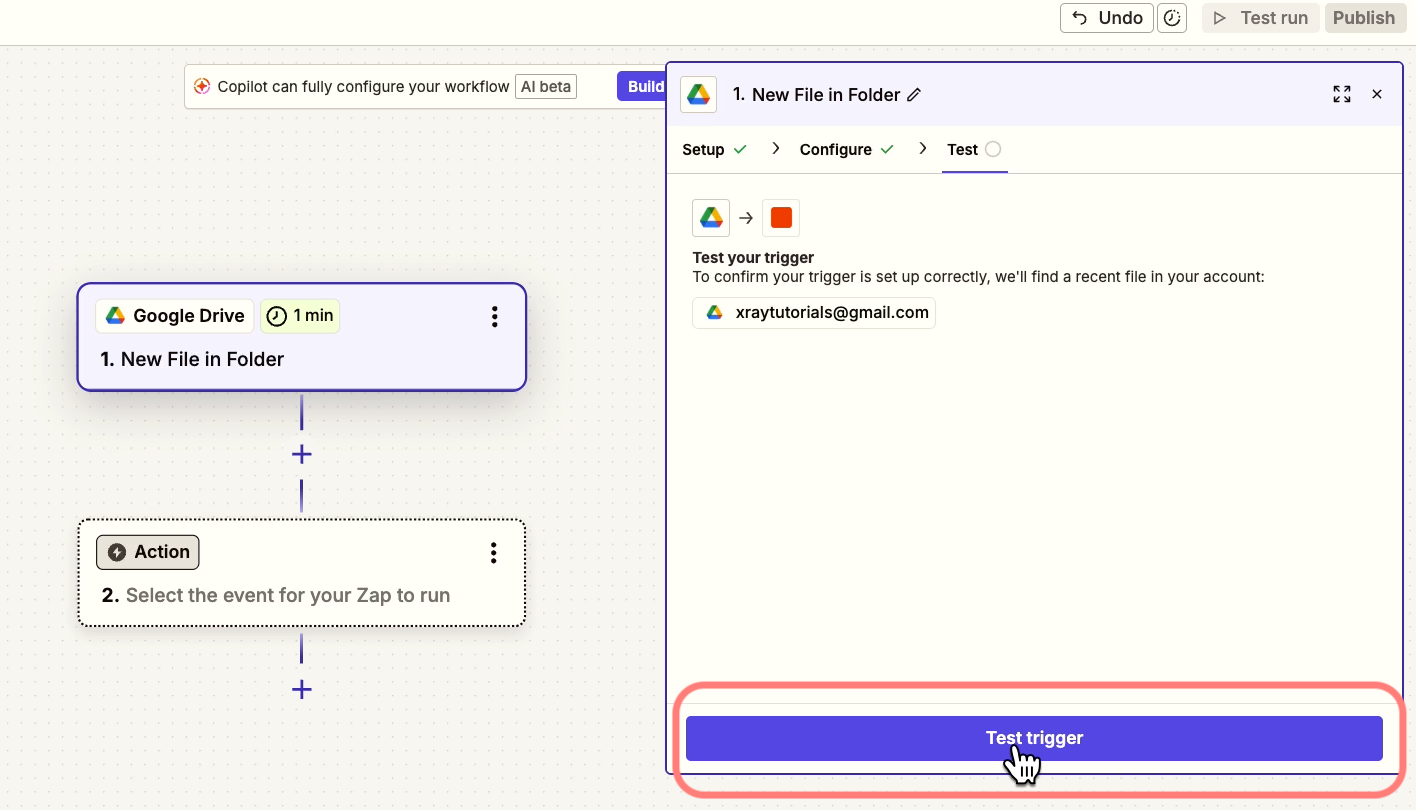
Once you’ve finished configuration, give your trigger a test. It should find the test data you made earlier, as well as any other files you’ve uploaded to your specified folder.
You can click on the arrow next to each piece of data to see the details of the information retrieved.
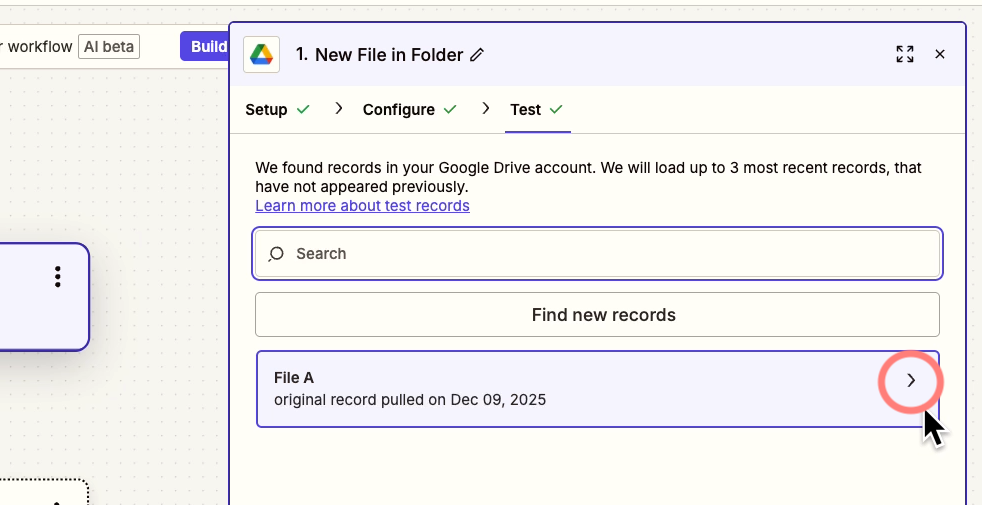
You’ll see several data points here, and you can use all of them as you build your Zap.
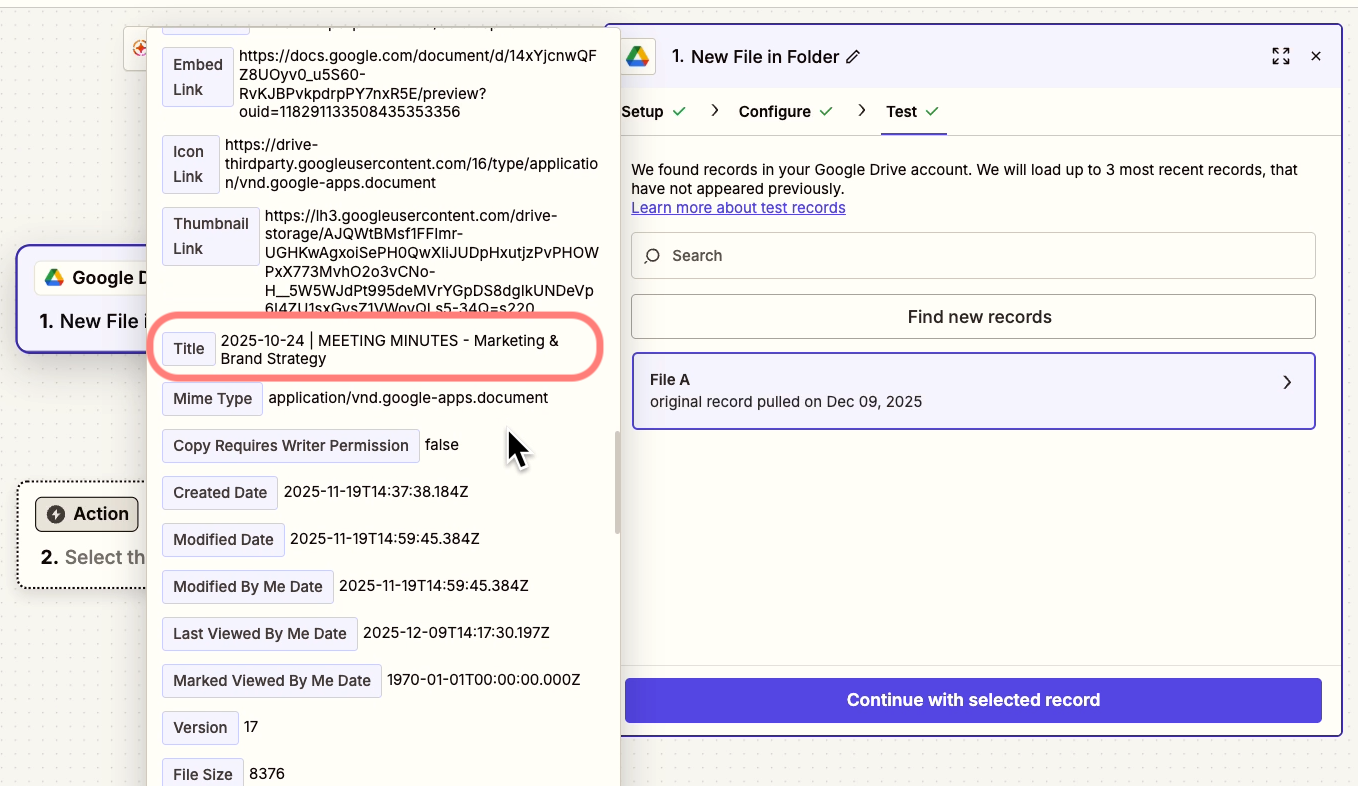
Think of these data points as variables, or placeholders.
For instance, when we reference the “Title” variable anywhere in future steps in the Zap, it will fill in the title of the Google Doc that it’s processing - not just this specific Doc that we’re testing with now.
Next, let’s see how these variables work by sending a Slack alert.
We’ll go back and add the AI summary later – that app works pretty differently from most apps in Zapier.
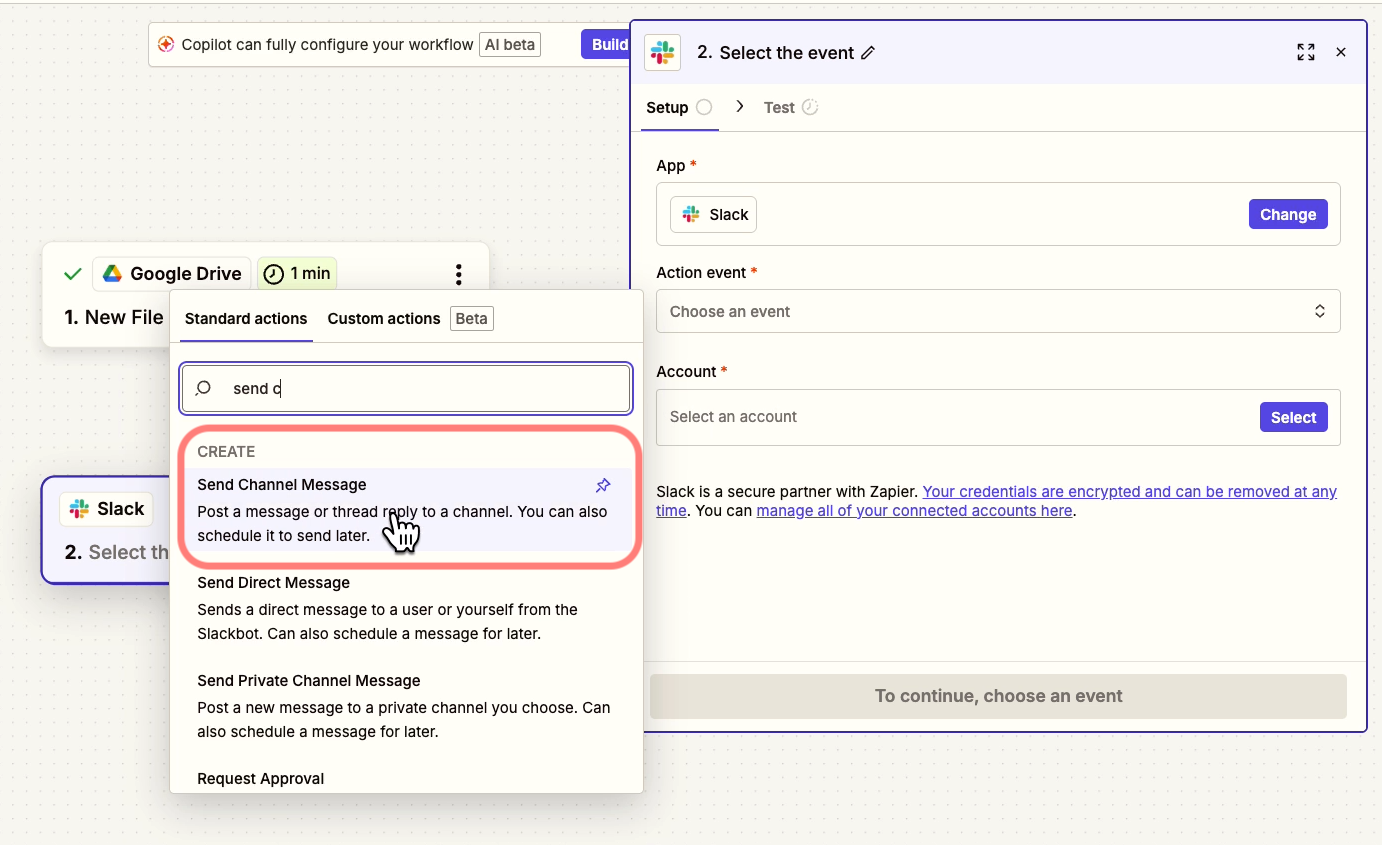
Click “Continue”. You’ll then be prompted to choose an app that you’d like to use to perform an automated action.
Choose Slack as the app, and “Send channel message” as the action event.
Just like with Google Drive, you’ll need to have a Slack account connected.
Click “Continue” to proceed to configuration.
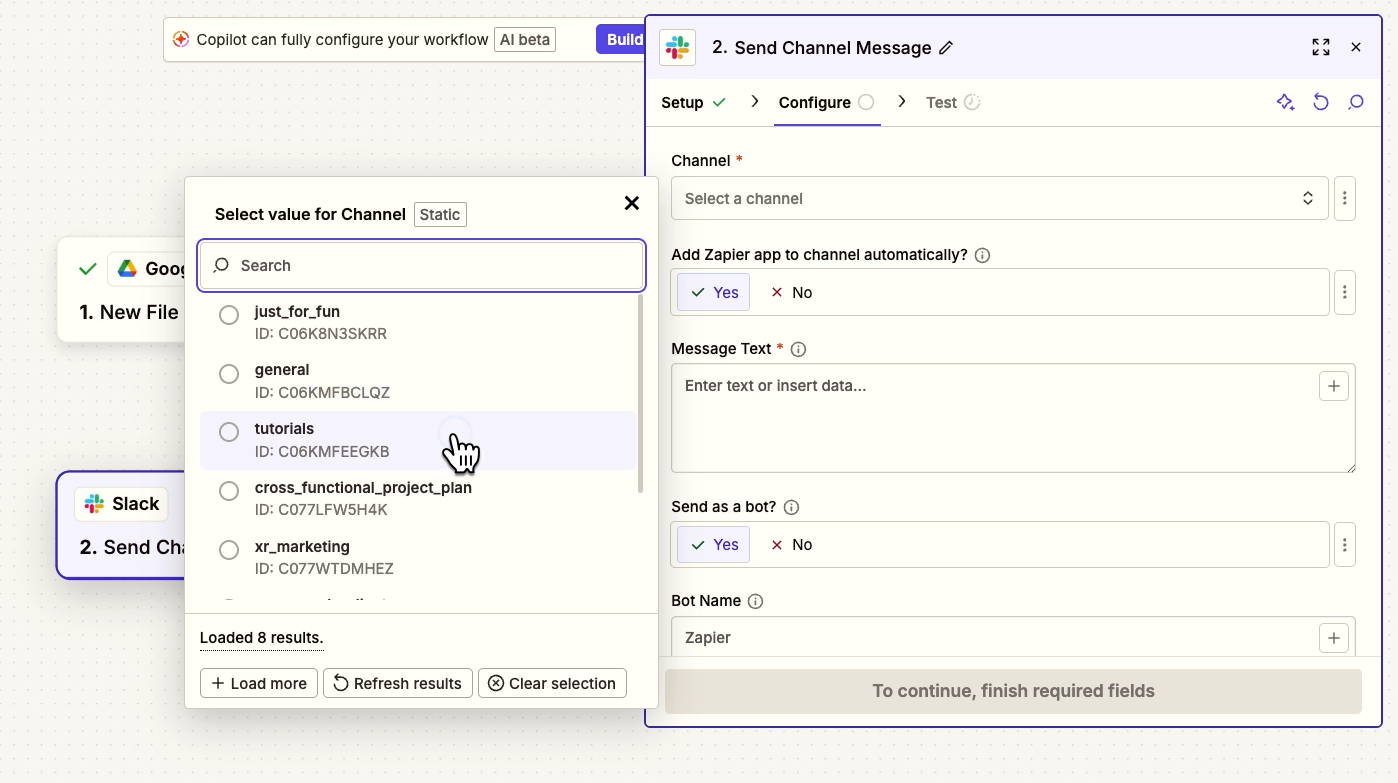
With any action in Zapier, you’ll see several straightforward fields in the “Configure” tab, with tooltips that explain what data you need to provide.
For this Slack message step, you just need to pick a channel to send the message to, and you need to compose the message. We’d recommend sending to a dedicated test channel while you’re building.
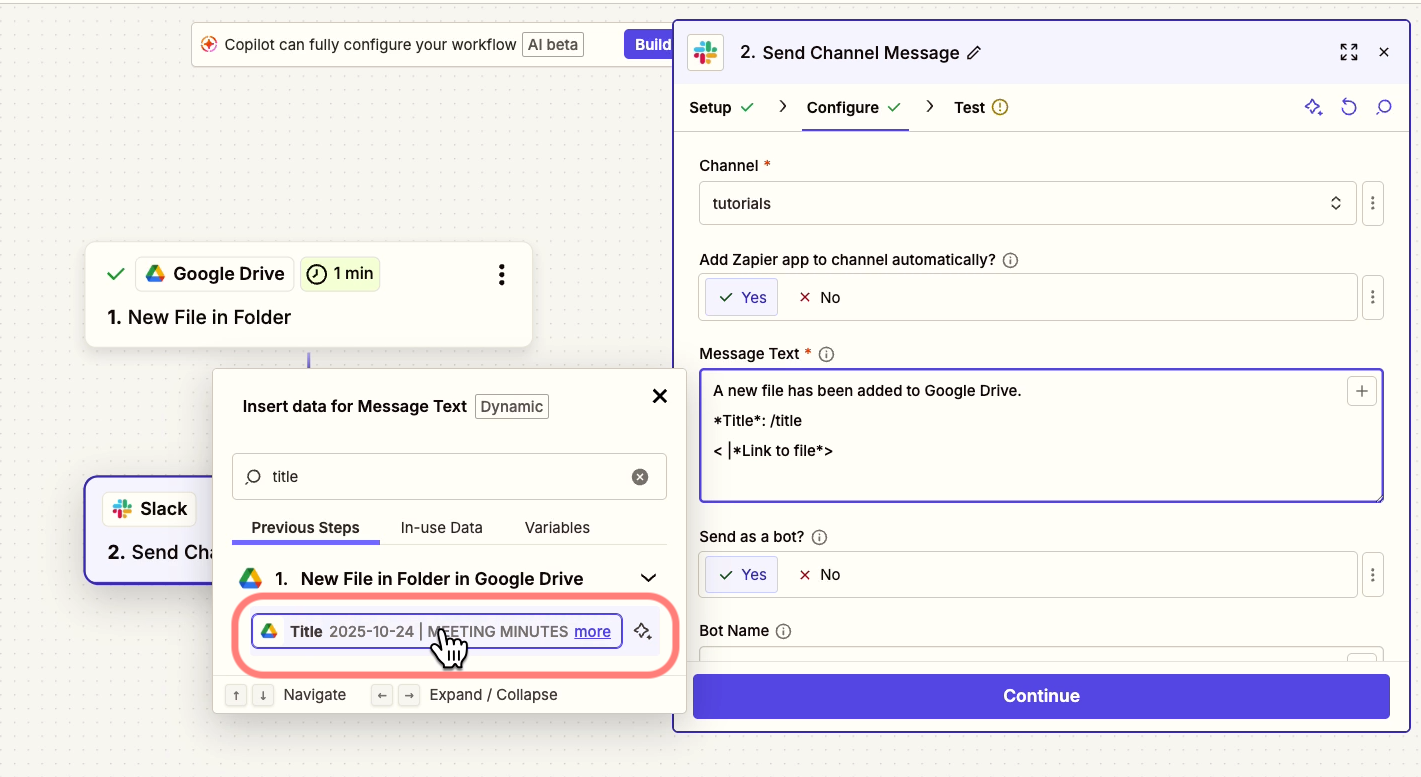
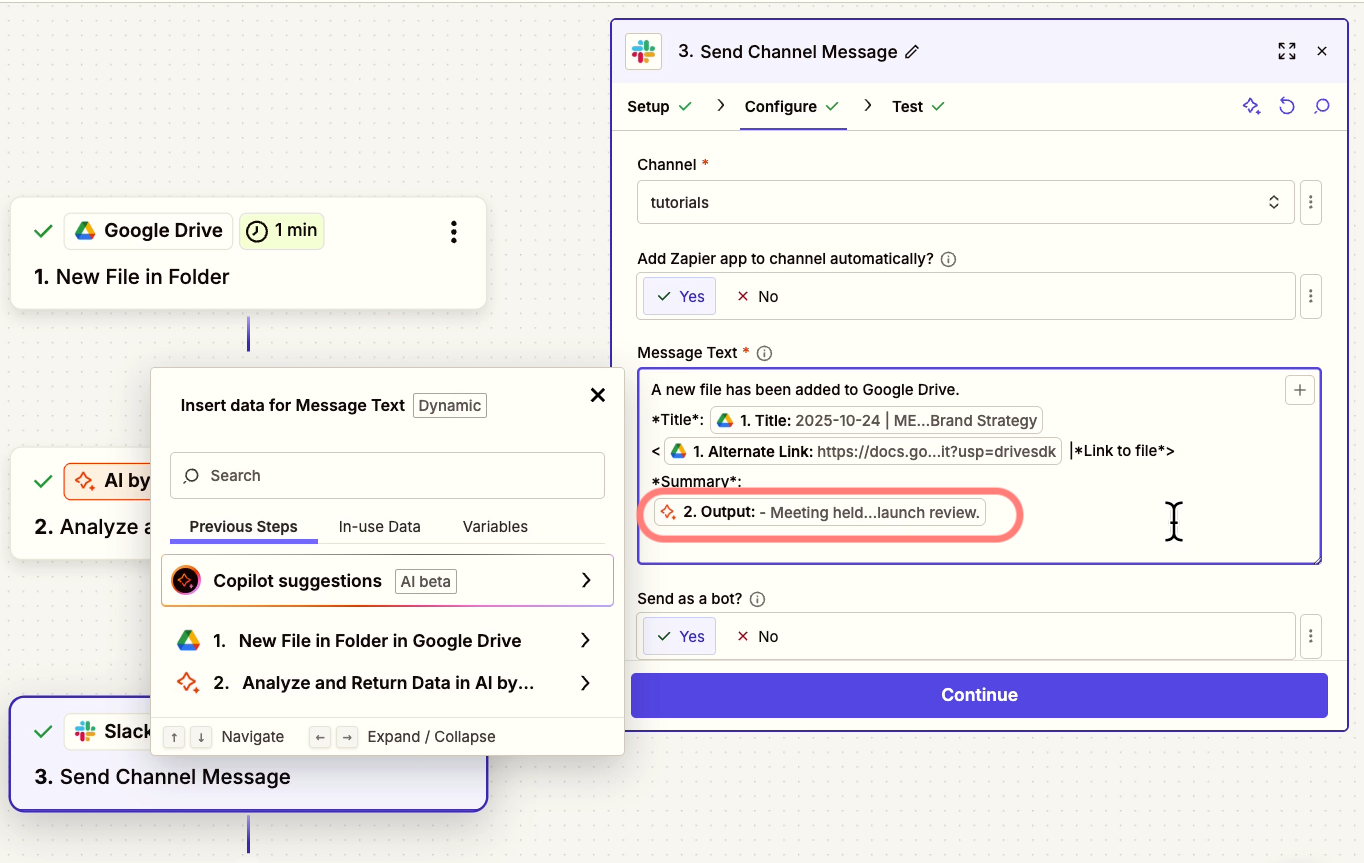
In a Slack message, and in virtually any text field in Zapier, you can insert variables from earlier steps by clicking on the plus button, or by pressing forward slash (/).
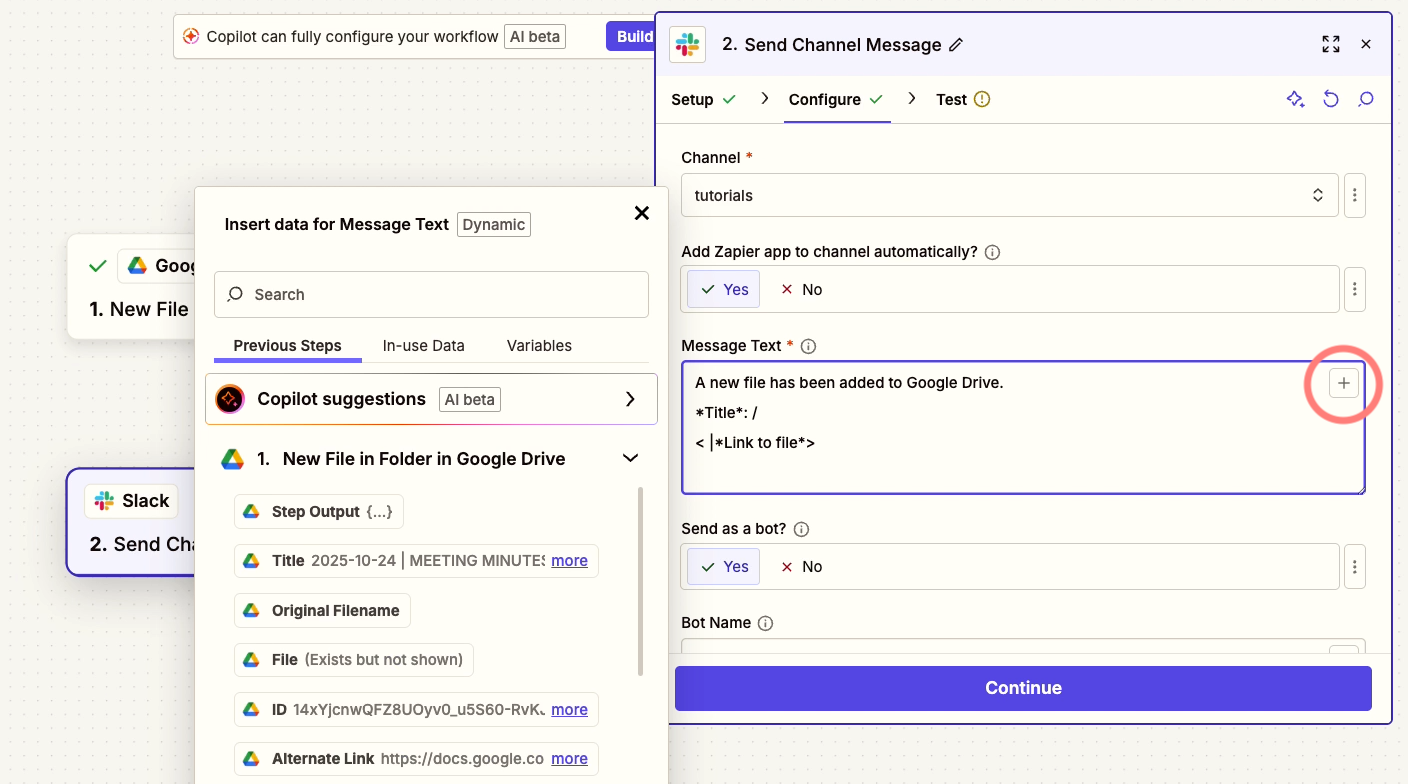
Use this technique to insert the title of the Google Doc into your message. Search for the variable you want, then click on it to insert it.
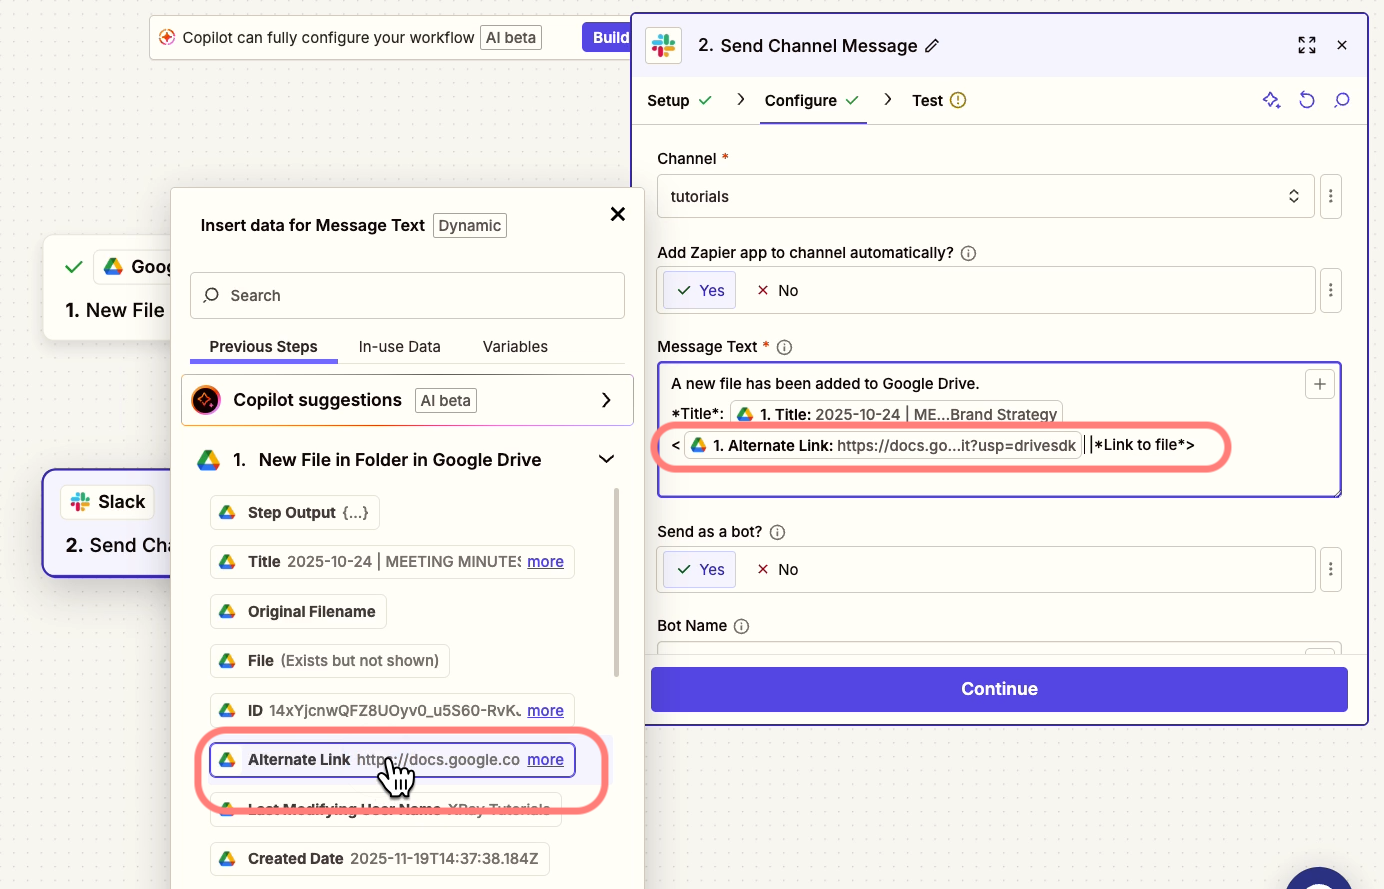
You can also include the ‘Alternate Link’ variable to add a link directly to the doc in Drive.
Note – you can also use Slack’s markdown syntax to format the text in your message. For example, you can use asterisks around text to make it bold:
*bold text*
You can also use carrots and a bar to embed a URL:
<URL|Text to embed URL in>
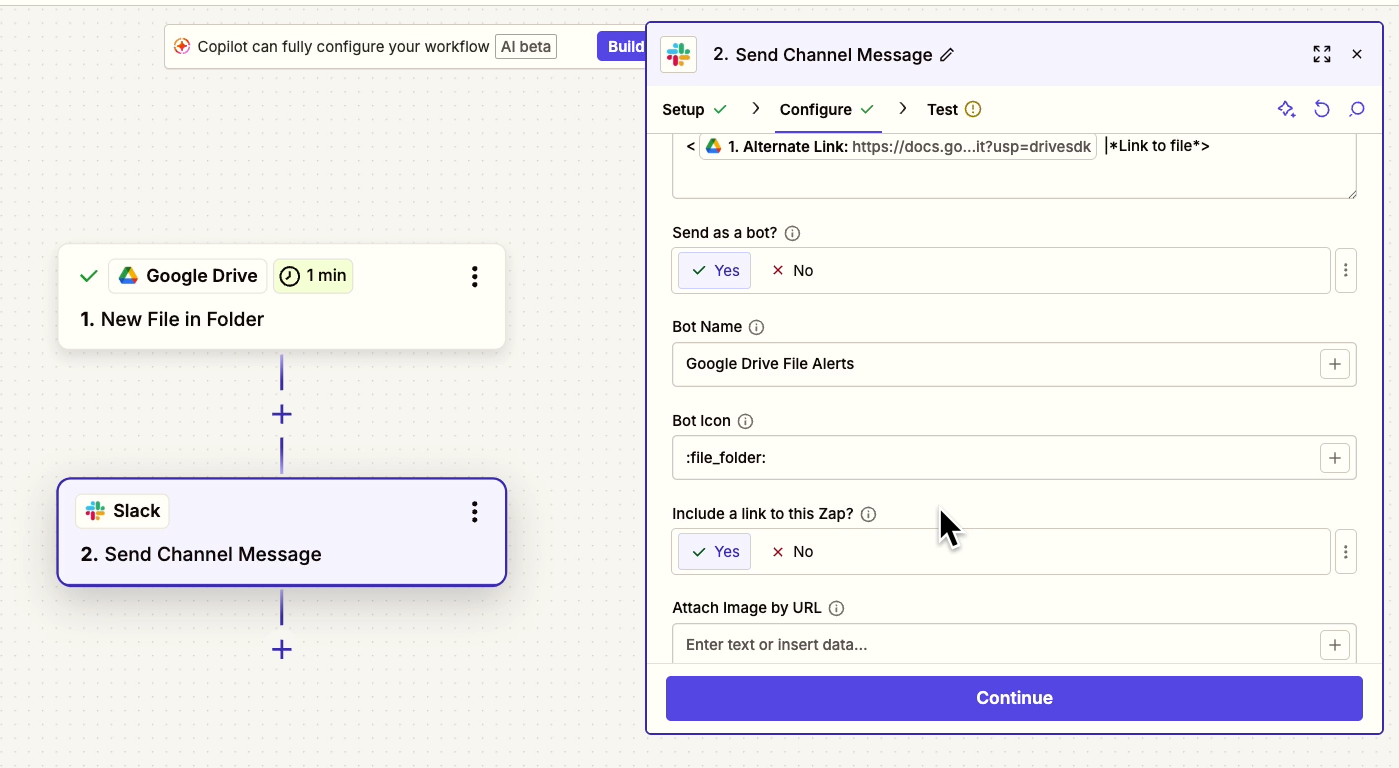
You can also configure some optional settings, like adding a bot name and icon for the message.
Once your message is all set, give it a test.
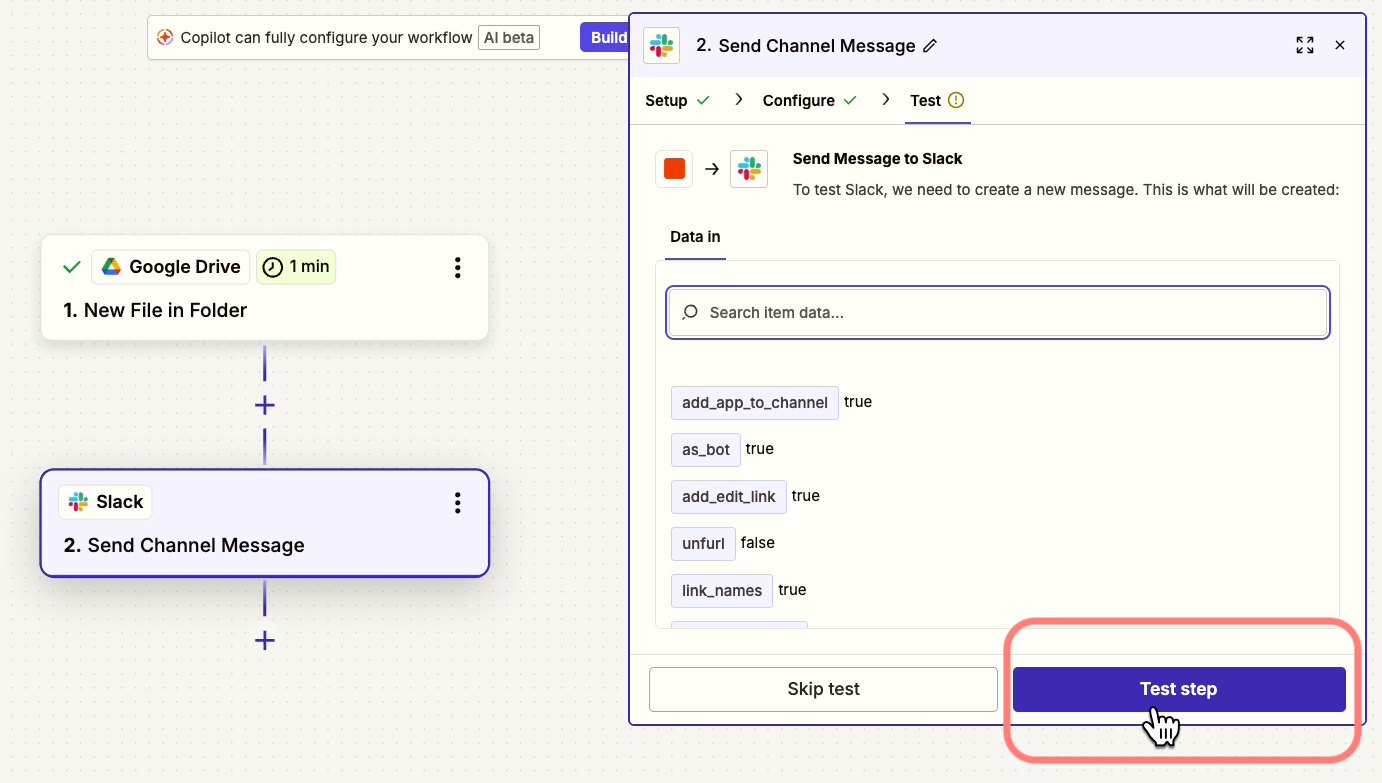
Testing actions in Zapier actually performs those actions, so you can check Slack to see the message.
Below, you can see the Slack message sent by our automation, complete with an actual title and link filled in.
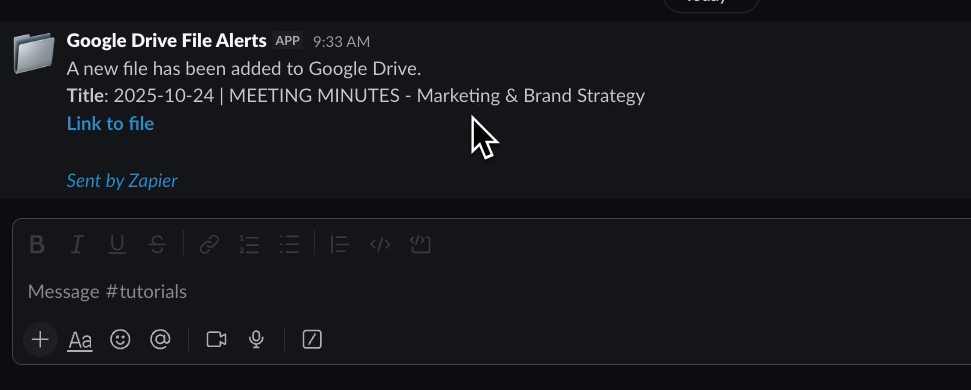
When we click the link, it takes us directly to the doc.
With a trigger and action, we could finish this Zap and turn it on. However, we can easily make this a much more advanced and useful Zap by adding an AI summary to this message.
Go back and add an action after the trigger, and select “AI by Zapier” as the app.
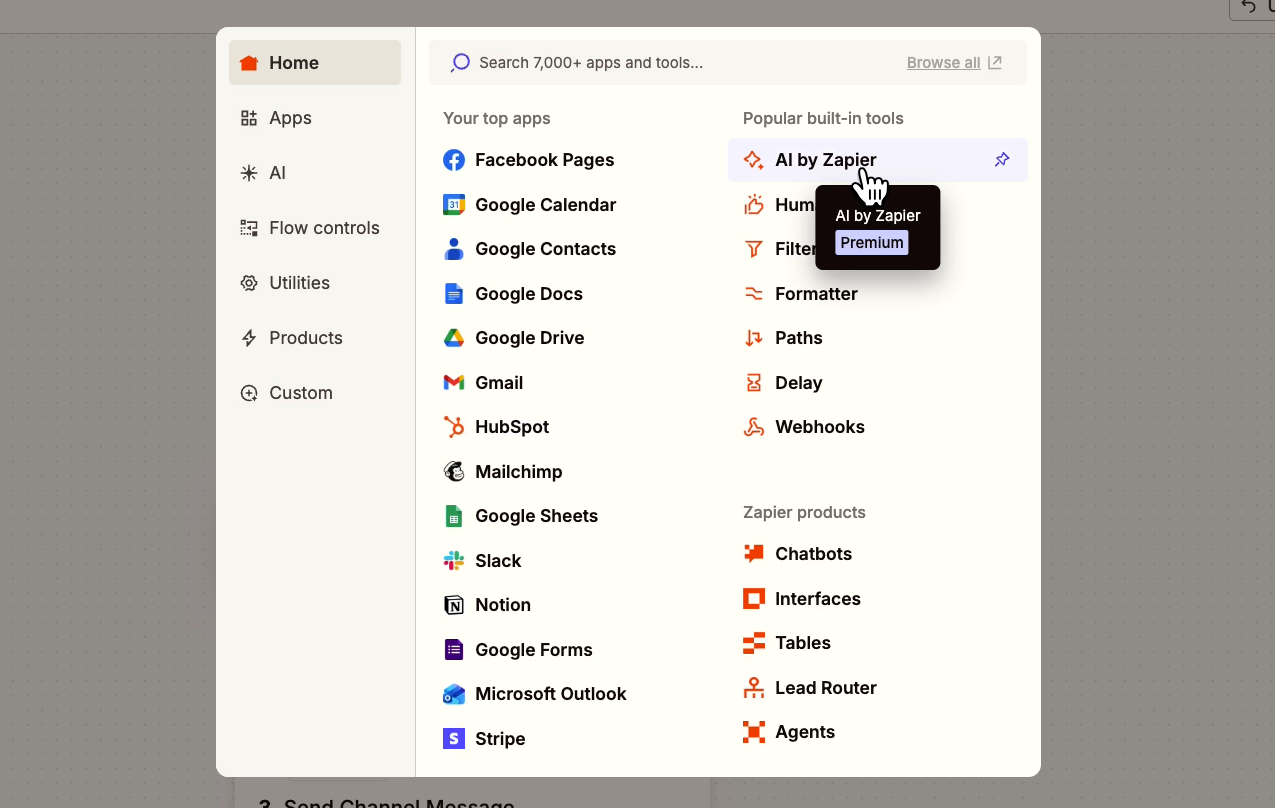
AI by Zapier lets you send AI prompts for free, without even connecting an OpenAI account. This makes it quite a bit different from most apps that you use with Zapier.
In the “input fields”, add a PDF export of your Google Doc.
That variable is called “File PDF”.
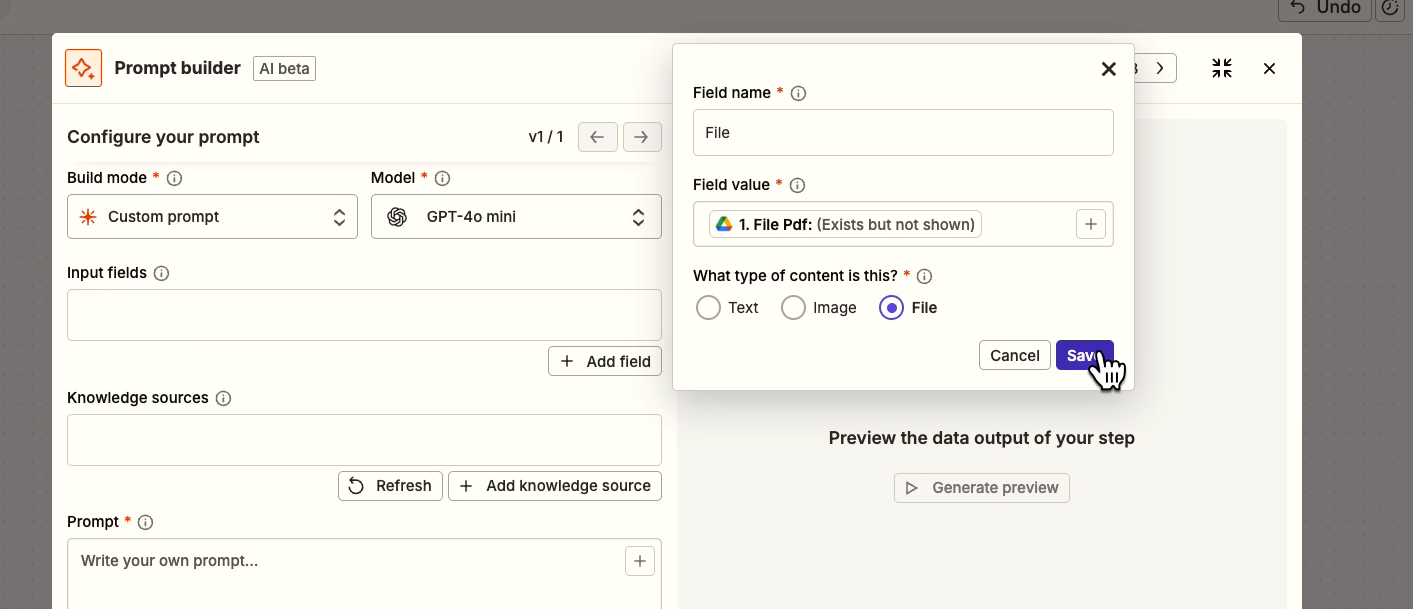
Make sure to note that it is a file, and not text or image content.
Then, write a simple prompt asking for a brief summary of the attached doc. You can find our example prompt below.
As a knowledgeable professional assistant, please provide a very concise bullet point summary of the attached file.
Ensure that your response is clear and straightforward, avoiding any markdown formatting or special characters.
Use hyphens as bullet points. Do not include anything in your response other than your summary.
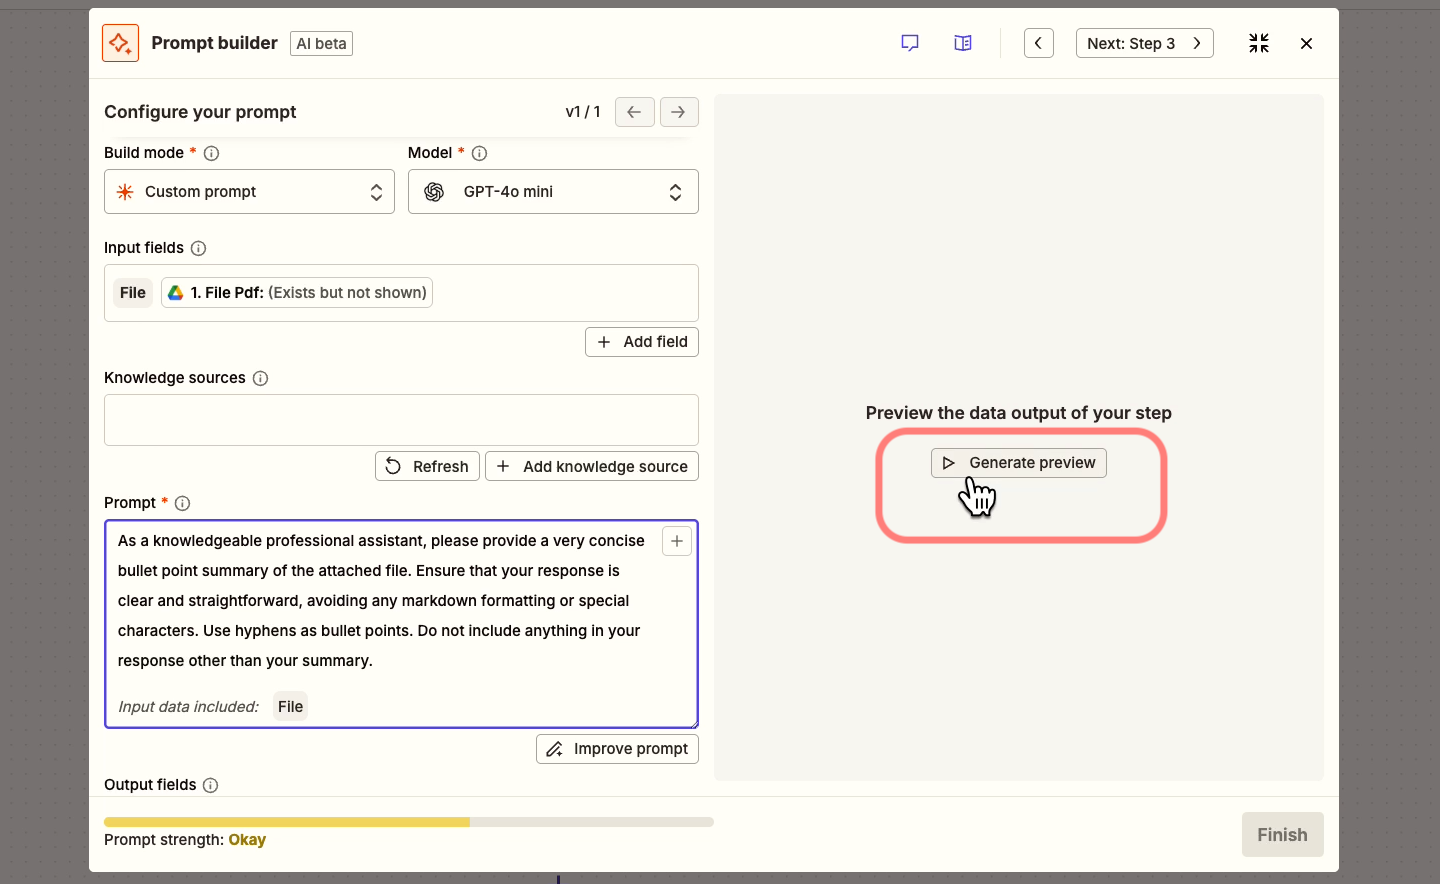
Generate a preview of the AI response.
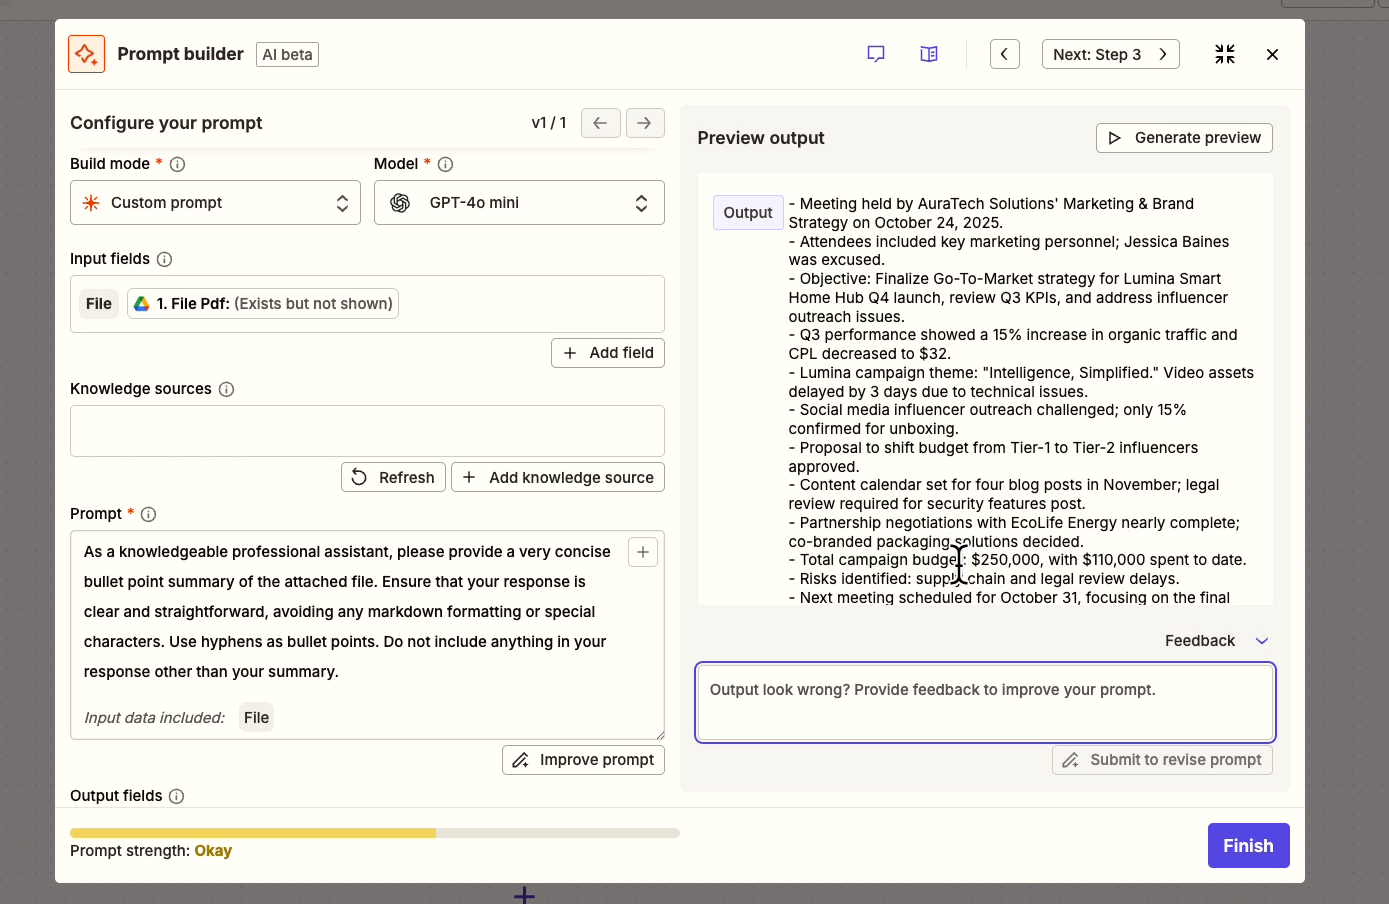
If you’re happy with the output, go back to the Slack step, and insert this “Output” variable into the message.
Then, give your Slack step another test. You should see that the new message includes the AI summary as well.
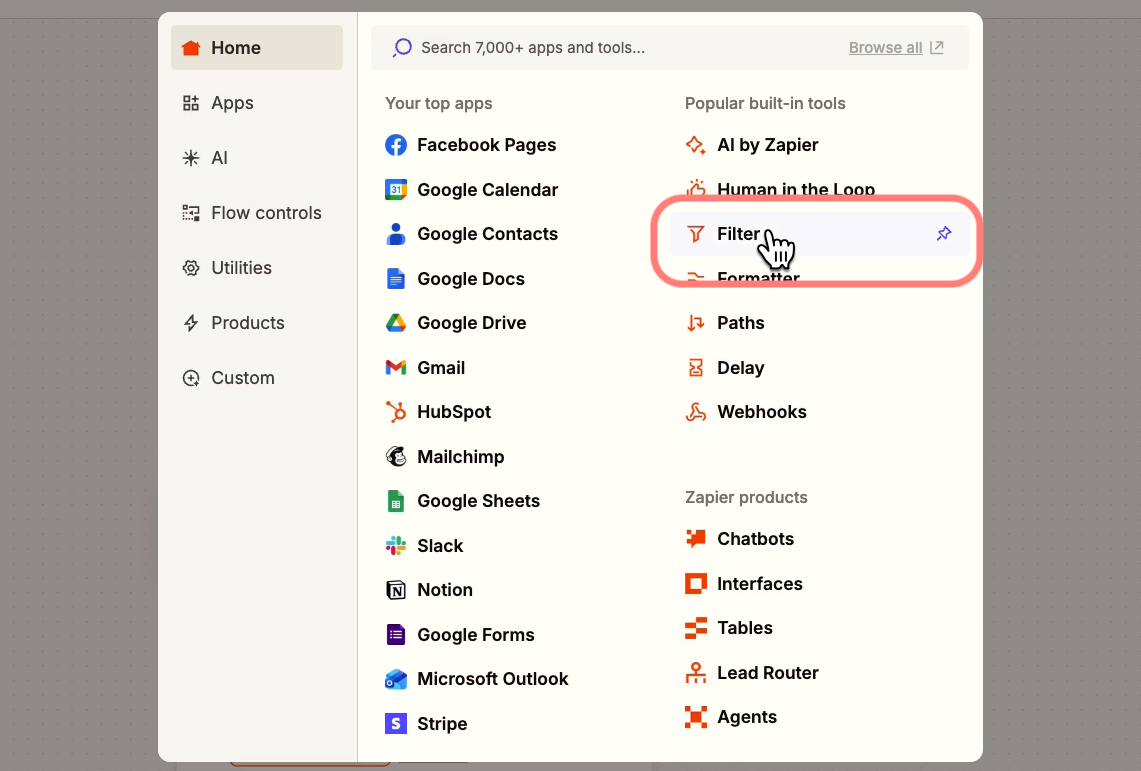
This Zap is looking good, but Zaps aren’t limited to just connecting your apps. There are also several options for flow control, like loops, paths, and filters.
For example, we can add a filter after the trigger that checks the file type of the new file.
Since this automation really only works for Google Docs, adding this filter will make sure it doesn’t run for images or Slide decks or anything other than a doc.
Add a new action right after the trigger, and select “Filter” as the app.
Configure the filter to check the “MIME type” field for a string of text that refers to a Google Doc (copy below).
application/vnd.google-apps.document
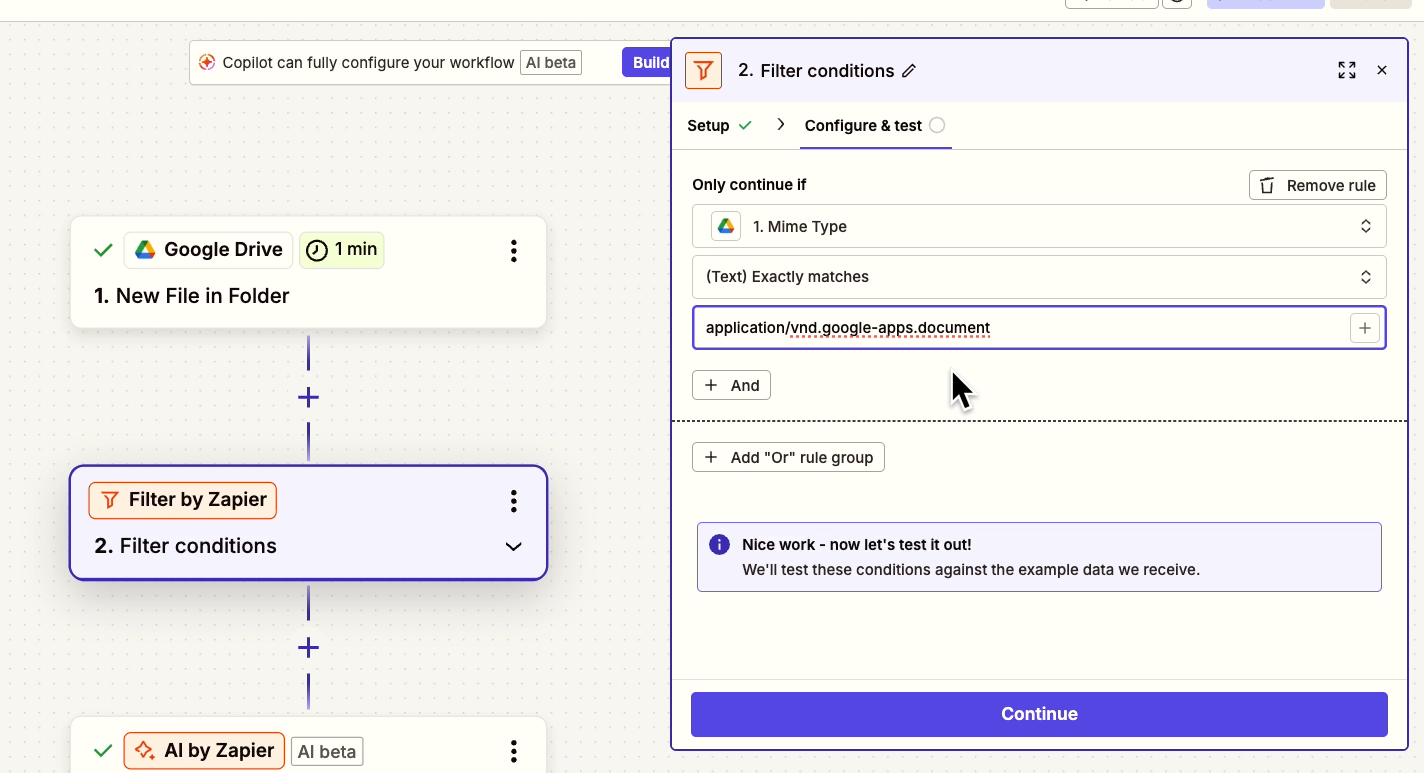
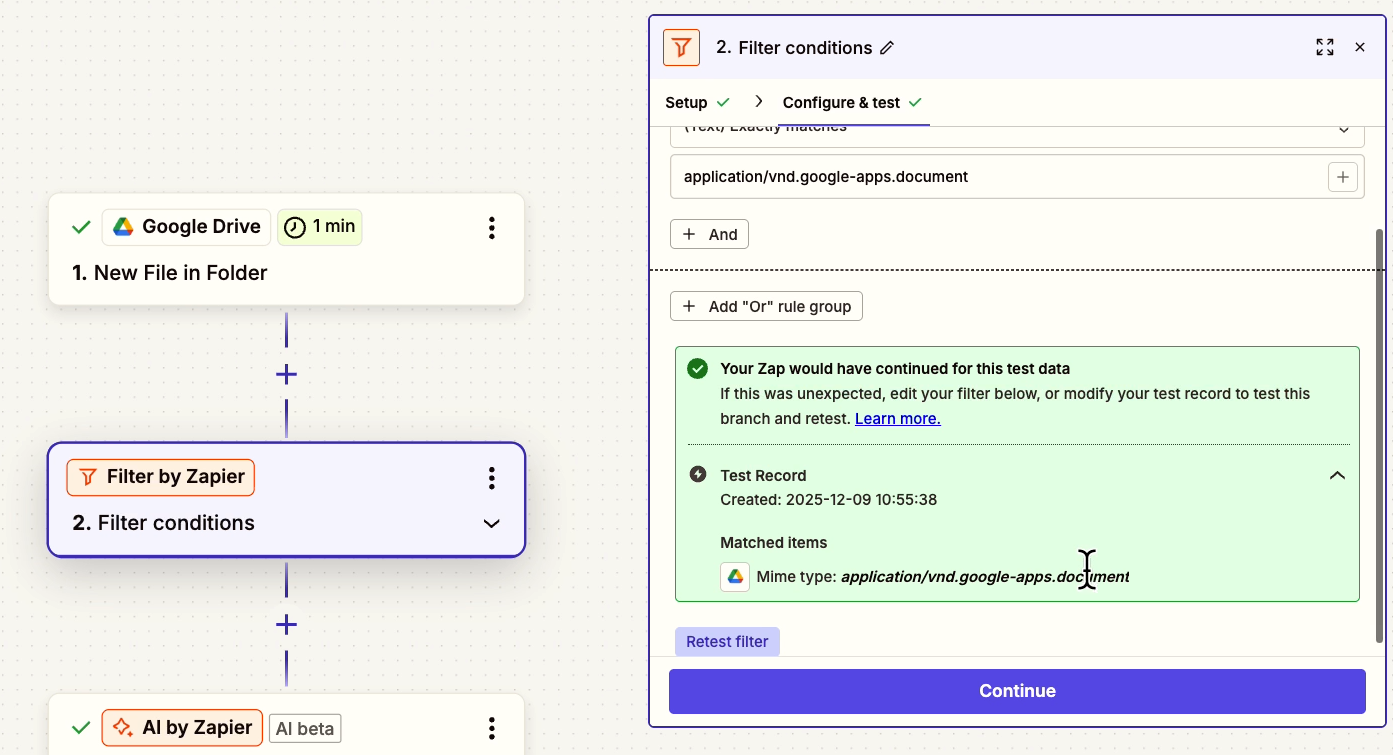
When you test the filter with a Google Doc selected in the trigger, your data will pass the filter, and the automation will continue.
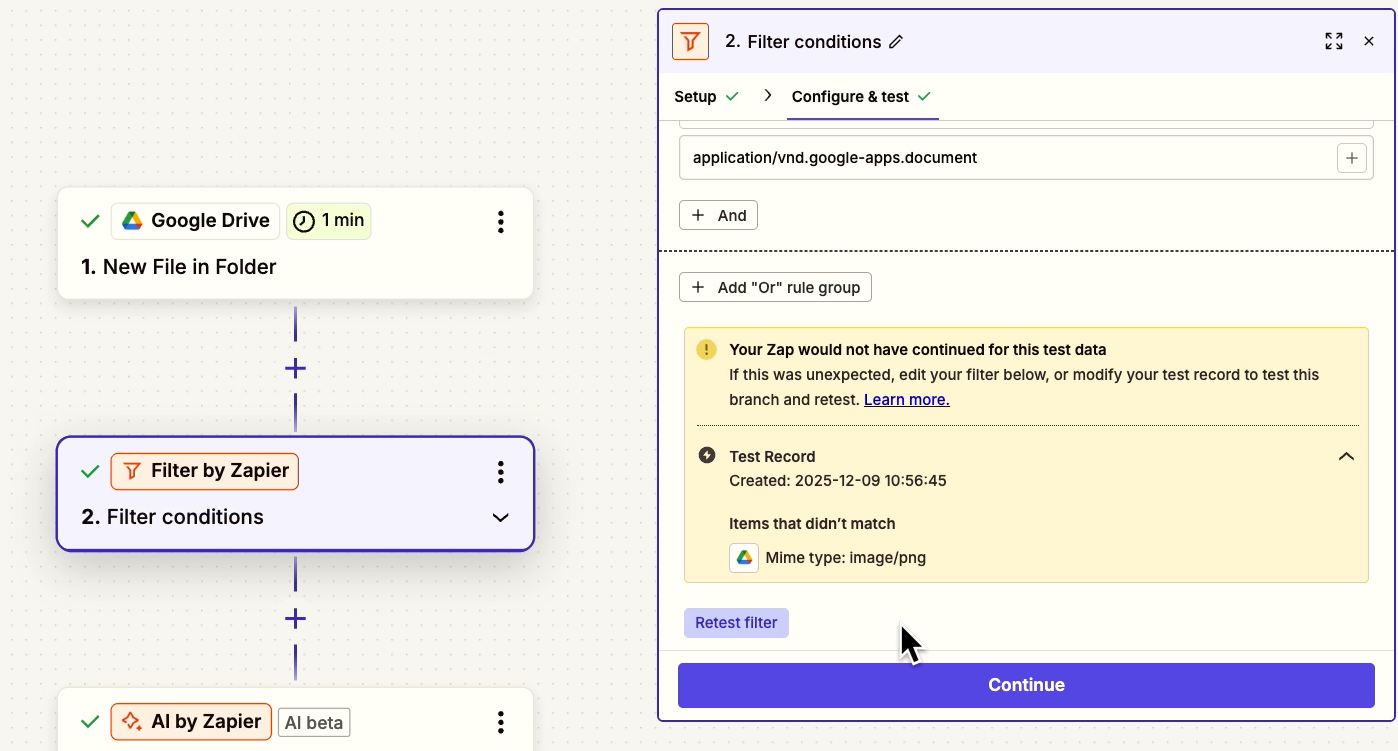
Try selecting another file type as your trigger test data - like a PNG image.
When you test the filter again, Zapier says it wouldn’t proceed, because it’s not the right file type. The automation would stop without running the AI or Slack steps.
Now this Zap is all set, so you can turn it on and publish it.
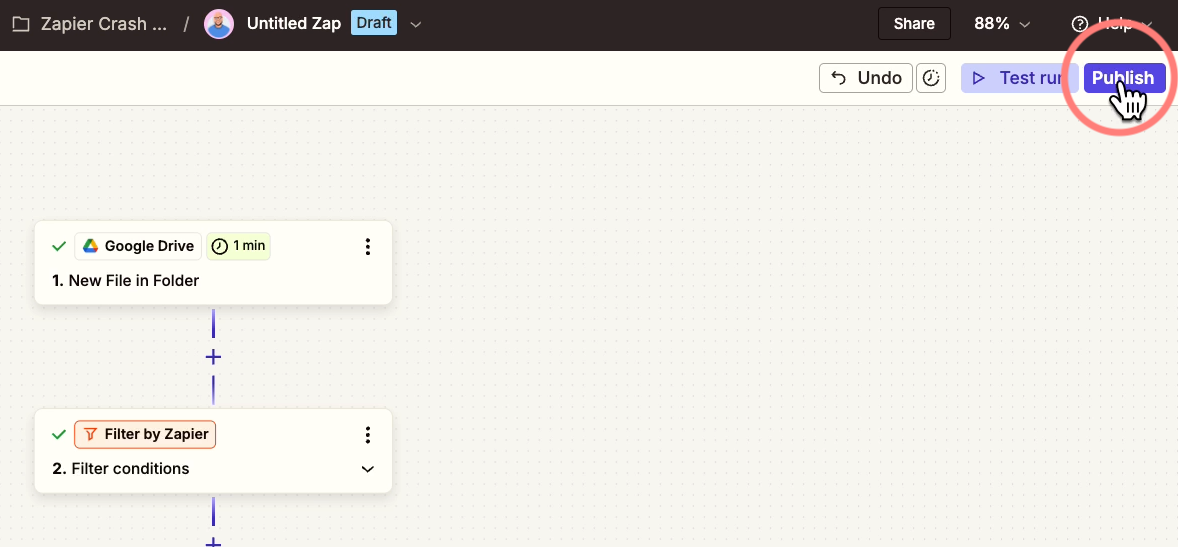
Note that if you’re on a free plan, you won’t be able to publish a multi-step Zap like this.
You’ll be able to build it and test it, but you won’t be able to turn it on and use it.
That covers the basics of using Zapier.
You should now know how to create a Zap with a trigger, a couple of actions, and a filter.
If you’d like to learn more about using Zapier, you can check out the in-depth tutorials on our blog.
For one-on-one expert support, you can also go to hourly.xray.tech to schedule a collaborative building session with one of our vetted low-code engineers.


.pptx.png)
.pptx.png)