
Your Notion automations are burning through credits. Every few minutes, they check for new records. Most of the time, there's nothing new – but that still uses up your limited credits each month.
Meanwhile, you're sitting there waiting for your automation to run, watching the clock tick by.
Notion's webhook feature solves both problems. It triggers automations instantly, exactly when you want them to run. In this guide, we’ll show you how to get started with webhook buttons step by step.
We’ll cover the entire process in detail, but let’s start with a quick overview of the key steps.
1. Create a webhook button - Add a button property to your Notion database and configure it to send webhook data
2. Get your webhook URL - Set up a custom webhook in Make and copy the URL
3. Connect the webhook - Paste the webhook URL into your Notion button and select which database properties to include
4. Test the connection - Click your button and verify the data appears in Make
5. Process the data - Add modules in Make to send your webhook data to other apps like AI tools or your CMS
Most automation providers use polling triggers to watch databases. These run on a set schedule, checking your Notion database every few minutes looking for new records.
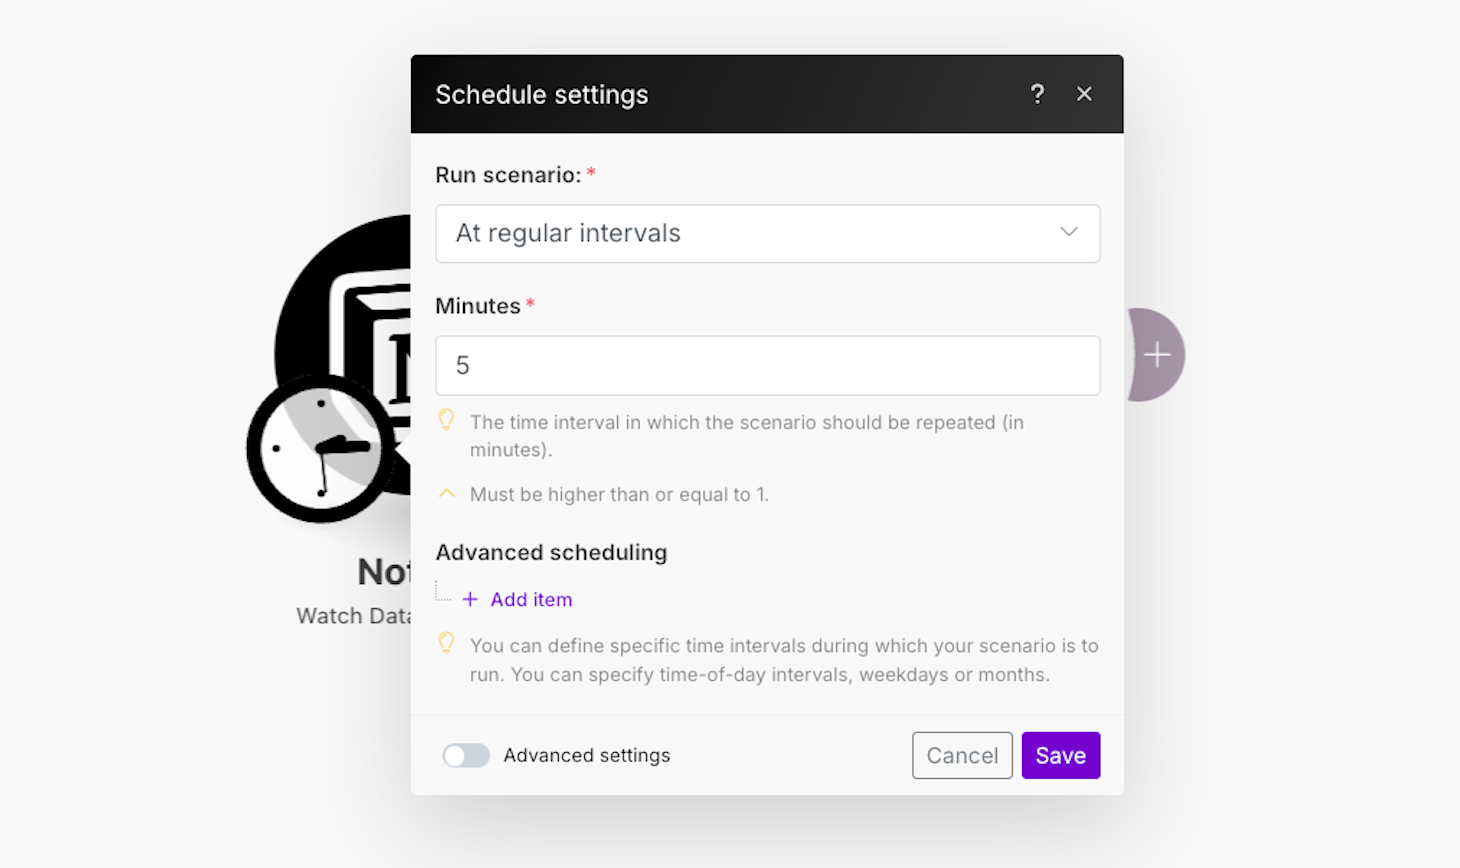
On a polling interval of 5 minutes in any automation provider, you may need to wait the full five minutes for an automation that you probably want to run instantly.
However, there's an even bigger issue with Make specifically. Every time a polling trigger runs, it consumes a credit, even when there's no new data.
An automated scenario checks 288 times per day on a 5-minute interval. That's 288 credits burned daily, whether your automation actually finds and processes any new data or not.
Run just a few scenarios like this and you'll hit your monthly credit limit fast.
To work around this, you might try setting a longer polling interval or scheduling your automations to run during limited hours – but then you're stuck waiting longer between checks to conserve credits.
Webhooks solve both problems. They run instantly when triggered, and connected automations only consume credits when they actually fire.
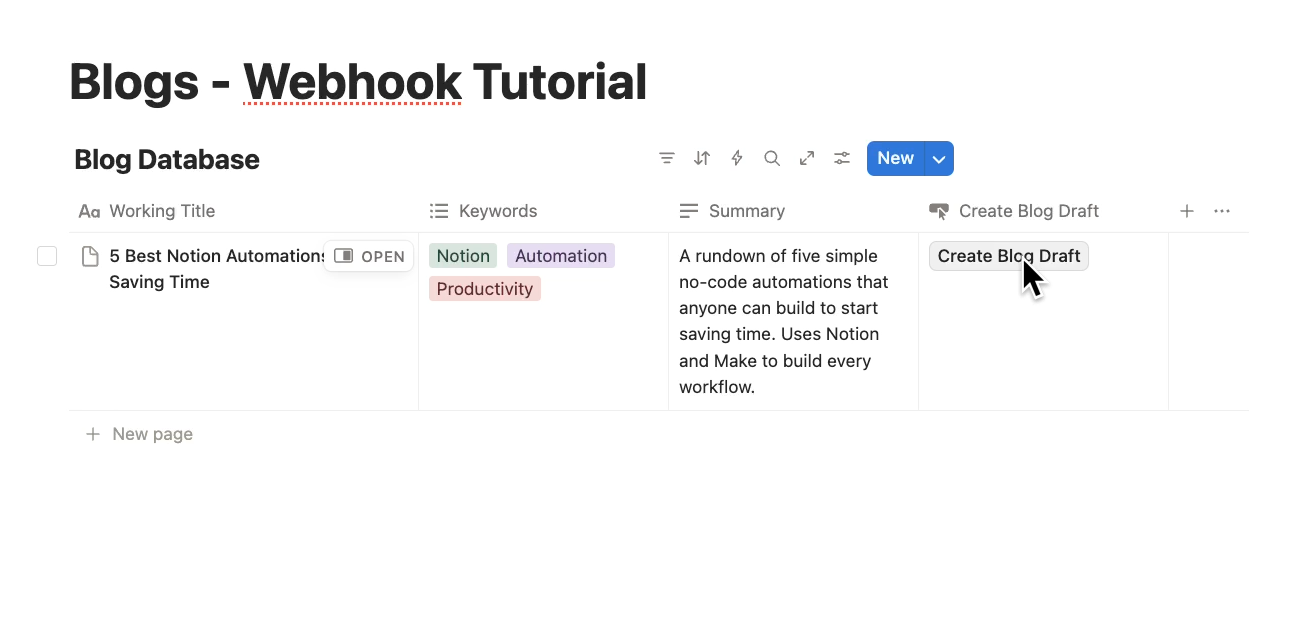
Let's create a webhook button in Notion and build a connected automation. For this example, we'll use a blog database that contains notes like a title, keywords, and a summary. The webhook button will trigger an automation that uses this data to generate a blog post with Gemini AI.
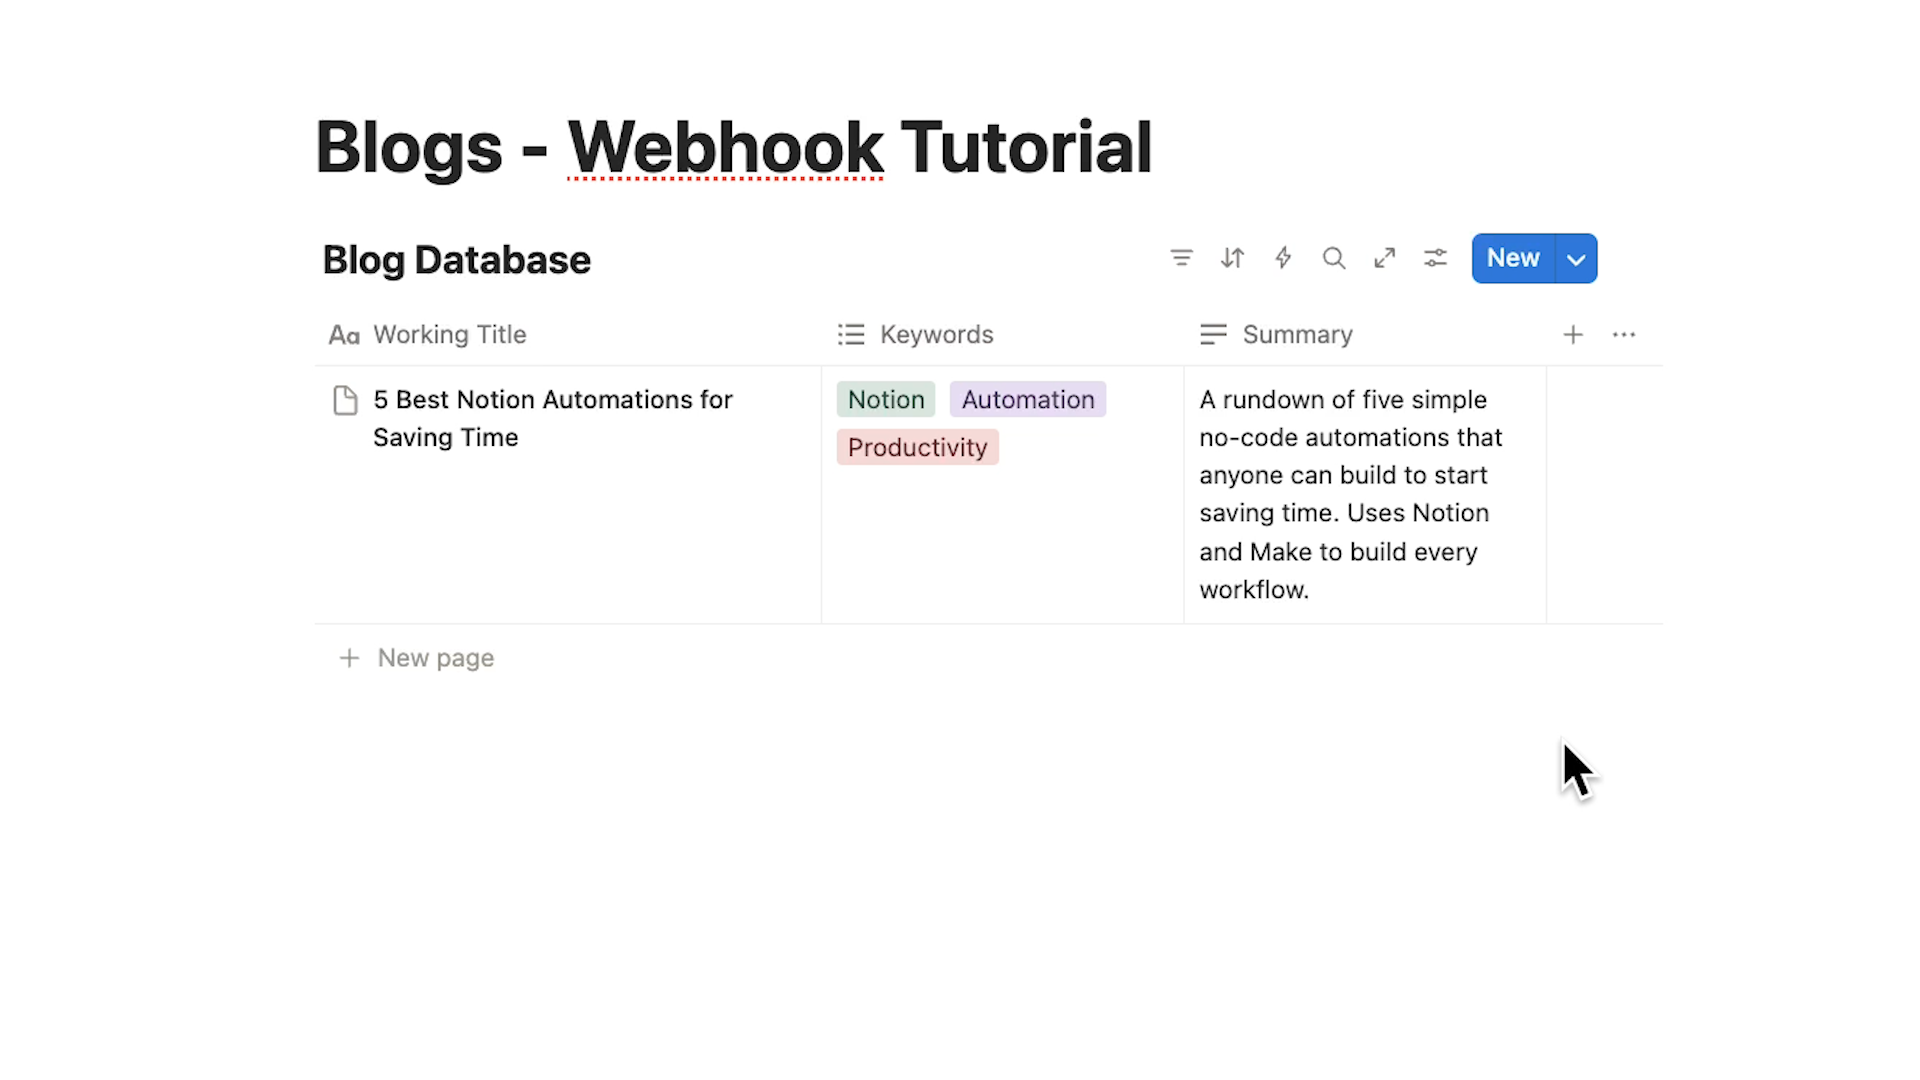
However, you can build any workflow you’d like.
Start by opening your Notion database.
Add a new property, and choose "Button" as the type.
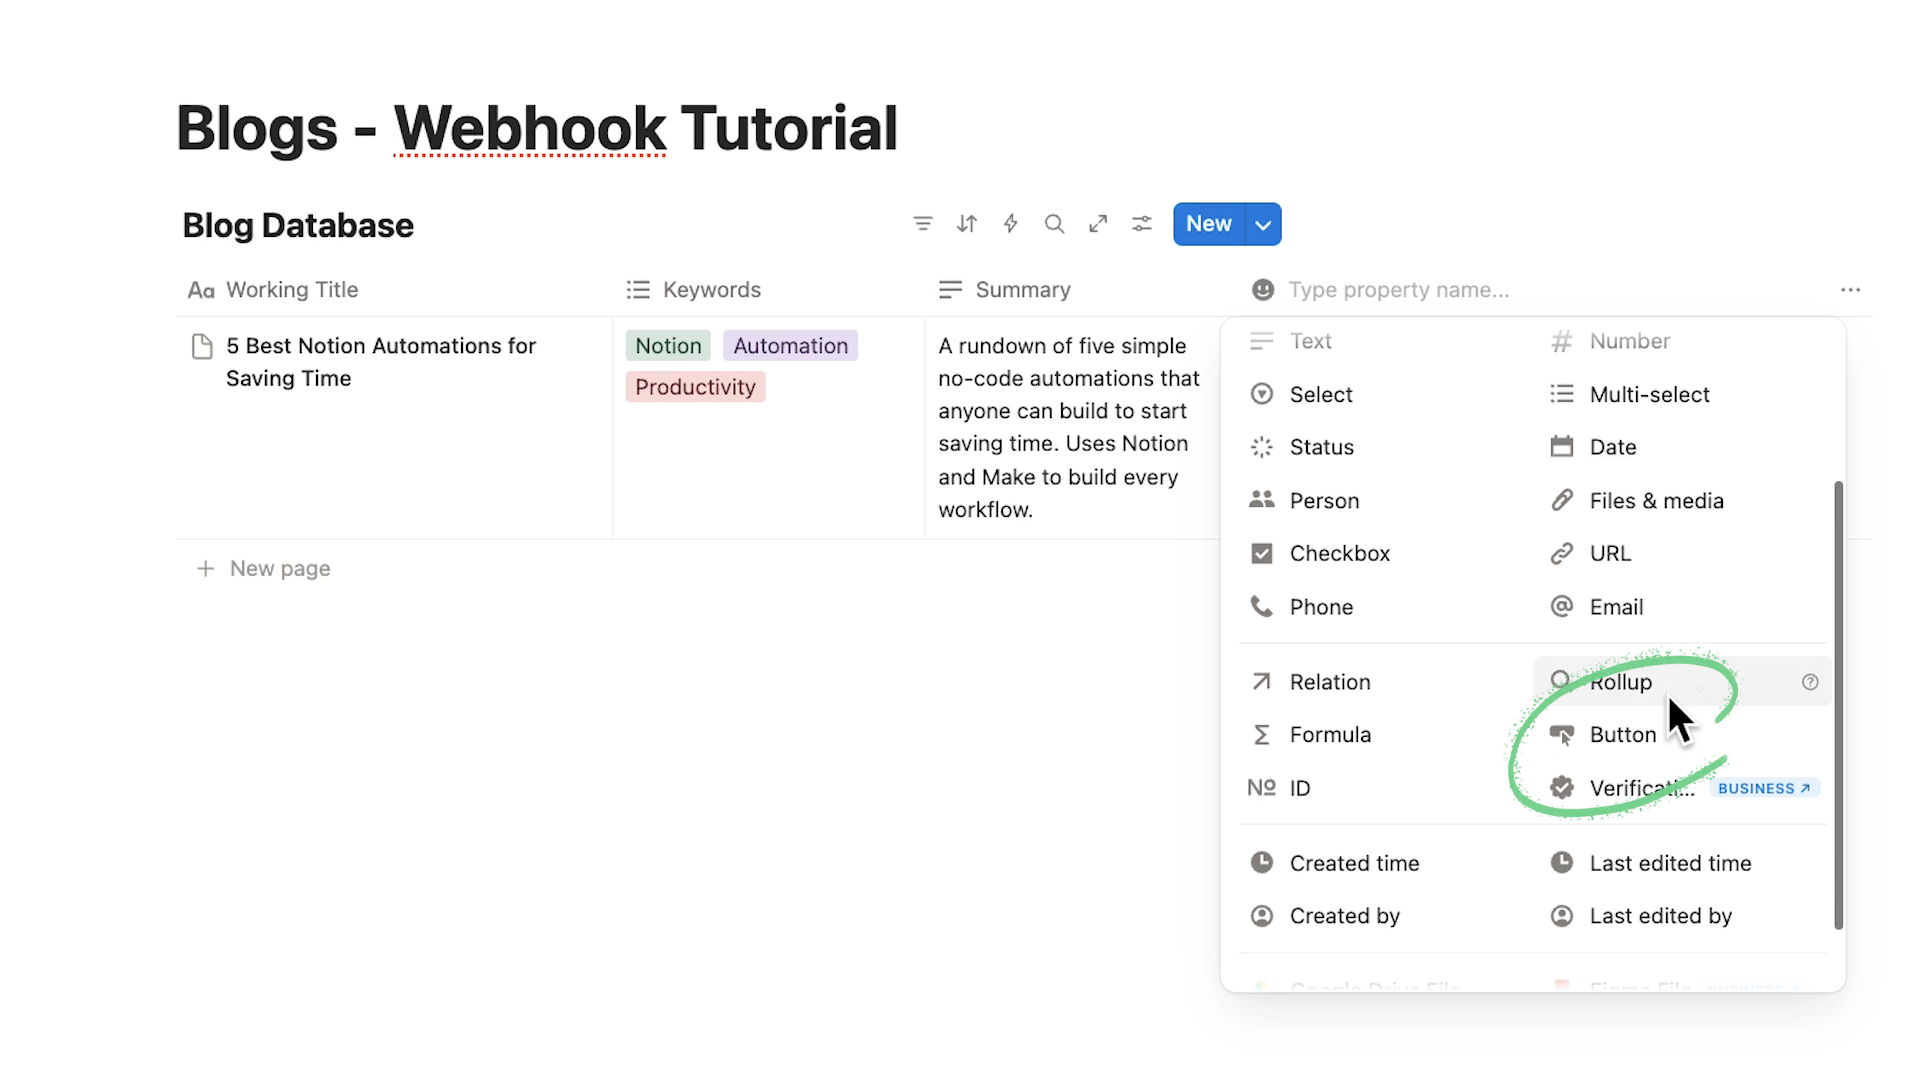
Name your button something descriptive. For this example, we'll use "Create Blog Draft."
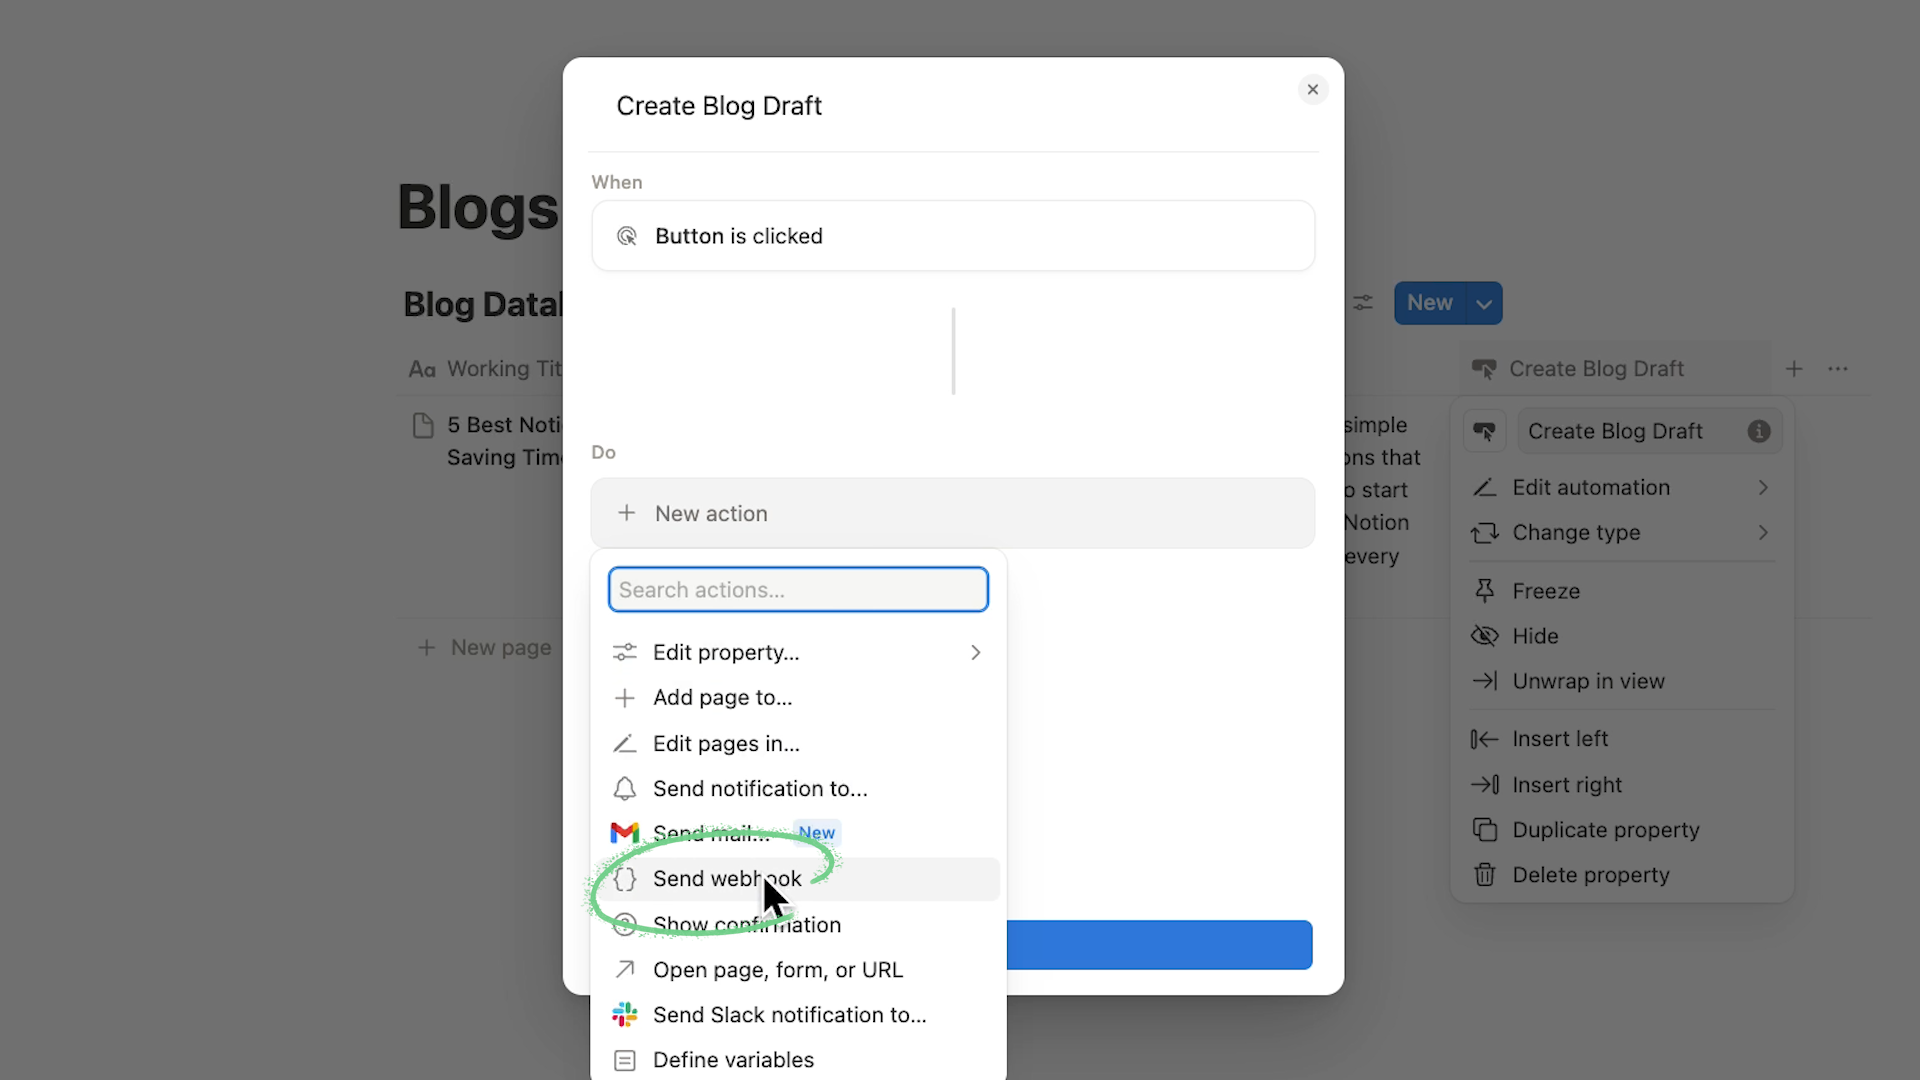
Add an action to your button.
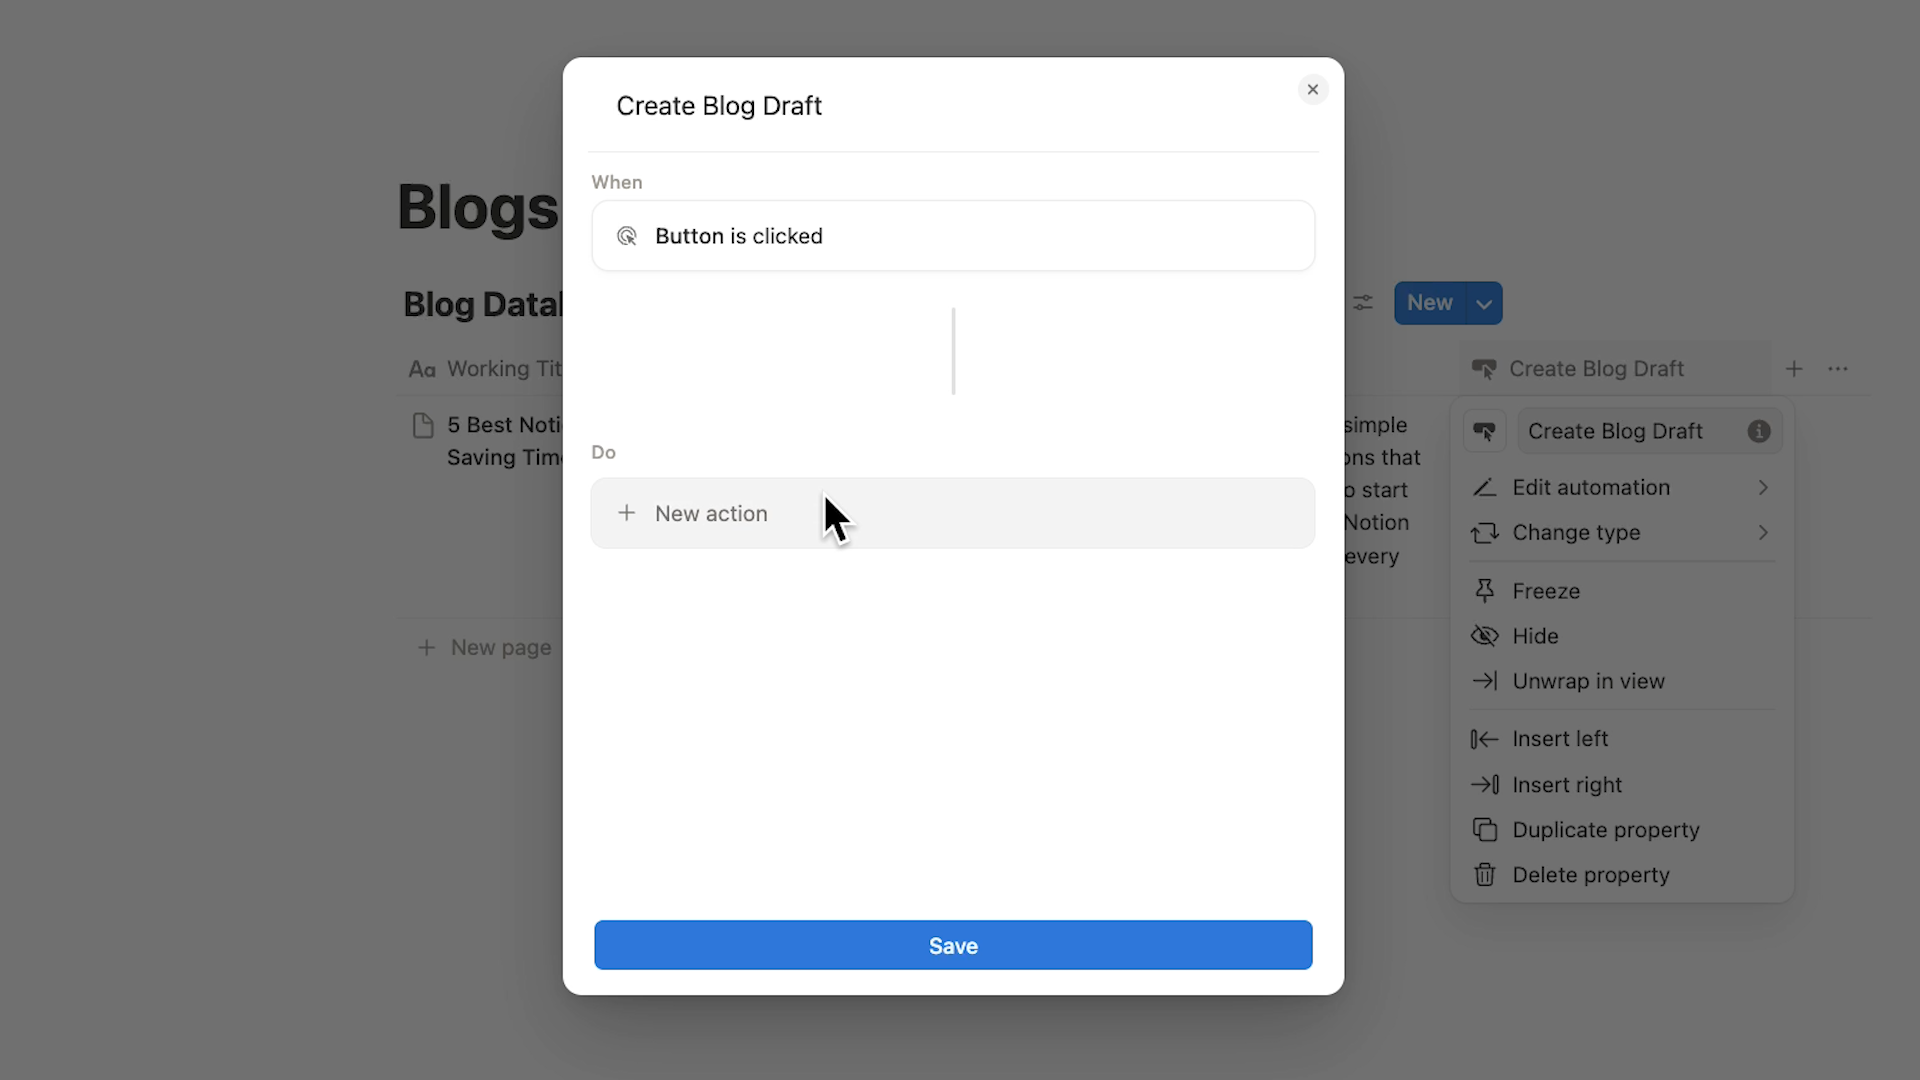
Select "Send webhook."
The first piece of information you need is a webhook URL.
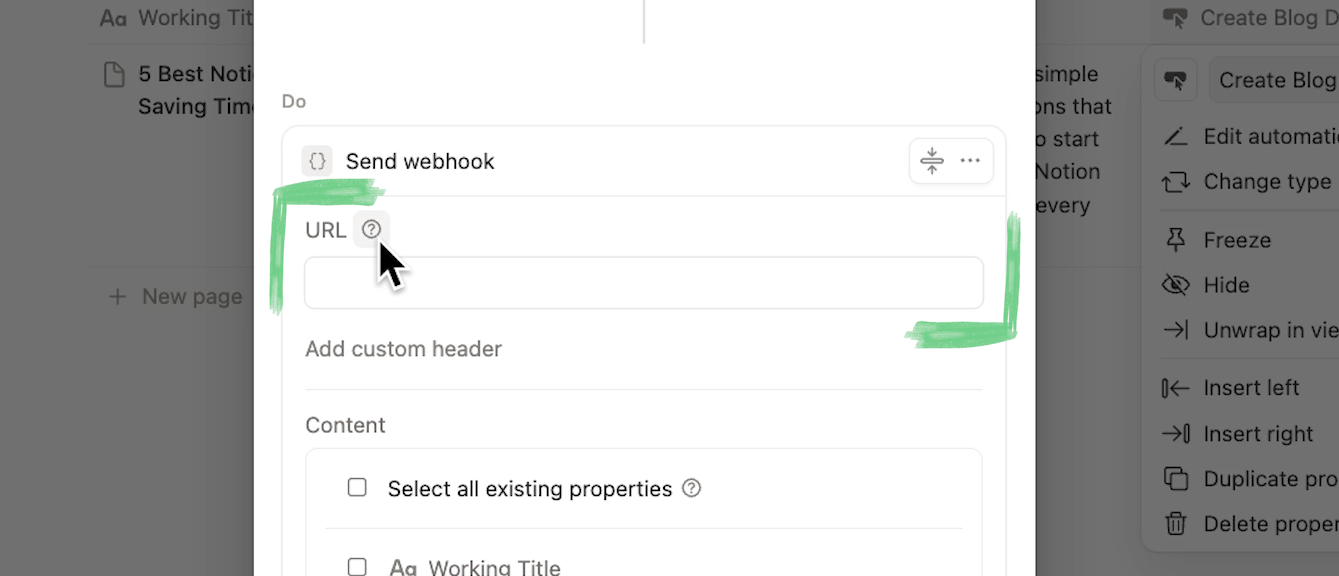
This is where Notion will send the request when you click the button. You can get the webhook URL from Make.
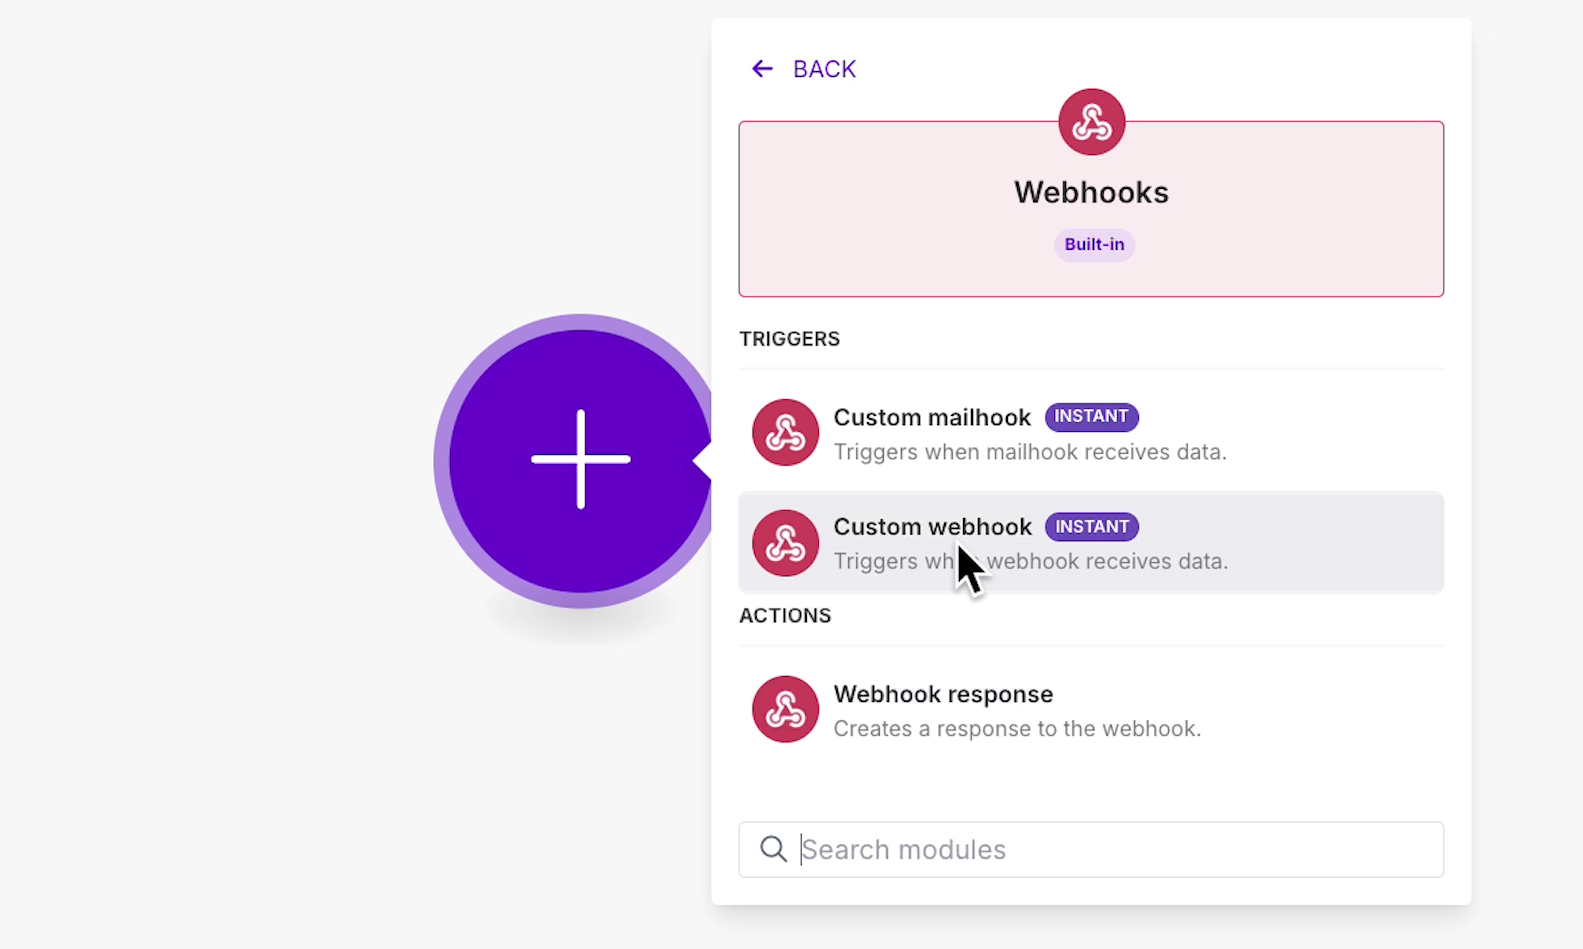
Open Make and create a new scenario. For your trigger module, choose "Webhooks", then select "Custom Webhook."
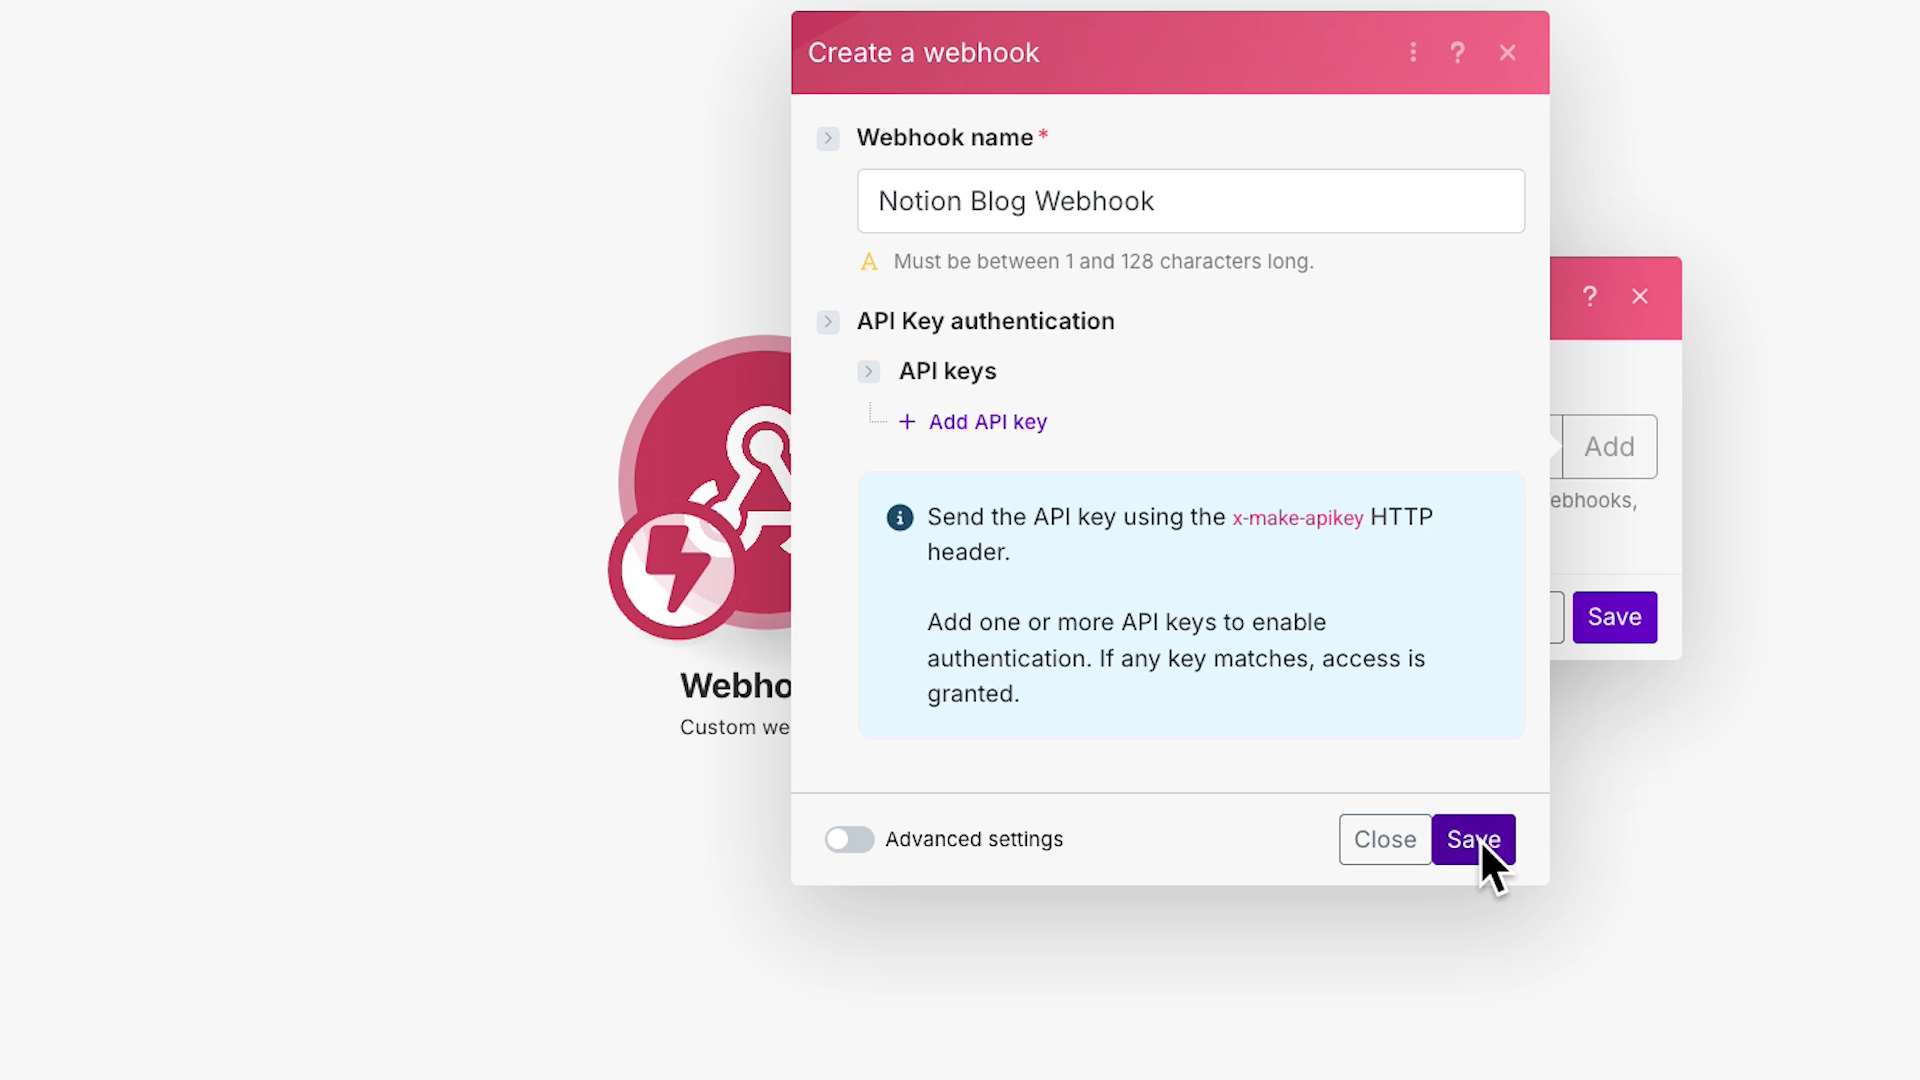
Click "Add" to create a new webhook.
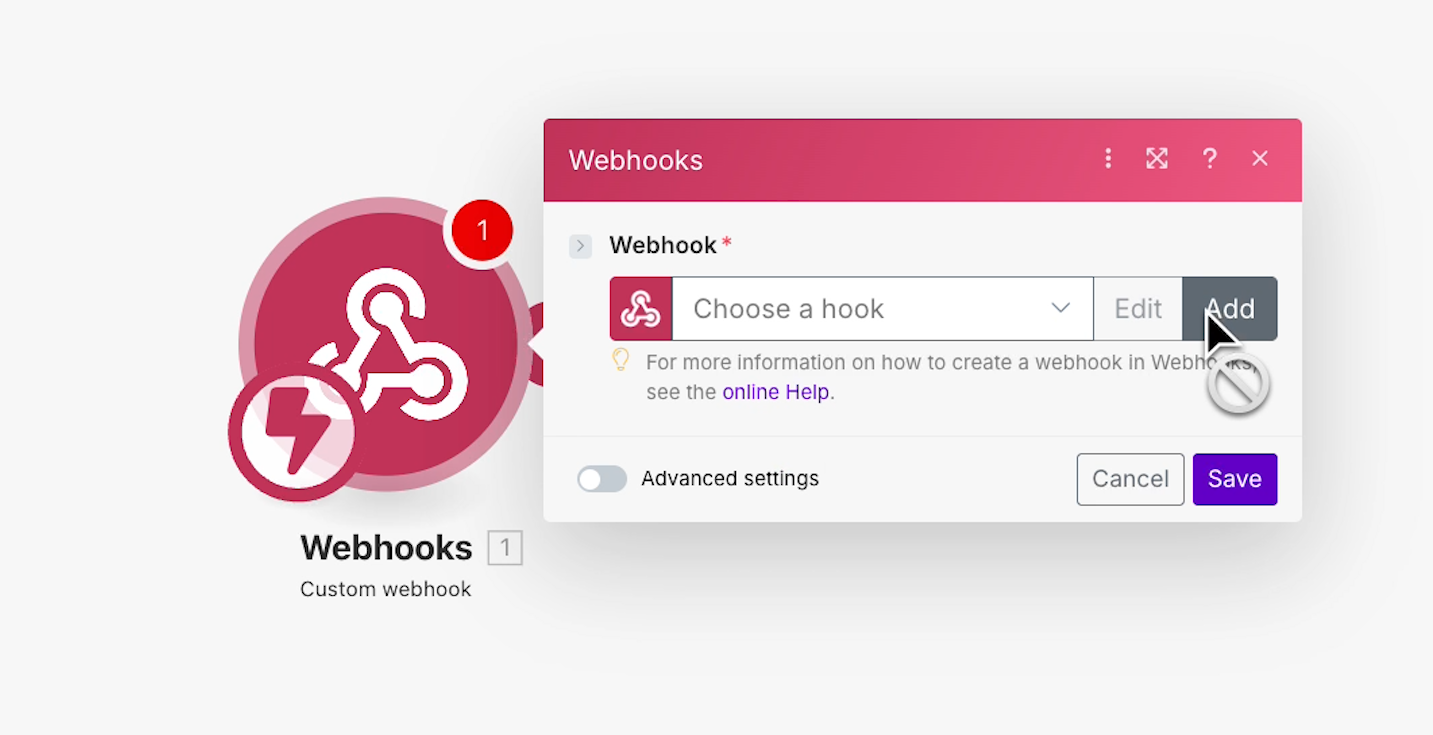
Give it a clear name like "Notion Blog Webhook." There are several advanced configuration options, but the default settings work fine for most basic setups.
Click "Save" to create your webhook.
Your webhook is now live and listening for requests.
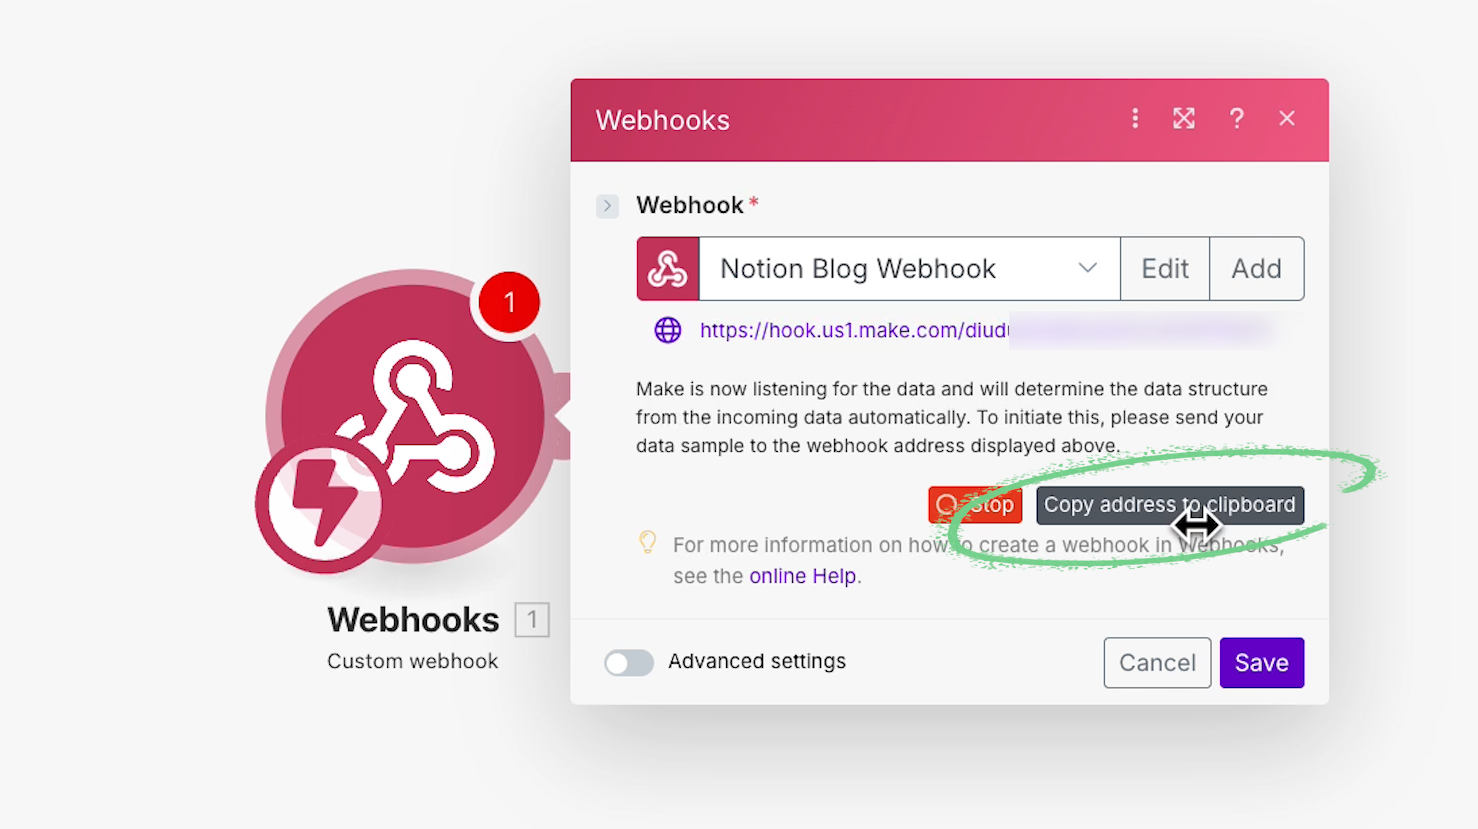
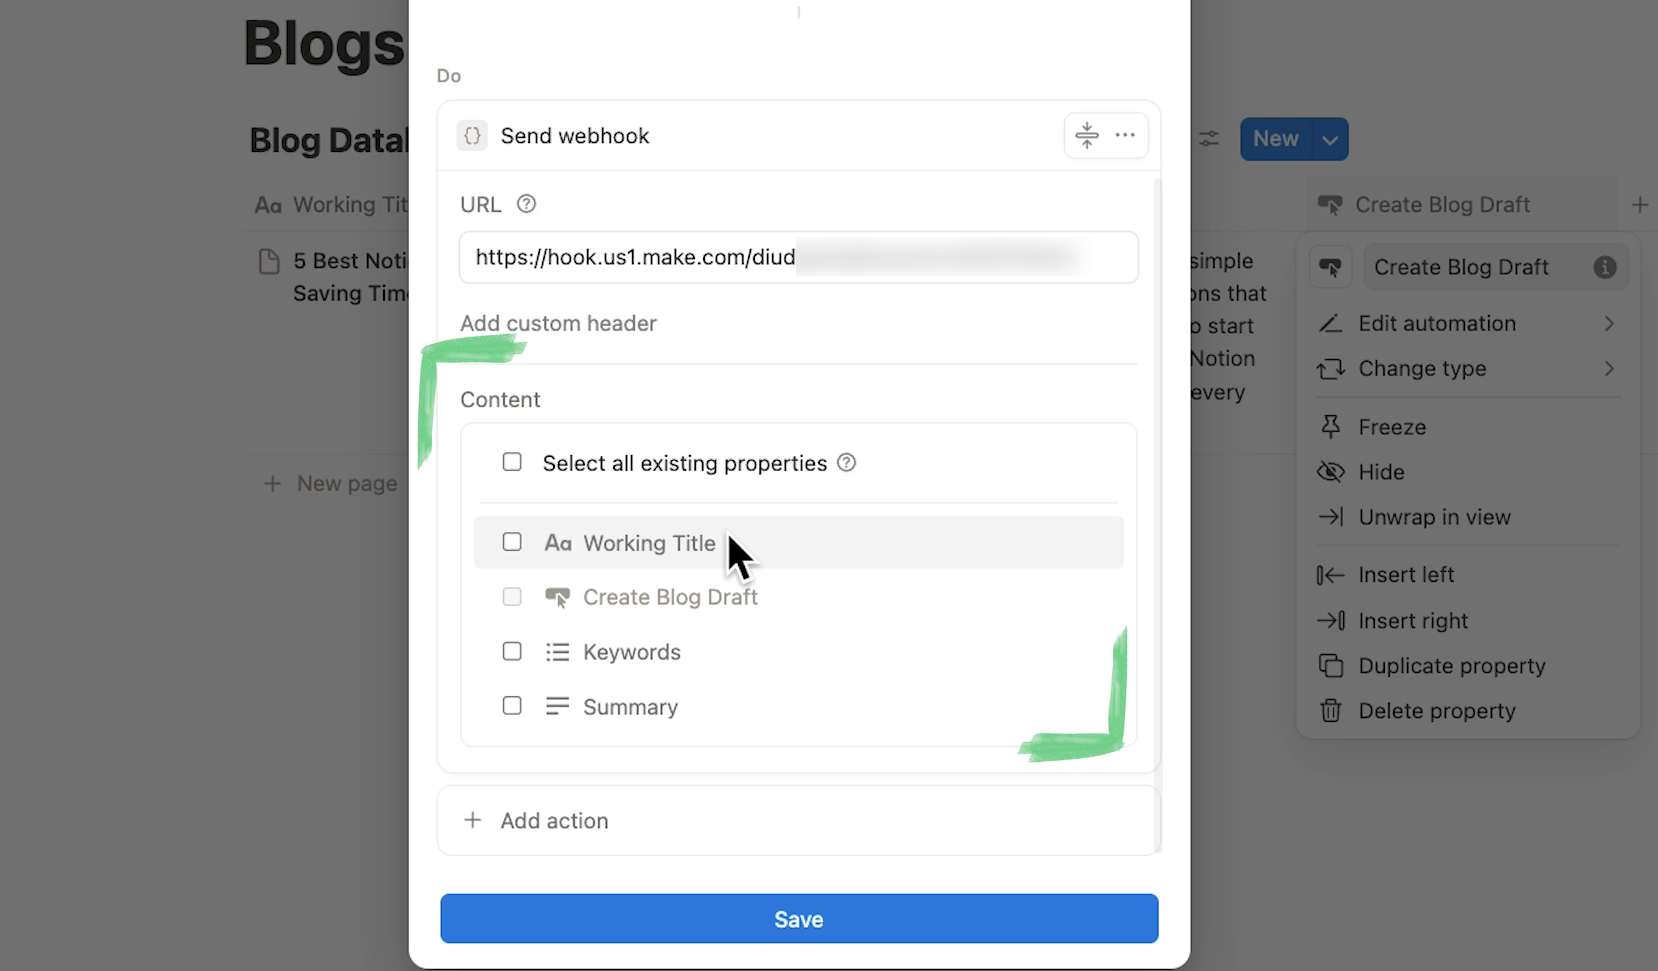
Copy the webhook URL and paste it back into Notion's URL field.
The "Content" section in Notion is crucial. Here, you can determine what Notion data gets sent along with your webhook request.
Use the checkboxes to select the individual database properties you want to include, or add them all at once. For our blog example, we'll include everything.
This option to send content along with your webhook is why database buttons are the best way to use webhooks in Notion.
When you create a button on a regular Notion page, you can only send static custom headers. Database buttons automatically send the page property data whenever you click the button.
However, the webhook button won't send page content. If you want to send over a long piece of text, you can either add it as a text property in your database, or do a lookup of your page content in your automation.
You can add several actions to a single button if you’d like, but the webhook action is all you need to trigger an automation in Make.
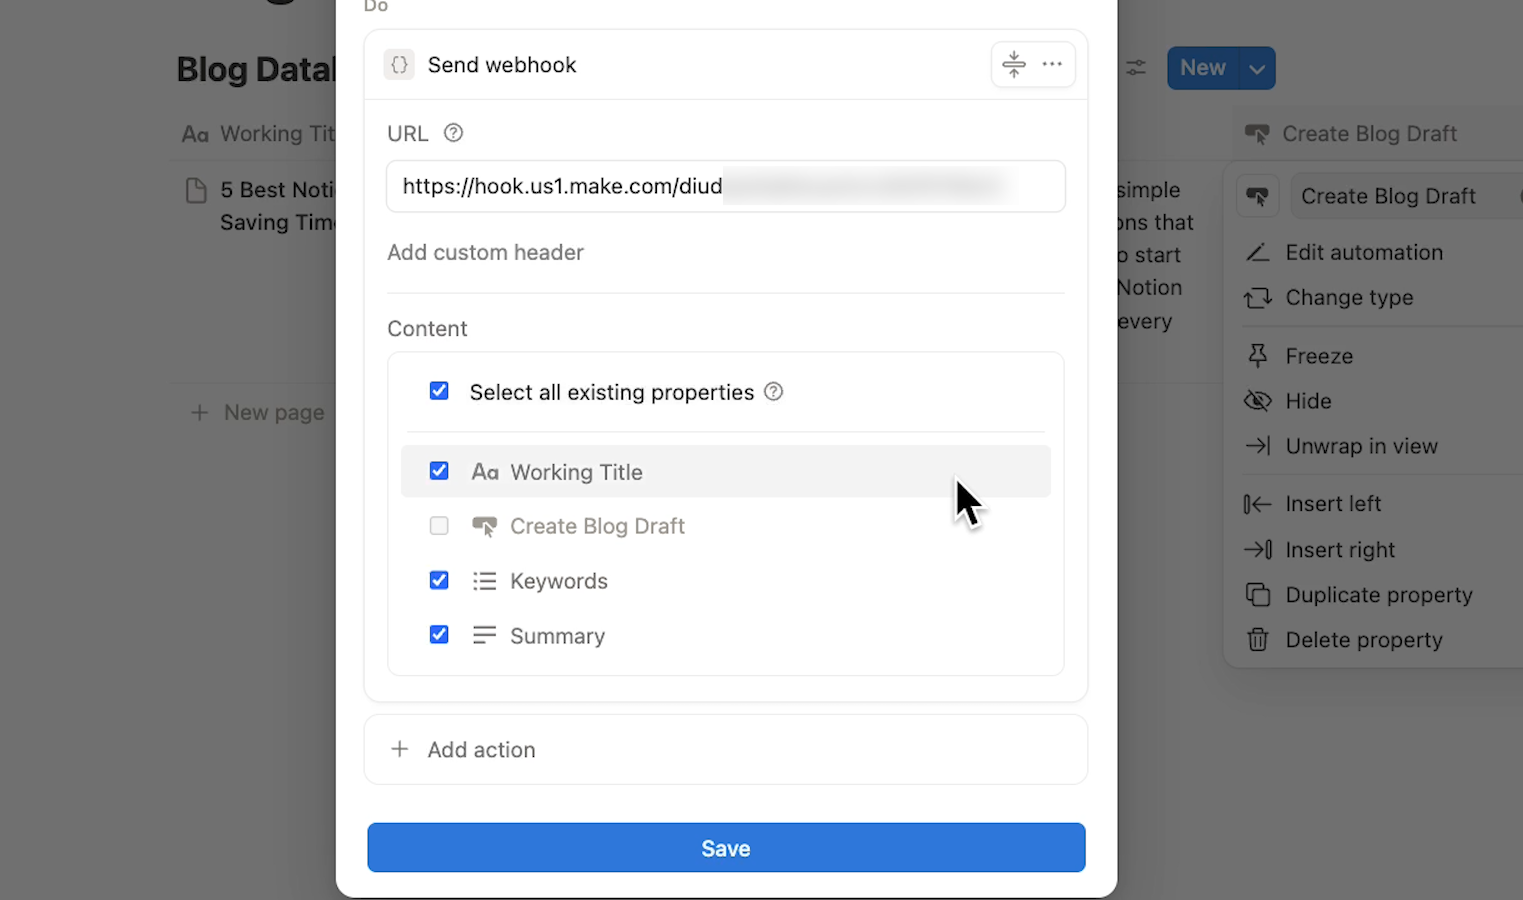
Once you’re all set, click "Save" to finish setting up your button.
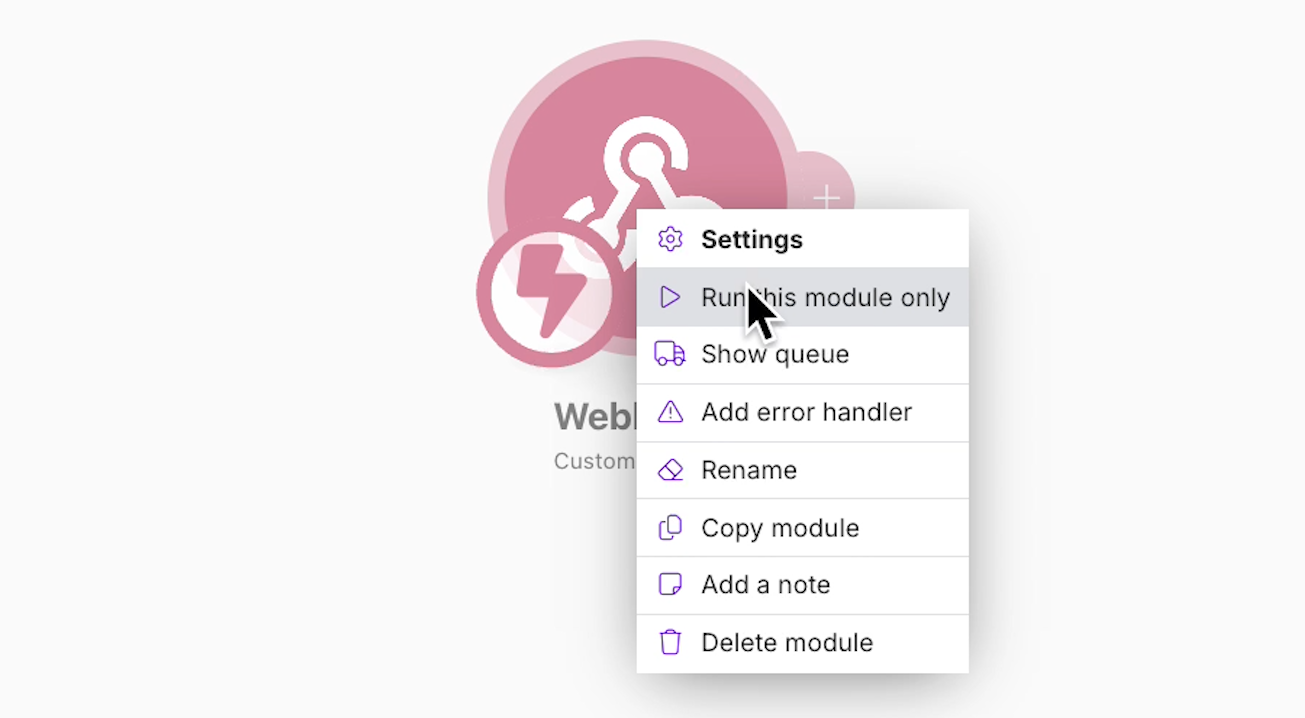
With your button configured, it’s time to test out the webhook. In Make, right-click your webhook module and choose "Run this module only."
Back in Notion, click your webhook button on any record.
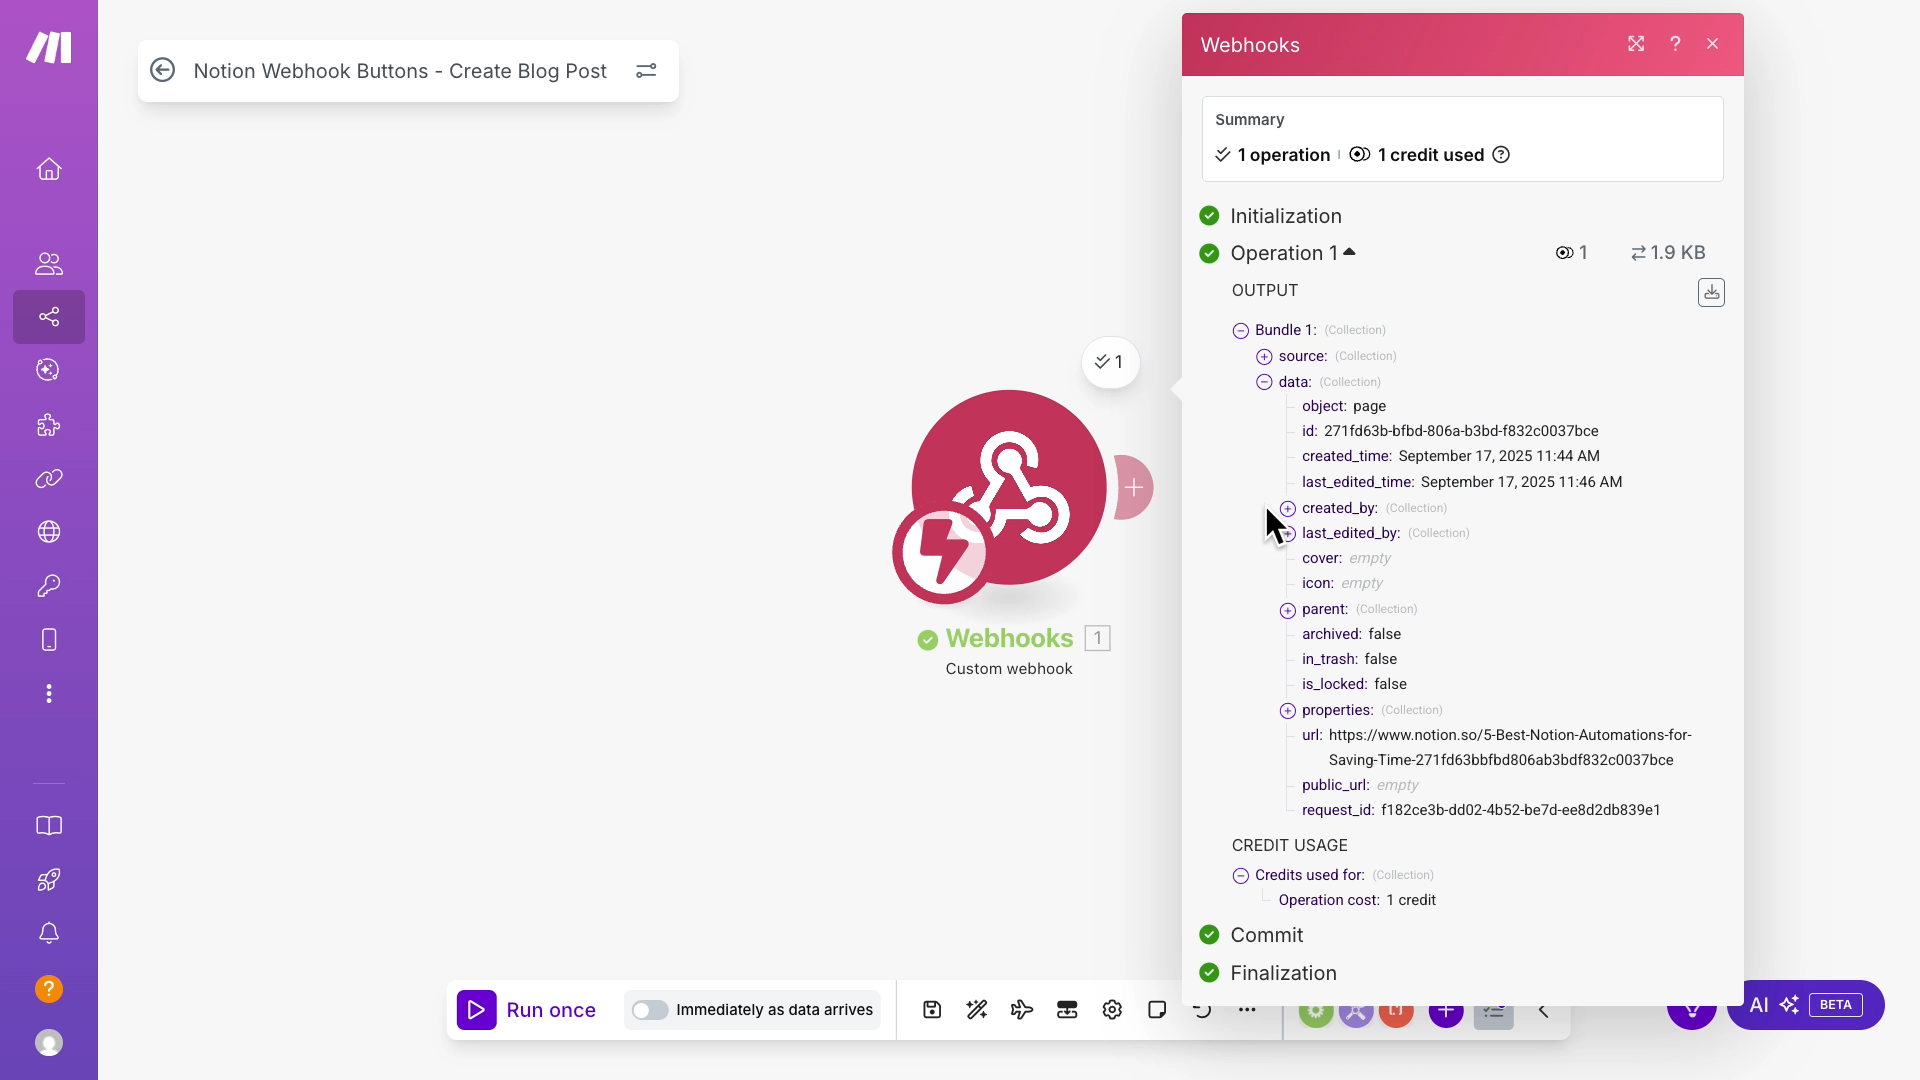
Switch over to Make again. You should see the webhook data appear, including all the properties you configured.
Now we can add modules to process this Notion data and send it to any other app. For instance, you could send project information to QuickBooks to generate invoices automatically, or you could push new employee data to Asana for onboarding tasks.
For our blog example, let's send this content to Gemini to create a draft. Gemini’s API has limited free access, so it’s a great AI tool to use when you’re building and testing automations.
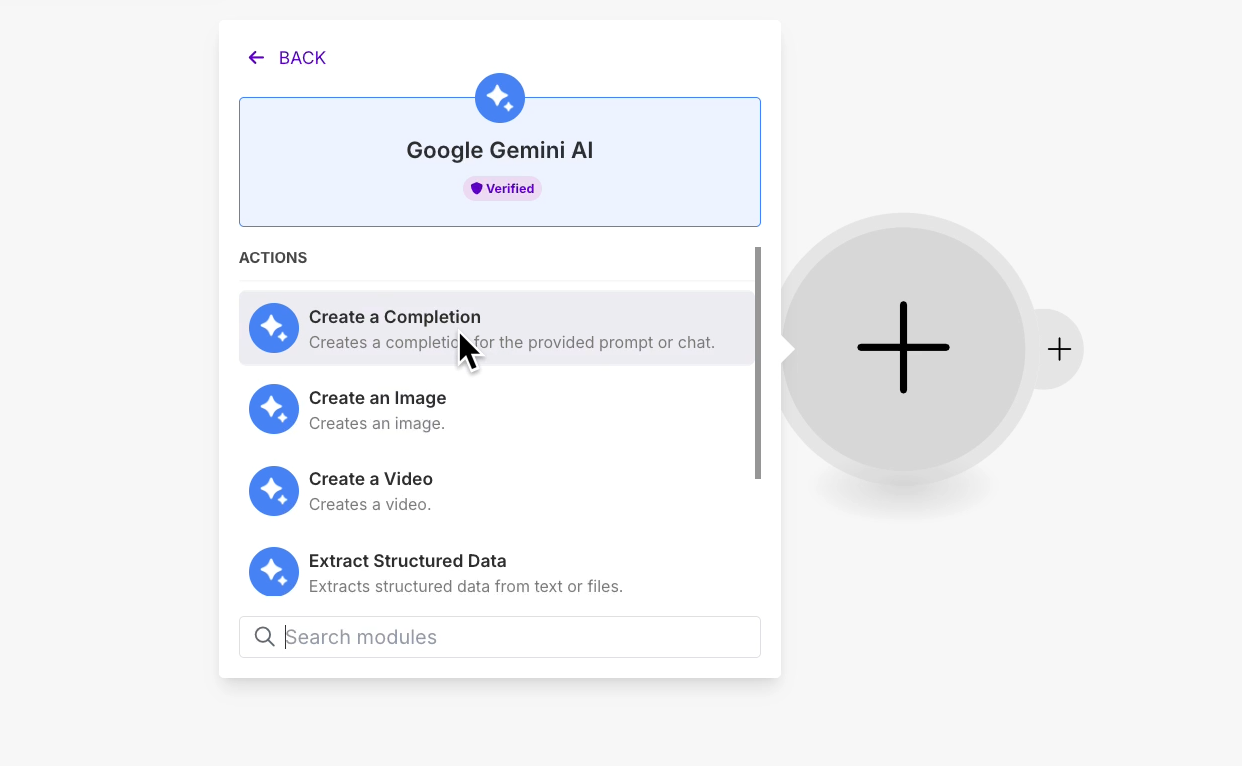
Add a module and choose the app you want to send your Notion data to. We’ll pick a Gemini module and choose "Create a Completion."
Configure the necessary settings – in this case, picking a model and writing a prompt. Be sure to insert the data passed over via the webhook. You can find this data under the “Properties” menu.
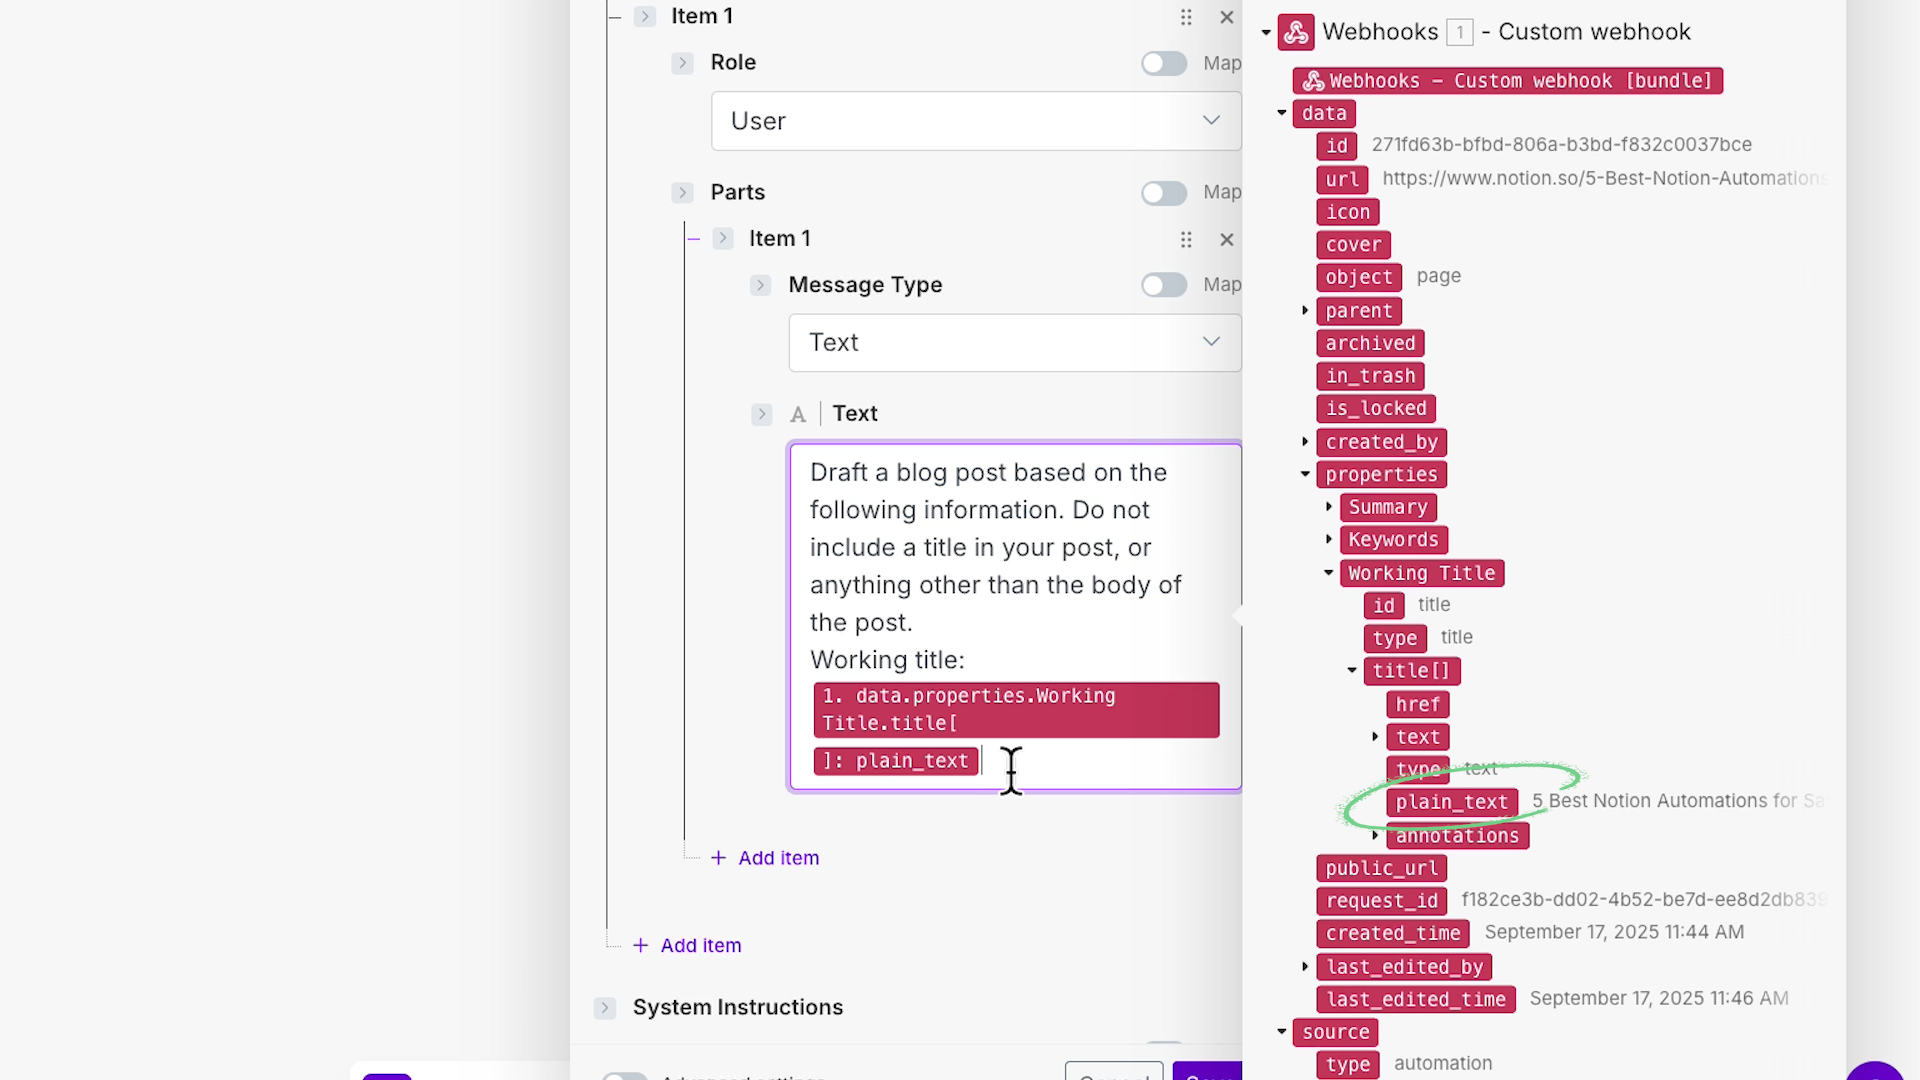
Note that you might need to dig into sub-levels in Make's data structure to find exactly what you need. The webhook sends everything in a nested format.
We’ll use the “plain text” variable for each piece of data - the blog’s title and summary.
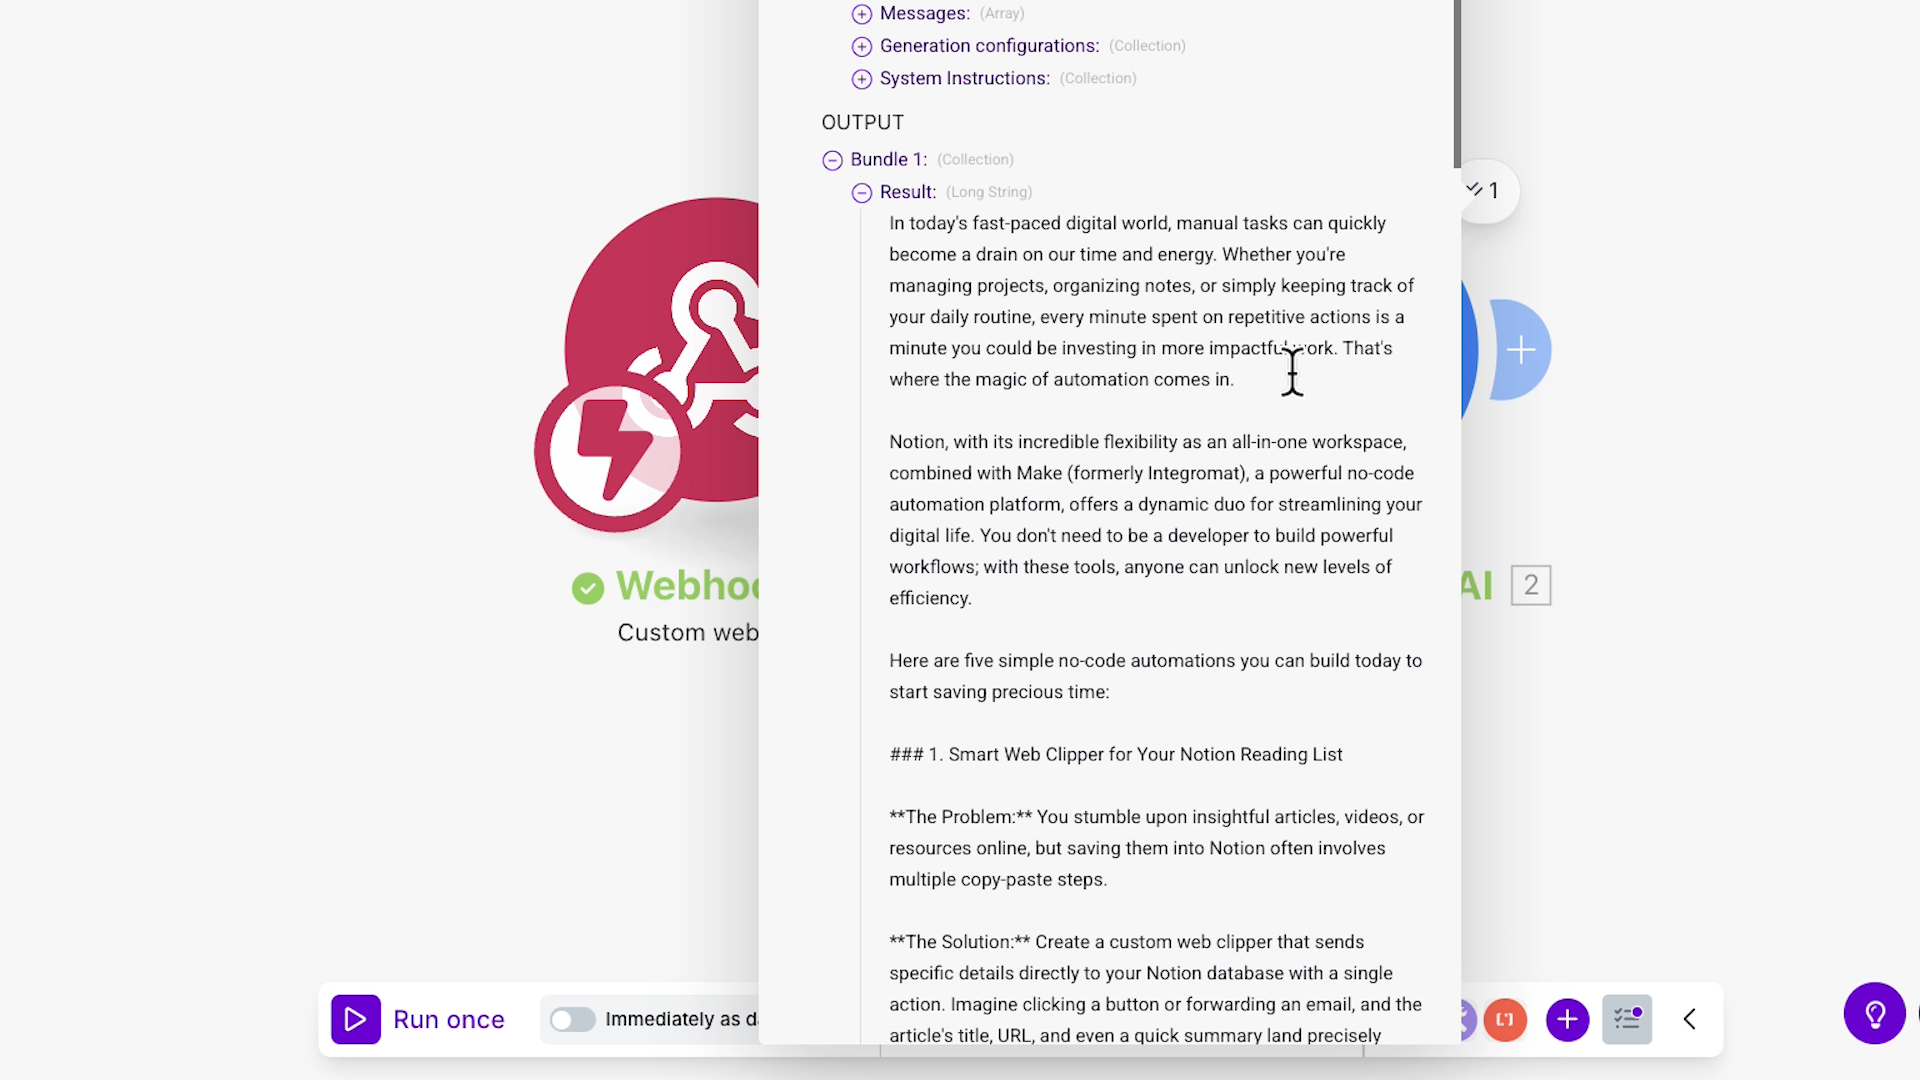
Once you’ve configured the action as you like, save it and give the scenario a test to make sure everything works. To test the scenario, click “Run once” in Make, then click the webhook button in Notion.
After your test, you can check to make sure that everything ran correctly. In our example, we’ve got a decent blog draft generated from our Notion data.
You can add as many additional steps to your automation as you’d like. For example, we’ll also add a module to send the AI-generated draft to our CMS in Webflow.
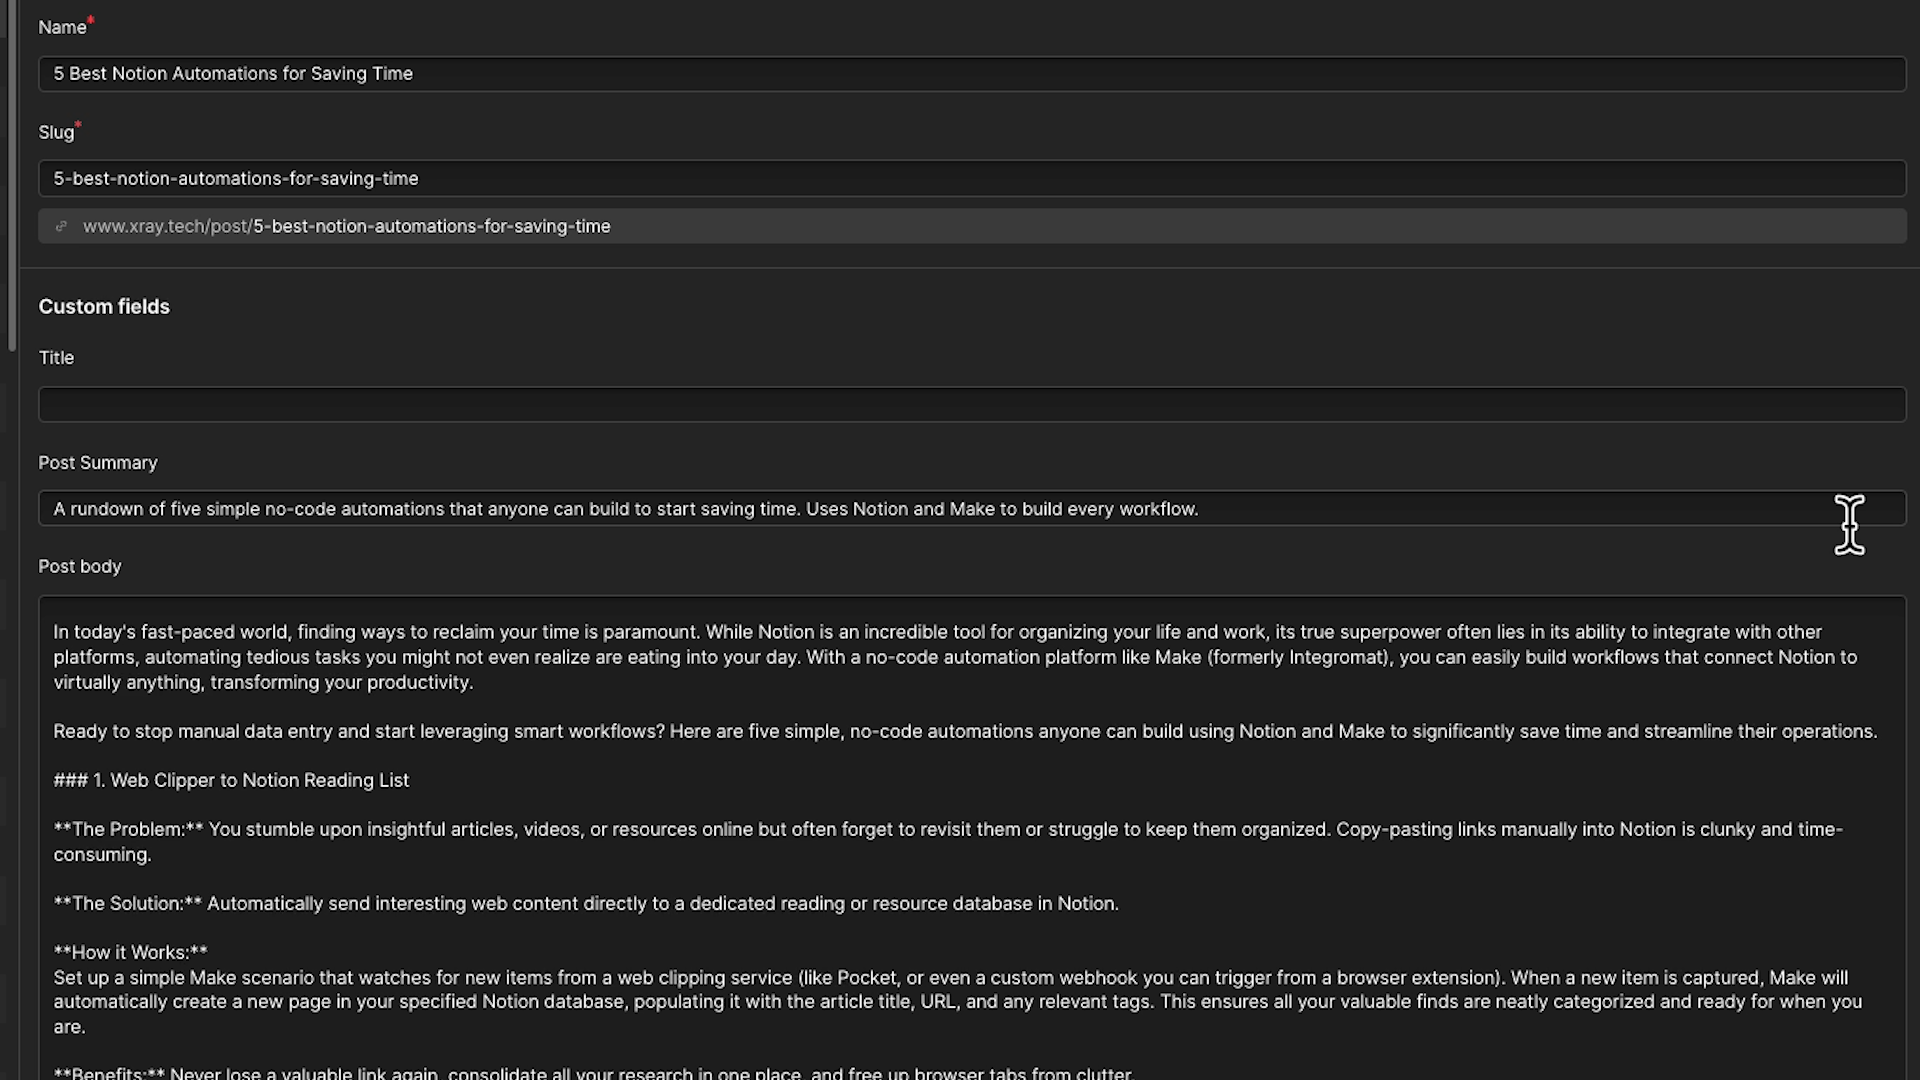
Once your scenario is done, save it and turn it on to start using it. Now, whenever you click the webhook button in Notion, the automation will run instantly.
Webhook buttons are a powerful upgrade to standard Notion automations. Instead of waiting for polling triggers that run every few minutes and consume credits even when there's no new data, you get instant automation that only runs when you actually need it.
This approach works with any automation platform that supports webhooks - Pipedream, Zapier, and Microsoft Power Automate, not just Make.
Setting up webhooks is straightforward, but building comprehensive workflows with multiple apps, conditional logic, and data transformations can get complex fast.
XRAY specializes in designing better ways to work. We automate and streamline daily processes to create more time for what really matters.
Whether you need quick hourly support to troubleshoot a specific automation challenge, or you're ready for a complete workflow transformation with a long-term partnership, we've got you covered.
Quick support: Get expert help for Notion, Make, or any other automation tool on an hourly basis.
Complete transformation: Work with us on an ongoing retainer to systematically automate your entire operation.
Contact us today to discuss how we can help streamline your workflows and eliminate the repetitive tasks that slow you down.

.pptx.png)

