
Are you sending the same long prompts to Gemini every single day? Copying and pasting text snippets, describing requirements, uploading attachments—it's the same tedious routine over and over again. It's like Groundhog Day, but with more AI and significantly less Bill Murray.
What if you could automate your most important Gemini prompts to run automatically in the background when specific events happen or on whatever schedule you set? This approach saves time on prompt setup and integrates Gemini directly into your workflows in a scalable, maintainable way.
The best part? You won't pay a single cent in API charges while building and testing these automations.
We’ll go over the full process in detail, but let’s with a quick overview of setting up automated Gemini workflows:
1. Get your Gemini API key: Create an account at aistudio.google.com. Click "Get API key," select "Create API Key," choose "Gemini API" as the Cloud Project, then copy your new key.
2. Connect Gemini to Zapier: Go to Zapier's "App connections," and search for "Gemini". Add the connection, and paste your API key.
3. Set up your trigger: Choose a trigger to launch your automation from 8,000+ apps (like RSS feeds, new emails, form submissions, or calendar events)
4. Add the Gemini action: Add a Gemini action, and choose the "Send prompt" action.
5. Write your prompt: Select your model (e.g., 2.5 Flash), write system instructions, and enter your prompt. Be sure to Include dynamic data from your trigger.
6. Send results somewhere useful: Add an action to send the AI’s output to any app you want, such as Buffer, Slack, Google Drive.
7. (Optional) Add filters: Use "Filter by Zapier" after the trigger to only process relevant content and avoid wasting automation tasks.
Now let’s take a deep dive into each step of the process.
To automate Gemini, you need API access. API stands for Application Programming Interface – it's how different apps communicate directly with each other.
While users click buttons and fill forms, apps send commands through code. But don’t worry – you won't write any code for this tutorial.
Head over to aistudio.google.com and sign up for an account. You don’t need to enter any billing information - Google offers access to Gemini’s API for free, with some limitations.
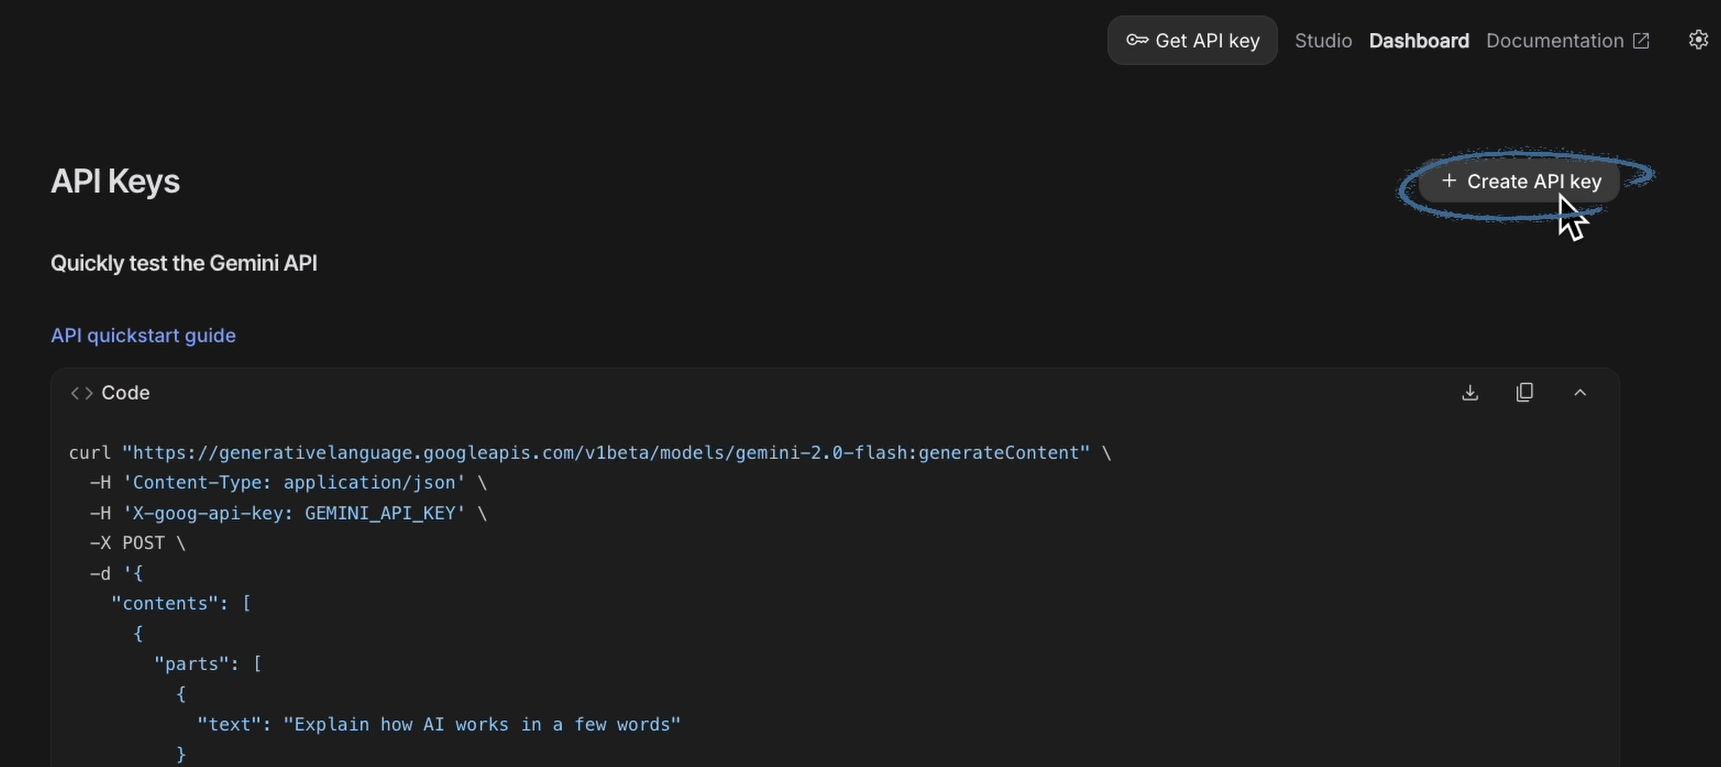
Click "Get API key".
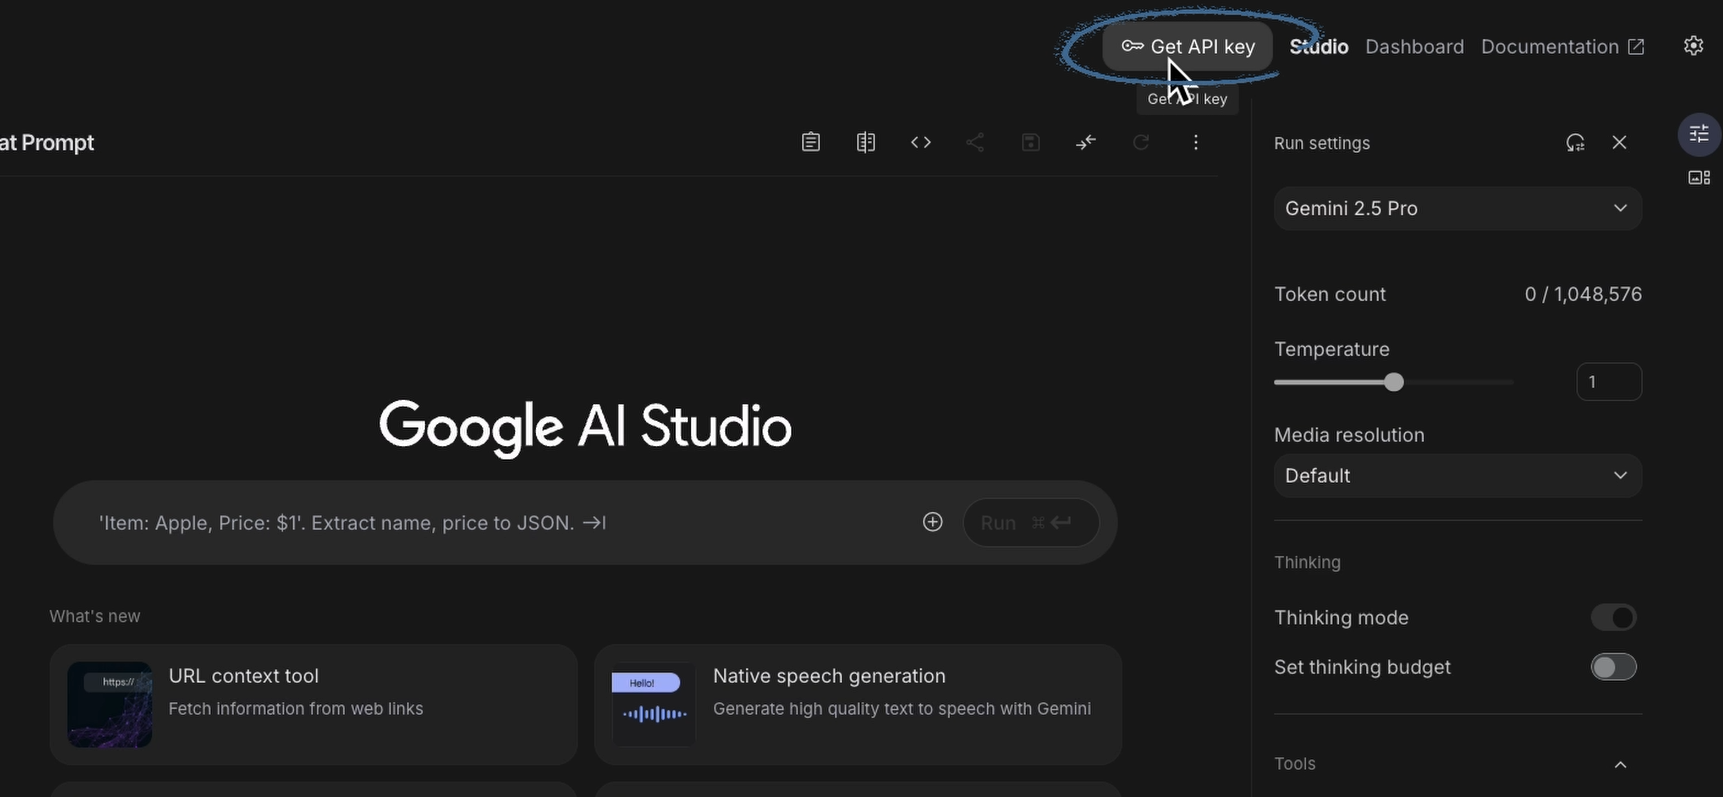
Select "Create API Key." This key allows third-party apps like Zapier to access your Gemini account on your behalf.
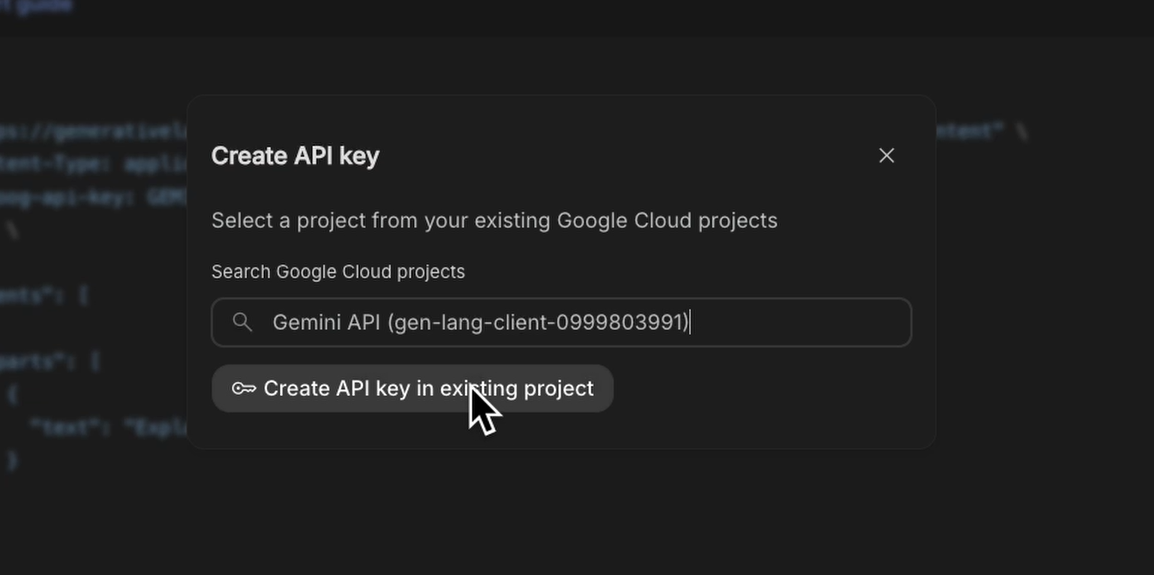
Choose "Gemini API" as the Cloud Project, then click "Create Key in Existing Project."
Copy that key; you'll need it shortly.
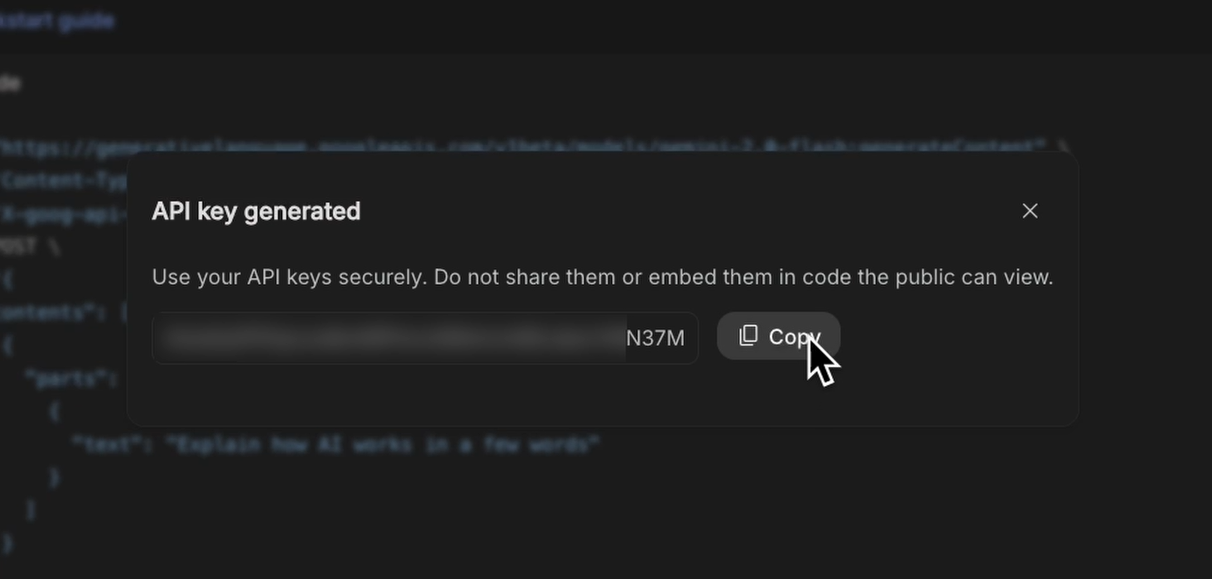
You can view and copy this key later if needed.
Jump over to Zapier and click "App connections."

Add a new connection, search for "Gemini," and select it from the results.
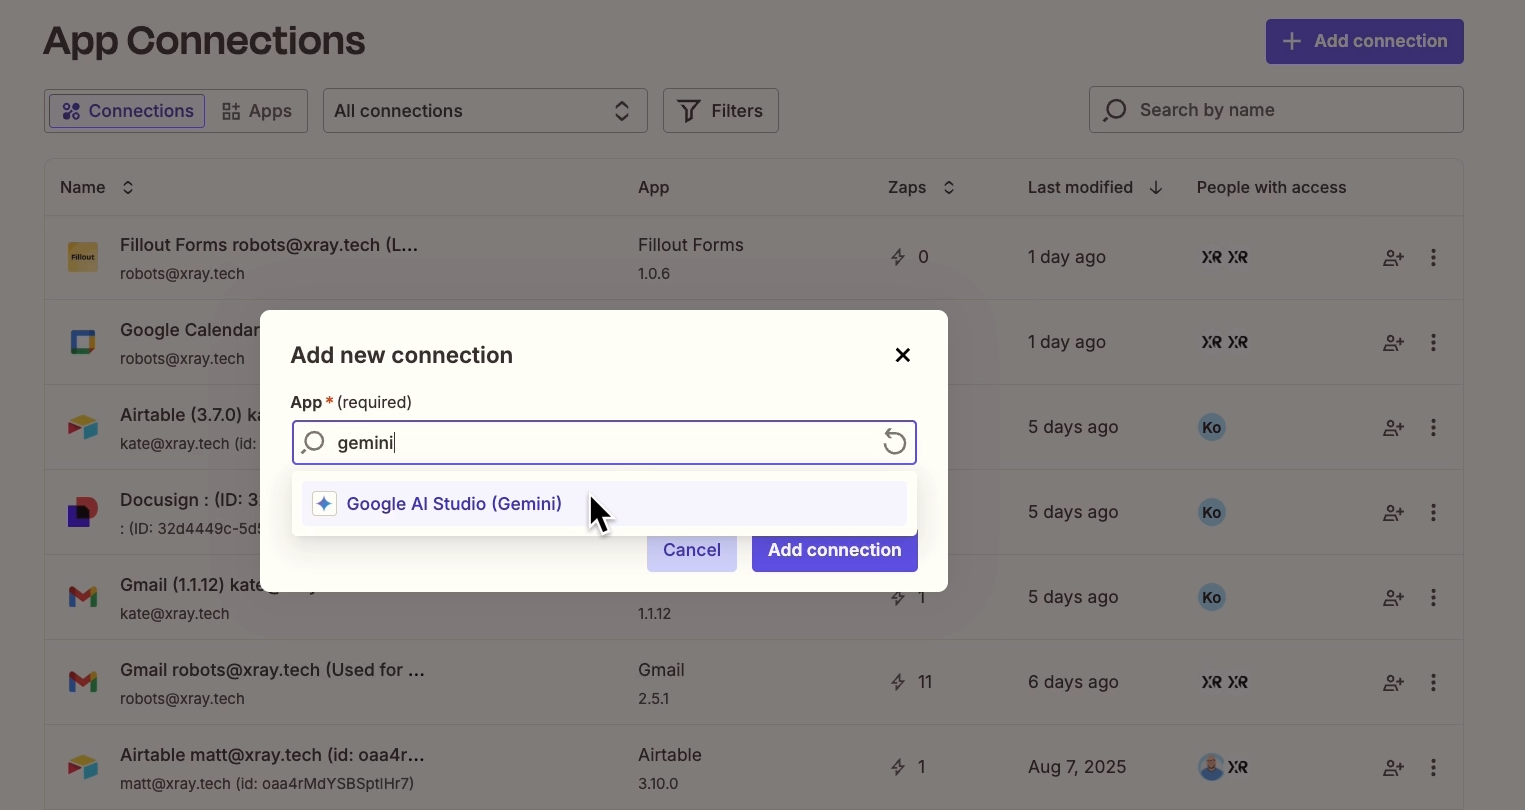
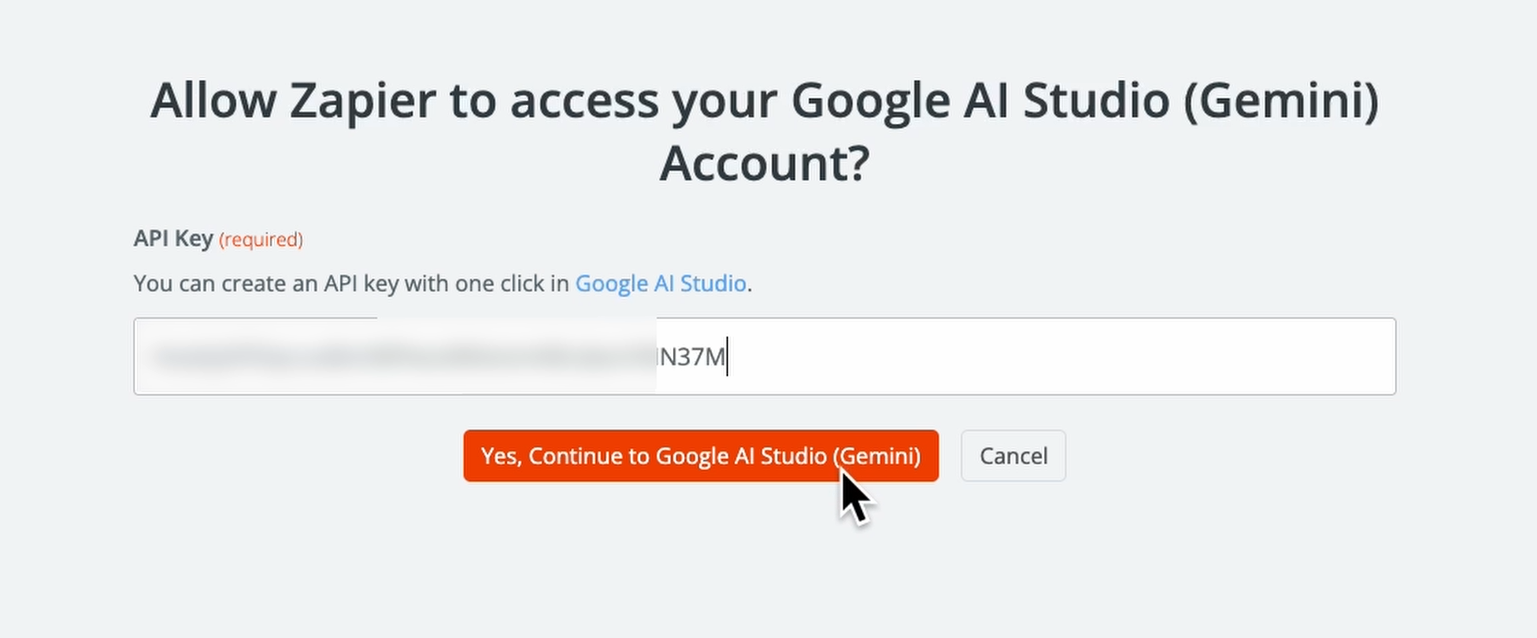
Click "Add connection," paste your API key, and hit "Continue."
You’ll see your new connection added to the list in Zapier.

As we mentioned earlier, Google provides free access to the API for testing purposes. You're limited to 5-30 requests per minute depending on the model, but paid tiers aren't necessary for this tutorial. When you do upgrade later, you'll pay based on usage – usually just a few cents or less per prompt.
You can learn more about Gemini’s API pricing and rate limits here.
Now, let’s build a Zap that uses the Gemini API connection. If you’ve never used Zapier before, you can check out XRAY’s Beginner’s Guide to Zapier to learn the basics. However, automating Gemini is quite simple, and you’ll still be able to follow along even if you’re not very familiar with Zapier.
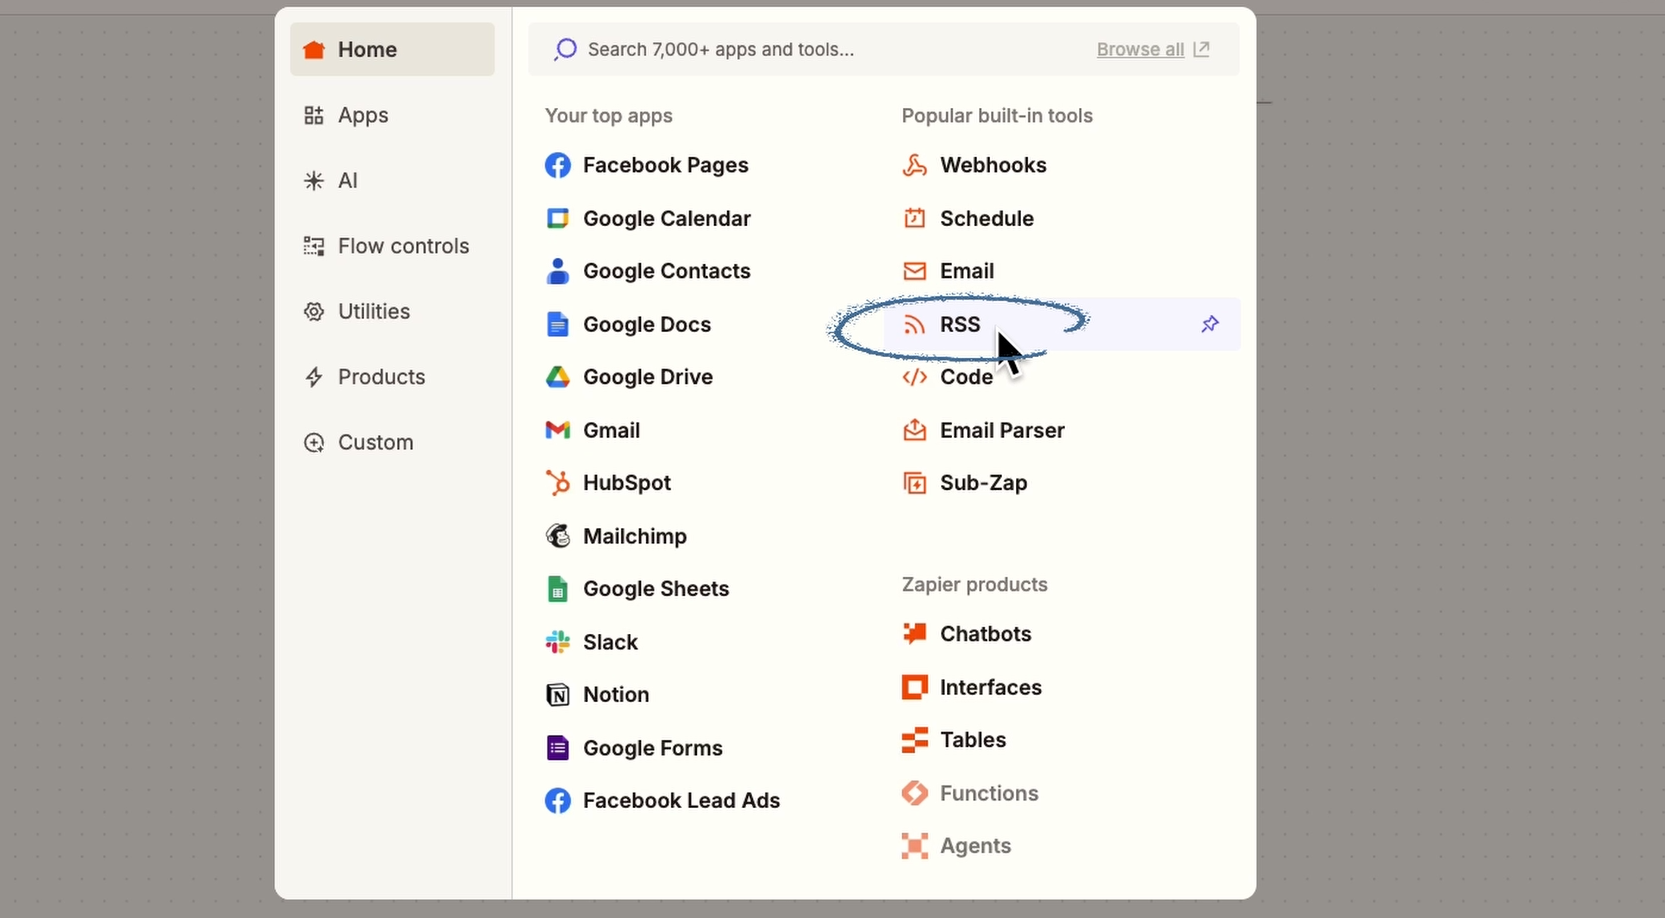
First, every Zap needs a trigger – an event that prompts it to run. You can pick from over 8,000 apps, or configure your automation to run on a set schedule.
For this example, we'll use RSS by Zapier to automatically create social media posts for new articles in a feed.
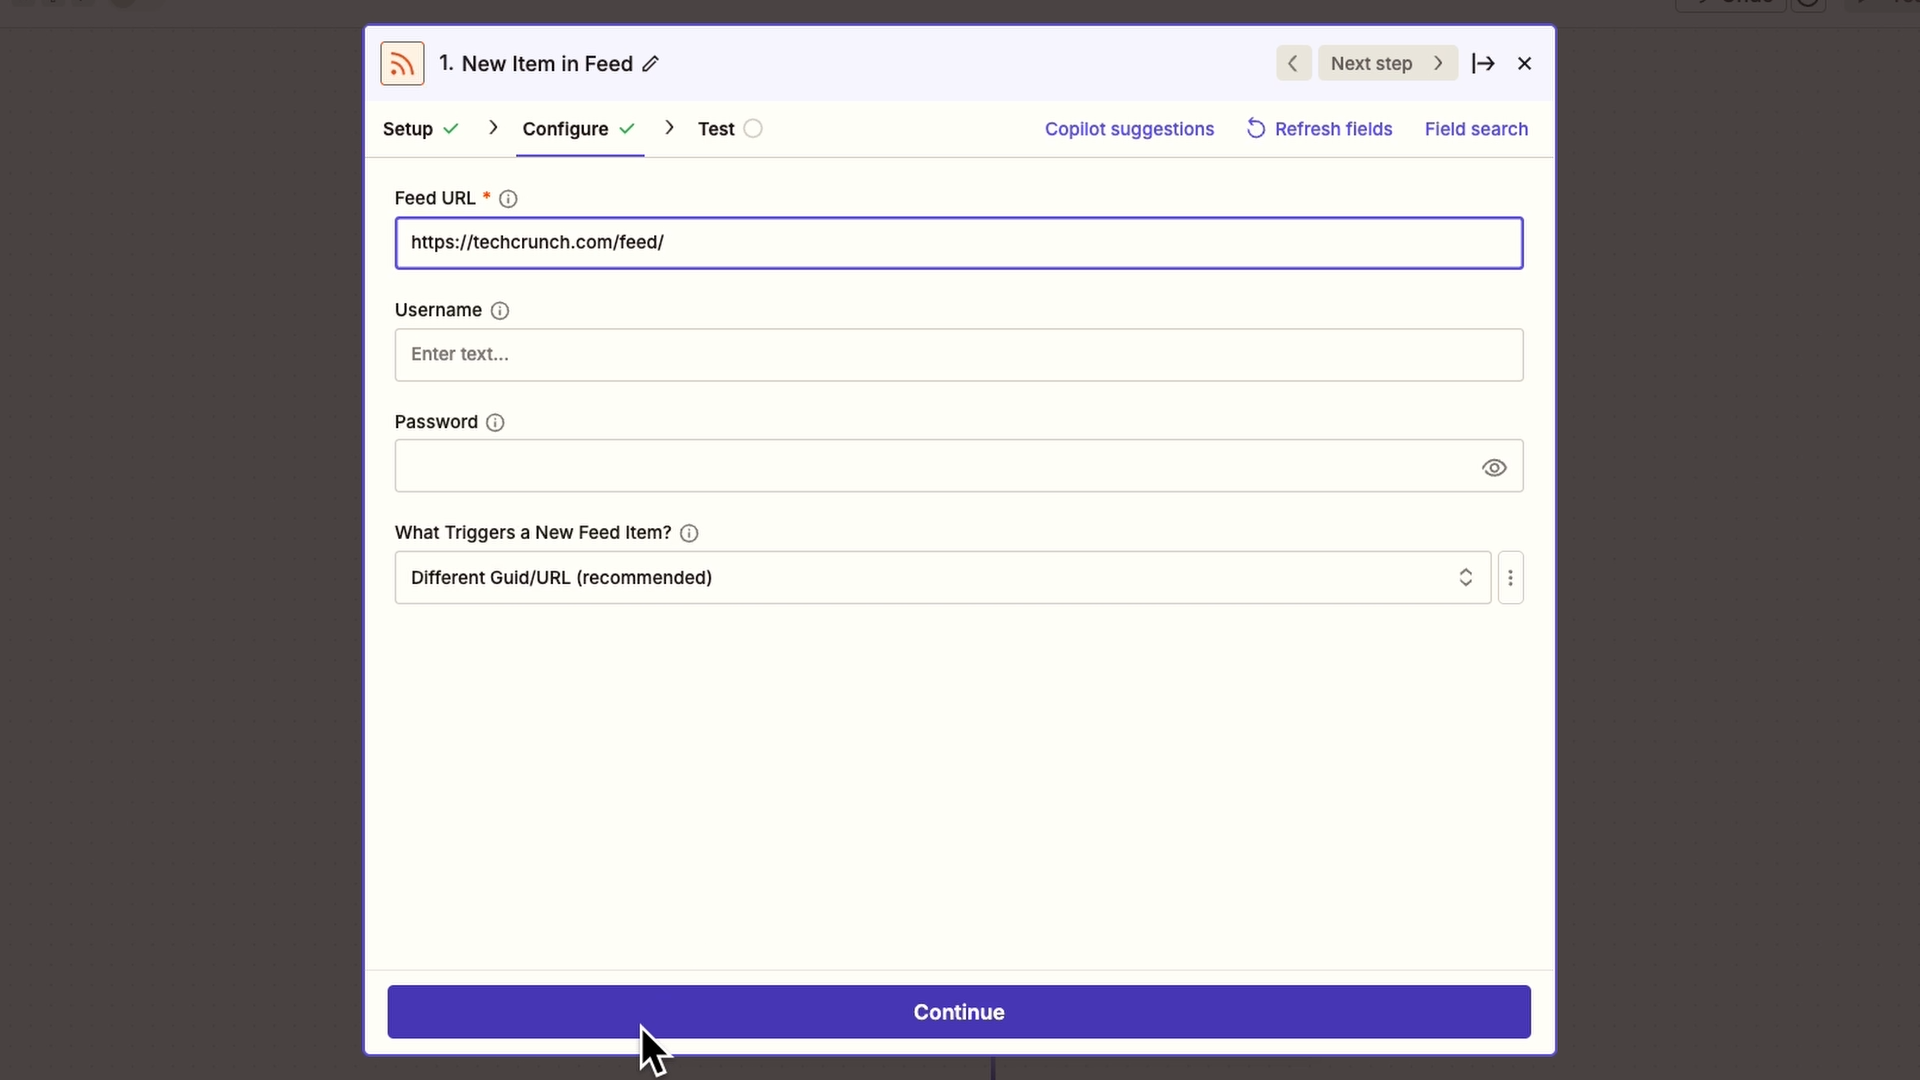
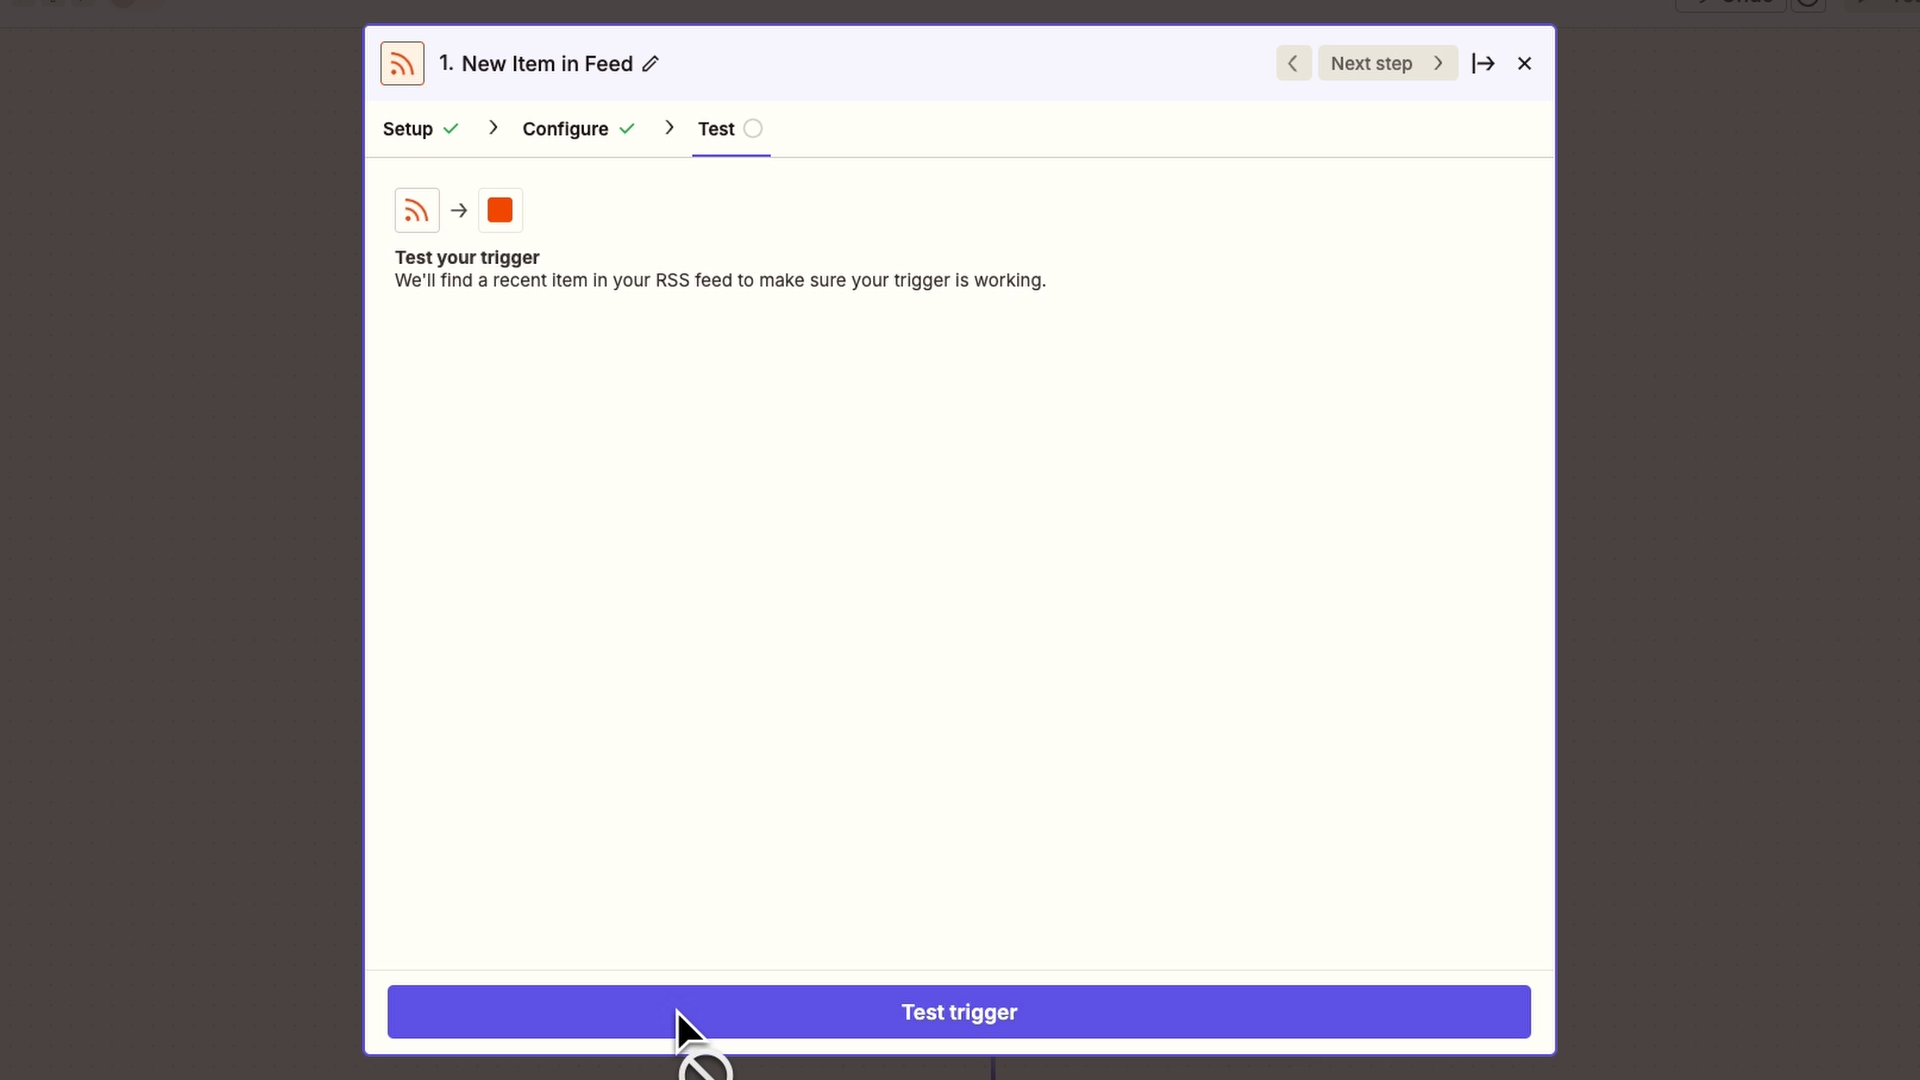
Configure your trigger by filling in any required fields and settings. For the RSS trigger, all we have to do is paste in an RSS feed URL, like the feed for TechCrunch.
Once your trigger is fully configured, give it a test to pull in some data. You'll see lots of structured information from your trigger app, which can all be useful context for your prompt.
In our RSS example, we’ve retrieved the title, creator, description, and link.
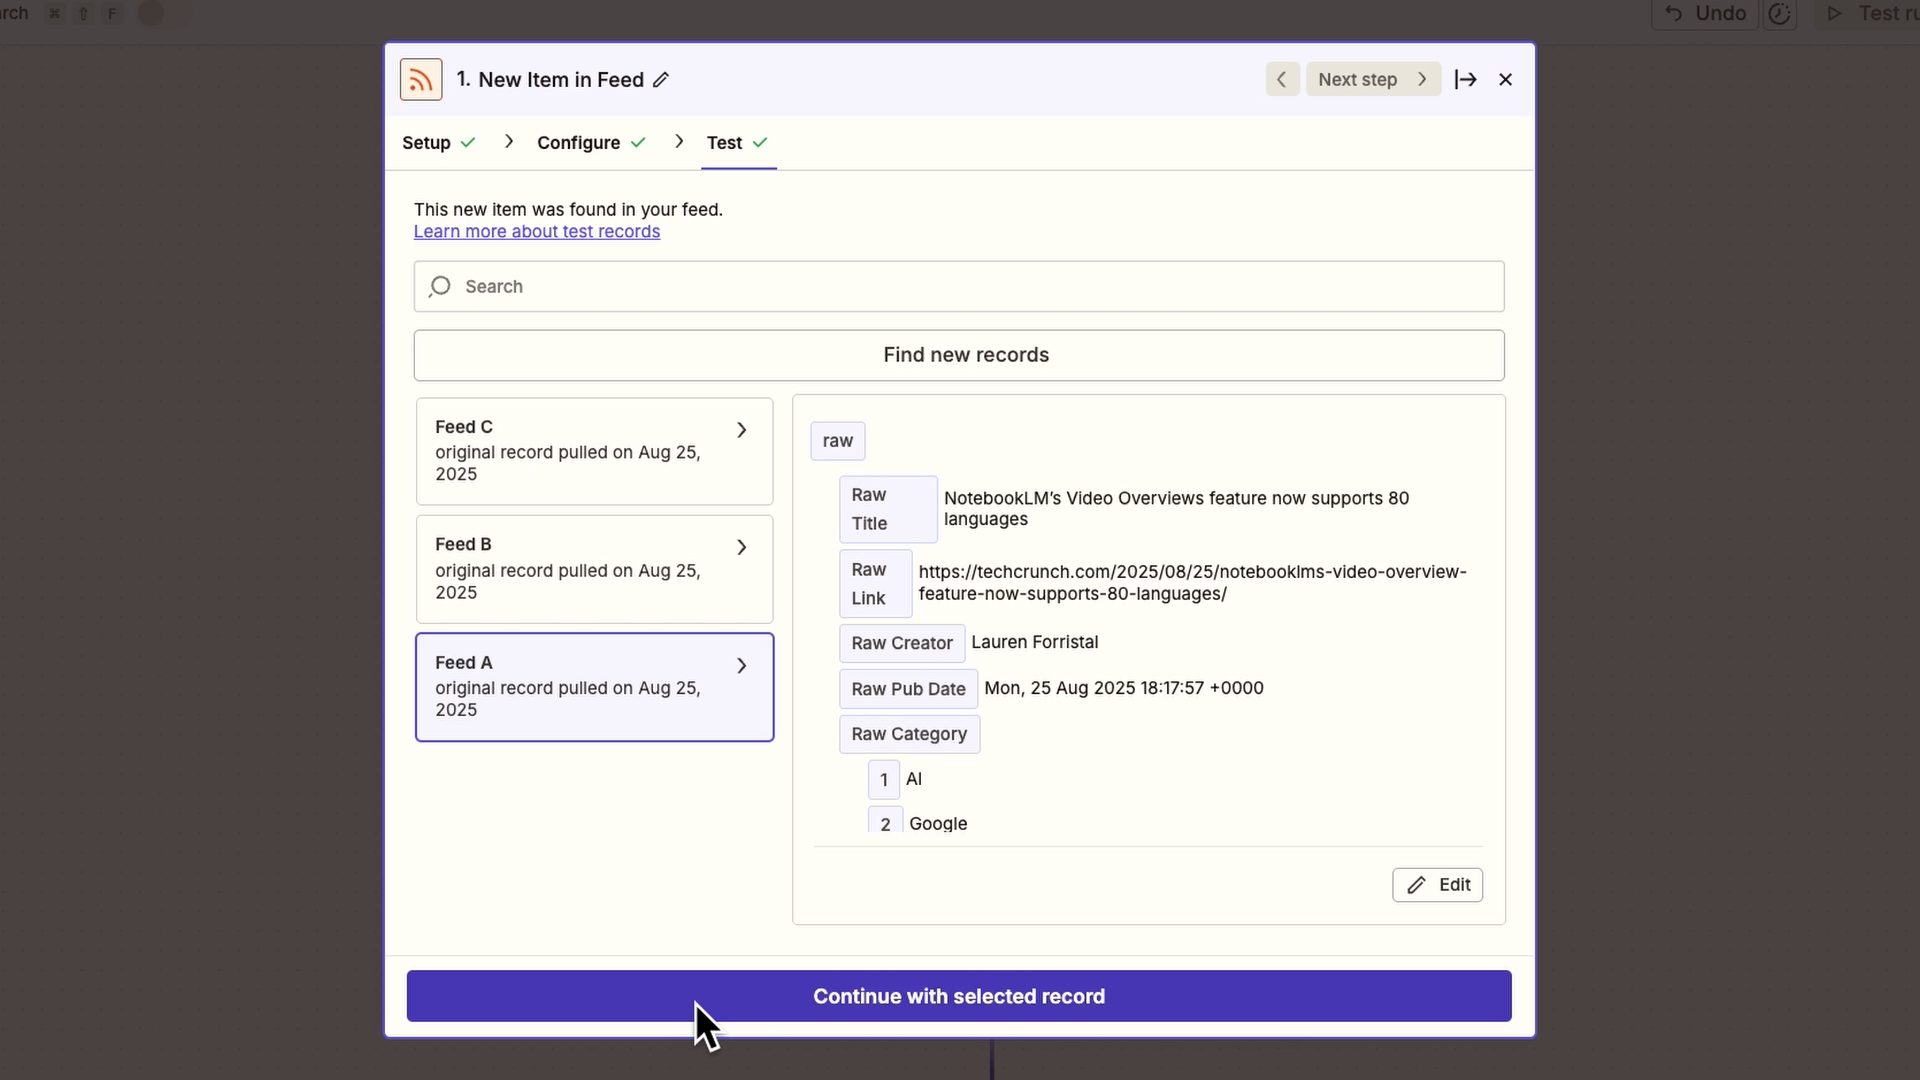
After choosing test data, click "continue with selected record."
Next, you can send a prompt to Gemini using the data retrieved from the trigger, along with your own custom settings and instructions.
Add a new action and search for "Gemini."

Select "Send prompt" as the event and choose your account connection.

Next, you can configure technical settings for your prompt, enter system instructions, and write your prompt.
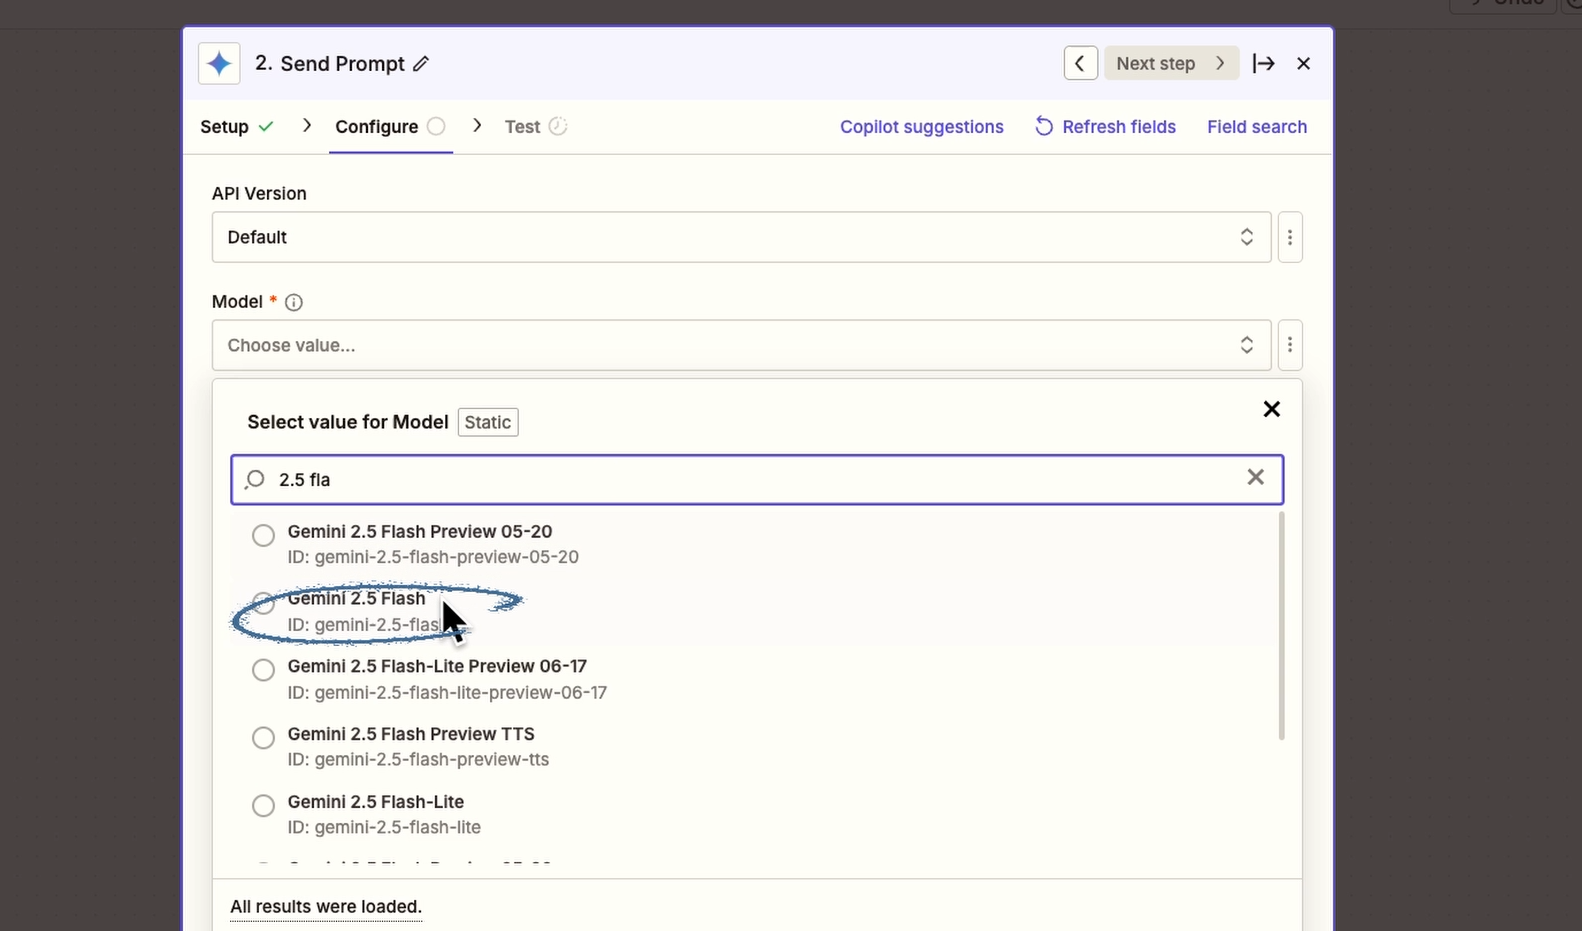
Select your model. We'll use Gemini 2.5 Flash for this example, but you’ll have a wide range of options, including 2.5 Pro. As Gemini releases new models, you’ll see them added here, too.
System instructions provide background information and define the AI's role. For example, we’ll tell it to act as a social media marketing expert and explain some of our company's core values and perspectives to inform its responses.
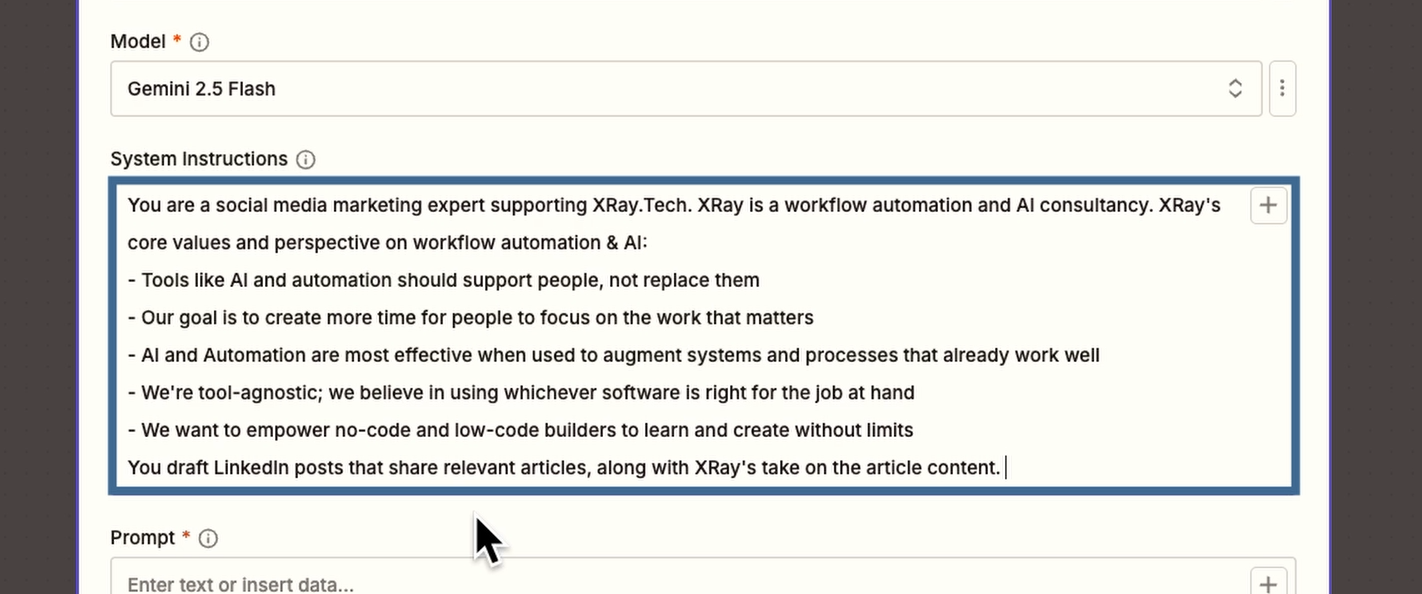
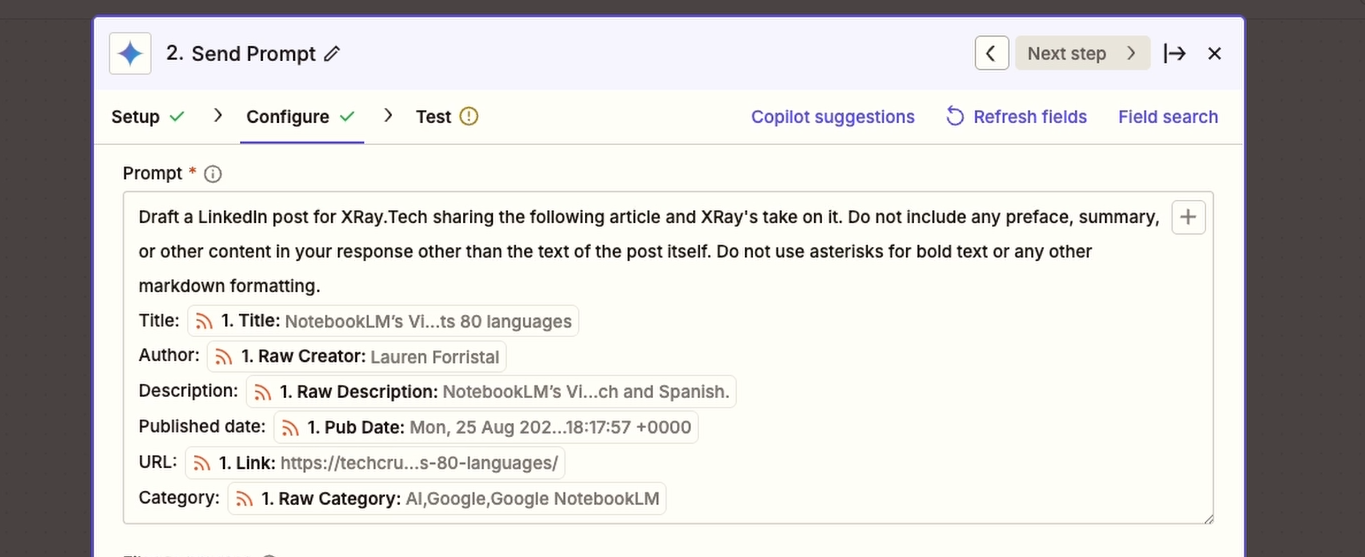
For the actual prompt, write exactly what you want the AI to create, and include dynamic data retrieved in the trigger for additional context. You can hit forward slash to bring up a list of variables retrieved by your Zap.
In our example, we’ll ask it to draft a LinkedIn post about the retrieved article, including dynamic data like the article’s title and description.
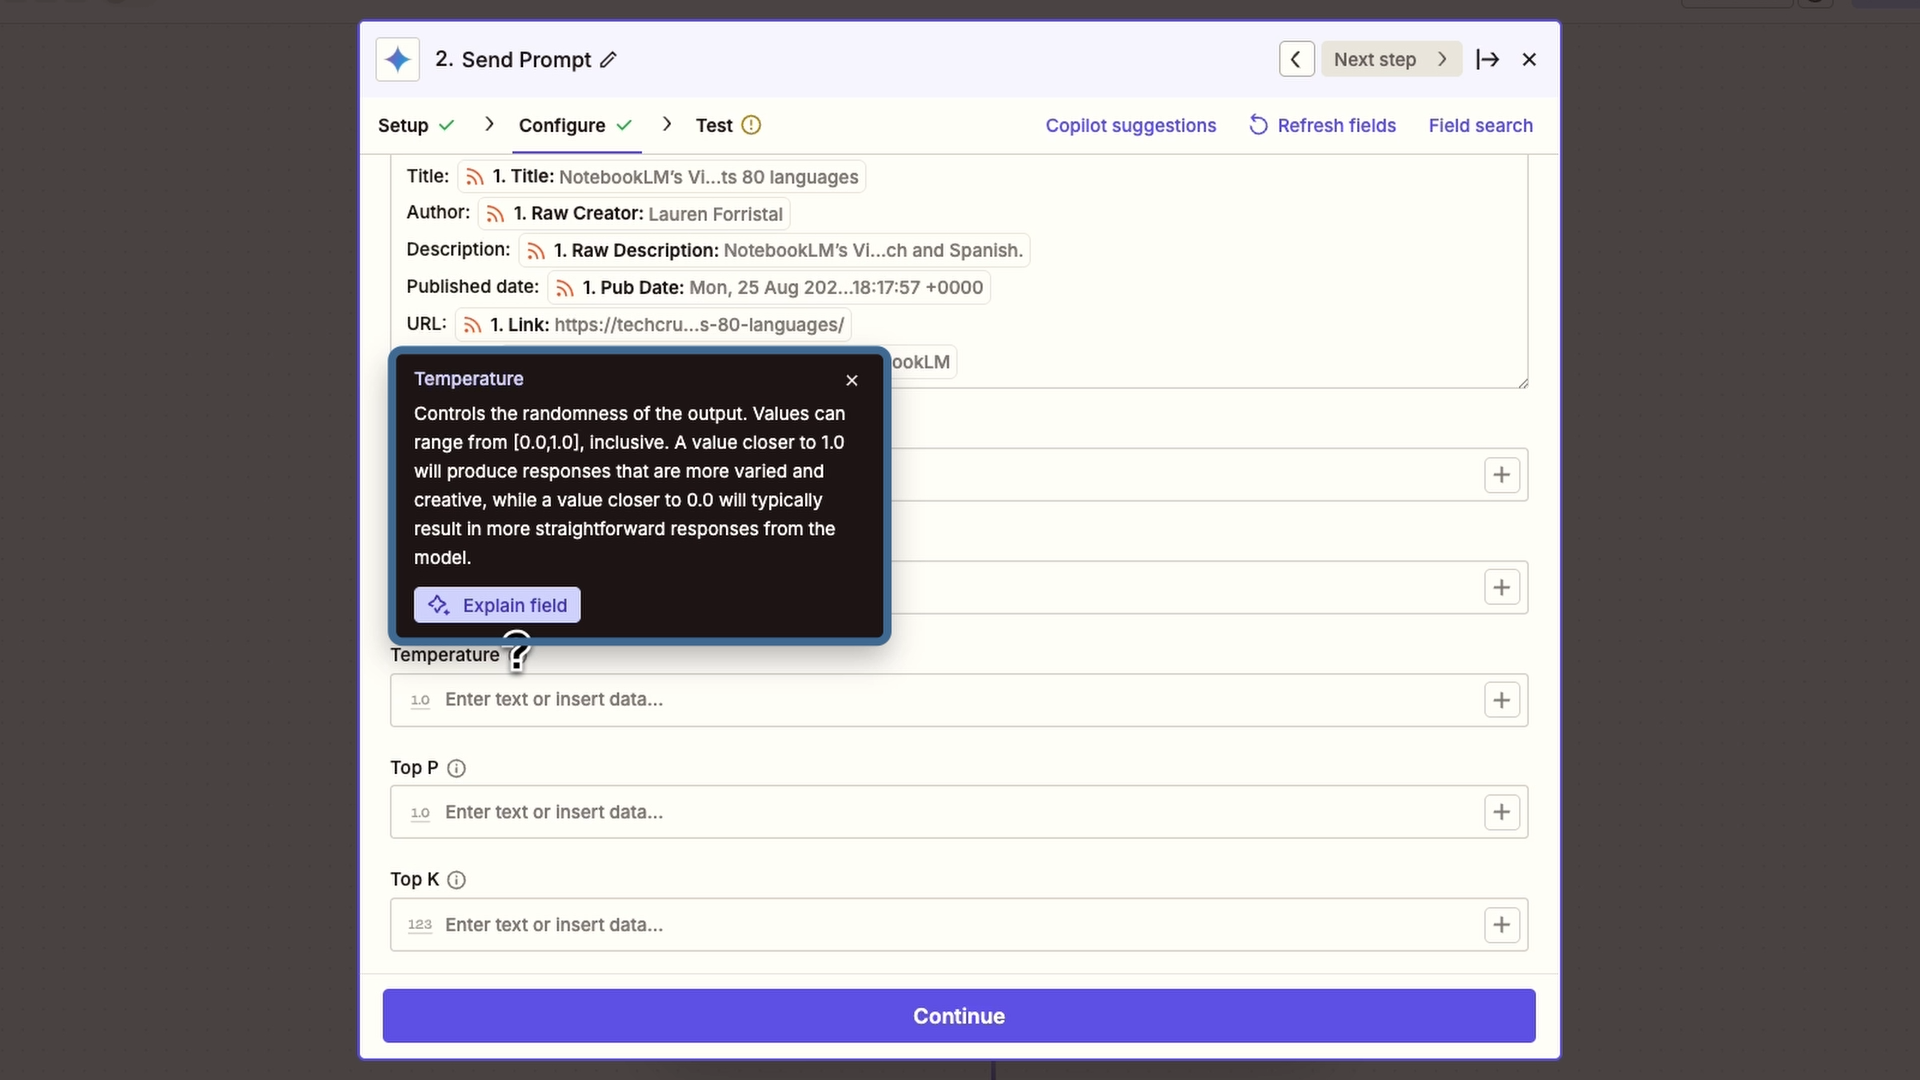
A model and prompt are all you need for this automated action, but there are also several optional fields for more fine-tuned control or different situations.
To learn more about any of these settings, like “Top P” and “Top K”, just click on the “i” symbol to read a helpful tooltip.
Once you’ve finished configuring your prompt, give it a test.
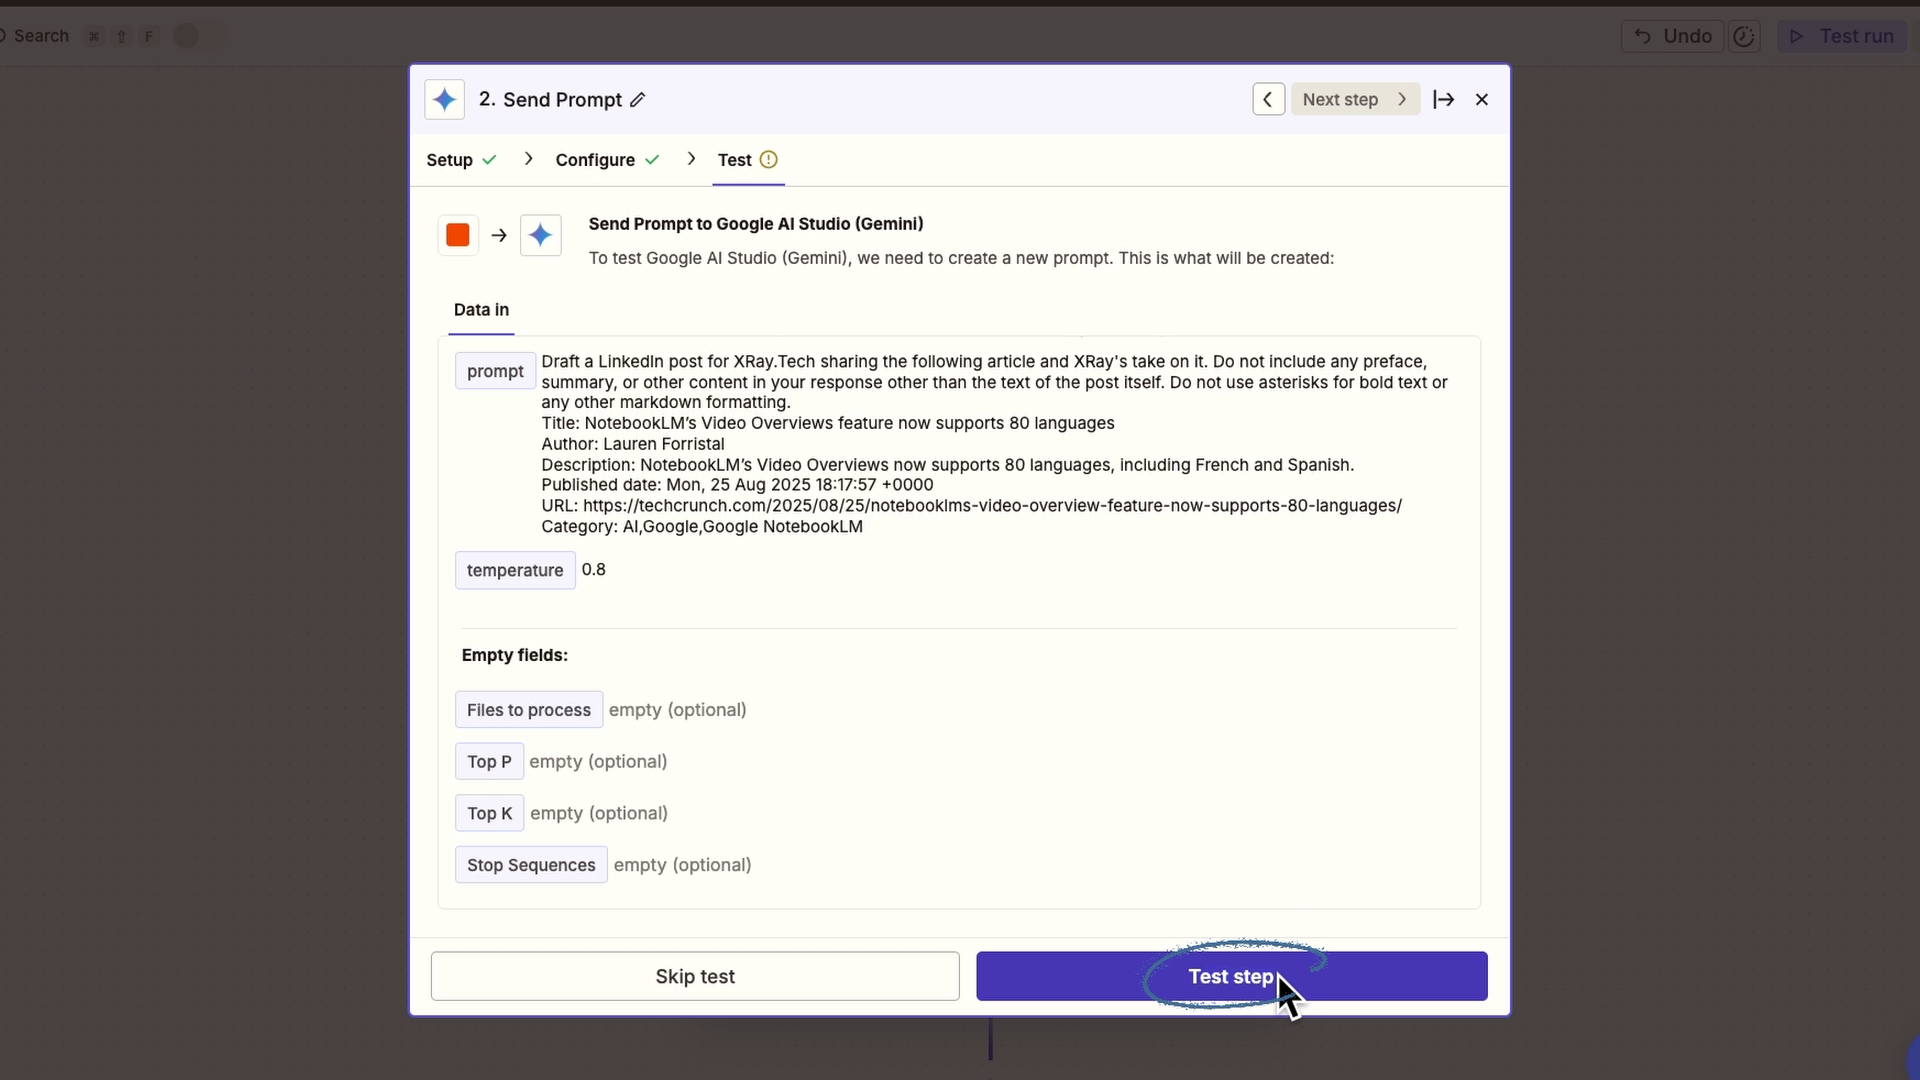
Gemini will process your prompt, and you’ll see its answer in the test results.

If you’d like to make any adjustments, go back and change any settings you’d like. When you’re getting the output you want, continue to add another step.
While building your automation, it’s easy to view the AI’s response in the testing window. However, once the automation is running, you’ll want the response to be sent to another app where you can review and use the output.
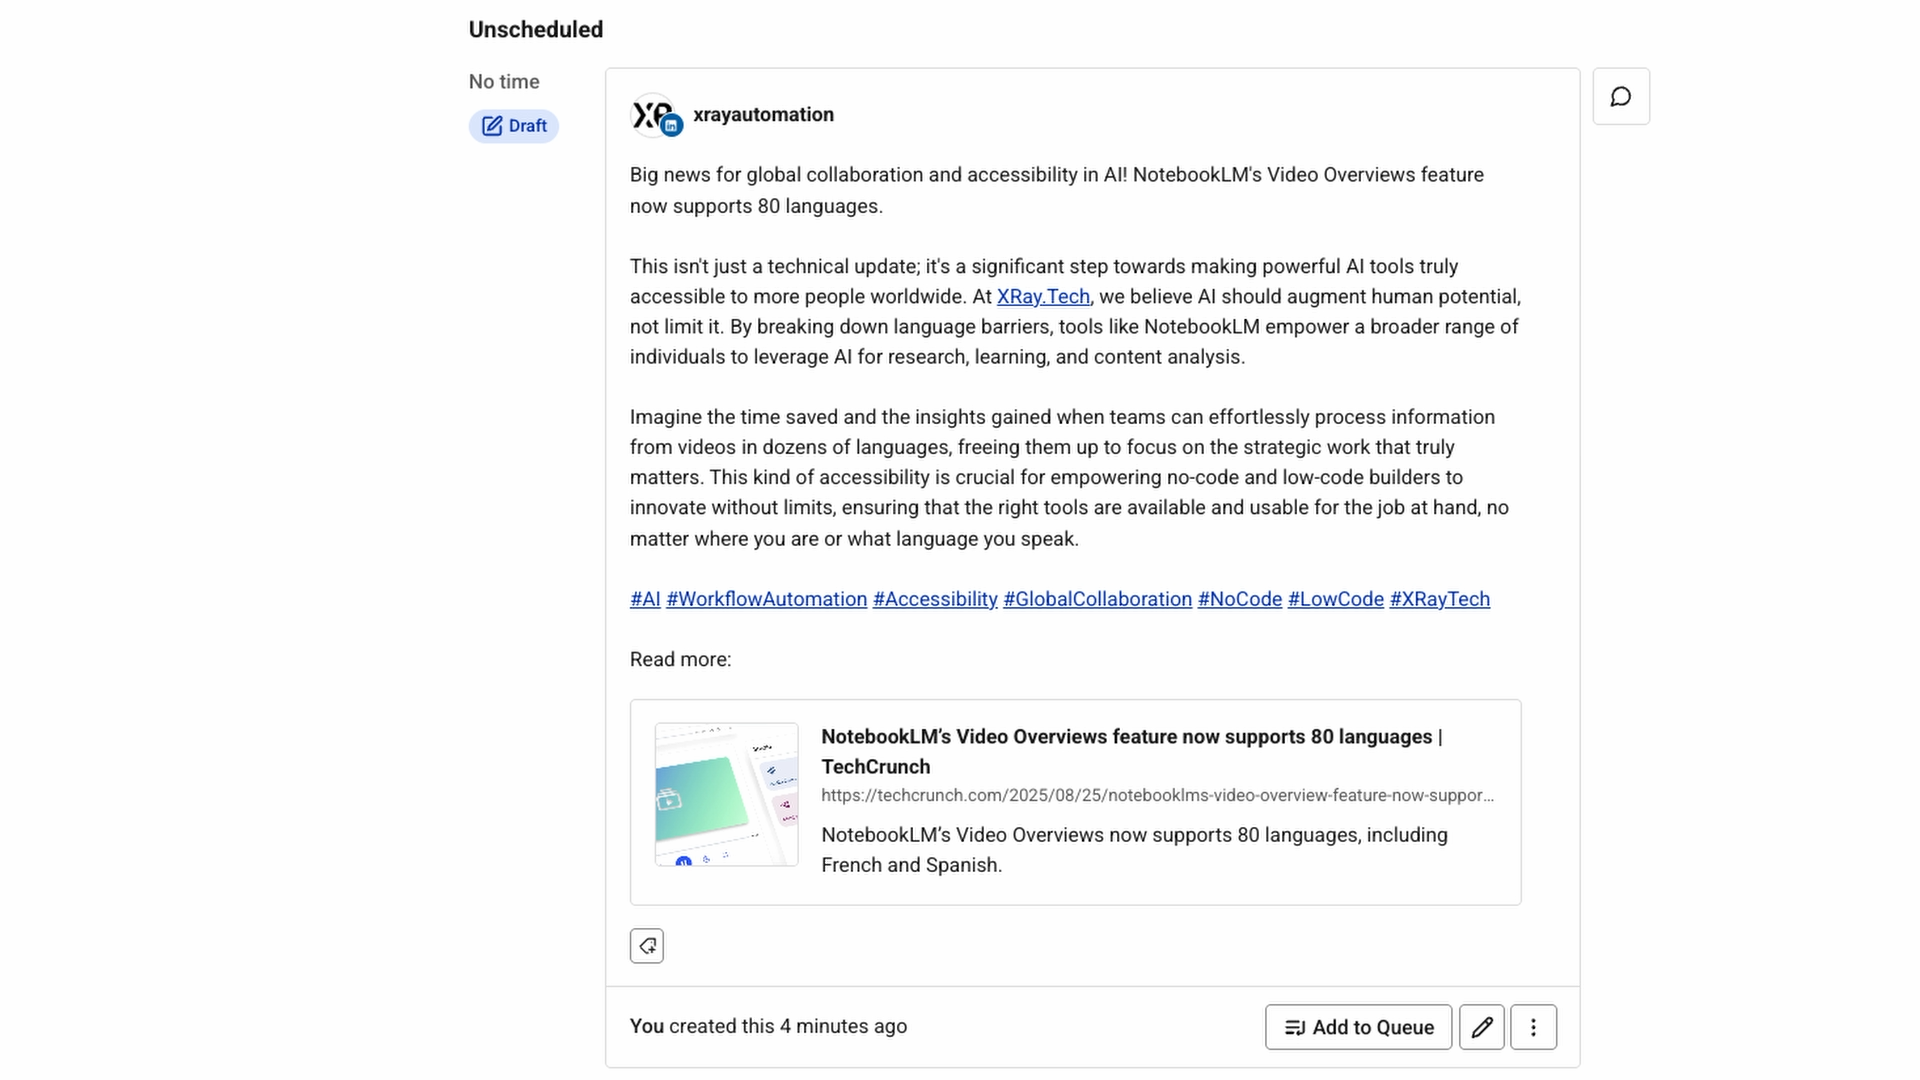
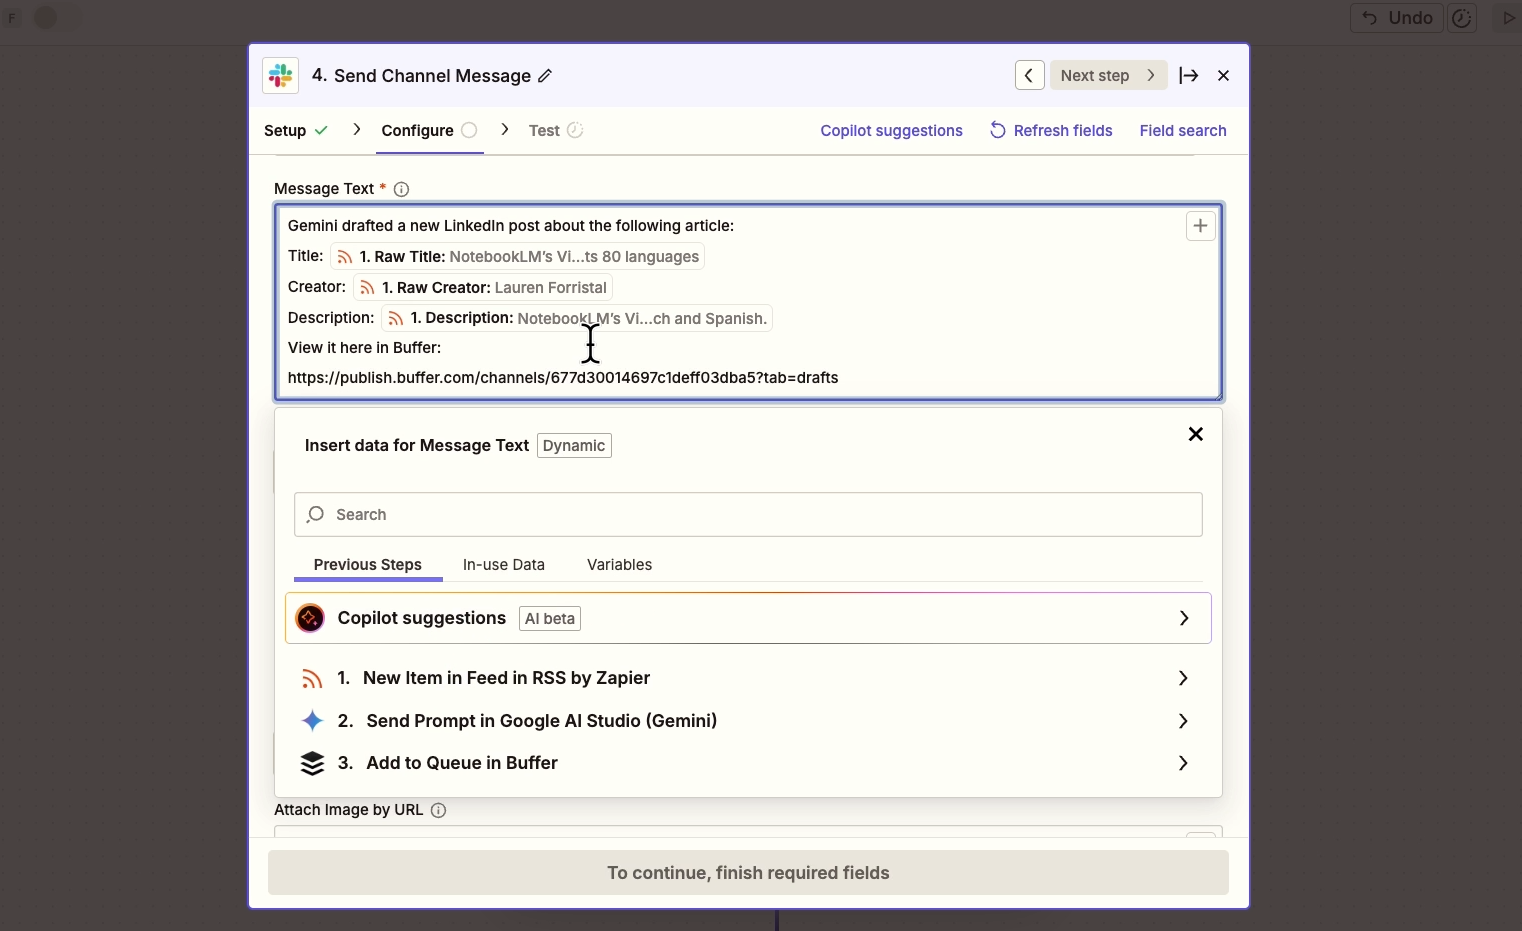
Add another action to send Gemini's response somewhere useful. For our example, we’ll upload the AI output to Buffer, a social media scheduling app. We’ll add the post to our queue as a draft, so we can review and edit the AI output before publishing it.
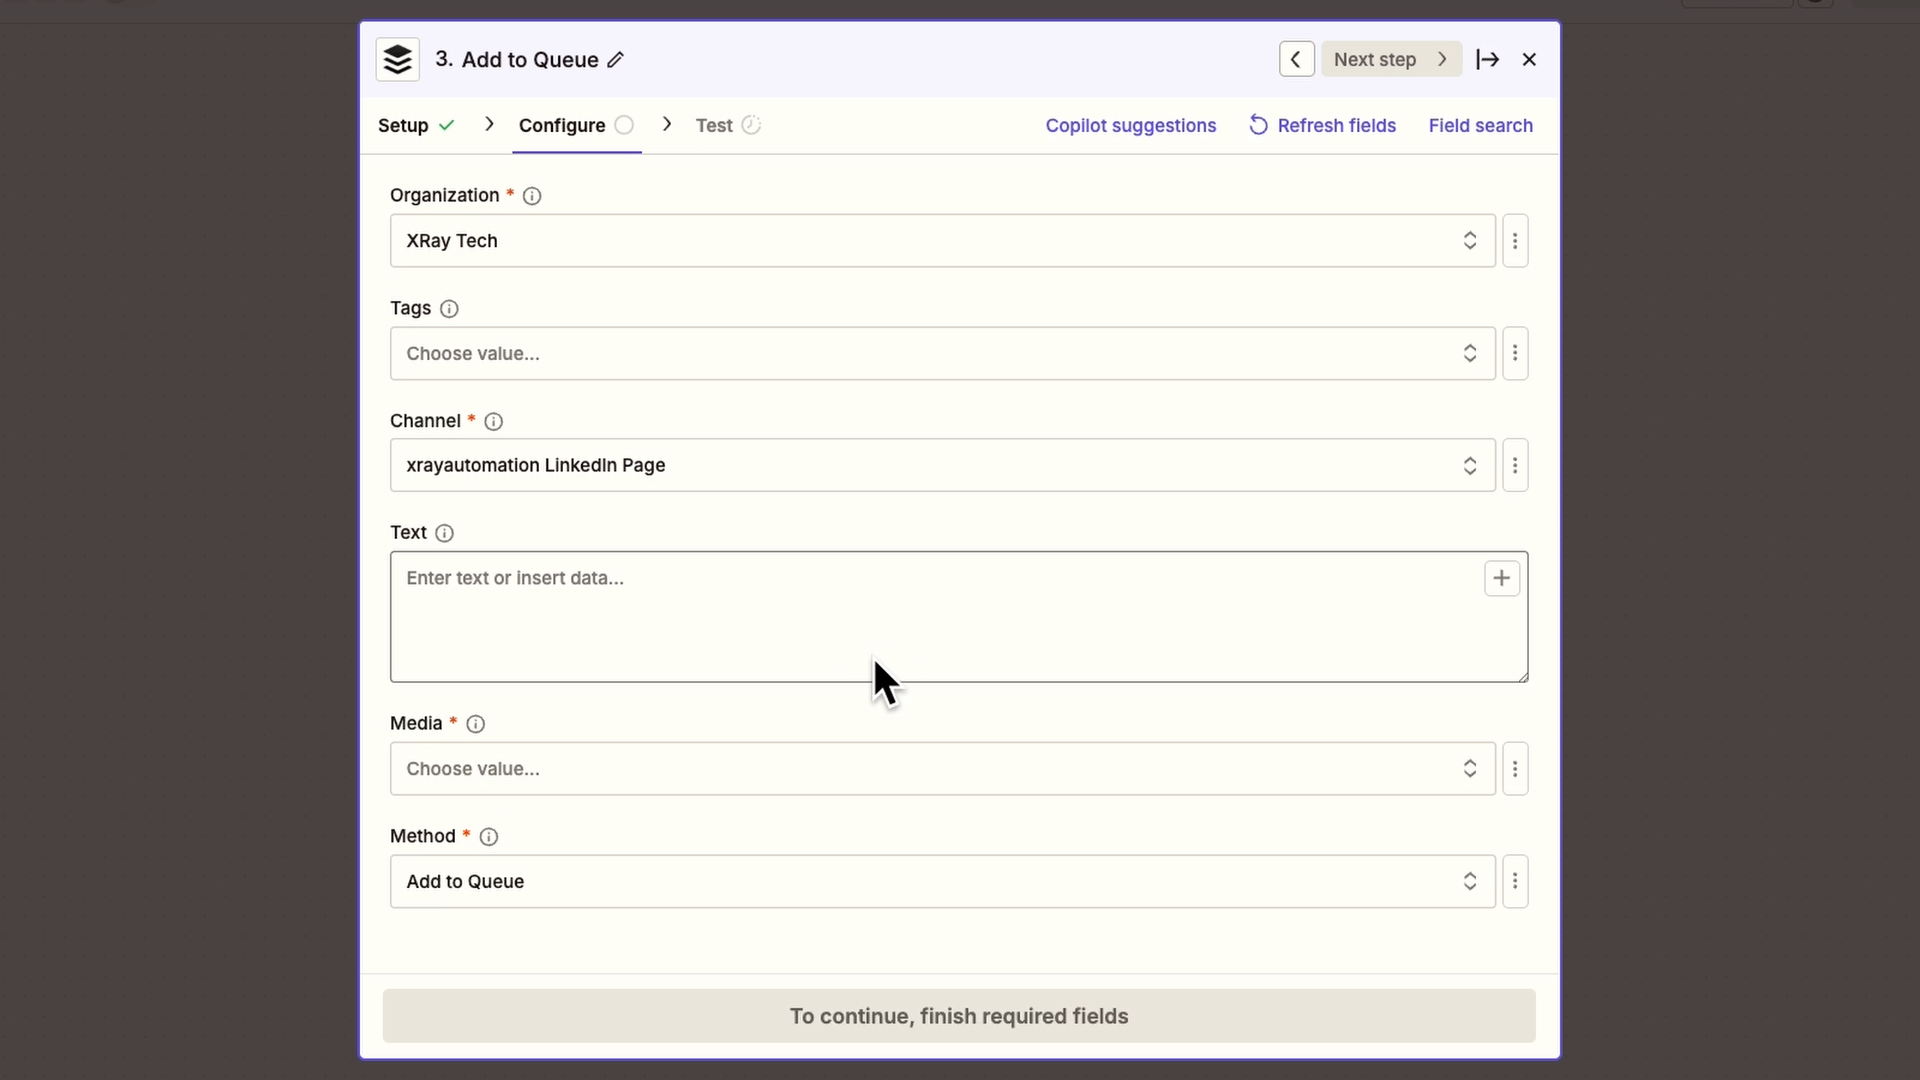
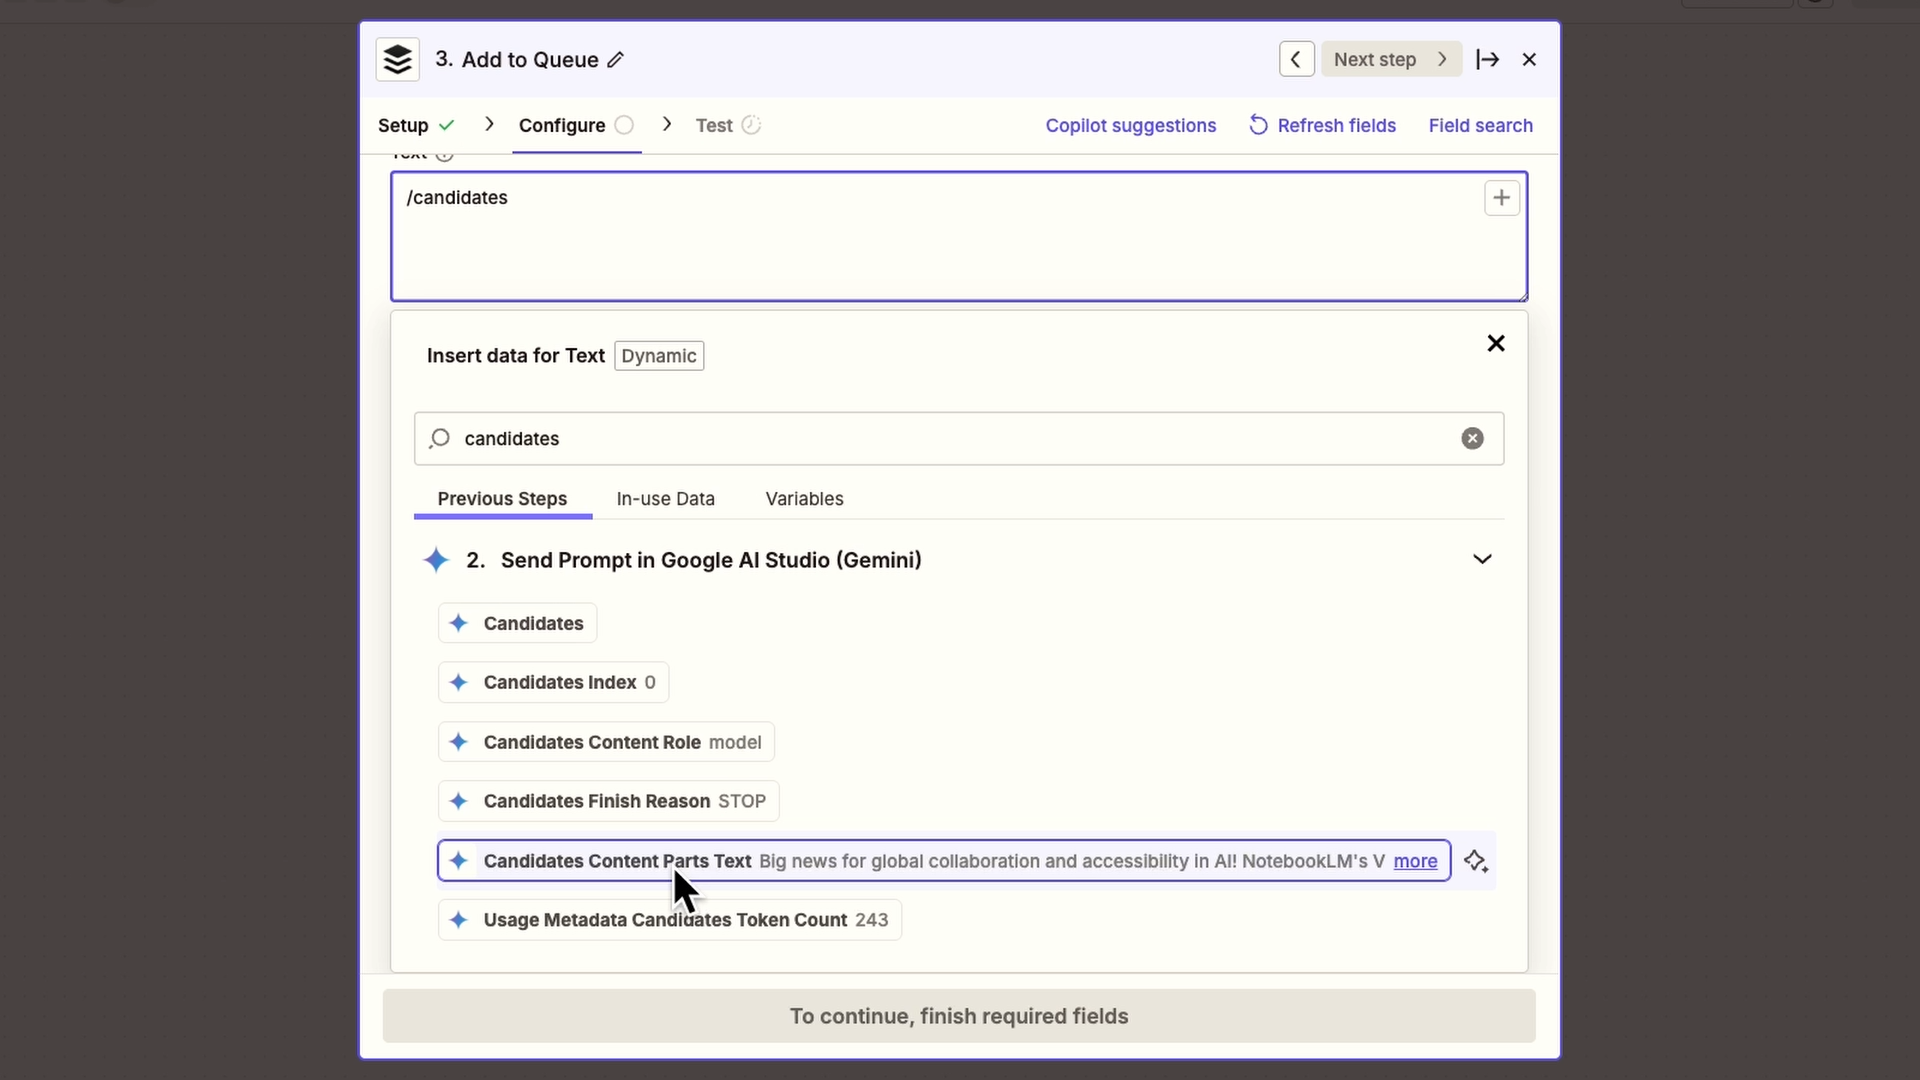
Configure your action’s setting, and add Gemini’s response in any appropriate text field. To find Gemini’s output in Zapier, hit forward slash and search for the "Candidates Content Parts Text" variable.
Once your action is configured, you can give it a test.

After testing our example automation, we can see the AI drafted post in our Buffer queue.
All of the necessary parts of your Gemini automation in Zapier are now in place. If you’d like, you can also refine this automation with additional steps, as well.
For instance, we’ll also add a Slack step at the end of the automation to send an alert whenever a new AI-drafted post is ready.
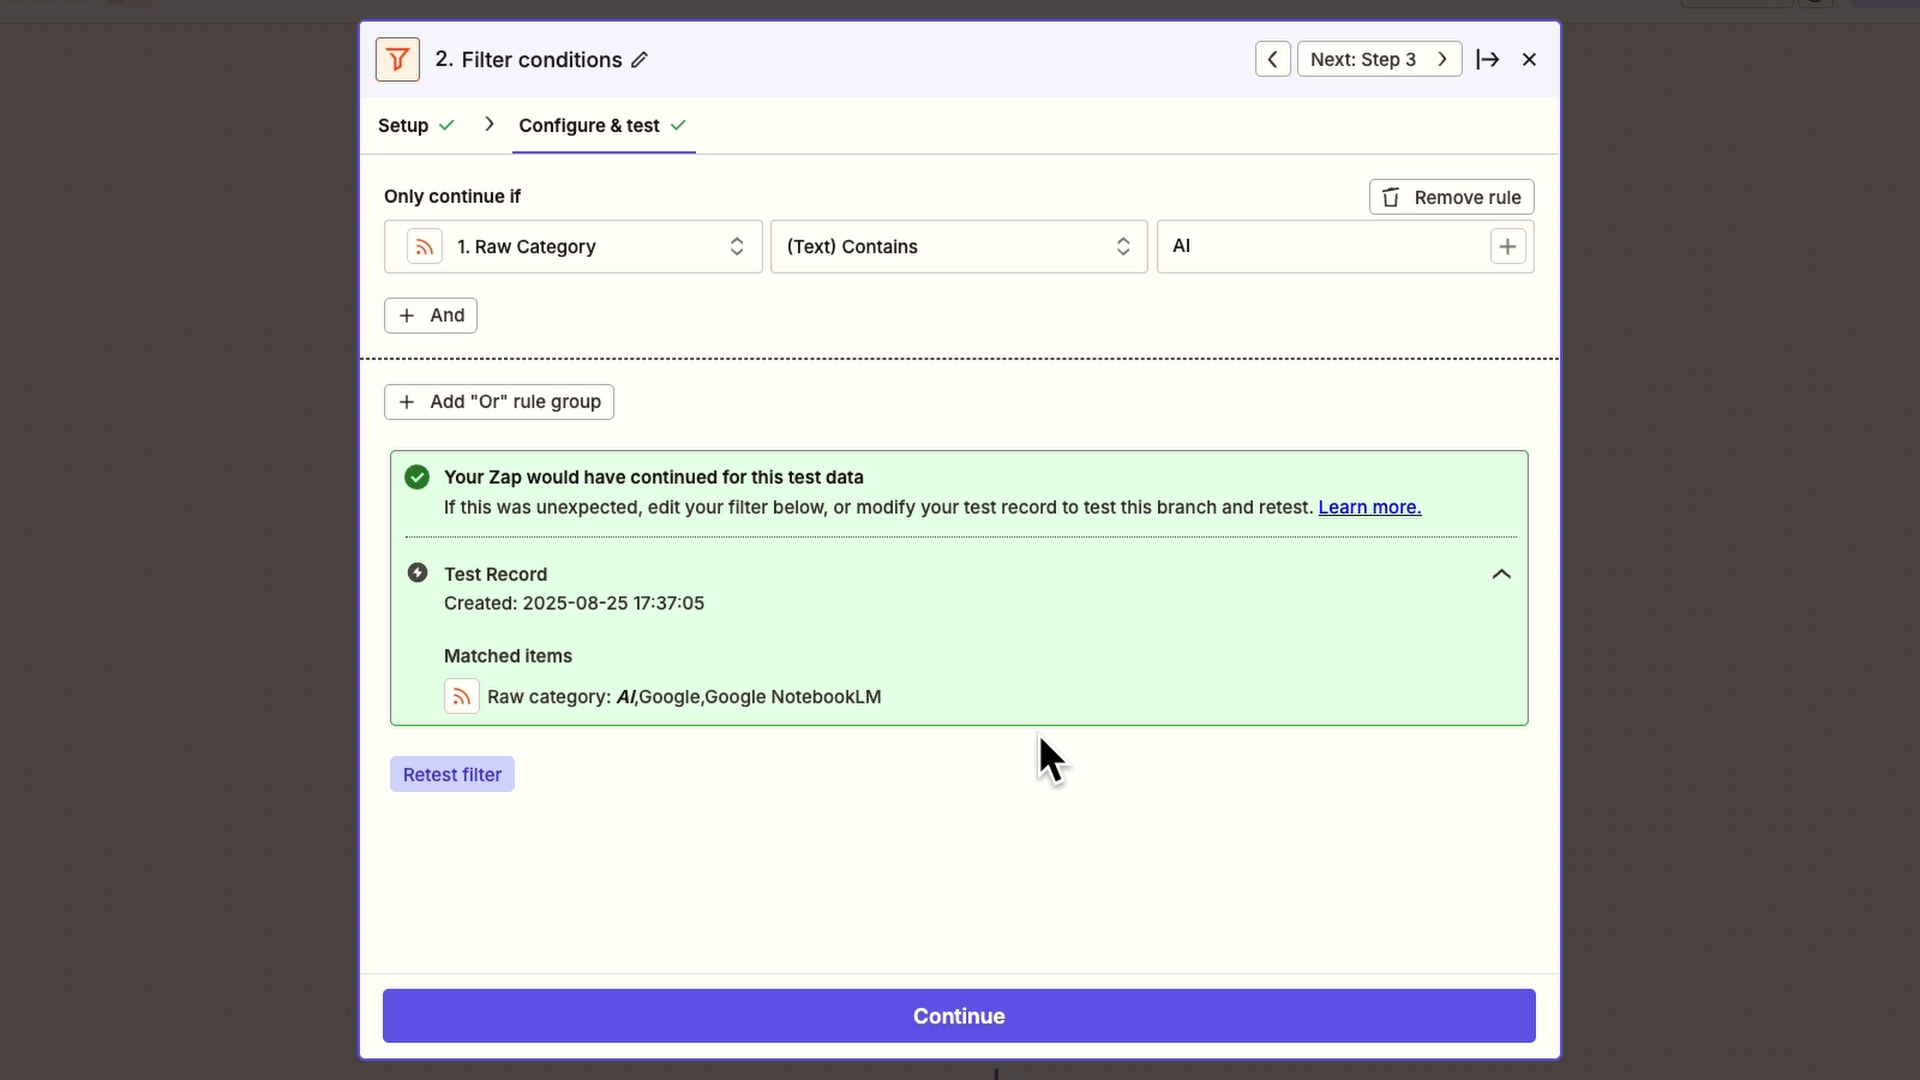
We’ll also add a filter step right after the trigger. The filter will check for relevant keywords like “AI”. If a new article doesn’t match the filter, the automation will stop right after the trigger, ensuring that the Zap doesn’t waste limited monthly tasks on irrelevant articles.
No more copying the same prompts into Gemini day after day. Set up the automation once, and it runs in the background doing the work for you.
Try this with your own repetitive prompts and see how much time you get back.
–
Need help setting up your own AI automations? Reach out to XRAY Hourly.com for expert support on a convenient, hourly basis.


.pptx.png)
.pptx.png)