
Automating your document templates is a great way to save a little time and create consistency with a simple task that you perform every day.
Adding a few simple variables to a Google doc will let you use that document as an automated template for automation platforms like Zapier or Make (formerly Integromat).
By just filling in a form with all the values you want to insert into your variables, you’ll be able to generate new docs in a matter of seconds.
In this tutorial, we’ll show you how to format the variables in Docs so that Zapier or Make can recognize and use the variables.
Then we’ll show you how to set up simple automations that actually create new documents, using either Zapier or Make.
To create an automation-ready variable in Google Docs, you just need to enclose the text of your variable in two sets of curly braces.
For example, in the doc pictured below, we want to change “John Smith” into two variables: First Name, and Last Name.
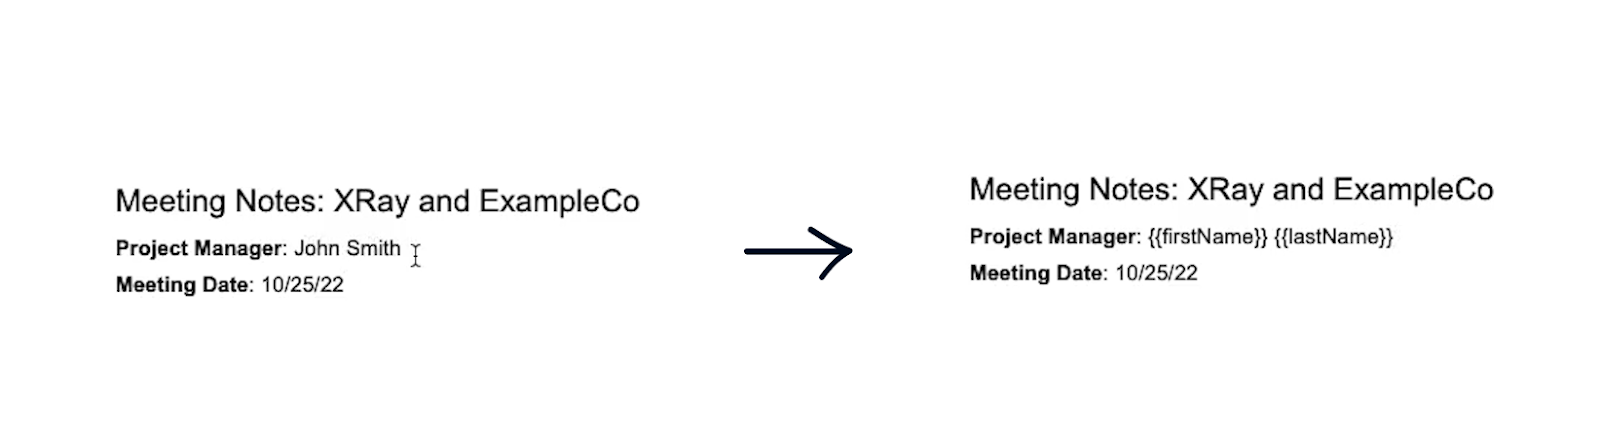
We’ll replace “John” with {{firstName}}, and we’ll do the same with “Smith” and {{lastName}}
If you plan to use Make or Integromat to create documents, then you can use any format you want for your variable names.
However, if you’re using Zapier, we’d recommend avoiding hyphens, spaces, or other special characters in your variable names.
Variables with spaces and hyphens aren’t currently recognized and supported in Zapier. They have supported these characters in the past, and they may update this later, but leaving them out of your variable names is the safer choice for now.
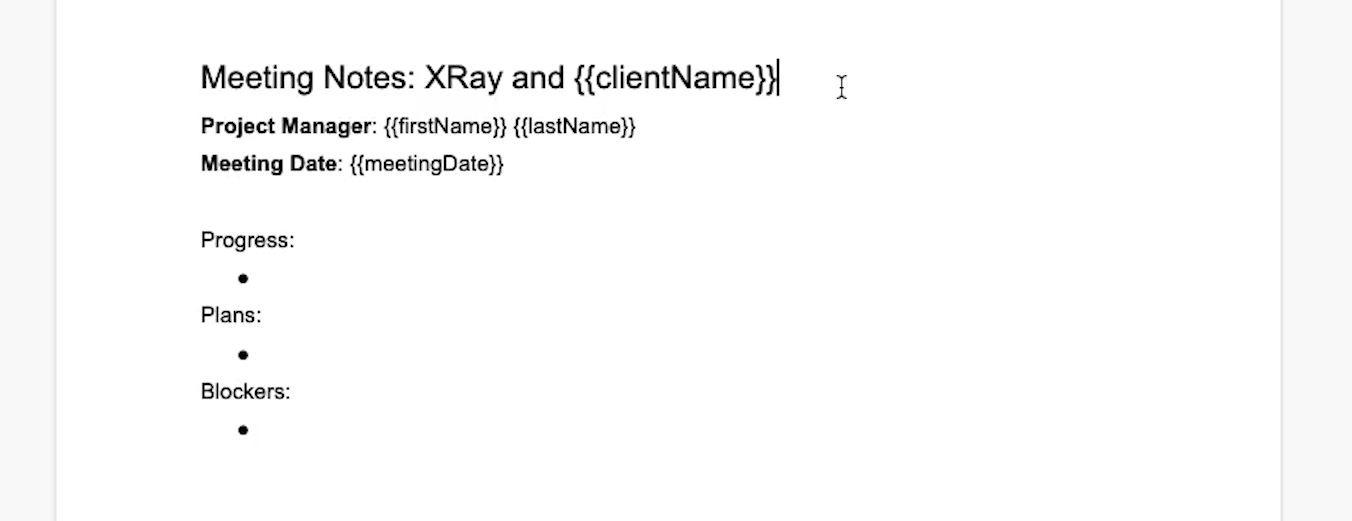
Add all of the variables you want to your document. In our example, we’ll add several variables to our Meeting Notes documents like {{date}} and {{clientName}}
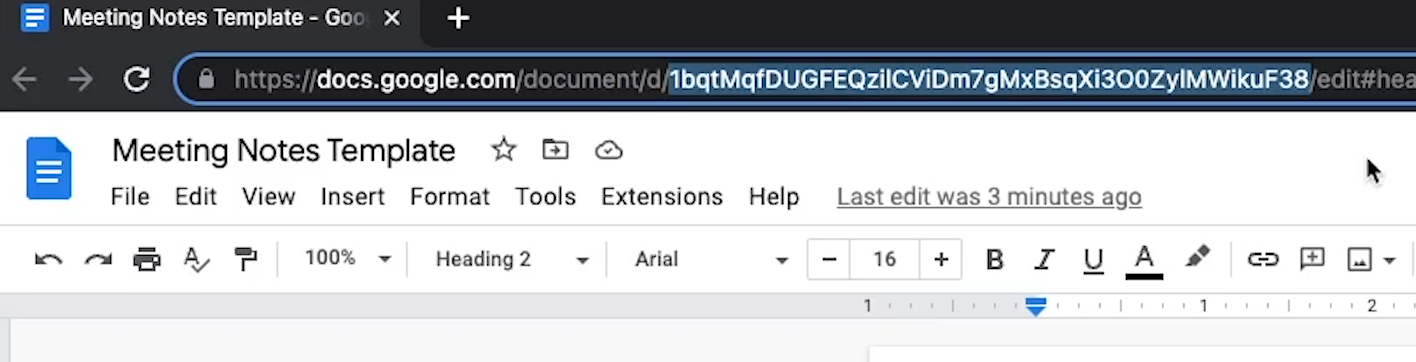
Once you’re finished adding all of your variables, copy your document ID. The ID can be found in the URL bar. It starts after /d/, and ends at the next forward slash.
You’ll need this ID later when we build the automation.
Now let’s see how these variables work in practice.
First, we’ll demonstrate how to make a simple Zap that creates a Google Doc from a template, then we’ll show you a similar scenario in Make.
We’ll create a Zap that uses our example doc as a template. When it triggers, it will automatically make a copy that fills in all of the variables with actual names, dates, etc.
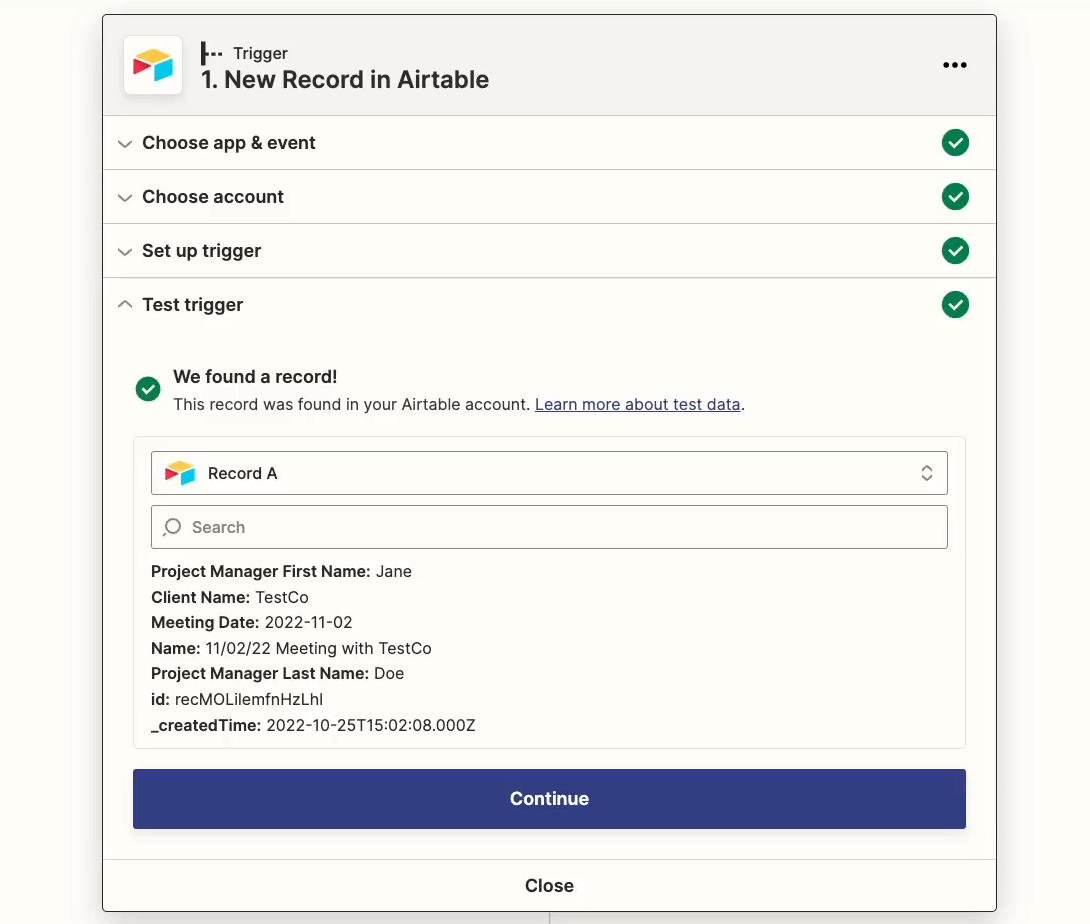
First, you’ll need a trigger step that gathers data to insert into the variables. In our example, we’re using a simple Airtable form to collect the information.
Then, add a Google Docs step to your Zap. Choose “create a document from template”.
Click “continue”, and log into your Google account.
Paste your document’s ID that you grabbed earlier into the “Template Document” field. Give your new doc a name, and specify the folder where you want it to be created.
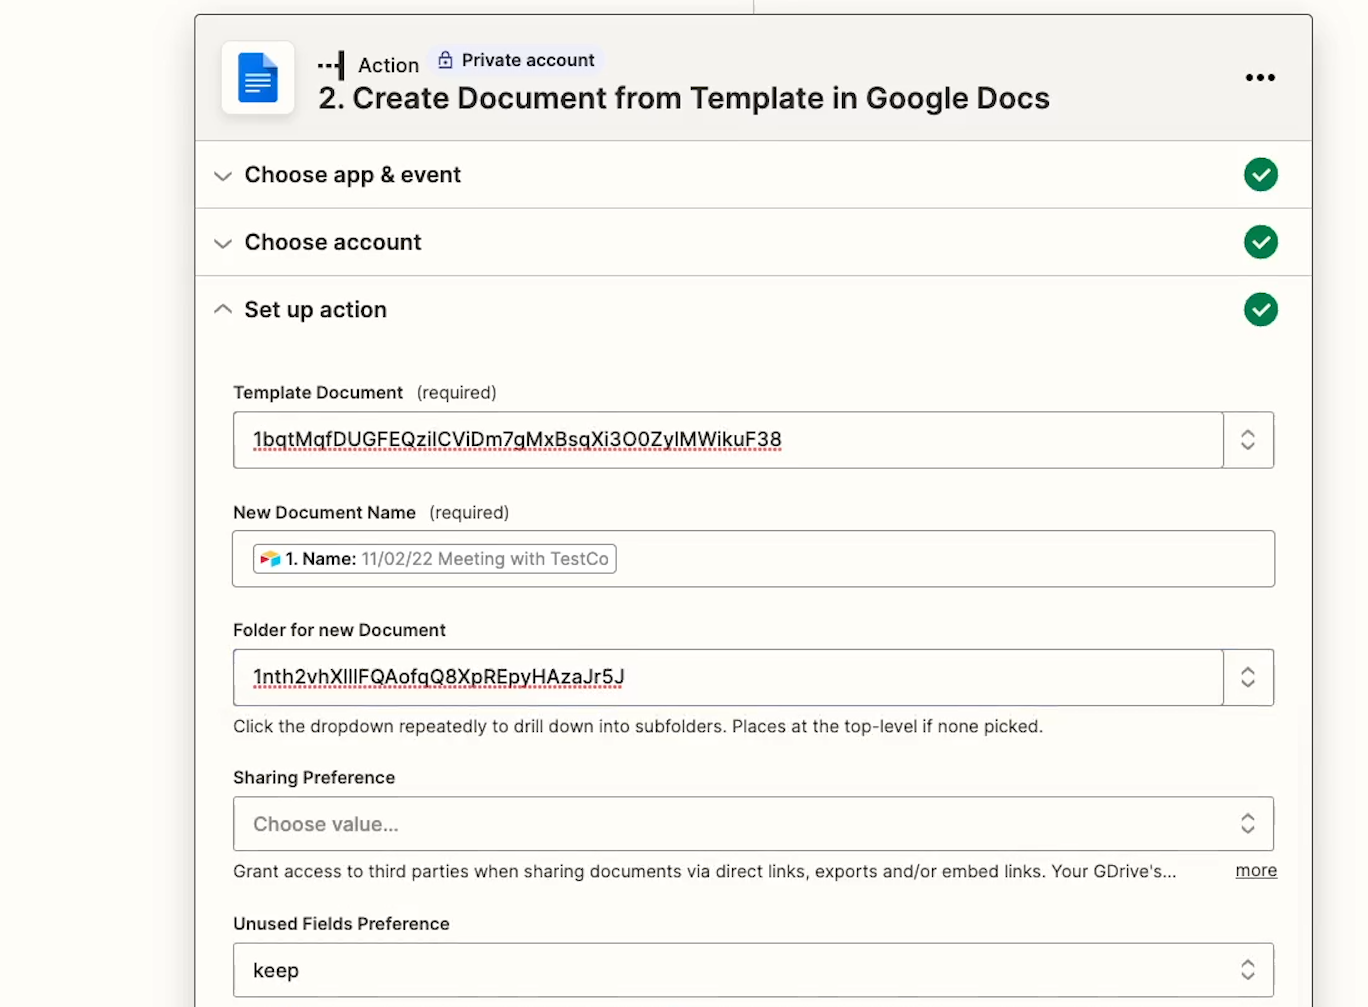
Then, you should see all of the variables that you created as fields. If any of them are missing, just go back to your template and make sure that every variable has two sets of curly brackets and no spaces.

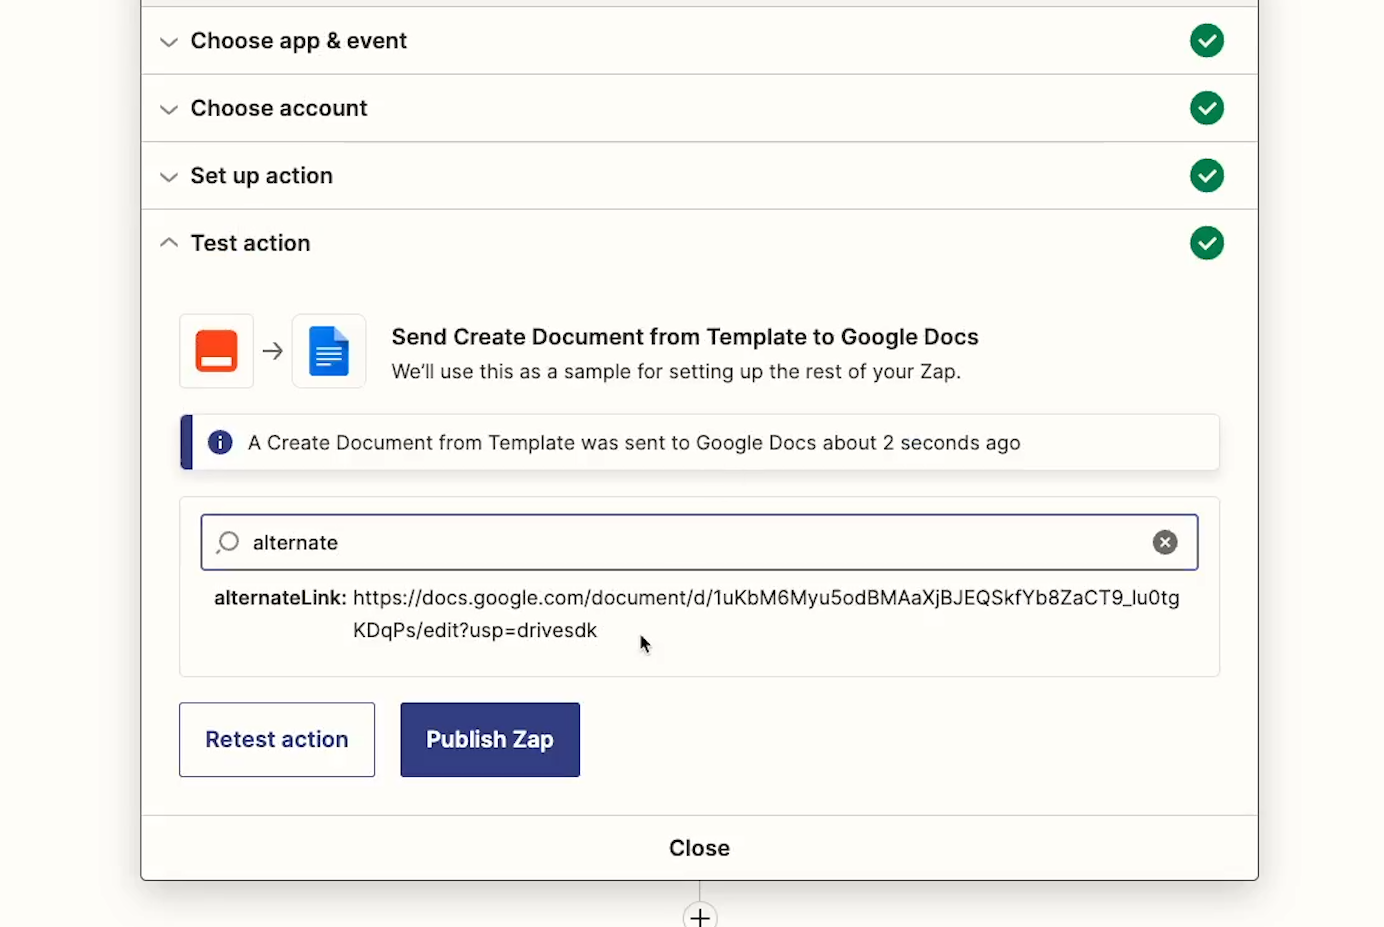
Map each piece of collected data to the appropriate variable, and test your Zap.
You should see a new doc in the specified folder, with all of the variables replaced with real data.
You can also look for the “alternate link” in the Zapier output to find the doc’s URL.
To automatically create a document from your template in Make, start by creating a new scenario.
Just like with Zapier, you’ll need a trigger module that can gather data to replace your variables with. Once again, we’ll use an Airtable form in our example, but you can use any application that collects the necessary information.

With the trigger set up, add a new Google Docs module and select “Create a Document from a Template”.
Under “Create a document from a Template”, select “By mapping”.
Copy and paste your Google doc’s ID into the “Document ID” field.
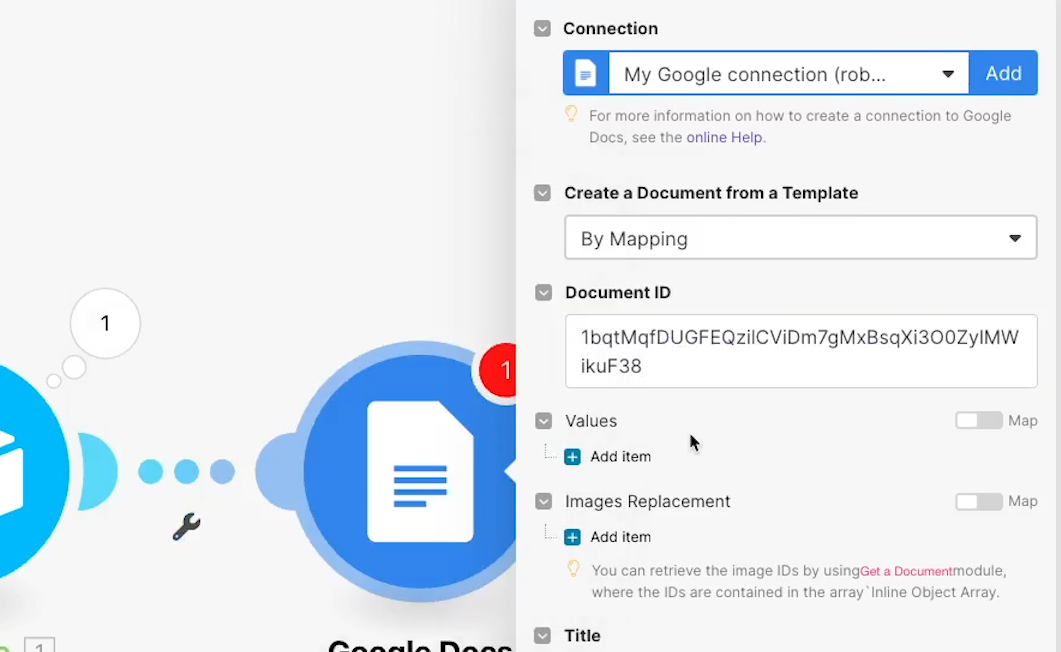
The “values” field is where we’ll identify and replace our variables.
Click the “add item” button to add a new Tag. Tag is the term that Make uses to describe variables in Google Docs.
In the field that says “Tags”, enter the name of your first variable exactly as it appears in your doc, except without the curly braces.
Then, in “replaced value”, enter the data from your trigger that you want to use.
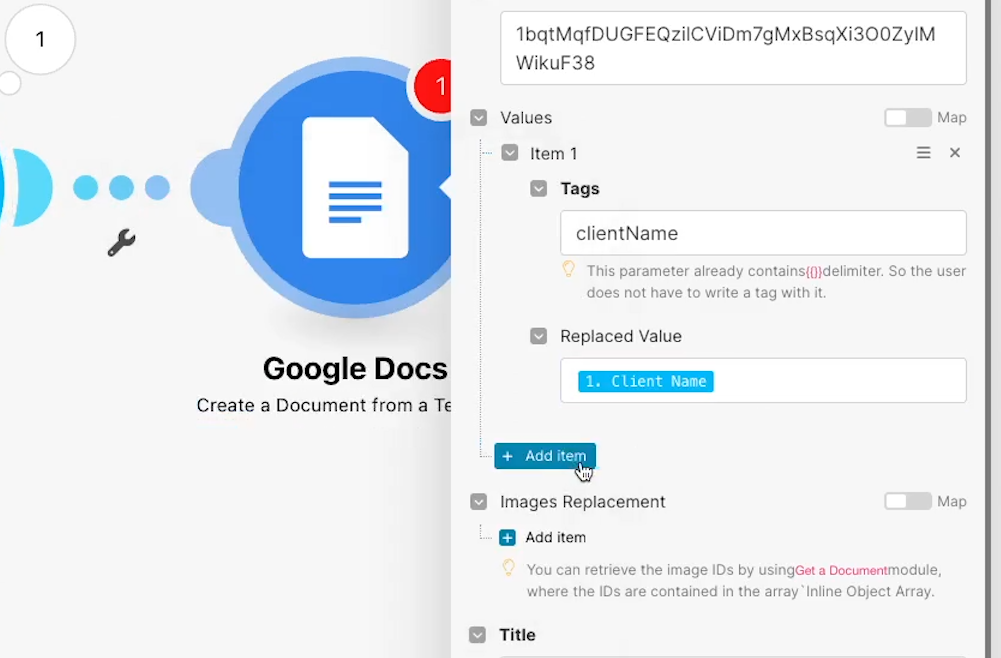
If possible, make sure the names for your variables are similar or identical in both sources. It’s much easier to map all of your variables when they’re clearly named.
Repeat this process for every variable in your doc. Then, run the scenario to test it.
You should see a new doc with each variable replaced by the appropriate data.
Now you’re all set to create automation-ready templates with your Google docs. It just takes a few minutes to set up, and then you can create error-free documents in seconds with either Zapier or Make.
If you’d like to learn more about building no-code workflow automations, check out our blog or our YouTube channel. You can also follow XRAY on Twitter, Facebook, or LinkedIn.

.pptx.png)

