
If you’ve been dabbling in no-code and low-code automation, then you’ve probably already used Zapier to set up a few simple automations.
While Zapier excels as an intuitive, no-code platform, it also has the ability to perform some useful low-code functions that let you do more with your automations.
In this post, we’ll show you one of the most practical low-code functions that Zapier supports: making your own custom API calls.
If you’re not familiar with the term API, you can check out our post here for a thorough explanation of what they are and why they’re important for automation. But in short, an API (Application Programming Interface) is a way to issue commands to an application without using the app’s typical user interface. These commands, usually issued by developers, let someone fetch data from the app, create new data, or edit existing data.
As a low-coder, you can use API calls to add functions that Zapier doesn’t support natively. For instance, if you’re working with Asana, you may have noticed that Zapier doesn’t have an option to create a new section within a project. To do that, you’ll need to write an API call.
In this post, we’ll walk you through setting up an API call to create a new section in Asana, but the principles apply pretty well to any app and action that you want to make an API call for. So even if you’re not using Asana in your workflows, it can still be useful to follow along.
• An Asana account - a free trial will work
• A paid Zapier account - any level from “Starter” or higher will give you access to premium apps like Webhooks by Zapier
• (Optional) Airtable - we’re triggering this Zap with Airtable, but you can use any app
Before going through the trouble of making an API call, check to see if you can use pre-built integrations first.
If we check Asana integration, we see that there’s no step to add a section. That means we’ll need to make an API call in order to create a section as part of our automation.
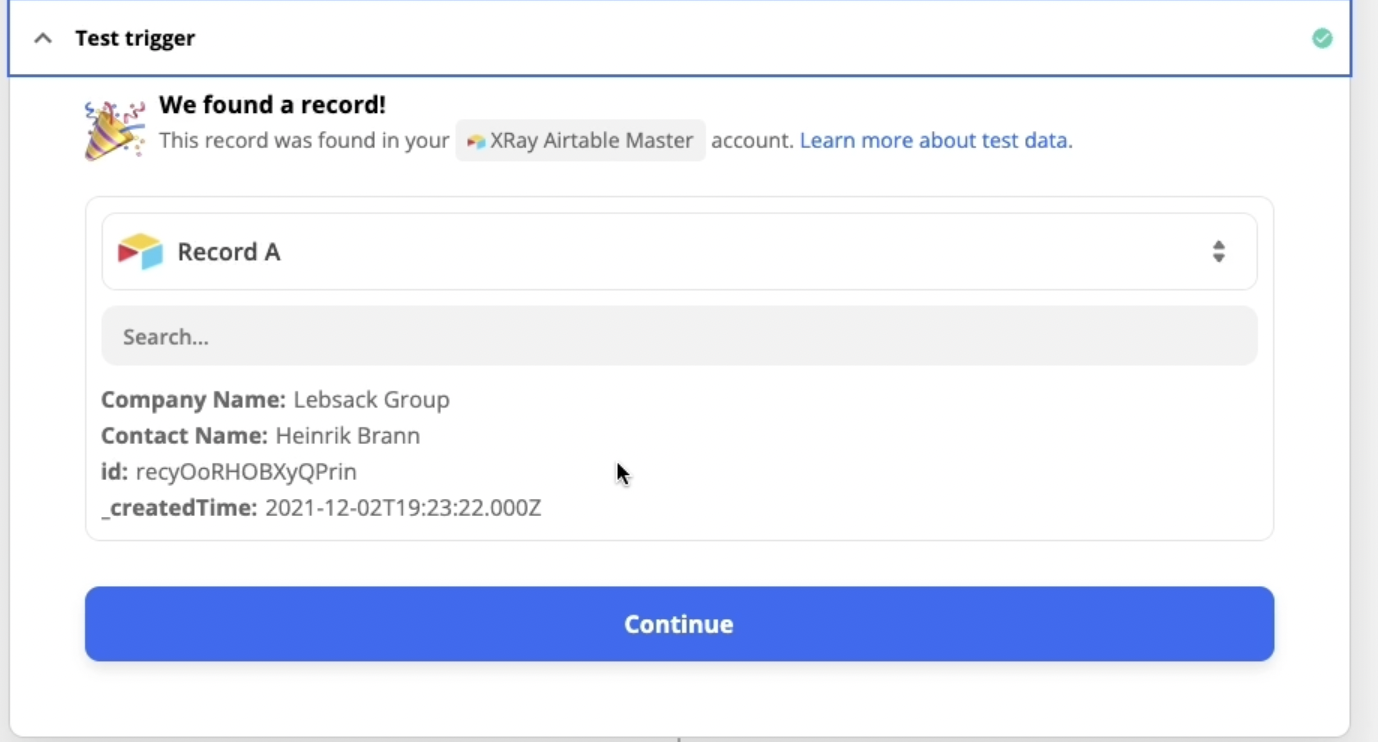
Now, you’ll need to create a Zap and add a trigger. Your trigger can be anything; in our example, we’re using a “New Record” trigger in Airtable. The record contains some information we’ll use in the API call, but you can also enter that data manually for this tutorial.
Add a new step, and choose “Webhooks by Zapier”.
Choose your webhook’s type from the menu. POST will let you create data in the app; GET will retrieve existing data; PUT will update existing data.
Since we want to create a new section with our automation, we’ll choose POST.

Zapier will now ask you for a URL. This URL is how your webhook will actually be sent, and it needs to have some particular information to communicate properly with Asana’s API.
To figure out what you need to put into the URL for any API, it’s always best to consult the API documentation.
Most modern apps have documented APIs, so you just need to do a quick search for “{app name} API docs” to find them.
When you open up Asana’s API documentation, you can use the search bar on the left of the screen to search for information pertaining to “sections”.
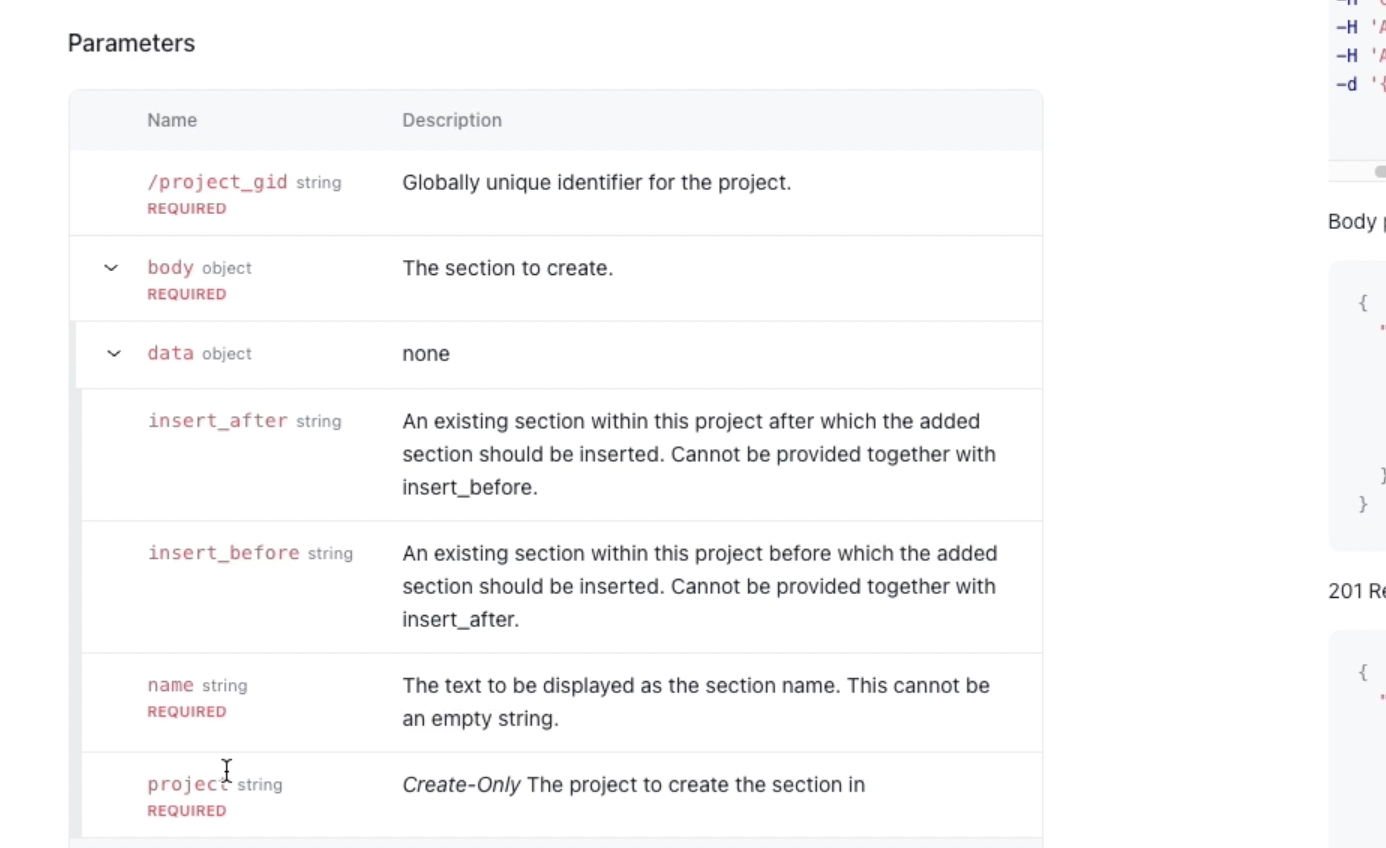
The entry on sections has a lot of information about all the functions you can perform with sections, and what data is needed to complete the command. There’s also example code, which is extremely useful for getting started.

To start, copy the URL from the example code. You’ll need to replace the placeholder text of “{project_gid}” with your Asana project’s actual GID.
To find your GID, open up your Asana project in your browser, and copy the number in the URL between 0/ and /list.
Once you’ve got your Asana GID, paste the completed URL into the field in Zapier.
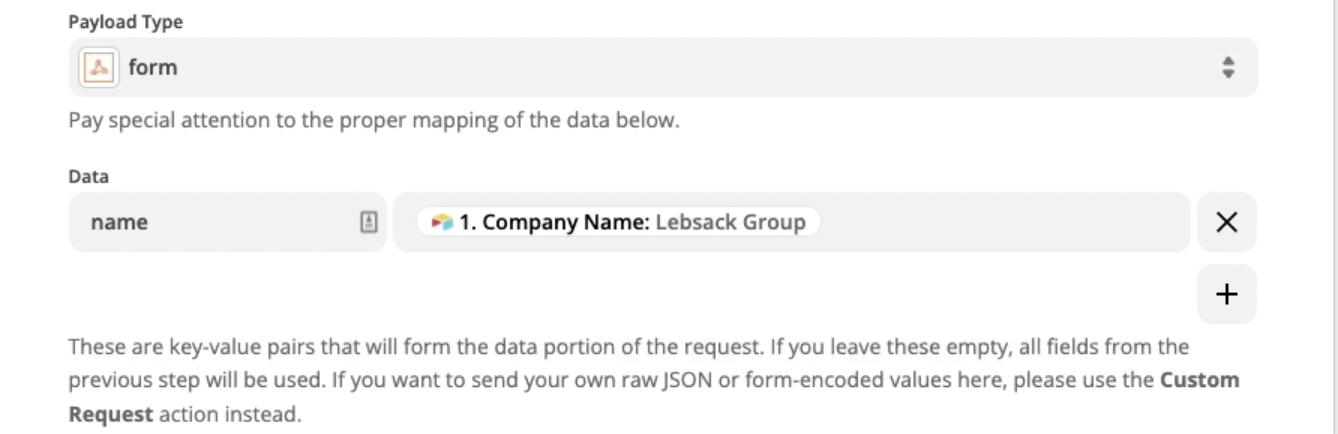
Under “Data”, Zapier lets you assemble a set of key-value pairs to include all of the data needed to execute your API call.
Refer to the API documentation to find out what data you need to include here. To create a new section in Asana, the docs indicate that you only need to identify the project that the section will be created in, and the name of the section.
Since the project is already identified in the URL, you can just include a name for the section. Enter “name” into the key field, and whatever name you’d like in the value. We’ll use data from our Airtable trigger in our example, but you can enter a name from a different source, or just enter one manually.
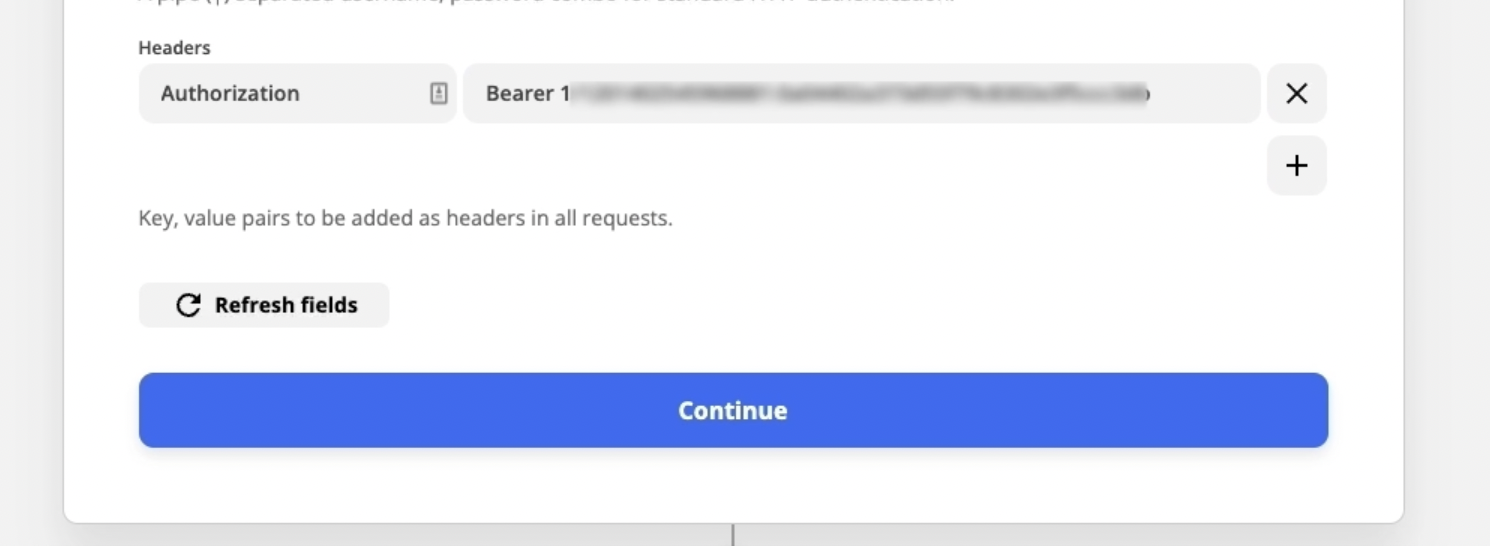
Headers act as a sort of label for your webhook; they tell the recipient app information about the request that you’re sending.
You’ll frequently need to include authorization data here - a simple credential check to make sure that your request is authorized to access data in your account.
Again, check the API docs to determine what you’ll need to add here. Asana’s docs indicate that we need to include a token authorization.
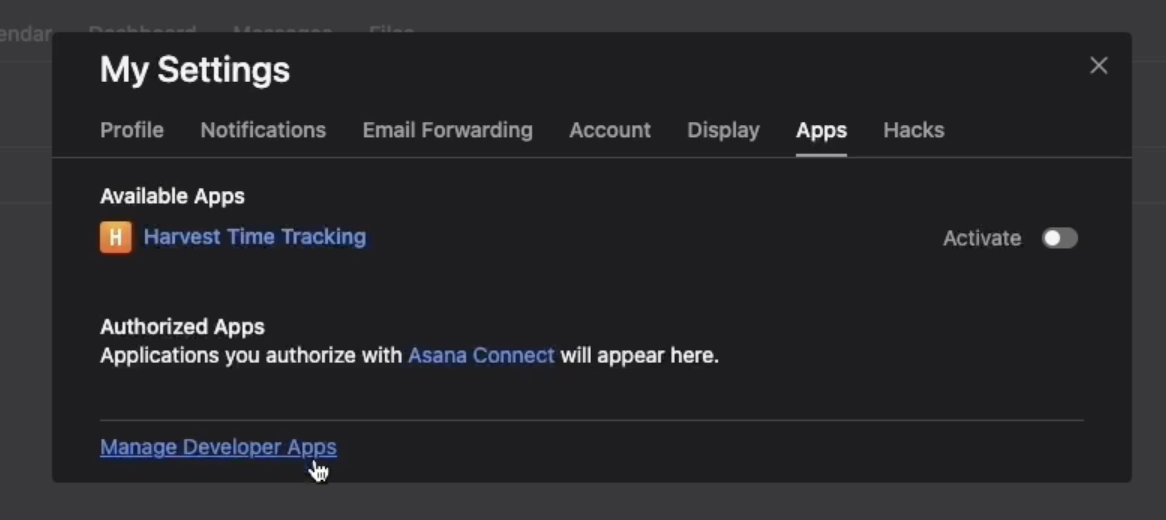
To get the authorization token, you’ll need to go to your Asana account and navigate to Settings > Apps > Manage developer apps. From there, click on “New access token”.
Name the token and create it. Copy the token, and return to Zapier.
Under headers, enter “Authorization” as the key. For the value field, enter “Bearer” followed by a space, and paste your token in.
With your URL, data, and headers all filled in, you’re all set to test the automation. It should create a new section in your designated project with the name you provided.
Now you know the basics of making an API call in Zapier, and you can start adding custom steps whenever Zapier doesn’t support exactly what you want to do.
This post just covers some of the fundamental principles of API calls; you’ll need to do a lot of trial and error on your own to figure out the details. Just remember to always check the documentation when in doubt, and you should be able to find what you need.
If you’d like to learn more about building low-code automations to enhance your workflows, check out our blog or our YouTube channel. You can also follow XRAY on Twitter, Facebook, or LinkedIn.


.pptx.png)
.pptx.png)