
With automated templates, you can create presentations, reports, and other slide decks faster than ever. By completing a quick form in Airtable, you can instantly create a Google Slides presentation populated with custom text and even images.
In this post, we’re going to show you how it all works with a simple 3-step automation in Make, formerly known as Integromat. All you’ll need are free accounts for Google Slides, Make, and Airtable (or any other form building app you want to use).
To begin, just create a presentation in Google Slides as normal. Note that you won’t need to upload this presentation as a template in Google Drive. Just make note of where the file is saved so you can identify it later in Make.
Quick tip: enter “slides.new” in your URL bar or in a Google Search bar to instantly open up a new, blank presentation.
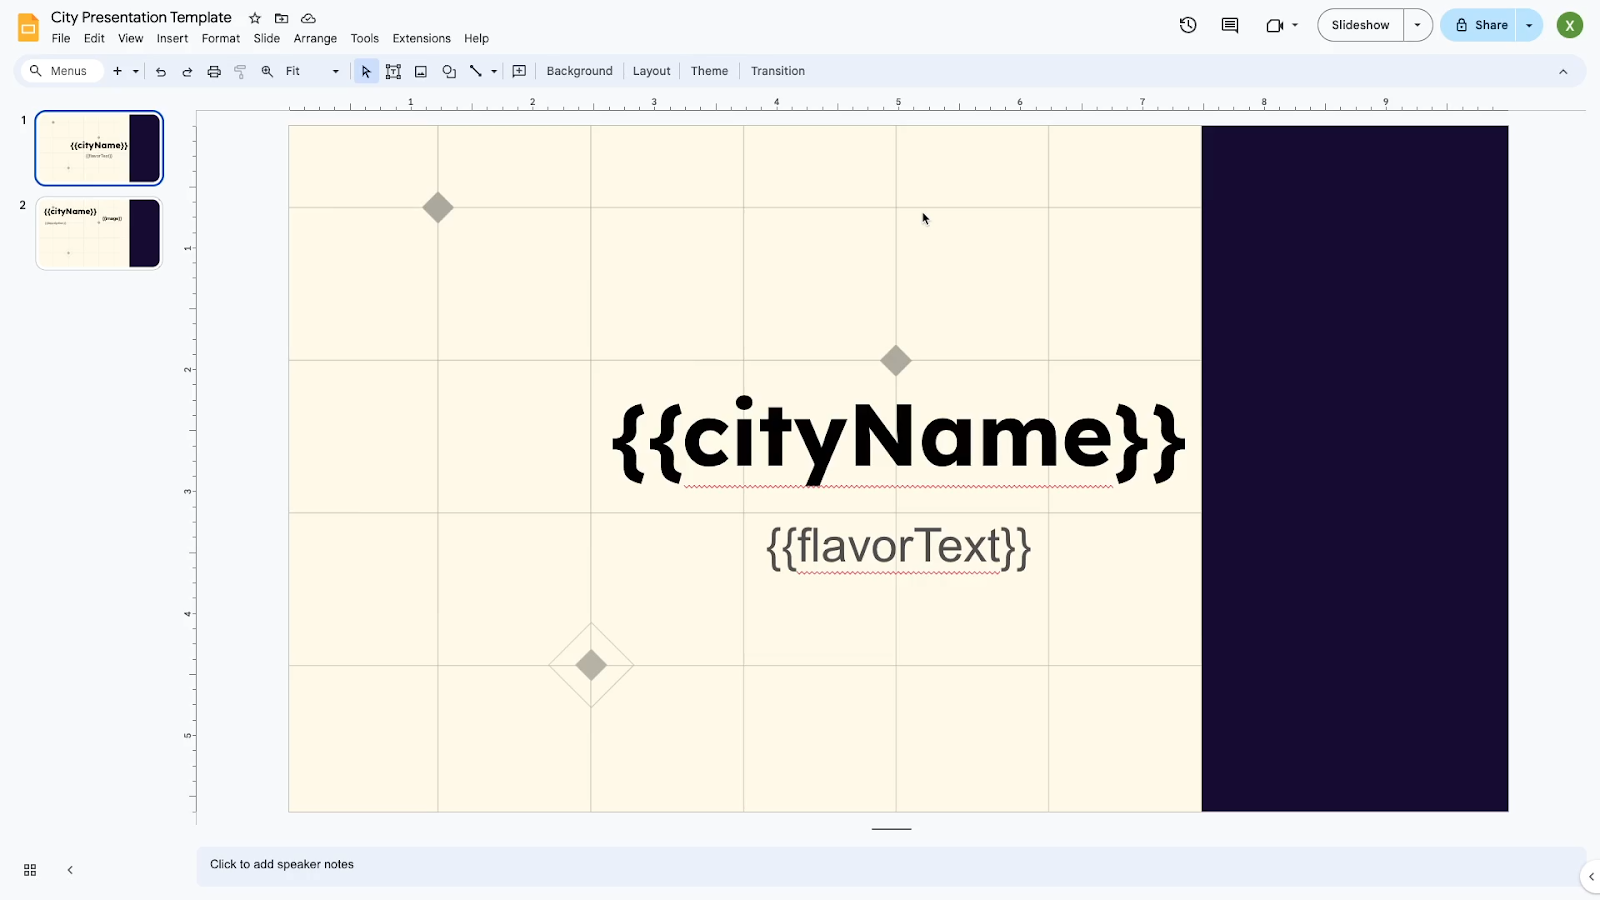
Next, you can add variables to your presentation by enclosing text in two pairs of curly brackets.
A variable will act as a placeholder. When Make creates a new presentation from your template, it will copy the template as a new deck, and replace the variables with text or images from Airtable (or your other data source).
In Make, you can use nearly any symbols and syntax you want for your variables as long as they’re enclosed in two curly brackets {{like this}}
However, we would generally recommend using “camel case”, where each word is separated with a capital letter instead of a space, hyphen or other character. This will ensure compatibility with other automation platforms like Zapier, in case you want to use them in the future.
For example, your variables would look like this:
{{presentationTitle}}
{{shortDescription}}
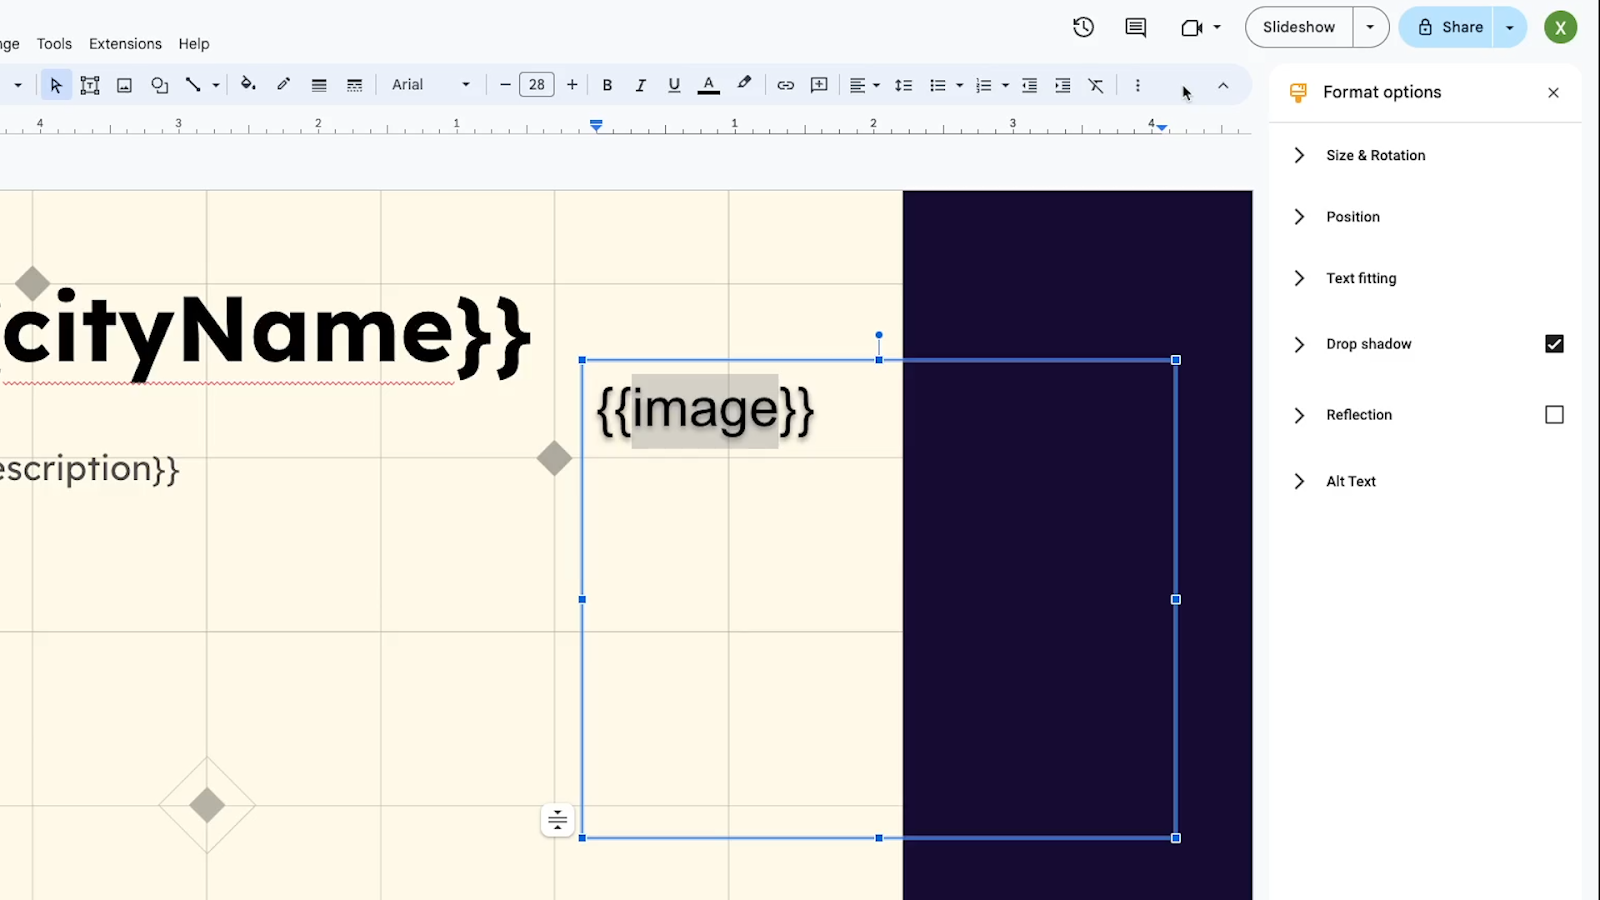
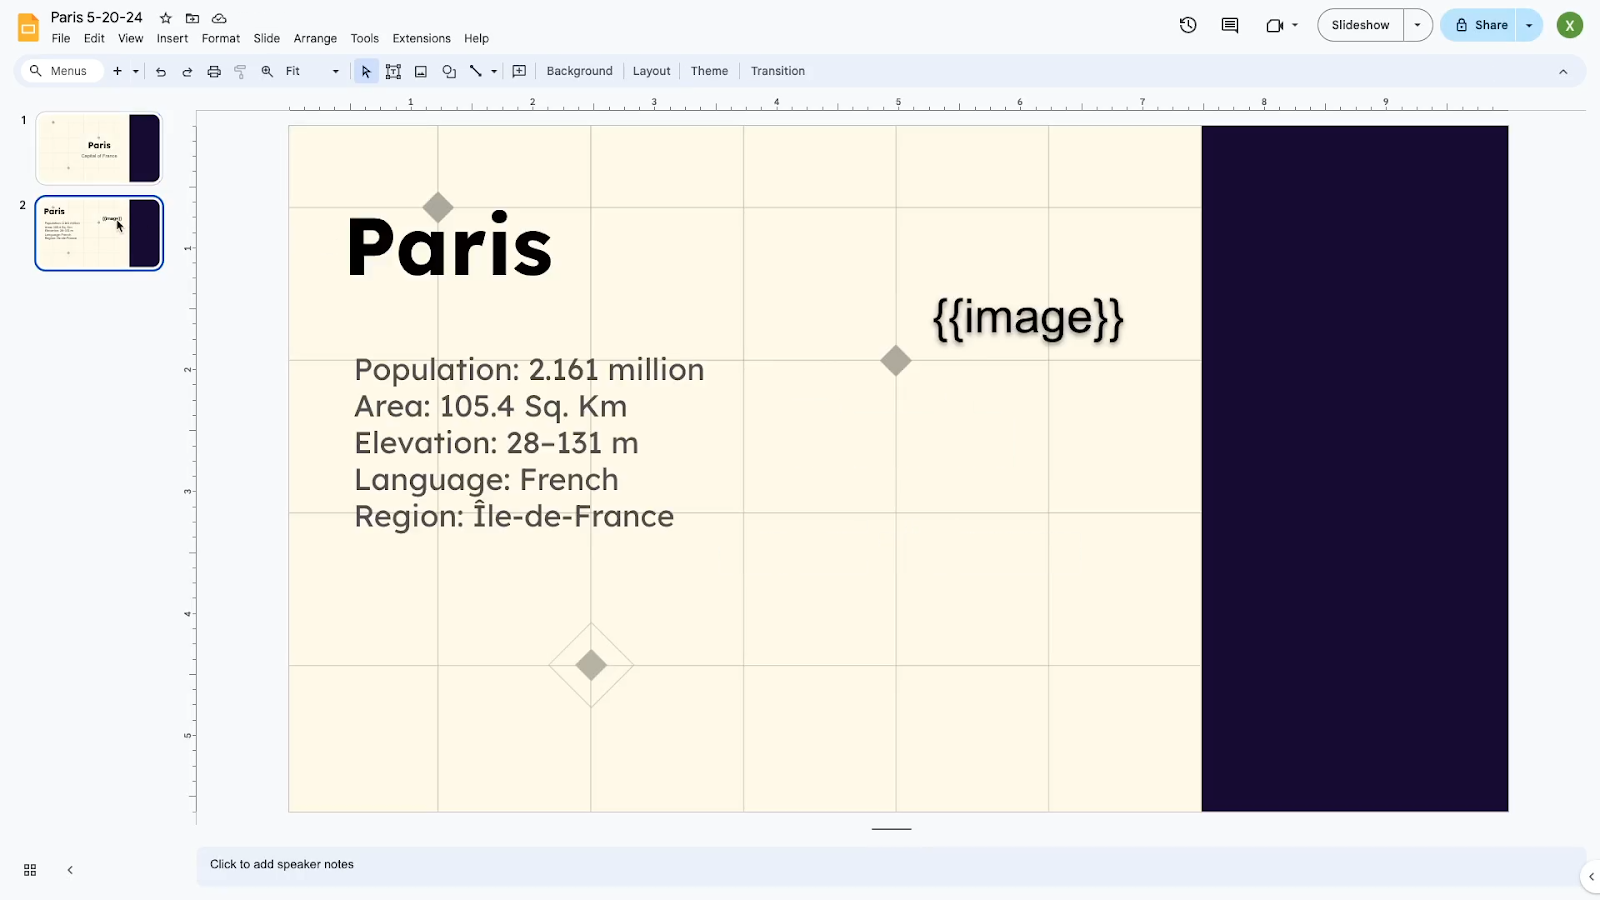
In the image below, you can see a finished Google Slides template with a few variables in curly brackets.
If you plan to replace any of your variables with images, you can still use a text field like with any other variable.
Just note that the final placement of the image will be based on the placement of your variable.
When the variable is replaced with an image, the image will be the same width as the text box you’ve drawn.
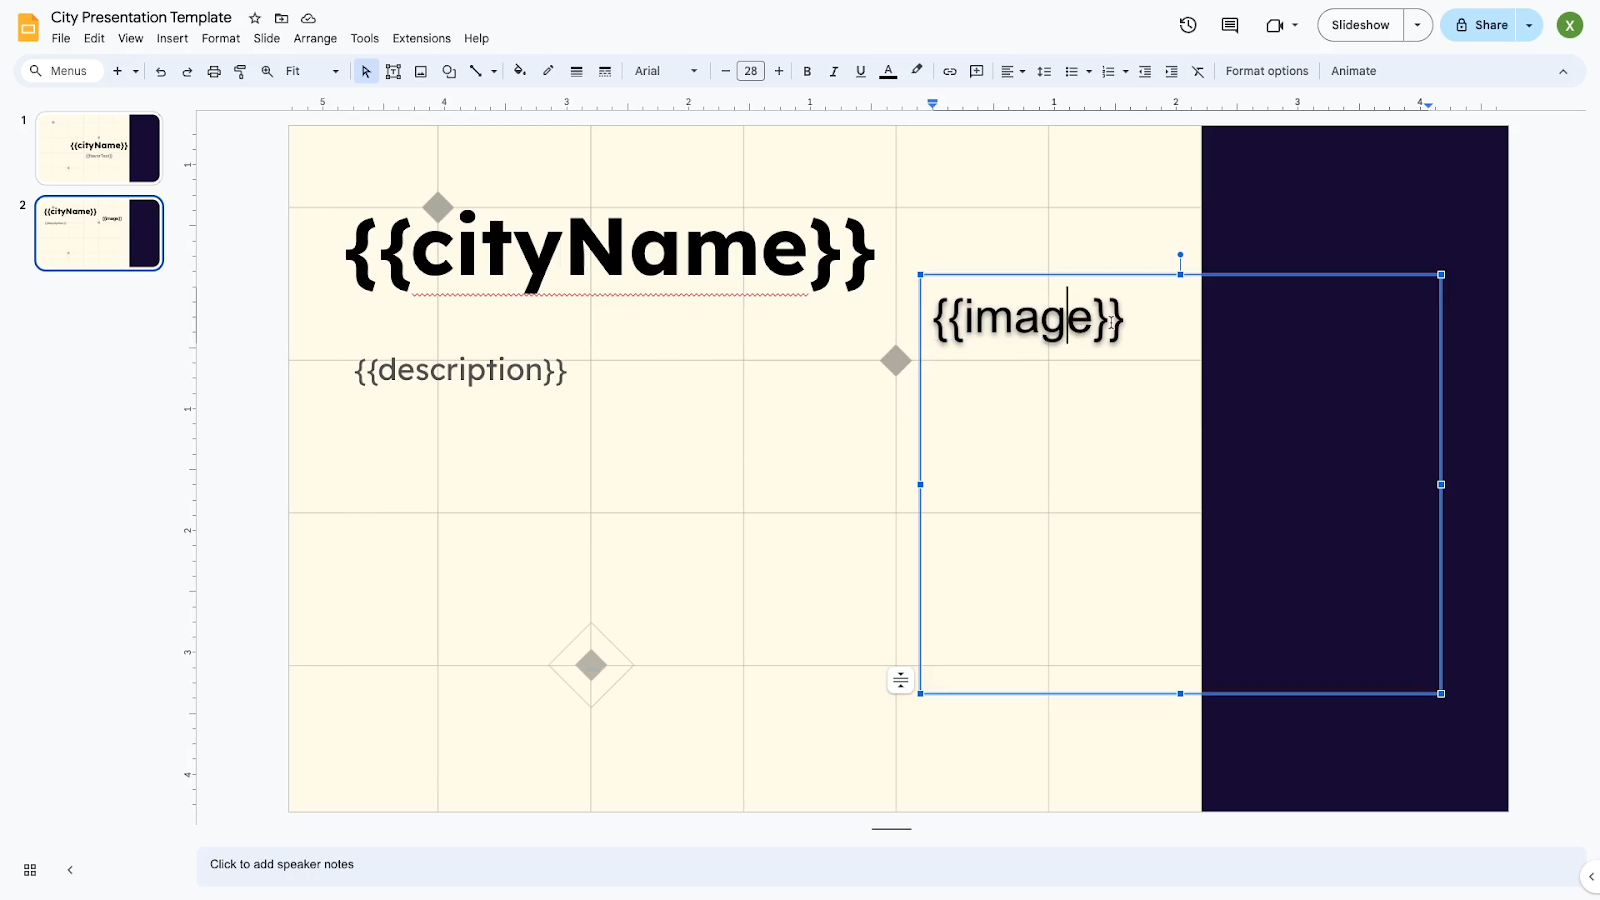
The top of the image will align roughly with the top of the text box as well, so we’d recommend drawing the text box for your image variable where you want the image to be.
However, getting the exact right placement may take a little trial and error.
Additionally, many effects that you’ve applied to the variable text will also apply to the final image. For instance, an image variable with “drop shadow” applied will also have a drop shadow on the final image.
Once your variable tags are all set, it’s time to create a form in Airtable
In Airtable, or in any other app that you want to use that supports forms, create a form with a question for each variable that you added to your slide deck.
You could also use apps like Tally, Typeform, or Google Forms. However, the automation that we demonstrate in Make will use some Airtable-specific settings.
If you're new to Airtable and would like to learn more about using the app, you can check out our beginner's guide here.
In Airtable, you can make a form by simply creating a form view for any existing table. When you do that, every field in your table will become a field in the attached form view.
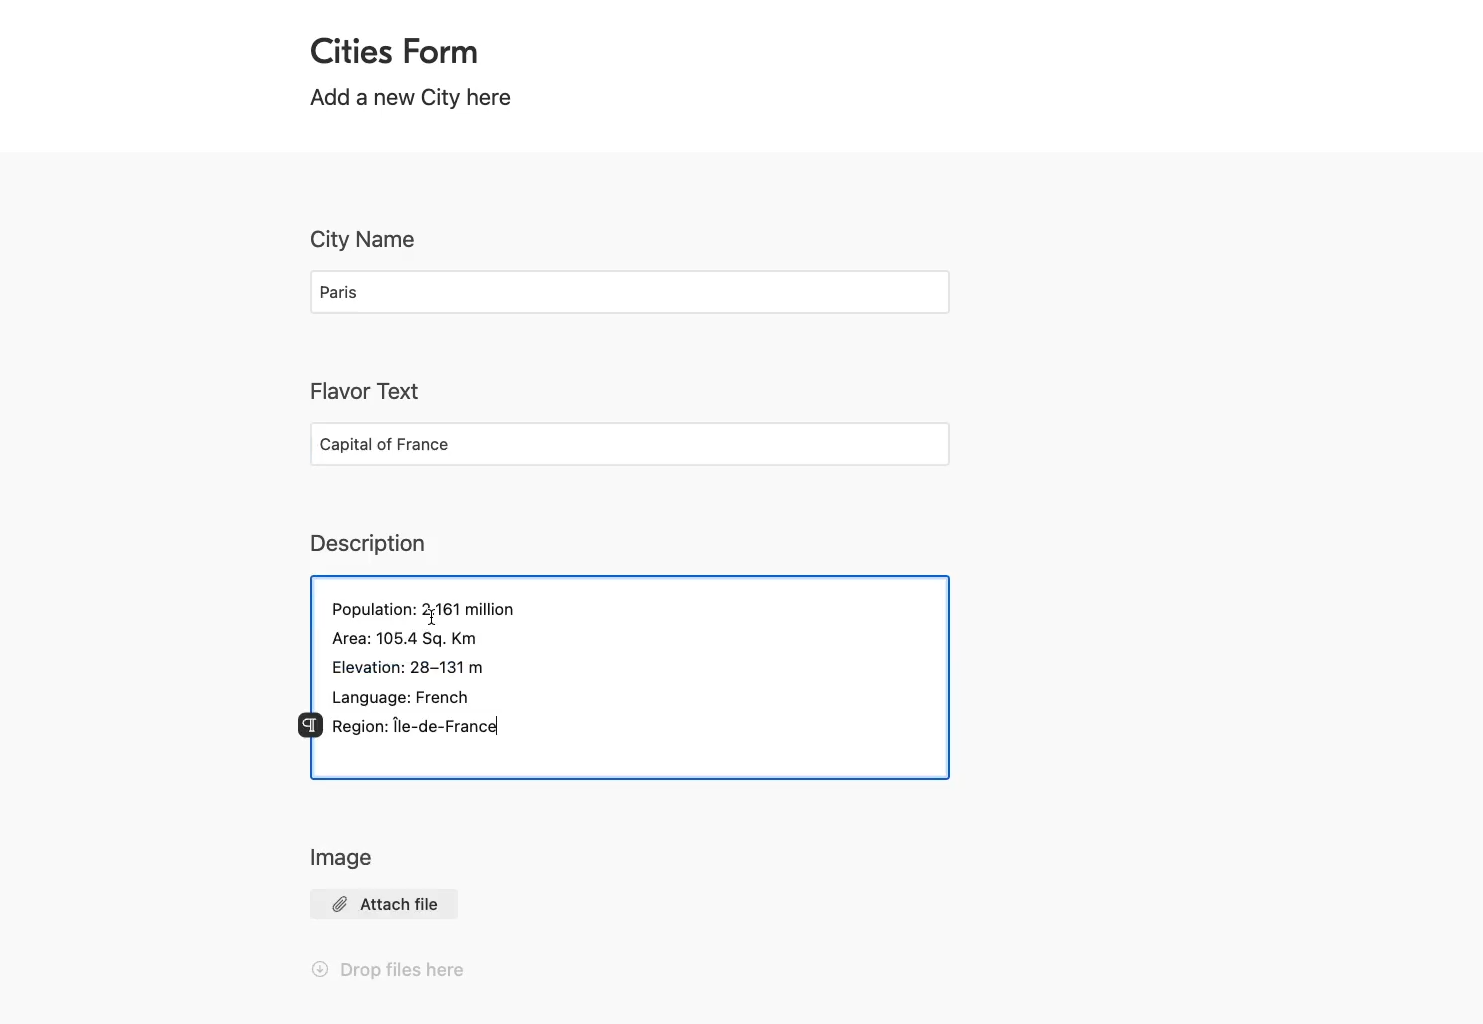
So to begin, just create a table with a field for each variable in your presentation template. Be sure to choose appropriate data types for each field.
In our example pictured below, most of the field types are “text”.
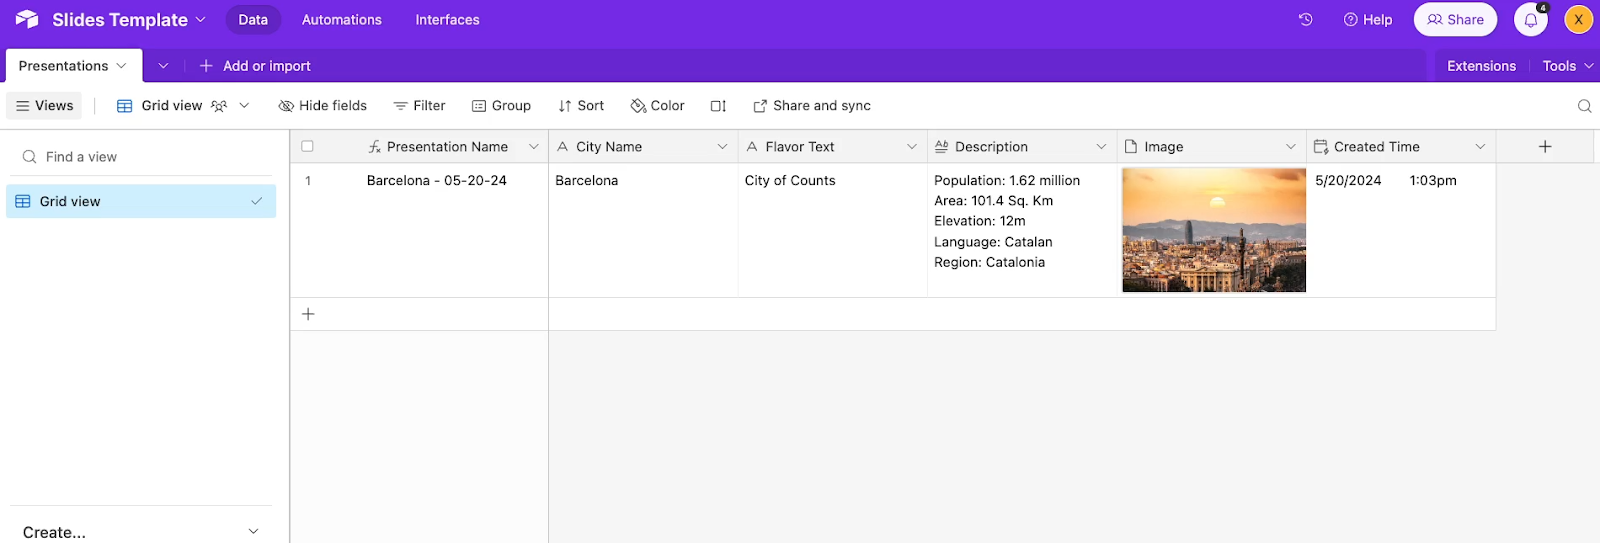
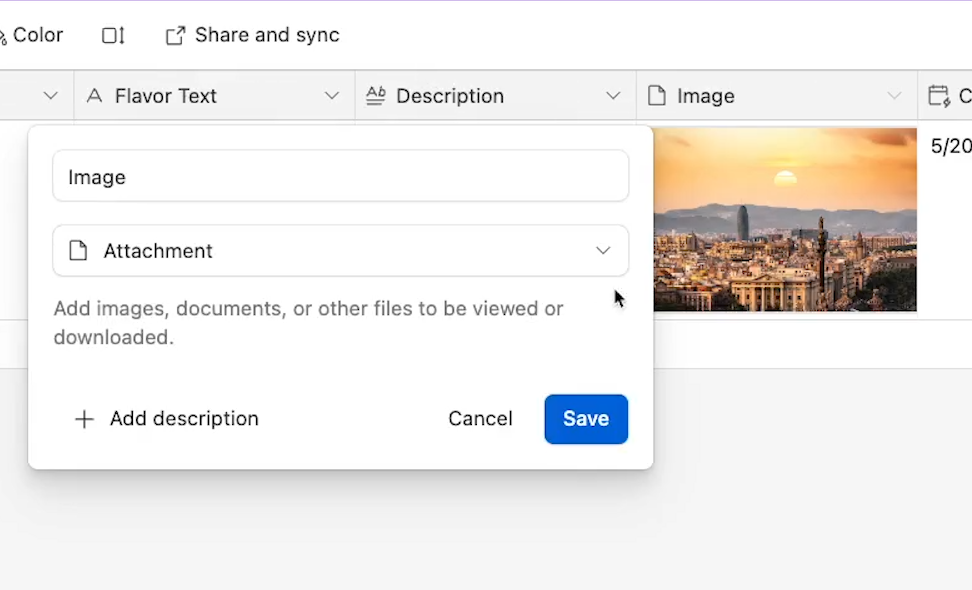
However, we have included one field called “Image”, which is an “Attachment” field type. That will allow us to upload an image to the field.
You'll also note that we've included a “created time” field. This is a necessary field whenever you're trying to automate Airtable with Make.
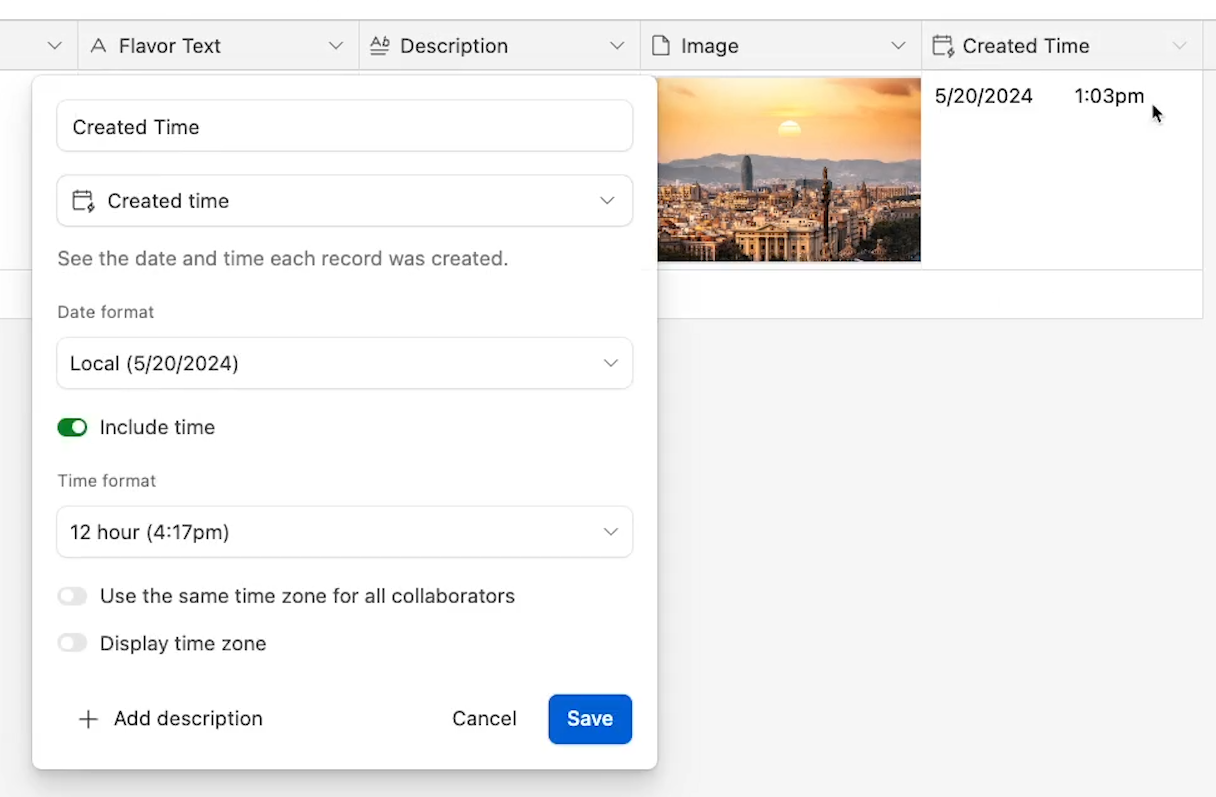
This field will be automatically populated with the date and time when each record was created. Since Airtable fills it in automatically, this field won’t be included in the form.
Once all of the fields in your table are ready, you can create a form view. Just click on “Form” in the bottom left-hand corner.

All of the fields from your table should be added as questions in the form, except for any formula fields like “Created Time”. You can customize the form with a title and description, and change the title for any field.

Once your form is all set, click on “Open form” to view the form in your browser. Then, fill it out to create test data.
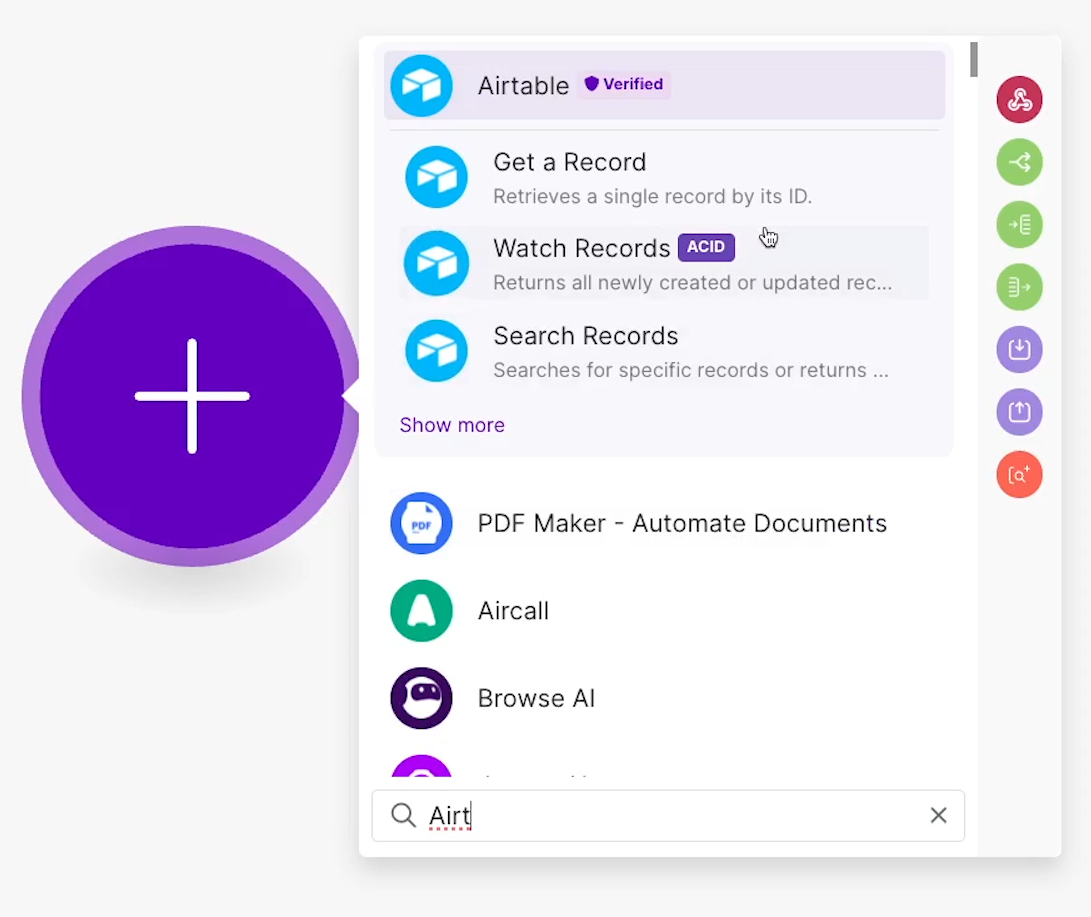
To create an automation for generating Slides presentations from a template, go to Make.com and sign in.
If you don’t have an account yet, you can create one for free.
You can also check out our Make beginner’s guide to learn the ropes.
Once you’re signed in, create a new scenario.
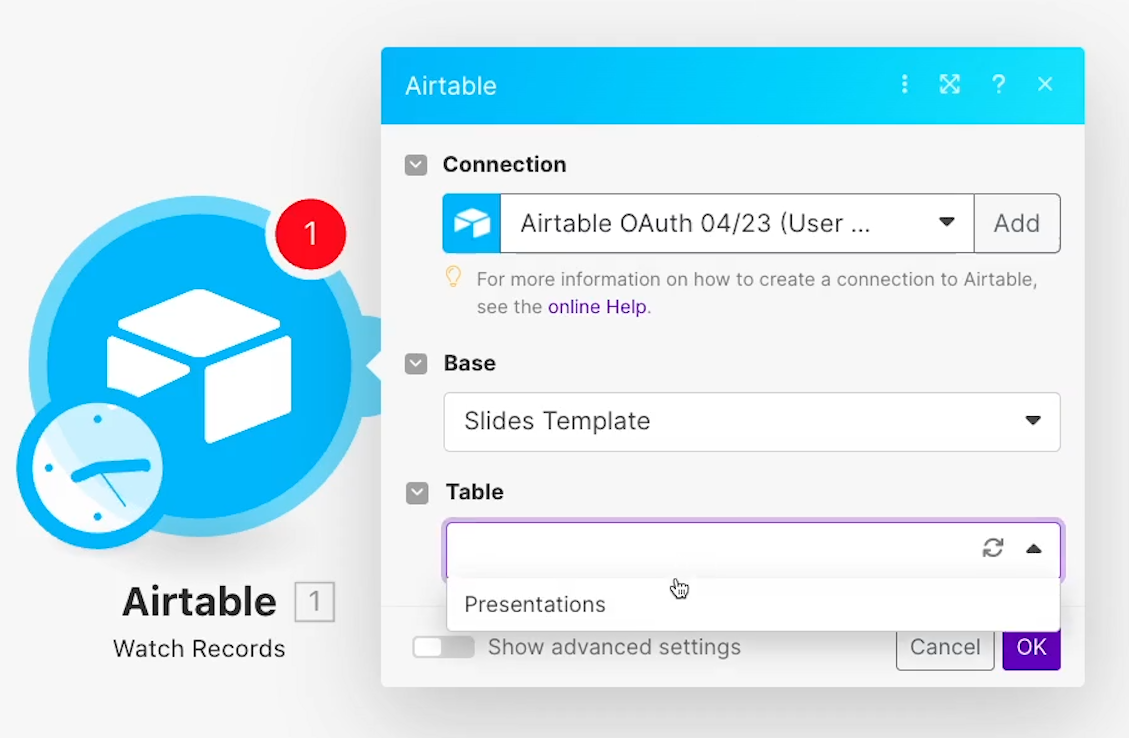
Choose Airtable as the app for your trigger module. Then, pick “Watch records” as the event.
Sign in to Airtable to authorize Make if you haven’t already. Then, choose the correct base and table to watch. In our example, we’ll watch the “Presentations” table for new records.
For the “Trigger field”, you need to pick a field with date-time data that Make can use to sort your records. That lets it determine which records were created most recently, and this is why we made the “Created time” field earlier.
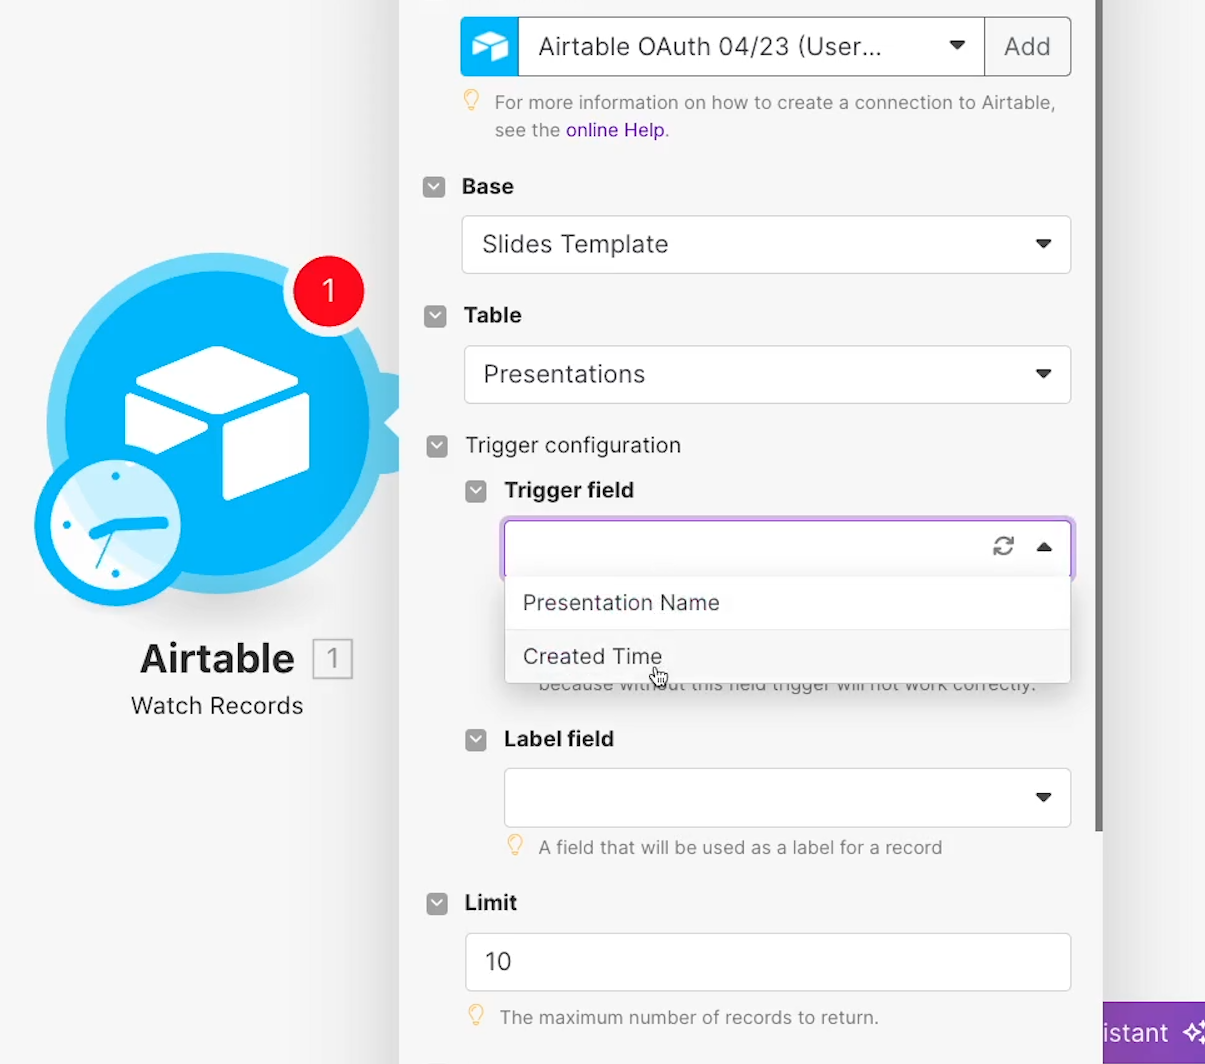
For “Label”, pick a field to use as the label or title for each record. You can pick any one that you want.
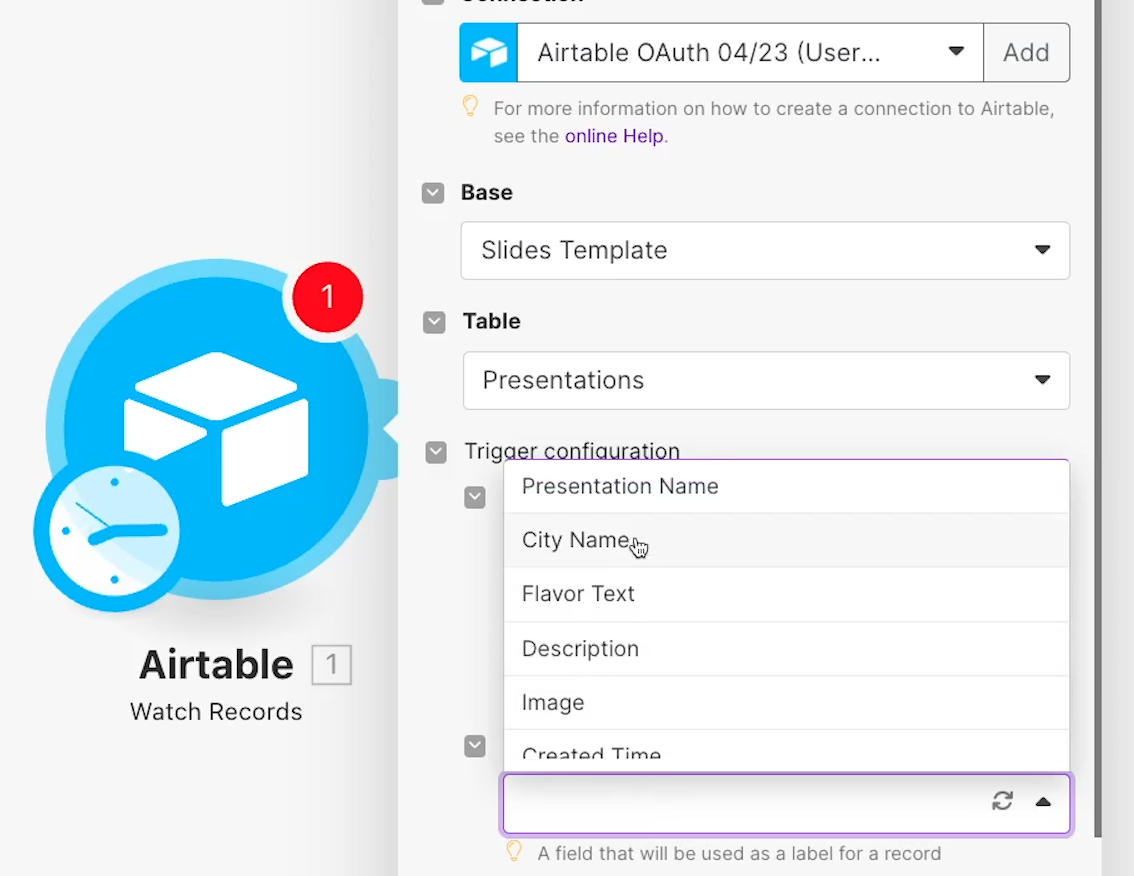
In the “Limit” field, you can set the maximum records that the automation will retrieve each time it runs. You can set this to whatever you’d like.
Once your trigger is configured, click “OK”. Then, test the trigger.
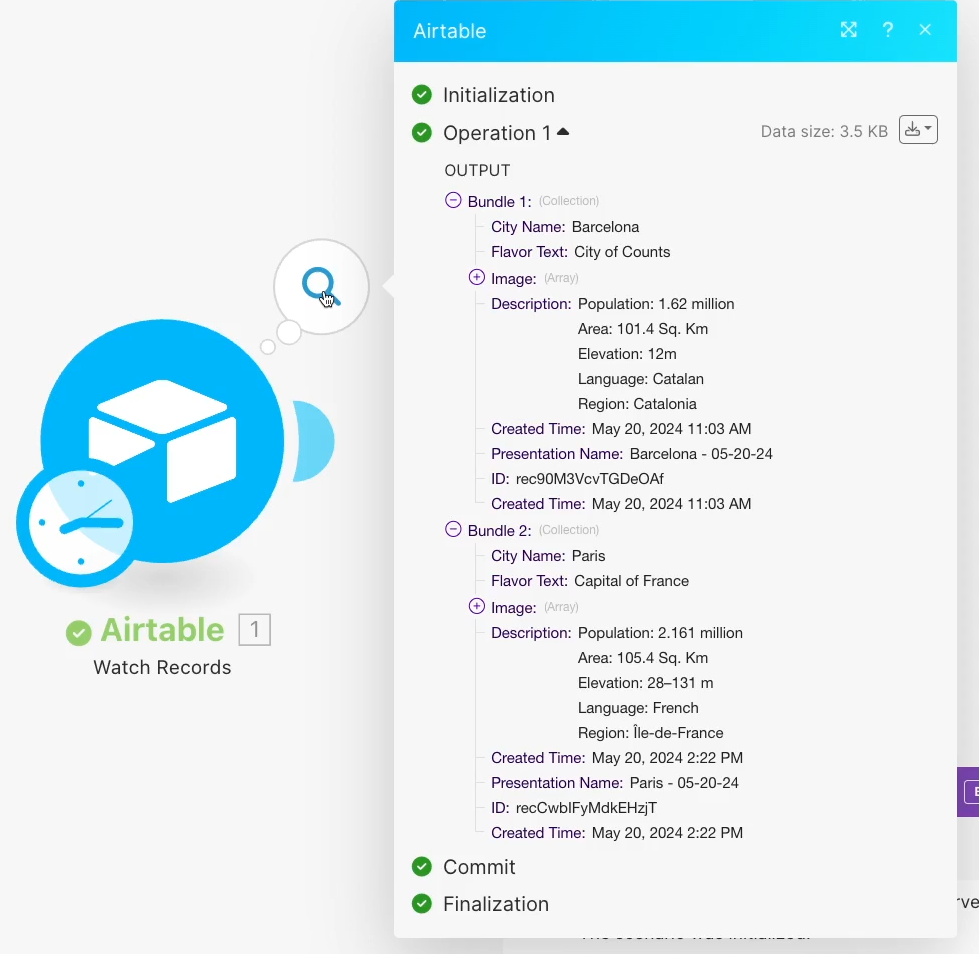
After testing your trigger, you can click on the number that appears over the module to see the data it retrieved.
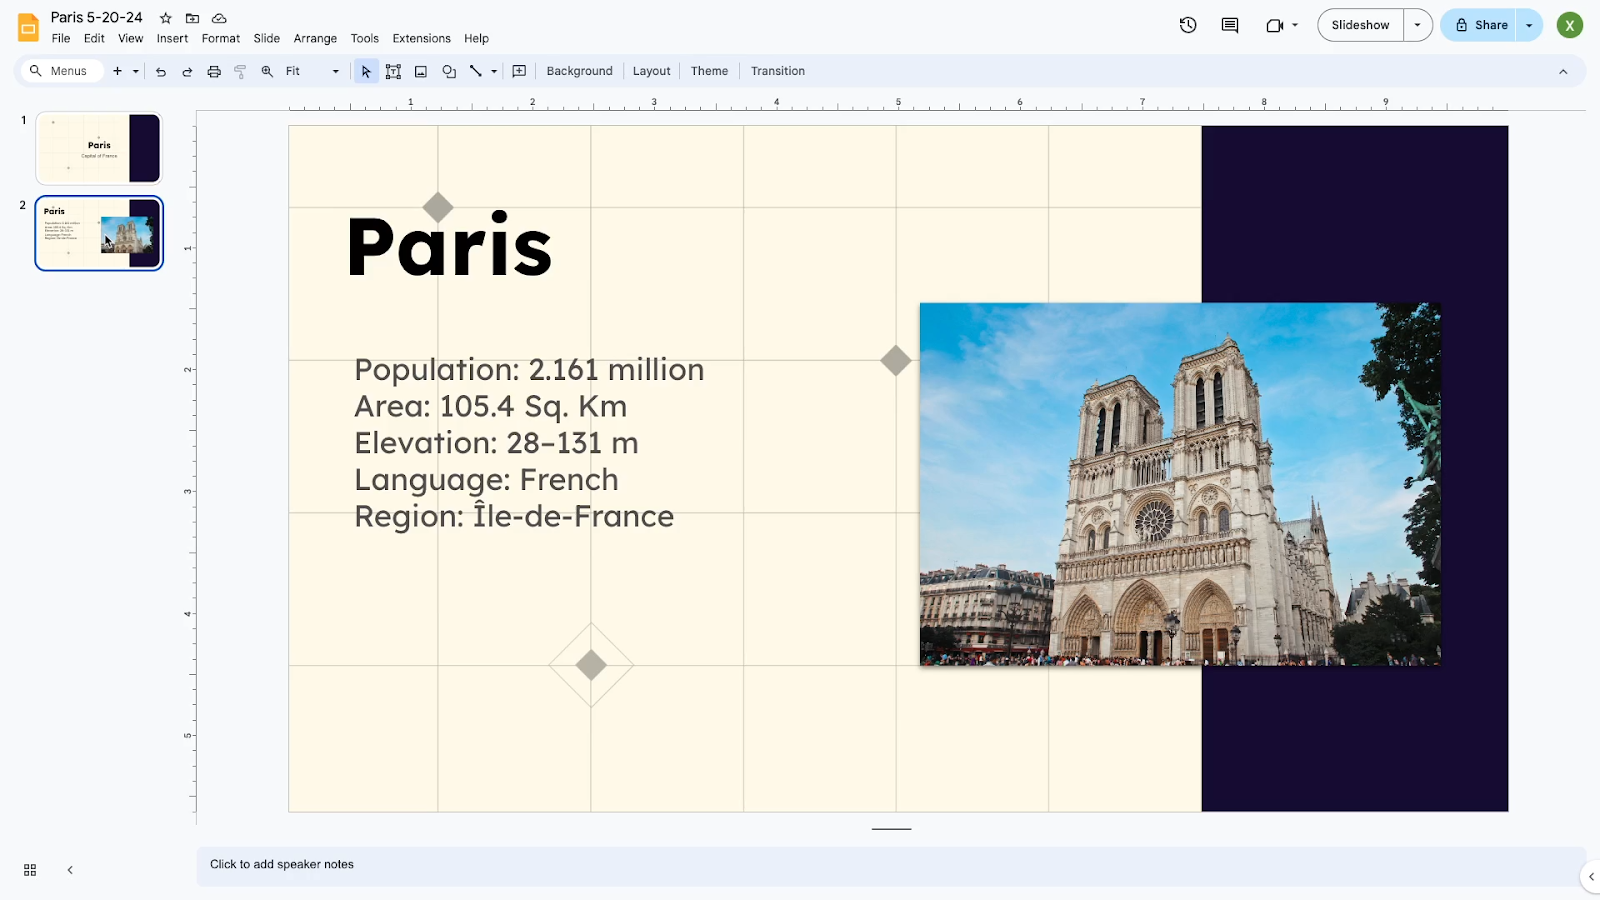
In our example, we can see that the trigger successfully retrieved our test data about Paris.
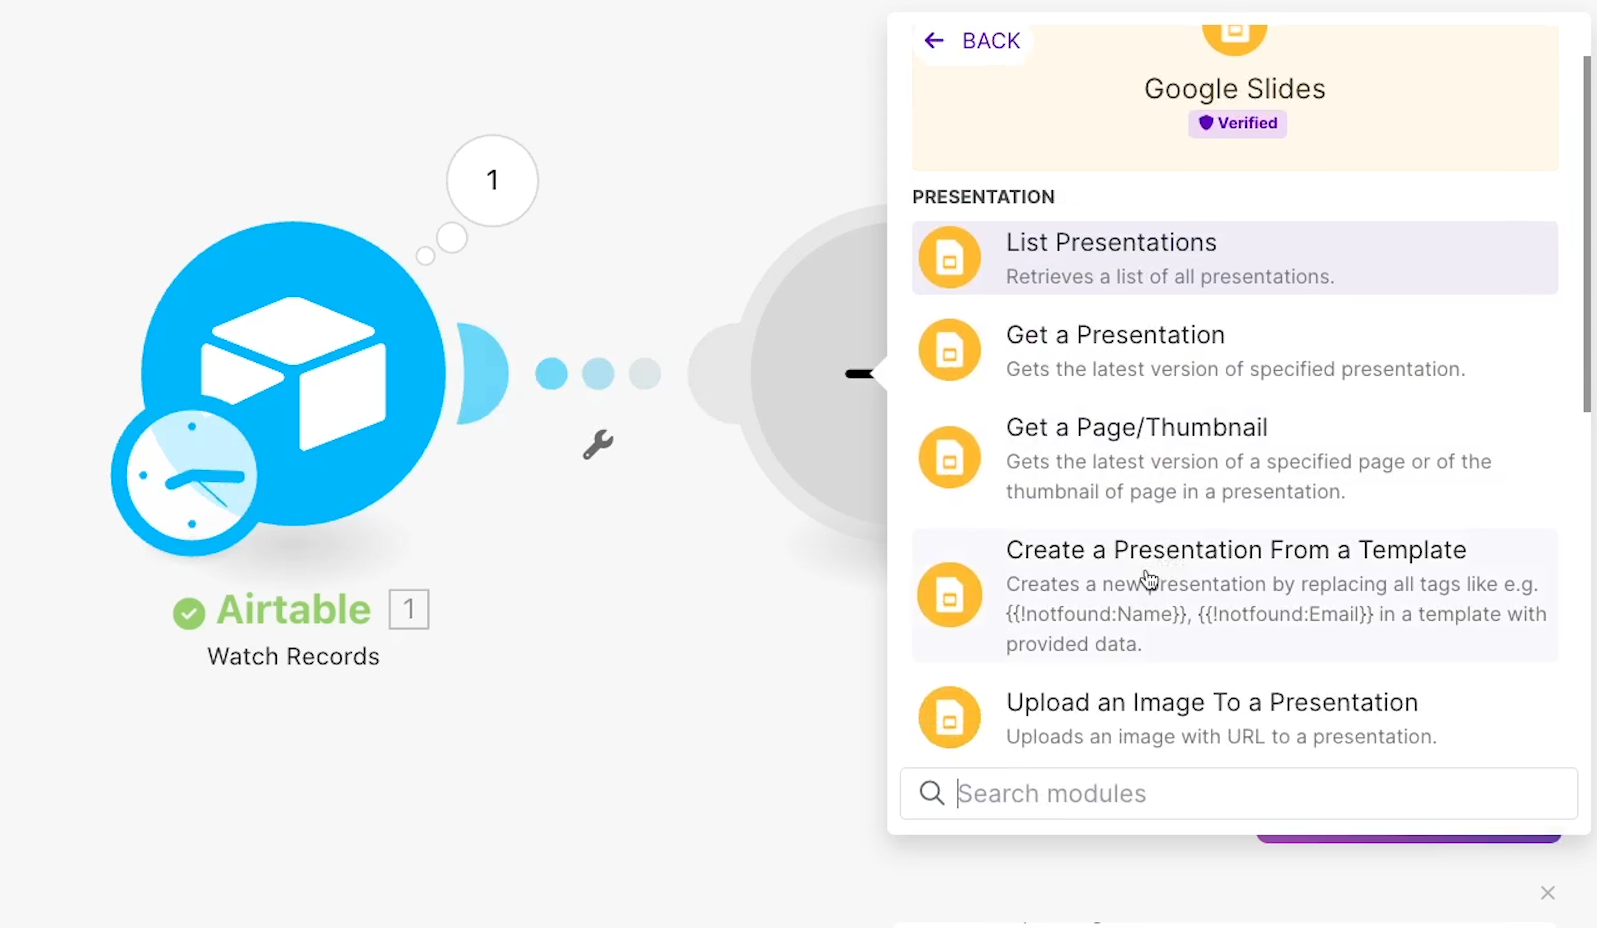
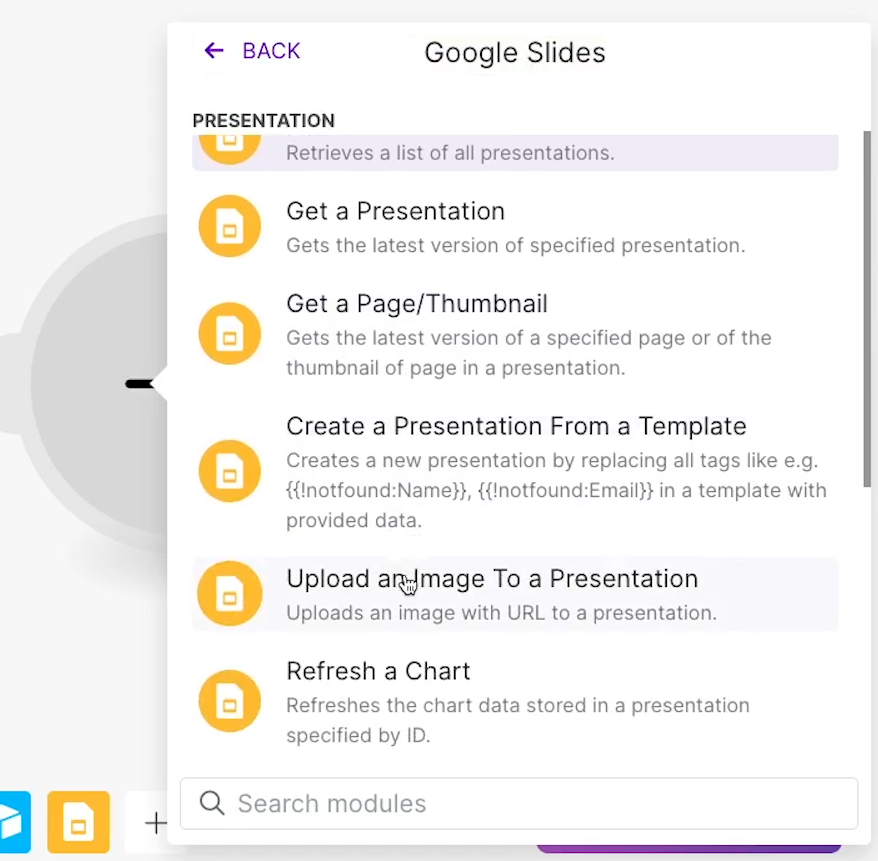
Next, add a new module to your scenario. Search for “Google slides”, and choose “Create presentation from template”.
Sign in to your Google account to authorize Make.
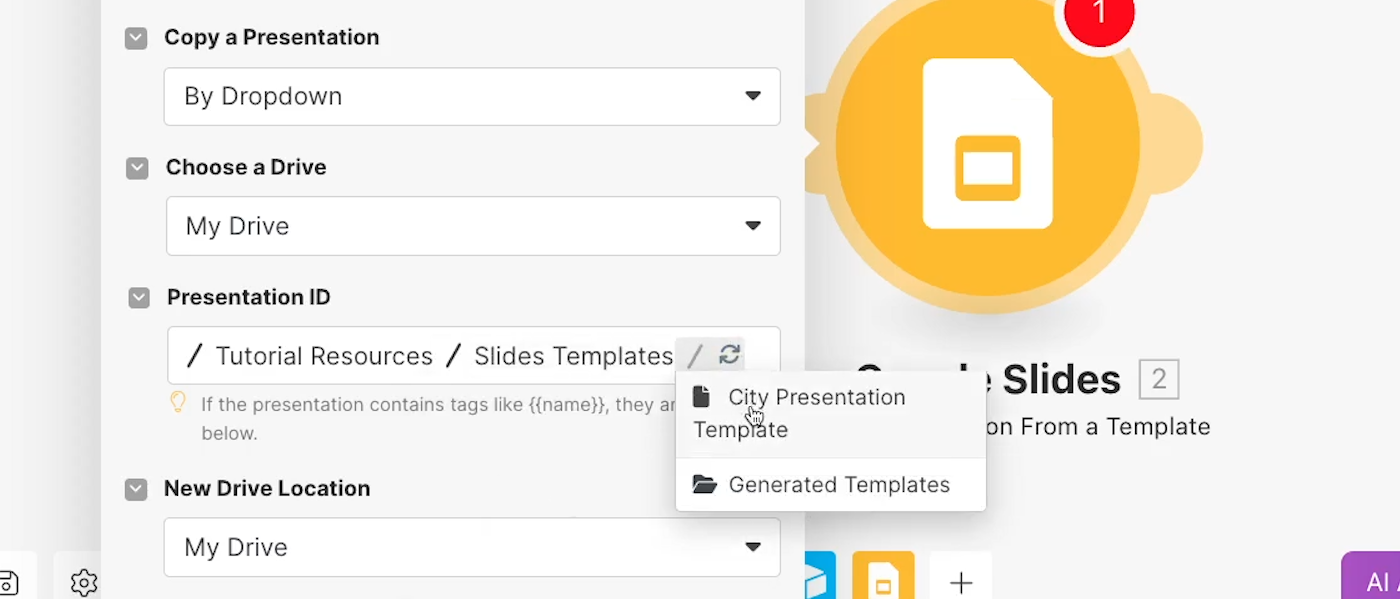
Then, provide a title to use for each new presentation. Be sure to include some dynamic data to make sure the names for each presentation are unique.

Identify the presentation you want to use as a template.
Once you choose it, all the variables in your deck will appear under the “Values” section.
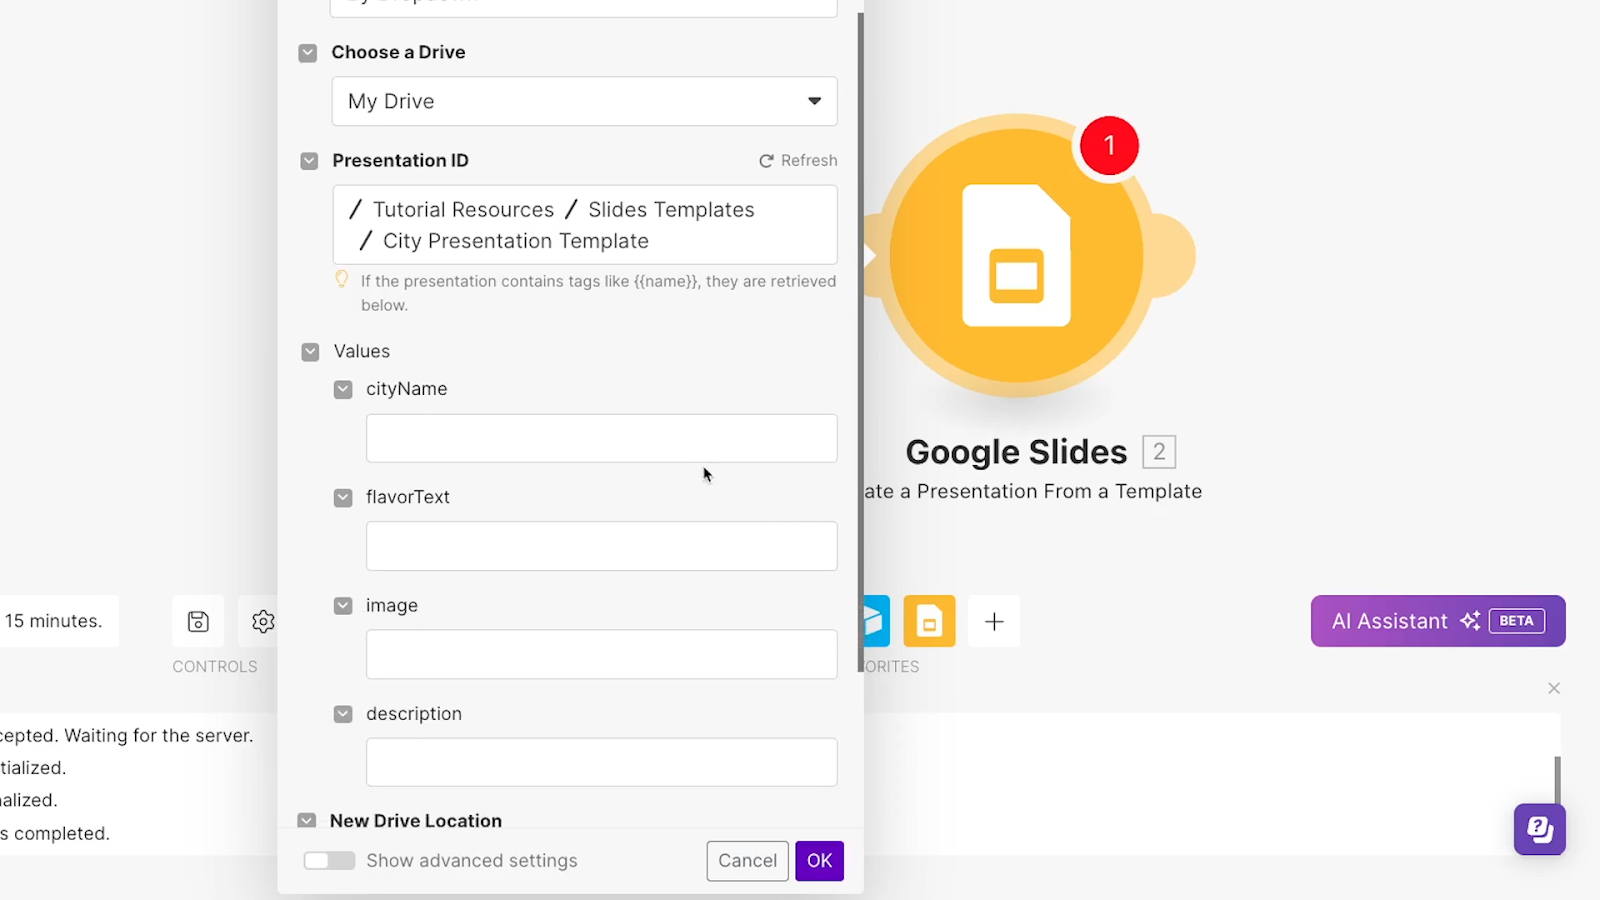
Map your Airtable form data to every field, except any image variables. You’ll need a separate step to fill in those, so just leave them blank for now.
Next, pick a Drive folder to store each new presentation in.

Once you’ve finished configuring the module, click “OK”. Now you can test your whole scenario again.
After testing, open up Google Drive to check the newly created deck. You should see all of your text variables replaced with your test data.

Any image variables will remain unchanged, but that’s fine.
Next, we’ll show you how to add one last step to this automation to fill in the image variable.
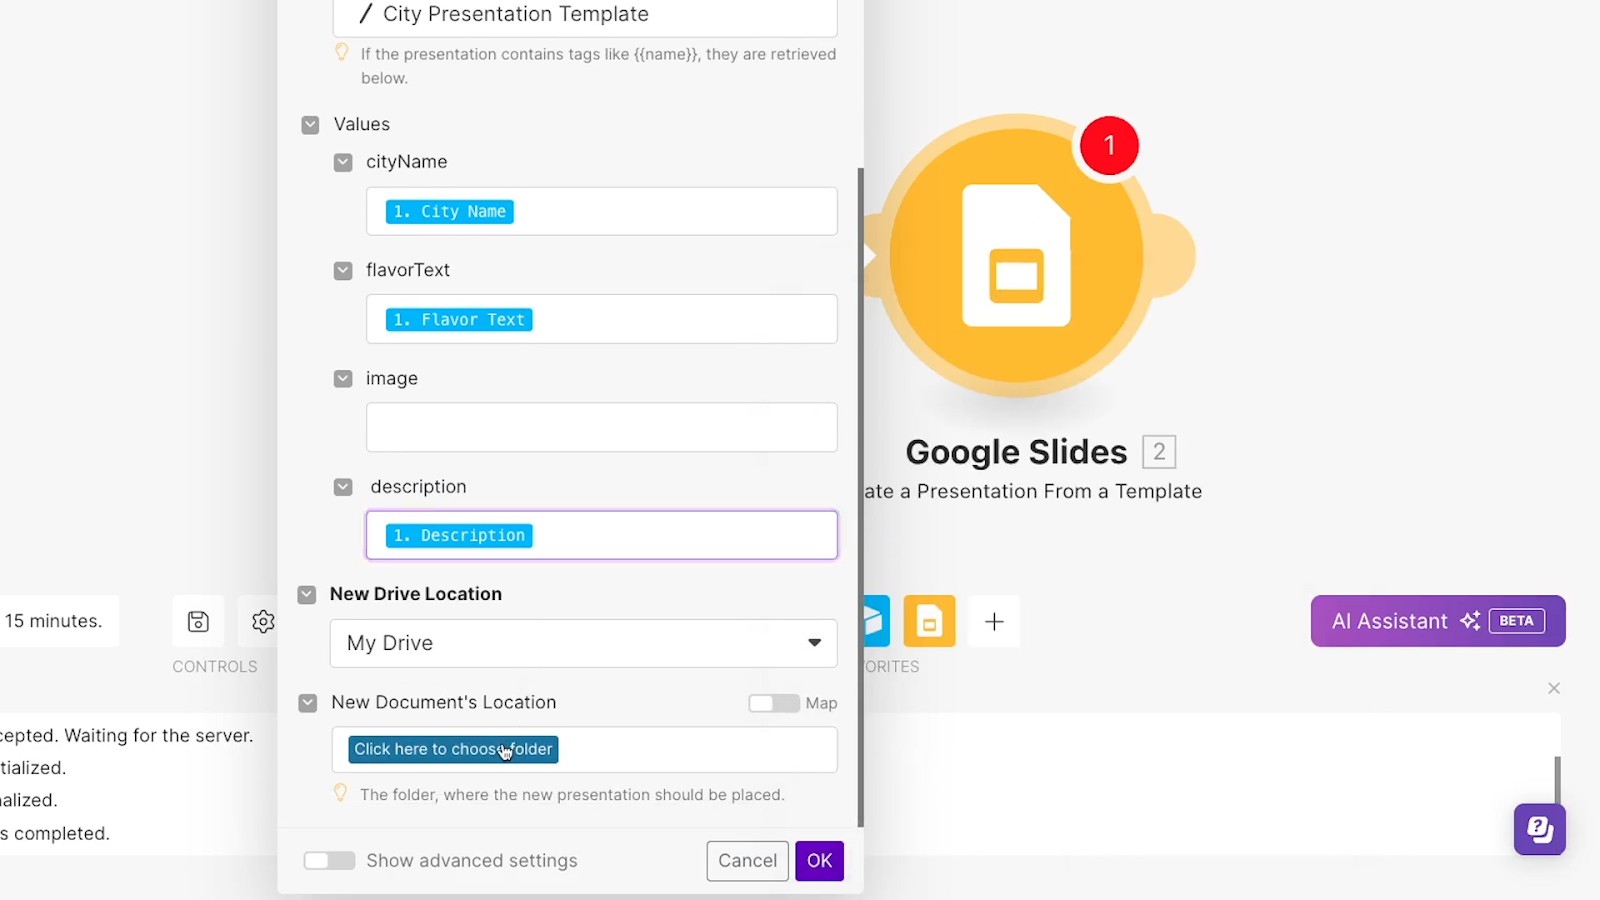
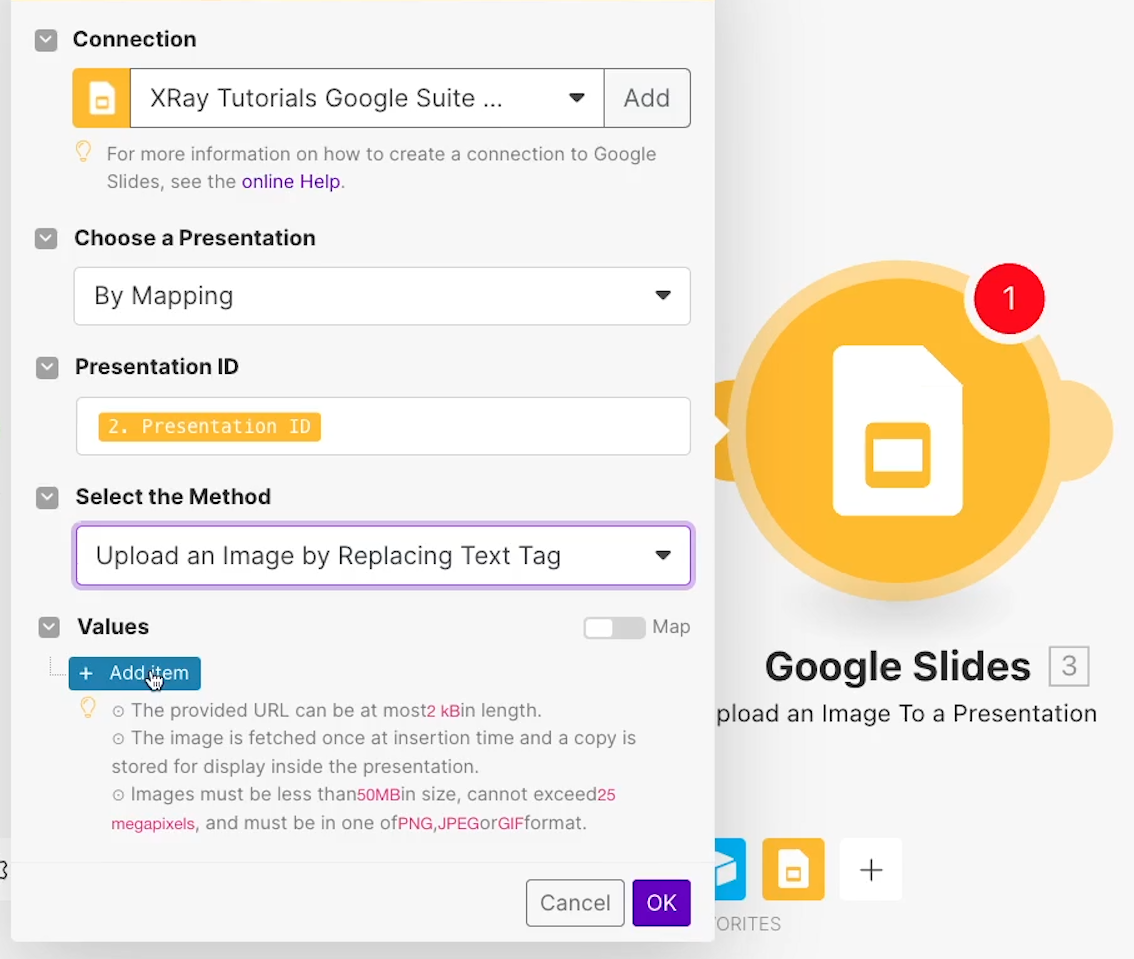
Go back to your Make scenario, and add a new module. Search for “Google Slides” and choose “Upload an image to a presentation”.
For “Presentation ID”, enter the Presentation ID retrieved in the previous step, not the ID of the original template.
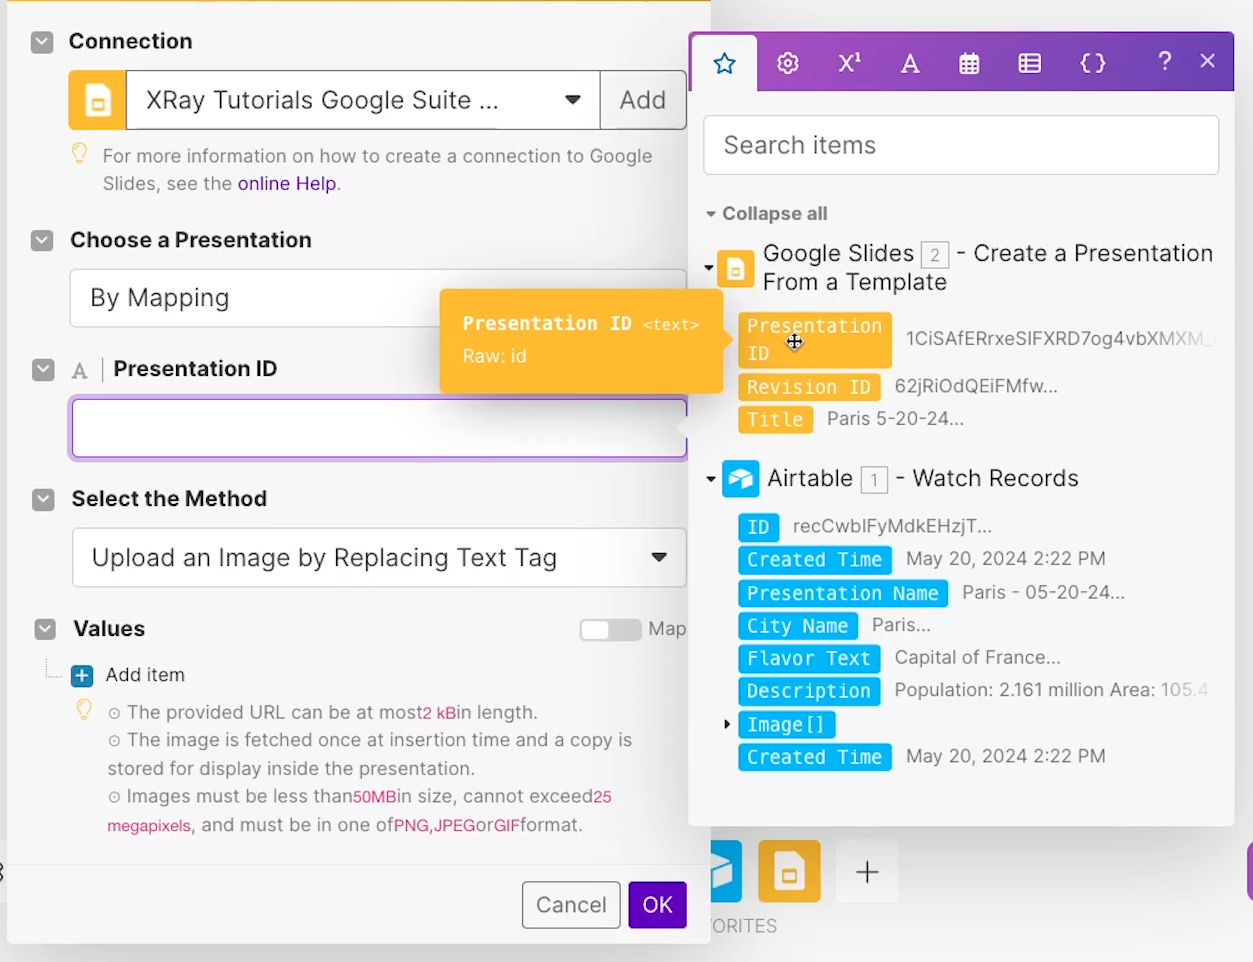
Under “Select the Method”, you can stick with “Upload an Image by Replacing Text Tag”

In the “Values” section, add a new item.
In the “tag” field, type your image variable’s name, without any curly brackets. For our example, we’ll just enter “image” here.
In the image URL field, enter the URL of the image you want to upload.In our example, we’ll select the “Image URL” data retrieved from Airtable.
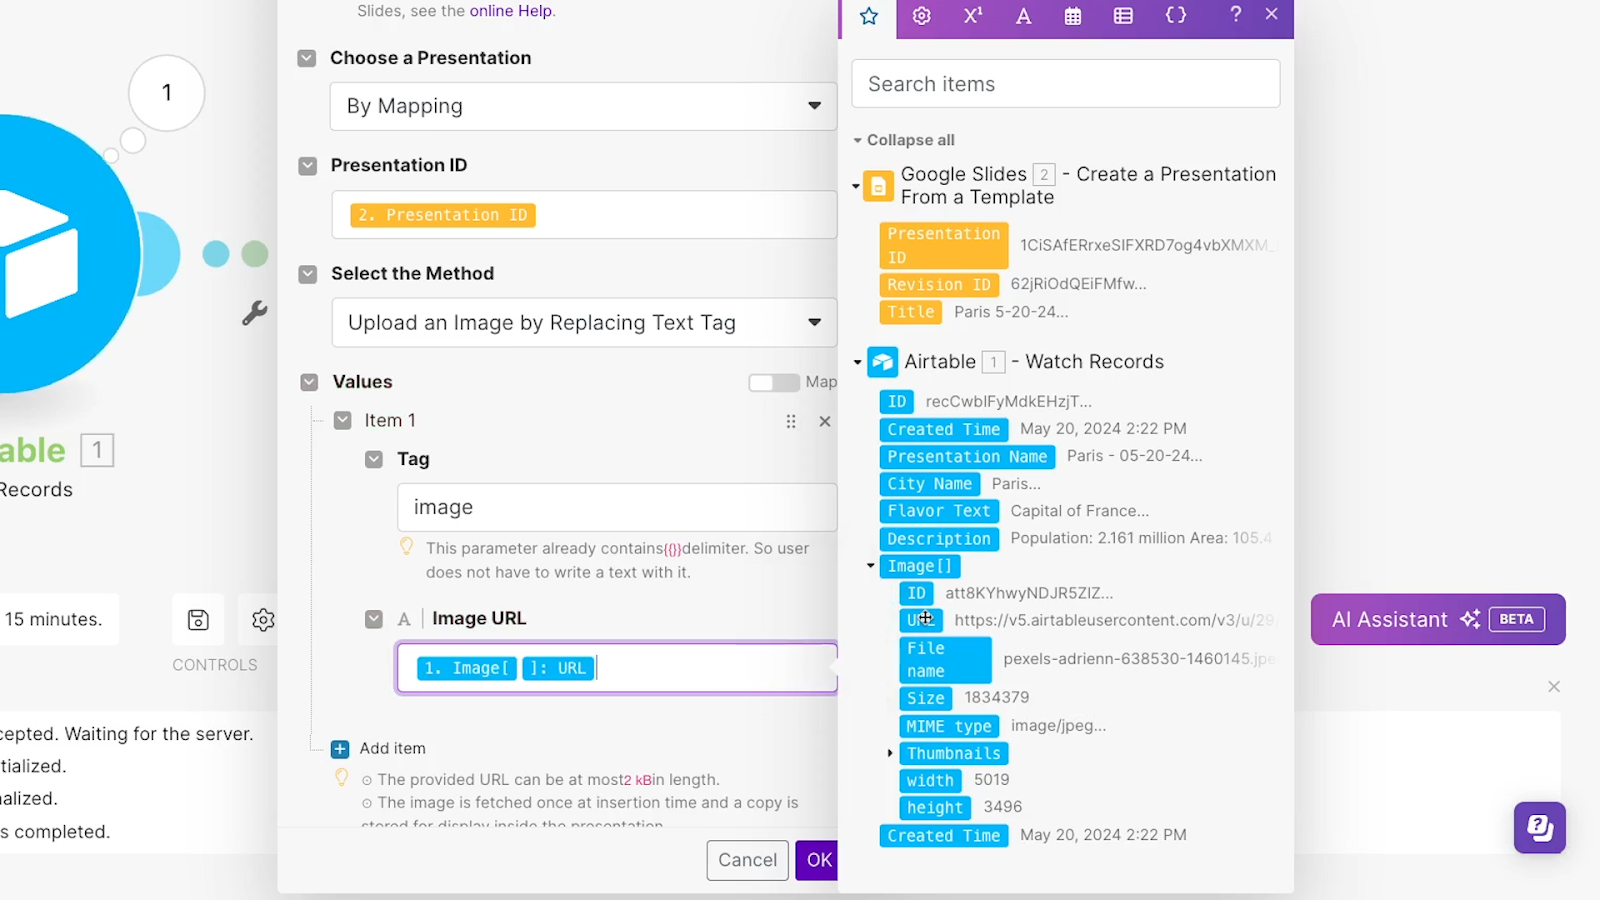
If you have several image variables, you can create additional items here for each one. Once you’re all set, click “OK”.
Now you can test the scenario one more time. As always, check Google Drive to ensure that the presentation was created correctly.
In our example, we can see that all of the text variables have been filled in just like before.
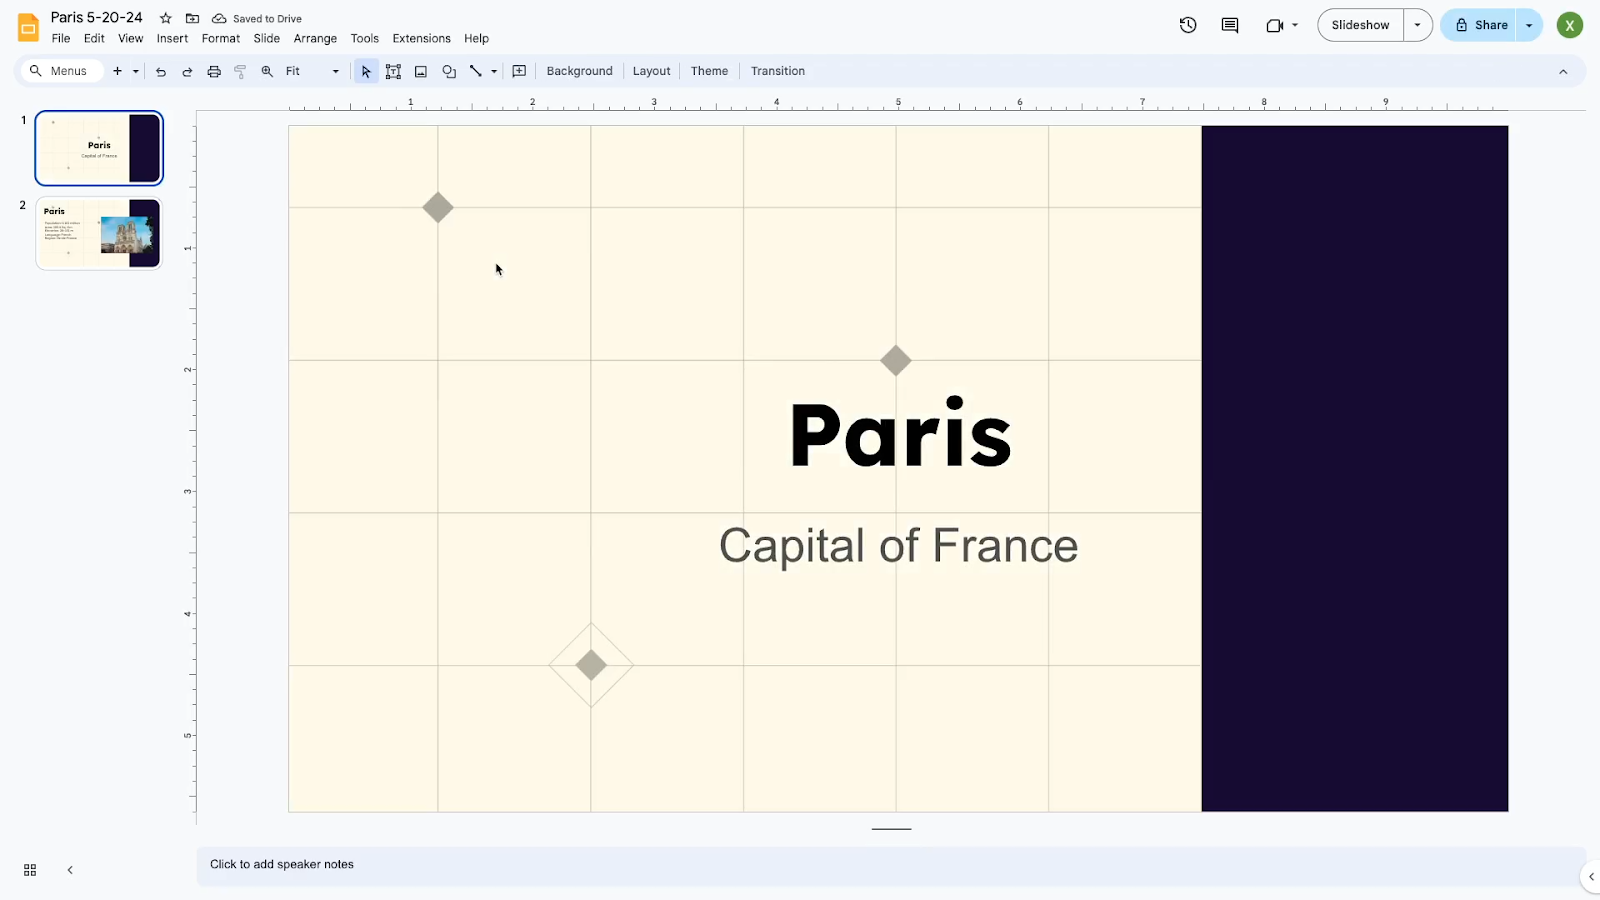
However, with the final step added, the image variable has also been replaced.

You’re now all set to save this automation, turn it on, and start using it.
With automated Google Slides presentations, you can save time whenever you need to create a commonly used report or other document. You can also use the form to let collaborators create presentations in your account without logging in and getting direct access.
No matter how you want to use this automation, it just takes a few minutes to set up, so give it a shot today.
If you’d like to learn more about automating software like Google Slides, Notion, Airtable, and more, be sure to check out our blog or our YouTube channel. You can also follow XRAY on Twitter, Facebook, or LinkedIn.

.pptx.png)
.pptx.png)
