
Airtable is a fantastic app for organizing your team’s data, and with Airtable’s extensive options for sharing and syncing specific views, it’s easy to collaborate with coworkers or people outside of your organization.
In this post, we’re going to take a deep dive into Airtable’s Share and Sync settings, and we’ll show you three different ways you can share your Airtable bases: Sharing views with a link, syncing data between tables, and using form views. Along the way, we’ll also cover creating HTML embeds with your Airtable data, and the new “Data Libraries” feature.
With all of these options, you can easily configure your Airtable bases to start collaborating with your team, your clients, or anyone on the web.
Note: All of the sharing options that we’ll go over today can be accessed by clicking on the “Share and Sync” button at the top of any view.
To get started, let’s take a look at creating shareable links and embeds for specific views.
Sharing a view with a link will let you share the data from a specific view in a “read-only” format. You can allow users to copy data from the shared view, but you can’t allow people to edit records from that link. If you’d prefer to add the data directly to your site, Airtable will also provide an optional HTML embed.
Shared views and embeds work for all view types except for lists, and they’re a useful way to share data for simple reports, demonstrations, and reference. They’re especially helpful if you need to share data with someone who doesn’t use Airtable.
In this tutorial, we’ll demonstrate view sharing using a basic grid, but all of the options are essentially the same no matter which view type you’re using.
To get started, open up the view that you want to share. Then, click on the “Share and Sync” button in the toolbar.

The first option in the menu will be “Create link to view”. When you select this option, Airtable will create a shareable link for the view that you currently have open.
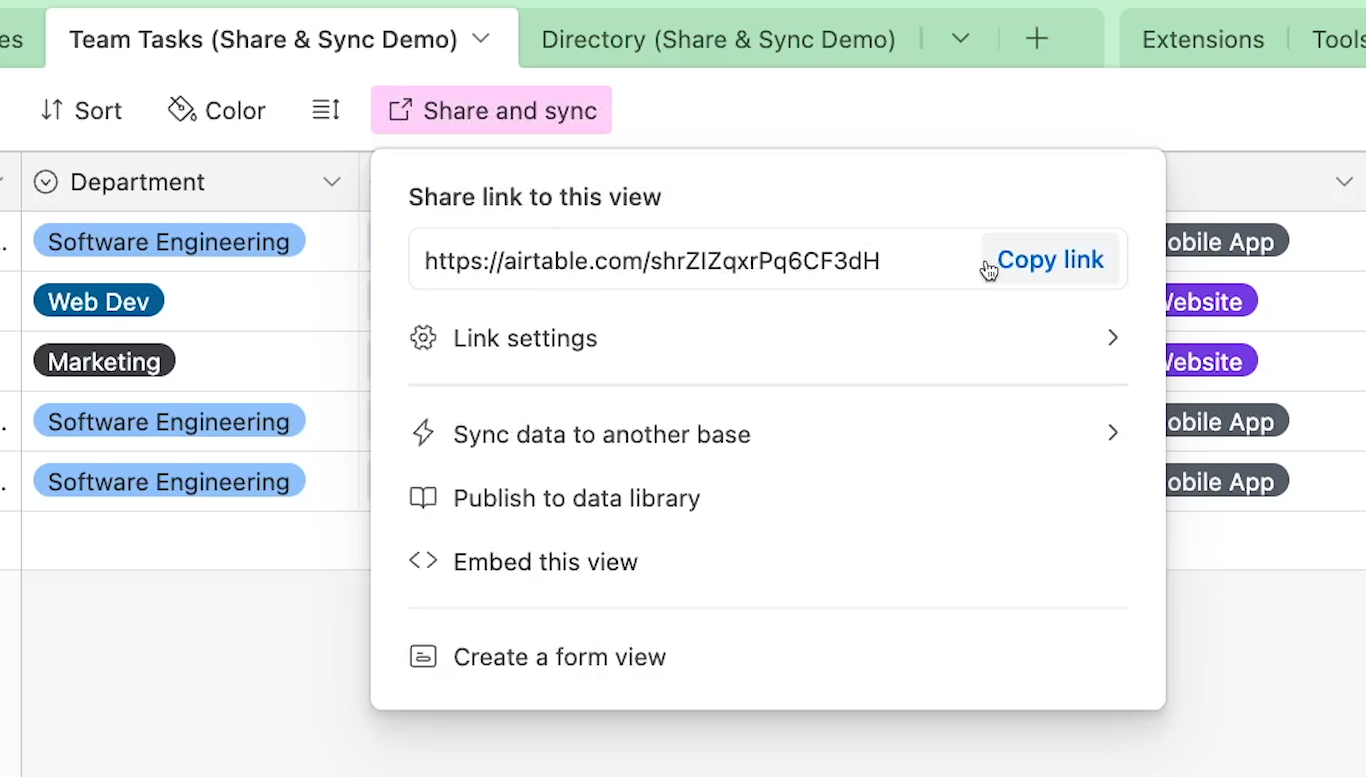
There are several options you can configure here, but first, let’s just see what the shared view looks like.
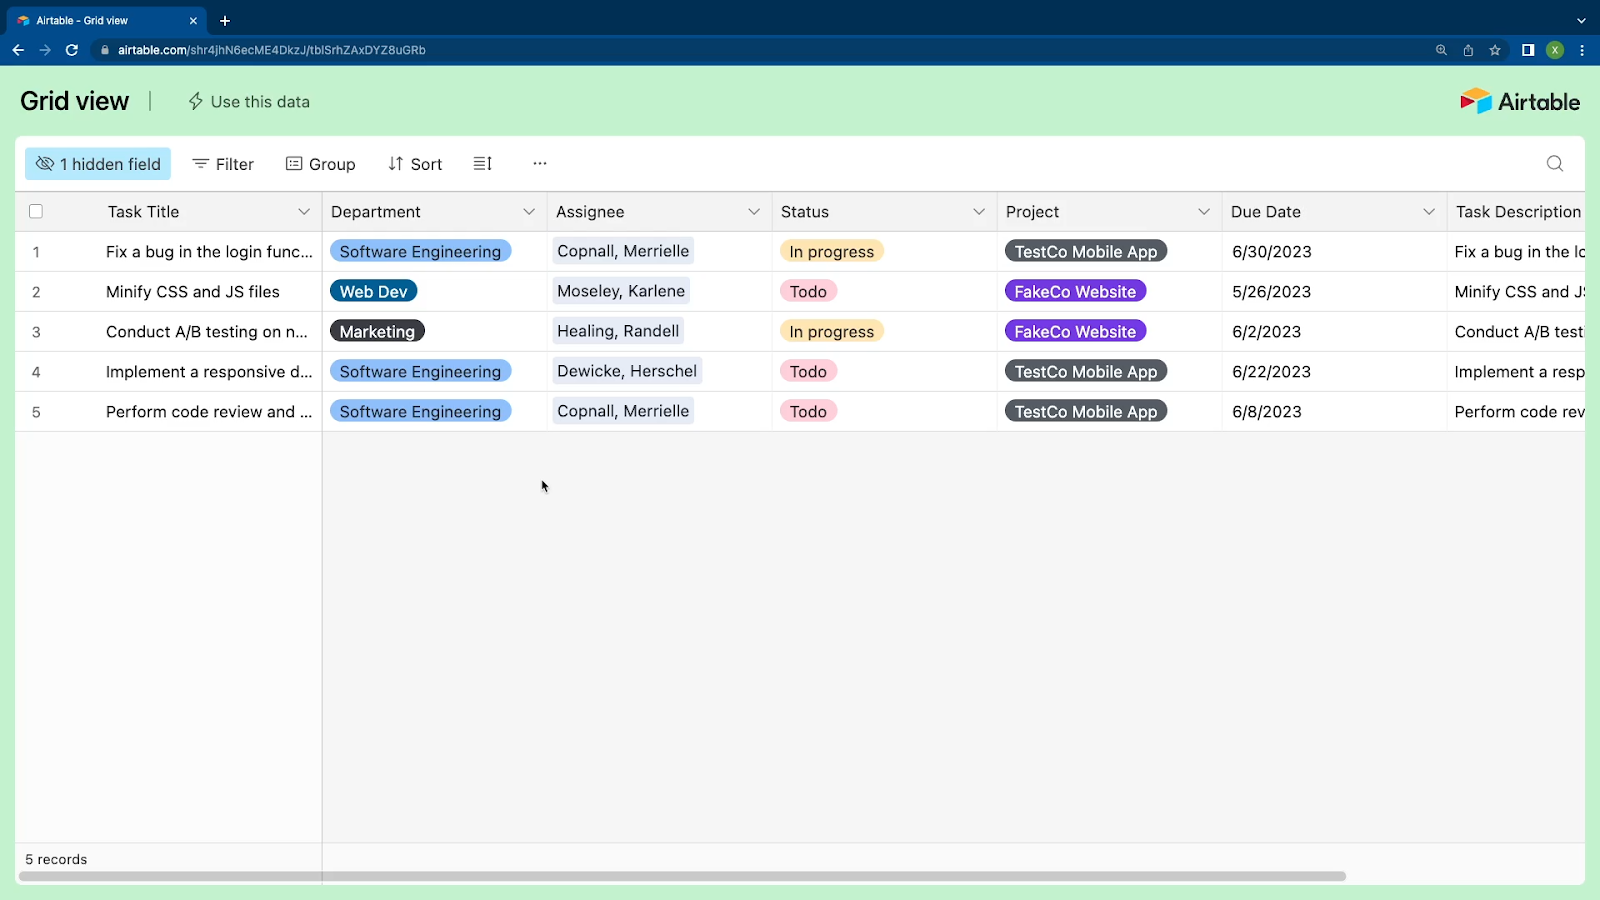
We’ll copy this link, and open it up in another browser so we can see exactly what everyone else opening this link will see.
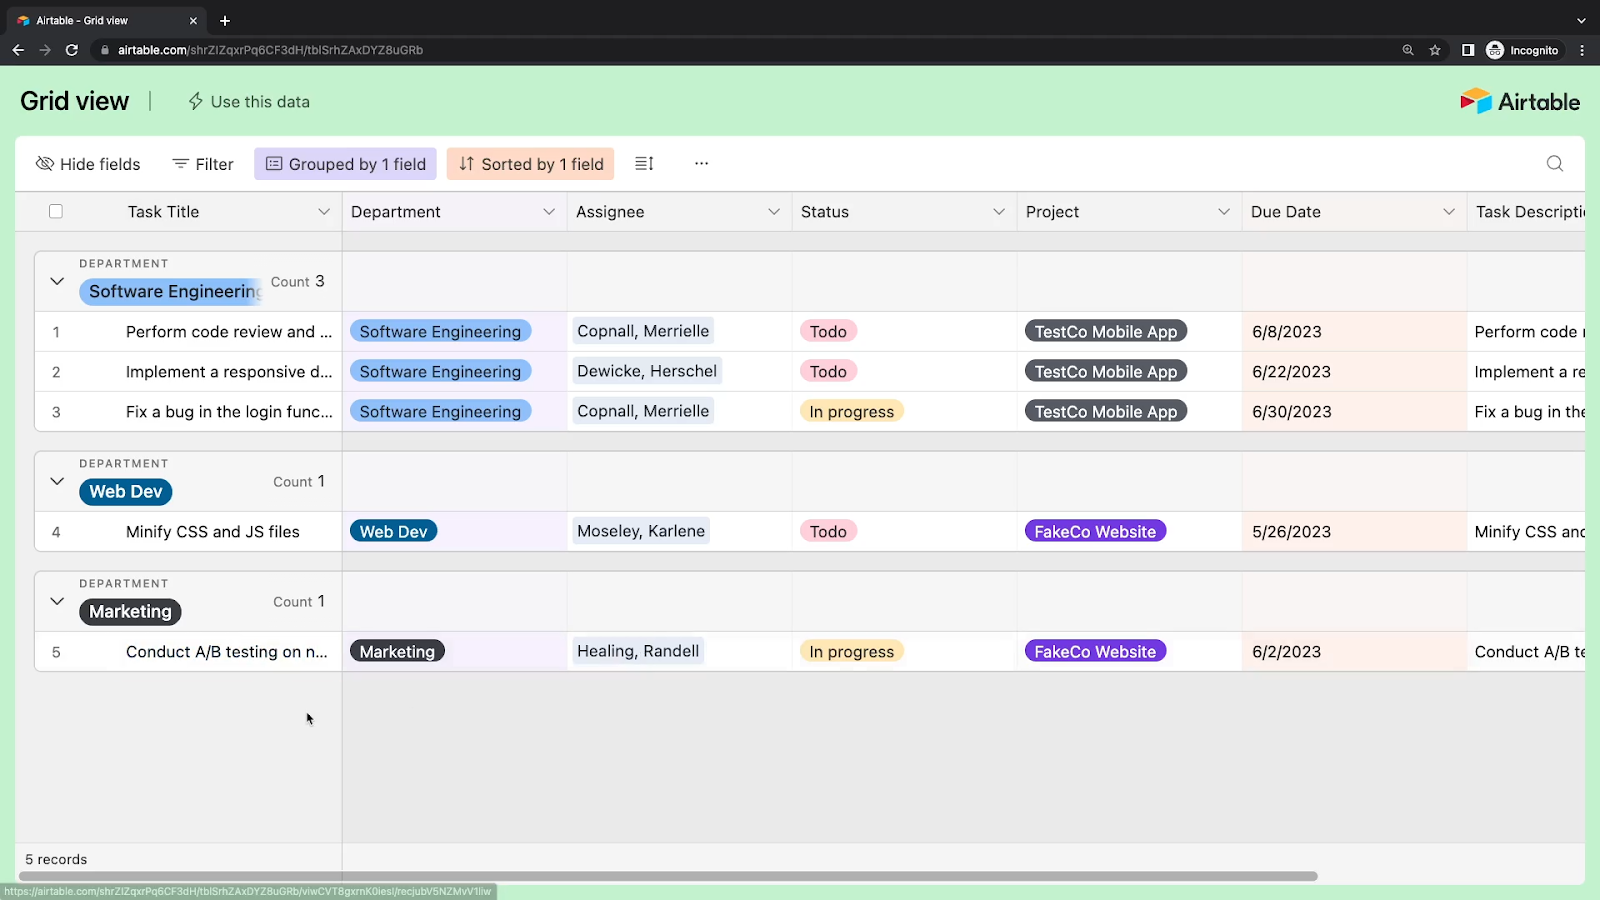
All of the data from our view is visible here, and we can filter, sort, or group the data however we’d like.
But with the shared view link, we can’t edit or delete records, and we can’t add any new ones either.
Now we’ll go back to our Airtable base to explore our options for configuring our shared view.
Immediately, you should note that the “Share and Sync” button is now highlighted in pink. This indicates that the view has been shared. It’s basically just a reminder that any data in this view may be visible to others.
If you want to disable or reconfigure the sharing link, click on “Share and sync” and select “Link settings”.
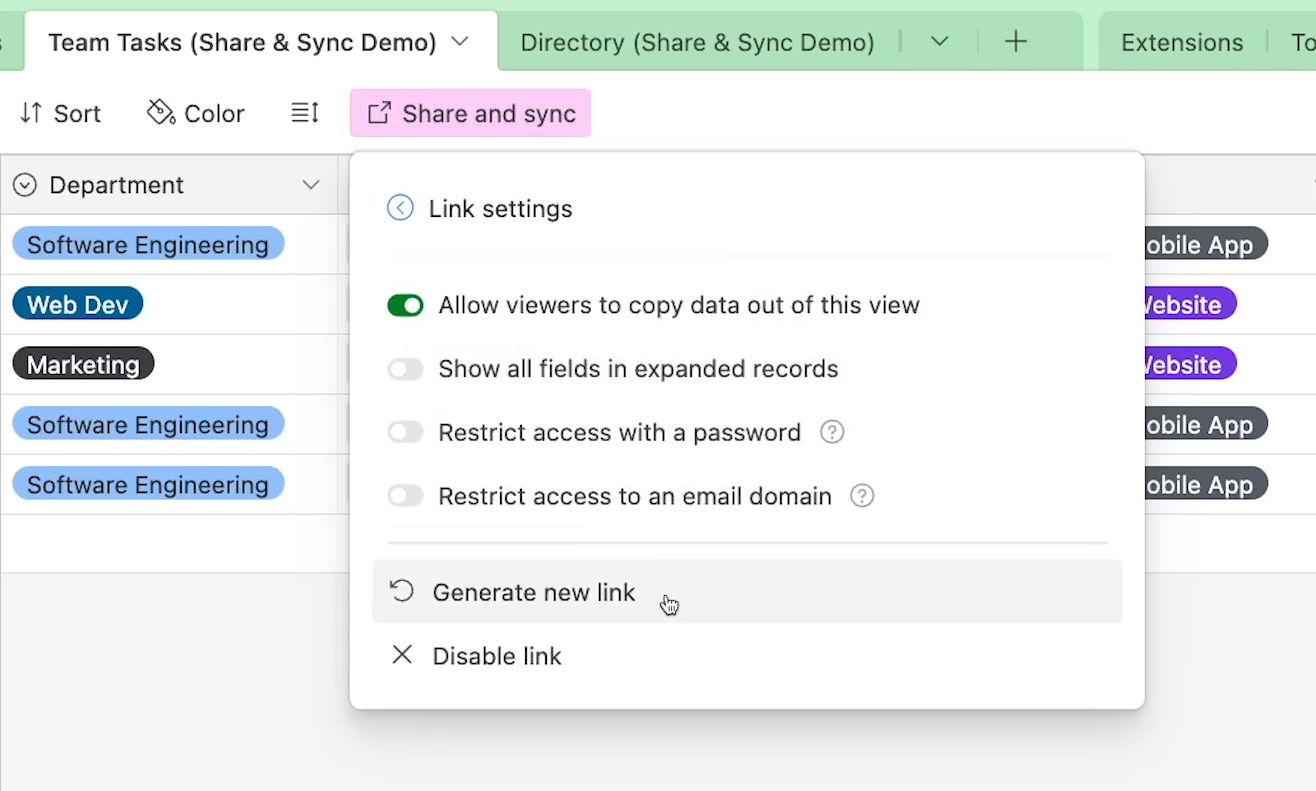
At the bottom of this menu, you’ll see a couple relevant settings.
First, there’s “Generate new link’. This will create a new URL where people can access your shared view. This is useful if you want to keep sharing the base, but remove access for anyone who only has the old URL.
Next, you’ll see “Disable link”. This option will disable the existing link, and won’t create a new one. This is helpful if you just want to stop sharing the view altogether. If you disable the link, you’ll see the “Share and sync” button is no longer highlighted, since this view isn’t being shared anymore.
At the top of the “Link settings” menu, the first option you’ll see is “Allow viewers to copy data out of this view”. After creating a shared view, this setting is enabled by default.
When “copy data” is enabled, anyone with the link will be able to easily duplicate the data in your view into an Airtable base of their own.
When opening a shareable link with copying enabled, users should see a button at the top of the view that says “Use this data”.
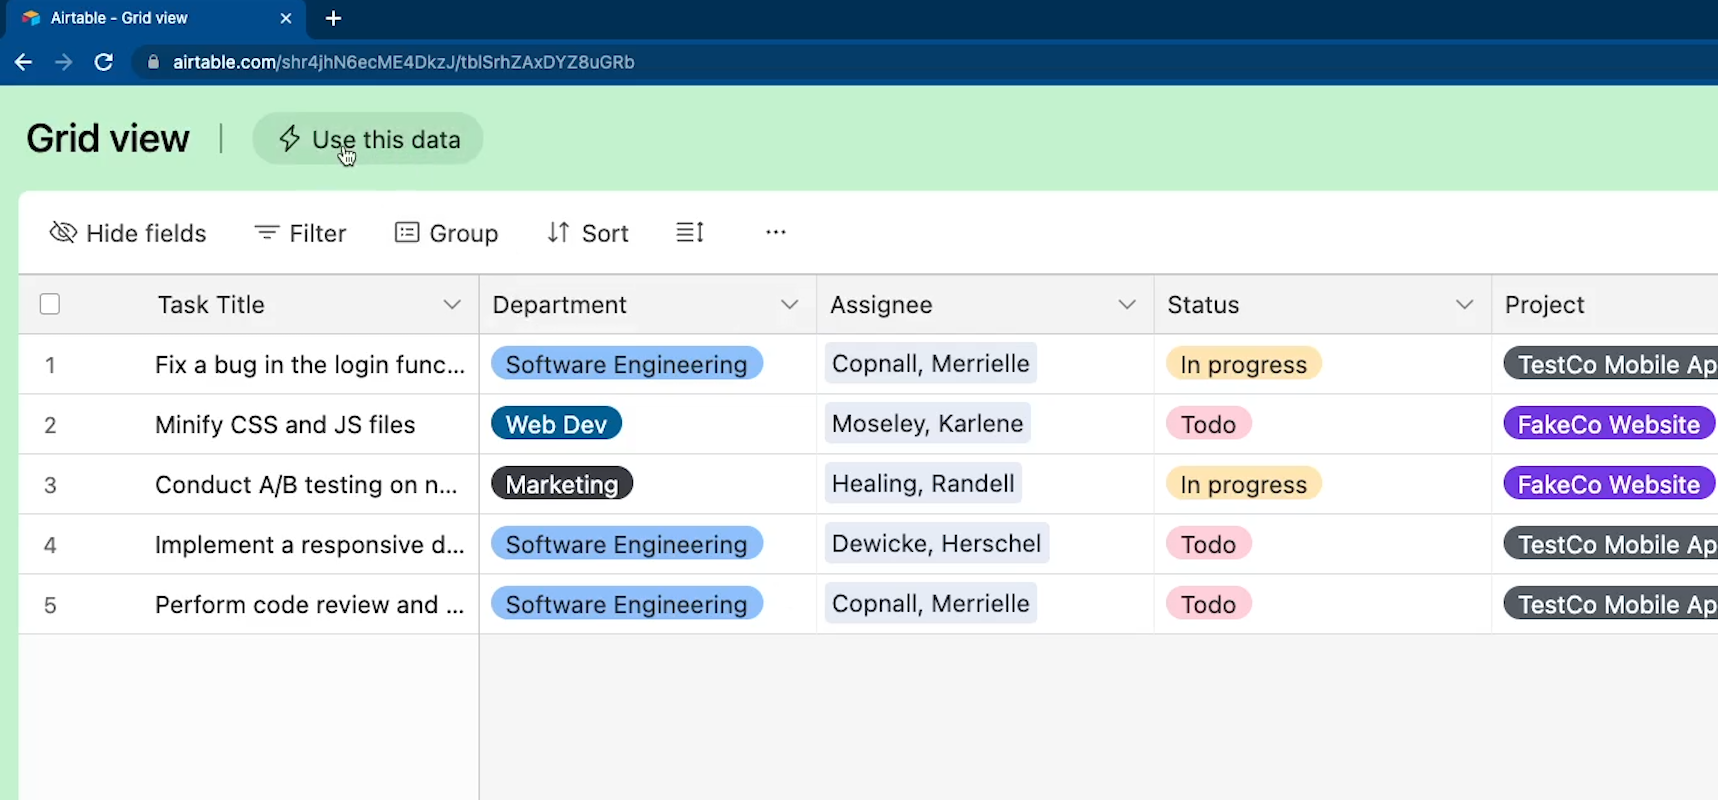
When someone clicks on it, Airtable will let them make a copy of this view in another Airtable account. Any copy that users make won’t be synced to the original table in any way, but they will see any data that was in the view when they made their copy.
If you disable this option, users won’t see a “Use this data” button, but they could still copy the data manually. However, if they try to copy multiple records at once, Airtable will prevent them from doing so.
Ultimately, this setting is just about providing a convenient way for users to copy the data if you’d like.
Next, there’s an option that says “Show all fields in expanded records”. Although you might see a different word instead of “record” - we’ll explain why at the end of this section.
Essentially, this option will determine if users can see your view’s hidden fields or not. If you leave the option disabled, users will have no way to see this view’s hidden fields.
If you enable the option, users still won’t see hidden fields in the main layout of the shared view, but they will be able to see these fields when they expand the record.
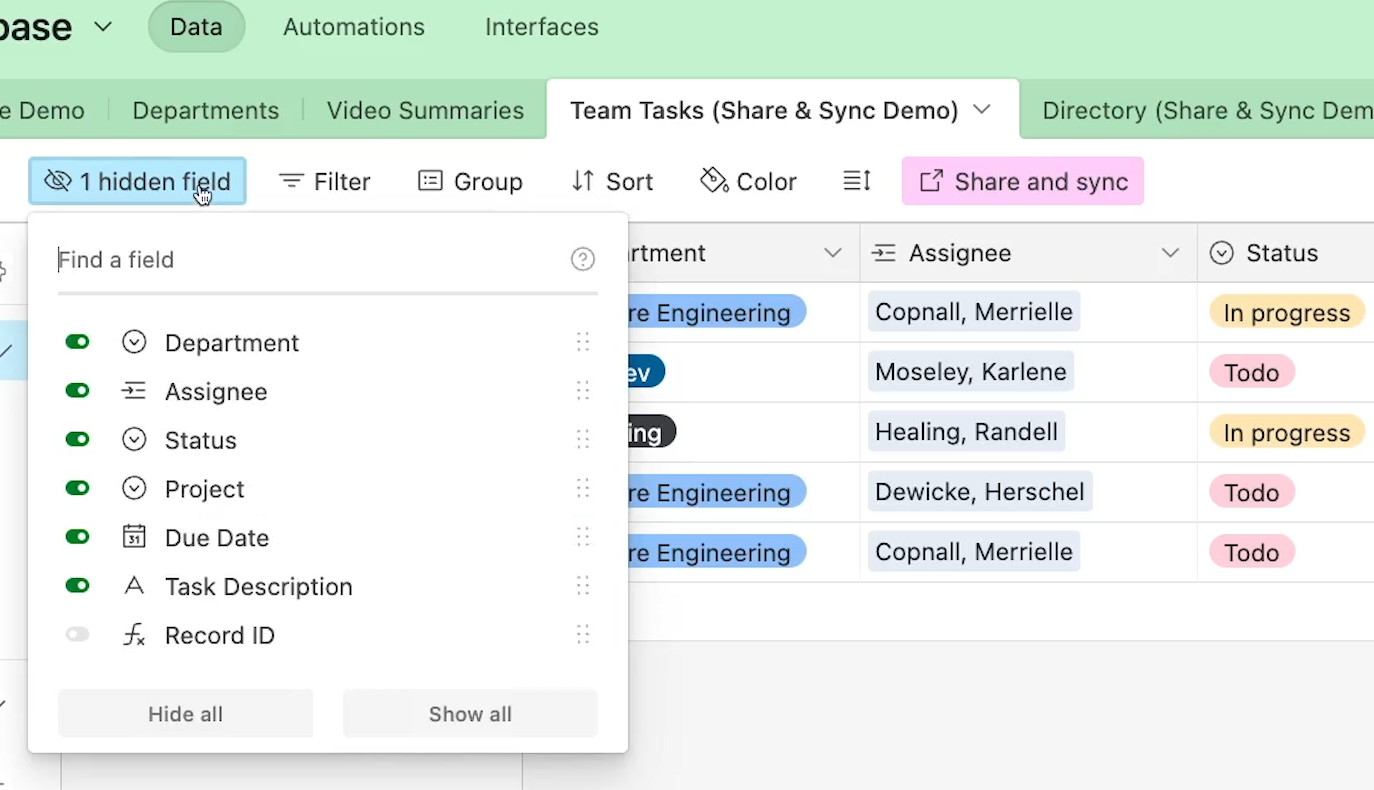
In our example, “Record ID” is a hidden field in this view. We’ll enable “Show all fields in expanded records” and see what that looks like in the shared view.
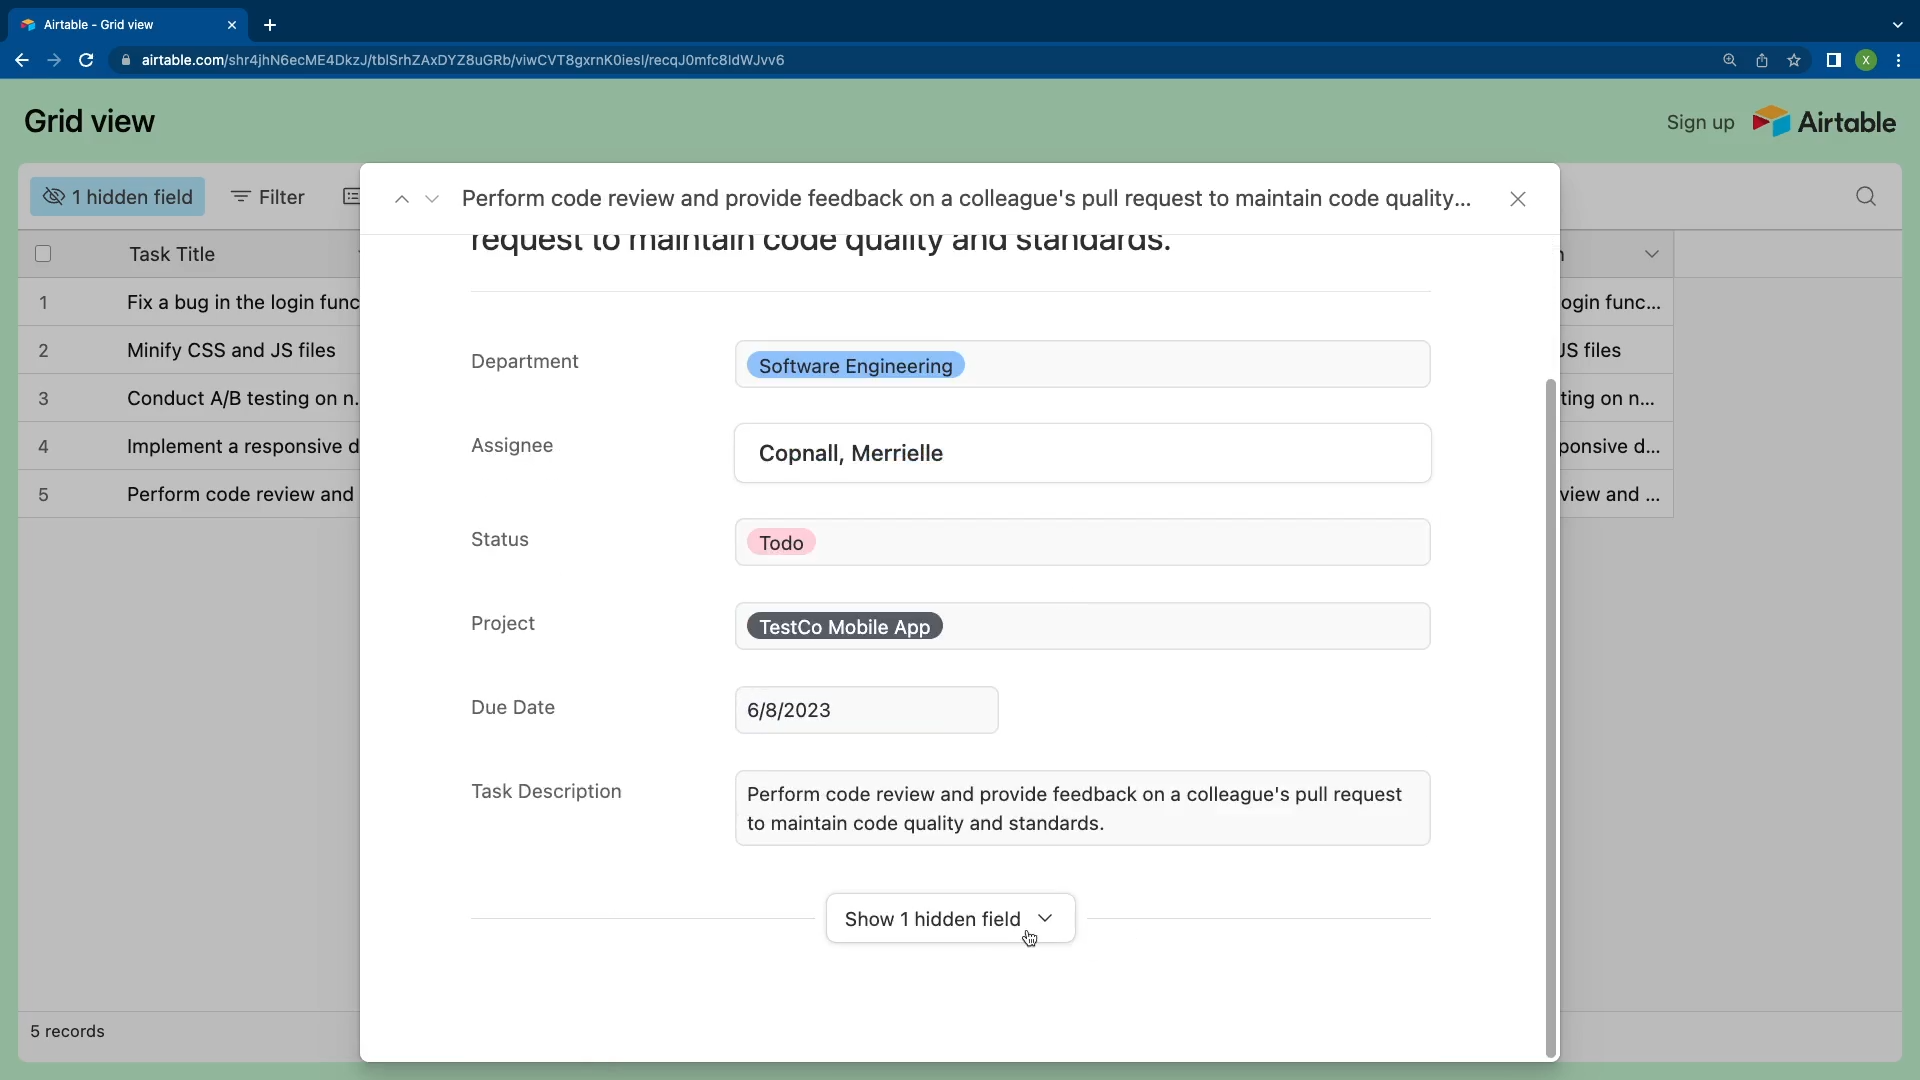
We can’t see the “Record ID” field in the grid view, but when we expand any record, we can see an option to view hidden fields.
You might see some unusual or unexpected verbiage in this option. This is because the “hidden fields” option will use whatever term you’ve provided for ‘records’ in your table.
So if the records in your table are called “People”, this option will say “Show all fields in expanded people”. If the wording looks a little strange, Airtable is probably just using your custom term for “record”.
Going back to the link settings, the next option we see is to “Restrict access with a password”. Enabling this will require users to enter a password before they can access the shared view.
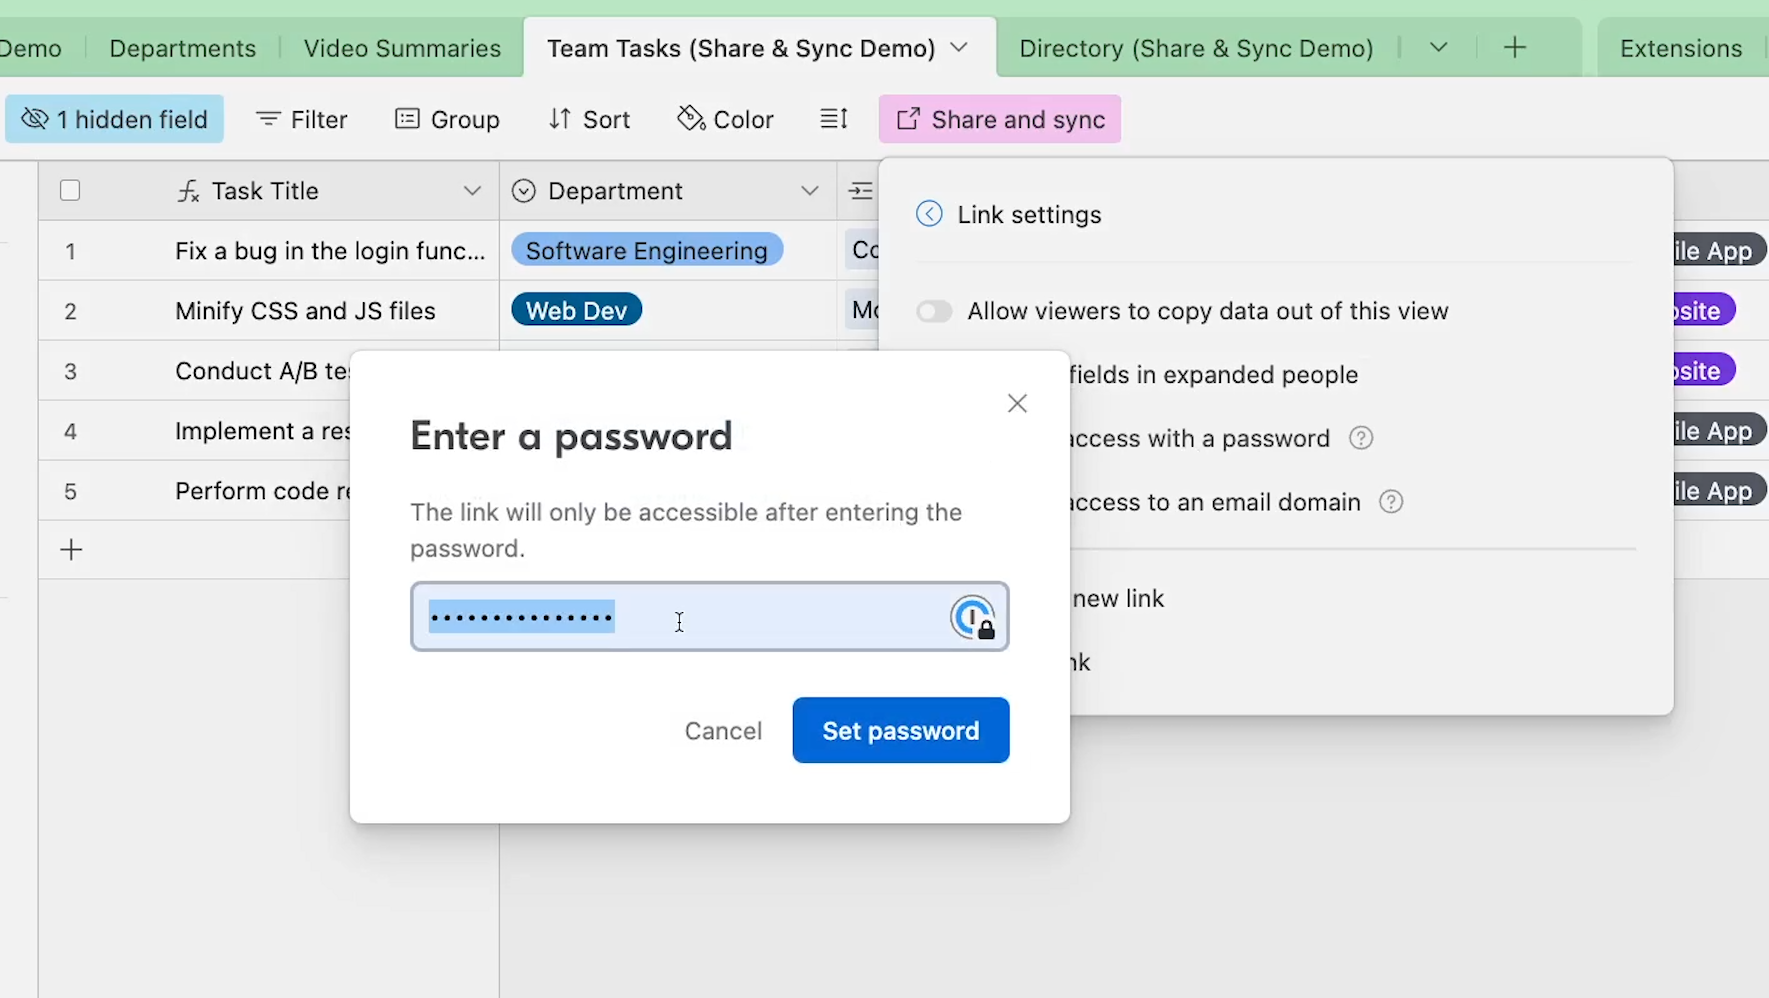
Once you enable the option, you’ll be prompted to create a password for the view. This is the password users will need to enter to see your shared view.
Once the password is set, you can click on “edit” to change the password. Just note that once you change the password, the old one won’t work anymore.
Here’s what a user will see when they open up a password-restricted link.
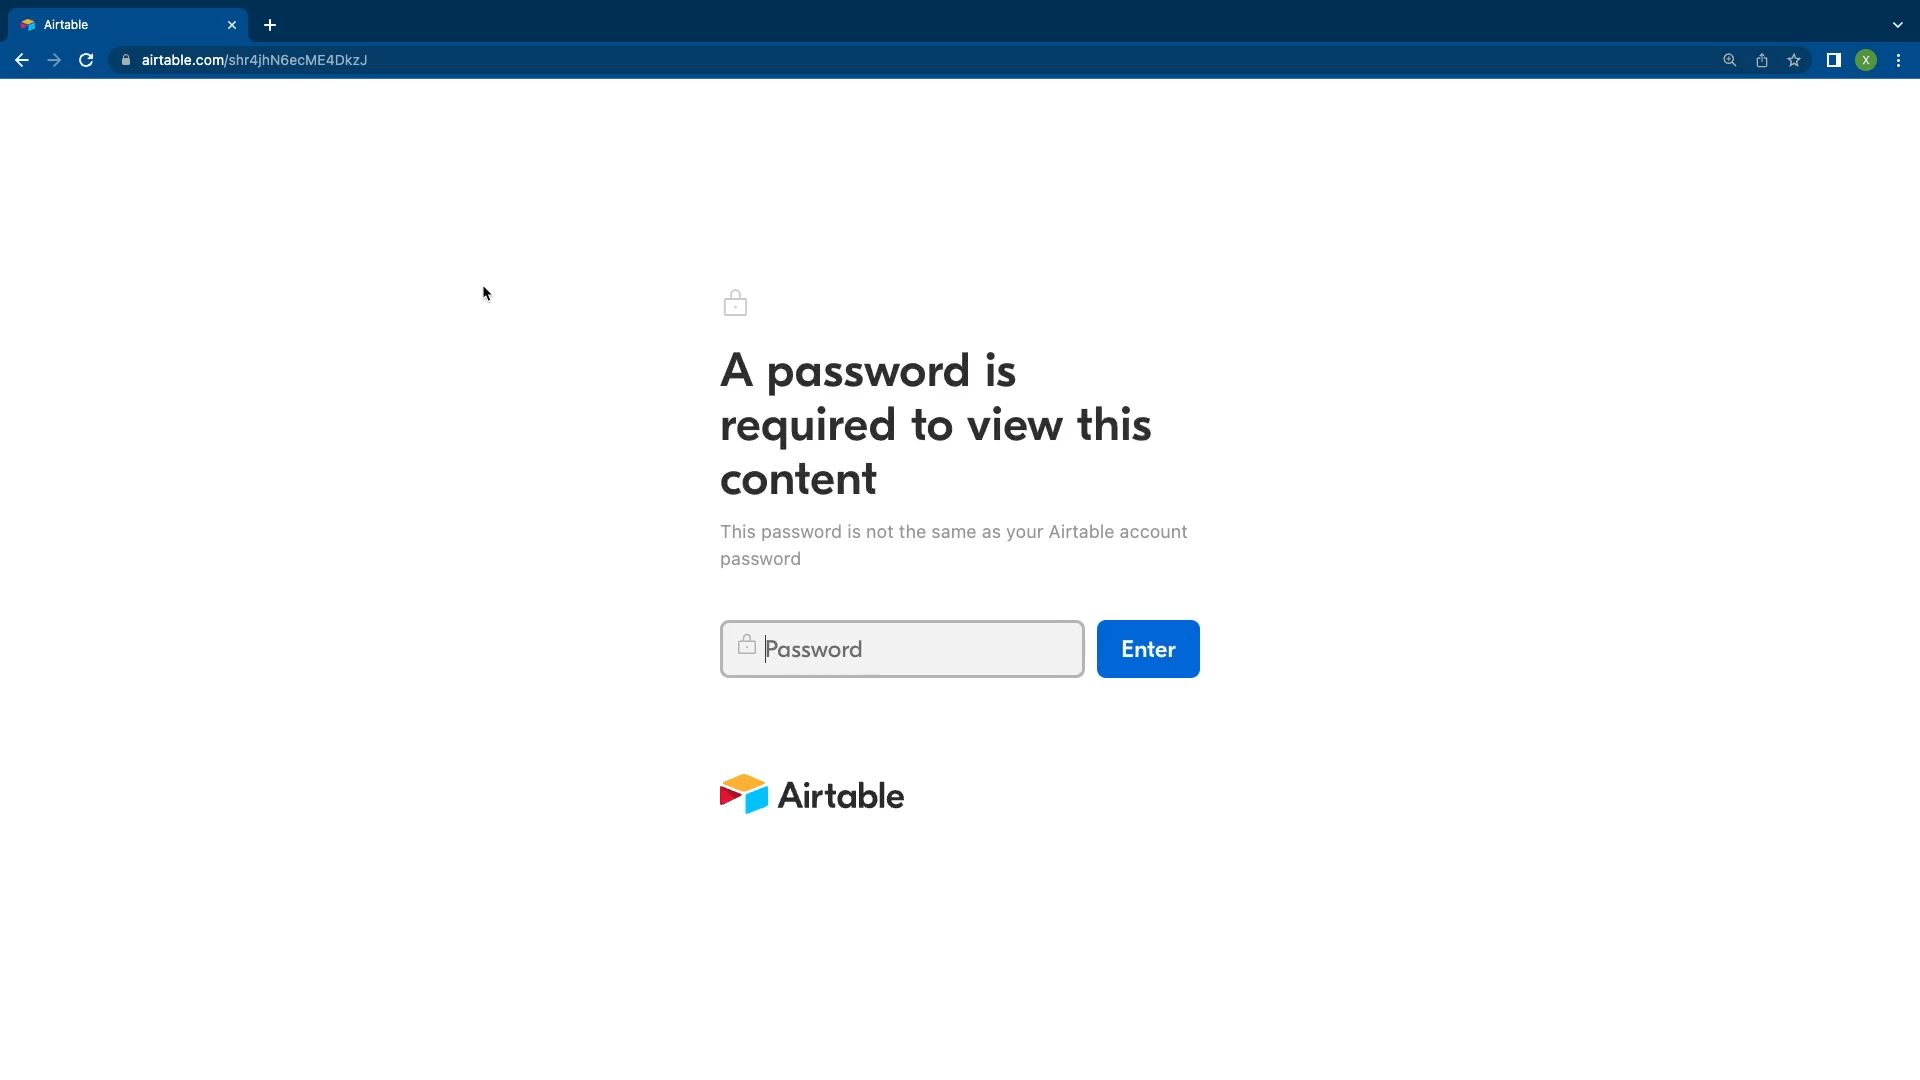
Once they enter the correct password, they can see the shared view.
If you’d like to go back to allowing unrestricted access to your shared view, you can just disable this option at any time. However, you will need to set the password again if you re-enable the option.
To finish out the “Link settings” options, we see a setting to “Restrict access to an email domain”.
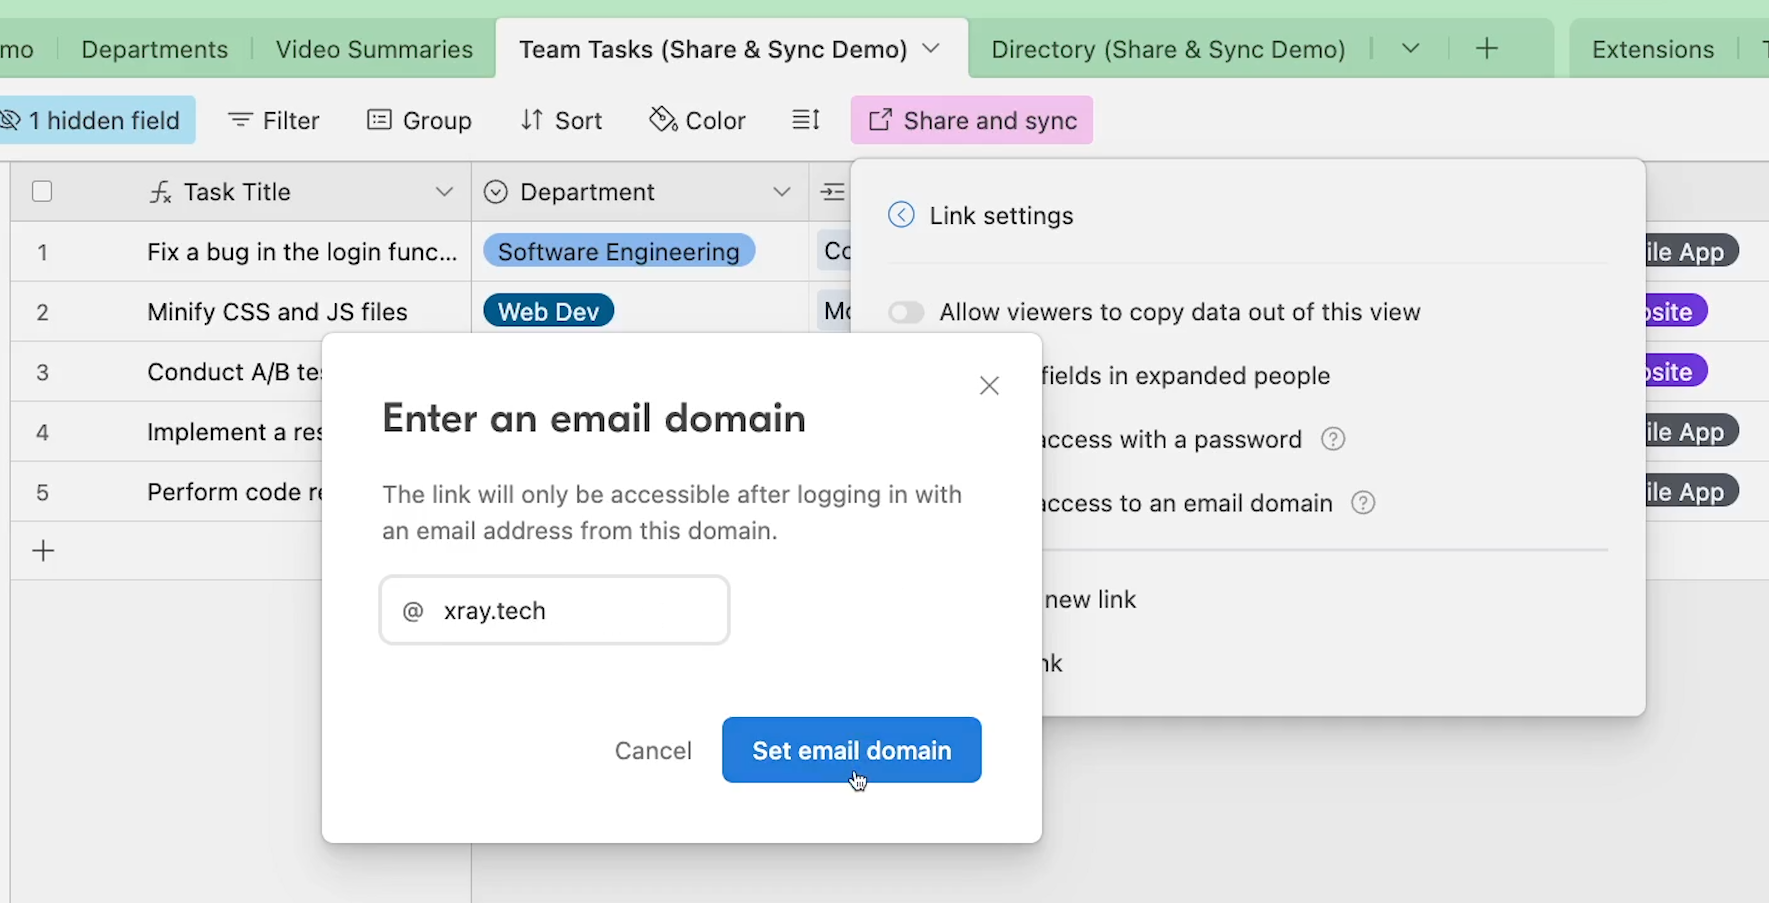
When this setting is enabled, users will have to log in to Airtable before they can see the data in your shared view. They’ll only be able to see it if they use an email address from the domain that you specify.
For example, we could limit access to a view to users with an XRAY domain.
When we open up the view, we’re prompted to sign in to Airtable.
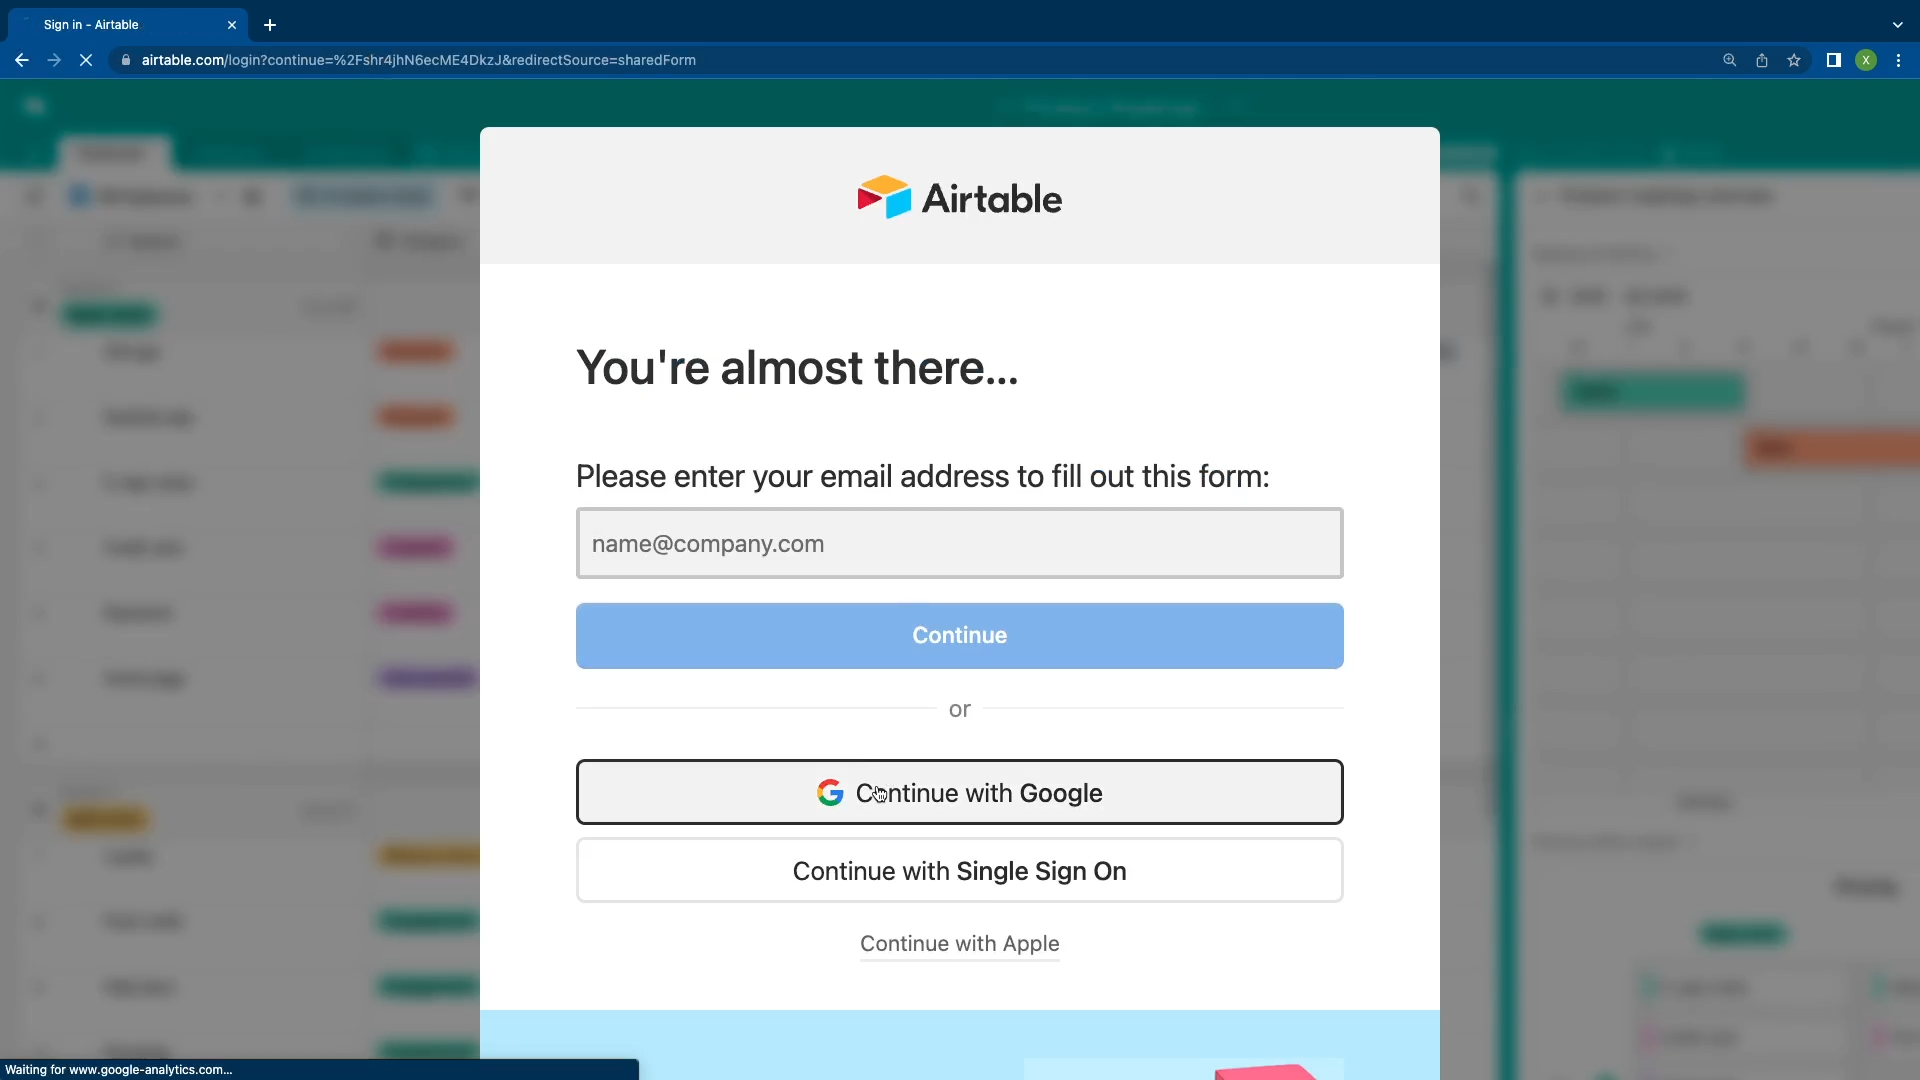
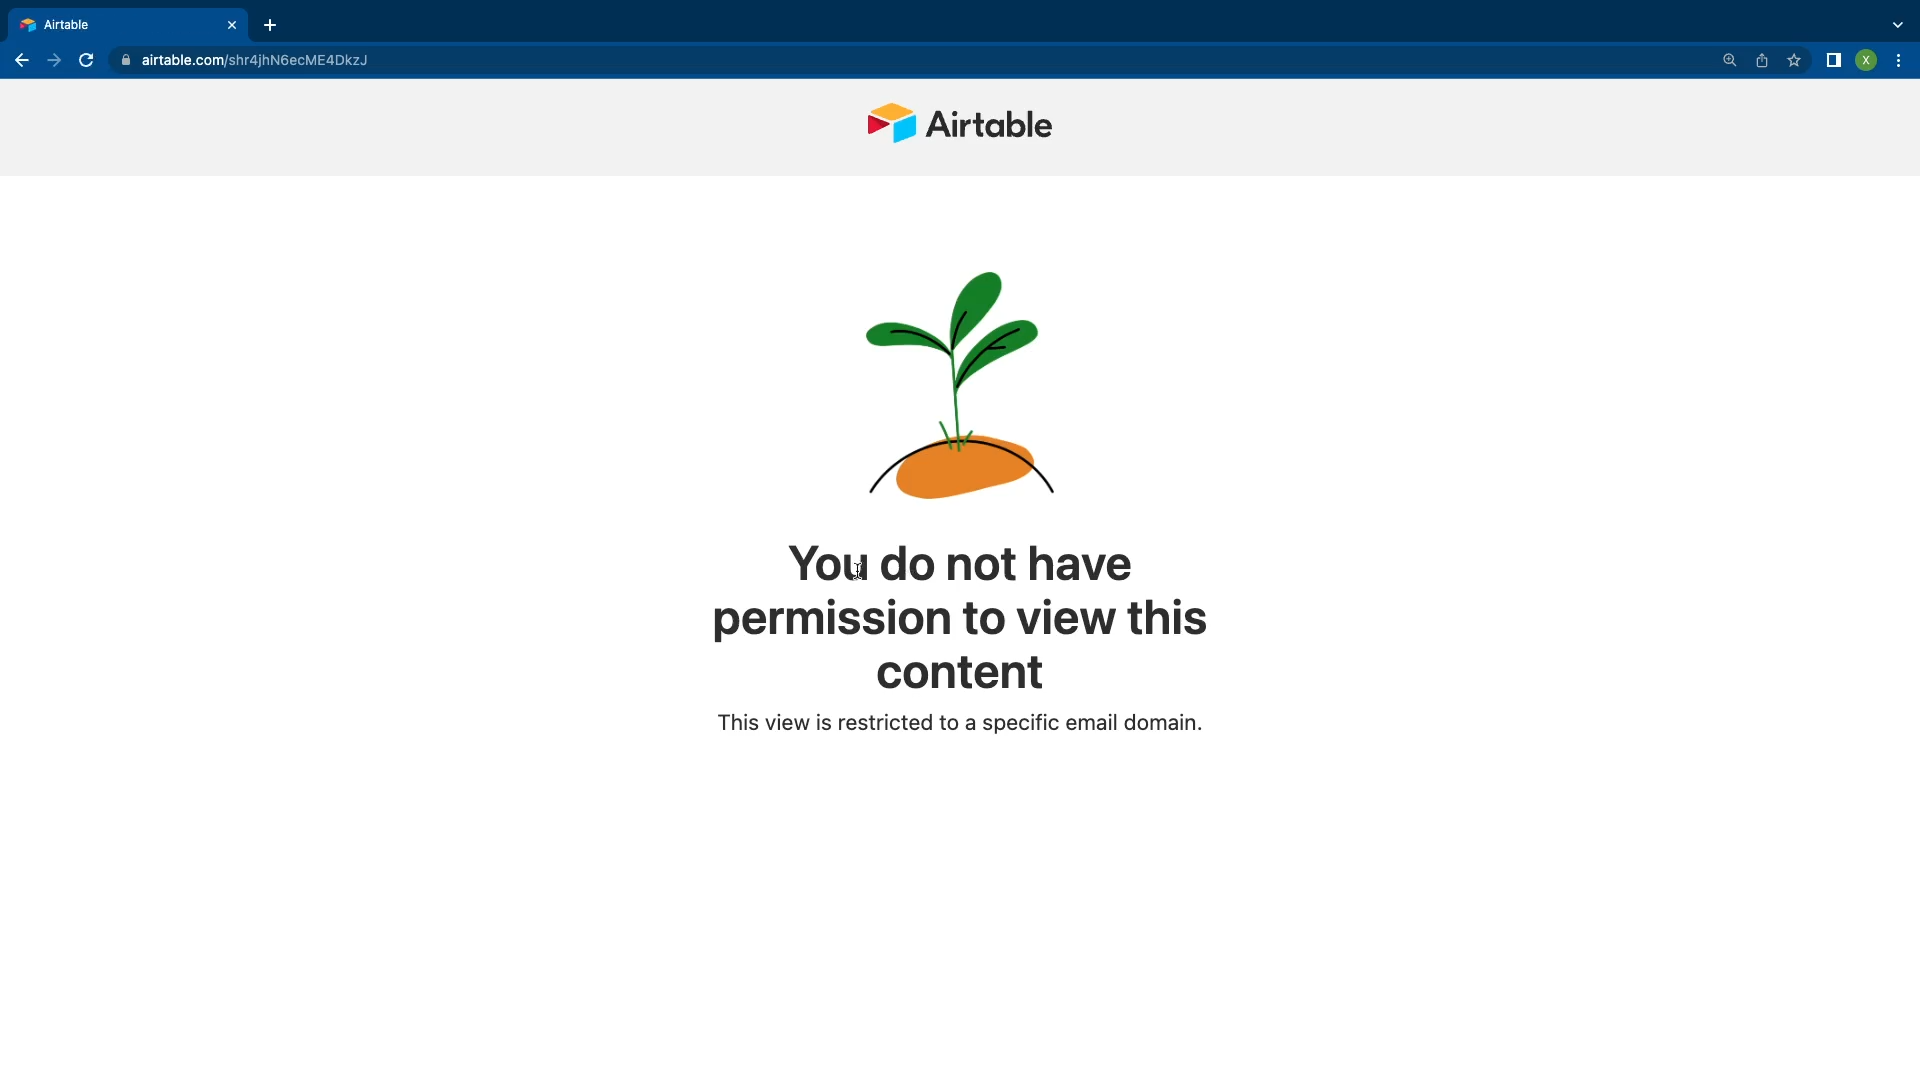
If we use an “@gmail.com” account, we won’t be able to access the view.
Just like with passwords, you can disable this setting at any time to remove the domain requirement.
Finally, before we explore synced tables, let’s take a look at embedding your shared views.
If you’d like to add your shared view to a page on your website, or as part of a slide deck, Airtable provides an embed code with shared links.
The embed will use all the same settings as the shareable link. It just adds an iFrame wrapper so you can embed the view into your site’s HTML.
To embed a shared view, start by opening the view you want to share and click on “Share and Sync”.
Click “Embed this view”. Airtable will open up a new tab with a few options for configuring your embed, and a preview of what the embed will look like on desktop and mobile.
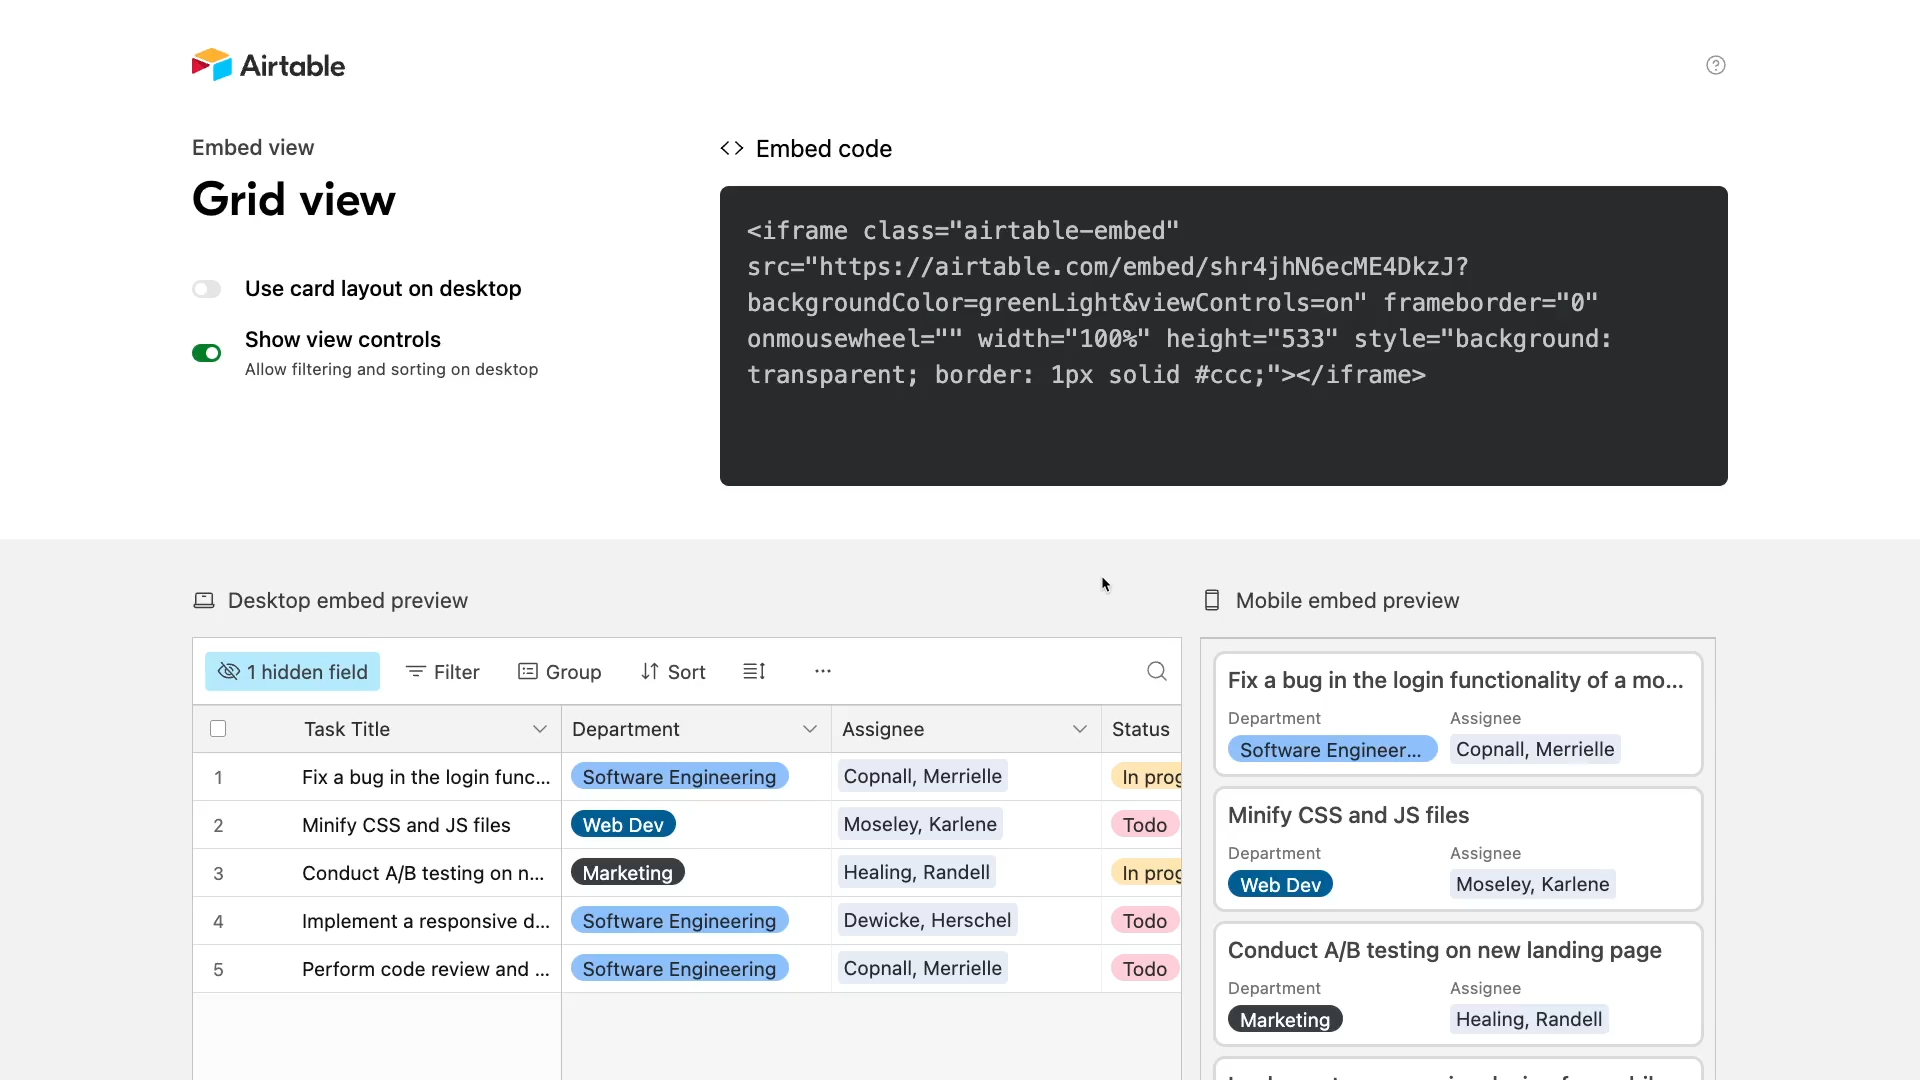
The first option is “Use card layout on desktop”.
Embedded views always use a card layout on mobile, as you can see in the preview. When you enable this option, you’ll also see a card-based layout on desktop. If you select it, you’ll see the layout updated in your preview.
The next option is “Show view controls”. As the tooltip says, enabling this will let users filter and sort data in your shared view.
Once you’ve configured your settings, you can view, edit, and copy the embed code in the panel on the right hand side.
Next, let’s go over creating synced tables in Airtable.
With synced tables, the contents of your selected view will be automatically synced to another table that you choose.
The two tables can be in different bases, and in different workspaces. However, they both need to be within the same organization.
Additionally, you can only create syncs using grid views. Once you’ve created a sync, you can then create additional views with different types for the same data. You just have to create the initial sync with grid views.
By default, Airtable sets up 1-way syncs, and until recently, this was the only option for synced tables in Airtable.
With a 1-way sync, you can edit the source table, and all of your edits will be reflected in the synced table. However, you can’t edit any synced records in the synced table. You can only make edits to the source table.
Recently, Airtable has added beta support for 2-way syncs, which allows you to edit synced fields directly. Your changes will then be synced to the original source table.
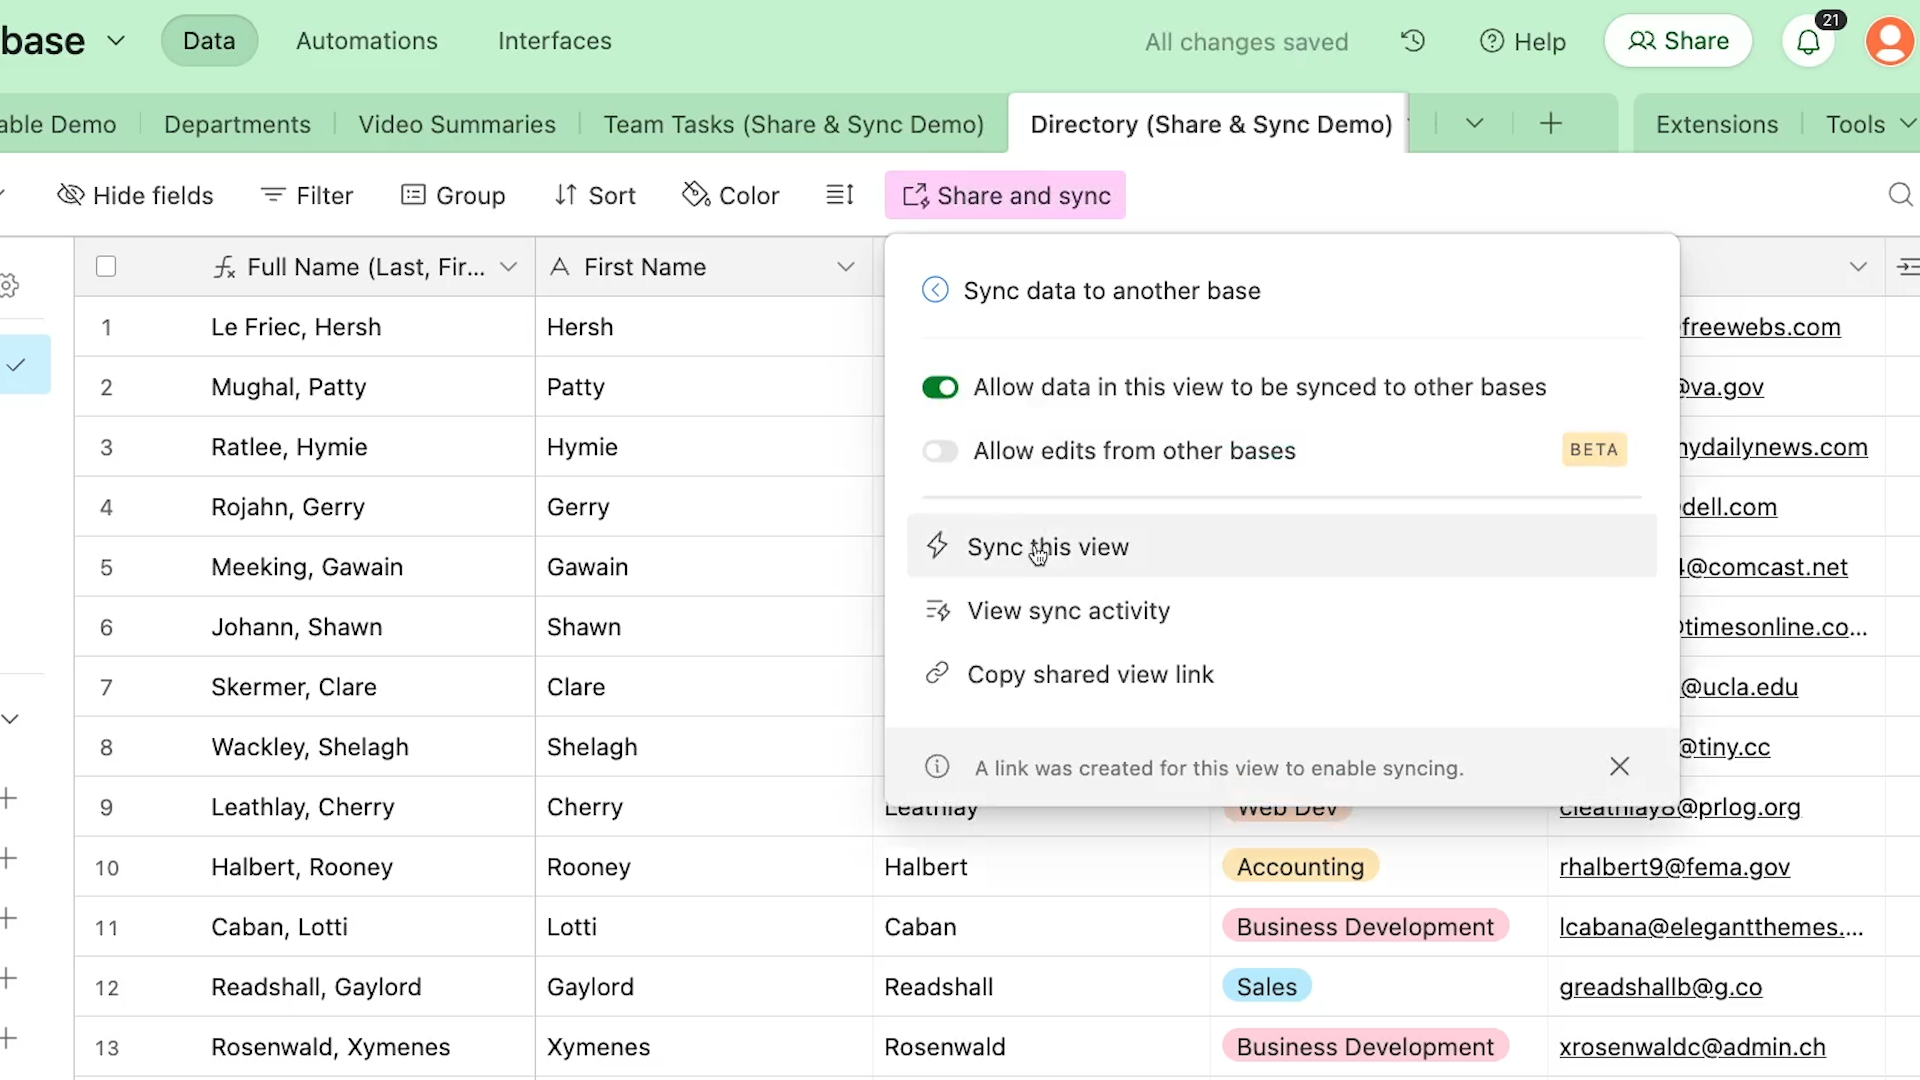
To get started with syncing your tables, open the view that you want to use as a source and click on “Share and Sync”.
Then, select ‘Sync data to another base’. Check “allow data in this view to be synced to other bases”. Then click on “Sync this view”.
You’ll be prompted to choose a workspace and base that you’d like to sync this view to. Here, you can choose whether to copy the data or sync it. Copying the data will just duplicate the data in its current state, and won’t sync any changes made in the future.
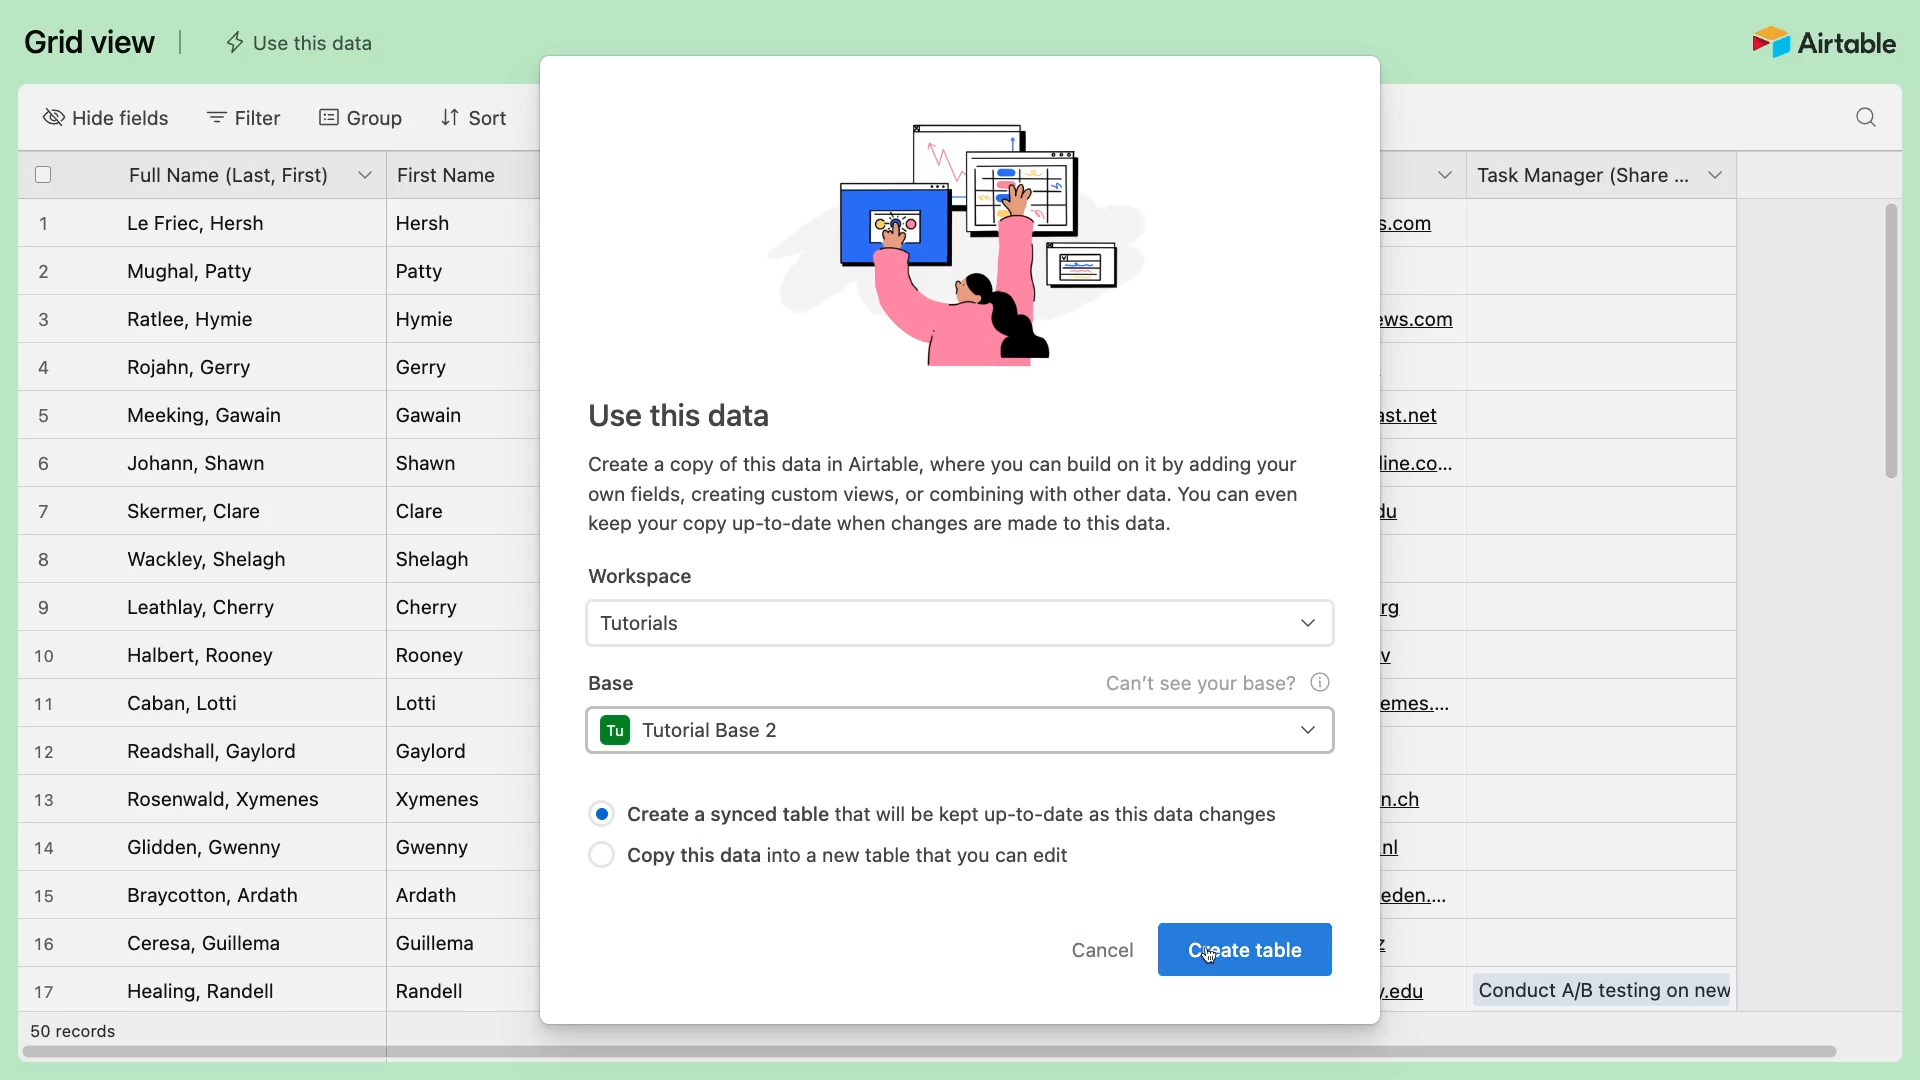
Once you’ve finished your initial configuration, click “Create Table”.
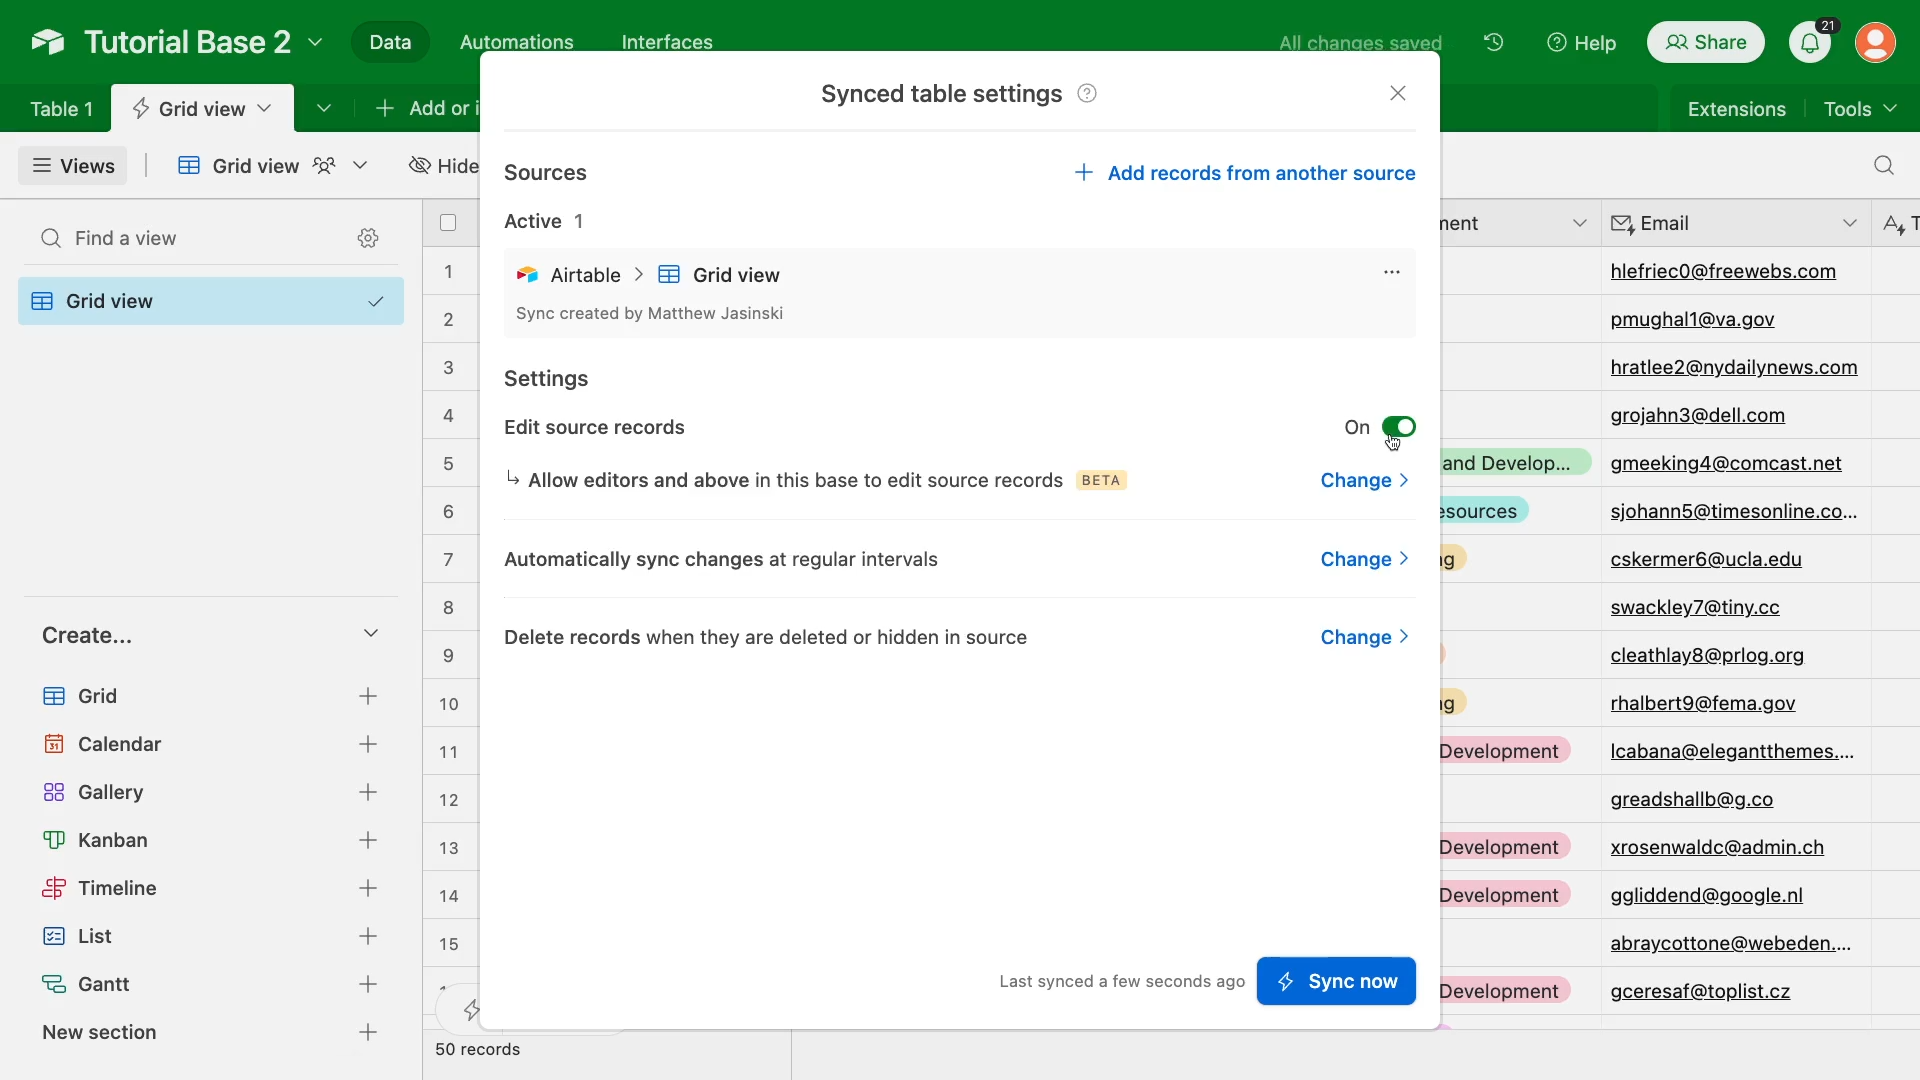
Airtable will open up your new synced table, and a new settings window will pop up.
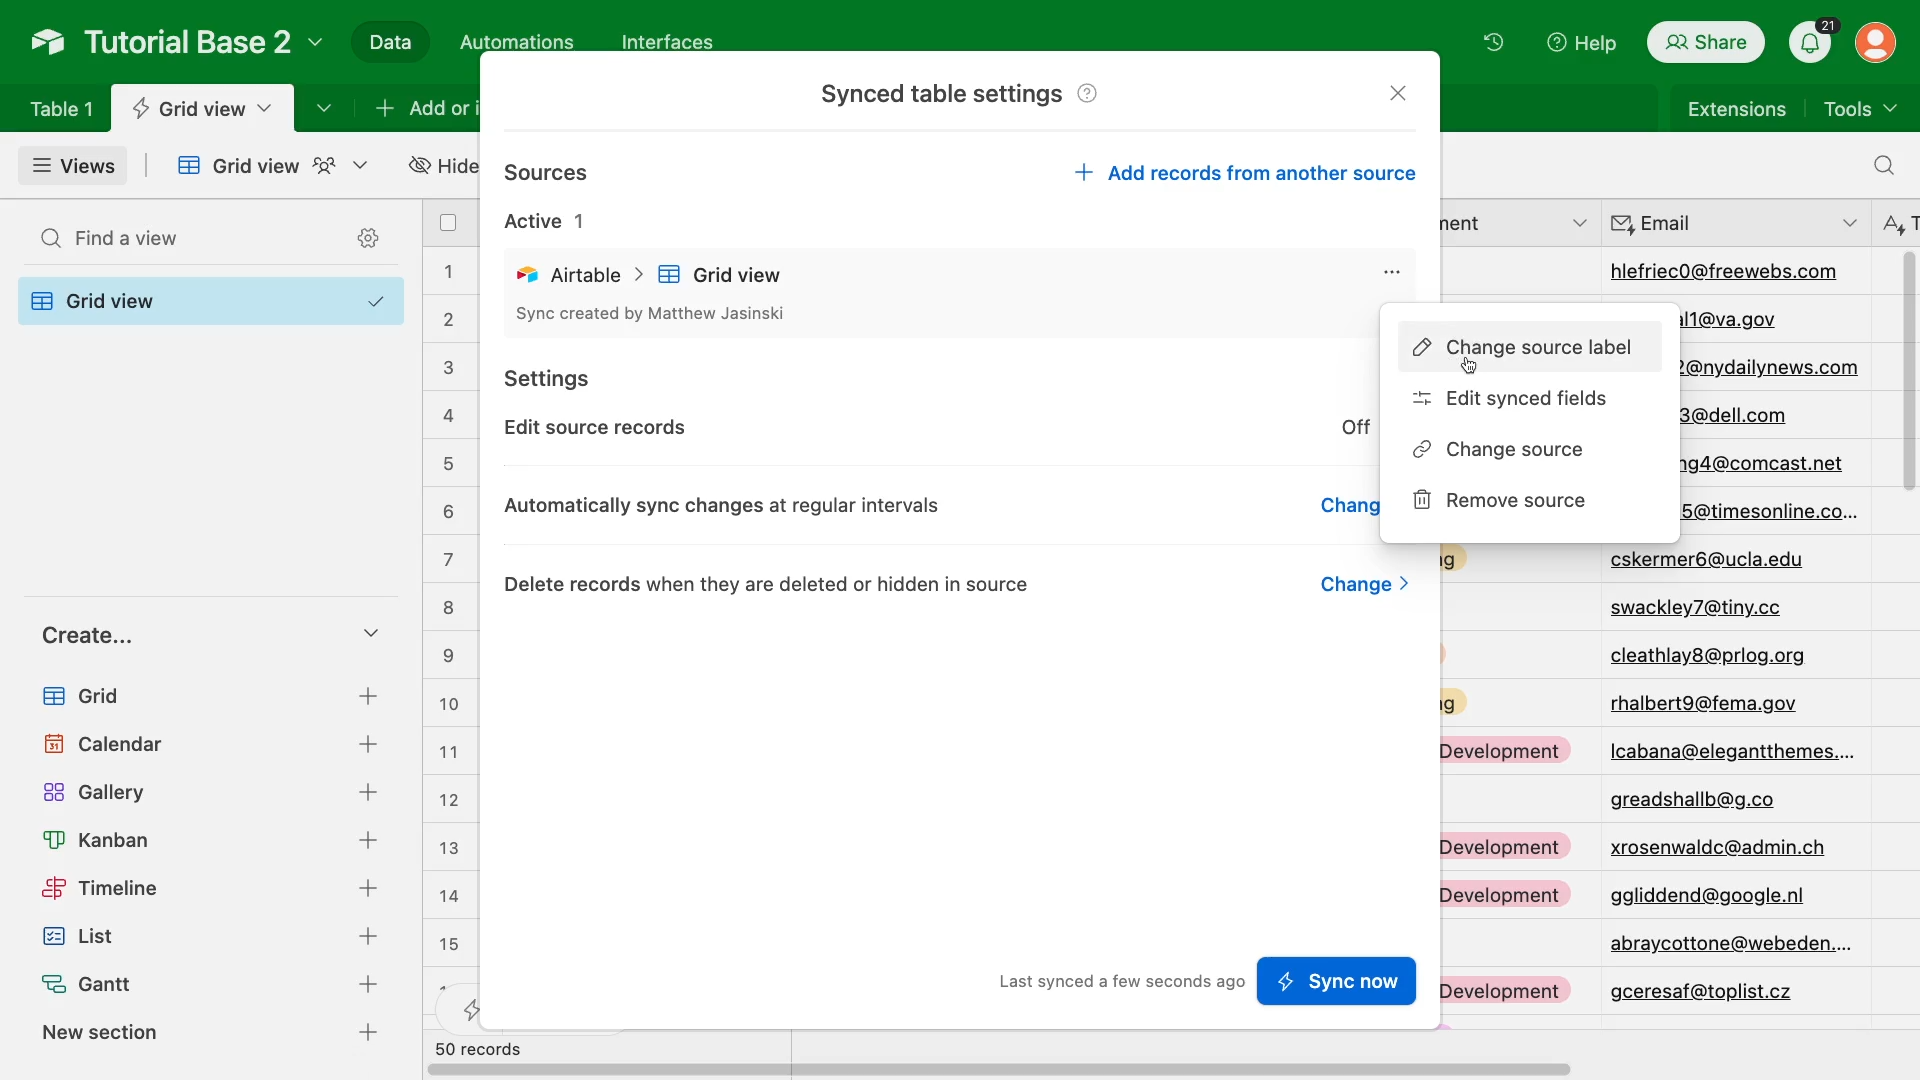
In this window, you can rename the sync by clicking on the three dots next to the sync name. In this same sub-menu, you can also change sync source, or choose which fields that you want to include in the sync.
Back in the main settings menu, you’ll see an option called “Edit source records”. Selecting this option will enable a 2-way sync, but you’ll have to reconfigure the source base as well.
We’ll focus on setting up a 1-way sync for now, but we’ll revisit the 2-way sync later in this post.
The next option will let you choose how and when your synced table is updated. By default, this is set to “Automatically sync changes at regular intervals”, but you have two other options as well.
If you choose “Only sync changes when requested”, the synced table will never automatically retrieve updated data from the source table. Instead, you’ll have to run a manual sync whenever you want to update the data.
If you choose “Stop syncing changes and convert to unsynced table”, the synced table will just become a regular table. Whatever data was in the table will remain, but it won’t be synced with the source anymore.
In most cases, you’ll probably want to use “Automatically sync changes at regular intervals” so your synced table stays up to date on its own. You can expect a sync about every 5 minutes or so, but the exact interval will depend on your Airtable pricing plan.
Finally, our last option in this menu is to “Delete records when they are deleted or hidden in source”.
When a record is deleted in the source table, you can choose whether or not to have it deleted in the synced table as well.
If you’d like to revisit any of these options later, you can reopen this menu at any time in your synced table by clicking on the table name and selecting “Update sync configuration”.
In your fully configured synced table, you should see all of the data from the source table. Every field will have a lightning bolt symbol, indicating that the data comes from a sync.
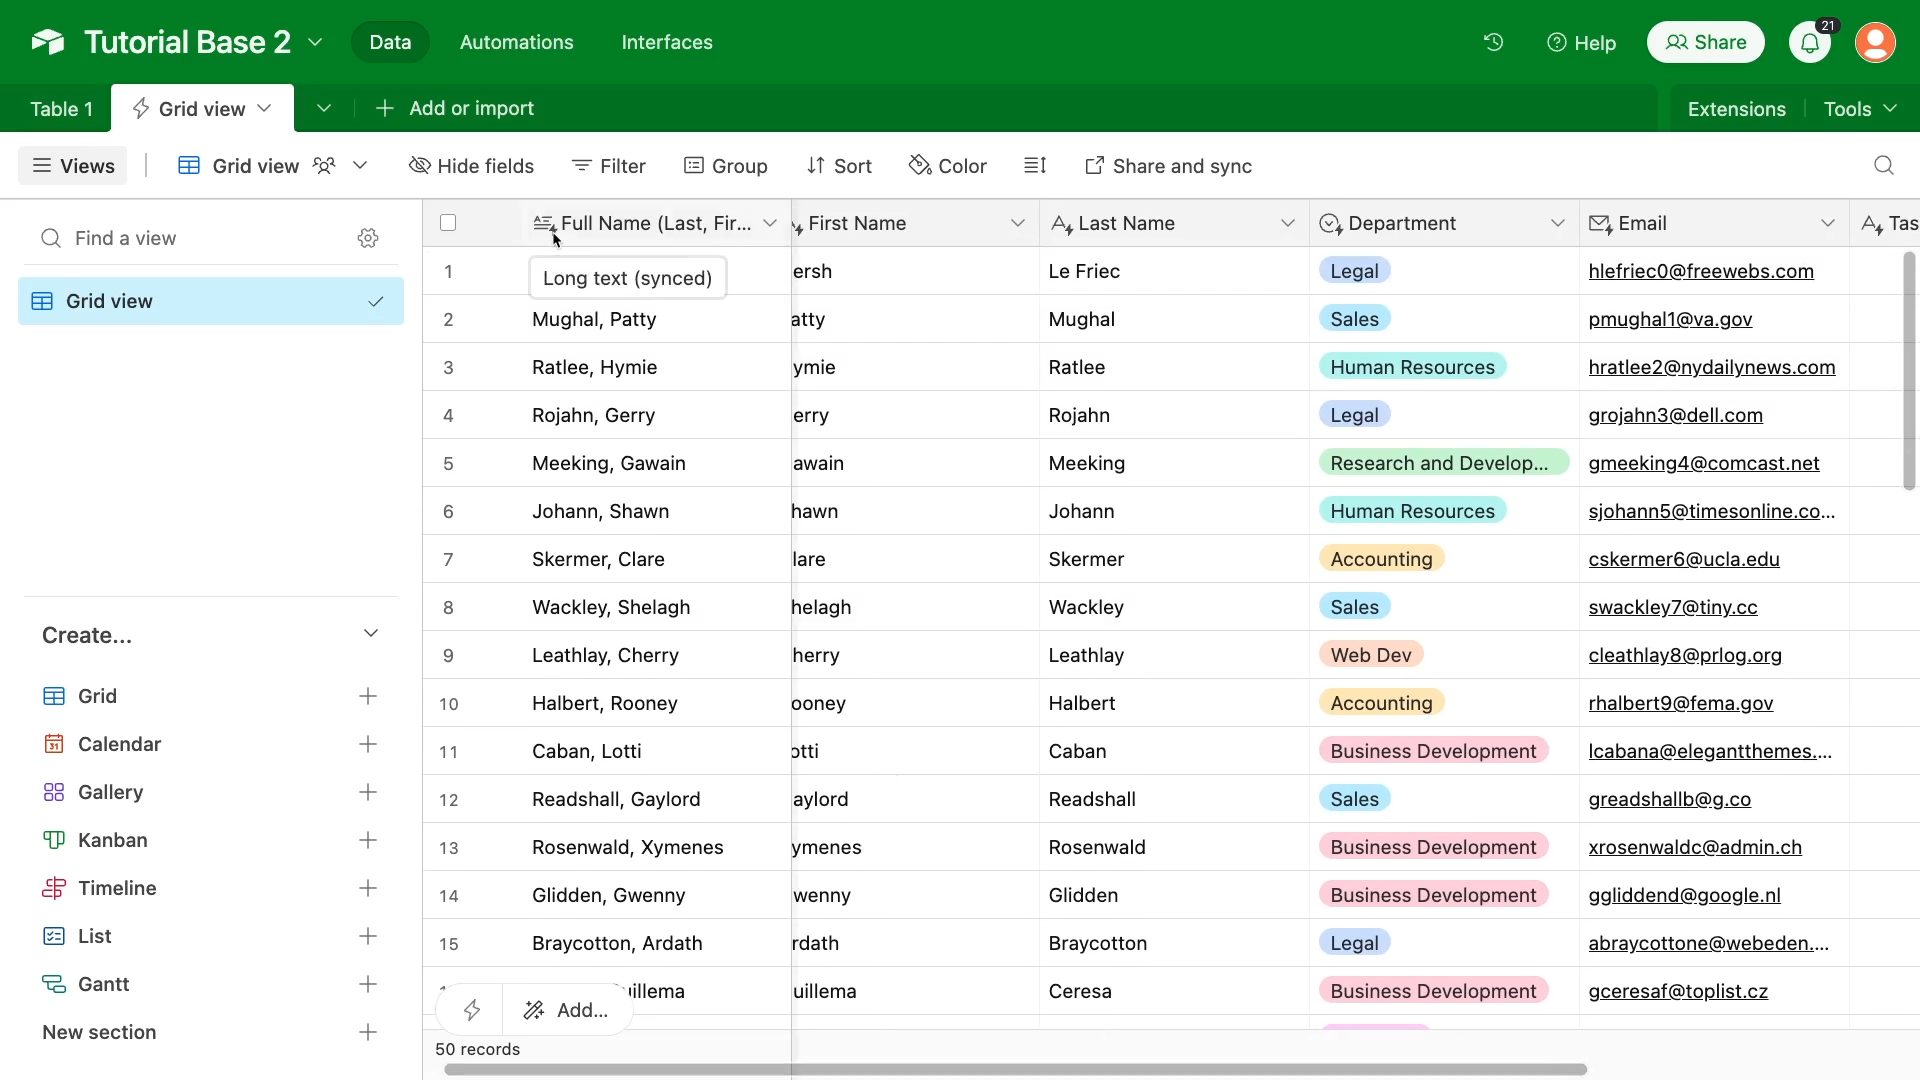
Since this is a 1-way sync, you can’t edit any of these fields or add new records. However, you can add new fields, such as formula fields that reference data from these synced fields.

To see how the sync works in action, return to your source view and make a couple quick edits. Your synced table should update shortly after without requiring any additional input.
But what if you want the sync to work in both directions?
For anyone working at large organizations, enabling 2-way syncs can be a huge boost to productivity and collaboration.
To enable a 2-way sync, go back to your source view. Click on “Share and Sync”.

Select “Sync data to another base”, and enable “Allow edits from other bases”. Choose which fields you’d like to include in this sync, or just use all fields.
Once you’ve configured the fields you want to use, close this settings menu and return to your synced table.
Click on the table name and select “update sync configuration”.
Enable the option that reads “Edit source records”, and close this settings menu.
Now, you can make edits to either the source or the synced table, and those edits will automatically be synced to the other table.
However, you can’t add or delete records in the synced table. You can only edit records that already exist in the source table.
Note that the synced table still includes the lightning bolts, while the source doesn’t. That should help you to tell the two apart at a glance.
Syncs in Airtable are great for sharing data with your team without having to share an entire base that may include sensitive information, or information that’s just not relevant to that department.
However, syncs aren’t a viable way to share data with outside organizations like clients and customers.
To finish up with Airtable syncs, let’s take a look at a closely related feature: your Airtable Data library.
The data library is essentially a way to create a templated synced table. It will enable your team to create a synced table referencing your selected view whenever they want.
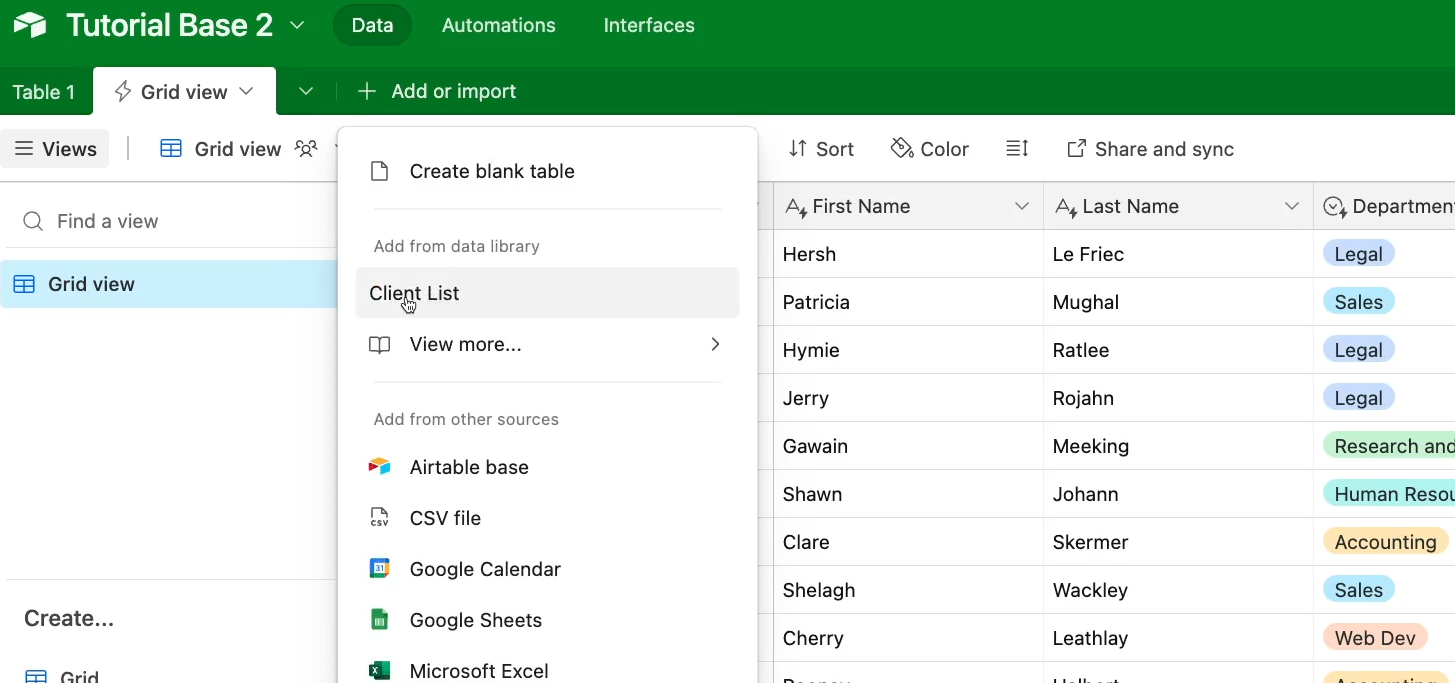
Under the “Share and sync” menu, you’ll see an option to add your view’s data to your organization’s “Data library”.
When you’ve added a view to your data library, users in your organization will have the option to quickly copy any data shared to the library whenever they make a new table.
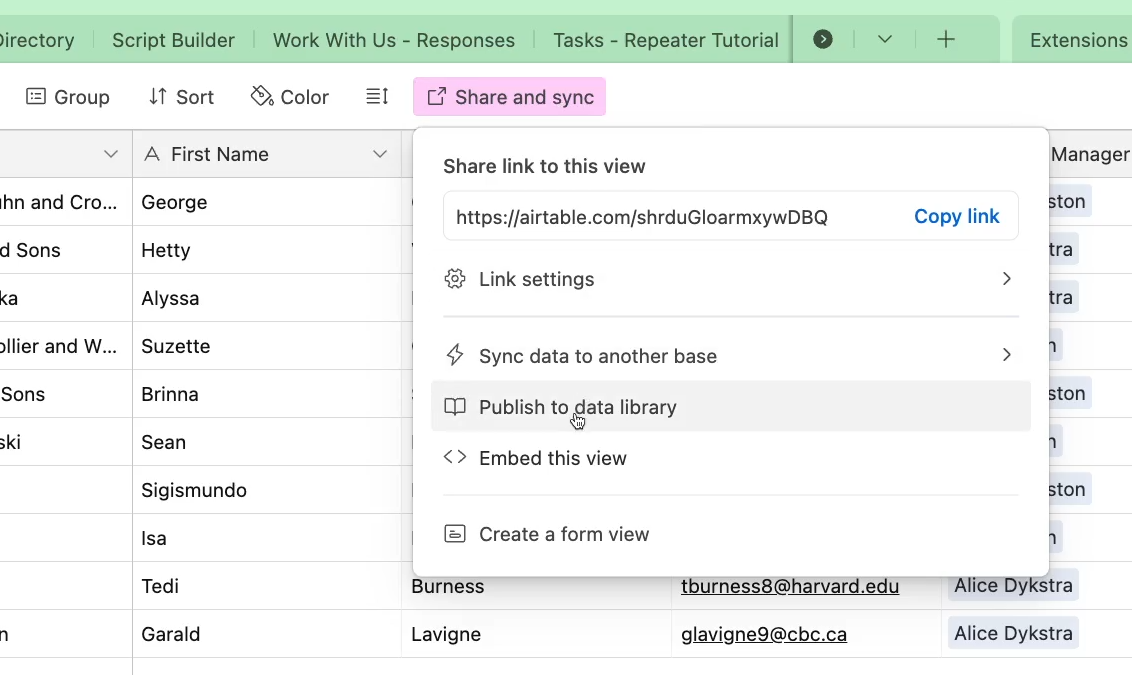
To add a view to your data library, click on “Share and Sync”. Select “Publish to data library”.
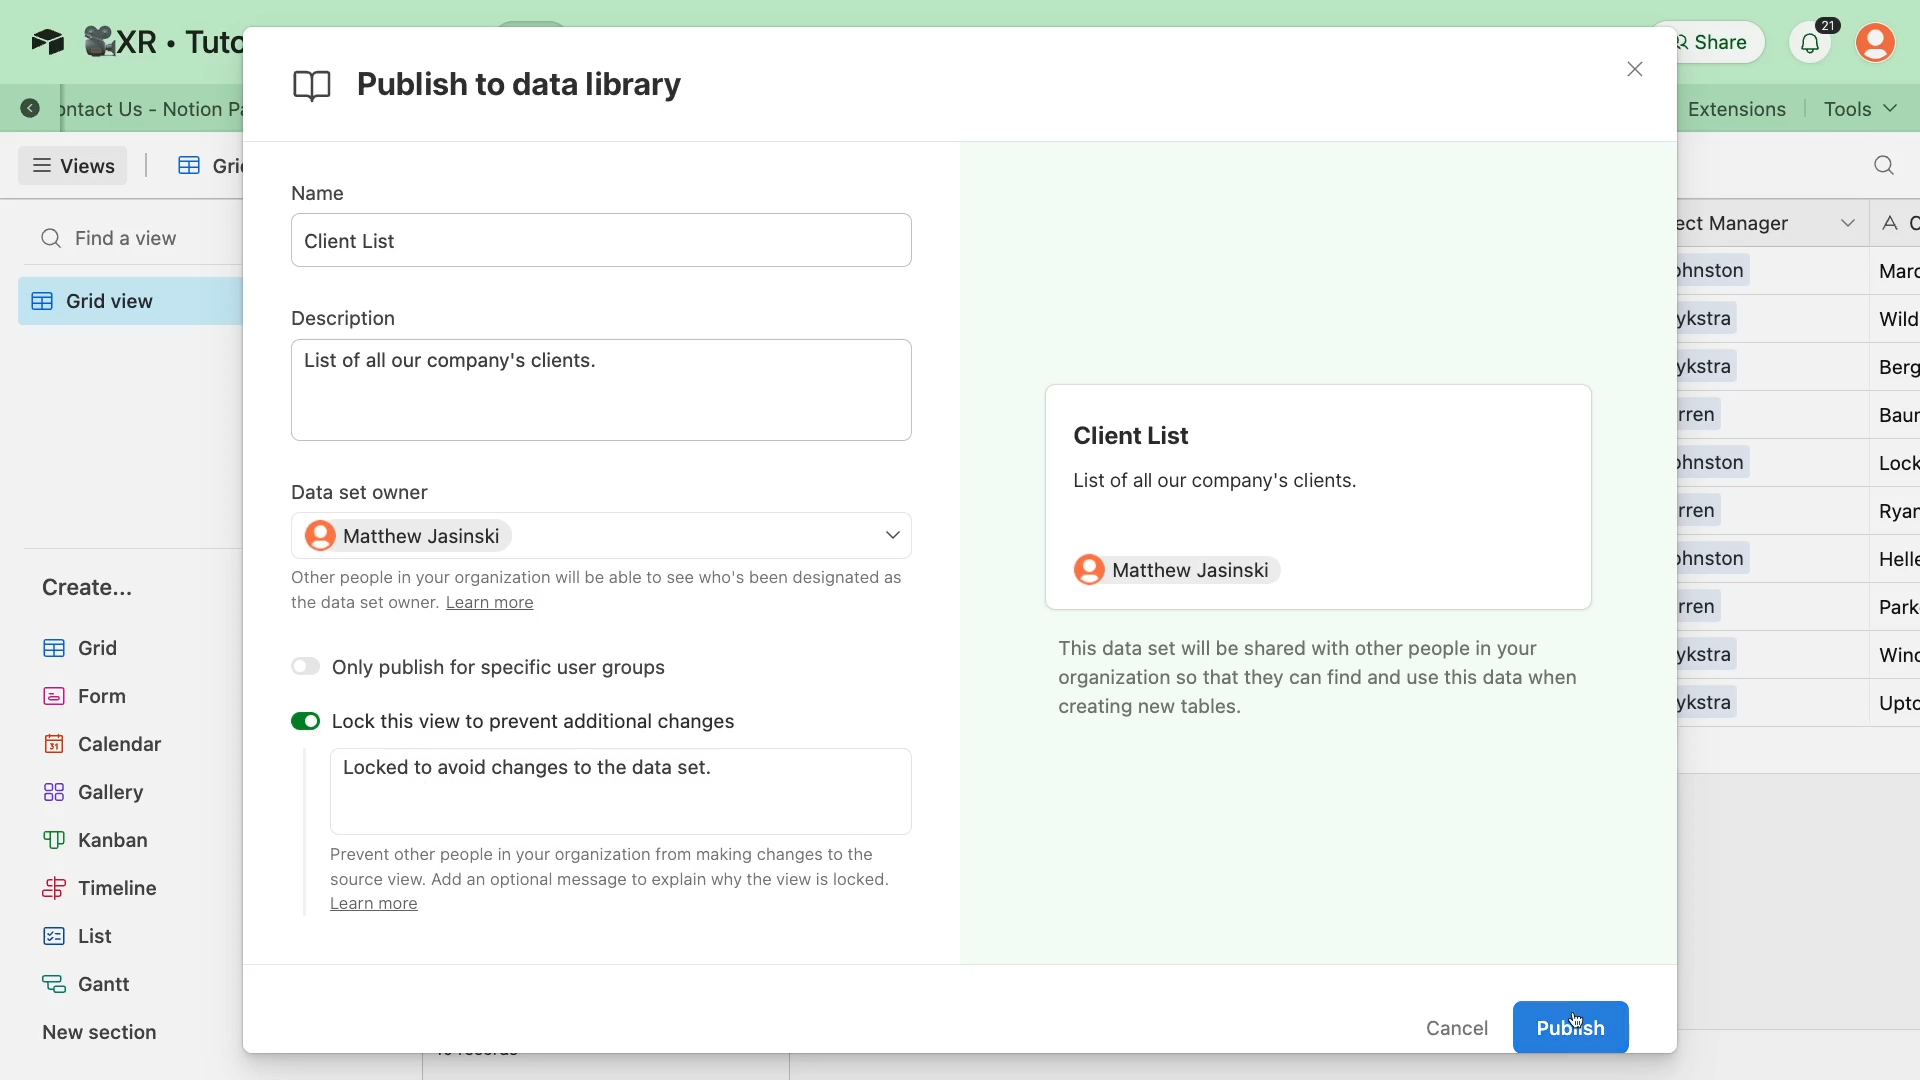
Airtable will prompt you to provide a name and a description. It will also give you the option to lock the current table, which it will enable by default.
You can’t edit the share and sync settings of a table when it’s locked, but you can unlock the table later just by clicking on the view title.
Once you’ve configured all your settings, click on “Publish”.
Your view is now part of your Data library.
To access it, create a new table. Any views that you’ve added to your Data Library will be visible near the top of the menu.
If you select a Data Library option, your new table will be a synced table using the original view as the source.
Your new table will use a 1-way sync. You won’t be able to edit any synced fields in the synced table.
Currently, 2-way syncs aren’t compatible with the Data Library feature. If you enable a 2-way sync in a table synced to a data library, the dataset will be set to “Inactive”, and won’t be accessible when creating a new table.
–
Data libraries are a bit of a niche feature for small companies, but could easily become an indispensable tool for larger organizations .
If you’re managing data for a large publisher or marketing agency, using data libraries will be a great way to streamline your sources of truth and let every department reference critical data with just a couple of clicks.
Finally, let’s take a look at the last option that you’ll see in the sharing panel: Form views.
In Airtable, a form view creates a survey that includes a question for each field in the table. As the owner or editor of the base, you can remove questions from the survey to skip certain fields, edit the field labels into questions, and add descriptions for further context.
Once your form is configured however you’d like, you can send it out and gather data from anyone with the form link.
This is a great way to let people contribute to your Airtable bases without needing any direct access to your data.
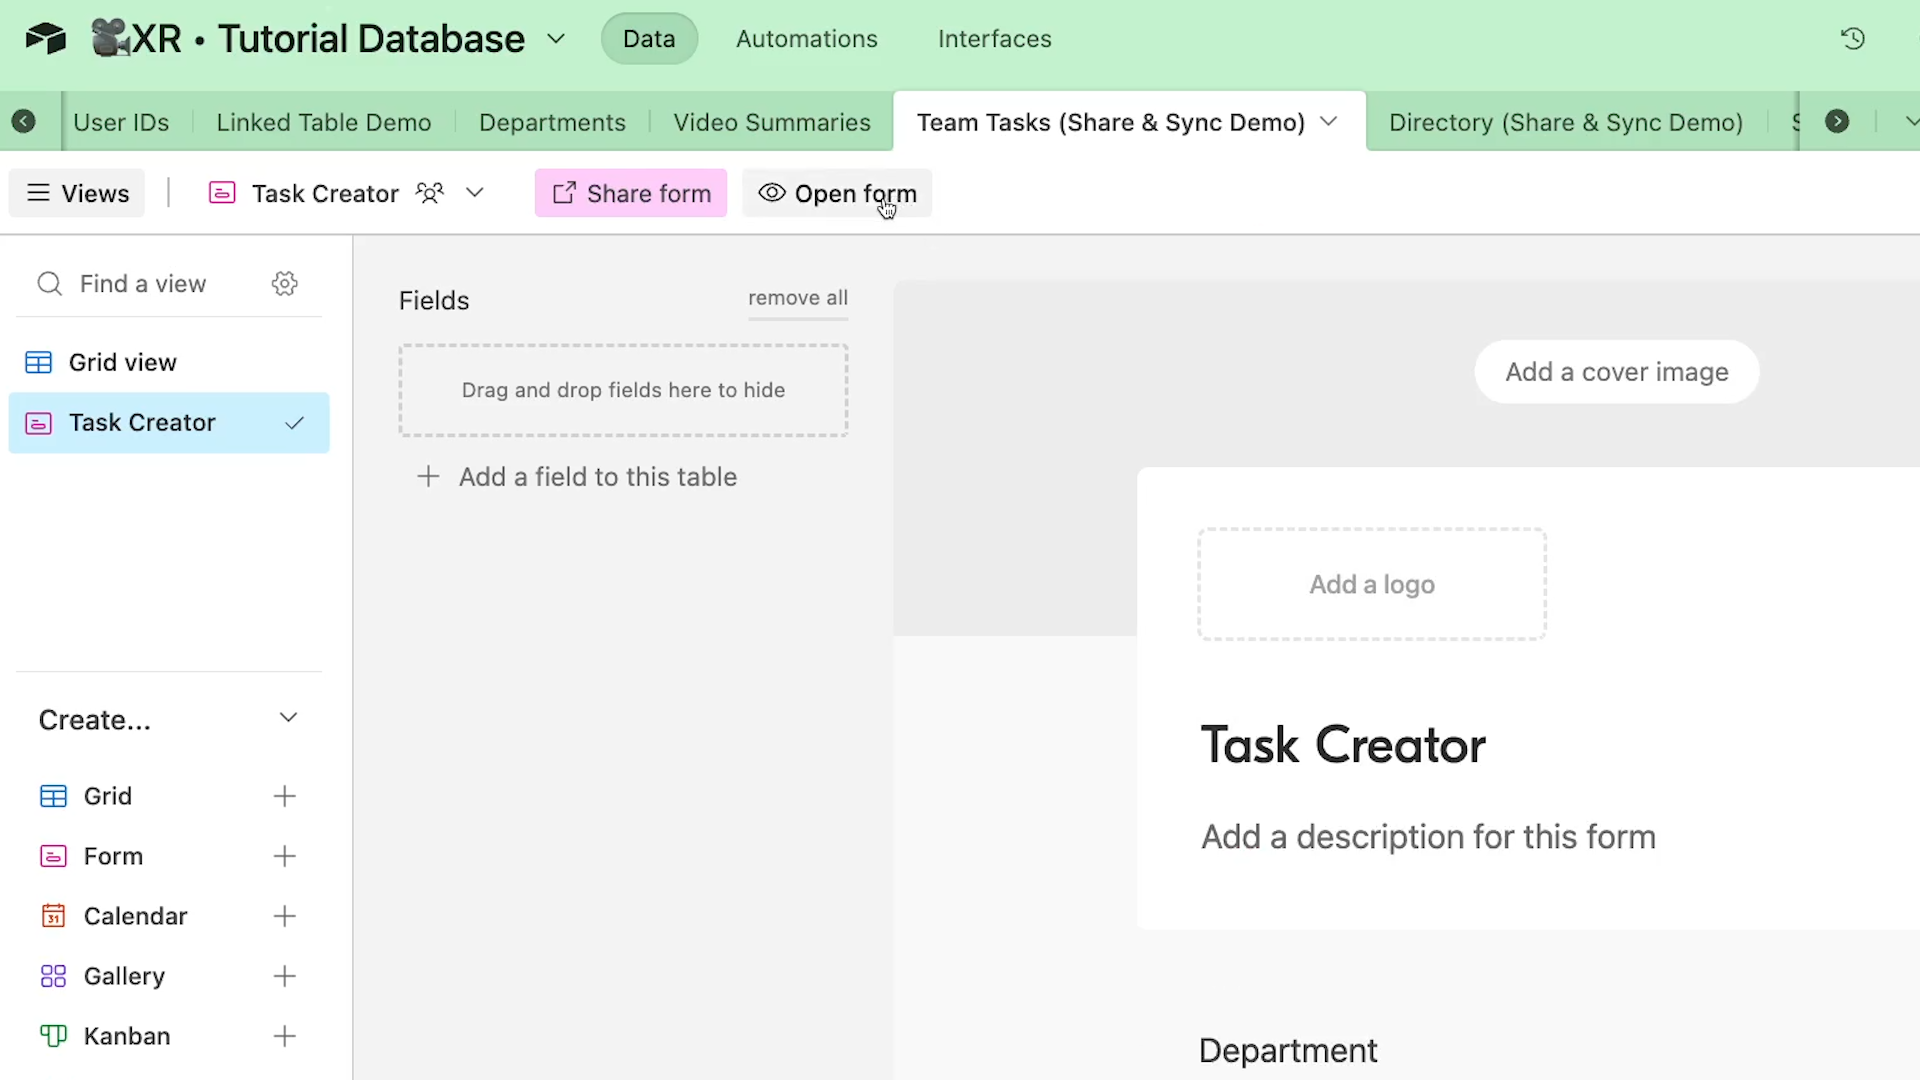
To get started, click on Share and Sync, and click “Create a form view”.
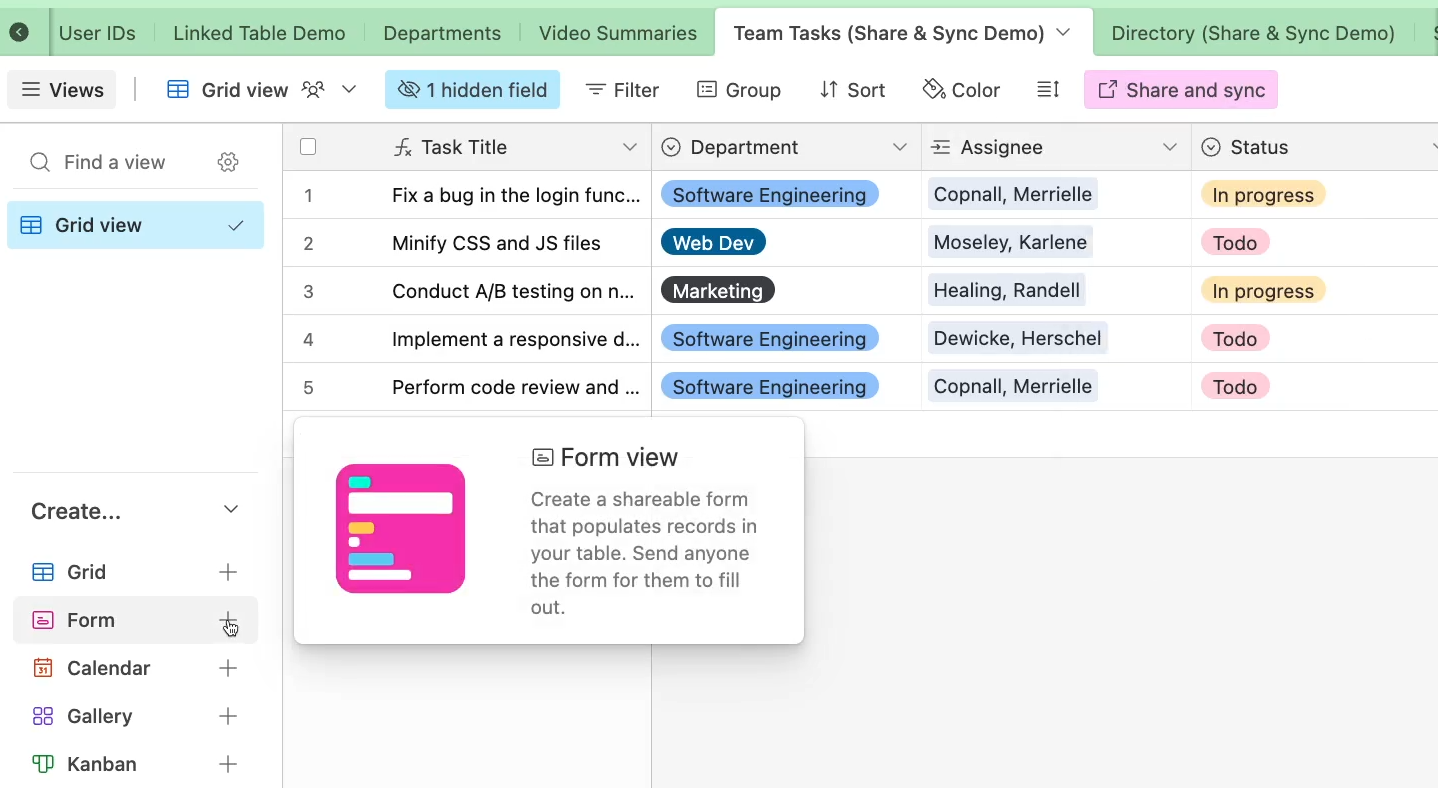
Alternatively, you can create a new view in the left hand panel by clicking on the plus sign next to “Form”.
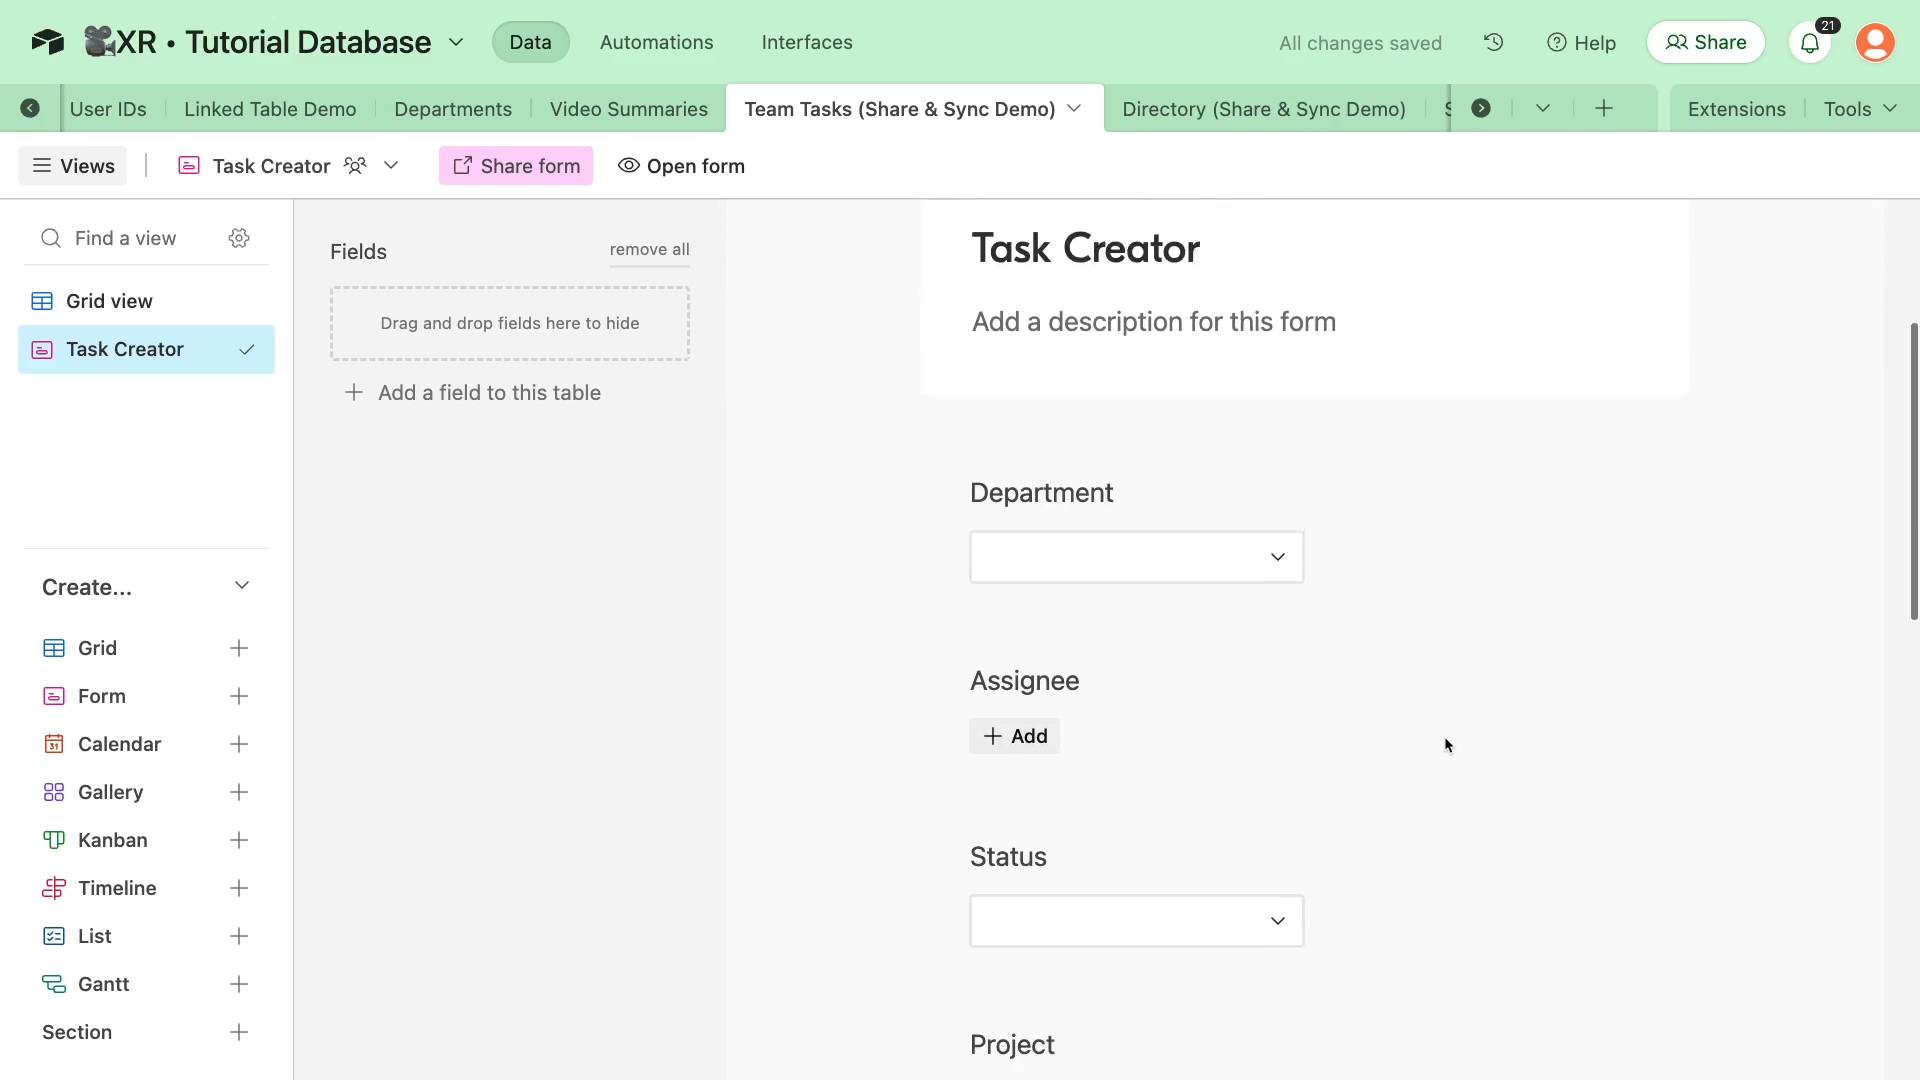
By default, your new form view will include every field in the table. If there are any fields you want to skip in your form, you can just drag and drop them out of the form.
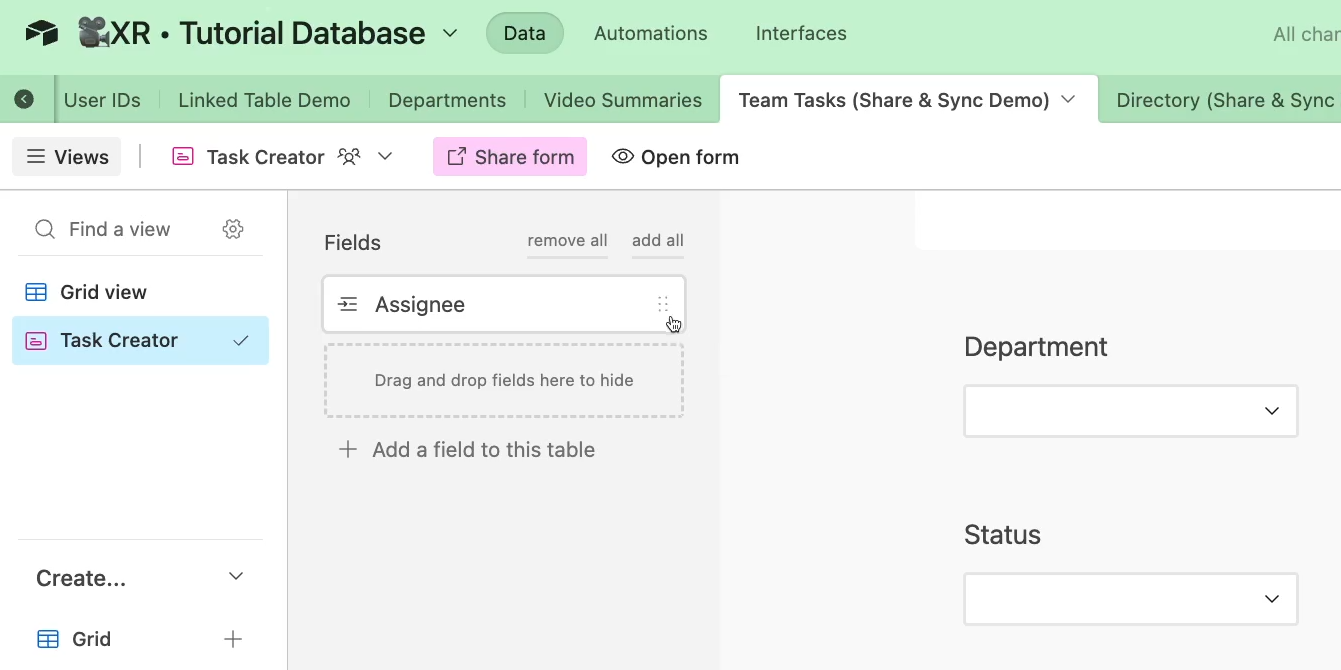
Taking a field out of the form won’t hide or remove the field in other views; it will just skip the field in the form. If you’d like to add any fields back in, you can just drag and drop again.
Every field will start with its original label from your table, but you can edit these into more verbose questions and prompts.
Editing the titles or adding descriptions won’t affect the fields in your other views either.
While you’re in the form builder, you can’t actually complete the form and submit data.
You can enter text into the boxes, but there’s no way to submit that text and create a new record from this editor.
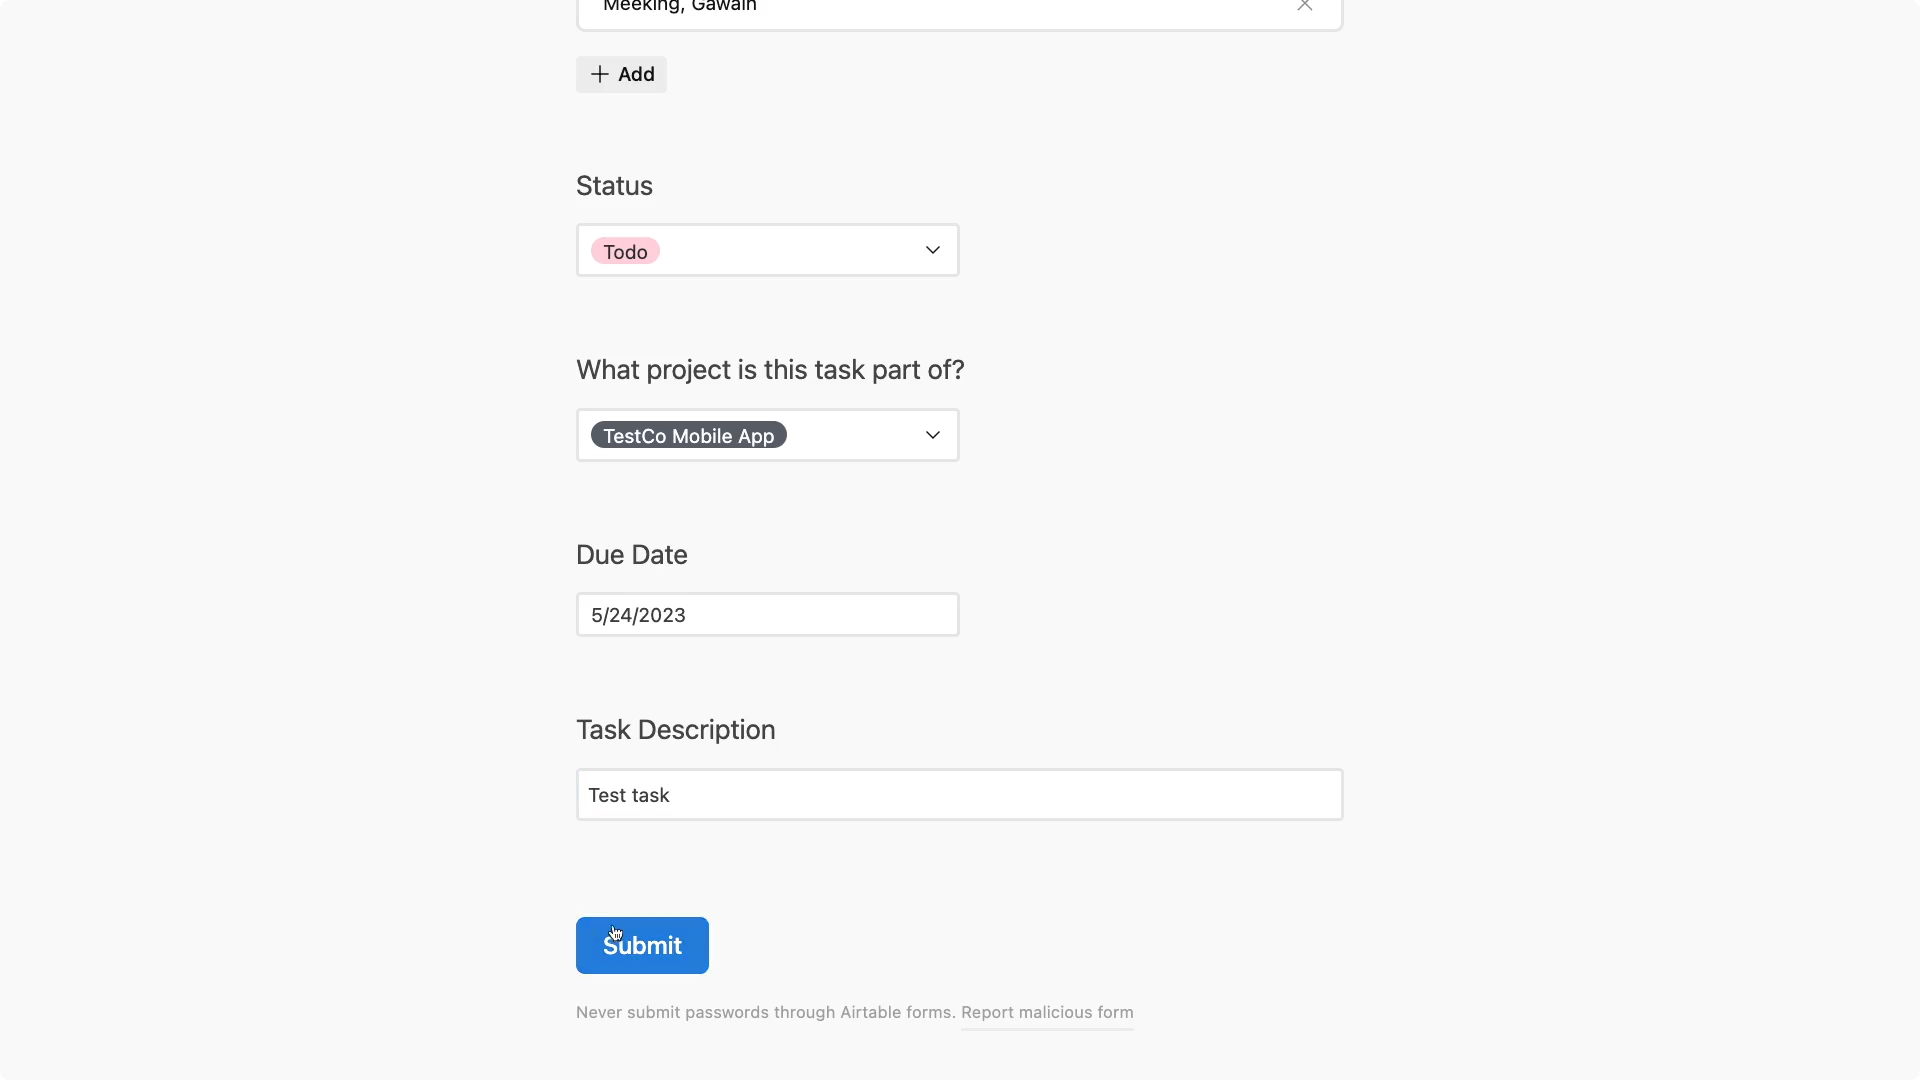
Once you have all the questions you want, you can click on “Open form” to see the live form and test it out.
When accessed through this link, you should be able to fill out the form and create a new record with your responses. Note that the new record will not be created until the form is submitted.
After you’ve given your form a preview and a test, it’s time to share the form. Return to the form view in your Airtable base and click on “Share form”.
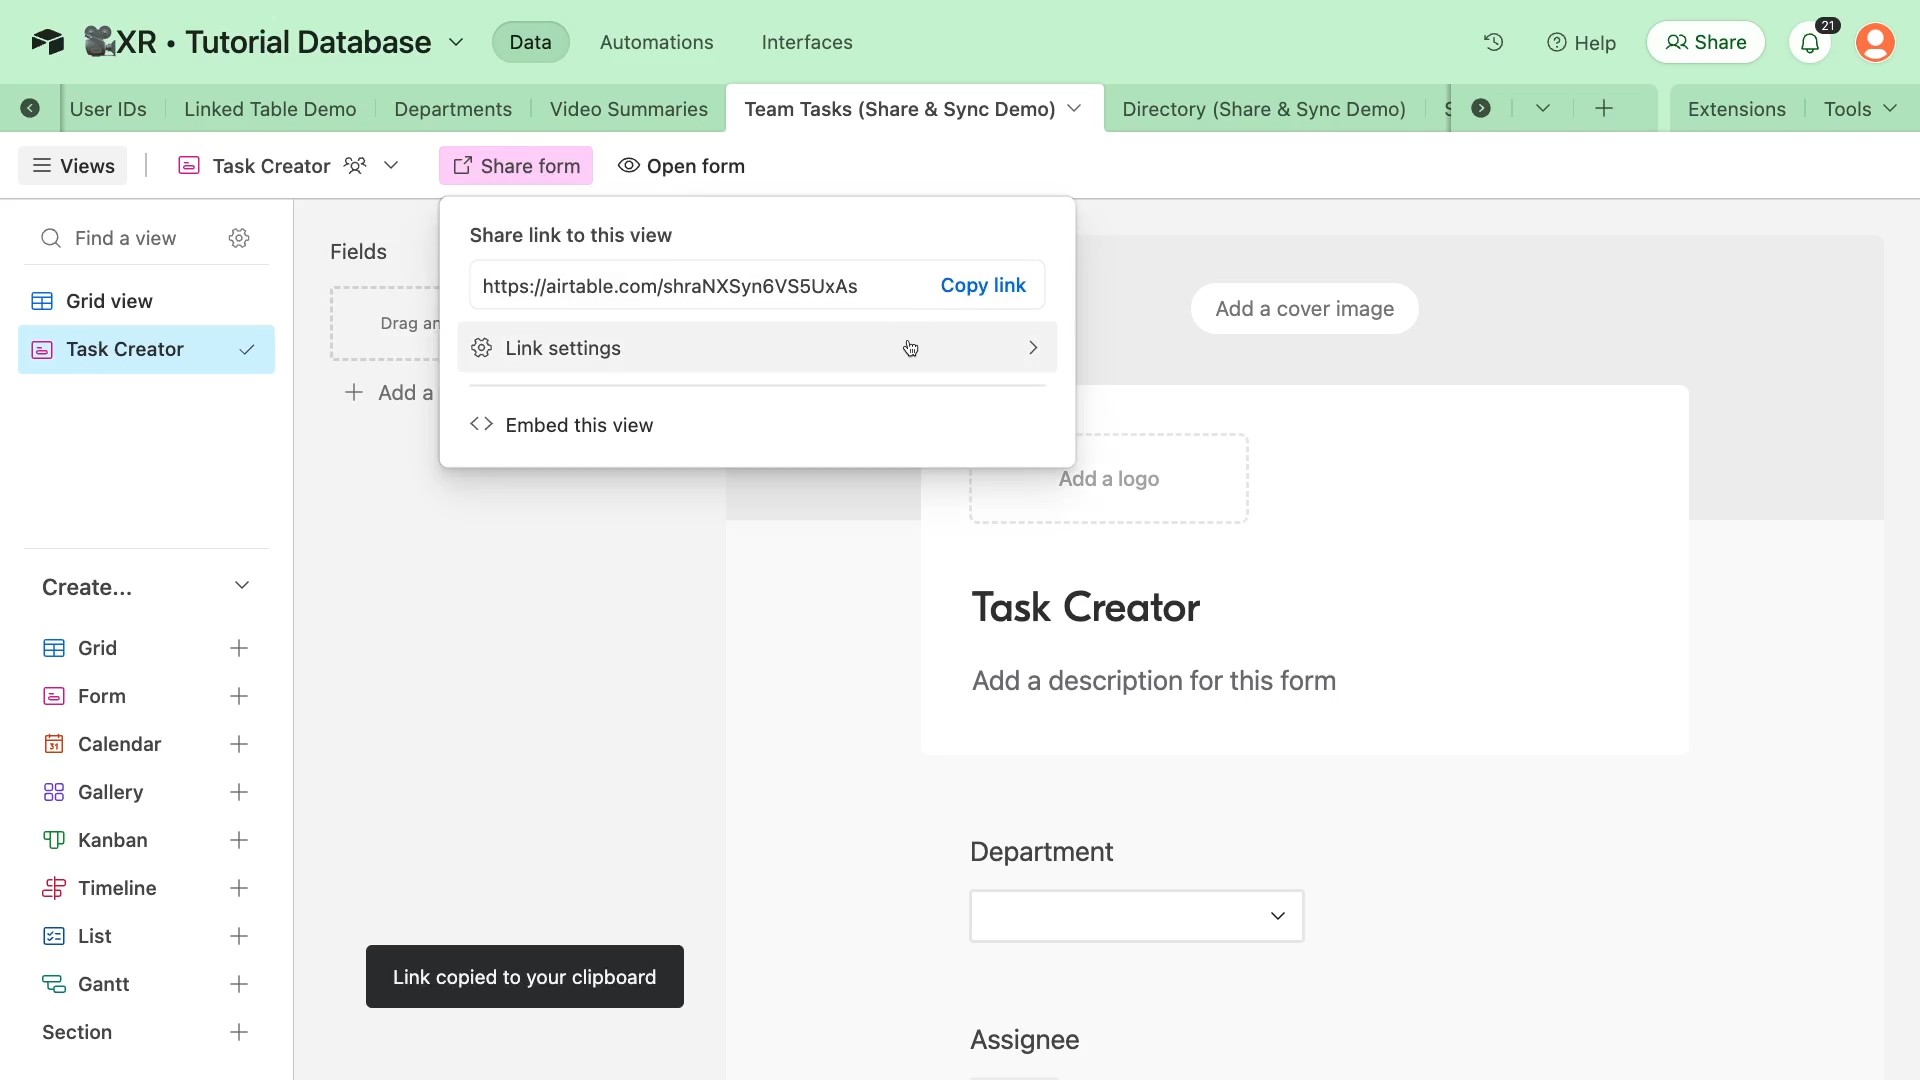
Here, you can copy the form’s URL to share it with others, and configure key sharing settings.
The form sharing settings are all pretty straightforward, but let’s go through those options one at a time.
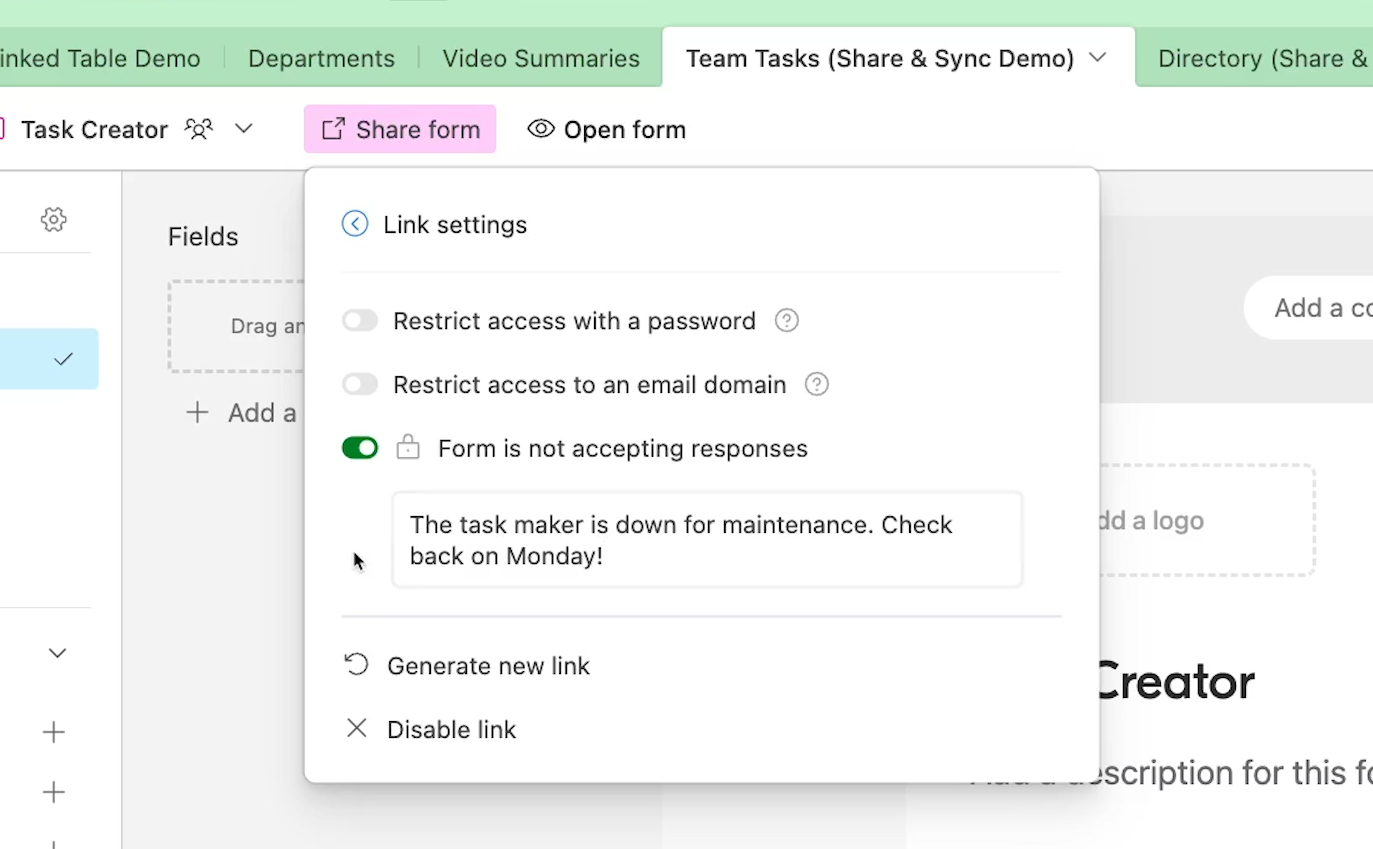
With “Restrict access with a password”, you can set a password that users must enter before accessing the form.
If you enable “Restrict access to an email domain”, you can limit access to users with an email address from a specific domain. This is a good way to limit responses to people from your organization.
“Stop accepting new responses” will prevent people from submitting new data without getting rid of the link. When you enable this option, you can also provide a custom message to give further context.
For instance, in this screenshot, we’ve updated the message in this task creation form to say “The task maker is down for maintenance! Check back on Monday.”
If you open the form after selecting “Form is not accepting responses”, you’ll just see a message like the one pictured below.
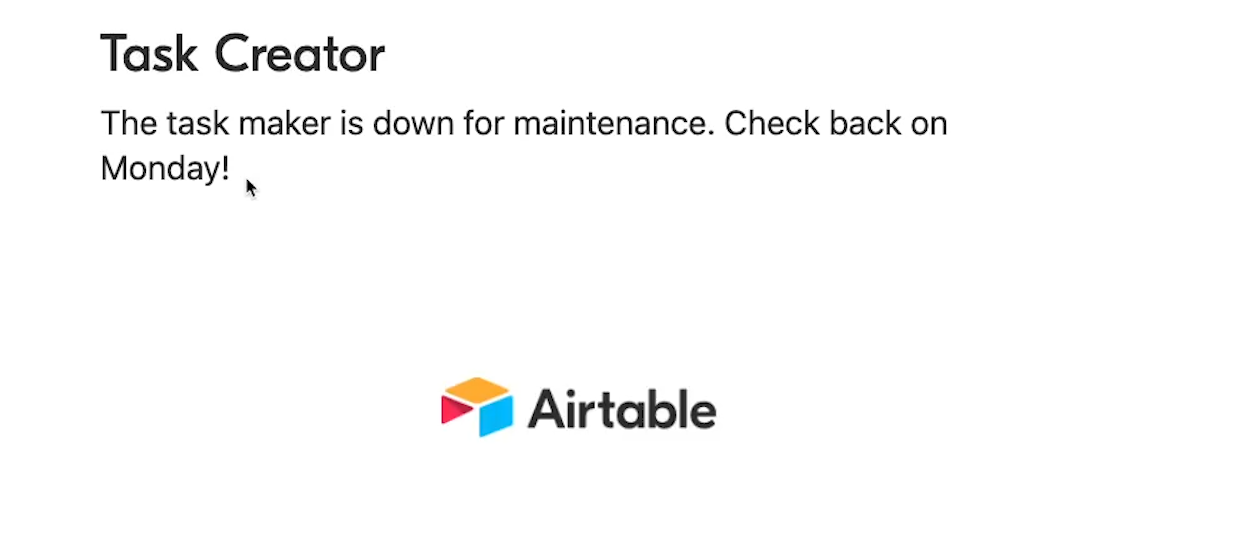
The “stop accepting new responses” option is a good way to temporarily pause data collection on a form.
When you’re ready for people to start using the form again, you can just disable the option. No need to make or share a new link.
The last couple options will be helpful if you want to make a new link or delete the one you’ve created. “Generate new link” will let you disable the current link and create a new one, while “Disable link” will disable the current form URL without creating a new one.
Ultimately, forms are a convenient way to let anyone contribute to a base, even if they’re not part of your organization - or even if they don’t use Airtable.
Form views are the only way to create a publicly accessible URL where anyone can contribute data to your bases.
Just remember to be careful about when and how you use form views. In many cases, you might not want anonymous users contributing data to just any base.
But with Airtable's sharing options, you can make sure that the form is only accessible to the people you want to share it with.
By configuring a few simple settings, you can share any airtable data you’d like with your team, your clients, or anyone on the web. Just follow along with this tutorial and choose the sharing format that works best for you.
If you’d like to learn more about no-code/low-code tools like Airtable, be sure to check out our blog or our YouTube channel. You can also follow XRAY on Twitter, Facebook, or LinkedIn.


.pptx.png)
.pptx.png)