
Make (formerly Integromat) offers extensive low-code functionality, making it one of the best automation tools available if you’re looking to build more sophisticated workflows.
In addition to a wide selection of pre-built modules for specific apps, Make also gives users several modules that can work with just about any software, like the HTTP module focused on sending requests to webhooks.
Webhooks let you access an application’s API, transferring data that you can then use in another platform. With HTTP requests and Webhooks, you can connect your Make scenarios to additional automations in apps like Zapier or Airtable,
In this post, we’ll show you how to send HTTP requests in your Make scenarios step-by-step.
First, you’ll need to add an “HTTP” module in Make.
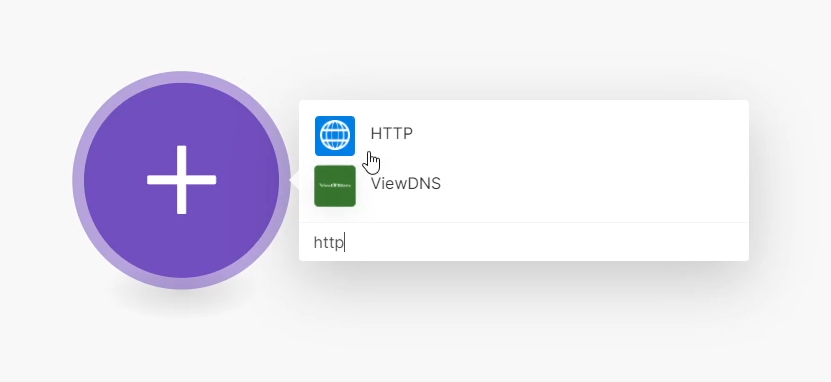
Note: don’t select the “webhooks” module. The webhook module is designed for receiving requests, while the HTTP module is Make’s approach to sending requests.
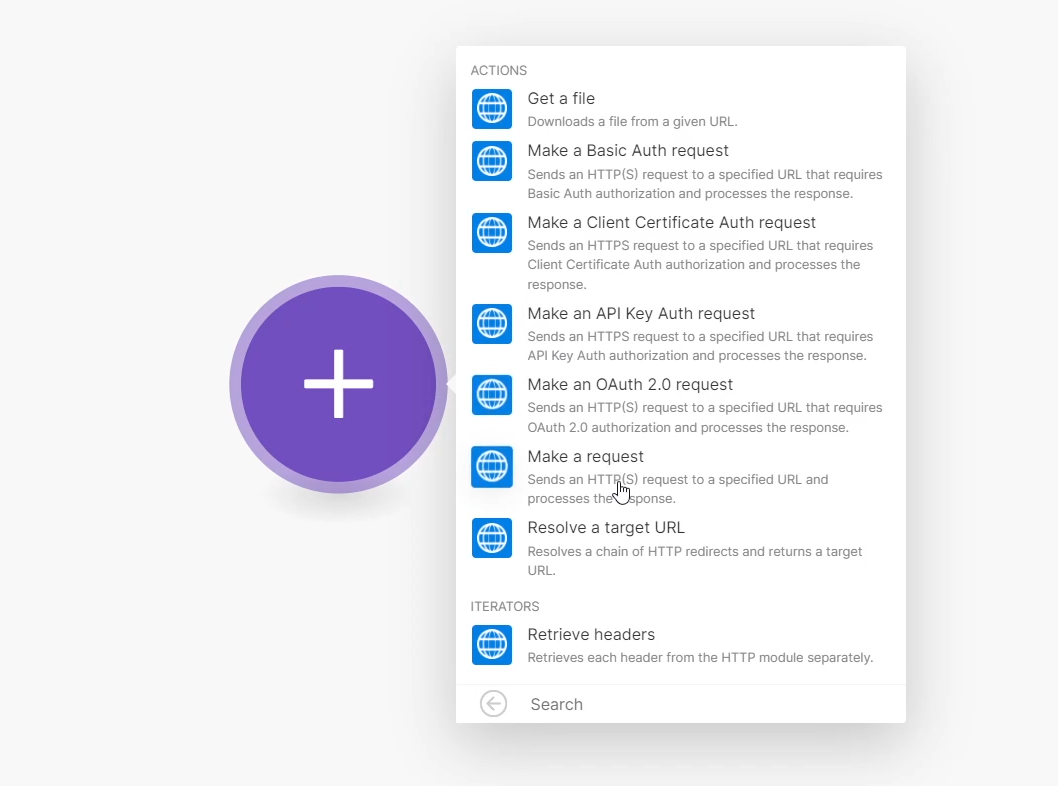
Search for “http”, select the appropriate module, and choose “Make a request”.
To fill in the URL and configure the rest of the module, you’ll need to consult the documentation for the app that you’re sending data to.
Their documentation or support guides will show you the appropriate URL, and how the data needs to be configured.
For example, we’re going to send data to an Airtable webhook in order to trigger an Airtable automation.

If we Google “Airtable webhooks”, we can easily find some relevant support docs. You could also search for “[your app] api”, or “[your app] docs” to find what you need.
Refer to your app’s documentation to find the target URL you need to send your request to.
With Airtable, the docs indicate that we need to open a table, create an automation, and select “When Webhook Received” as the trigger.
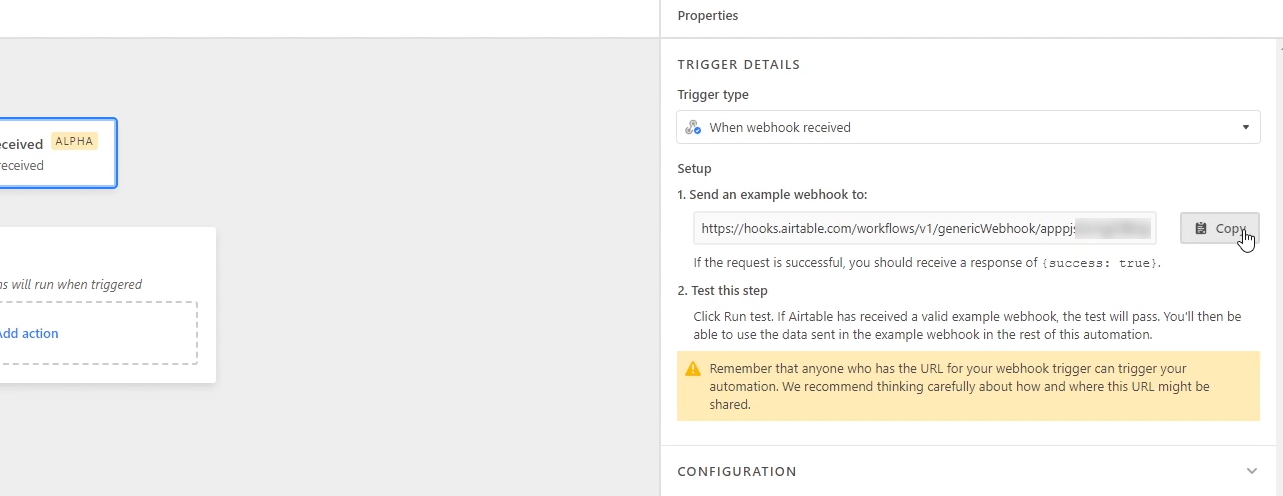
Then, we can see the URL we need in the “Automations” panel on the right hand side of the Airtable UI. We’ll copy it and paste it into our HTTP module in Make.

Next, you’ll need to select an option from the Method menu. In most cases, you’ll need to choose “POST” to send data.
If you’re curious about what these other options are for, here’s a quick rundown:
• POST creates new data
• GET finds existing data
• PUT and PATCH are used to update data, and DELETE is used to delete data.
You can check the docs to confirm which method to use, but if your goal is to create new data, you’ll probably want to use POST.
In many cases, you’ll need to add a header to authenticate your request, but in this case, authentication is already handled by connecting Airtable to Make, so we’ll leave Headers blank.
Adding a query string would let us filter results, but we won’t need one in this example.
Check your app’s documentation to find out how the body and content of your request need to be formatted.
Airtable’s Docs specify that we need to format the content as a JSON object, so we’ll choose “Raw” as the Body type and “JSON” as the content type.
Now you need to fill out the “Request content” field with the data you want to send.
For our Airtable example, we need to use JSON formatting for the data to be parsed correctly. You’ll often find examples of how to format your data in the support docs, so it’s often a good idea to start by copying and pasting those examples.
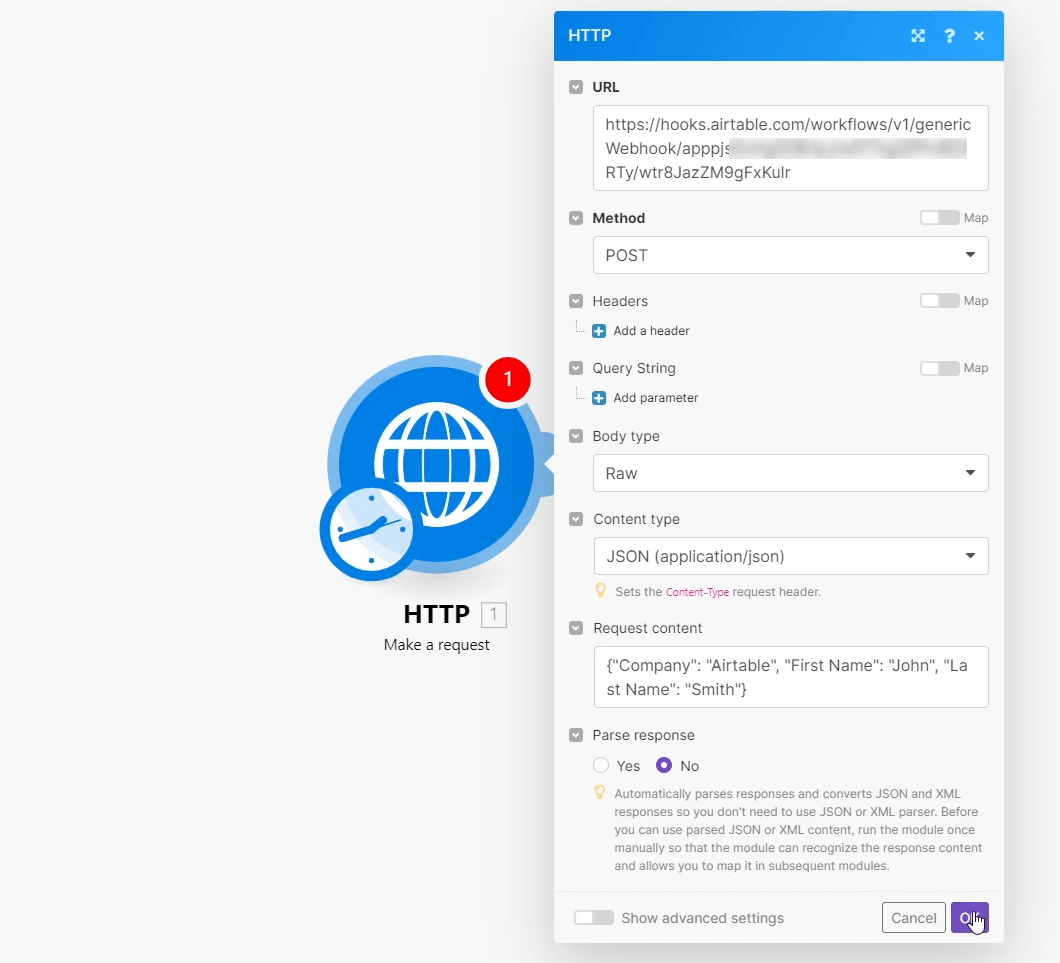
With your HTTP module fully configured, click “OK”, and then run your module once. You may also need to set your application to listen for incoming requests.
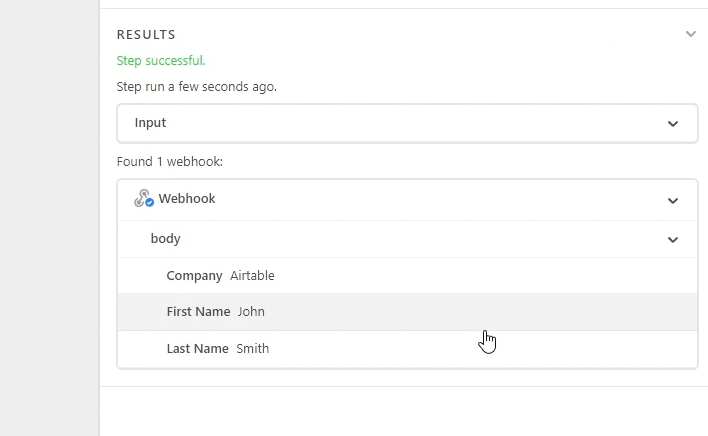
You should see that this module was successful. However, all that means is that sending the request was successful. You’ll need to check the app that you’re sending data to in order to confirm everything worked.
As you can see in the screenshot, Airtable received our request, with each piece of data parsed and formatted correctly. We can now build an automation in Airtable with the data sent through Make.
Webhooks are a convenient way to send data from one platform to another as you’re building advanced, multi-part automations. You can even use them to avoid making overly complex branching paths within a single automation.
HTTP modules are a versatile tool for constructing automated workflows, and setting them up only takes a quick Google search.
If you’d like to learn more about no-code and low-code automation with apps like Make and Zapier, check out our blog or our YouTube channel. You can also follow XRAY on Twitter, Facebook, or LinkedIn.


.pptx.png)
.pptx.png)