
With tools like Zapier, it’s easy to export new emails to Google Sheets for better analysis. However, the best process for exporting existing emails isn’t always so obvious.
Today, we’re going to show you how to automatically send data from any Gmail message to Google Sheets by just adding a simple label. This will let you send over any data you want from your messages, like the subject, sender, and body, or even attachments. All you’ll need are accounts in Google and Zapier.
Let’s begin with a quick overview of how the finished automation works.
The automations in this tutorial consist of two separate Zaps: one for emails with no attachments, and one for emails with attachments.
We’d normally try to do this all in one automation, but there’s a special Gmail trigger for new attachments which is very useful for uploading each attachment individually without messing around with loops, custom scripts, or other advanced options.
However, since the “new attachment” trigger obviously won’t work for emails without attachments, we’ll need a separate automation to handle them.
With both of these automations, all you have to do is apply the appropriate label to an email in Gmail.
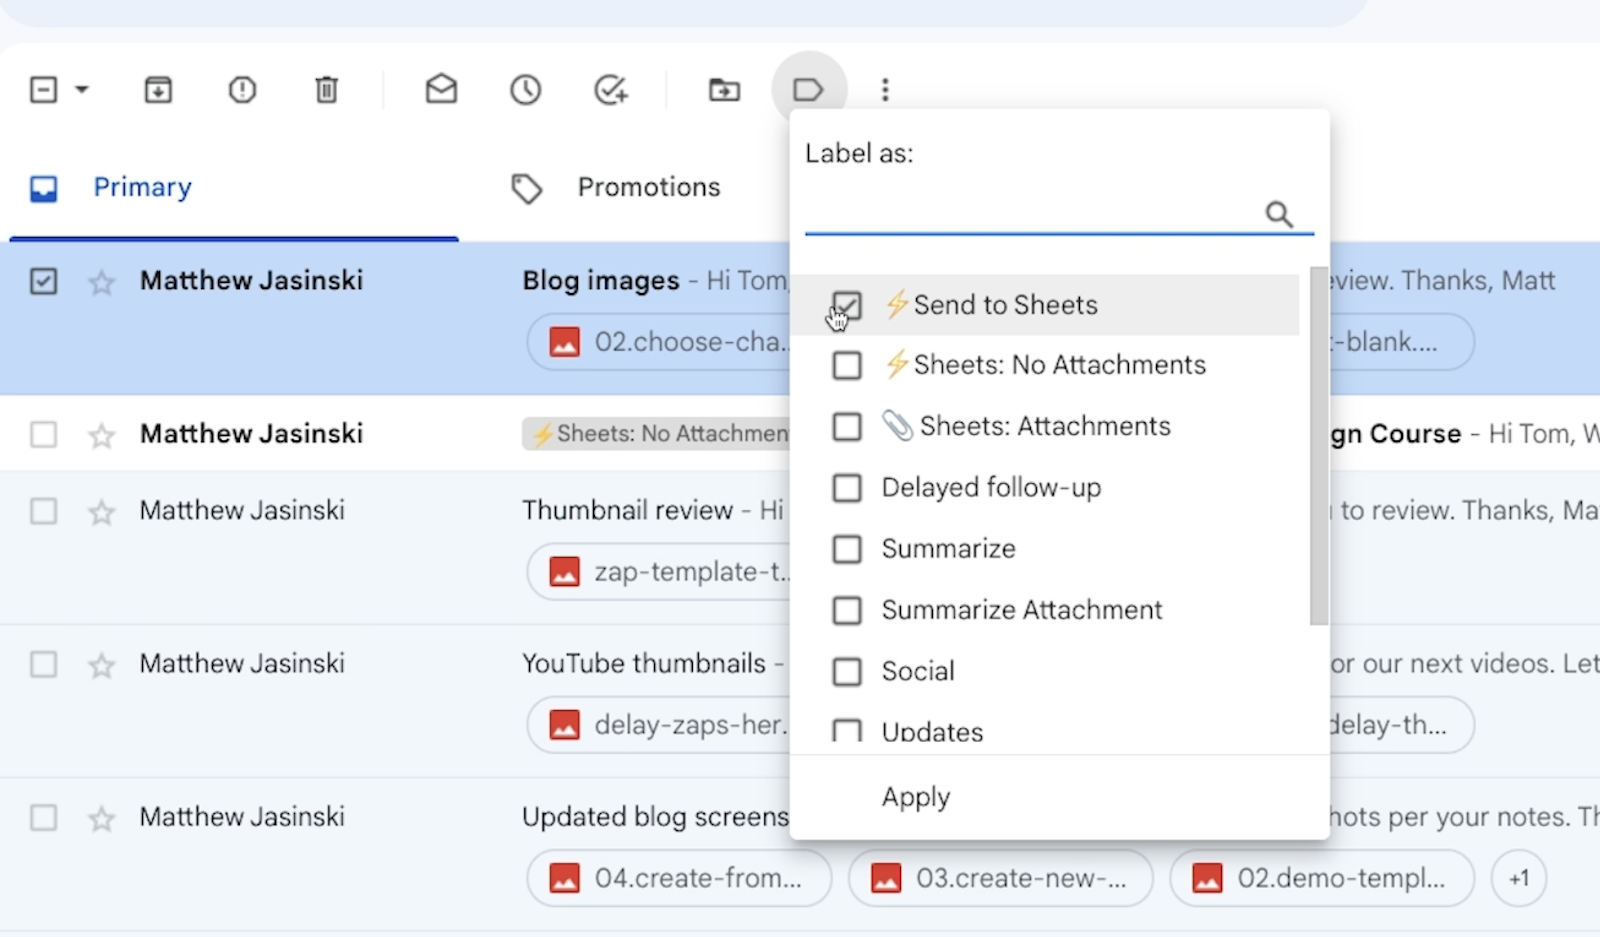
Then, that email’s data will be sent over to Google Sheets.
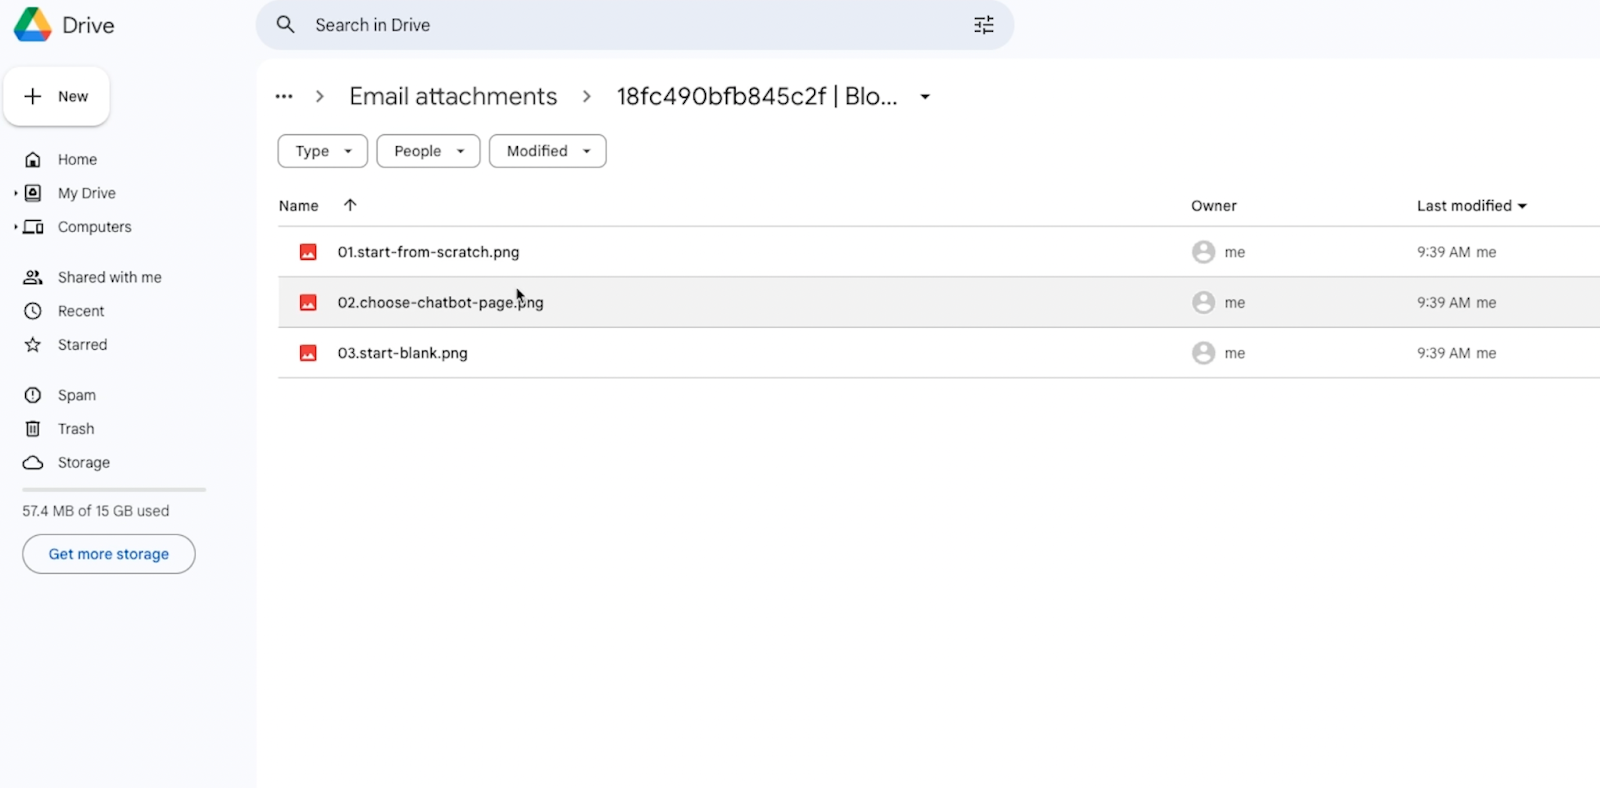
If the email has attachments, they will be automatically uploaded to a folder in Google Drive, and that folder is added to the email’s row in Sheets.
The Zap that doesn’t include attachments is only a 2-step, which means it can be built and used on a Zapier free plan.
Conversely, the Zap that handles multiple attachments is a 4-step Zap, so it won’t work on a free plan. You can build it in the editor, but you won’t be able to turn it on. If you’re limited to a Zapier free plan, we’d recommend using the first Zap only.
That’s how the automations work in a nutshell, but let's take a closer look and break down both Zaps step by step.
We’ll start off with the simpler option. This is an automation that will work great for sending email data to Google Sheets, but it won’t work so well for sending attachments.
On the other hand it’s only a 2-step Zap, so it will work on a Zapier free plan.
Add a Gmail trigger to your Zap and choose “New labeled email” as the event.
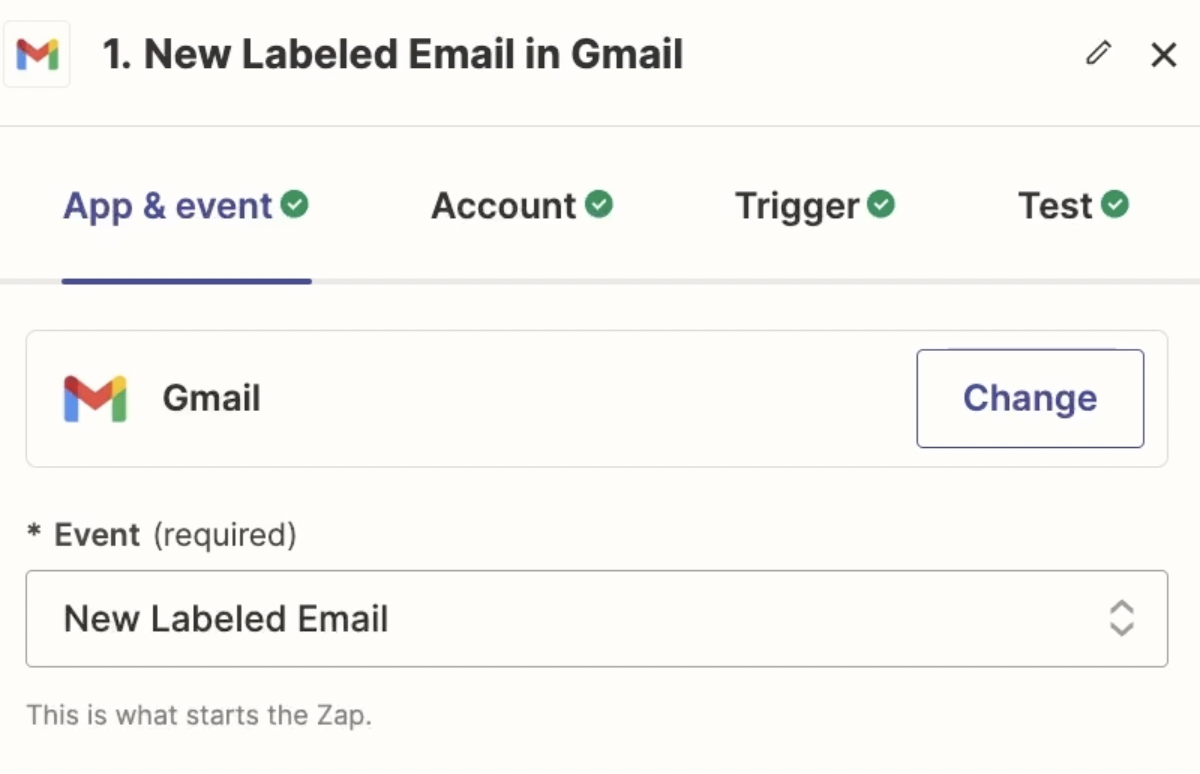
Using the “New labeled email” trigger will give you more direct control over which emails you export to Sheets and when you send them. If you use a standard “New email” trigger instead, every new email will be sent by default.
With this trigger, you can label new emails or historical emails whenever you’d like to send them to Sheets.
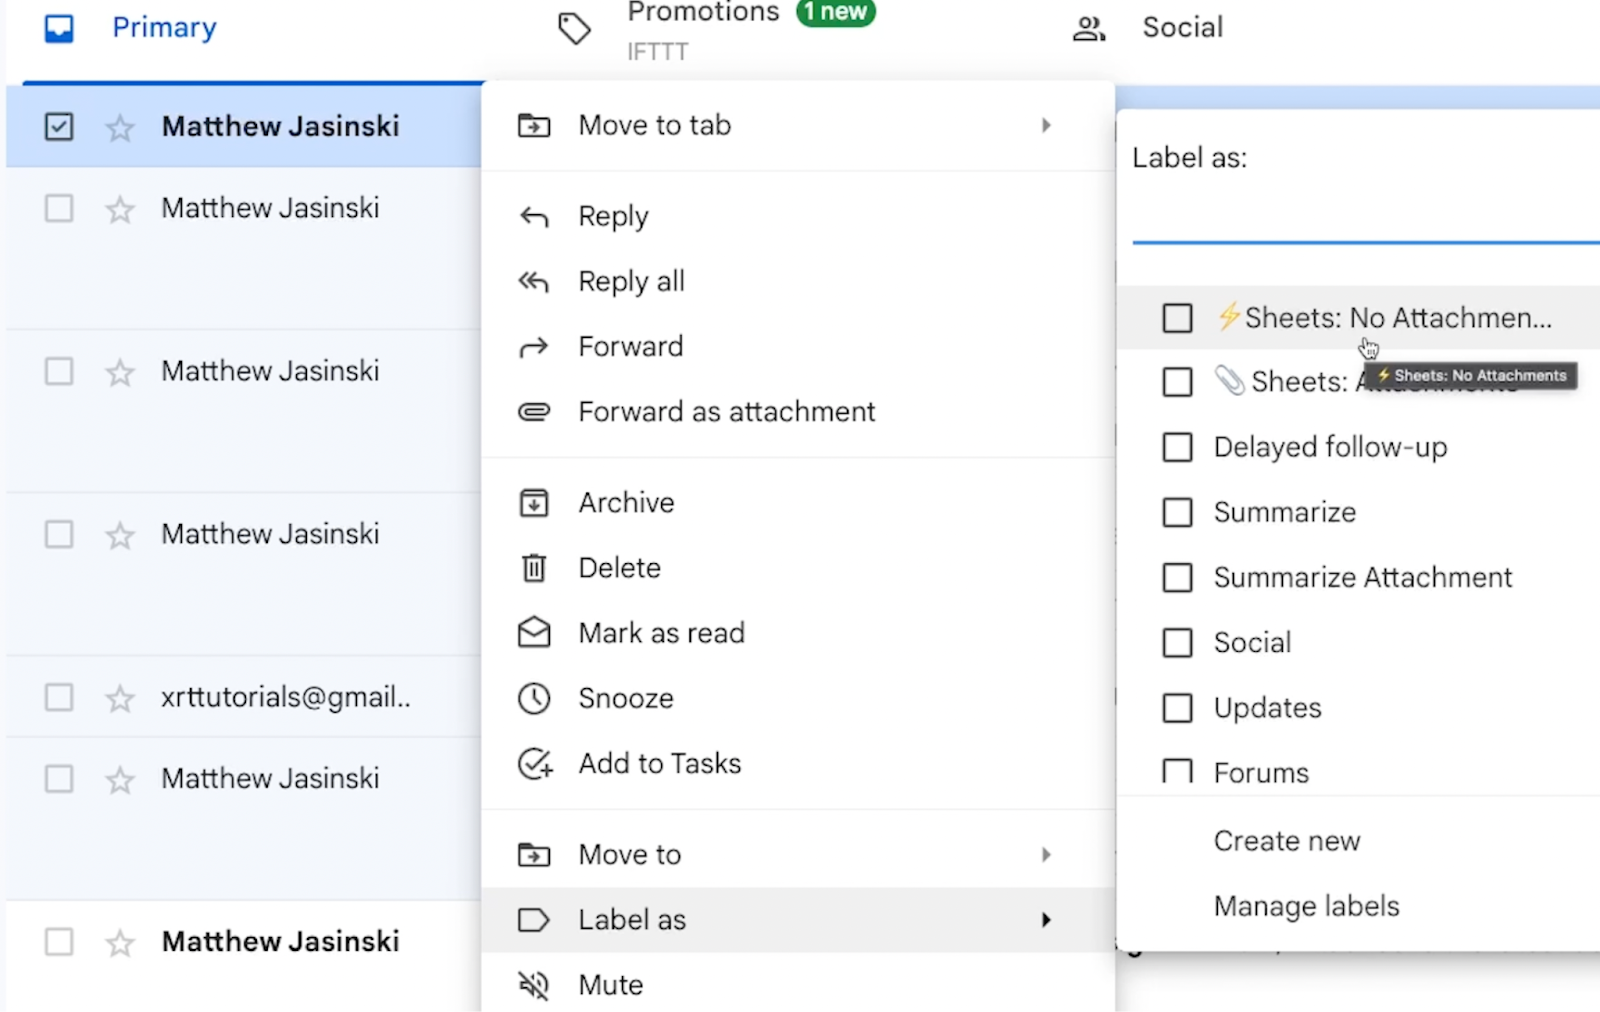
Select the label that Zapier should watch for. You’ll likely want to create your own custom label in Gmail first, then apply it to an email so you have test data.
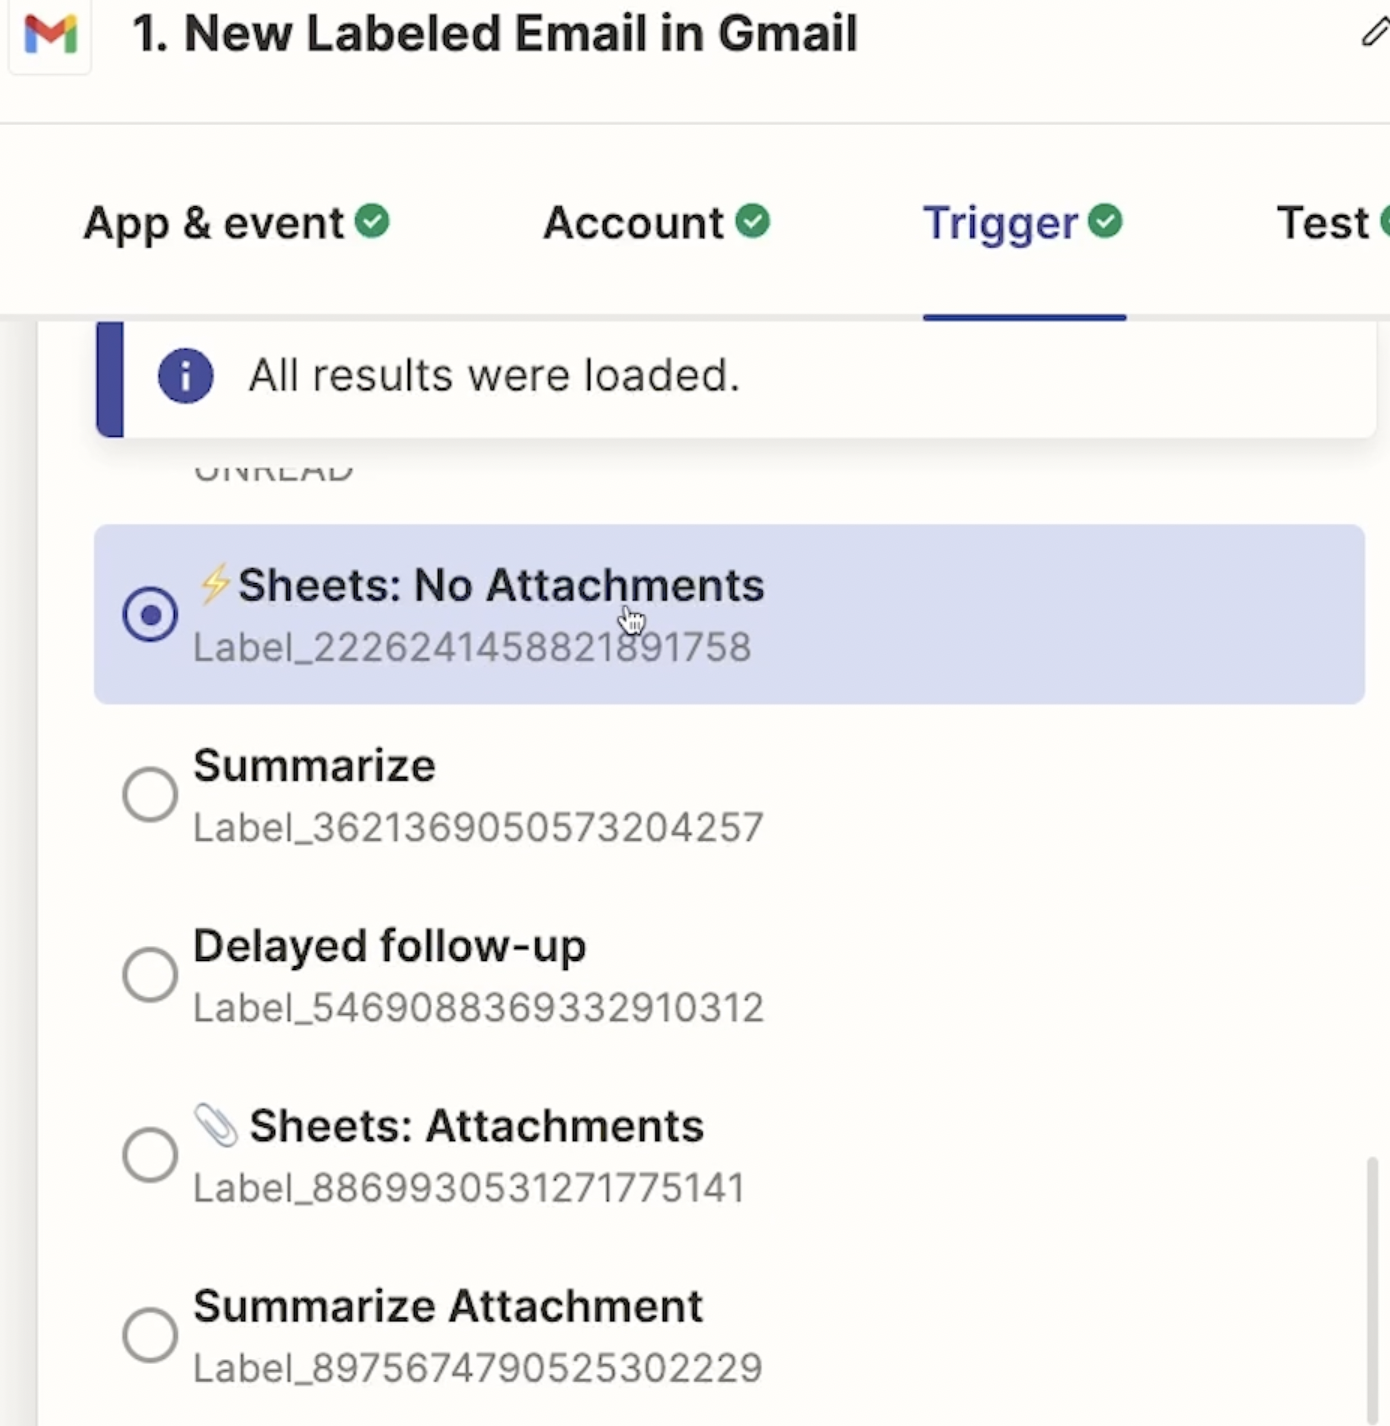
Once you’ve chosen the label to use, give your trigger a test. In the test data, you’ll see a huge quantity of data retrieved from the sample email – all of which can be sent to Sheets or other apps if you’d like.

However, in most cases, you’ll just want to send over a few data points like Body, Sender, Subject, Date, etc.
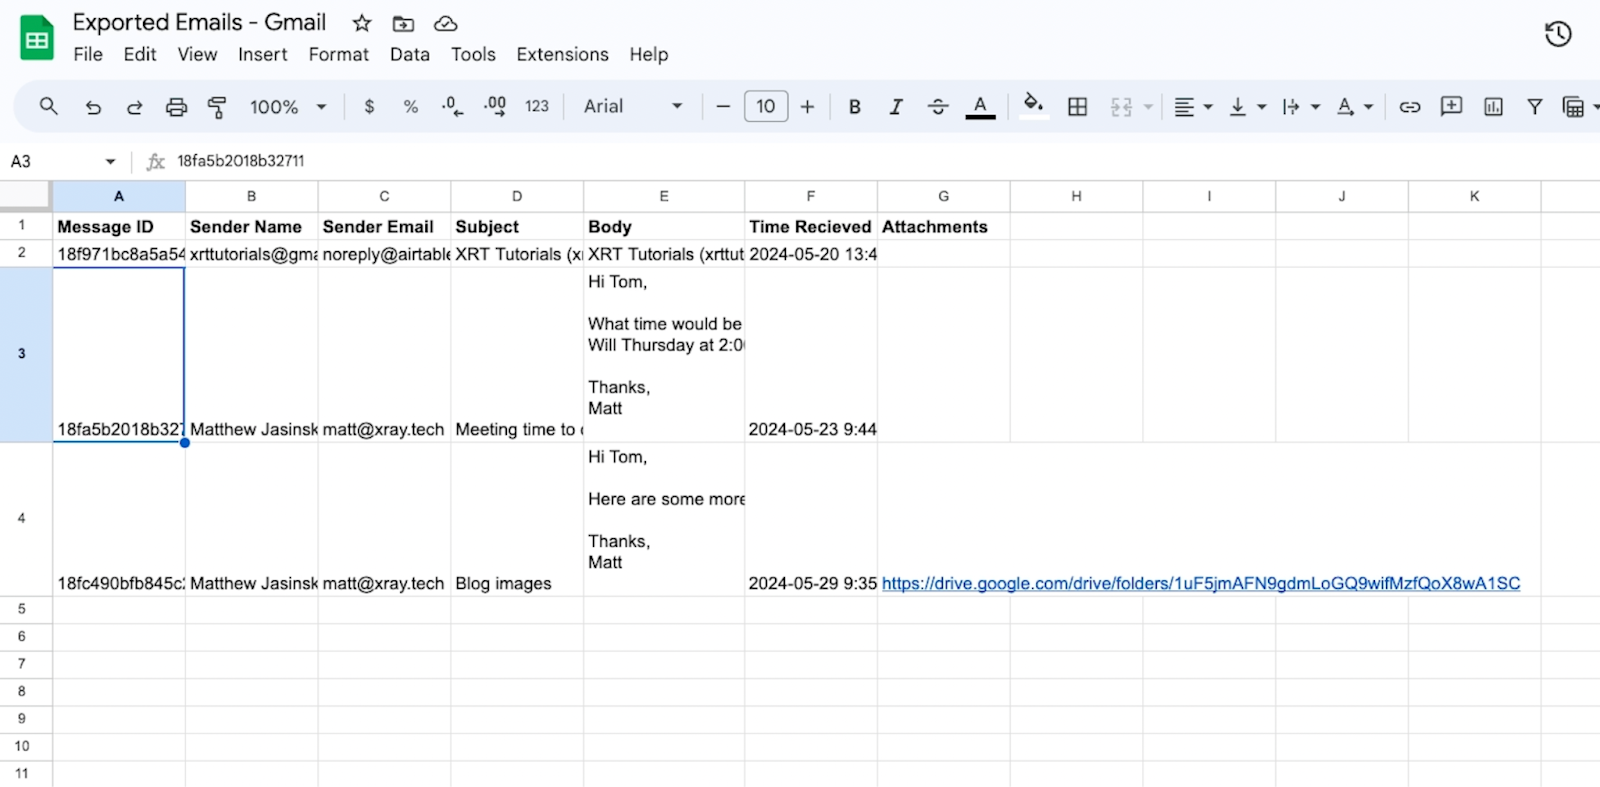
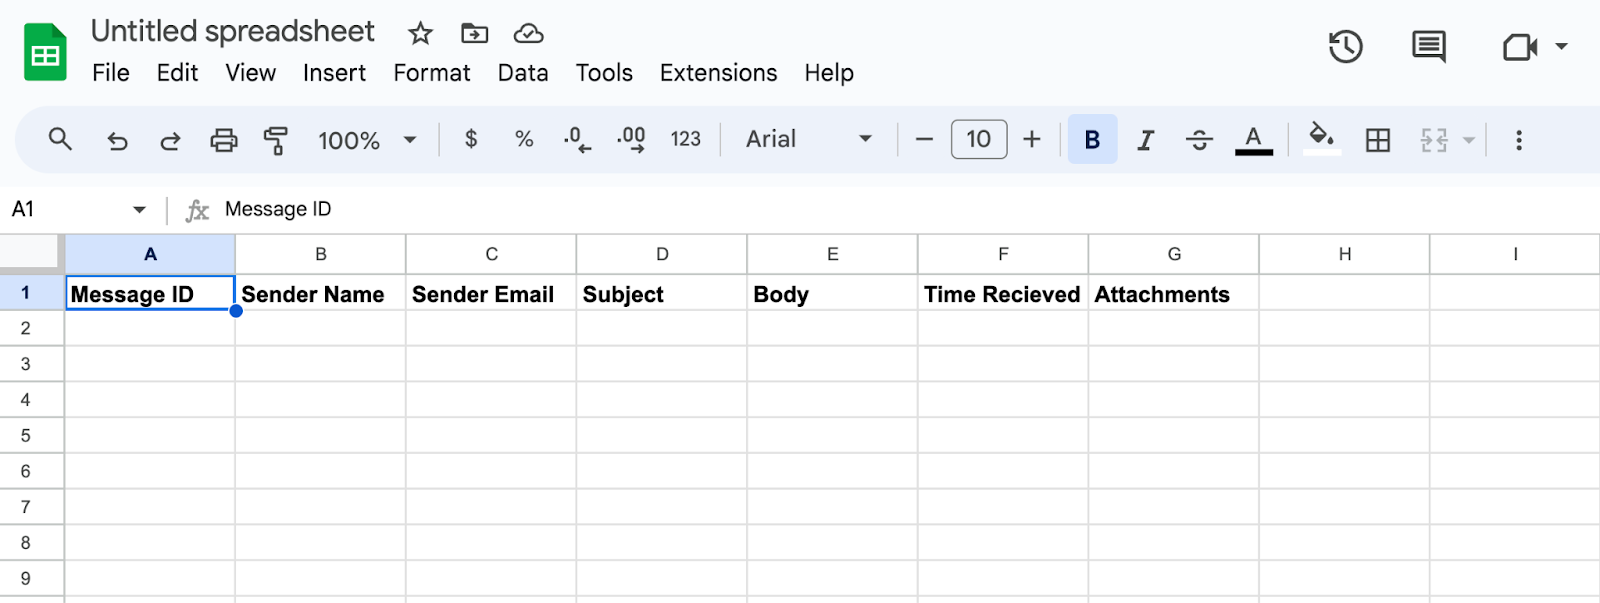
Create a spreadsheet in Google Sheets where you’ll store your email data. Be sure to include a column for each data point you want, as well as a unique identifier for each email. We’d recommend using “Message ID” as the identifier.
Add an action to your Zap and choose Google Sheets as the app. Select “Lookup spreadsheet row” as the event.
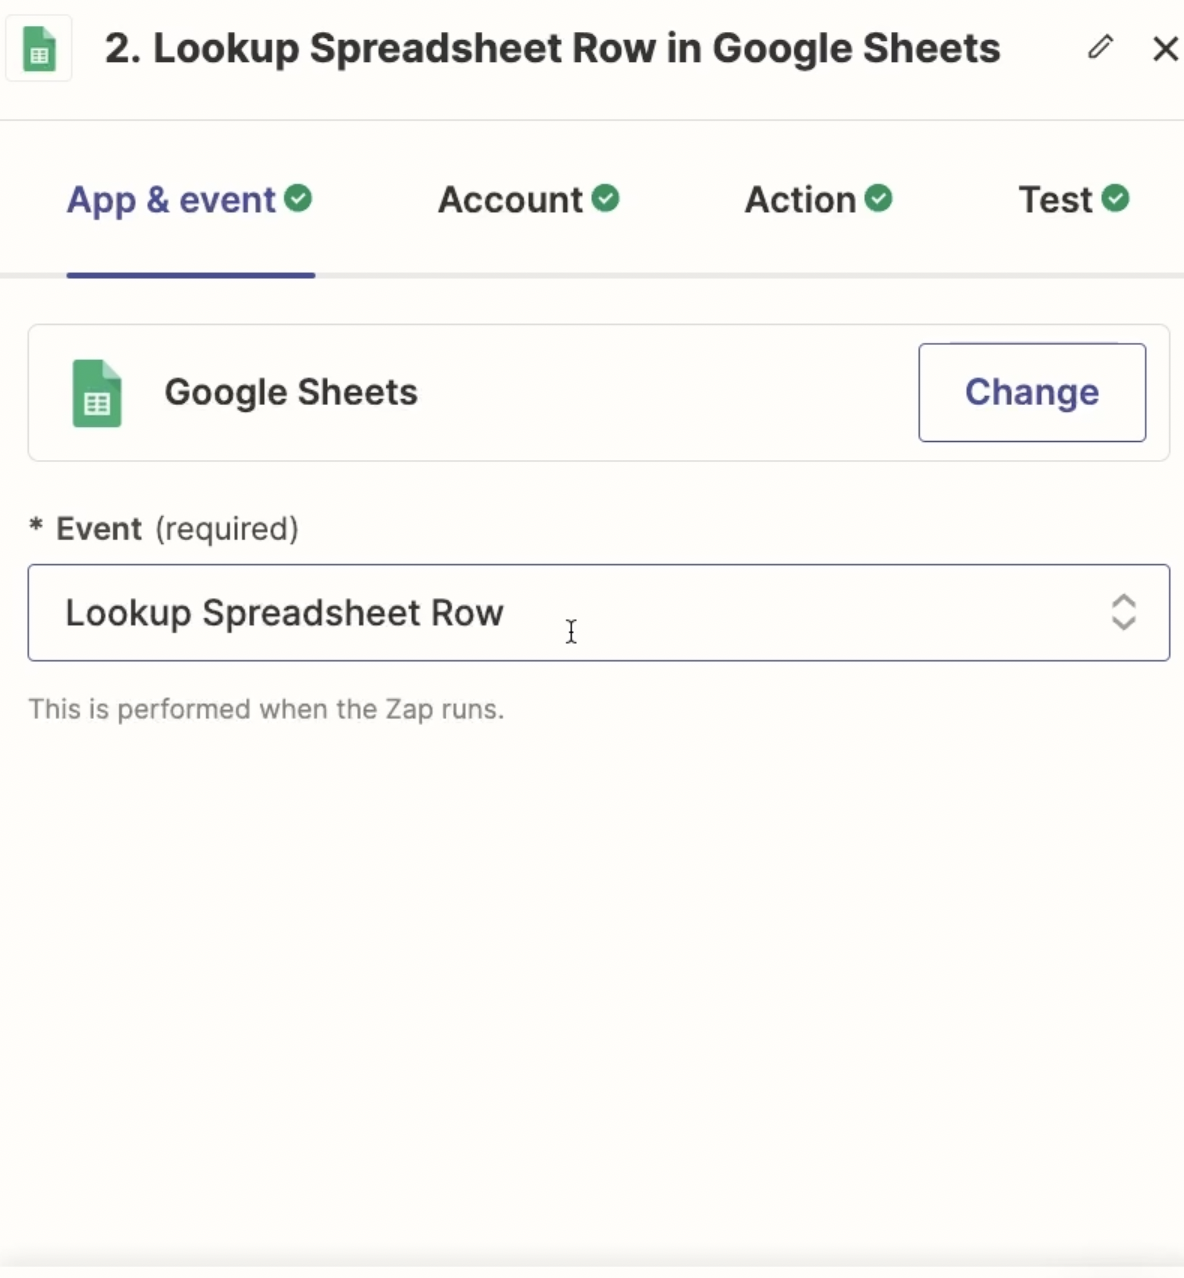
This might seem like an odd choice, but the name of the event doesn’t tell the whole story. “Lookup spreadsheet row” is essentially two actions in one. It will start by searching for a row, as the name suggests.

However, if it doesn’t find a matching row, you can configure the step to create a new one. You’ll have all the same options as usual to map any data you want to each field.
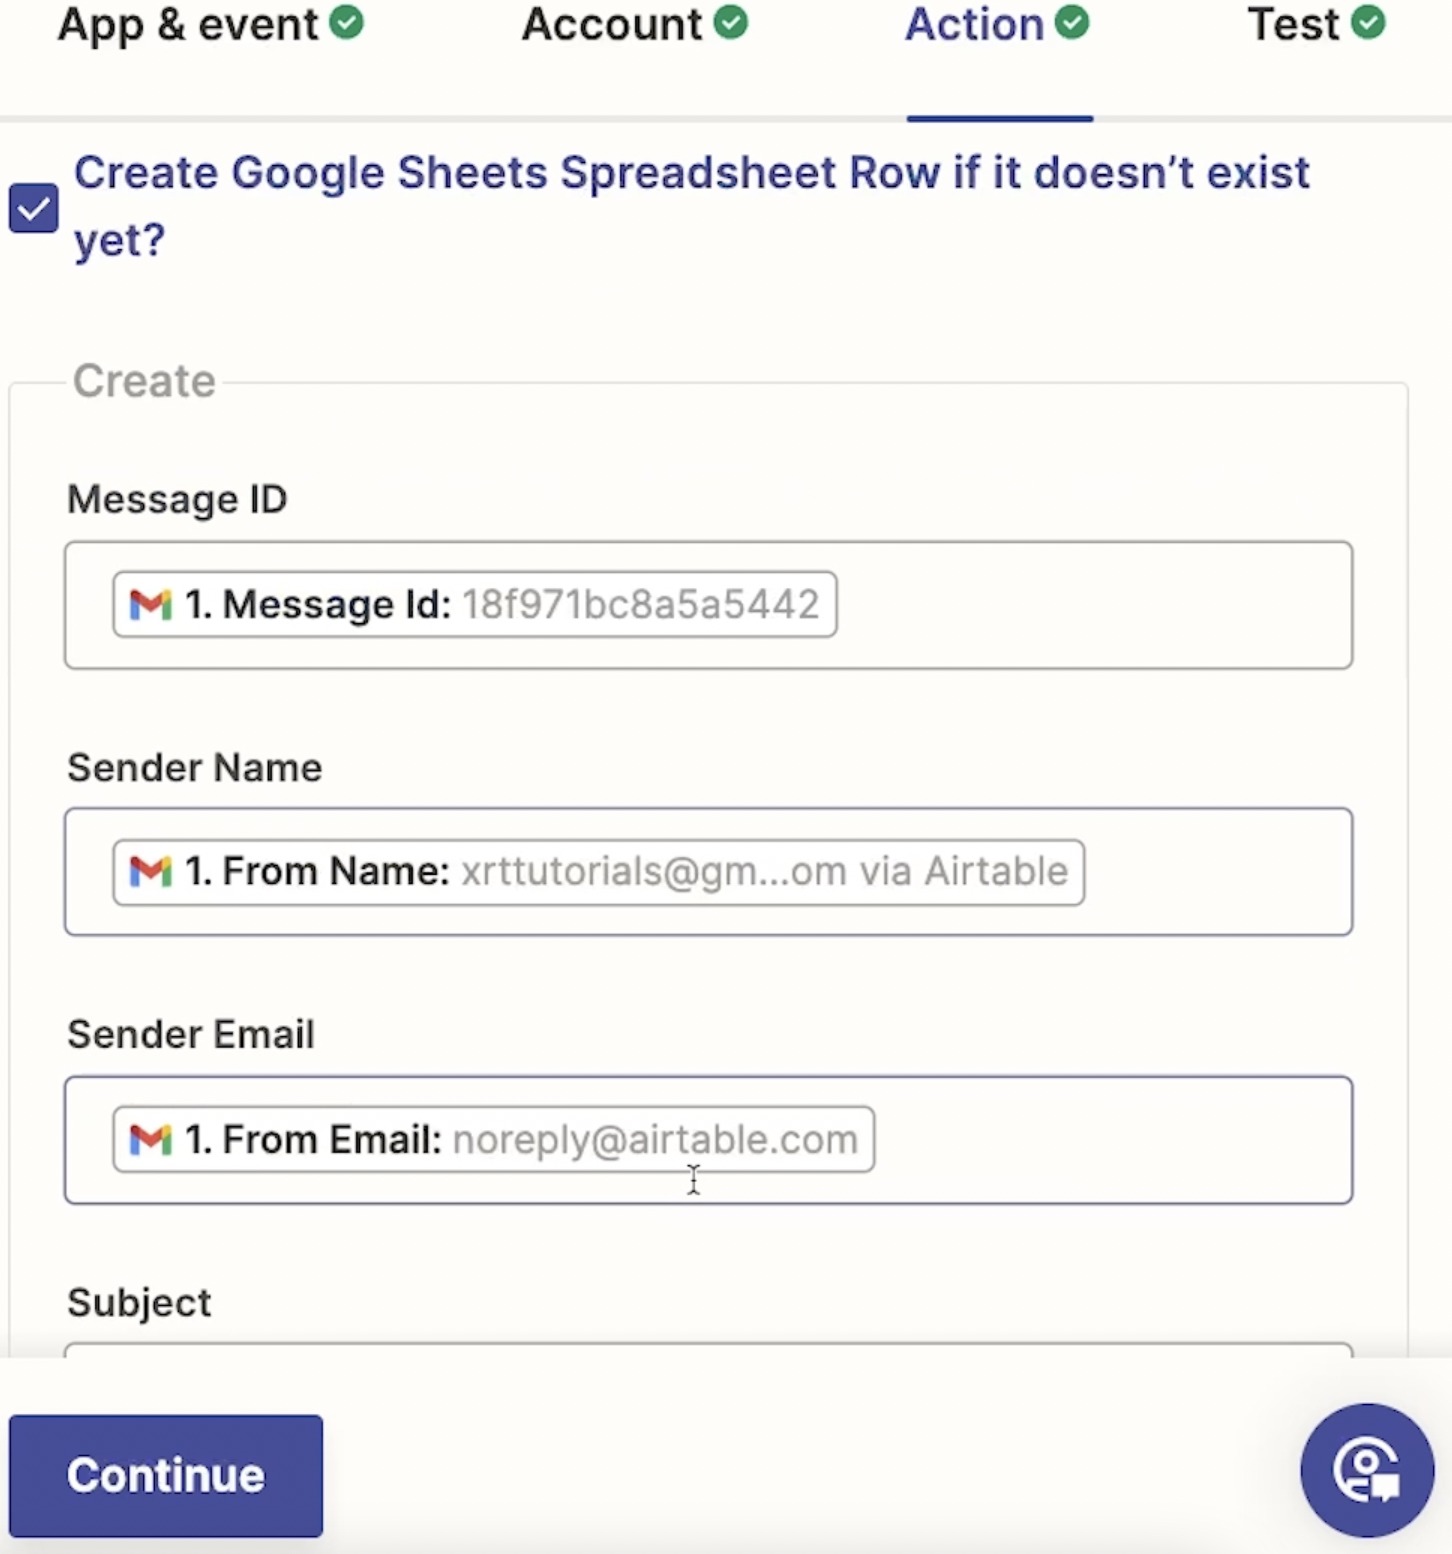
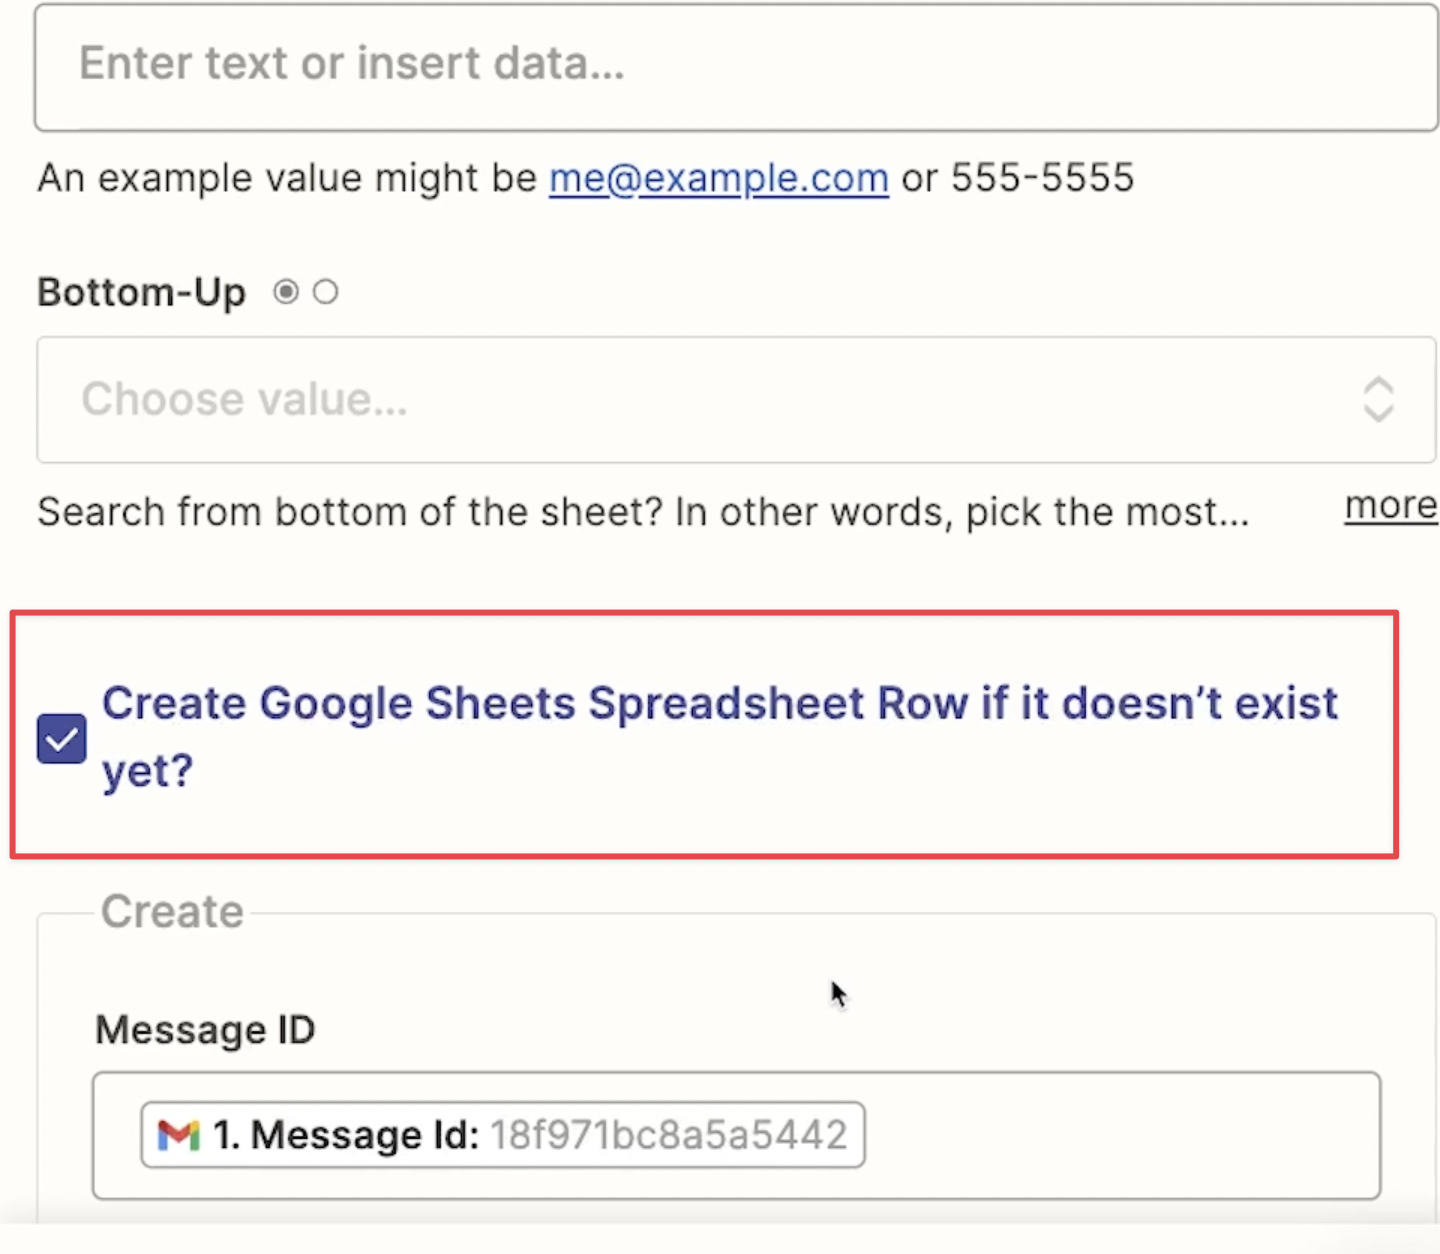
Just make sure to check the “Create Google Sheets Spreadsheet Row if it doesn't exist yet?” box to enable this option.
Using the lookup step is an elegant way to avoid duplicates without having to add extra steps to your Zap.
NOTE: We’d recommend searching for a unique identifier for each email, such as the “Message ID”. If you use something like “Subject” instead, the Zap won’t work correctly if you have two emails with the same subject line (which is quite likely).
Once your Sheets step is configured, your automation is all set. Turn it on, publish it, and give it a test by adding your designated label to an email in your inbox.
After adding the label, you may need to wait several minutes for Zapier to check your inbox for new labels. On the free plan, Zapier only looks for new data every 15 minutes. On higher tiers, you can expect to see new data processed within five minutes.
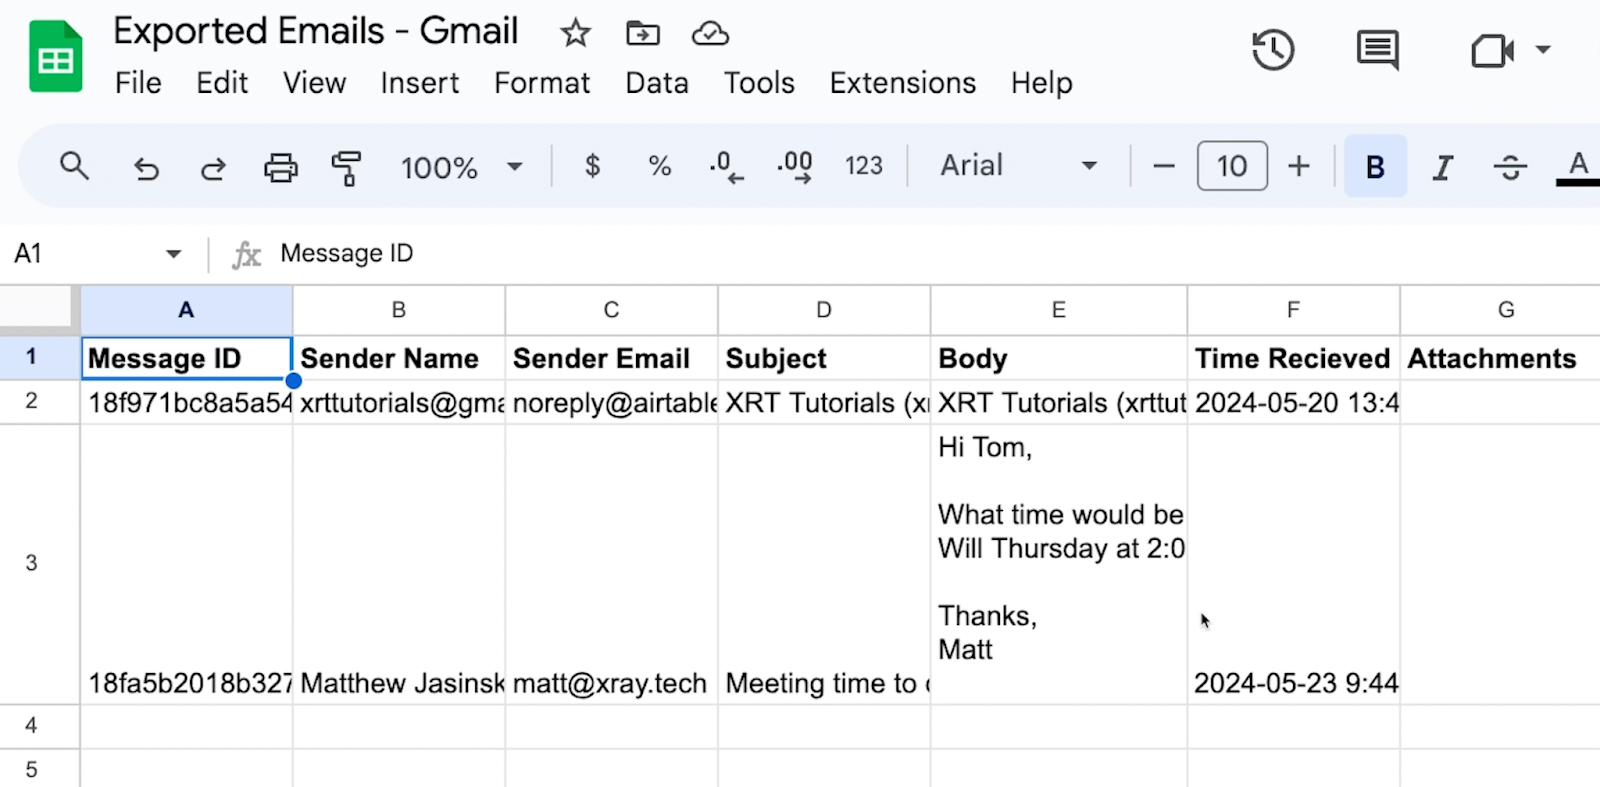
After waiting an appropriate duration, you should see data from your email appear in Sheets, just as in the image below.
Next, let’s take a look at the second Zap, which is designed to export emails with attachments. Since this Zap has 4 steps total, it won’t work on a free plan, but it’s still easy to set up.
To begin, create a new Zap and add a Gmail trigger. Select “New Attachment” as the event.

“New Attachment” is a unique trigger. Unlike most other email triggers, it will make the following Zap run for every attachment in a new email, not for each new email.
For example, if you receive a new email with 3 attachments, then this Zap would run 3 times.
This functionality can be very useful for processing an arbitrary number of email attachments, but it does carry the risk of duplicating or overwriting data if the subsequent actions aren’t configured carefully. We’ll use a “Lookup” step once again to avoid these potential issues.
If you’d like, you can also filter this trigger to only apply to emails with a designated label, or any other search criteria you want to apply.
Once you’ve set up the trigger and its filter to your liking, give it a test to pull in some sample data.
Be sure to have an email in your inbox with at least once attachment that you can use as test data.
In the next action, the automation will either find an existing folder in Google Drive where it can store the attachments, or it will create a new one.
This action will work very similarly to the “Lookup row” action we used in the first Zap.
Add a new action to your Zap, and choose Google Drive as the app. Select “Find a folder” as the event.
Provide a name for the folder. Make sure to use unique, dynamic data again to ensure that each folder’s name will be unique. In our example pictured below, we’ve combined the Message ID with the email’s subject line to create a unique name for each folder.
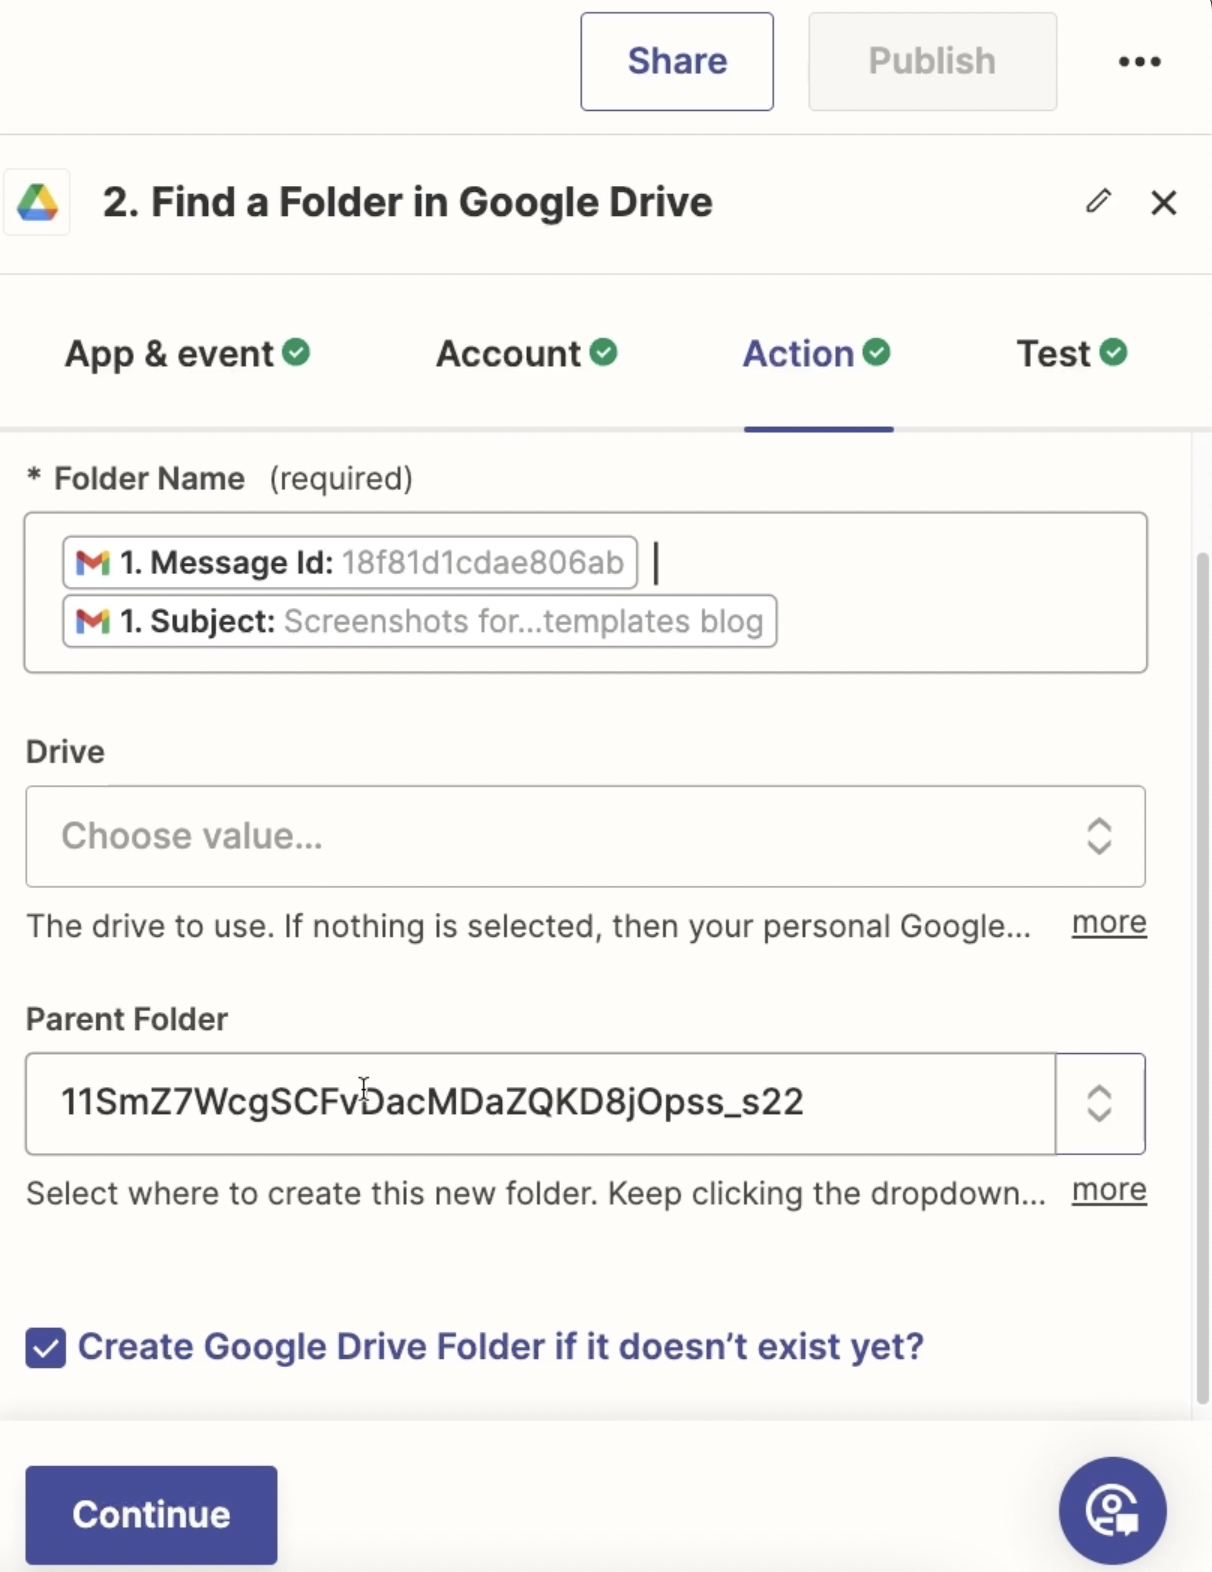
Choose the parent folder where this subfolder should be created, and check the box that reads: “Create Google Drive Folder if it doesn't exist yet?”
So if Zapier doesn’t find a folder with a matching name, then it will create a new folder instead using the name provided. When you test the action for the first time, it should create a folder, since there won’t be anything for it to find yet.
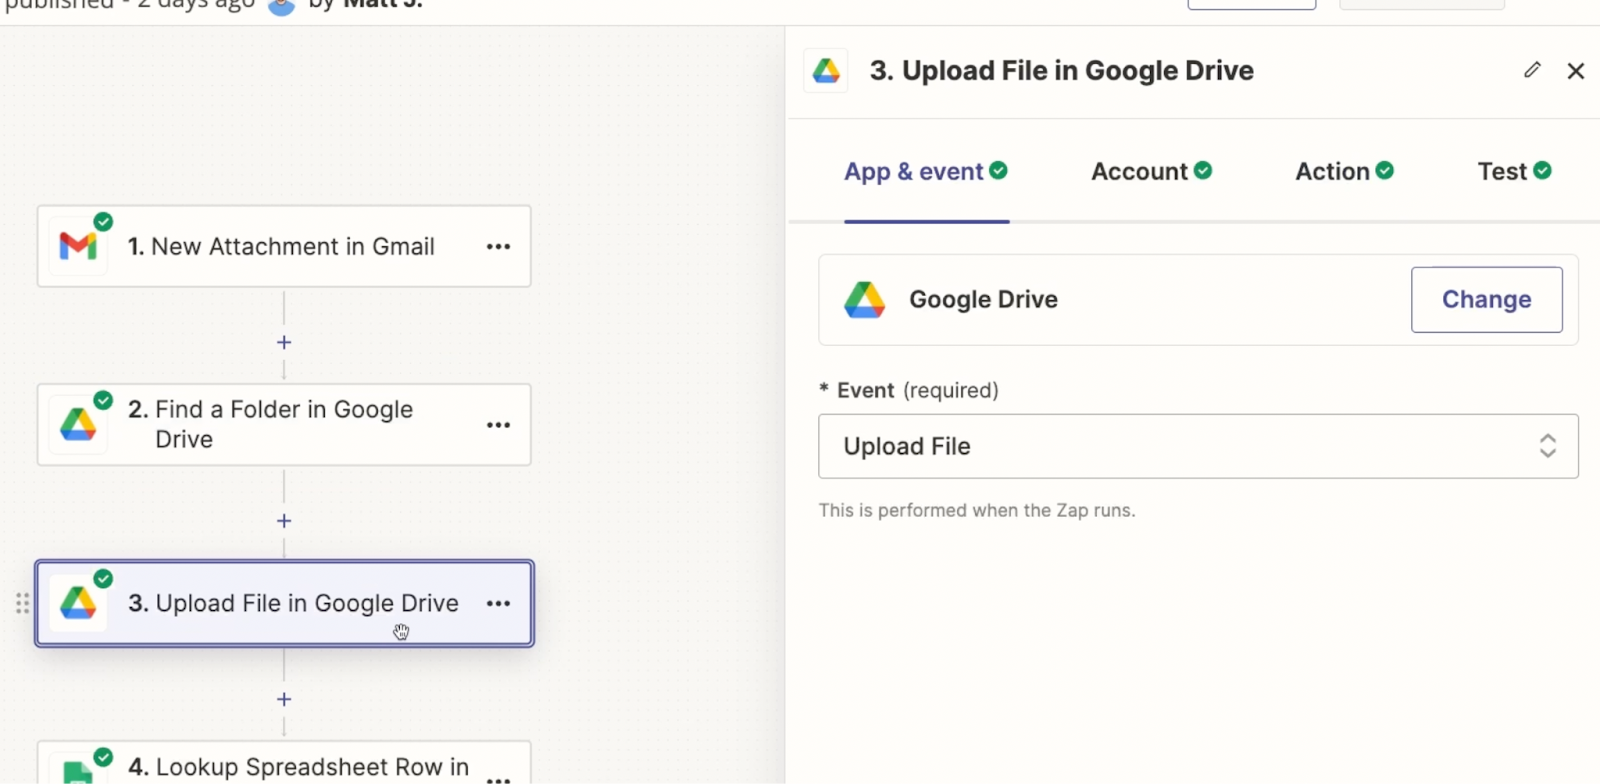
Next, we’ll add a step to this automation that will upload each attachment to a folder in Google Drive. This will be the folder that is created or found in Step 2.
Add a Google Drive action and choose “Upload file” as the event.
To configure this action, you just need to pick which folder to upload your file to, and the file you’d like to upload.
For the file, choose “Attachment: Exists but shown” from the trigger. The phrase “Exists but not shown” in a Zapier variable indicates that the variable represents a file, rather than a link or reference to a file.

Optionally, you can also provide a new name and extension for the file. However, if you just leave these fields blank, then the file will retain its original name and extension.

Test the action after configuring your choices.
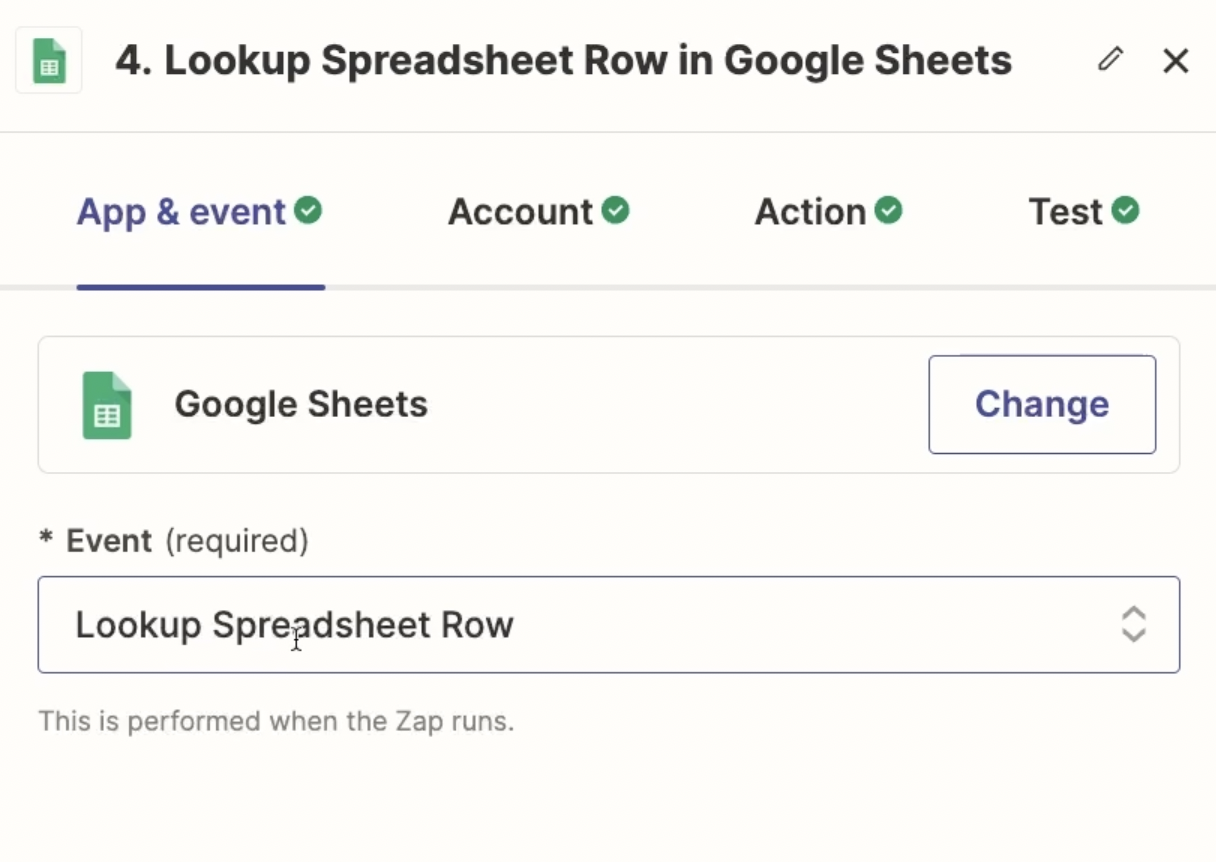
Finally, the last step in this automation will add the email’s data to Google Sheets, along with a link to the Google Drive folder where you can find all of the uploaded attachments.
Add a Google Sheets action, and choose “Lookup spreadsheet row” as the event. Just like in the simpler Zap, this step will let you find or create a row as needed with a single action.
Choose the sheet you want to use (you can use the same sheet as before), and select a column to search by. Again, we’d recommend using a column that will have unique data for each row, such as Message ID.
Once again, check the box that says “Create Google Sheets Spreadsheet Row if it doesn't exist yet?”
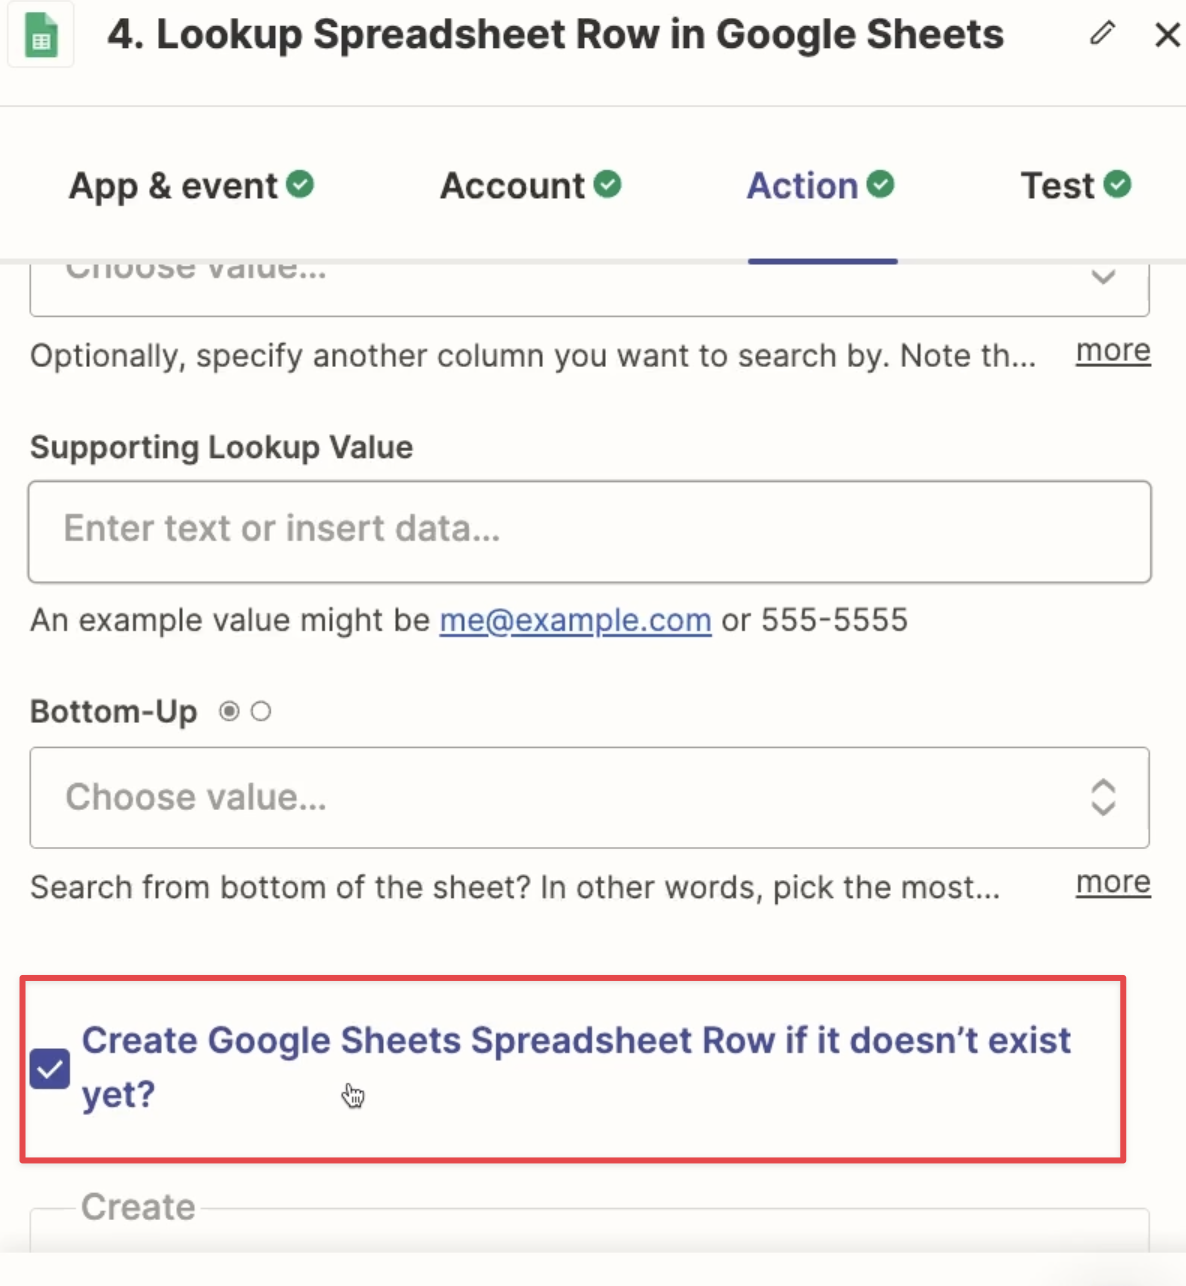
Then, map your email’s data to each column in your Spreadsheet.
For the “Attachment” field, provide the URL of the Google Drive folder created in the previous step. You can find this in the “Alternate Link” variable.
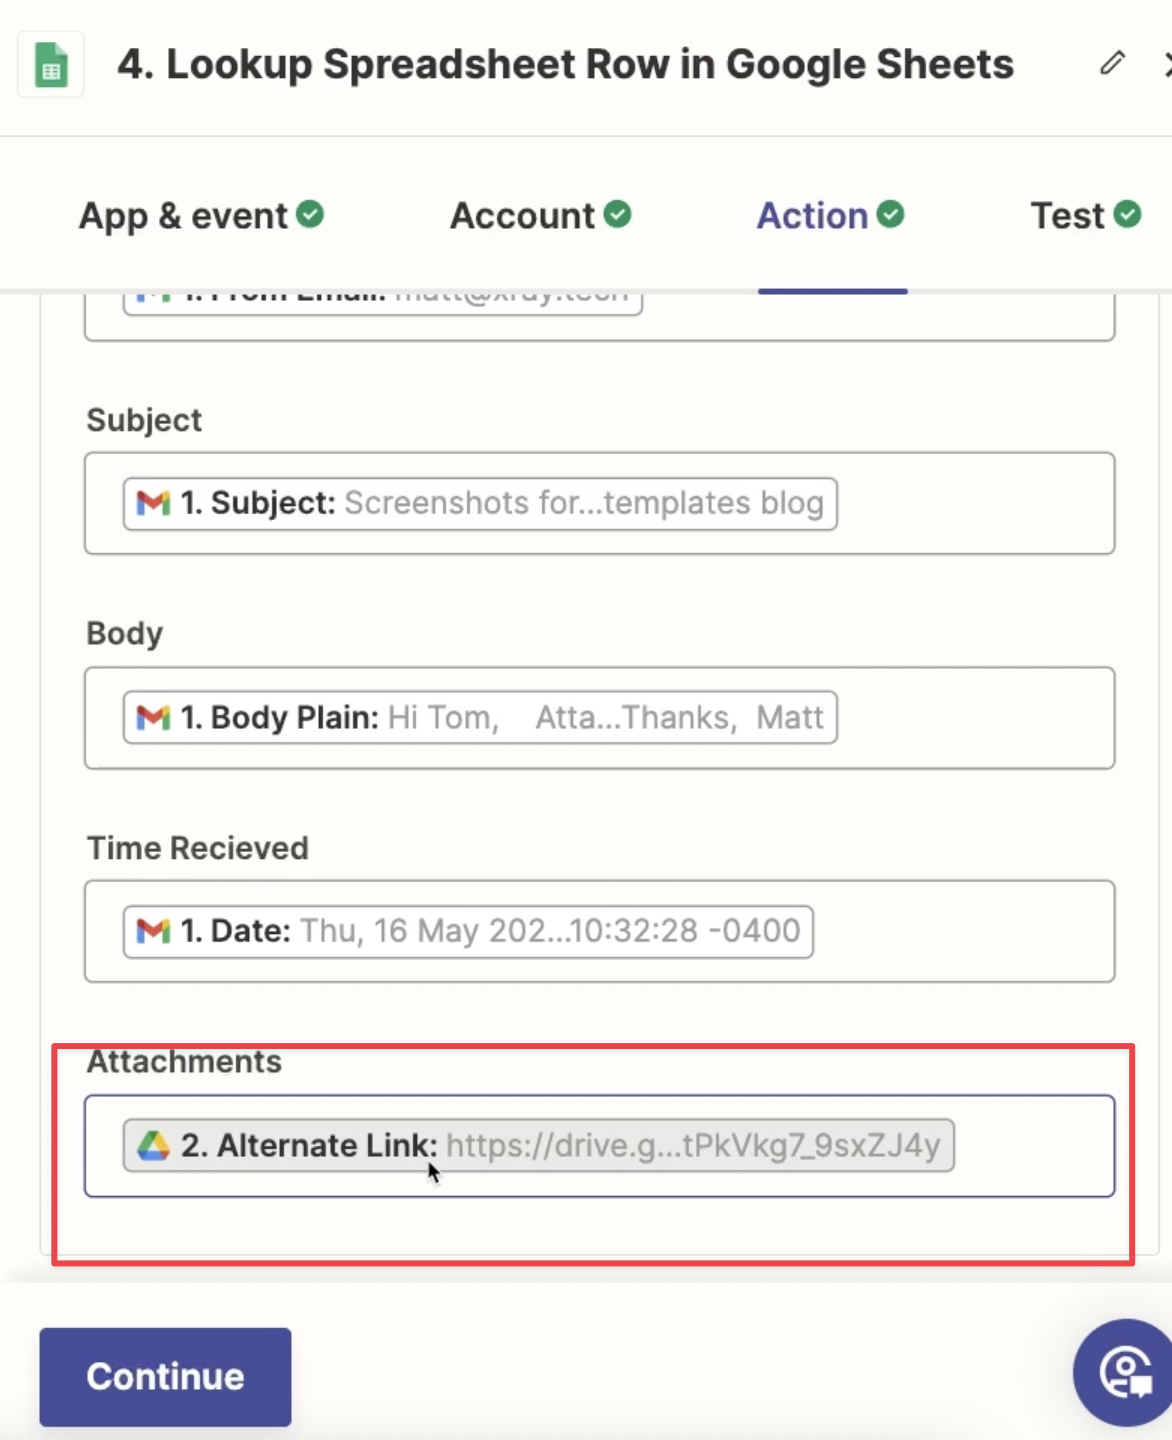
Linking a single folder will be much easier than adding a link to each attachment individually.
Once you’ve configured and tested this step, your Zap will be all set, and you can turn it on and publish it.
The “new attachment” trigger makes this a pretty unusual Zap, so let’s look at an example to explain how the whole thing works.
Let’s assume you’ve received a new email in your inbox with four attachments, and you’ve added the “Send to Sheets” label to that email.
The Zap will run once for each of the four attachments, but because of our “Lookup” and “Find” steps, it won’t perform exactly the same actions each time.
For the first attachment in a newly labeled email, this Zap will proceed to Step 2, where it will create a new folder in Drive to store the email’s attachments.
Then, it will upload the first attachment to that folder in Step 3.
Finally, in Step 4, it will create a new row in sheets with the email’s info and a link to the attachments folder in Drive.
For every subsequent attachment in that newly labeled email, the automation will find the folder that already exists in Step 2. It will not create a new folder for attachments 2-4.
In Step 3, it will upload the attachment that it’s currently processing to the right folder.
Finally, in Step 4, it should find the spreadsheet row that it created for the first attachment, and will simply leave that spreadsheet row unchanged.
To see it all in action, give the Zap a live test.
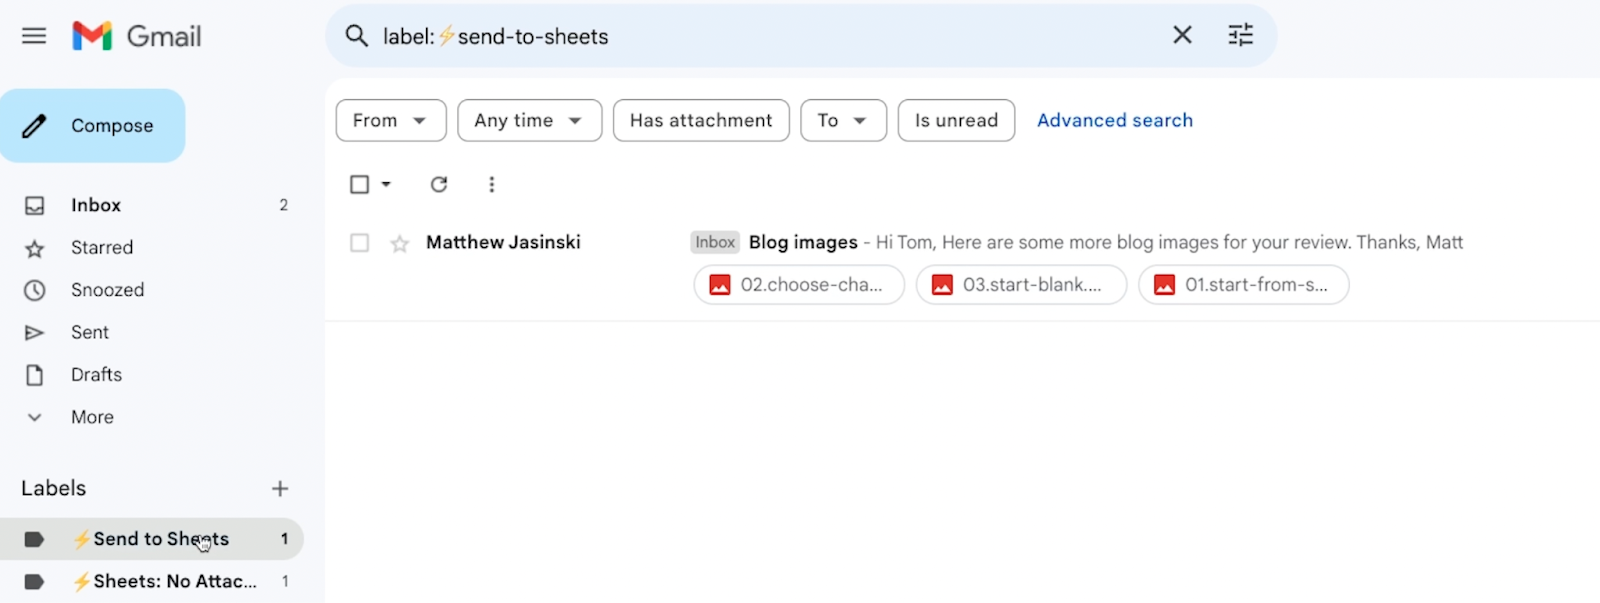
Add your label to a new email with a few attachments. To make things clear, it’s best to use a different email than the one you used as test data while building.

Wait up to 15 minutes (based on your Zapier plan), then check for your new row in Sheets.
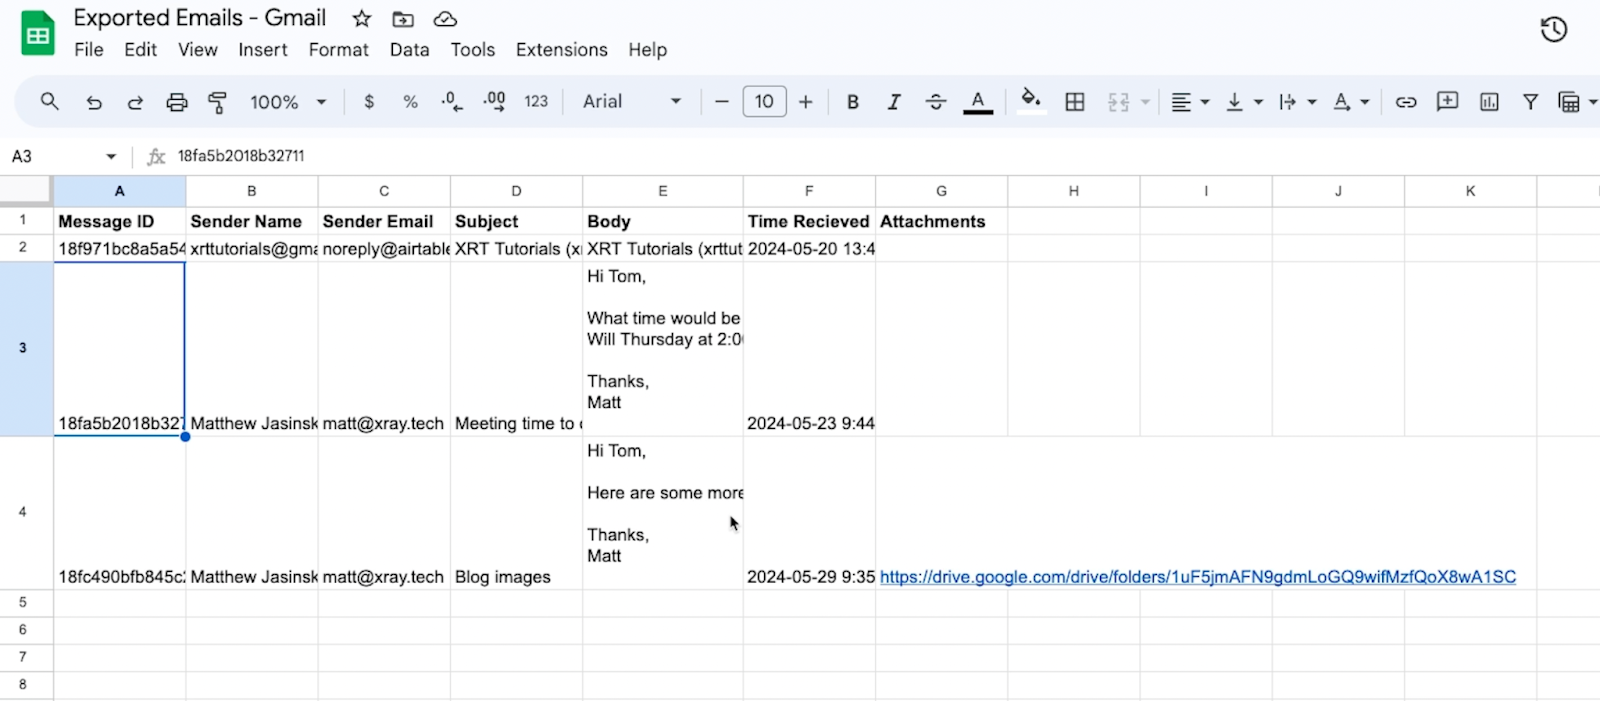
You should see it added to the bottom of the spreadsheet, and it should include a Drive link where you can find its attachments.

After giving it a test, this automation will be all set.
Before we wrap up, we just want to give you one quick warning:
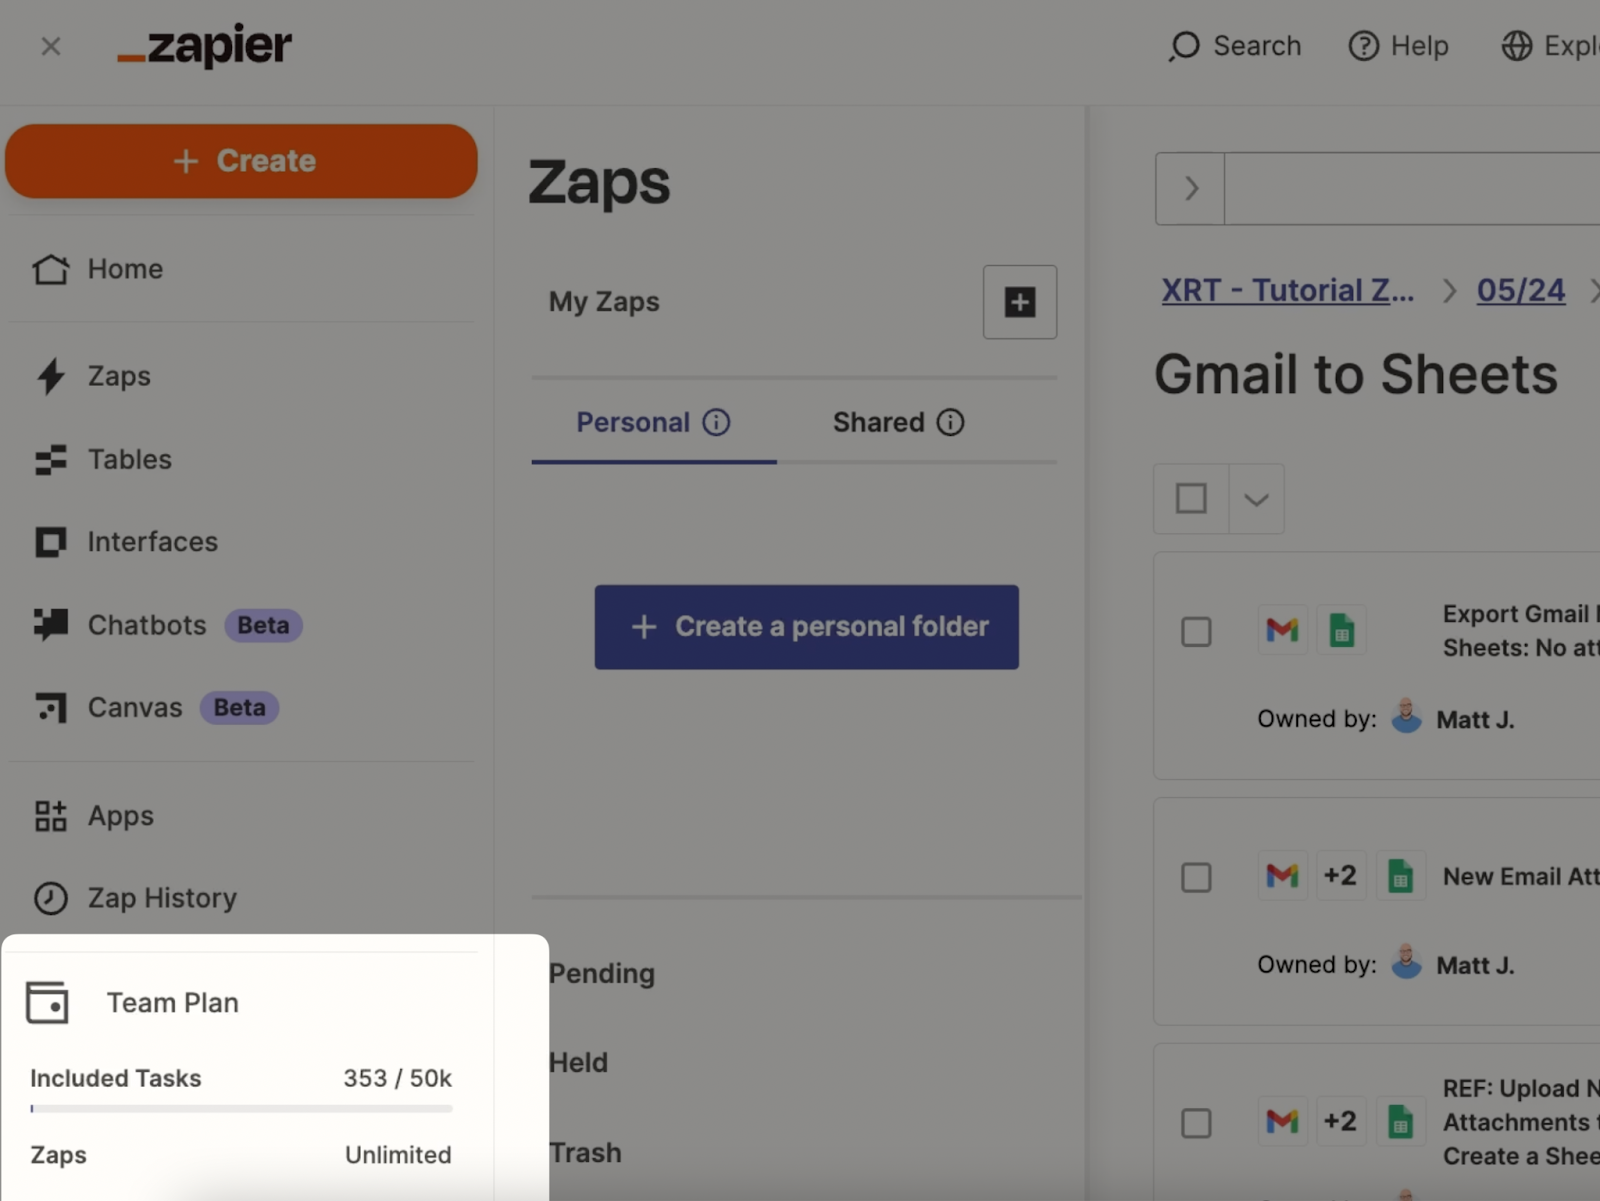
Always check your task limits in Zapier before mass exporting data!
Sending 1,000 or more emails to Sheets could easily use up your month’s tasks in a single day.
When you sign in to Zapier, you should see your task usage and limit in the bottom left corner.
Putting your emails into a convenient spreadsheet makes it much easier to get the insights you need. And with the simple Zapier automations we showed you today, you can send your emails over with just one click.
If you’d like to learn more about automating software like Gmail and Google Drive, be sure to check out our blog or our YouTube channel. You can also follow XRAY on Twitter, Facebook, or LinkedIn.

.pptx.png)

