
Loops are an extremely useful technique for any no-code and low-code automator.
Using loops will let you perform the same actions several times with each item in a dataset. A loop will let you do things like send an email to every address in a list, or update your inventory database for each line item in a receipt.
And if you want to integrate loops into your Zapier automations, you can do it all by just adding a single step.
In this post, we’ll show you how to add a line item loop step by step. We’ll also give you some tips for working with the other types of loops that Zapier supports: text and numbers.
First, you’ll need to create a new Zap and have a trigger set up to grab some data that you can work with.
In our example, our trigger watches an Airtable base for new records, and we’ve made sure to include some arrays and lists that we can build a loop with.

To add a Loop to your Zap, just add a new step and search for “Looping by Zapier”. Under the Events menu, you’ll see three options. You can create a loop from Line Items, from Numbers, or from Text.
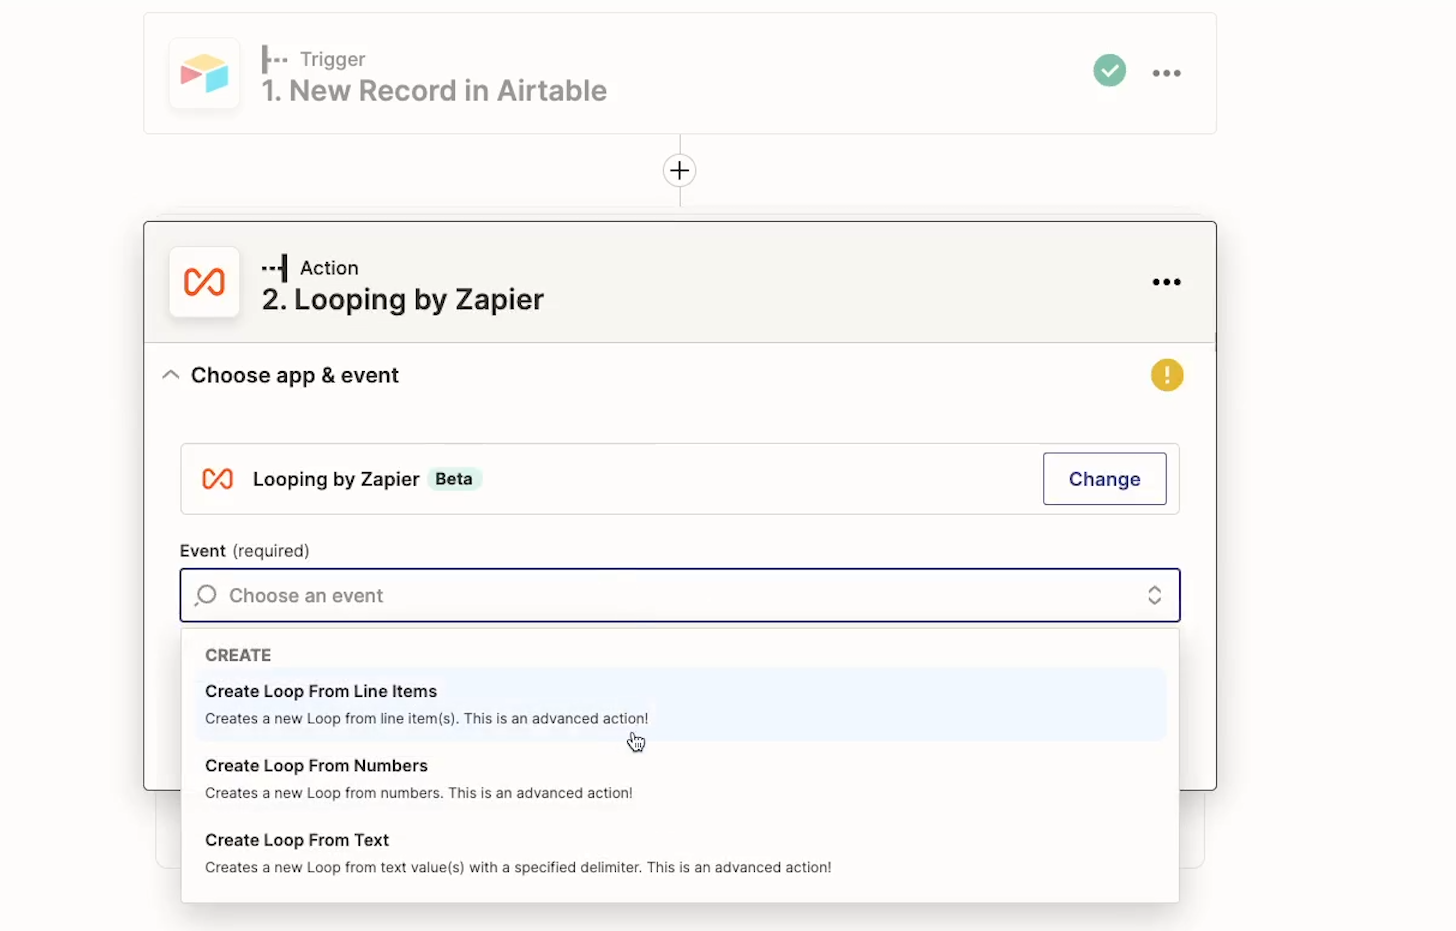
Each of these options works in more or less the same way, but we’ll take you through each one individually.
To create a loop from line items, you need to have a piece of data that’s already subdivided into several components.
In other words, your data will have to be formatted like an array.
In our example trigger, we’re grabbing each new entry to an airtable base, which contains some linked record fields. In Airtable, a linked record field with multiple entries is treated as an array, so this will be perfect for the example.
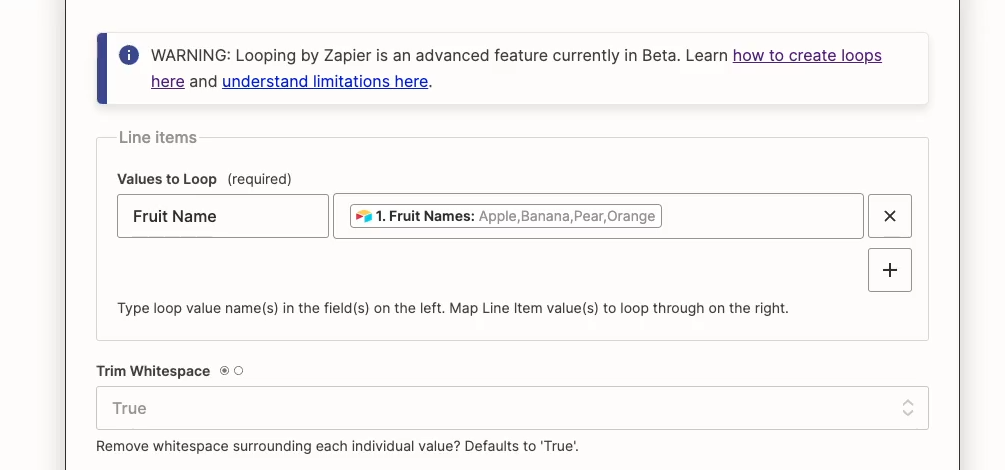
We’ll enter one of the linked fields — Fruit Names — into the second field under “Values to Loop”.
In the first field, you need to enter a label that you want to use for this data. We’ll call it Fruit Name.
Next, choose whether or not you want to trim whitespace. This defaults to “True”, and you’ll usually want to leave it as is.
In the “Loop Iteration Counter Start” field, you can pick where the Loop will start counting.
If you set this to 1, then the first iteration of the loop will be called Number 1.
If you set this to 2, then the first iteration of the loop will be called Number 2, and so on.
Note that setting this number to 2 won’t skip the first item in your array; it will just label the first iteration as “2”. You’ll usually want to leave this as 1, but there can be instances where setting it to another number can be useful.
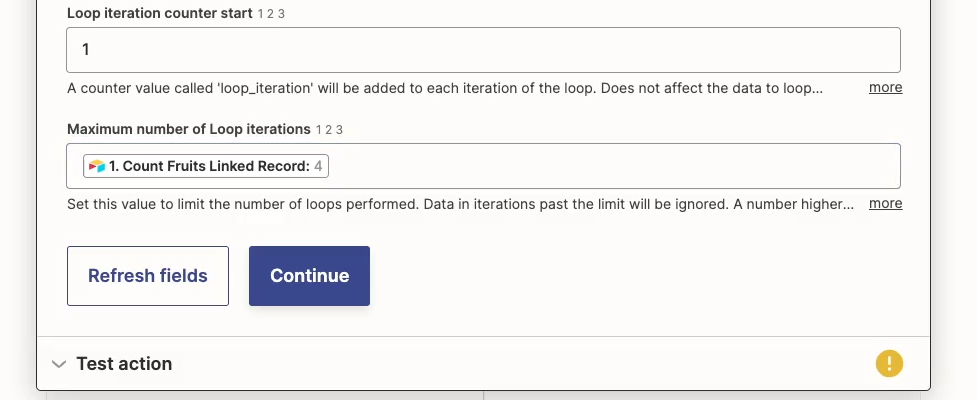
Finally, we have this option for “Maximum number of Loop Iterations”. Setting a maximum will make sure that your automation will stop running even if you’ve accidentally created an infinite loop, and will stop it from consuming too many tasks in your Zapier plan.
Ideally, you should set this number to be the same size as the dataset you’re going to loop through.
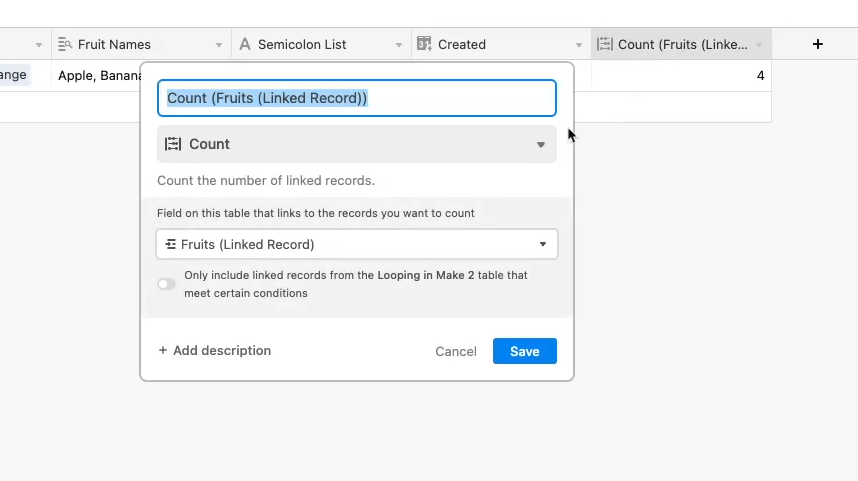
If you’re using an app like an airtable, you can add a field that counts how many records are in your linked field, and use that number as your limit. Otherwise, you can simply estimate and set this number to be just a bit higher than your expected number of items.
Next, test the loop. If you see multiple loop iterations like in the screenshot below, then your loop worked as expected.
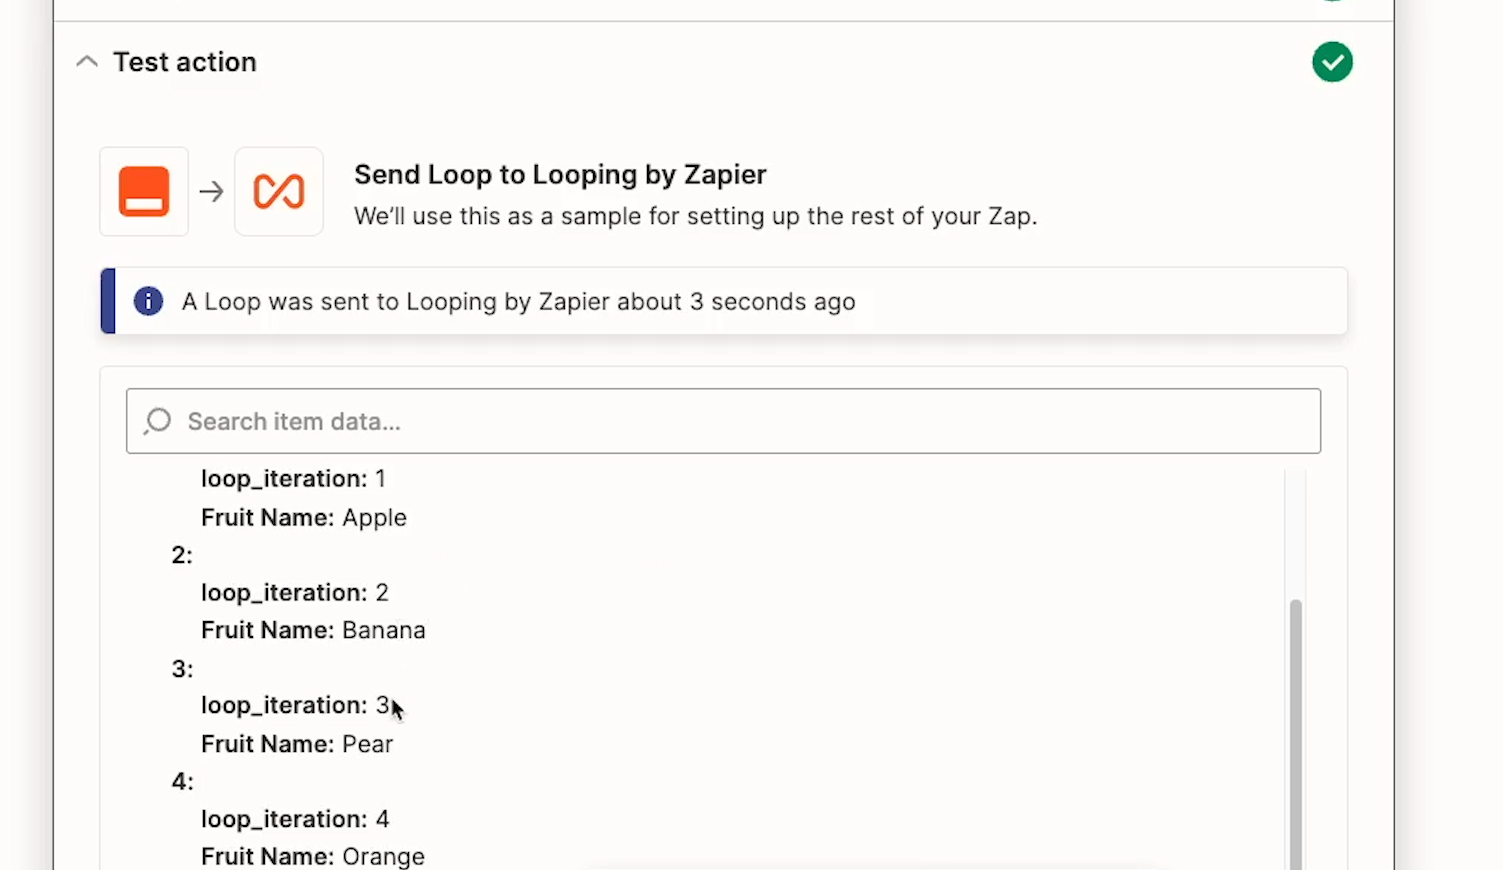
Any actions you add after this step will be performed once for each item in the loop. In our example, we’ll add a step to send a Slack message.
Our message will show us the iterator number, then the name of the item being processed in each loop. Note that these should change for each loop iteration. Even though they only show one value right now, they’ll change as the loop runs.

We’ll get one Slack message for each item in the array, so we should see four messages when the automation runs.
However, when we test this step, we only see one message.
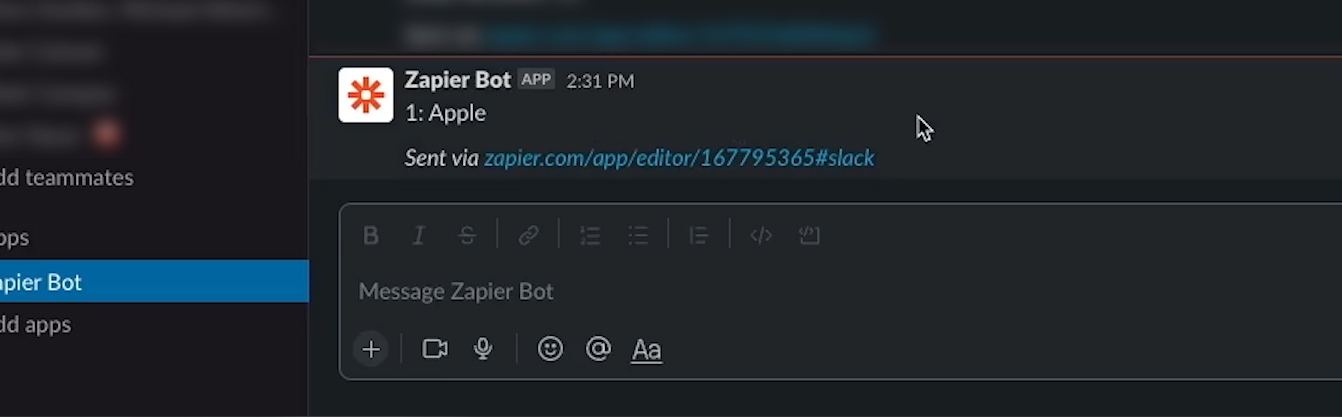
When you run a test in Zapier, the test will only execute the loop once.
If you want to see how the whole thing will run, you’ll need to turn the Zap on and trigger it.
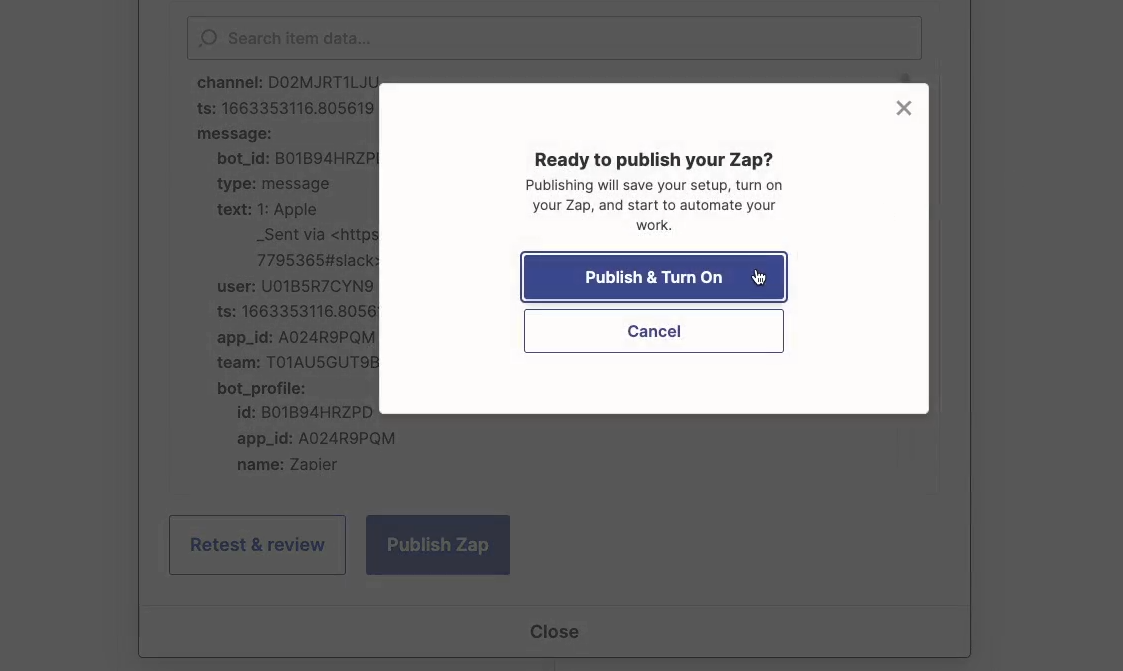
For our example, that means we need to add a new record to our Airtable database once the Zap is published and switched on. Then, when the Zap runs, we can see all 4 Slack messages appear.

When you’re structuring your Zaps that use loops, just bear in mind that any action you add after the loop step will be part of the loop.
If there’s anything that you only want the automation to perform once, make sure it happens before the Loop step, or add a filter that will only be fulfilled after a certain number of runs in the loop iterator.
For instance, you might add a filter that will only let the automation continue if the loop iterator is equal to 6, so those steps will be skipped in every iteration until you’re on the 6th iteration.
Regardless of which approach you use, just make sure that you take a moment to plan how your automation will work when you start implementing a loop.
Now, let’s take a quick look at the other options for creating a loop: text and numbers.
Creating a loop from text is very similar to creating a loop from line items, but it lets you work with any list that’s formatted as a piece of text.
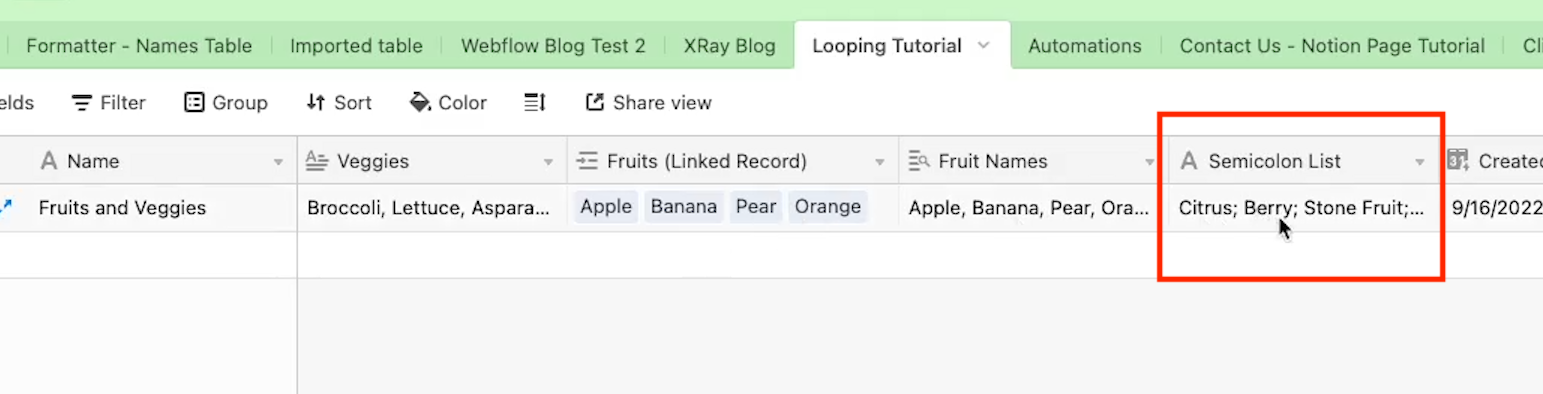
With these loops, your data doesn’t have to be in an array. You just need to have items separated consistently - like with a comma or a semicolon.
Enter the character that splits up your list into the “Text Delimiter” field, and fill in all of the other fields the same as before.
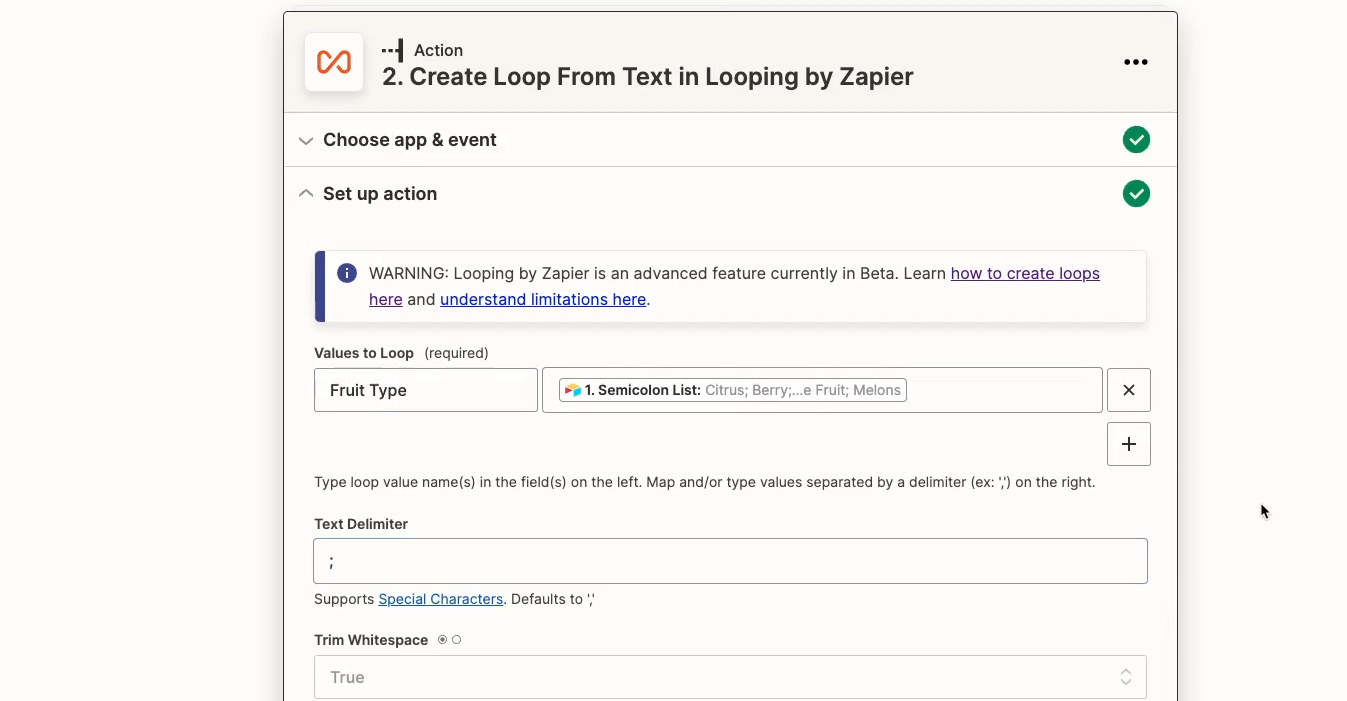
Test the loop, and you should see each item separated into its own loop iteration. Performing actions with this loop will work exactly the same as performing actions with a Line Item loop, so you can refer back to that section for more information.

Now let’s look at creating a loop with numbers.
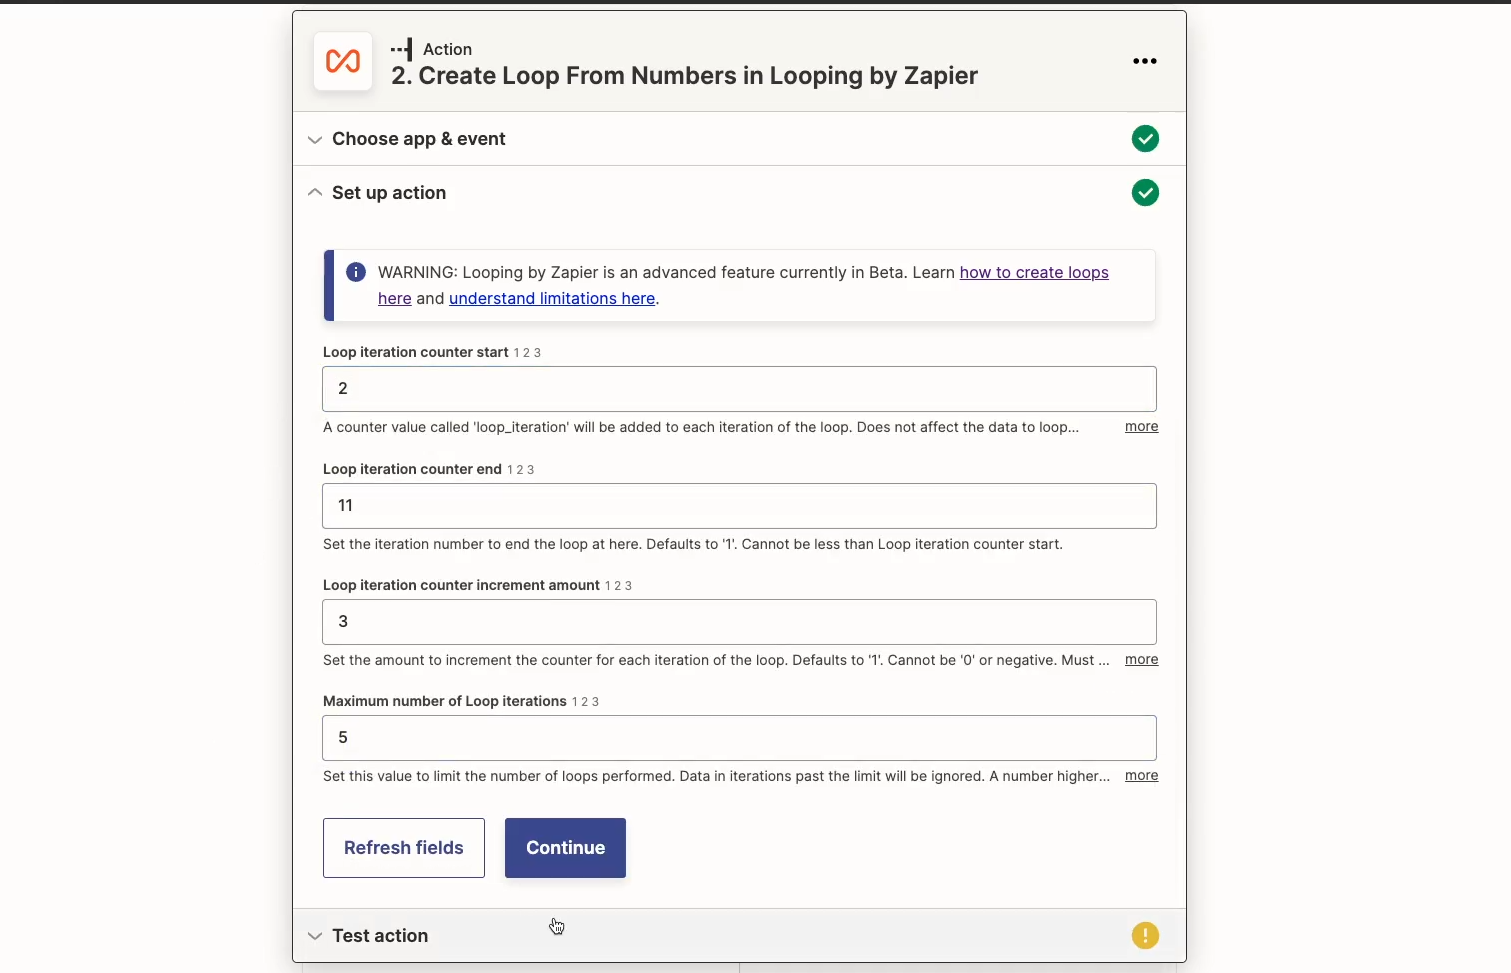
This is a bit different from using text or line items. Instead of always looping through every item in a dataset, a numbers loop will simply run as many times as you specify.
With a numbers loop, you have precise control over how the loop runs. You choose the iteration number that it starts and ends at, and how much the iteration number increases with each run.
For instance, you can have your iterator start at 2, then go up by 3 each time, up to a limit of 11.
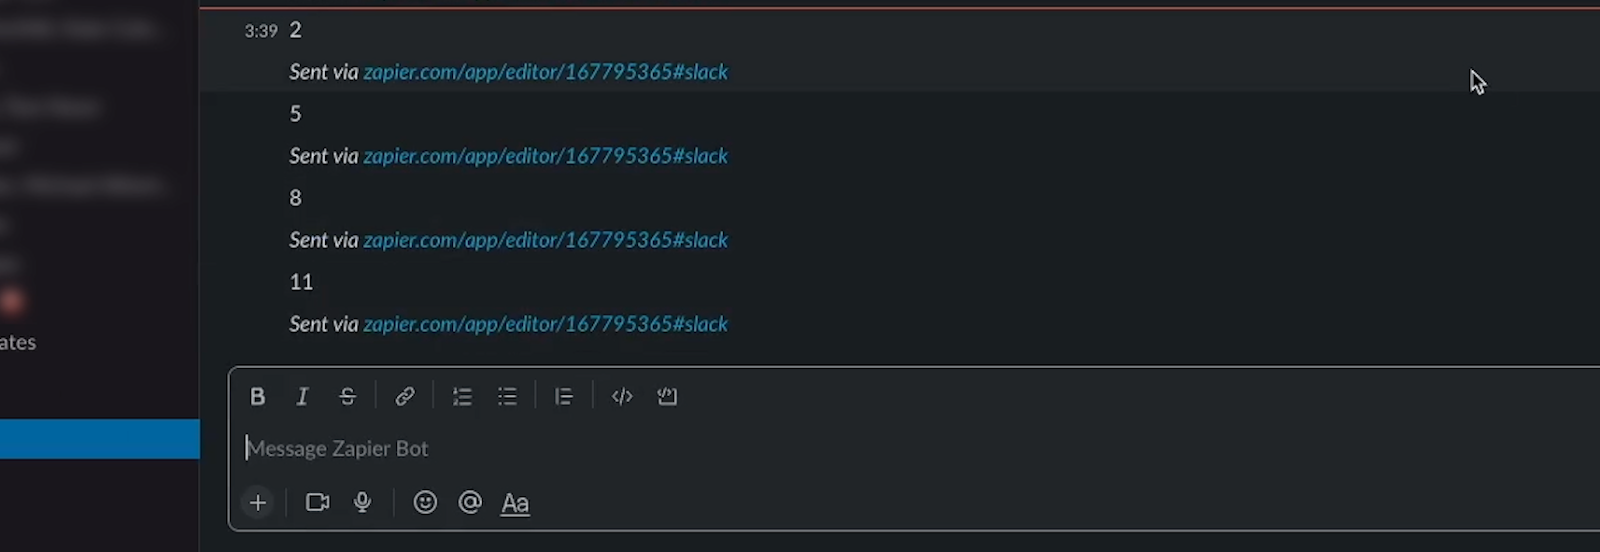
We’ll set up our loop with those numbers, then edit our Slack message, so it will just tell us the current iterator number.

We’ll turn on the Zap and add a new record to trigger it, and we see four messages in Slack: 2, 5, 8, and it stops at 11.
If you’re trying to perform more complex operations with your loop, using the “Numbers” event might give you the flexibility and control you’re looking for.
And that’s all you need to get started. Setting up a loop in Zapier is pretty simple, and it can be a great way to process lists and arrays and turn them into useful, time-saving automations.
If you’d like to explore more automation tutorials, check out our blog or our YouTube channel. You can also follow XRAY on Twitter, Facebook, or LinkedIn.

.pptx.png)

