
Adding human oversight to your Zaps ensures that your automated workflows run with fewer errors.
Now, with the ‘Continue Zap’ button in Zapier tables, you can add a crucial oversight to any Zap with a simple manual approval step.
In this post, we’re going to show you how it works step by step.
We’ll begin by adding a “Continue Zap” button to a Zapier Table. Then, we’ll demonstrate how you can build an automation that will pause itself until you approve it with the click of a button.
Before you can create a “Continue Zap” button and automation, you’re going to need to prepare a couple of items in Zapier.
First, you’ll need a Zapier table. This table is where you’ll add, configure, and use the “Continue Zap” button. Naturally, it’s best if this table also includes the data that you want to automate.
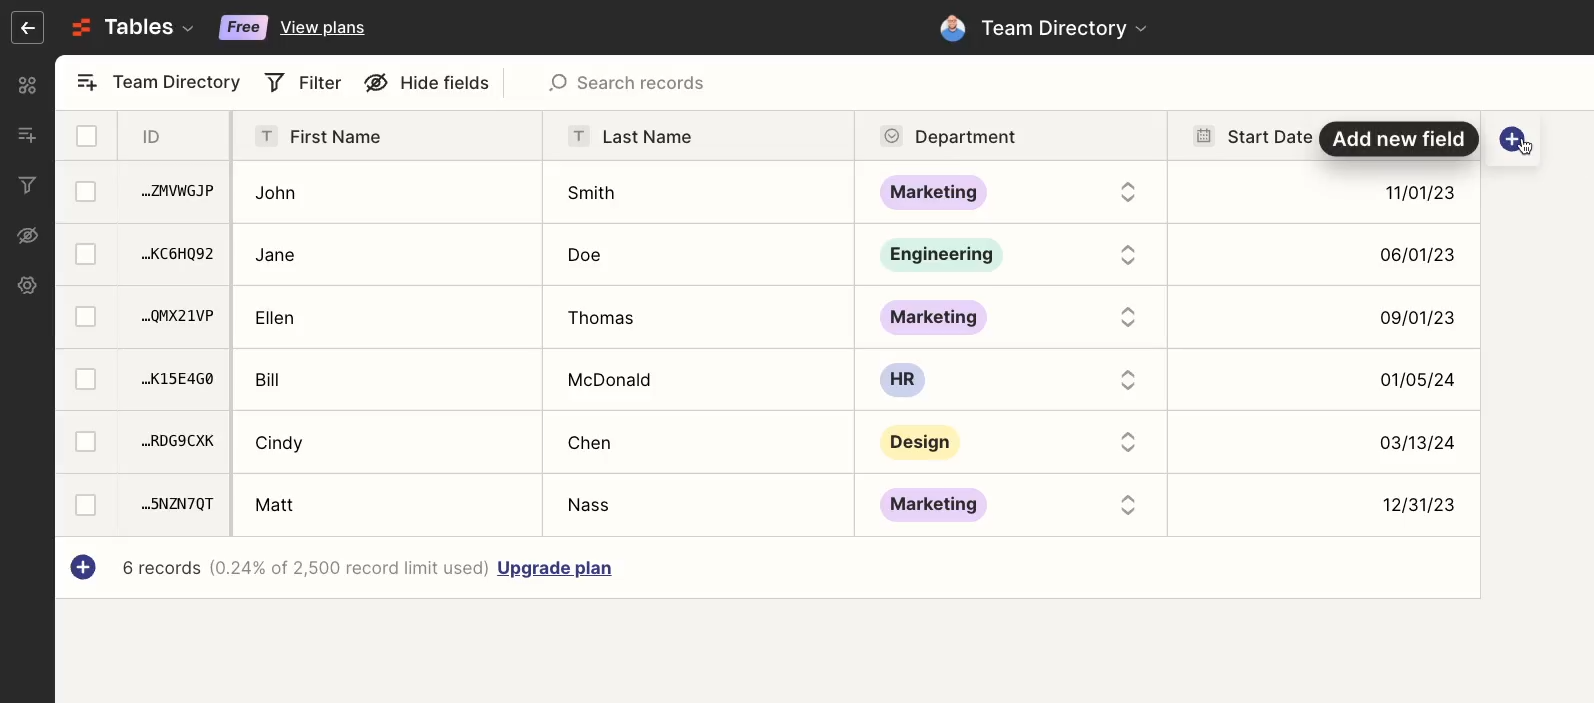
In this tutorial and demonstration, we’ll be using the “Team Directory” table pictured below.

You’ll also probably want to set up a Zapier interface with a form that connects to that table.
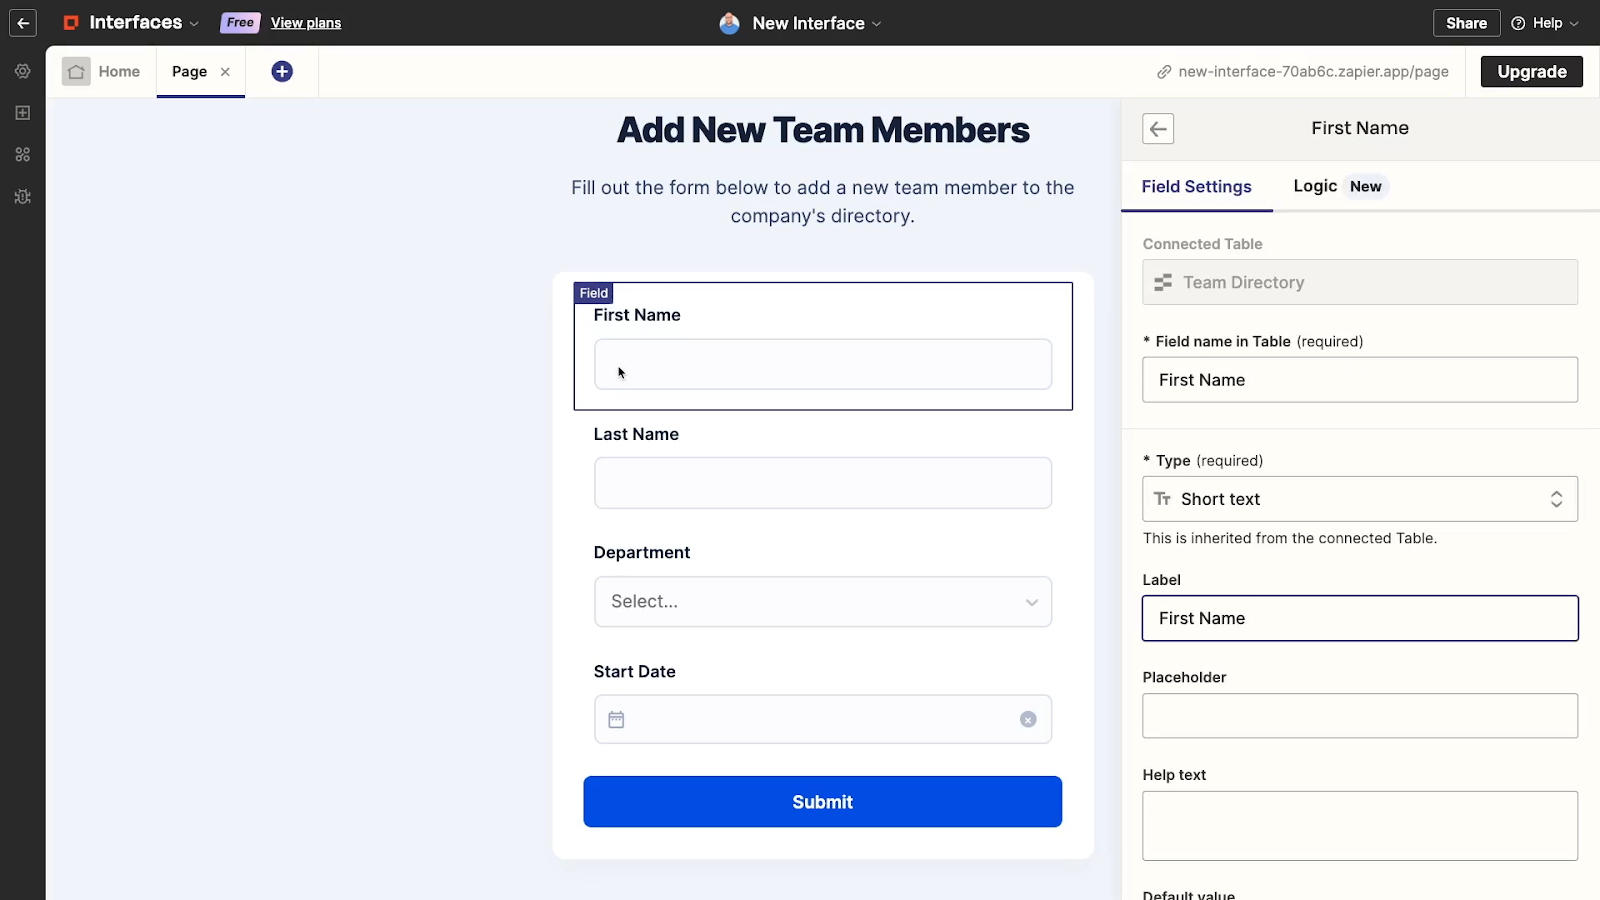
This isn’t strictly necessary, but it’s the easiest way to add a complete record to a Zapier table and will make testing the automation much more convenient.
Below, you can see a picture of the full automation that we’re going to build.
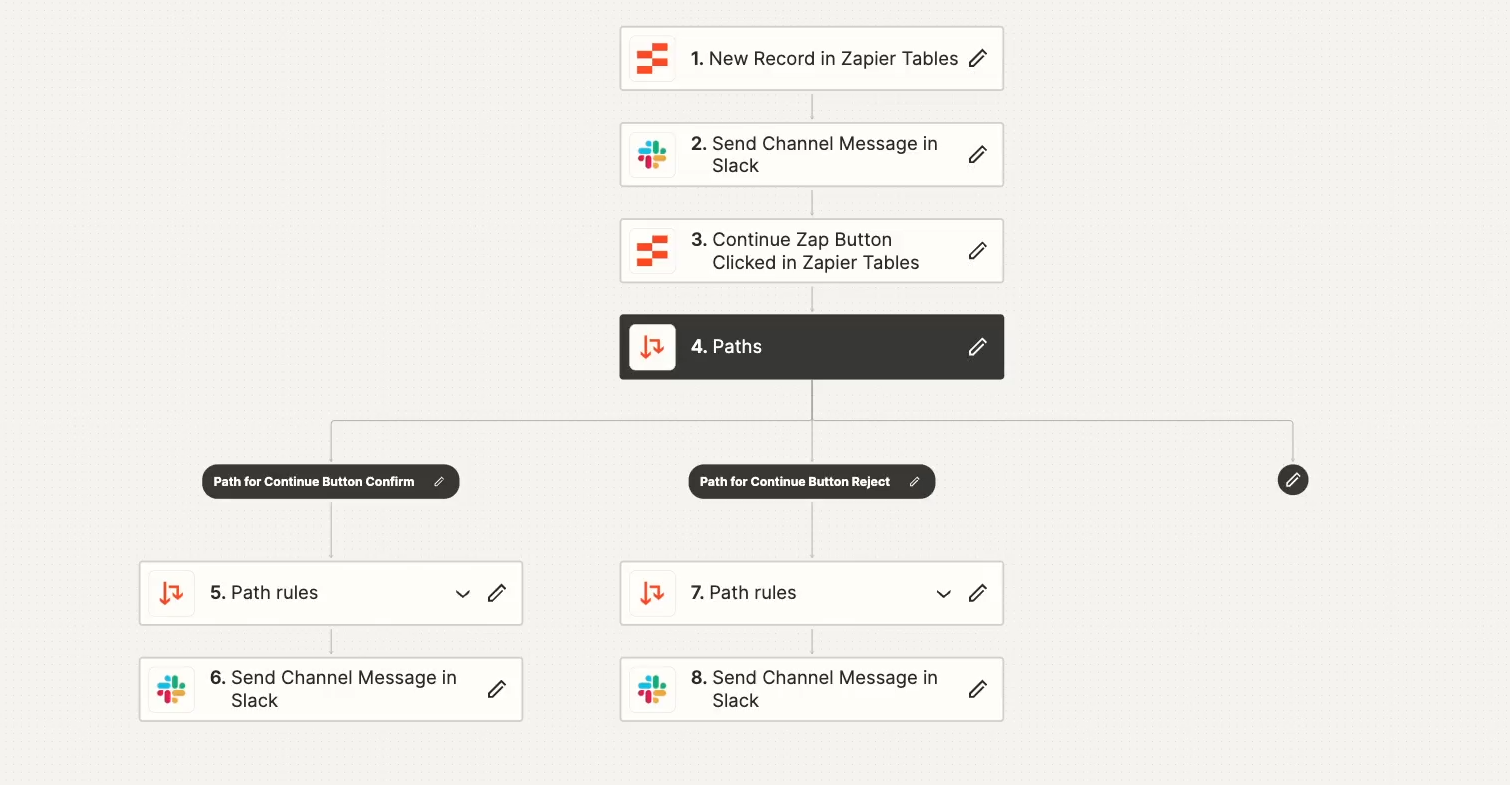
Whenever a new record is added to the table, our Zap will send an alert in Slack prompting us to confirm that the details of the new record are correct.
Then, it will pause itself until we click on either “Confirm” or “Reject”.

Based on our answer, the automation will go down one of two paths, and will send an appropriate message in Slack confirming our choice.
Bear in mind that you could always build a similar approval flow by just creating multiple Zaps.
The first Zap could alert you to the new record, while the second Zap would trigger once you make a selection.
However, it’s never a bad thing to have multiple options for designing and building your automations, which is why we want to show you how this new feature works.
Once your table and interface are ready to go, you can follow along with the rest of this tutorial.
To start, add a new field to your table. This is the field that will contain your button.
Give the field an appropriate name, like “Approve Details”. Then set the field type to “button”.
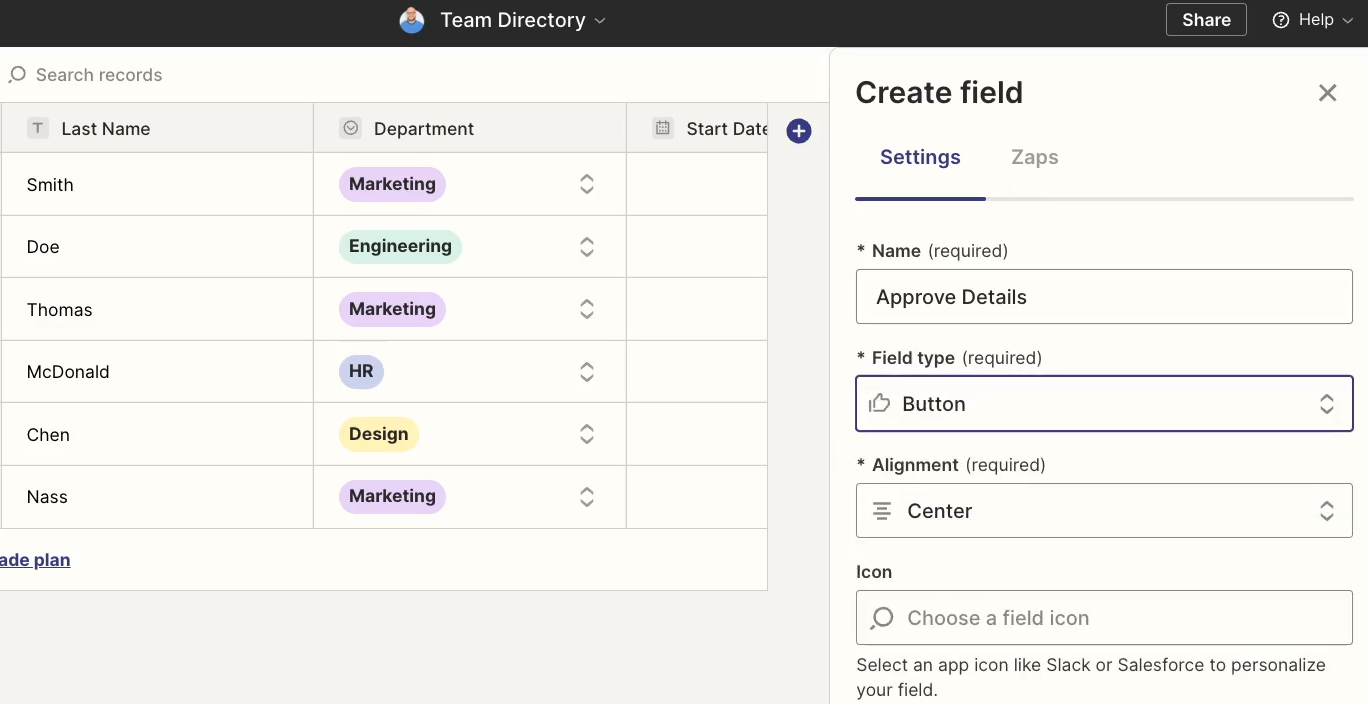
You’ll see several customization options for the field, like icon and alignment. You can set these to whatever you’d like, or leave them to their defaults.
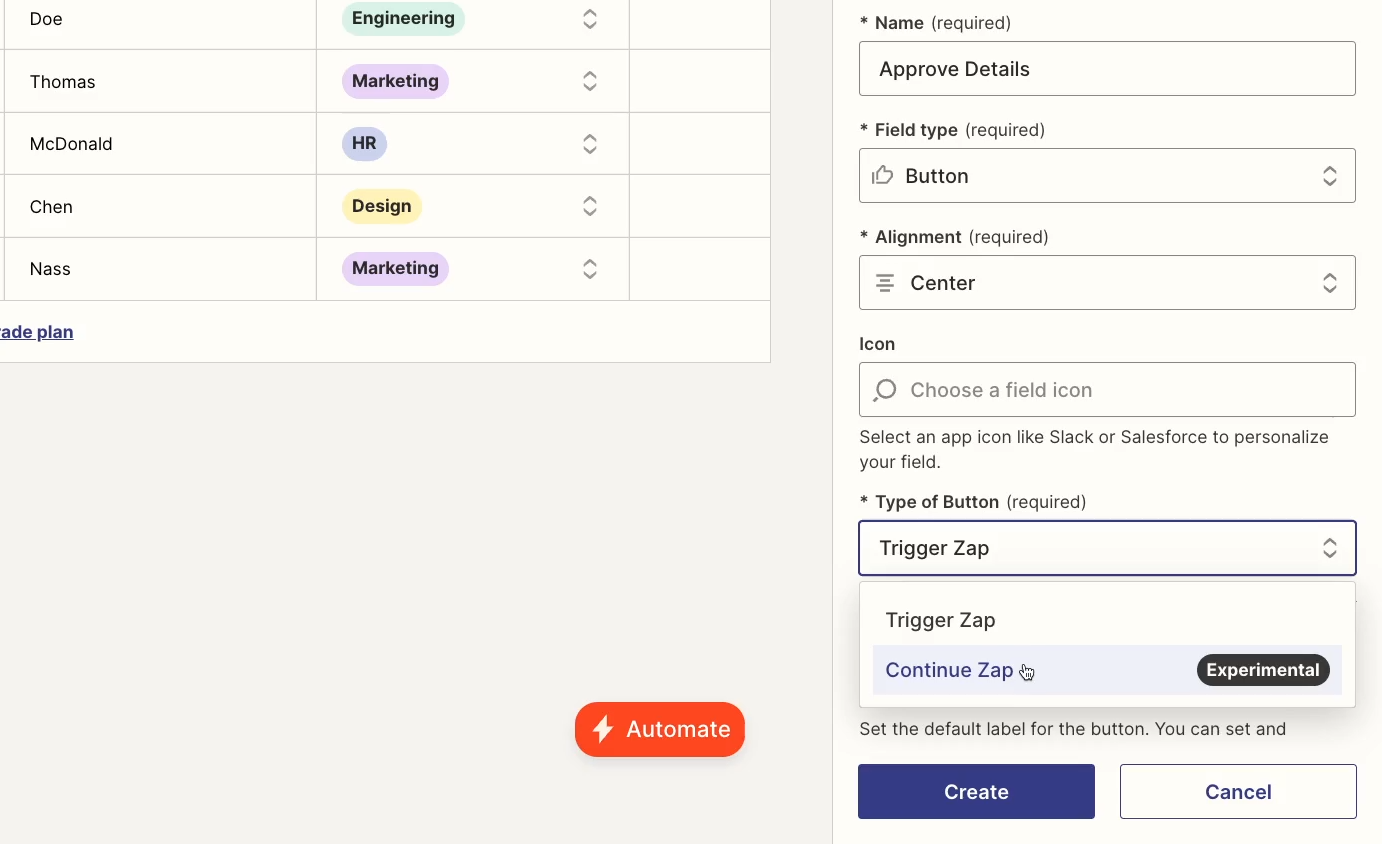
The most important setting is “Type of Button”, which you’ll need to set as “Continue Zap”. The default choice would launch a Zap instead, which can also be useful. However, it won’t work for pausing and continuing a Zap.
Next, you can provide labels for up to two buttons that will be included in this field. These labels should reflect the choices that you want to incorporate into the Zap, and should indicate what actions will follow after they’re clicked.

In our case, “Confirm” and “Reject” will be suitable labels.
Note that if you don’t include a secondary button label, then there won’t be a second button in the field.
However, we’d recommend including a second button. That way, you can make sure that you’ll always press one button or the other, and your automation will reach a definitive conclusion rather than pausing indefinitely.
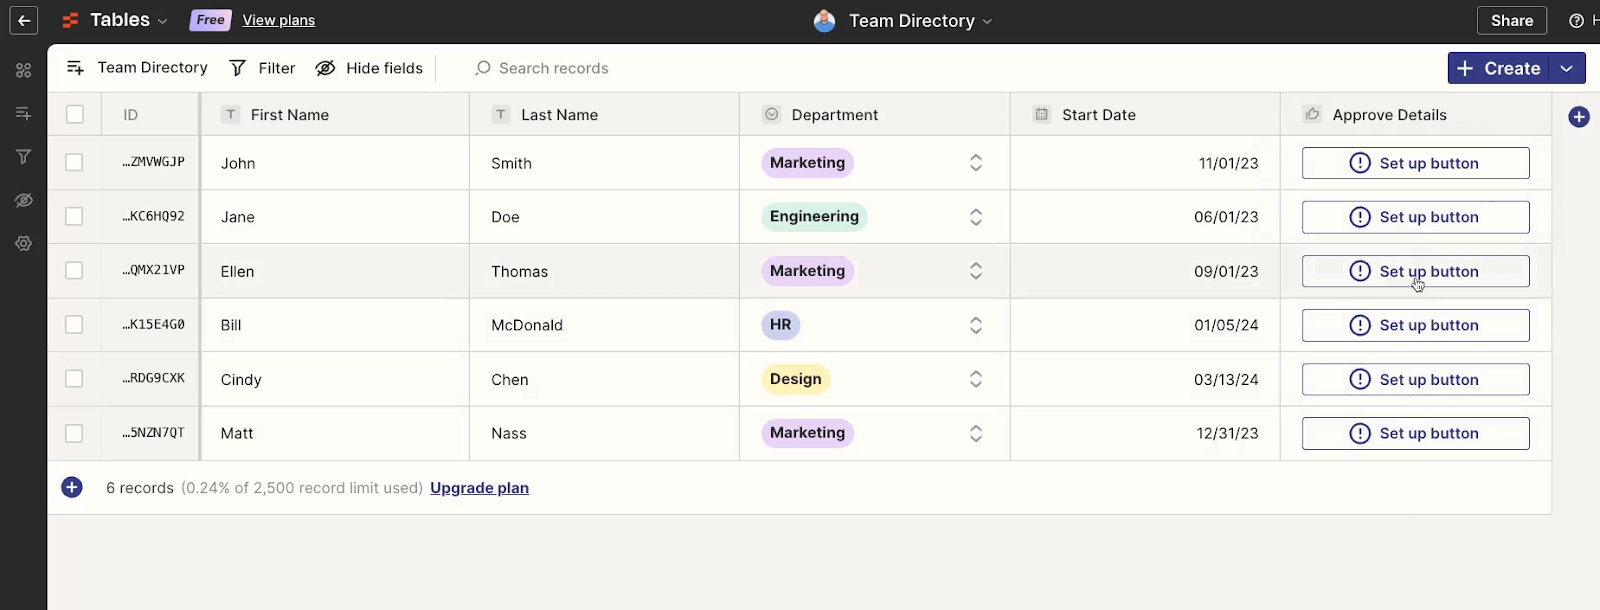
Finally, click “Create” to add your button field to the table.
Initially, the button will just have a warning that says “Set up button”. That’s OK. Just click on the button to continue setting it up.
When you click on the button, it should open up to the “Zaps” tab, which prompts you to create a new Zap to associate with this button.
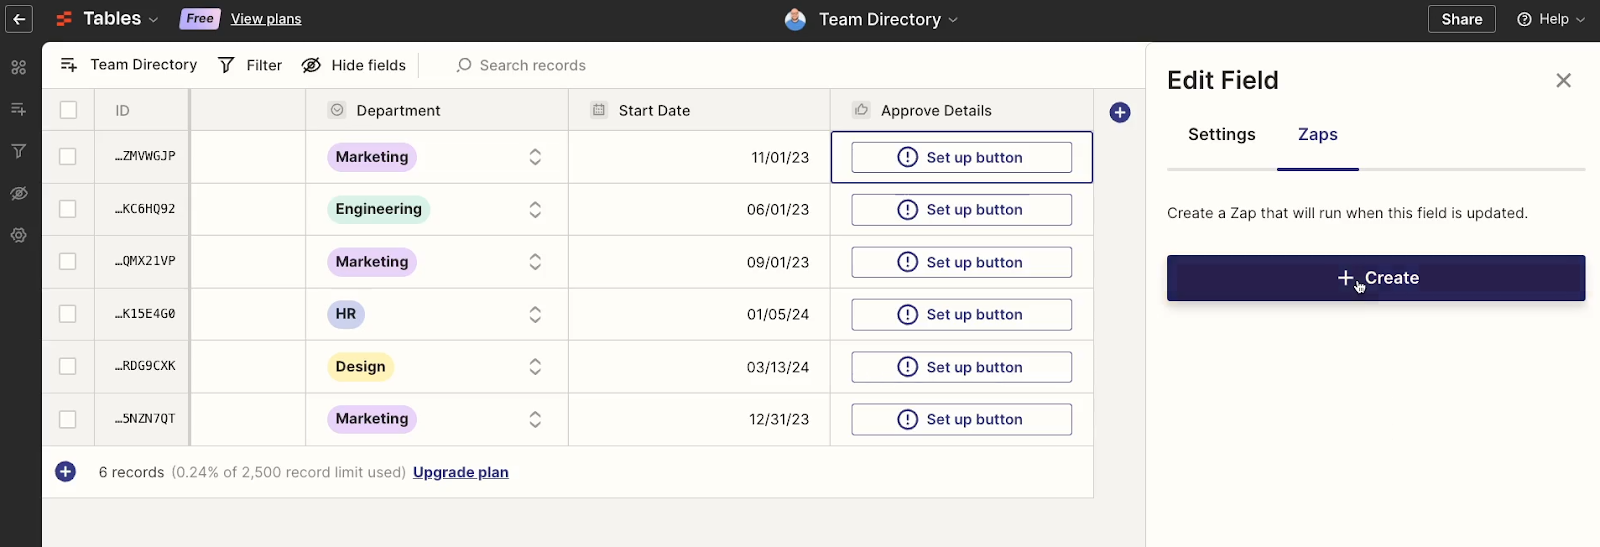
Click on “Create” to start building the automation.
After clicking “Create”, Zapier will create a default automation for you.
Zapier notes that the “continue Zap” button is an ‘Experimental’ feature, so the setup of this default automation may change.
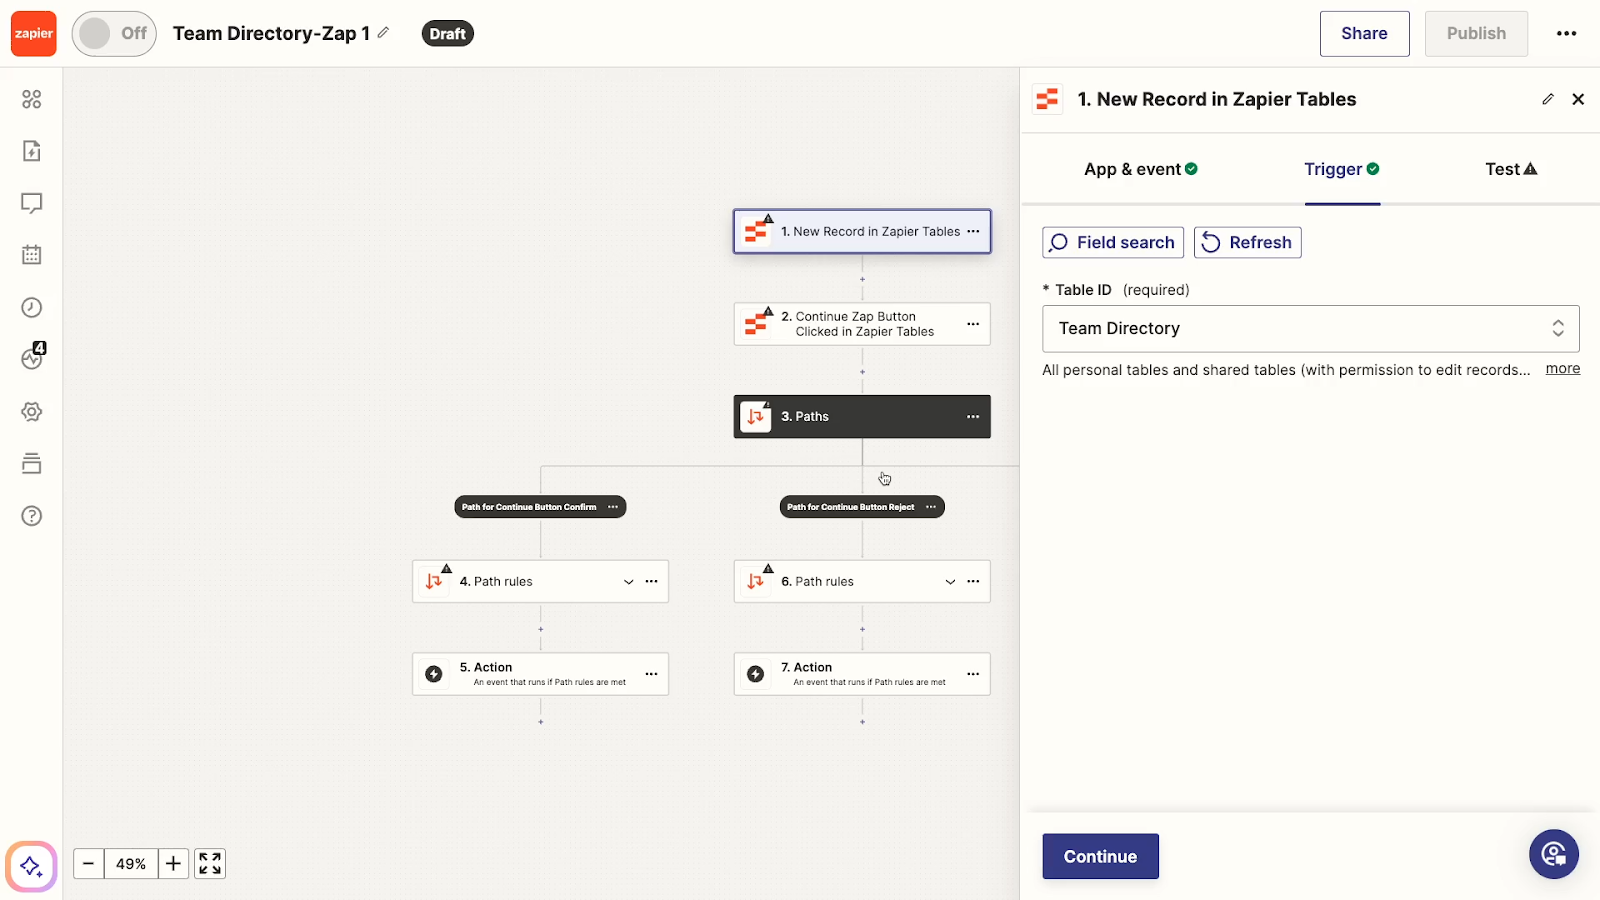
However, in our tests, the automatically created Zaps have always looked like this so far:
• The trigger is set to “New Record in Zapier Tables”.
• The first action is “Continue Zap button clicked in Zapier tables”.
• Then, two paths follow:
• One path for clicking on the primary button (“Confirm” in our example)
• One path for clicking the secondary button (“Reject”)
The rules for each path are configured, but they don’t contain any actions yet.
You can edit this default Zap to your liking, but it’s important to understand that this Zap will work a bit differently from most automations that you build.
The “Continue Zap Button Clicked” action kind of works like a second trigger.
Any action you put after the real trigger will run as normal whenever you add a new record to the table, but the automation will pause itself at this “Continue Zap” step and wait for your input.
Once it receives that input, it will continue running down the appropriate path.
As such, if there are any actions you want to perform right away for every record regardless of what button is clicked, place them before the “Continue Zap” step.
Every other action can be placed into an appropriate path.
Apart from that one unique consideration, you can edit and configure this Zap like any other.
To begin customizing the Zap, test the trigger to load in some data to work with.

Then, add any actions you want to run right after the trigger. In our example, we’ll add a Slack step to alert our team about the new record and ask them to check its details.
To make things easy, we’ll include a link to the table where they can view and edit records.
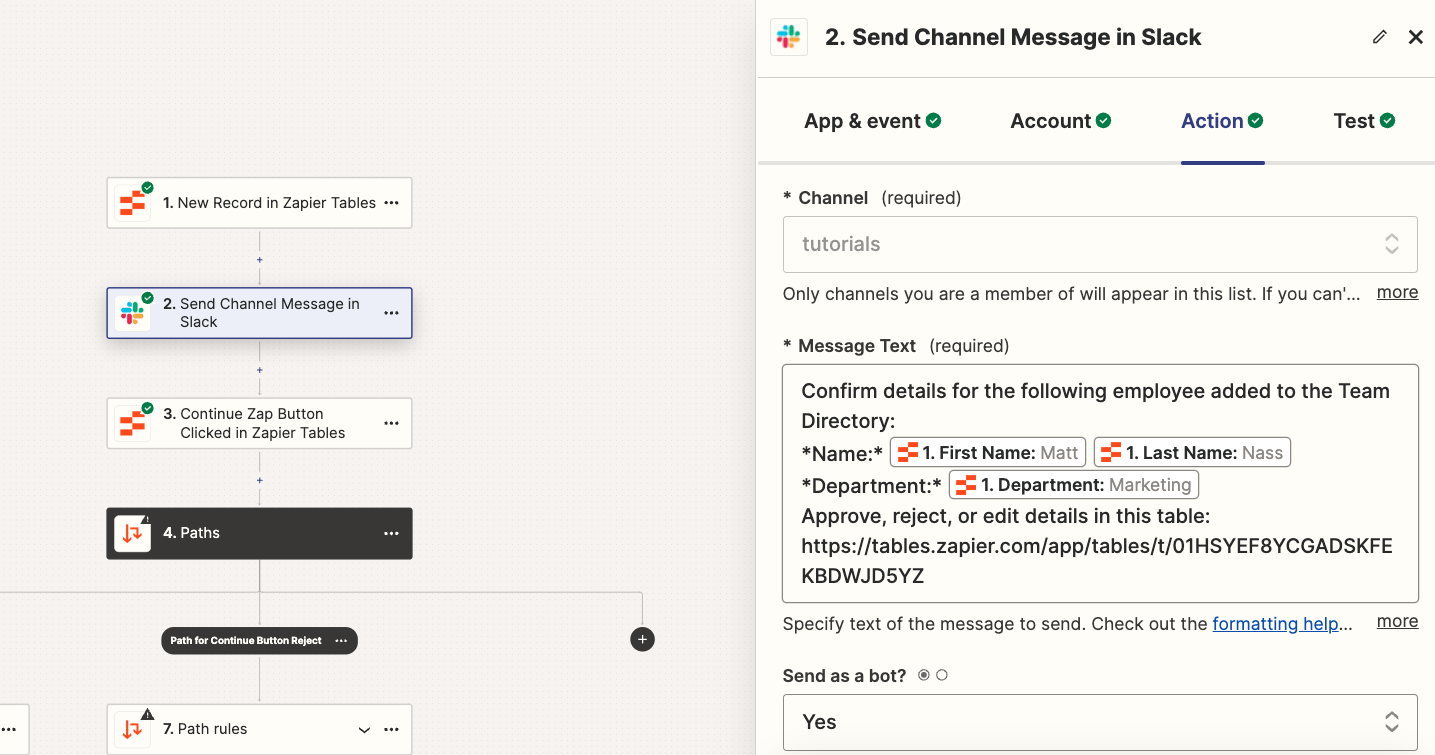
Again, this Slack step is going to be sent for every record that triggers this automation, since it is placed before the automation pauses itself.
Test any actions you’ve added and continue.
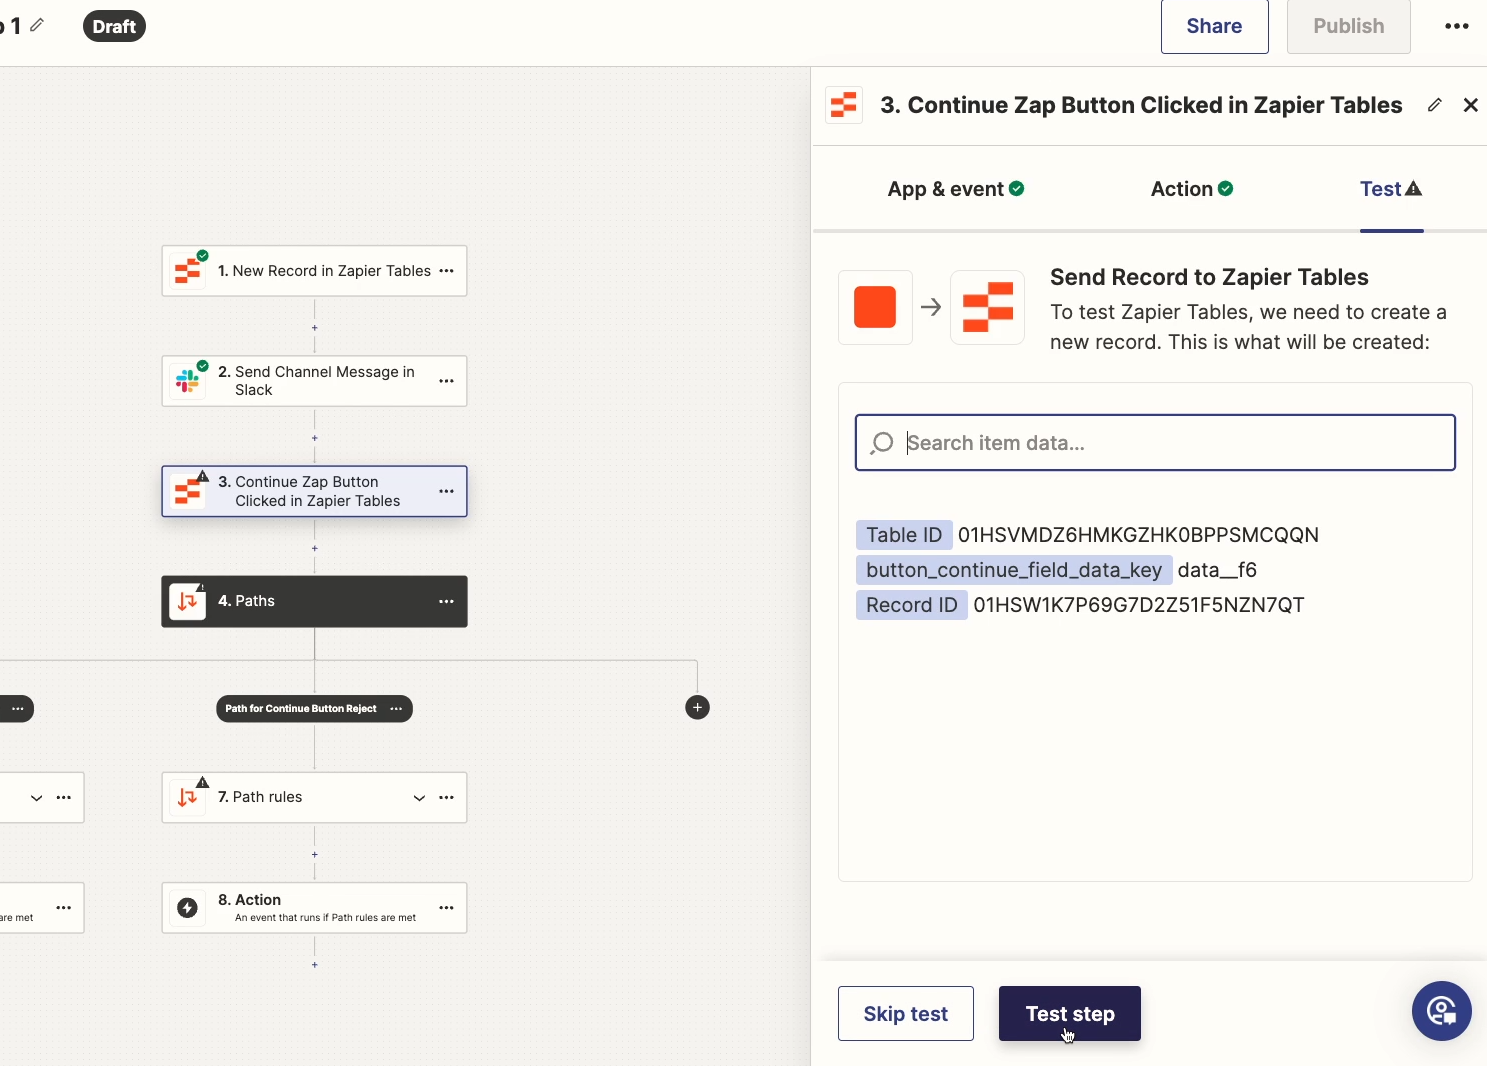
Next, select the “Continue Zap Button Clicked” step. You don’t need to add any data or change any settings here. Just click “continue”, then test the step.
Next, you can configure the actions that will run in your first path. This is the path that will run when the primary button is clicked.
Begin by confirming and testing the rule, which should be set to only continue if the primary button (“Confirm” in our example) was clicked.
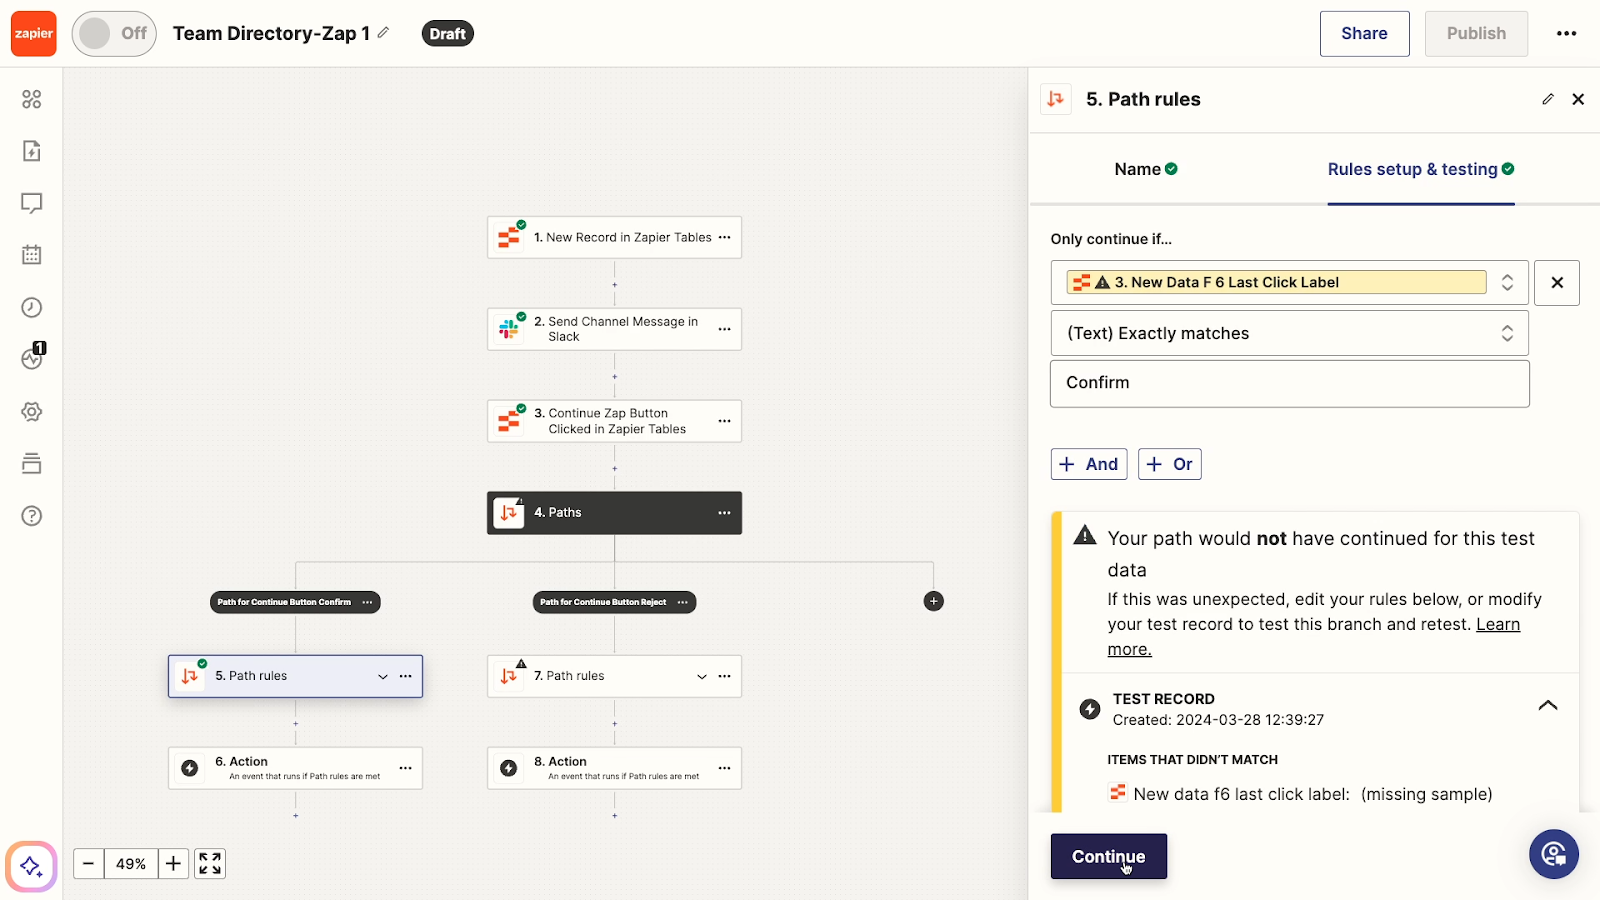
Add any action that you want to run in this path. In our example, we’ll add an action to send another message in Slack alerting the team that the record's details were confirmed.

Test any steps you add to confirm that they work correctly.
Follow the same steps to test the rule for your second path and add any actions you want.
In our example, we’ll add a Slack message that says the record’s details are inaccurate and need to be updated.

Once your Zap is configured the way you want and every step has been successfully tested, publish it.
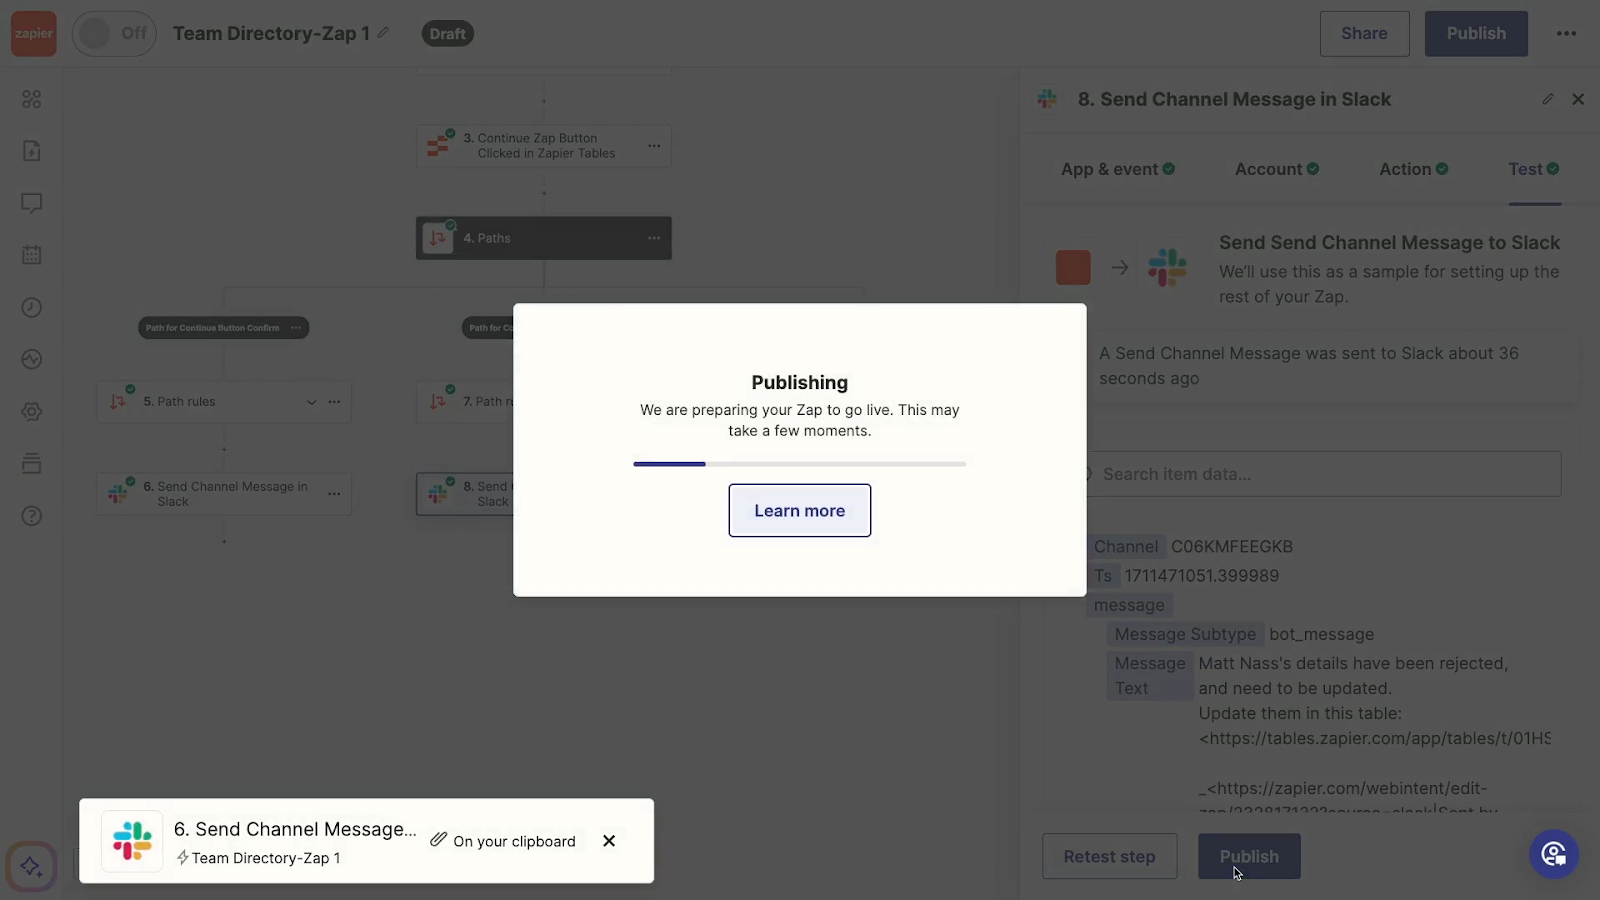
You’ll need to publish your Zap to ensure that it connects with your table.
After publishing the Zap, return to your table.
For every existing record, the button should now say “Send to Zap” instead of “Set up button”
This is because those records were added before the Zap existed, and so the Zap couldn’t process them. This actually gives you a convenient way to test out the flow.
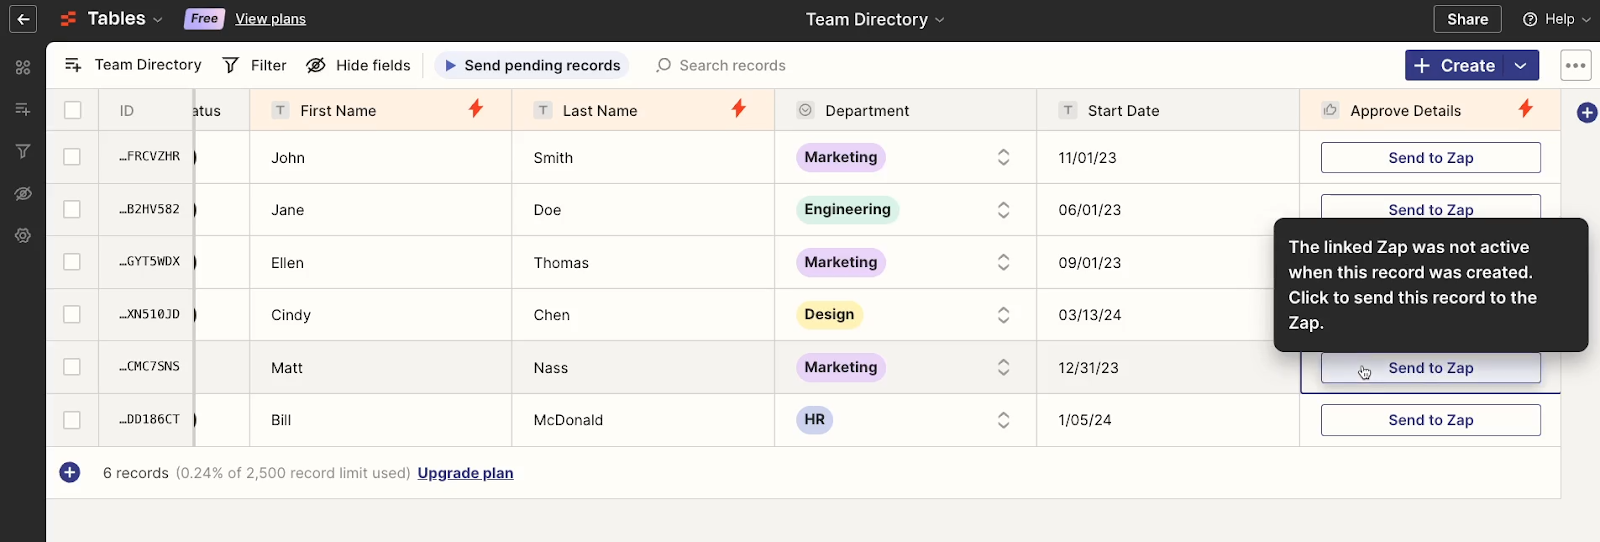
Just click on “Send to Zap” for any of the existing records, and your automation should instantly run all of the steps before the “Continue Zap” pause.
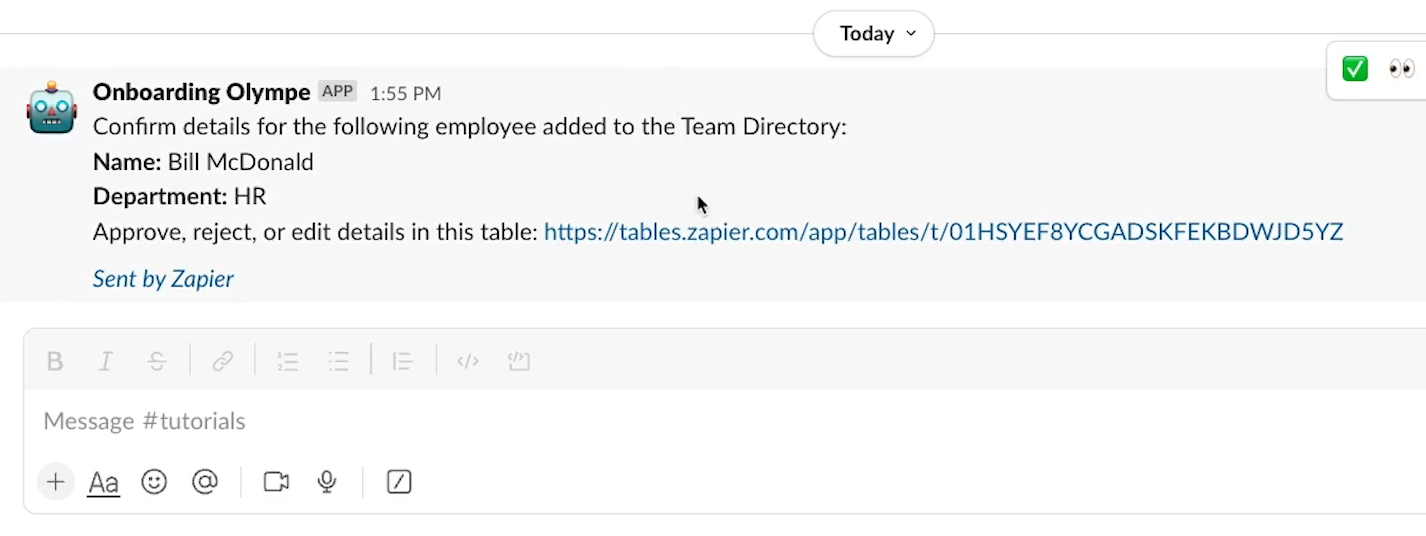
In our case, we instantly get the first Slack message prompting us to approve or deny the record’s details, along with the convenient link.

Note that neither message from the subsequent paths has been sent yet, so our automation paused itself correctly.
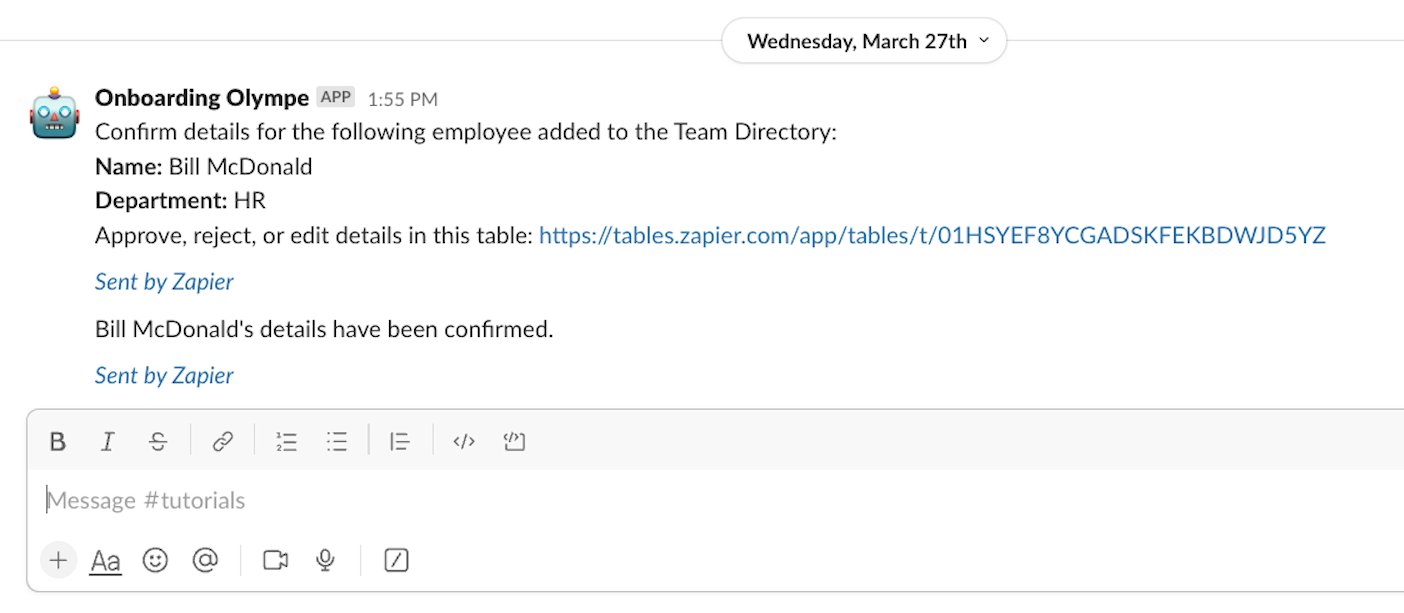
To continue testing the Zap, click on one of the buttons for the record in the Zapier table. For our example, we’ll click “Confirm”.
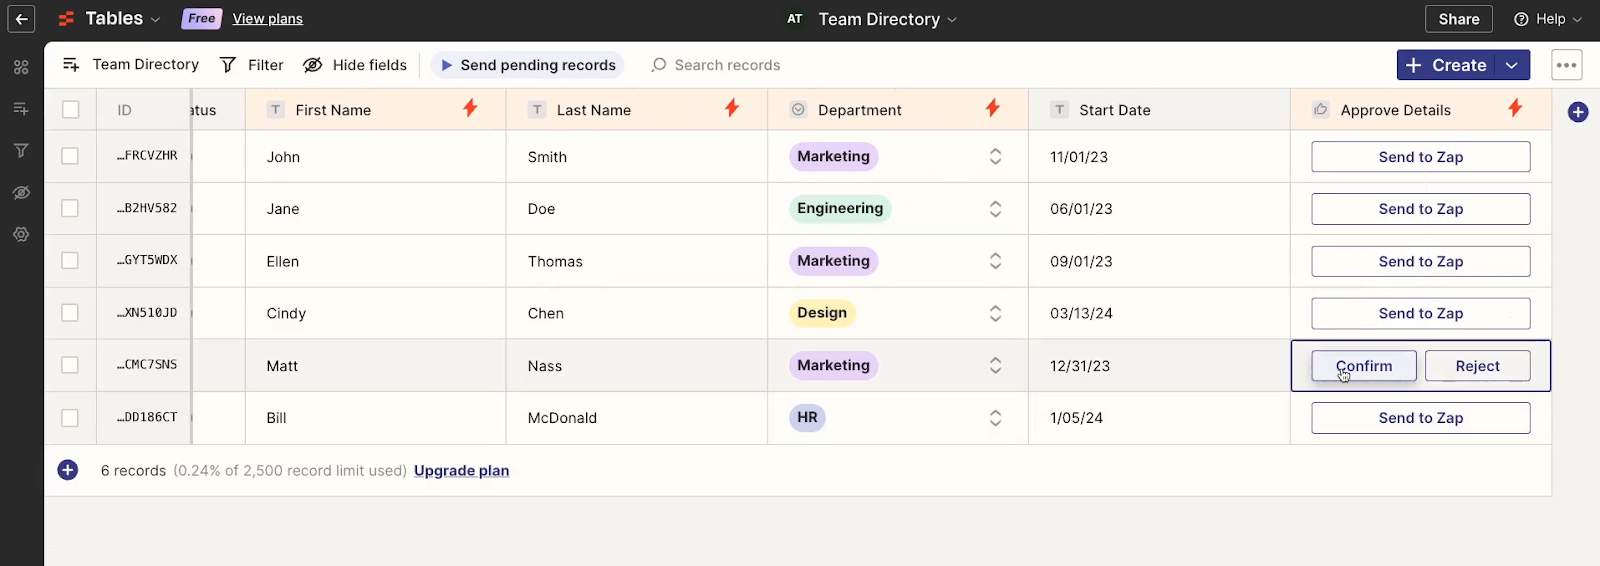
Instantly, we get a new message in Slack, reiterating that the details have been confirmed.
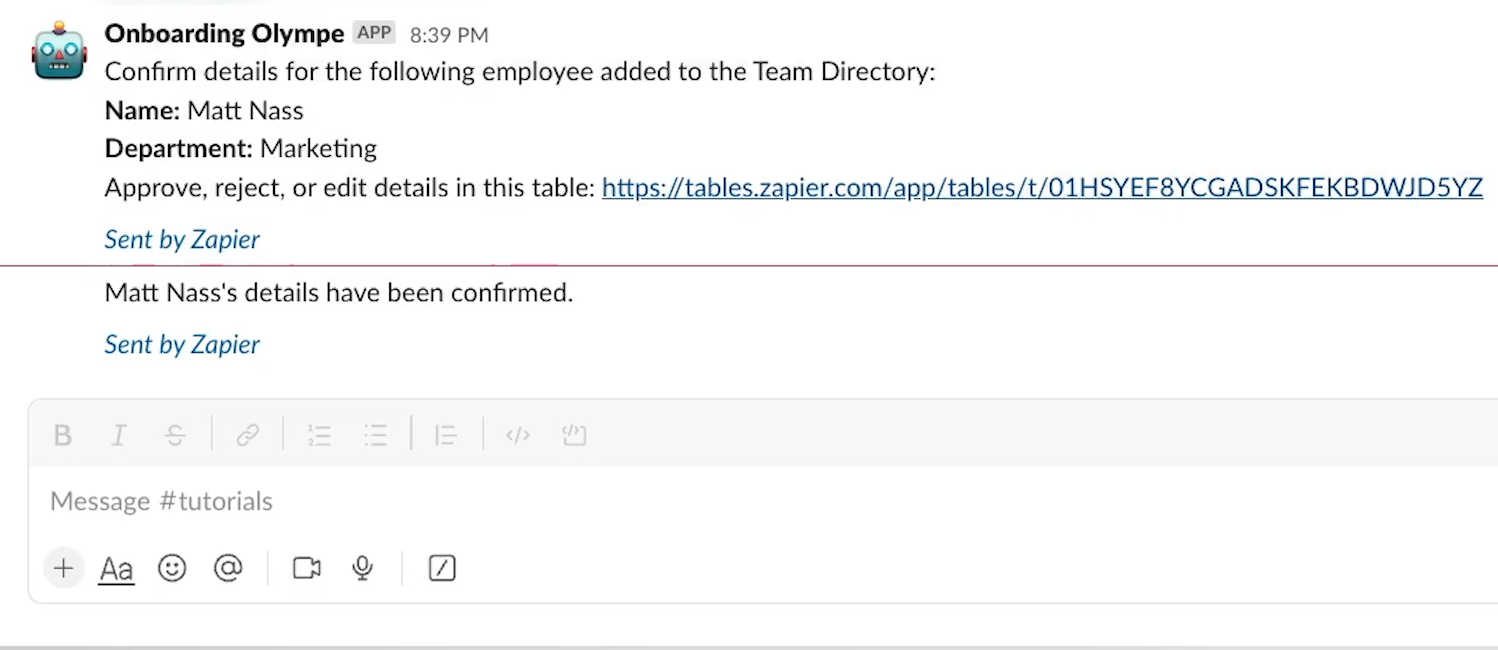
Everything looks good. The Zap ran for the new record, paused to let us make our choice, and continued along the right path after we made our selection.
Before considering an automation complete, we’d always recommend running a live test.
Conducting a live test ensures that your automation runs exactly as expected in real-world conditions, which can always be a little different than tests.
To do a live test, just make sure that the automation is turned on, and submit a new record to your Zapier table through your form interface.
Since we already tested the primary “Confirm” button, we’ll test the secondary “Reject” button this time.
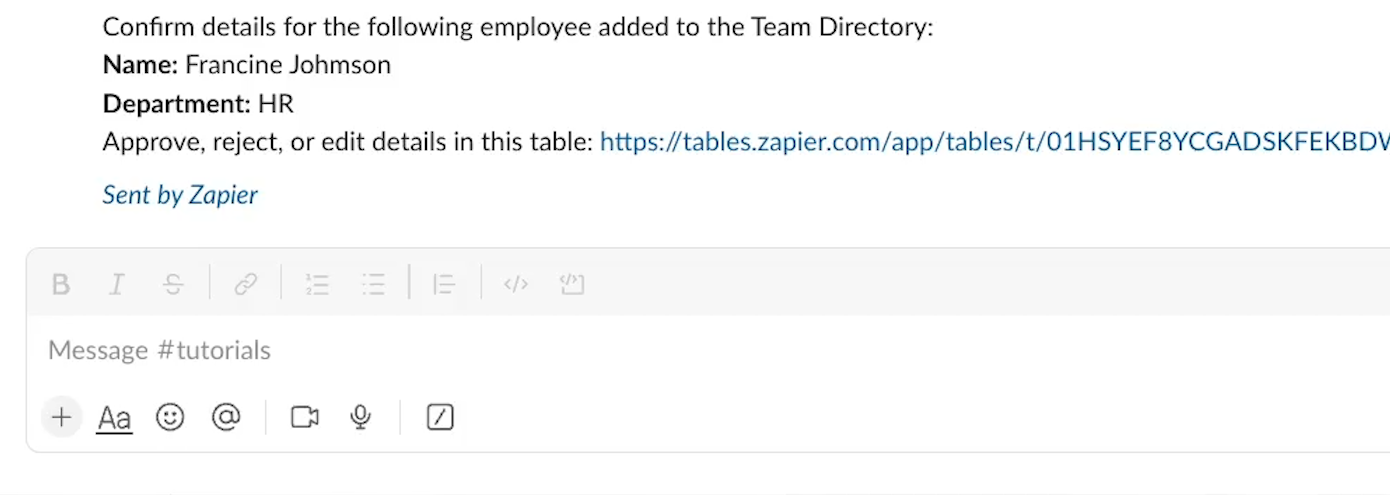
We’ll submit a record with a deliberate mistake (“Francine Johmson”).

Immediately, we get the same Slack message telling us about the new record and prompting us to check it.
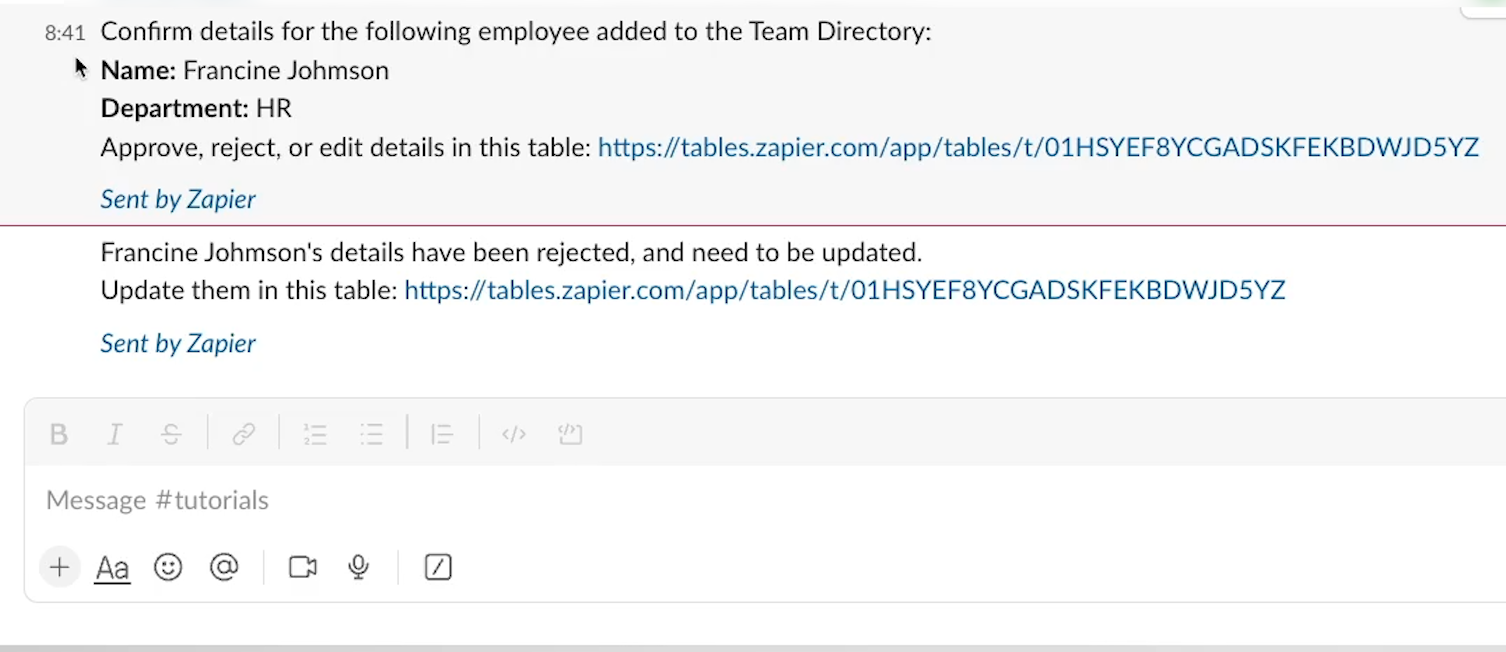
Since there’s a typo in the name, we’ll click “Reject”.

And now the appropriate message pops up in Slack, saying that the record details aren’t correct and need to be updated.
As we’ve designed them, there’s obviously not much difference between these two paths as, but this tutorial is really just about demonstrating the underlying structure, not a full workflow.
With this basic setup, we could add all sorts of actions to the “confirm” path, like creating onboarding tasks in Asana, Sending an email, or whatever else we want.
But once you’ve tested your automation and confirmed that it runs, pauses, and runs again as expected, you’re all set.
Manual approval takes just a few seconds, but it can drastically reduce errors and unintended automation runs. With the new “Continue Zap” button, no-code builders have another easy way to add a human checkpoint to their automations.
For more no-code automation tips and tutorials every week, be sure to check out our blog or our YouTube channel. You can also follow XRAY on Twitter, Facebook, or LinkedIn.


.pptx.png)
.pptx.png)