
Manually preparing graphics in different sizes and formats for every social media platform quickly becomes tedious.
But with Abyssale, you can prepare templates in as many formats as you want, then auto-populate them with text and images from your Airtable records.
In this tutorial, we’ll show you how to get started with this time-saving app step by step.
We’ll demonstrate how to connect Abyssale to Airtable, create some templates, and populate those templates with Airtable data.
To begin, go to Abyssale.com and create a free trial account. The free trial will last for 14 days.
It includes 30 credits for automatically creating graphics with apps like Airtable, Make, or Zapier, and allows for a total of 1 GB of bandwidth.
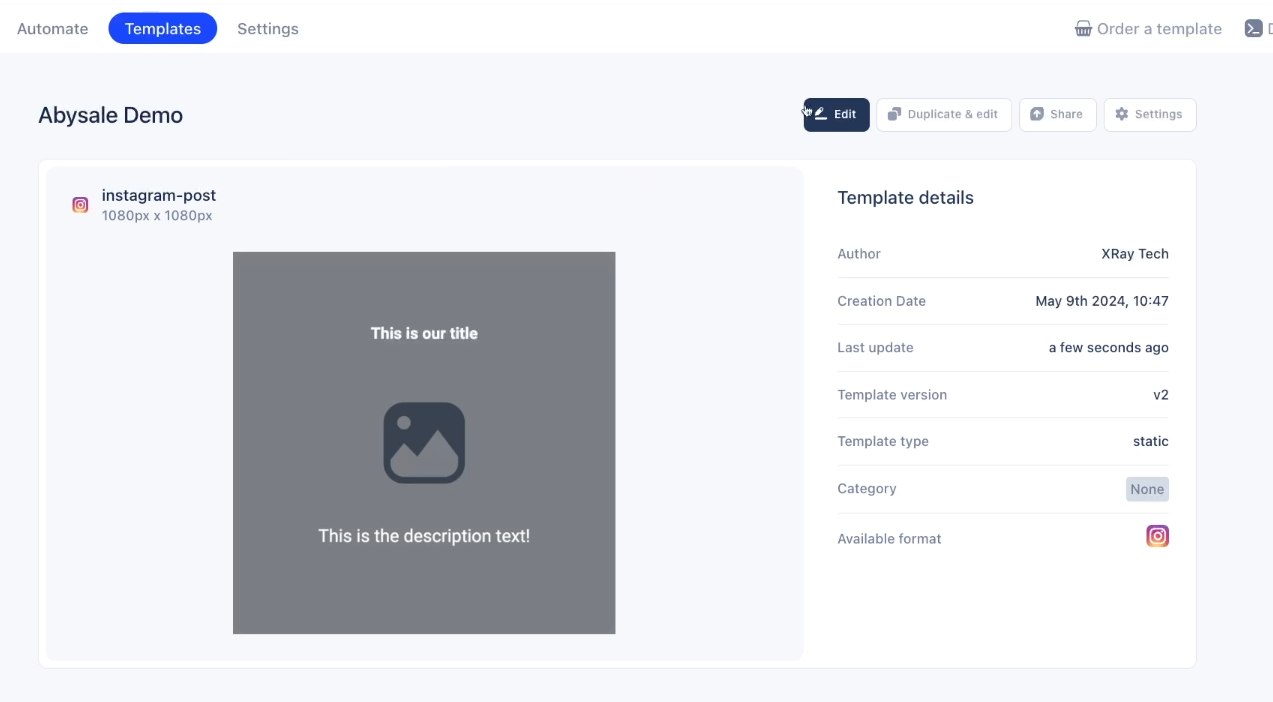
Click on “Templates” to view your library of templates.
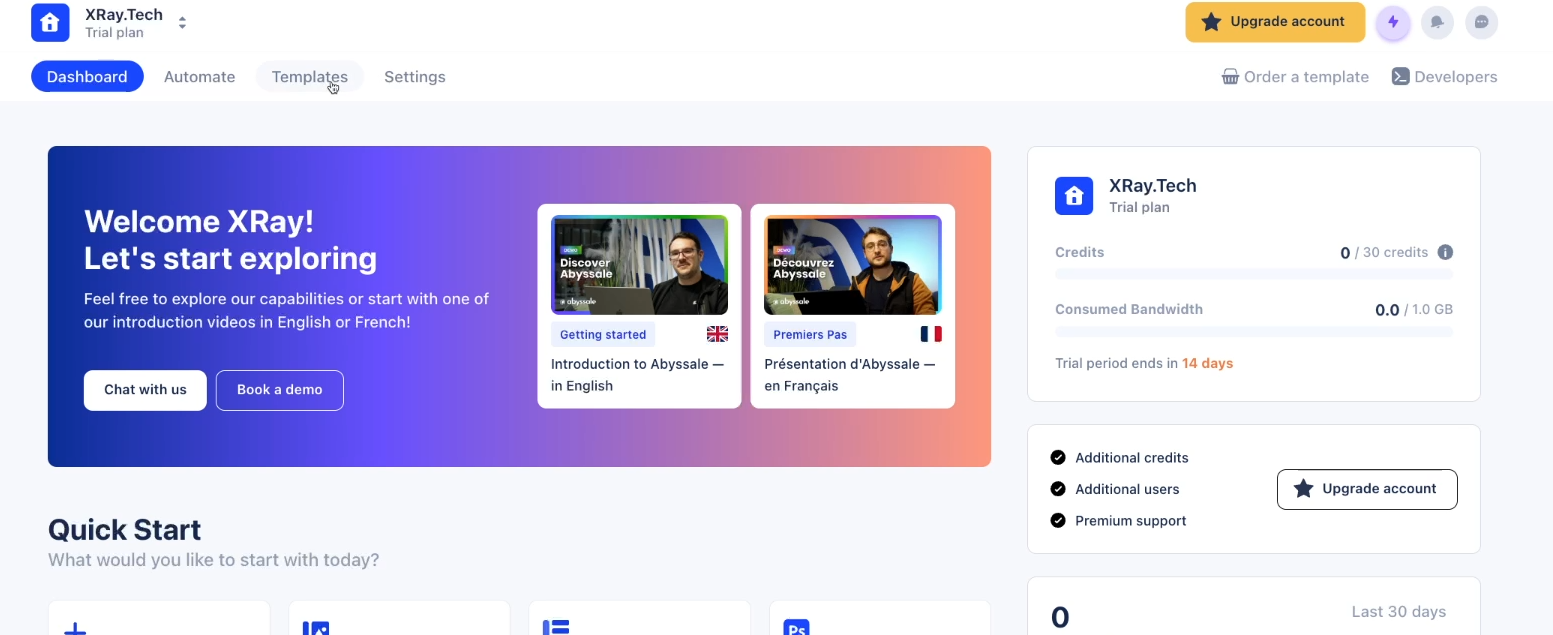
At first, you’ll just see a single Demo Template created by Abyssale. You can explore this demo to learn more about Abyssale, or get some hands-on experience by creating your own template.

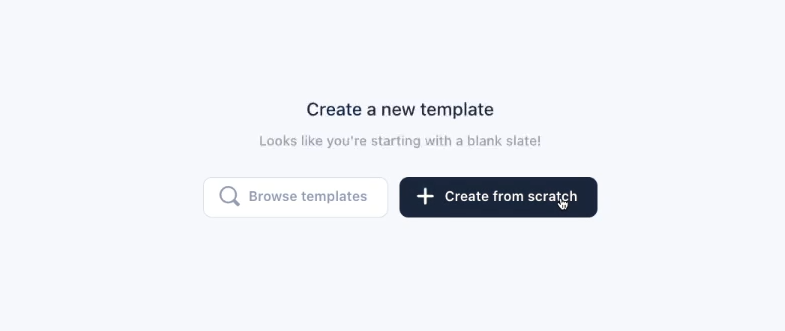
To make your own template, click on “Create new template”.
Then choose whether you want to browse the template library or make your design from scratch. In our example, we’ll build a template from scratch.
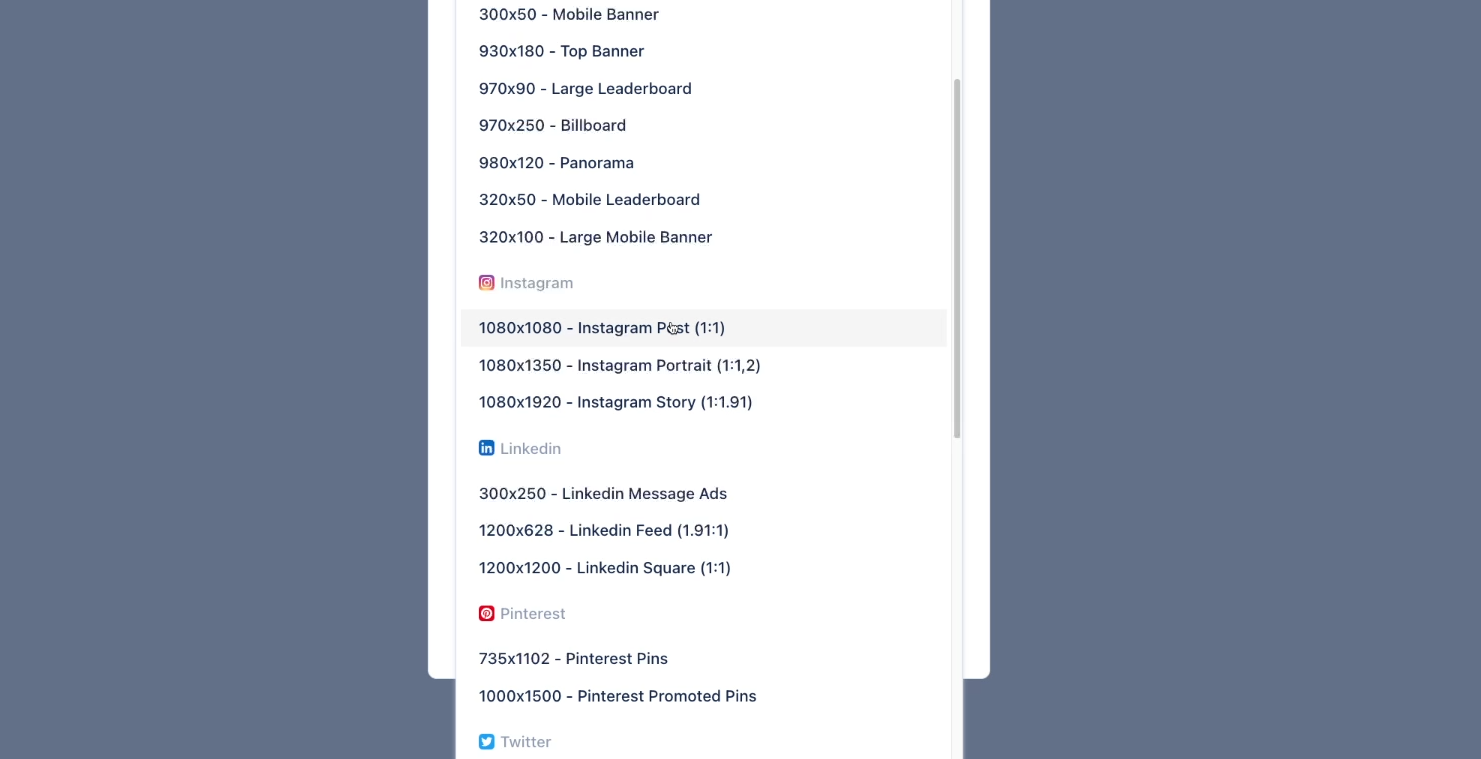
After clicking “Create from scratch”, Abyssale will prompt you to choose a type and format for your template.
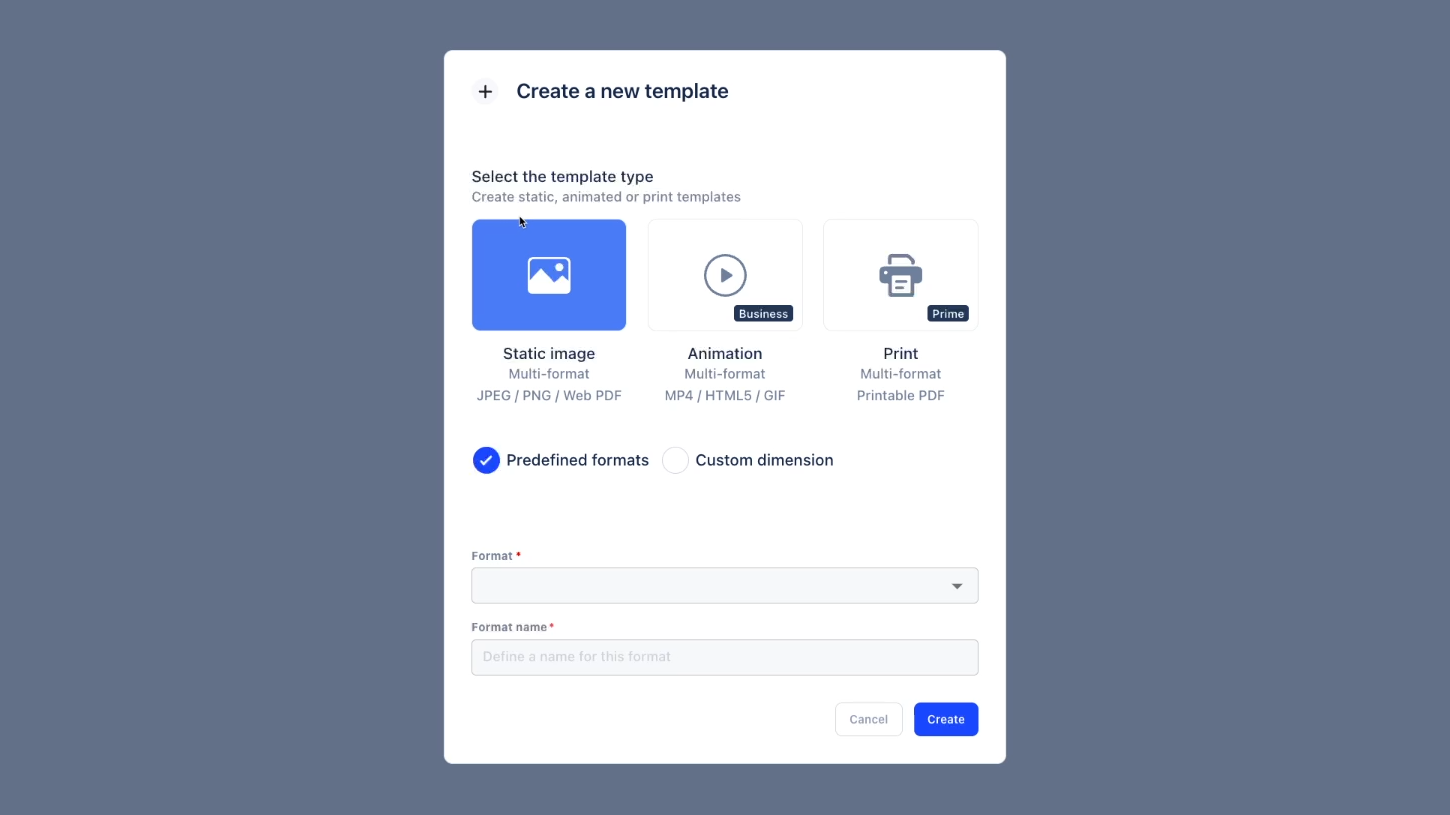
Abysale includes formats for a wide range of social media platforms, print layouts, animation, and more. For our example, we’ll begin with a simple 1080x1080 pixel square ideal for Instagram.
Click “Create” to generate a blank template to start with.
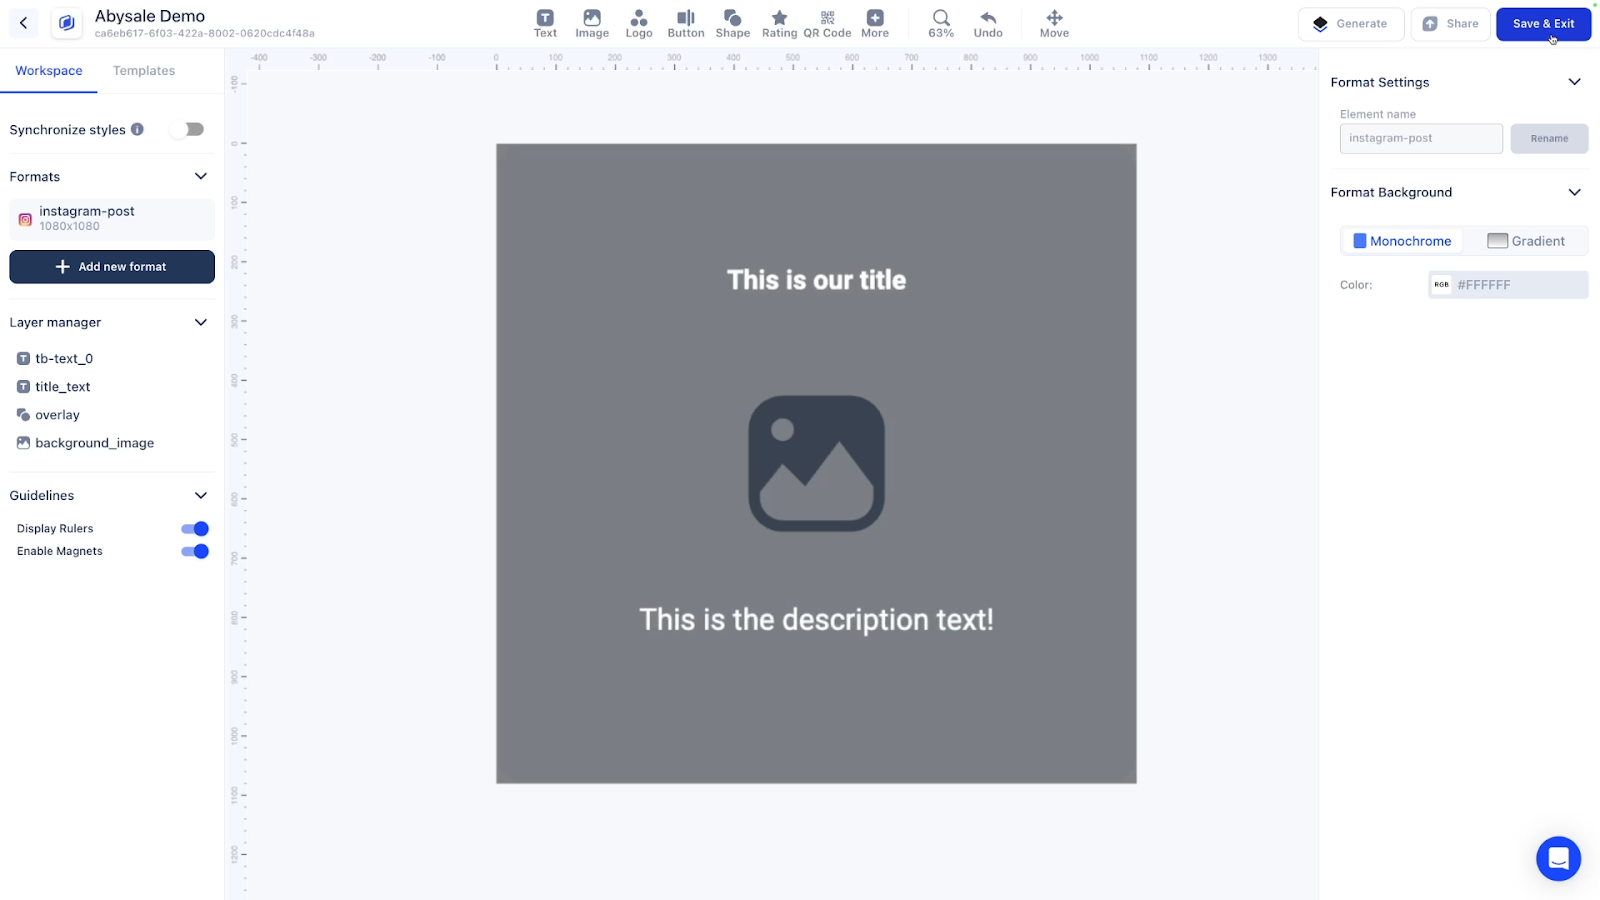
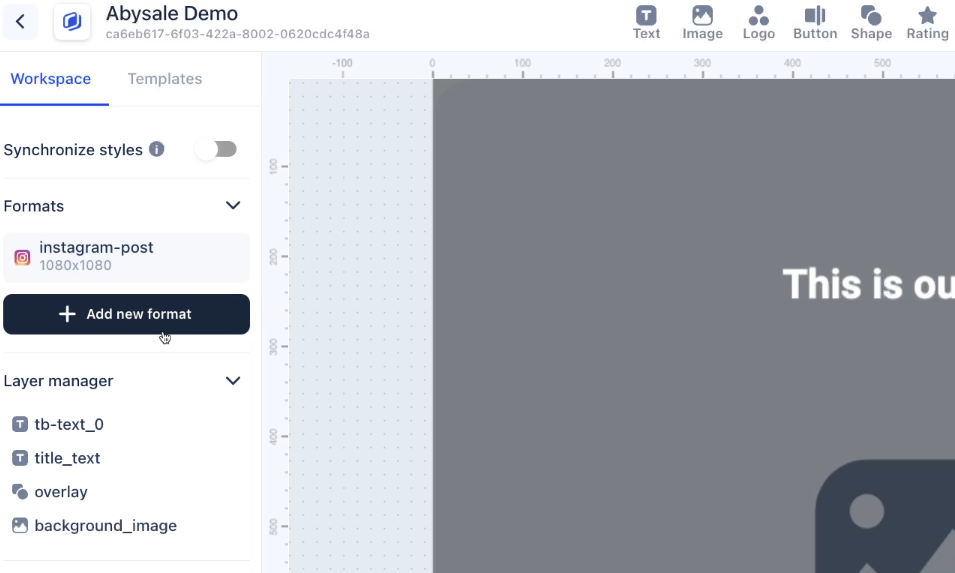
With Abyssale’s intuitive drag-and-drop designer, you can easily create any layout that you want for your graphics.
Use the element menu at the top of the screen to add images, text, shapes, and more to your design.
Note that every element you add to your design can act as a placeholder. When you sync this template with your Airtable base, you can replace the image with one that you’ve uploaded, replace text with custom copy, and even recolor fonts or shapes.

Our example template will consist of four key elements:
• A background image
• A semi-transparent black square over the background image
• Title text
• Description text
You can see how we constructed this template step by step in this blog’s companion video on YouTube.
You can follow along and build a similar template, or try your own design.
Quick tip: to keep an image centered while resizing it in Abyssale, hold Option on Mac or Alt on Windows while you drag with your mouse.
Be sure to give each element a descriptive name! The name is the only way you’ll be able to identify each element when you sync with Airtable, so it’s important to make it clear what each element is.
Once your template is all set, click on “Save & Exit” to commit your changes and return to the main Templates menu.
Each template can include multiple formats. To add more formats to your template click on “Edit” from the main template menu.
Then, click on “Add New Format” in the left hand sidebar.
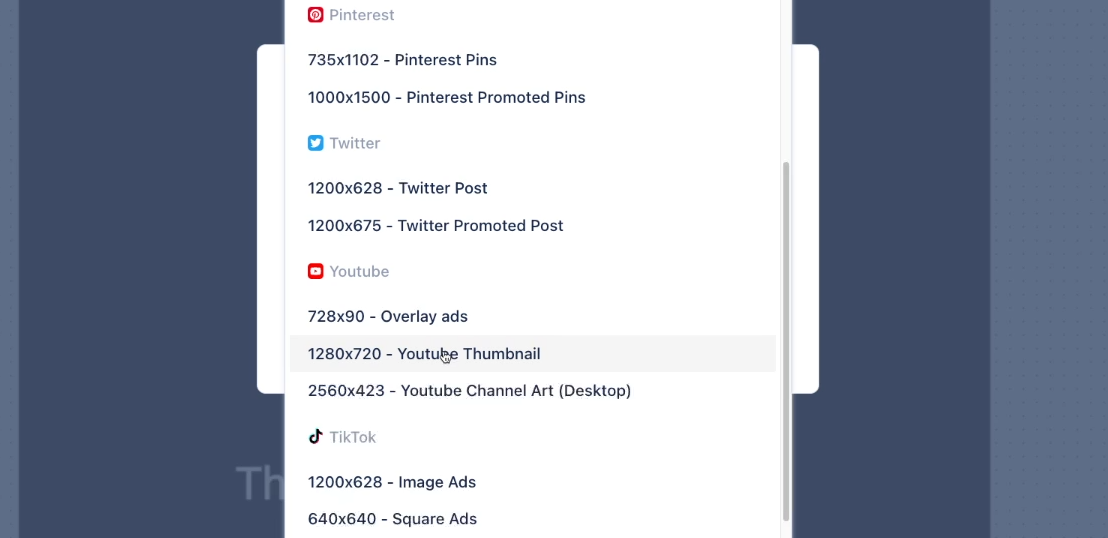
Each format within a template will have to be the same type (Static Image, Animation, or Print), but you can use a wide variety of formats within each type.
For instance, we’ll select a 1280x720 YouTube thumbnail for our second format within this template.
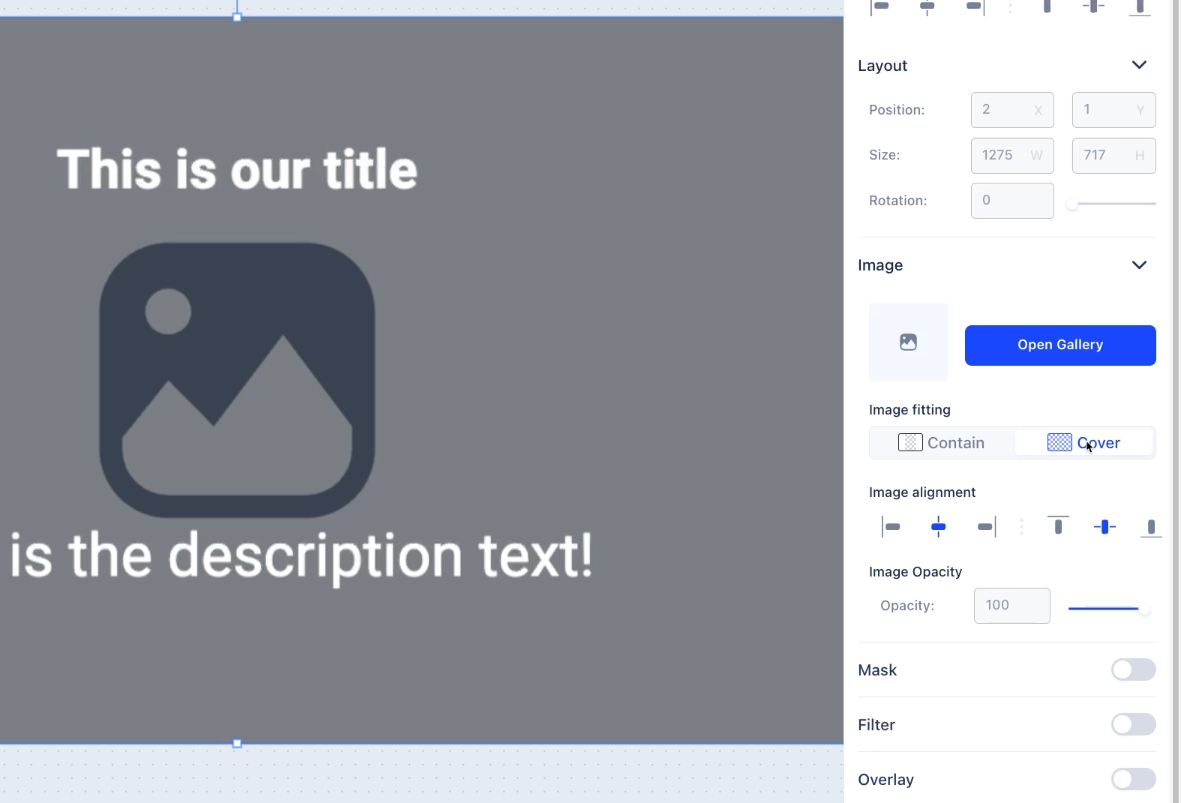
Any formats you add to your template will include all of the same elements as your original format. As you can see below, the background image, overlay, and text boxes are all still present in our new YouTube thumbnail design.
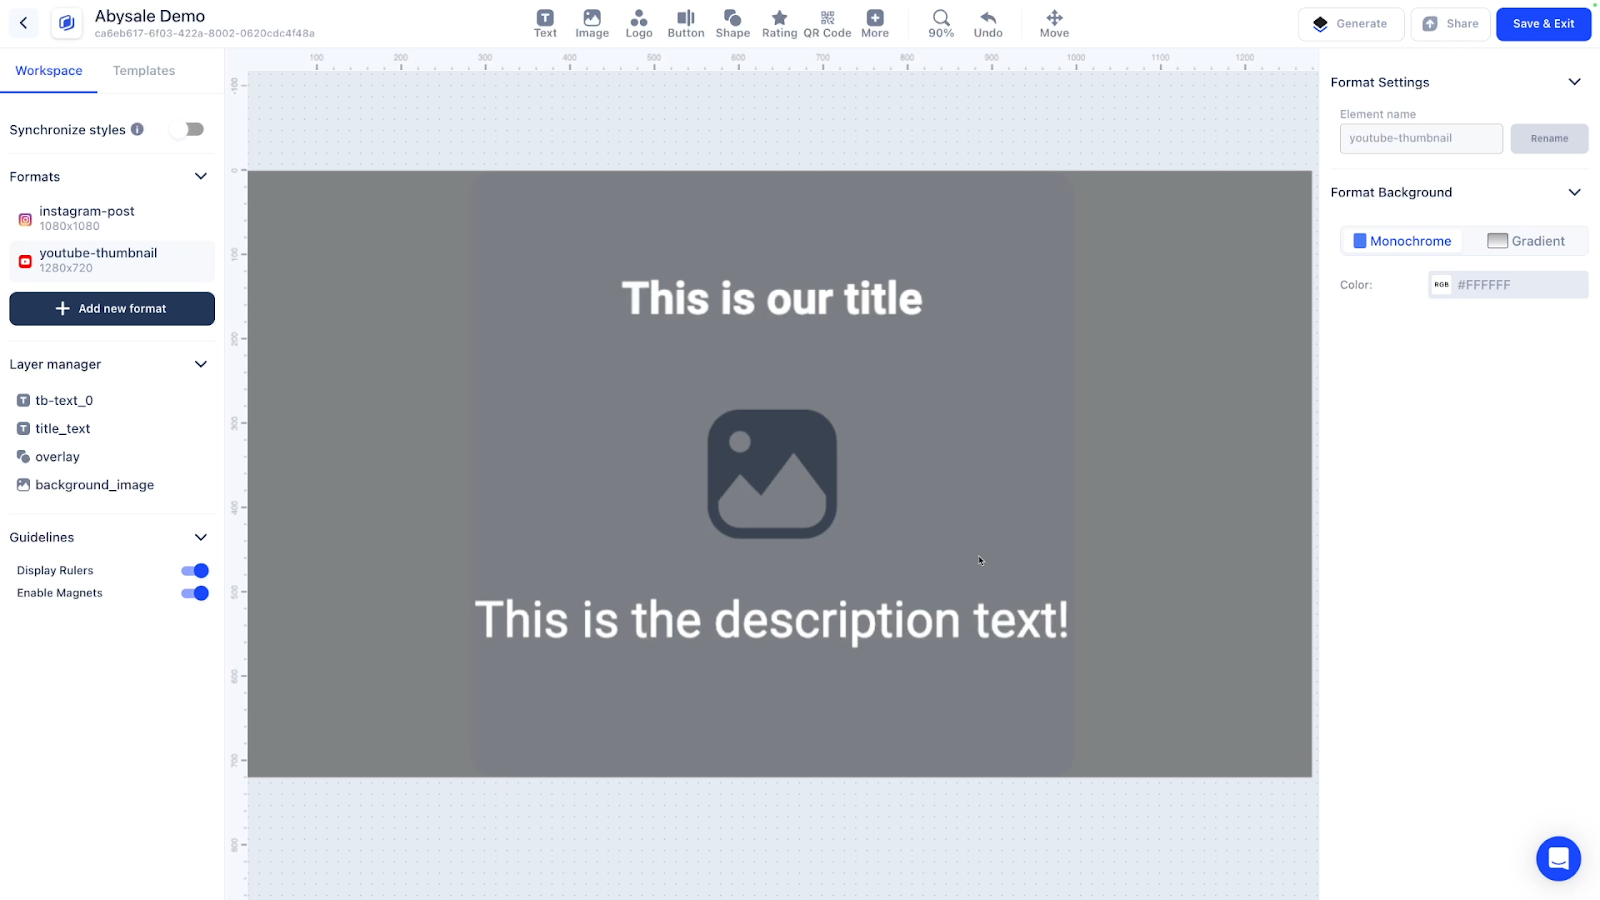
When you customize most settings in one format, the other formats won’t be impacted. For instance, we can change the background image in the YouTube format to “Cover” instead of “Contain” so that it takes up the entire canvas.
However some settings, such as element names, are applied to all formats universally.
Once your additional formats are finished, click on “Save & Exit” again to return to the template menu.
With a finished template in hand, you’re now ready to create an Airtable base that will populate your Abyssale template automatically.
To begin, go to Airtable.com and create a free account.
NOTE: While Airtable offers a free plan, you’ll need to be on the “Team” plan or higher to access Extensions, which are necessary for syncing with Abyssale as shown in this tutorial. Airtable does provide a free trial for Teams.
You can learn more about using Airtable in XRAY’s 2-part beginner’s guide. Click here to check out Part 1, and click here to explore Part 2.
Once you’re signed, create a new base, which will automatically include a new table.
In your table, you need to add a field for each element that you want to replace in your template. For our example, we’ll need a field for each text box, and a field for the background image.
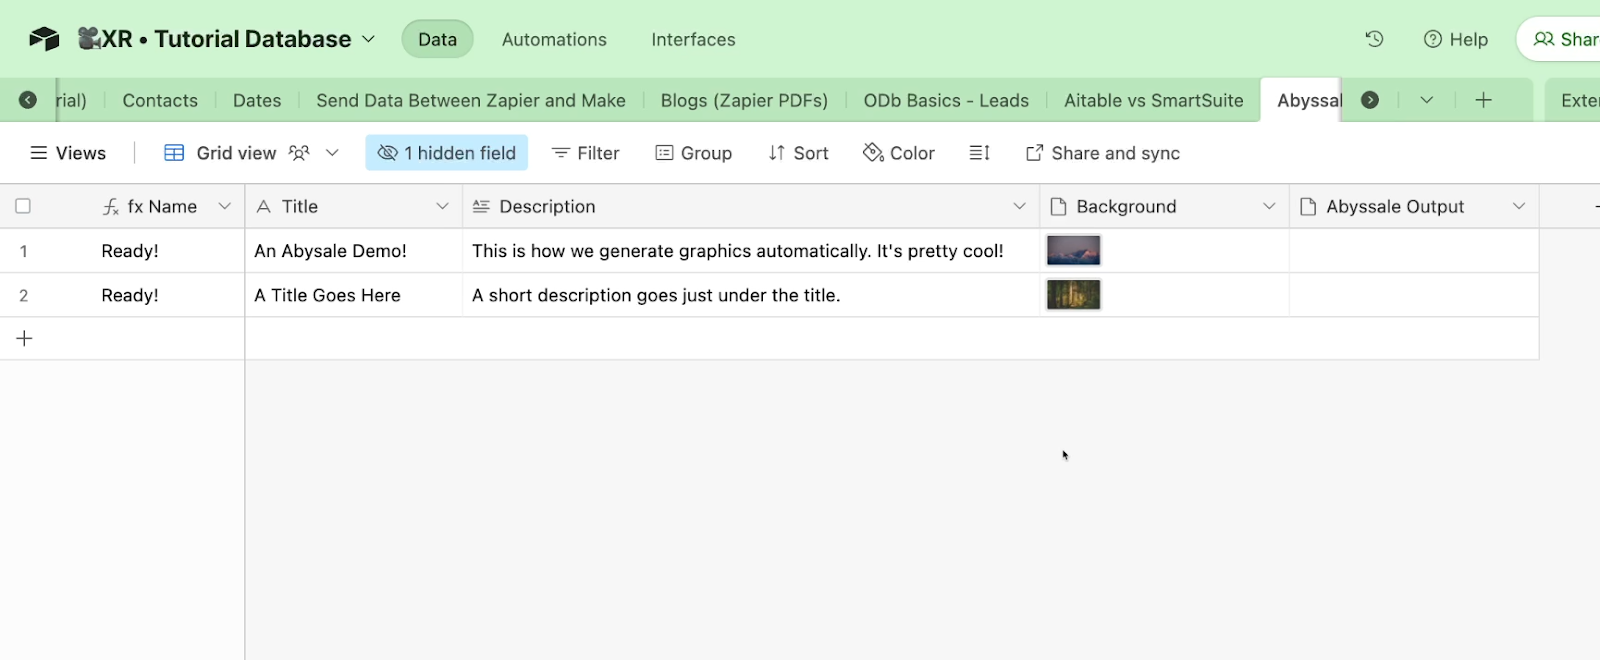
Be sure to use the “Attachment” field type to upload images or other media.

Finally, you need to add another attachment field for Abyssale’s output. This is where final, exported graphics will be stored.
Be sure to add at least one test record to your base that you can use to create a graphic.
Once your table’s fields are all set, you can add the Abyssale extension.
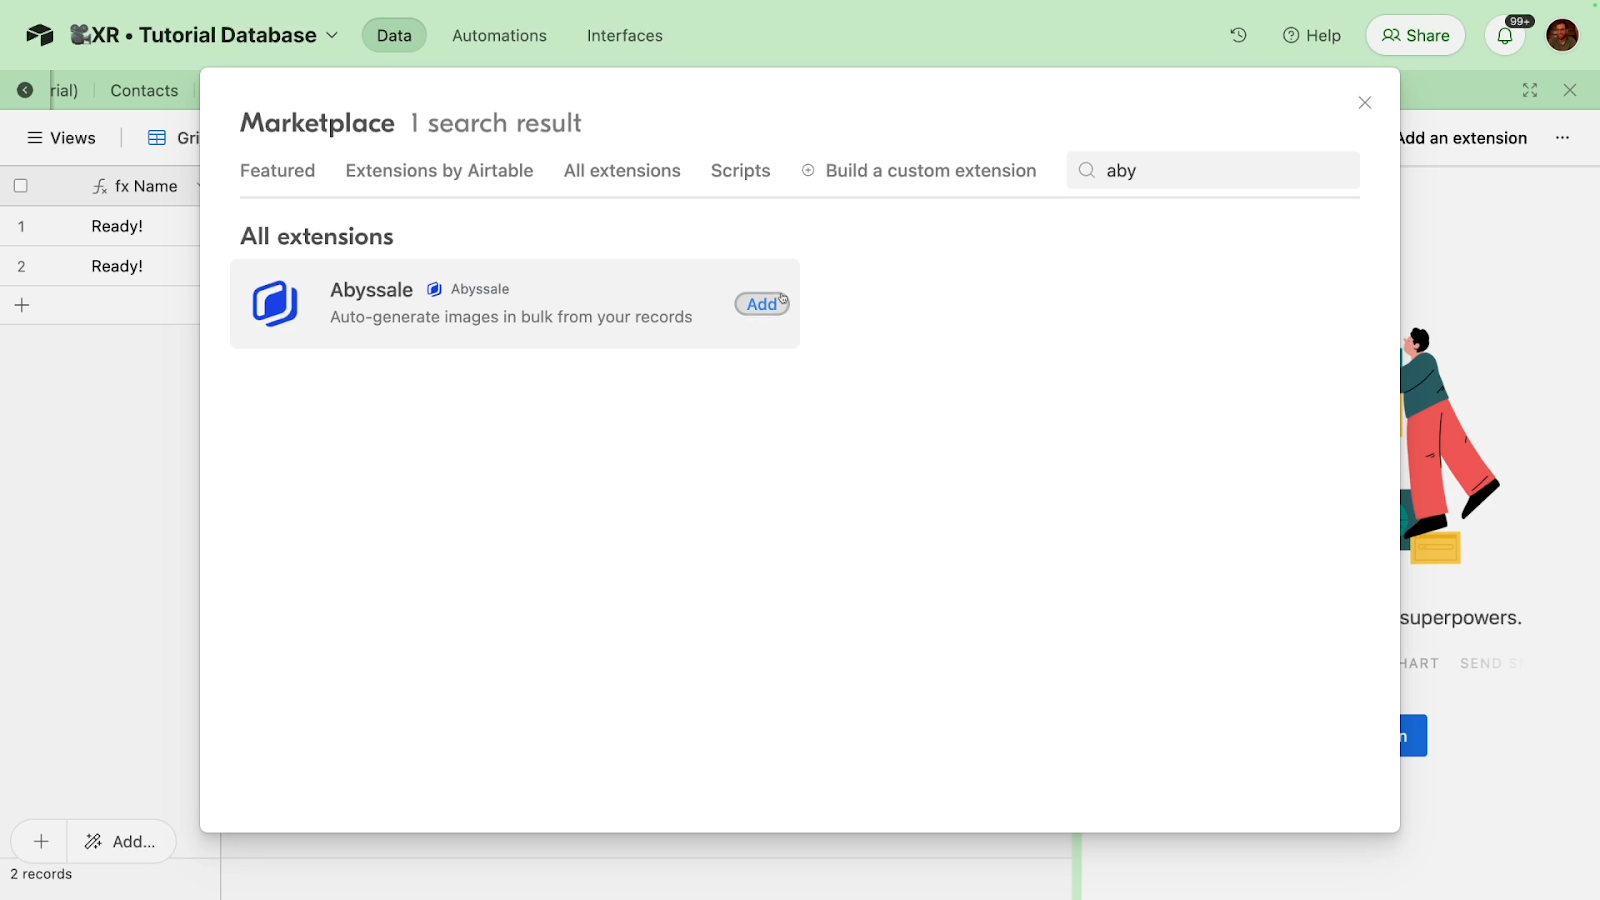
Click on “Extensions” in the top right corner to access Airtable’s extension menu.

Then, select “Add an extension”.
Search for Abyssale, then add the extension to your base.
Once the extension is added, you’ll see a pop-up prompting you to set it up. Click on “Get Started” to begin the setup.

Follow the steps in this pop-up to connect your account and generate an API key.
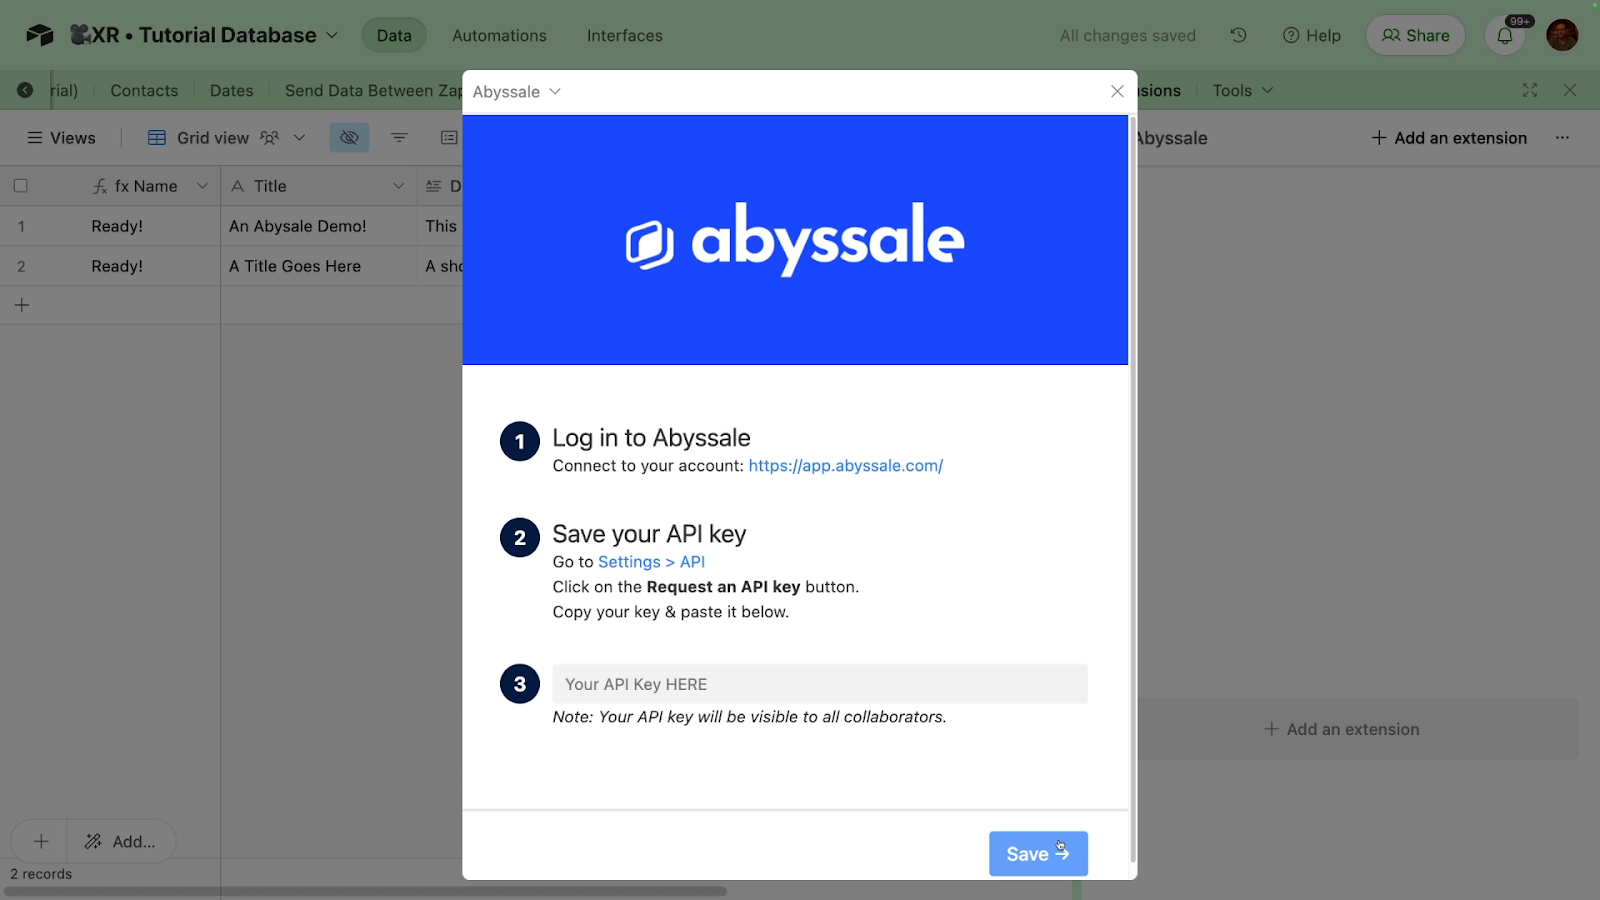
You can create an API key by clicking on “Settings”, choosing “API key”, and selecting “Request an API key”.
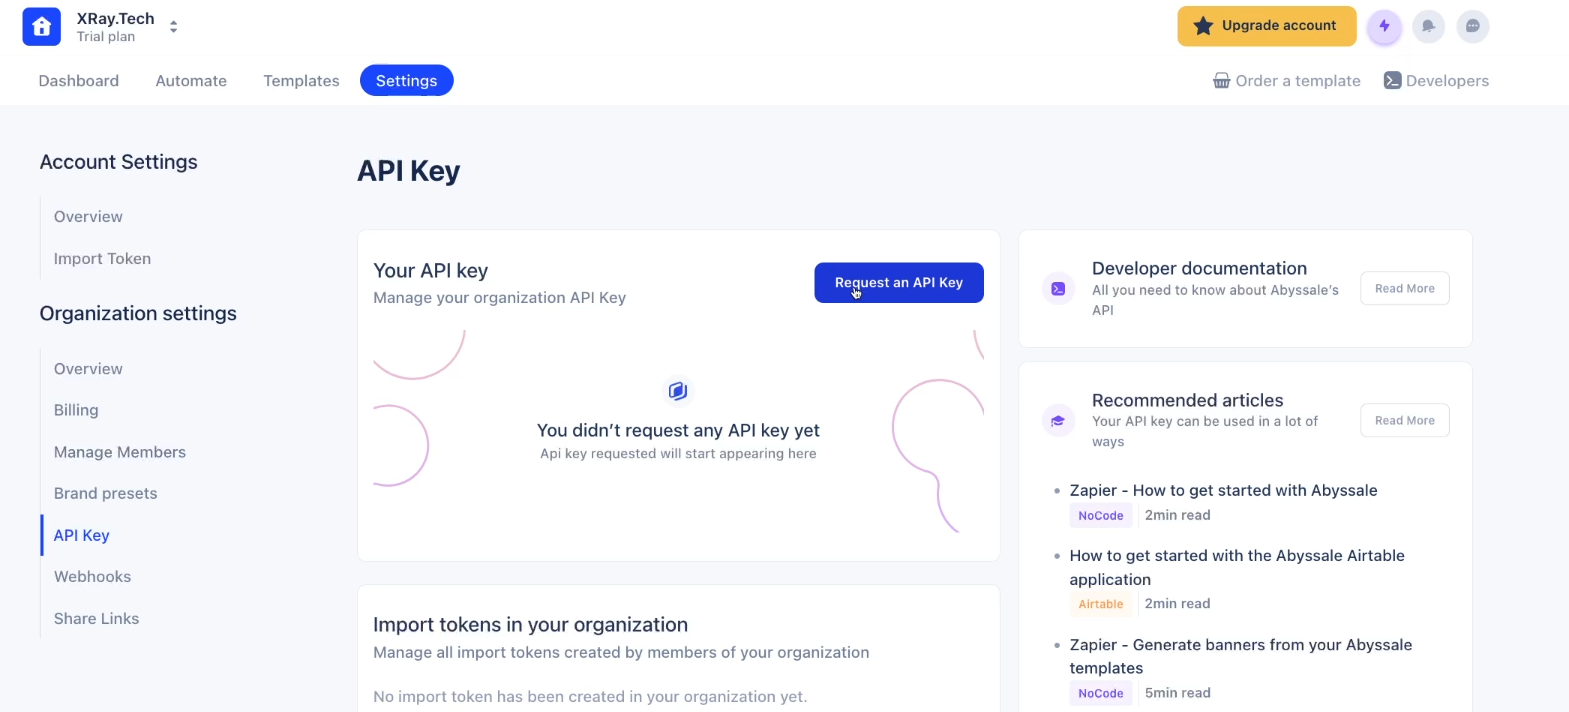
Copy the key that gets generated, and paste it into the pop-up window in Airtable.
Then, click on Save to finish linking your Airtable and Abyssale accounts.
Now that the accounts are connected, you can sync a specific table with a specific template.
In the Abyssale extension in Airtable, choose a table that you want to use. Select the specific view within your table that should be referenced.
Then, choose a matching template from Abyssale that you want to populate with this Airtable data.

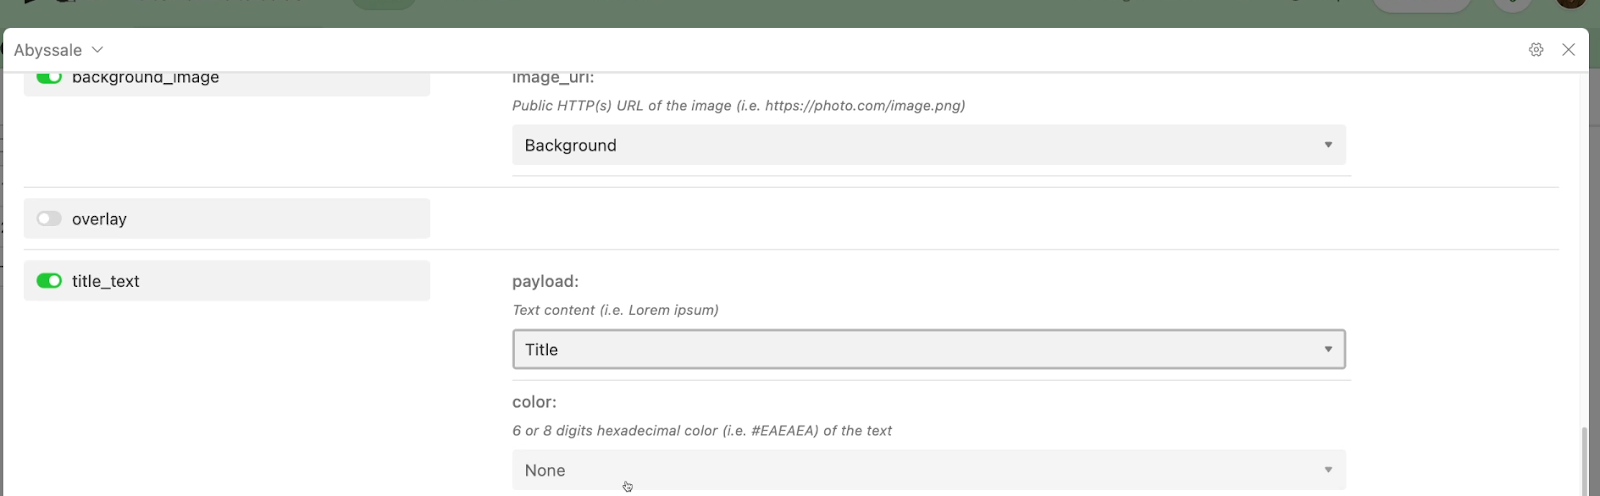
Once you select a table and template, you’ll see a list of every element (or “Layer”) from your Abyssale template.
Enable the toggle next to any layer that you want to replace with content from Airtable, then choose the Airtable field that you want to connect to that layer as the “payload”. You can also change the color of any text layer by providing a hex code in the “color” field. Alternatively, you can keep the color set in the Abyssale template by leaving this field set to “None”.
Once you’ve mapped all of your fields, you can designate a field for Abyssale’s output. You can make this choice in the “Save banners to this URL field or attachment field”. As the text indicates, you’ll need to choose either an attachment field or a URL field to store Abyssale’s output.

Once you’ve configured the sync, you can click on “Generate Banners” to create some graphics.
Before it starts creating graphics, the extension will tell you how many assets will be created, and will explain that only successful calls will count against your total credits.
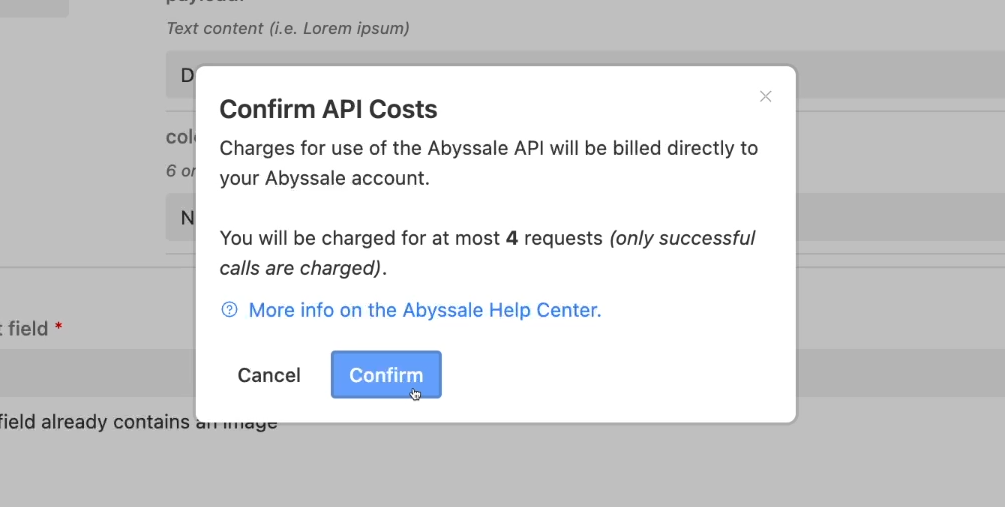
Click “confirm” to start generating your graphics.
Abyssale will process your requests, and then show you a preview of each finished graphic.
To see the full resolution images generated by Abyssale, close the extension window, and open the records in your Airtable base.

By clicking on “Generate” once, we produced four images - a YouTube thumbnail and an Instagram image for both records in our base.

Bear in mind that the template we’ve demonstrated here is just a basic starting point. You can go further and build very useful automations with your templates.
For example, we’ve worked with a company to build an Abyssale system for their Etsy store where user-uploaded images for blankets and signs are automatically assembled into print-ready graphics.
With tools like Abyssale, you don’t need to waste your time resizing images and text boxes manually over and over again.
You can generate all the assets you need for every platform and device with a single click. To get started, just try out Airtable and Abyssale for free, and follow the steps in this guide.
If you’d like to learn more about workflow automation, be sure to check out our blog or our YouTube channel. You can also follow XRAY on Twitter, Facebook, or LinkedIn.

.pptx.png)
.pptx.png)
