
Testing your no-code automations is an essential part of the building process. With most no-code platforms, you’ll need to build your automations around test data from the very start, and you always need to confirm that your automations work correctly before sharing them with your team or your clients.
In this post, we’ll explain why testing is so important, and we’ll show you how to test your automations in no-code platforms Zapier and Make.
Testing your automations isn’t just a best practice. To put it simply, testing is not optional in automation apps like Zapier and Make. You need to use test data to even build the automations in the first place.
For instance, if you want your automation to run every time you add the ‘URGENT’ tag to an email, then you must have a message in your inbox with the ‘URGENT’ tag.
When you test the trigger, Zapier or Make should find that email and return a long list of relevant data which you can then use to build the rest of the automation.
If your trigger step finds nothing when you test it, then that’s a sign that something wasn’t configured correctly.
Without test data from your trigger, you will have a very difficult time building your automation. In many cases, it won’t even be possible at all, since you won’t be able to reference the data that you want to manipulate in your automations.
Much like traditional software, no-code automations need to be thoroughly tested before they’re ready to use for everyone. The last thing you want is for your critical automated workflow to perform hundreds of inaccurate actions before you catch the problem.
Unlike software development, testing your no-code automations is just as simple and intuitive as building the automations themselves. Apps like Zapier and Make both make it easy to test your automations, and we’ll show you to use both step by step.
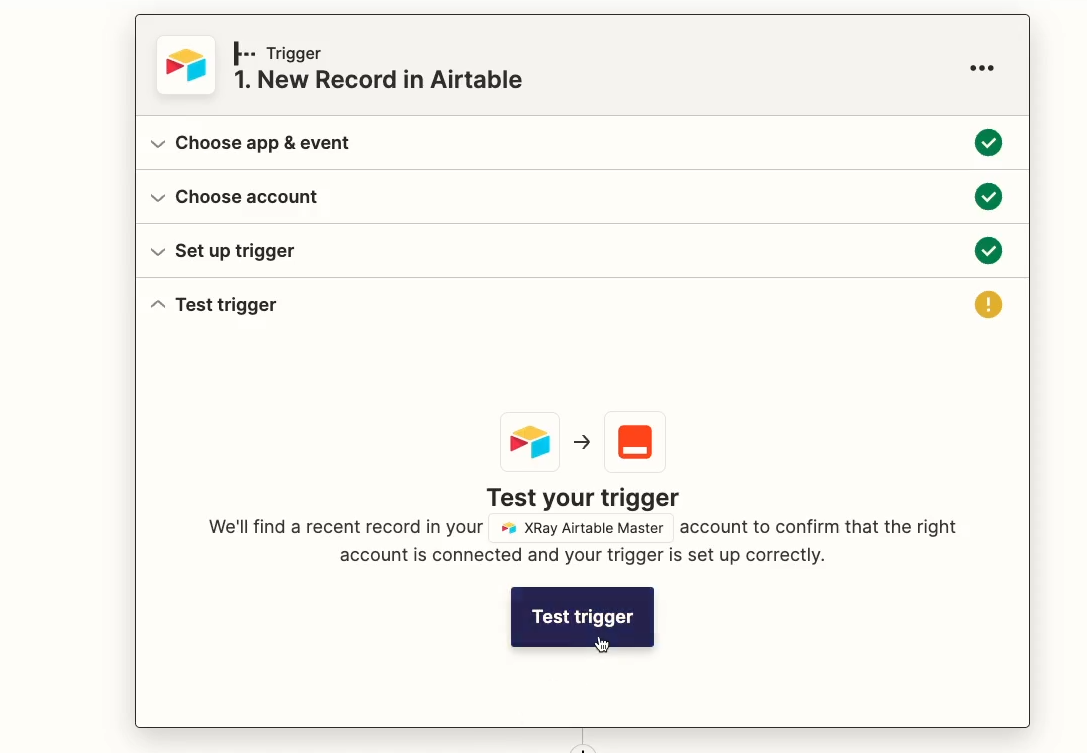
In Zapier, you’ll be prompted to test every step that you build with a clearly labeled button, but it looks a little bit different based on whether you’re testing the trigger or the actions.
Once you’ve configured your trigger for the first time, you’ll see a button that says “Test trigger”. Just click on it to grab your first round of test data.
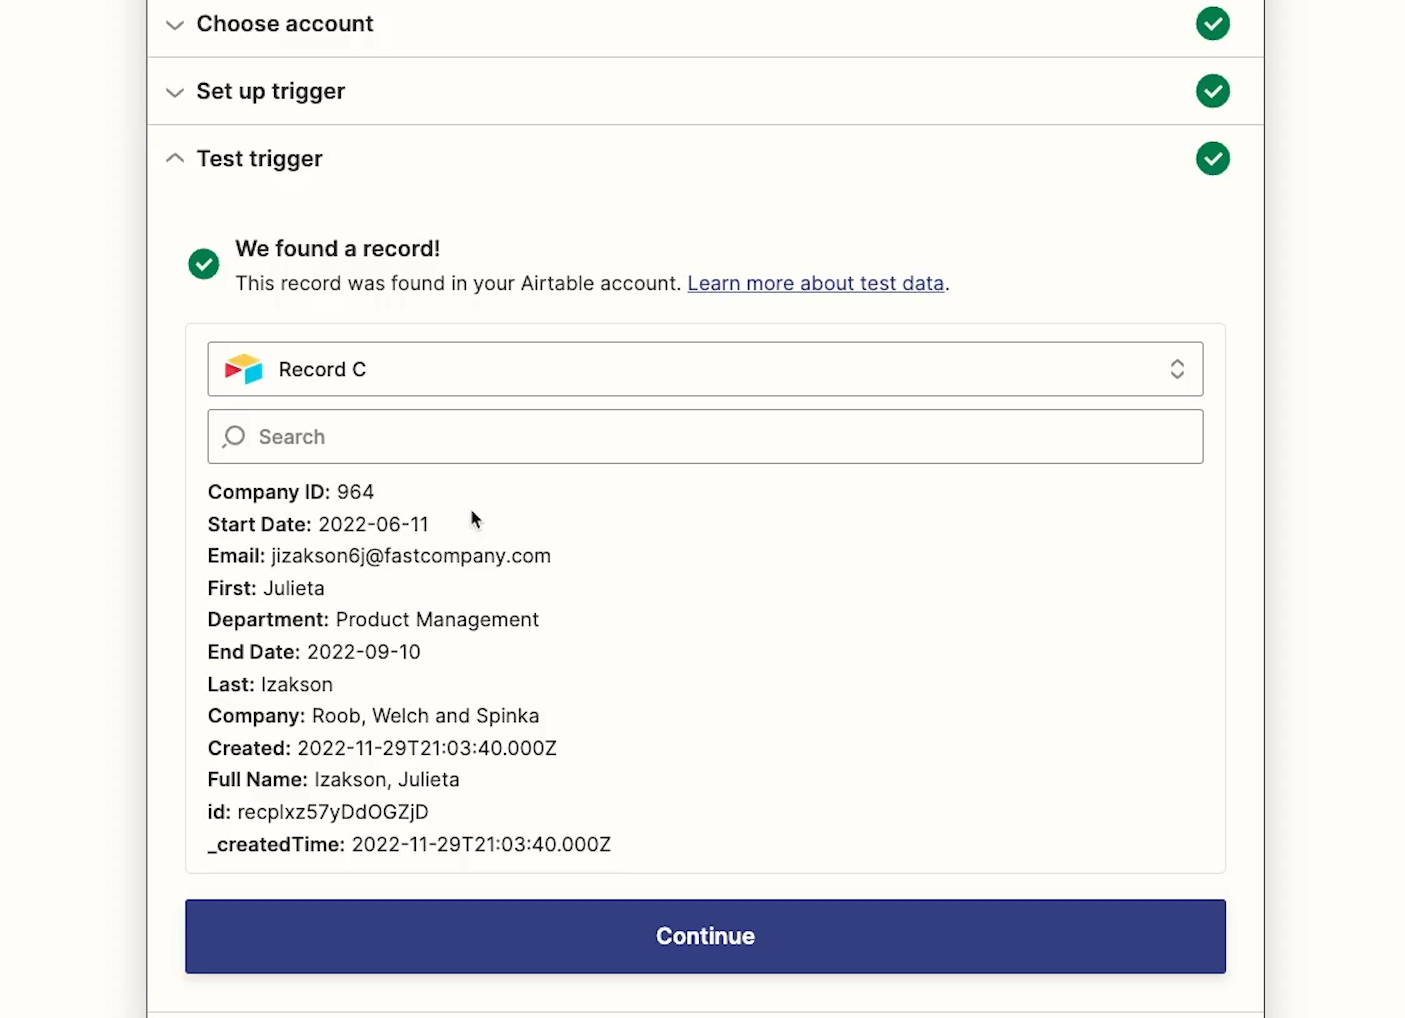
You can then see the information that Zapier found. In our example, we’re looking at an Airtable record that was added to our specified base and table.
If your trigger step found several pieces of data, you can just click on the dropdown that says “Record A” (or B, C, etc.) to choose a different one.
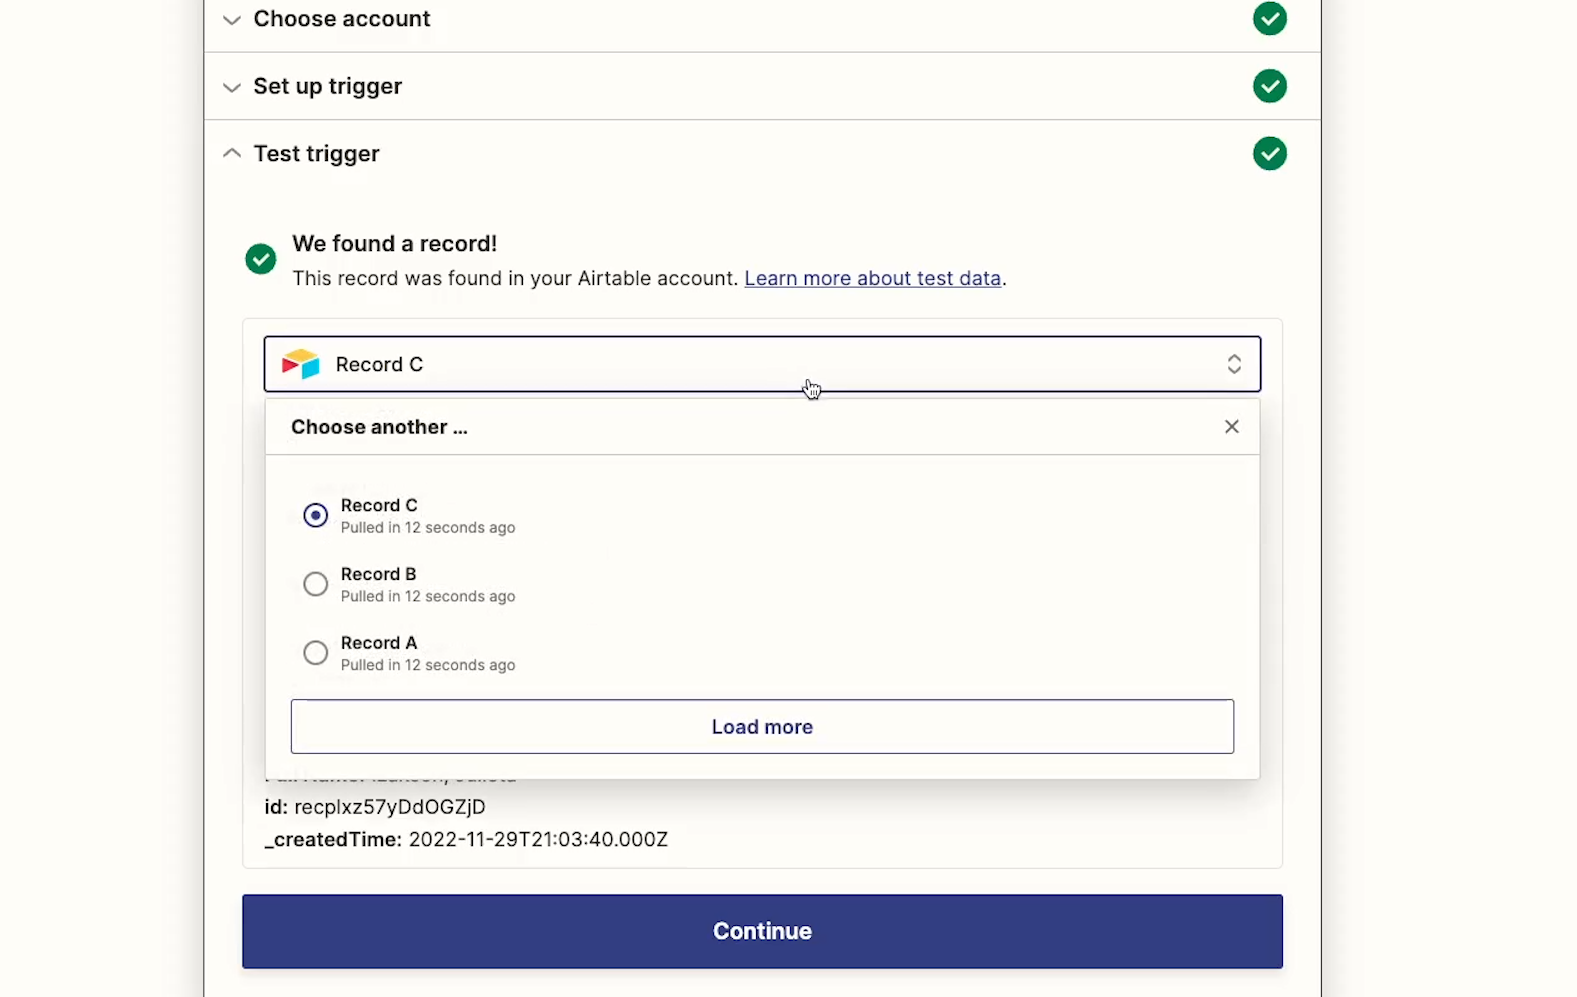
In that same menu, you can also click on “load more” if you don’t see a record that you think should have been found, or if you’ve created new data to test with since the last time you ran a test in Zapier.
Once you’ve reviewed the test data and confirmed that everything looks right, you can click on ‘Continue’ to add an action to your automation.
In our example, we’ll create a simple step that sends a brief message in Slack with the name of the new contact in our directory.
Once your Zapier action is configured, click on “Continue”, and you’ll see a button that says “Test Action”.
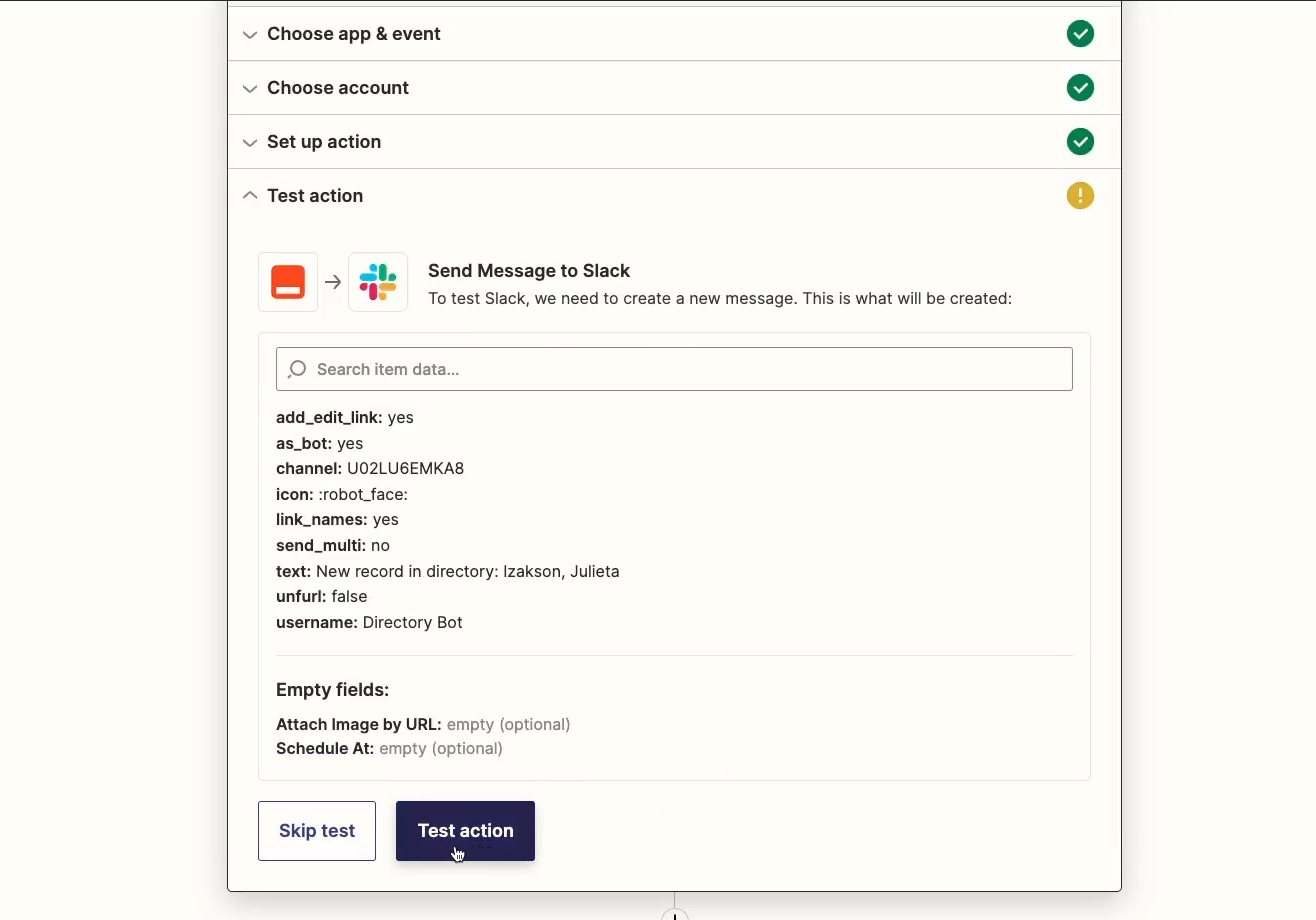
Before you click on that button, bear in mind that testing a step in Zapier will actually perform that action, and it will do so immediately.
In our case, clicking on “Test Action” would send a Slack message to the designated channel right away.
When you’re testing your automations, always make sure that your test data is safe to use. You probably don’t want to send a bunch of test messages to clients, leads, or other contacts.
If you need some fake data just to test with, we’d recommend checking out Mockaroo. It’s a great free resource for creating a CSV or XLS file with any data type you want - names, fake company names, dates, even numbers formatted like IP addresses.
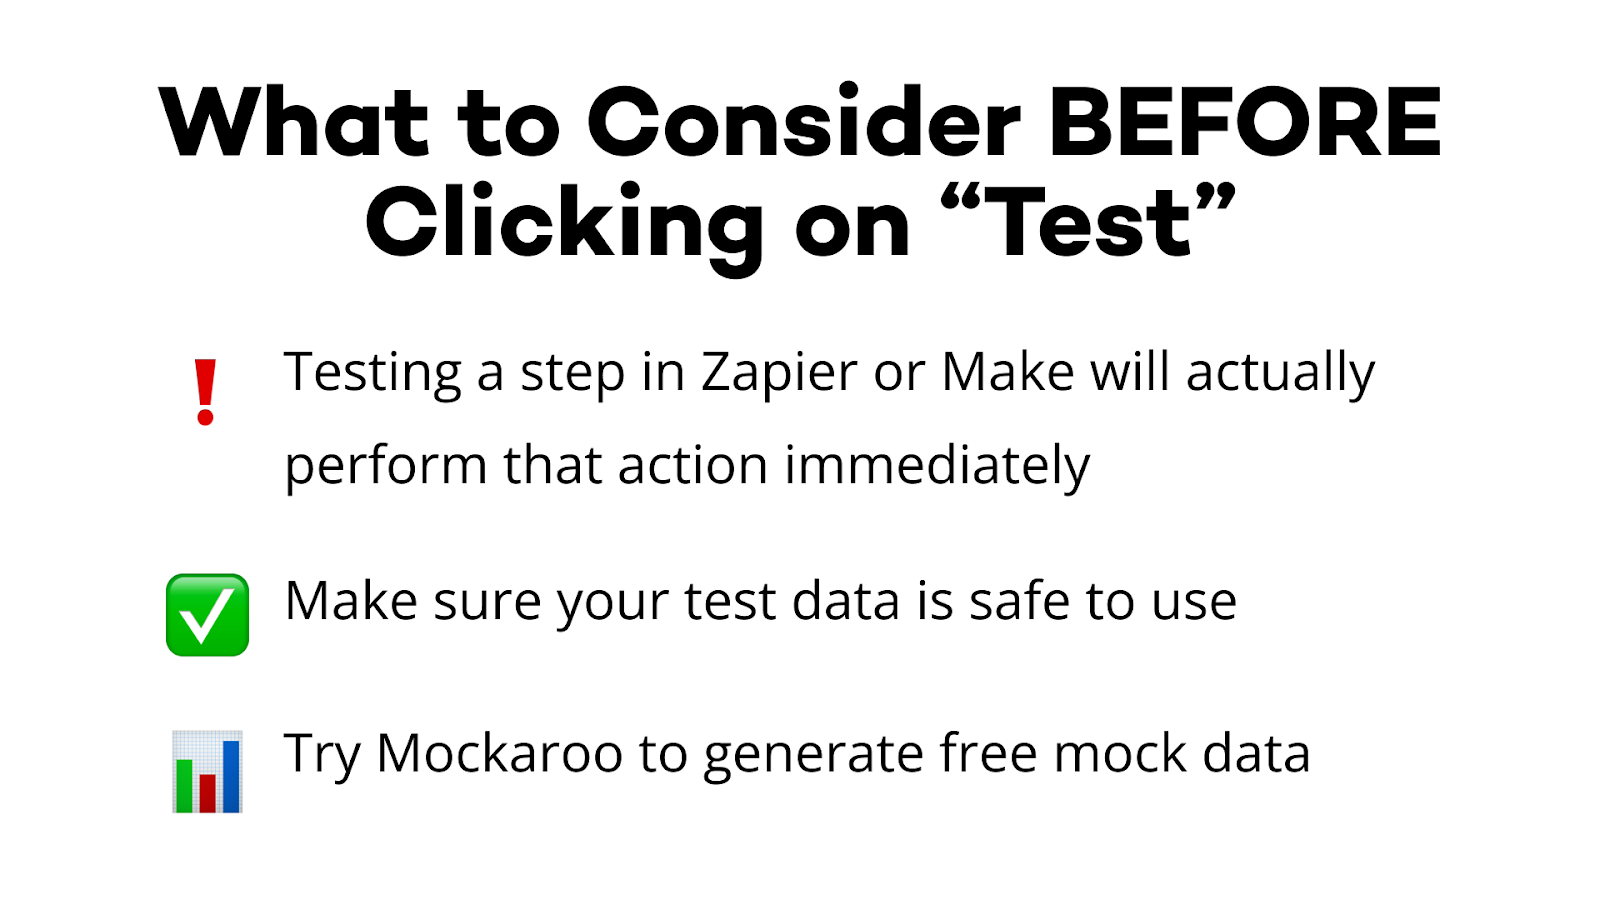
Alternatively, you can also just alert your client or your team that you’ll be testing the automation, and that they may see some messages or alert pop up that they can disregard.
Once you’re all set to test, just click the button and your configured action should happen immediately. In our example, we see the Slack message pop up shortly after clicking on the “Test” button.
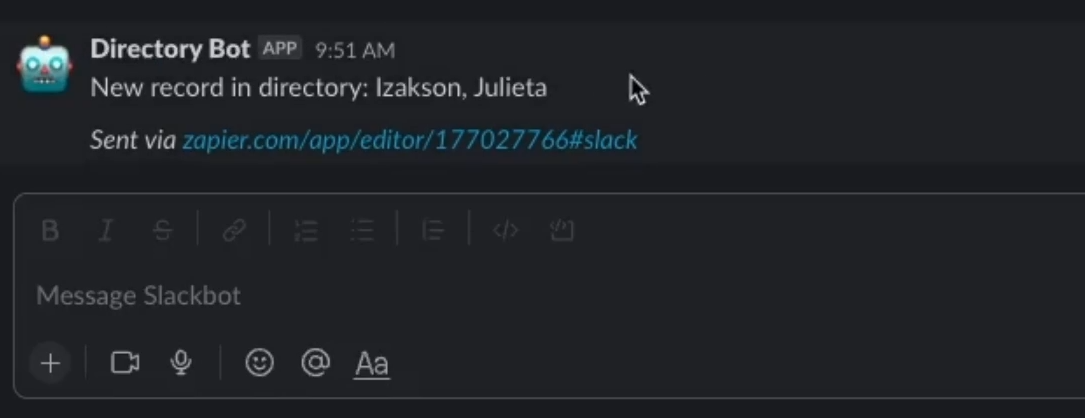
We can also see additional data about the message that was sent in Zapier.
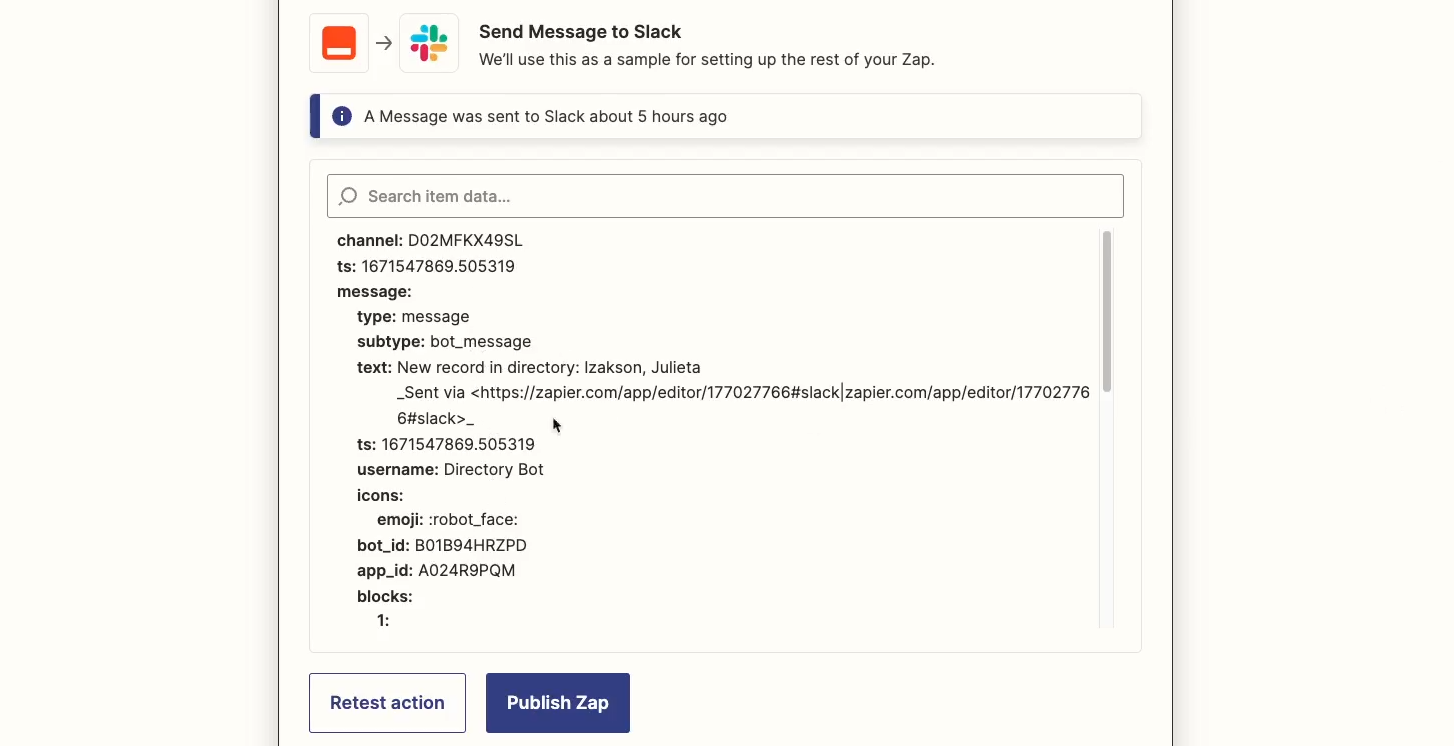
If your automation is configured how you want it after testing, you can click on “Publish” to turn it on.
Now let’s take a look at testing an automated scenario in Make.
Testing an automation in Make is a little different, as Make gives you the option to test the entire scenario at once. But first, let’s just start with testing the trigger.
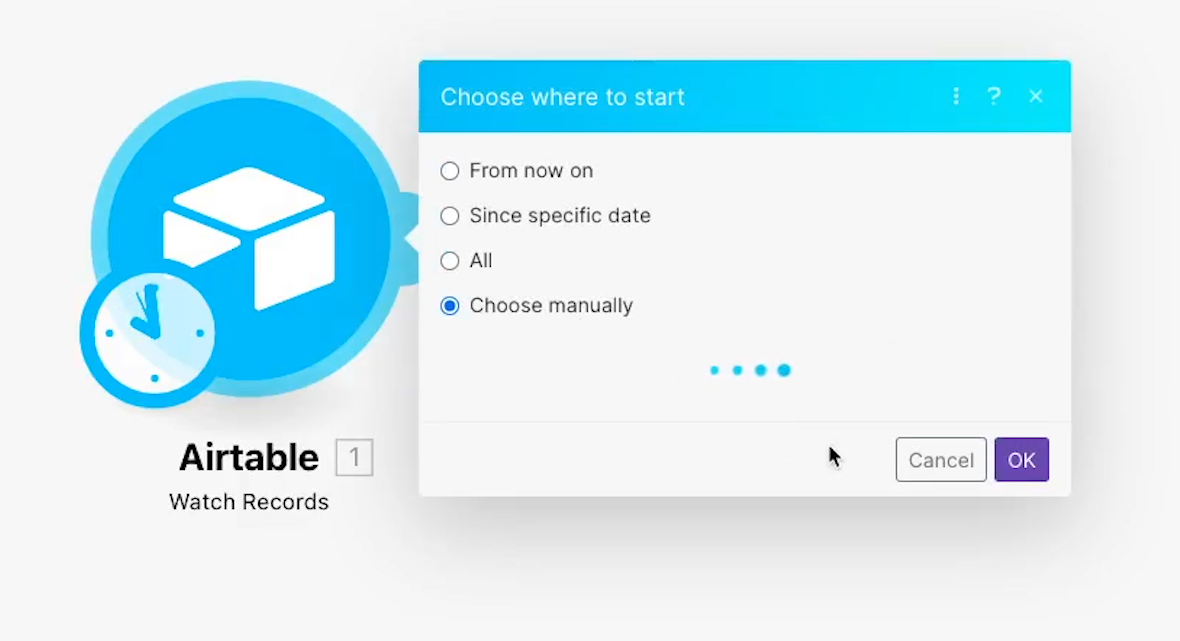
Once you’ve set up your trigger module, click OK to close the configuration window. Save your changes, then, right click on the trigger module.
You could select “Run this module only” to run it, but you’ll get the most consistent results by selecting “Choose where to start” first.
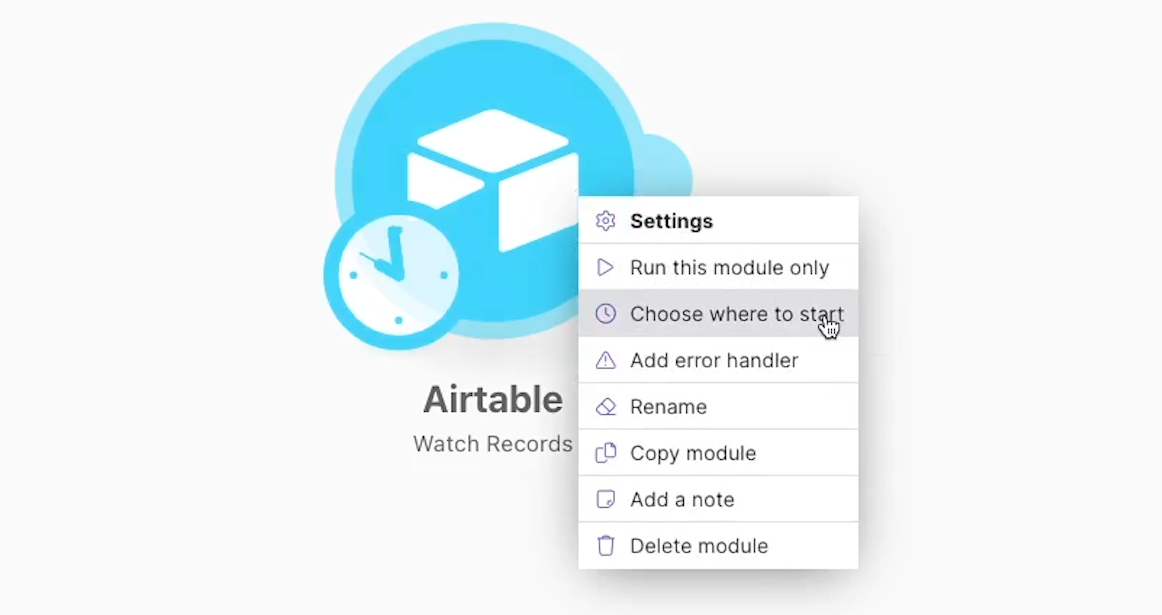
Then select “Choose manually”. From here, you can just pick a specific piece of data to use as you’re building your automation.
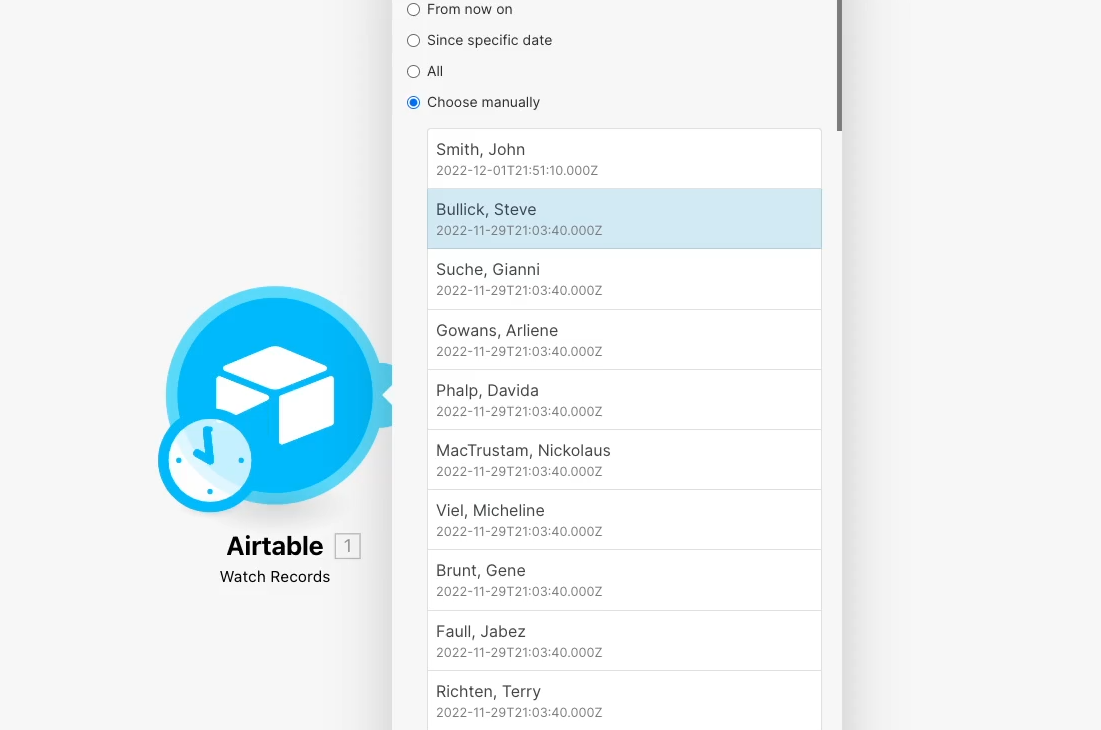
With a piece of data selected, you can right-click again and select “Run this Module Only”. You should see a number appear over the trigger module. Click on it to see the data retrieved by the trigger, and confirm that Make found the correct data.

When you add an action module, you can test that module alone by saving your changes, right clicking on the step, and selecting “Run this module only”.
However, depending on the integrations you’re using, you might see some unexpected results when you test one step at a time in Make.
If your action module uses data from previous modules, you’ll be prompted to provide that data manually instead, which might make it hard to tell if the automation will actually work correctly when all of the steps are running in sequence.

In many cases, the safest approach is to test the entire scenario by returning to the trigger step, choosing a starting point manually, and then clicking on “run once”.
It can be a little tedious, but it gives you the most consistent and reliable test results. If you’ve seen some of our Make and Integromat tutorials on our blog or YouTube channel, you may have noticed that we typically use this method to test.
Just like with Zapier, testing a step or a scenario in Make causes it to run, immediately creating, updating or deleting data as you’ve specified, so make sure that it’s safe to run your automation with the test data you’re using before you start testing.
With both Zapier and Make, we’d recommend running a live test before you consider an automation complete. With a live test, you won’t use either app’s testing functions; instead, you’ll just perform the actions required to trigger the automation and confirm that it runs correctly in real time.

In Zapier, publish your Zap to save it and turn it on. Then, perform whatever action you’ve specified as your trigger.

In many cases, nothing will happen immediately. Most Zaps only run on 5 or 15 minute intervals, depending on your subscription plan. Just wait for a few minutes, and you should see the configured action occur.
In Make, you can configure your trigger to run as often as you’d like (though bear in mind that this will use data, which will count against your monthly limits). Then, click on the “Save” icon to make sure all of your changes are committed, then click on the “On/Off” switch to turn the scenario on.

Perform the automation’s trigger action, and your scenario should run as configured.
Once you have a successful live test, you can let your team or your client know that the automation is ready to use.
Testing no-code automations in Zapier and Make is a necessary step to ensure that your automations are functioning properly and delivering the desired results.
By taking the time to test your automations, you can identify any potential issues and make any necessary adjustments before they impact your business.
If you’d like to learn more about no-code automation, check out our blog or our YouTube channel. You can also follow XRAY on Twitter, Facebook, or LinkedIn.

.pptx.png)
.pptx.png)
