Airtable boasts a wide range of features that make it the perfect database for no-code and low-code automations.
One of the simplest but most effective of these features is the ability to create linked records.
Linked records let you establish a 2-way relationship between records in different tables. It’s a great way to associate two related pieces of data - like connecting project managers to all of the clients they’re working with.
Once you’ve got a linked record in place, you can also add lookup fields, so you can see additional detail from the record that you’ve linked.
In this post, we'll show you how it all works step by step.
Before you create a linked record, you’ll need to have two tables within the same base.
In our example, we’ll be linking our “Project Managers” table with our “Clients” table. Since they’re both in the same “Tutorials” base, we can do this with a linked record field type.
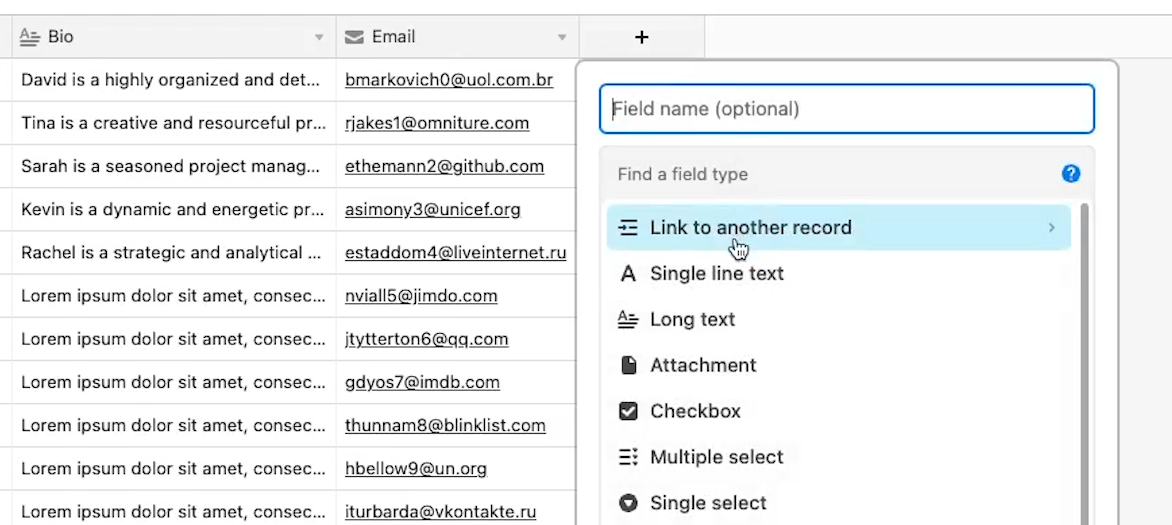
To create a linked record, start by adding a new field.
Then, select the option that says “link to another record”.
Choose the table that you want to link to. In our example, we’ll choose the “Clients” table.
Airtable will then give you a couple of options: “Allow linking to multiple records”, and “Limit record selection to a view”.
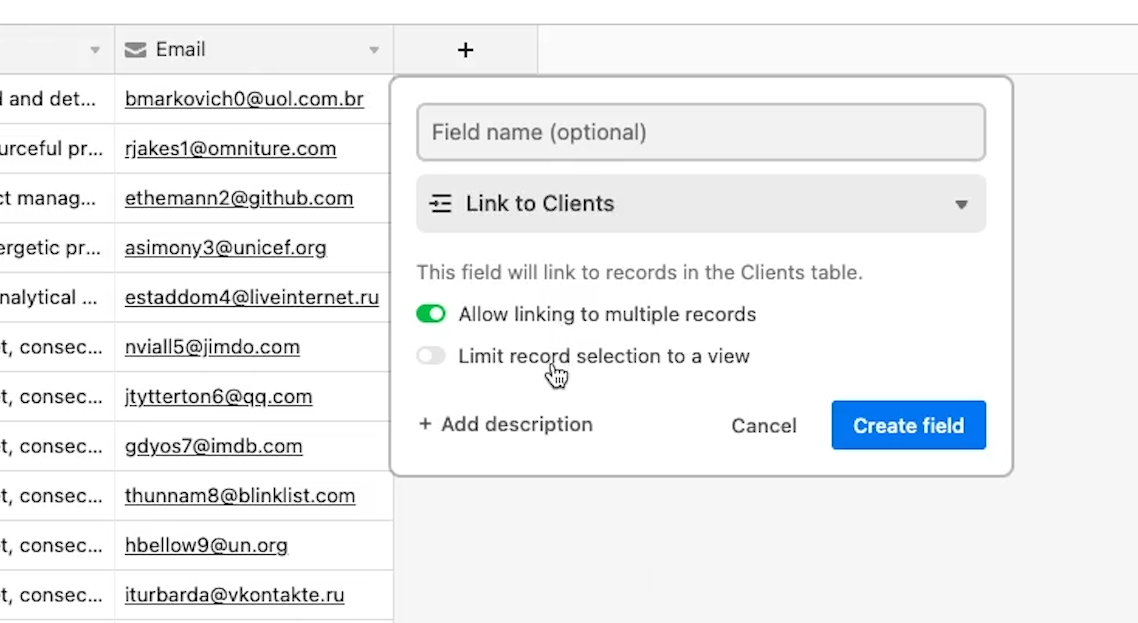
If you check “Allow linking to multiple records”, you can associate each record with multiple others. For example, this would allow you to associate one project manager with as many clients as you’d like.
If your data should only support a one-to-one association, then you should turn this option off. Otherwise, you can leave it on.
Checking “limit record selection to a view” will ensure that you can only choose records from a specified view. Once you’ve set your options accordingly, create the field.
Now, you can reference a record by just clicking on this linked field and selecting one of the options that comes up.

Once you’ve linked one record to another, you’ll see the association in both tables. In our example, you can see a “Clients” field in our Project Manager table, and a “Project Manager” field in the Clients table.
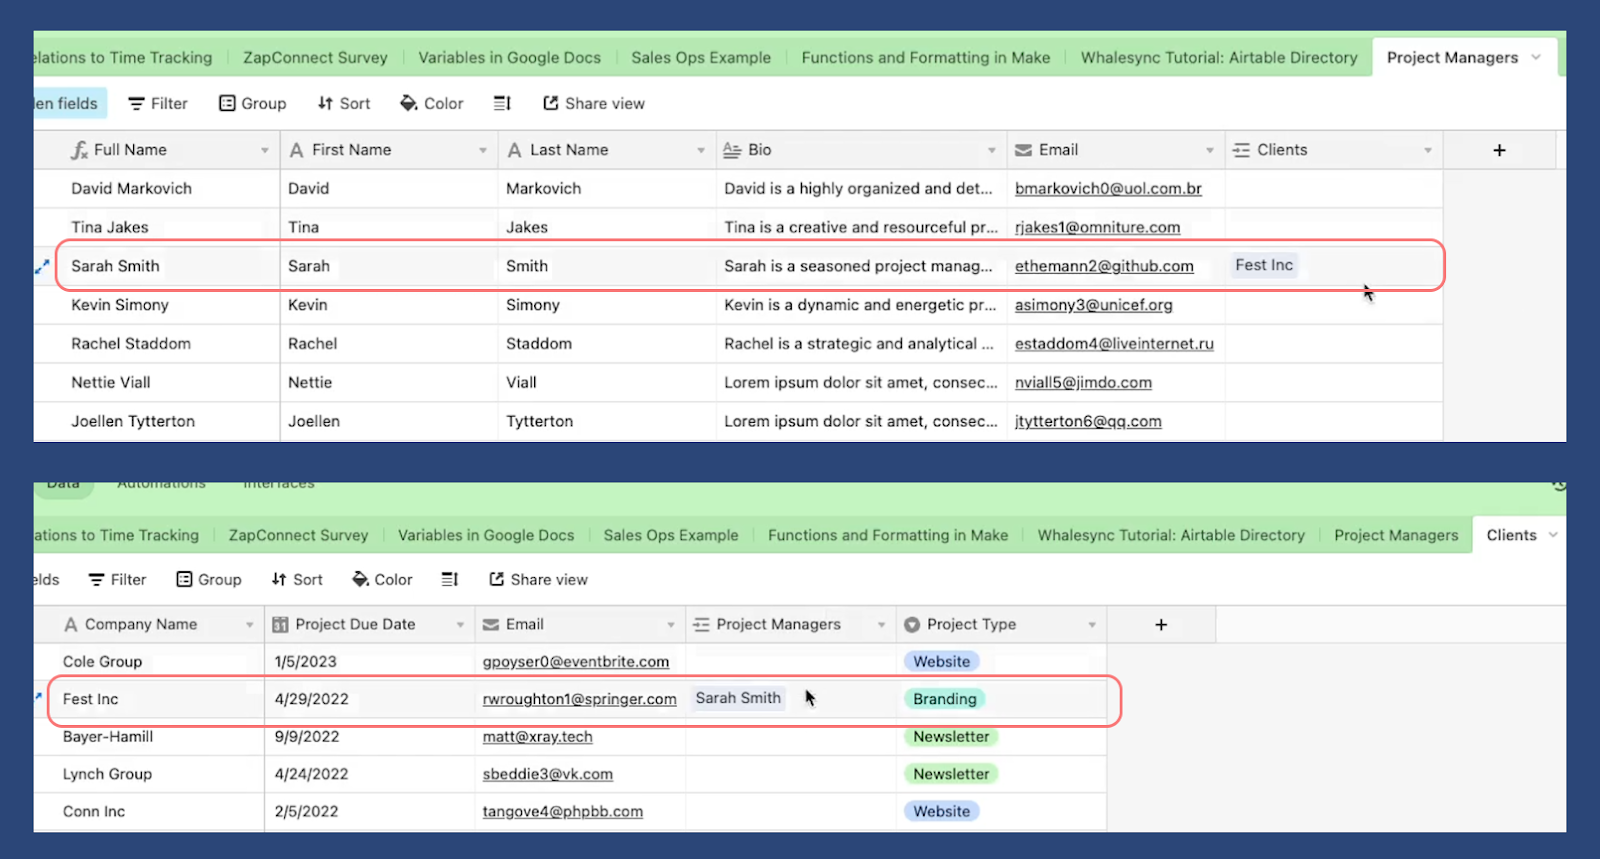
Note that if you change the names of the linked table, the new name will not update in the other table. So if you change your “Clients” table to “Customers”, the Clients field in the Project Manager table will still be called Clients.
One of the most practical benefits of creating linked records is the ability to add lookup fields. Lookup fields let you display additional fields from your linked records. So instead of just seeing the name of the record, you can see any other attributes that you’d like to add.
In our example, we’ll add lookup fields for the client’s email address, and their project type.
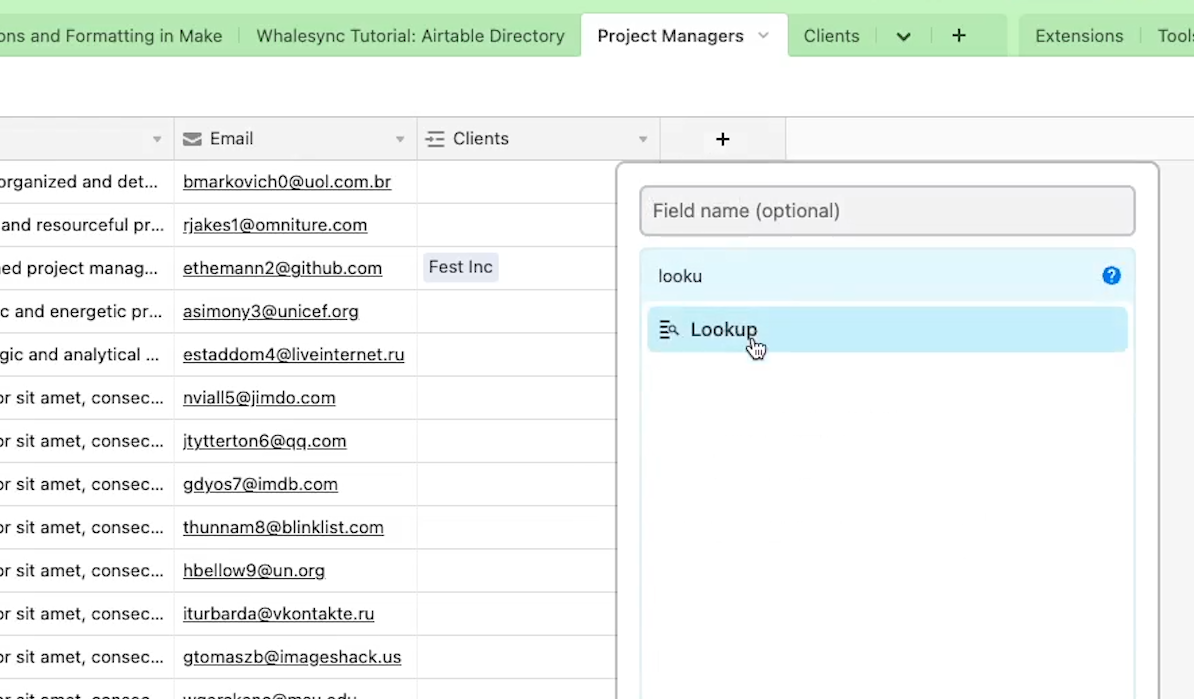
To add a lookup field, add a new field and select “Lookup”. You can also click on the linked field and select “Add Lookup”.
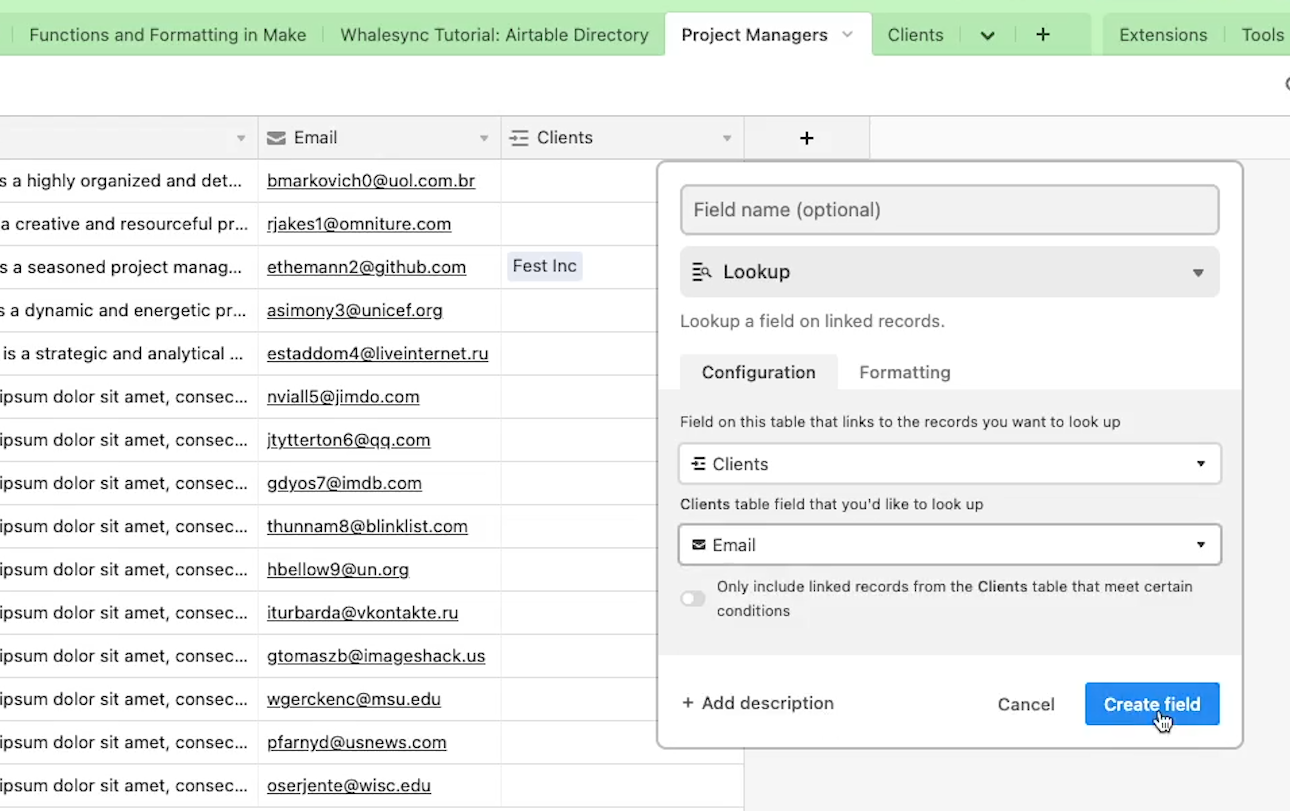
If you have multiple linked records in this table, you can choose which linked record you’d like to use. Then, choose the field from the linked record that you’d like to include.
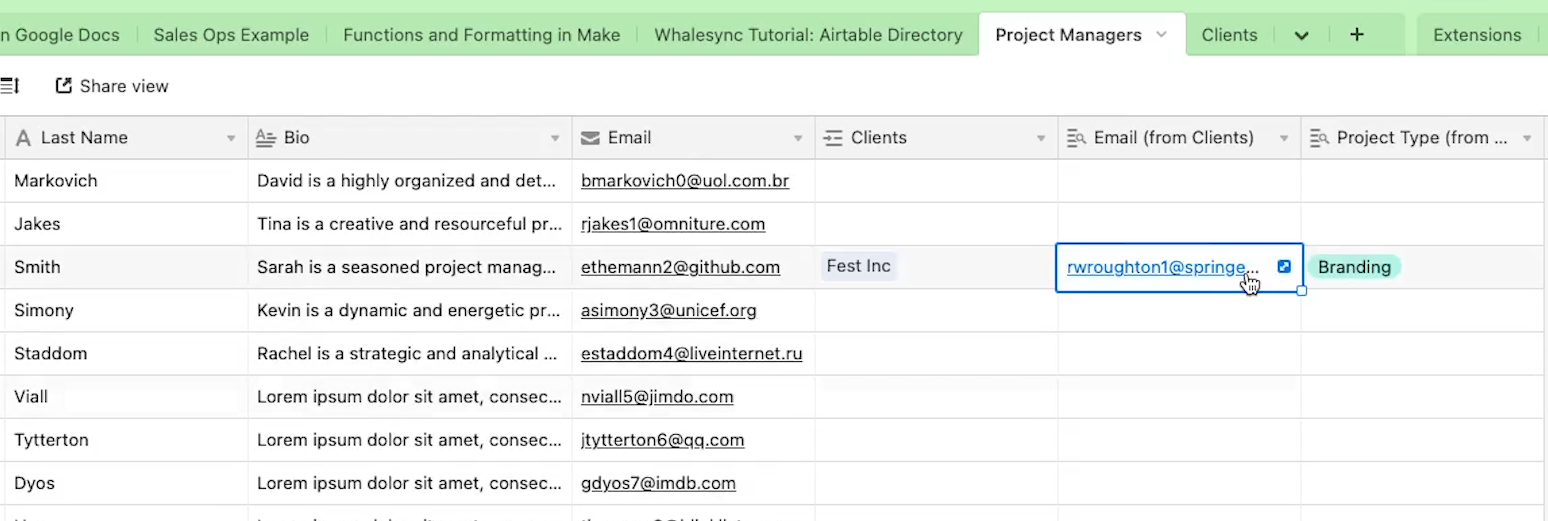
In our example, we’ll start with Email, then we’ll add Project Type in the same way.
Note that lookup fields populate automatically, and can’t be edited directly. You’ll have to update the record in its original table instead.
You can add as many lookup fields as you like to see all of the data you need in one place. This is also super handy if you’re automating with Zapier or Make.
If you’re a no-code automation builder, linked records and lookup fields can be a vital tool to have at your disposal.
With linked records, you can put all of the data an automation needs in a single table, so you can gather it all with just one trigger or search step. For instance, we can quickly put together a Zapier automation that runs every week to send an email to one of our Project Manager’s clients.
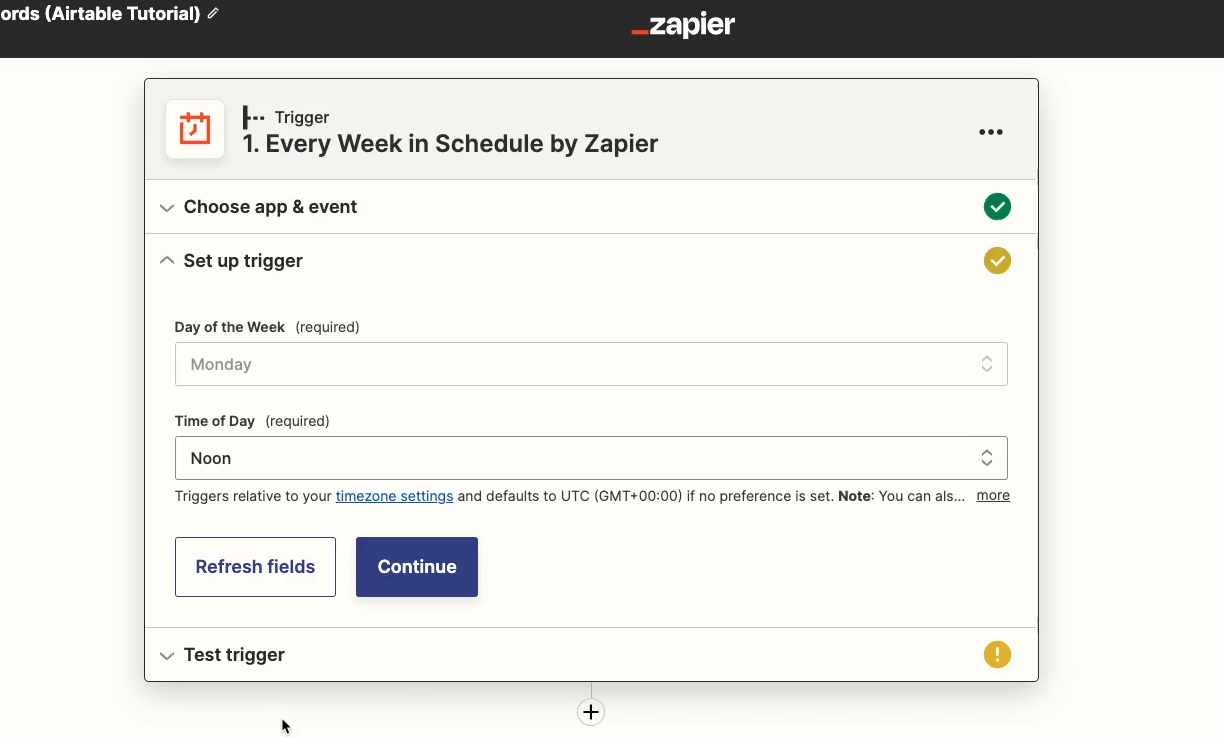
We’ll use “schedule” as a trigger, so the automation runs every Monday at noon.
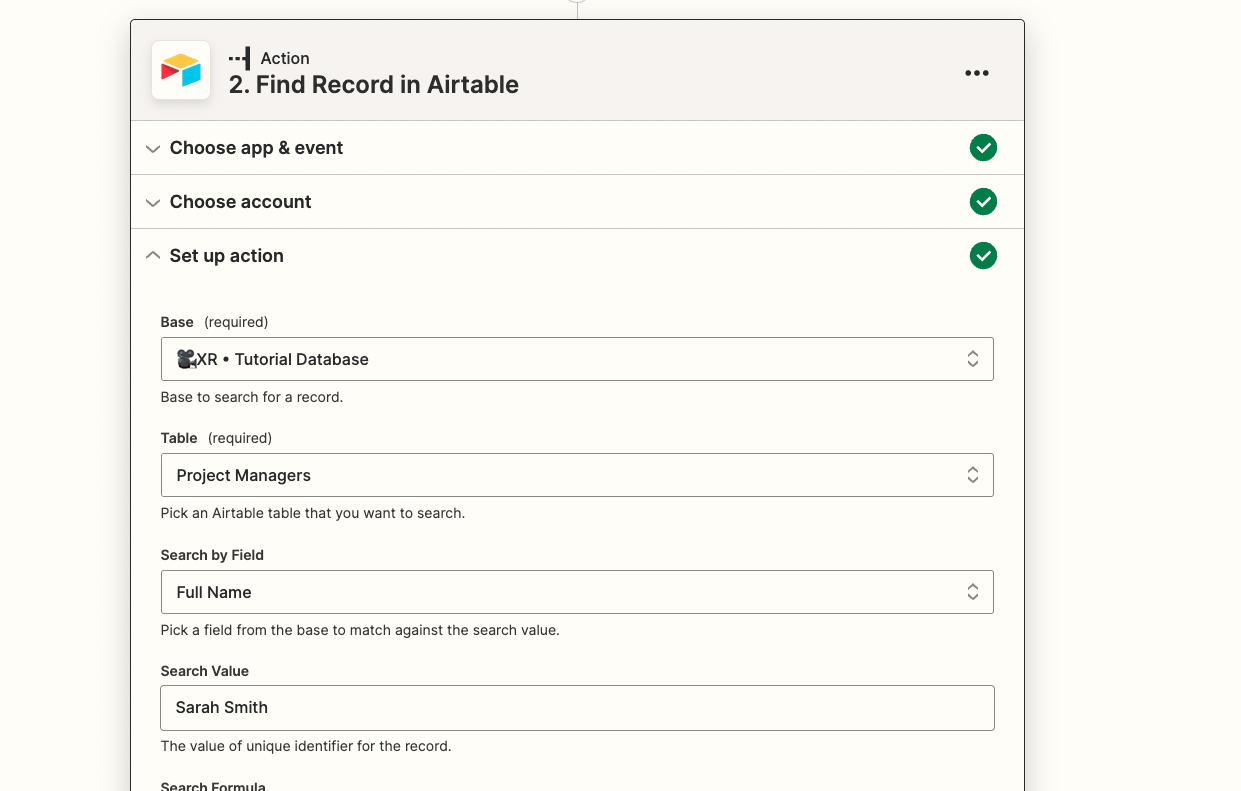
Then, we’ll add an Airtable step to find our project manager’s record. We’ll search the “full name” field for “Sarah Smith”, and test the action.
Now that Zapier found this record, we can use every field in future steps.
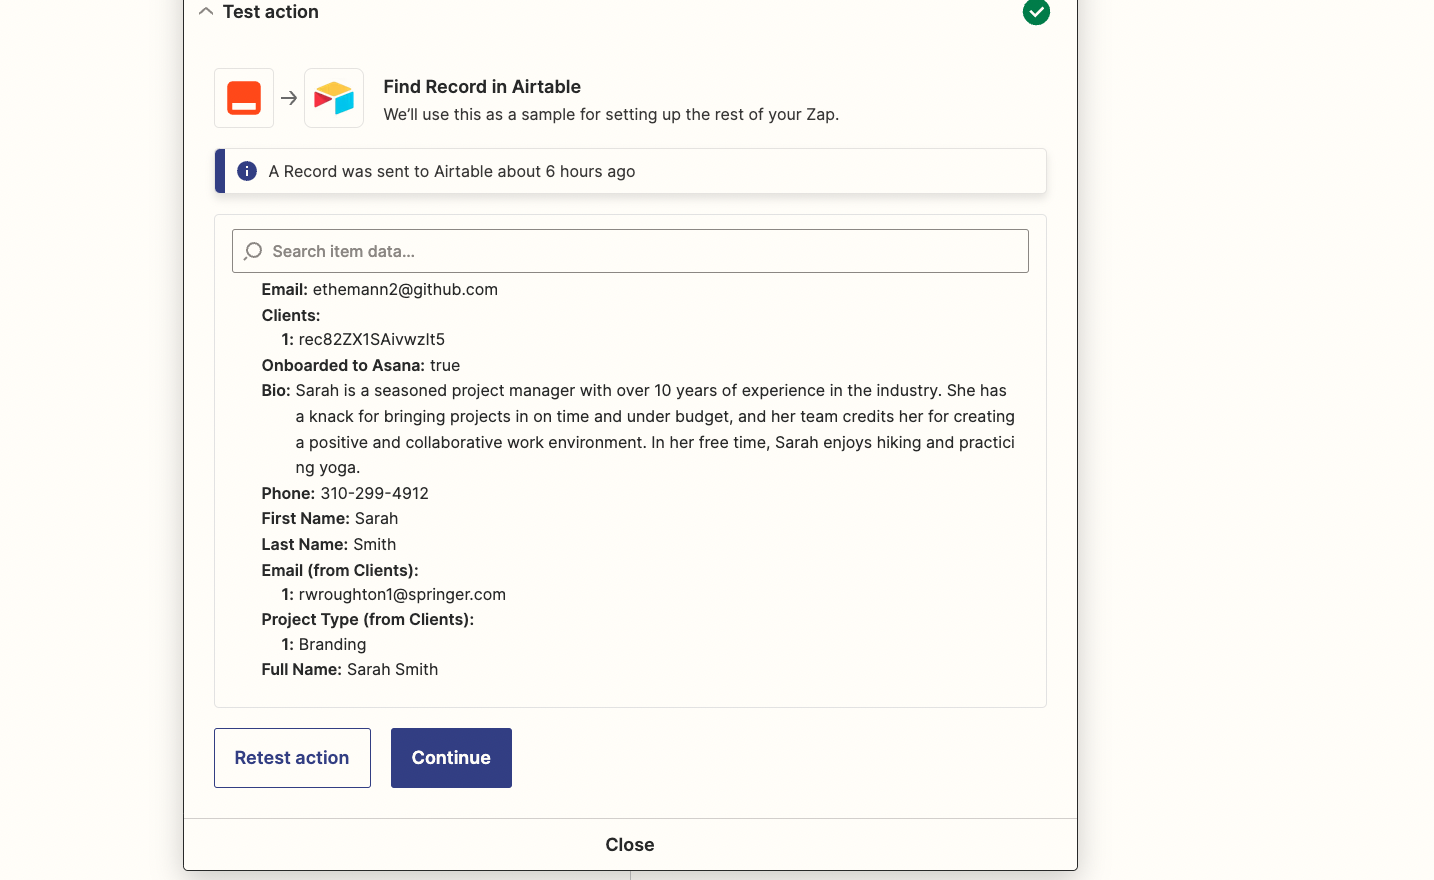
When we add a Gmail step, we can retrieve the client’s email from Sara Smith’s Project Manager record. No need for an additional search step in Zapier.

And if we ever need to update the client’s email address, we don’t need to manually update it in the Project Manager record. It will happen automatically once we update the clients table.
Airtable is a great spreadsheet app for building no-code automations. Tools like linked records make it easier to build and maintain efficient Zaps and scenarios in Make.
If you’d like to learn more about using tools like Airtable to support your no-code and low-code automations, check out our blog or our YouTube channel. You can also follow XRAY on Twitter, Facebook, or LinkedIn.