
Are you tired of building the same actions repeatedly in Zapier? Do you find yourself duplicating similar Zaps for different purposes? Well, there's a solution for you! Let's explore how you can use Sub-Zaps in Zapier to create modular and reusable automations, saving you time and effort.
Sub-Zaps allow you to repeat commonly used sets of automated actions without having to build all the same steps in multiple Zaps. Let's take a look at a few use cases where Sub-Zaps can be particularly beneficial.
Sub-Zaps are a great way to ensure that you create consistent, reliable data from any number of different sources.
Imagine you need to create new tasks and alert the assignee. Instead of creating multiple Zaps with the same actions, you can build a Sub-Zap that contains the steps for creating tasks and assigning them. This way, you can establish multiple avenues for creating tasks, such as using a simple form or sending a message in a dedicated Slack channel.
Or, suppose you want to add new leads and clients to your CRM from various sources like your website, third-party channels, emails, or in-person meetings. By using a Sub-Zap, you can ensure that all leads are added to your CRM in the same standardized manner, regardless of the source.
Sub-Zaps are particularly useful when it comes to updating frequently used actions. Instead of updating these actions in multiple Zaps, you can update a single Sub-Zap. For example, if you switch your CRM from Copper to HubSpot, you can simply swap out one step in your Sub-Zap, instead of replacing that step in every Zap that funnels leads to your CRM.
It's important to note that Sub-Zaps are currently in beta, so the user experience may not be as polished as other features in Zapier. Nevertheless, they are functional and definitely worth trying out if you've built several Zaps that perform similar actions. Using Sub-Zaps appropriately will help you build more efficient and easily maintainable automations.
Let's take a quick look at the broad strokes of how Sub-Zaps work and how you can incorporate them into your workflow.
Sub-Zaps are built as separate Zaps that can be called from other Zaps. A Sub-Zap always starts with the trigger "Start a Sub-Zap" and ends with a "Return from Sub-Zap" step. This ensures that Sub-Zaps won't run unless called upon by another Zap.

Note: in this tutorial, we’ll refer to the Zap that calls on a Sub-Zap as the "parent Zap." There's nothing inherently different about parent Zaps, and it’s not a term you’ll see in Zapier; it's just a term we’re using to describe any Zap that calls on a Sub-Zap.
In the Sub-Zap trigger, you can include a list of inputs to collect data from the parent Zap. These inputs will gather relevant data for the Sub-Zap from the parent Zap.
In the "Return from Sub-Zap" step, you can include a list of outputs to send back to the parent Zap. These outputs are the data returned from the Sub-Zap to the parent Zap.
To call a Sub-Zap, you need to add a "Sub-Zap" action to your Zap and choose the "Call a Sub-Zap" event. Select the Sub-Zap you want to use and include any required inputs. You can then add additional actions to the Zap and turn it on to start using it.
It's important to ensure that both the parent Zap and the Sub-Zap are published and turned on for the automation to work correctly.
Let's go through a step-by-step walkthrough of how to create and use Sub-Zaps in Zapier.
For our example, we’ll build a Sub-Zap that creates tasks in our Notion tasks database.

Then, we’ll call on our Sub-Zap in one parent zap that watches for Airtable records.

And we’ll call on it again in another automation that watches for Slack messages in a dedicated “Tasks” channel.

First, create a new Zap. Immediately give it a descriptive name. Having a descriptive name is important when building a Sub-Zao, because you need to be able to find this Sub-Zap easily later.
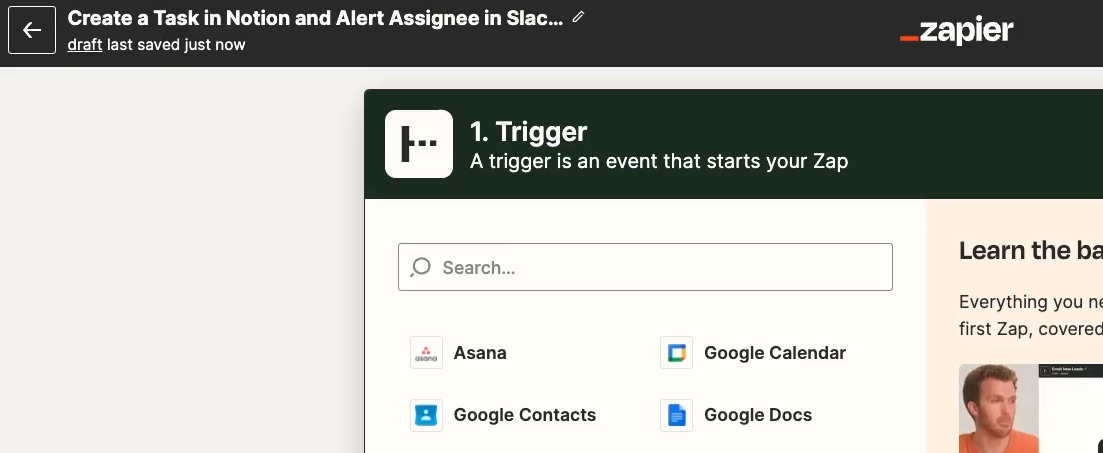
For the trigger, search for “Sub-Zap”.

Choose “Start a Sub-Zap” as the event. This will indicate that Zapier should consider this Zap a Sub-Zap, which is required for it to be selectable in your parent zap.
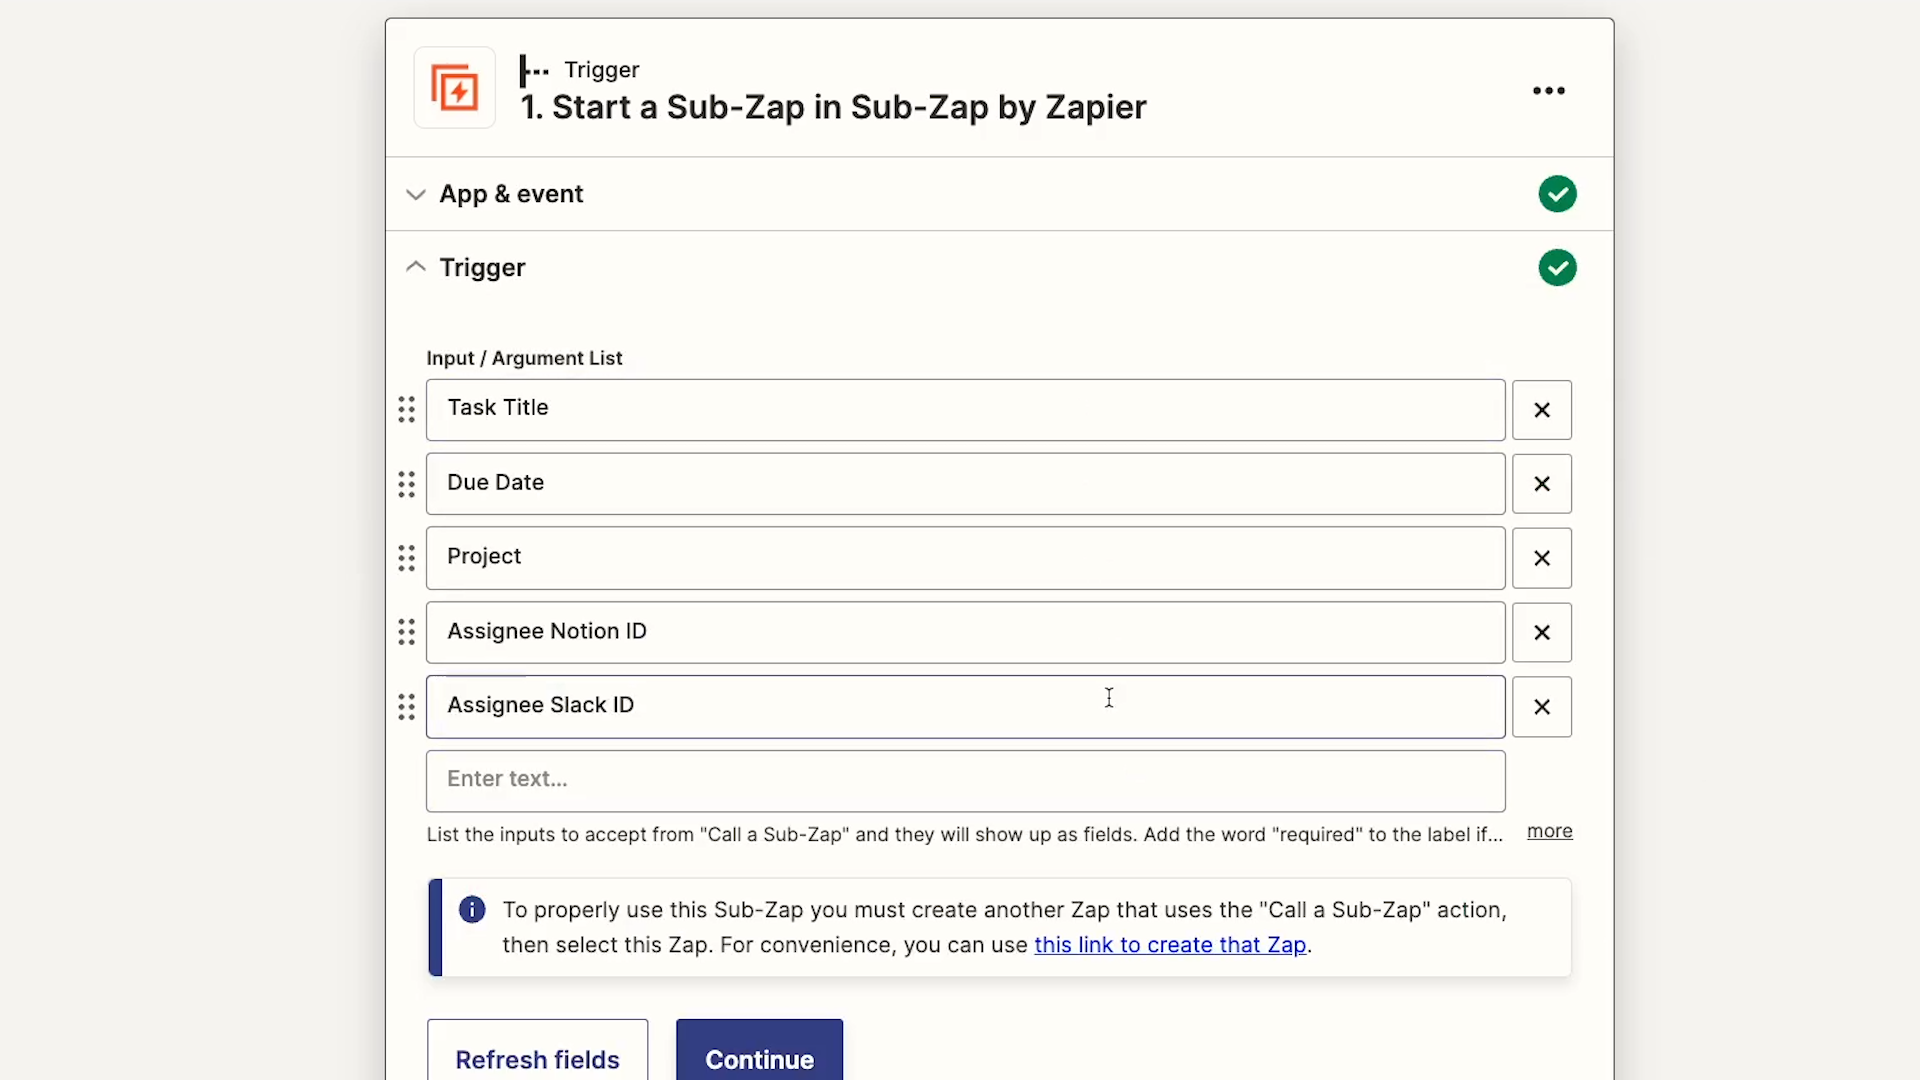
Then, fill in any inputs or “arguments” you want the Sub-Zap to collect from the parent Zap.

The Sub-Zap won’t automatically have access to any of the data gathered in the parent Zap’s trigger and actions.
Any data that you want to use from your parent Zap needs to be included in these inputs.
In our example, there are a few fields we’ll need in order to create a complete task, like task title, assignee, due date, project, Notion ID, and Slack ID.
When you create your inputs, you’re just providing labels; you don’t need to provide any values for these inputs yet.
Once you’ve added all the inputs you want to collect, you can click “Continue” and test the trigger. This is where you’ll first run into the main downside of Sub-Zaps.
Testing is a bit clunky in Sub-Zaps, to say the least.
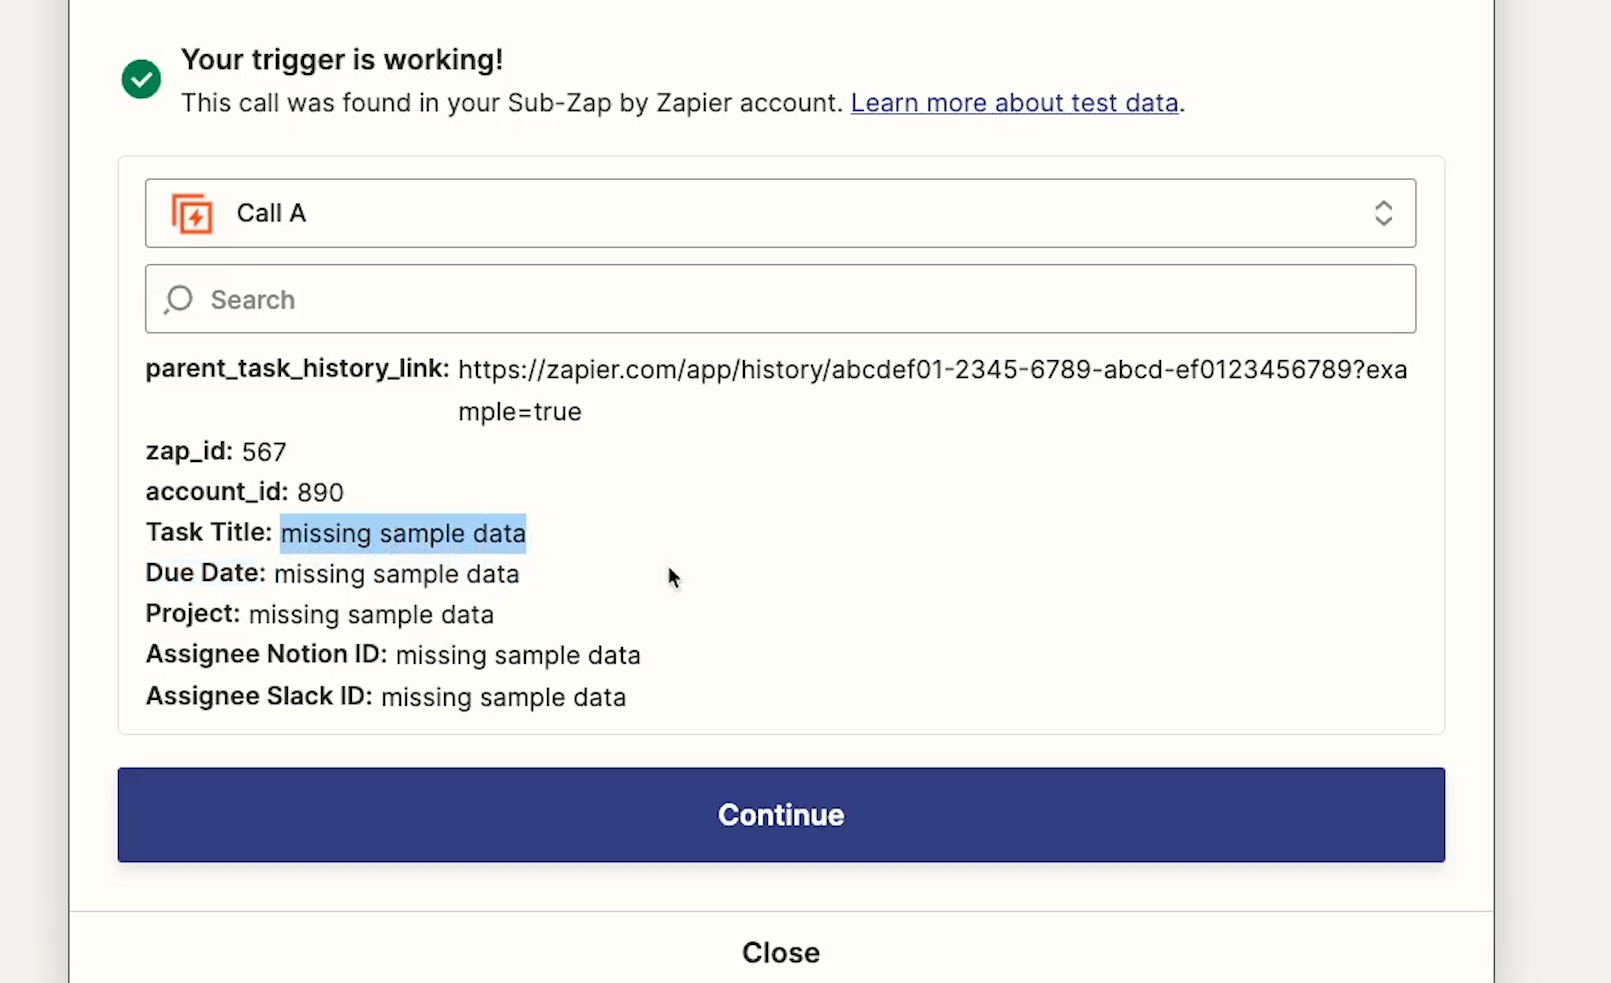
When you run your test, the trigger will almost certainly succeed, but every one of your inputs will simply say “Missing Sample Data”.
Don’t worry! As bad as this may look, it’s actually fine. You’ll be able to add test data in a moment.
Since the Sub-Zap is a fully separate Zap, it can’t gather any dynamic data from your Parent Zap unless you’ve already sent a call to this Sub-Zap from your parent Zap.
Since you’ll probably want to use real data while we’re building and testing our Sub-Zap, go ahead and create a new Zap that you can use as a “parent Zap" in a new tab.
In our example, we want our parent Zap to create tasks in Notion by filling out a short form in Airtable, so we’ll use a “New record” trigger in Airtable.
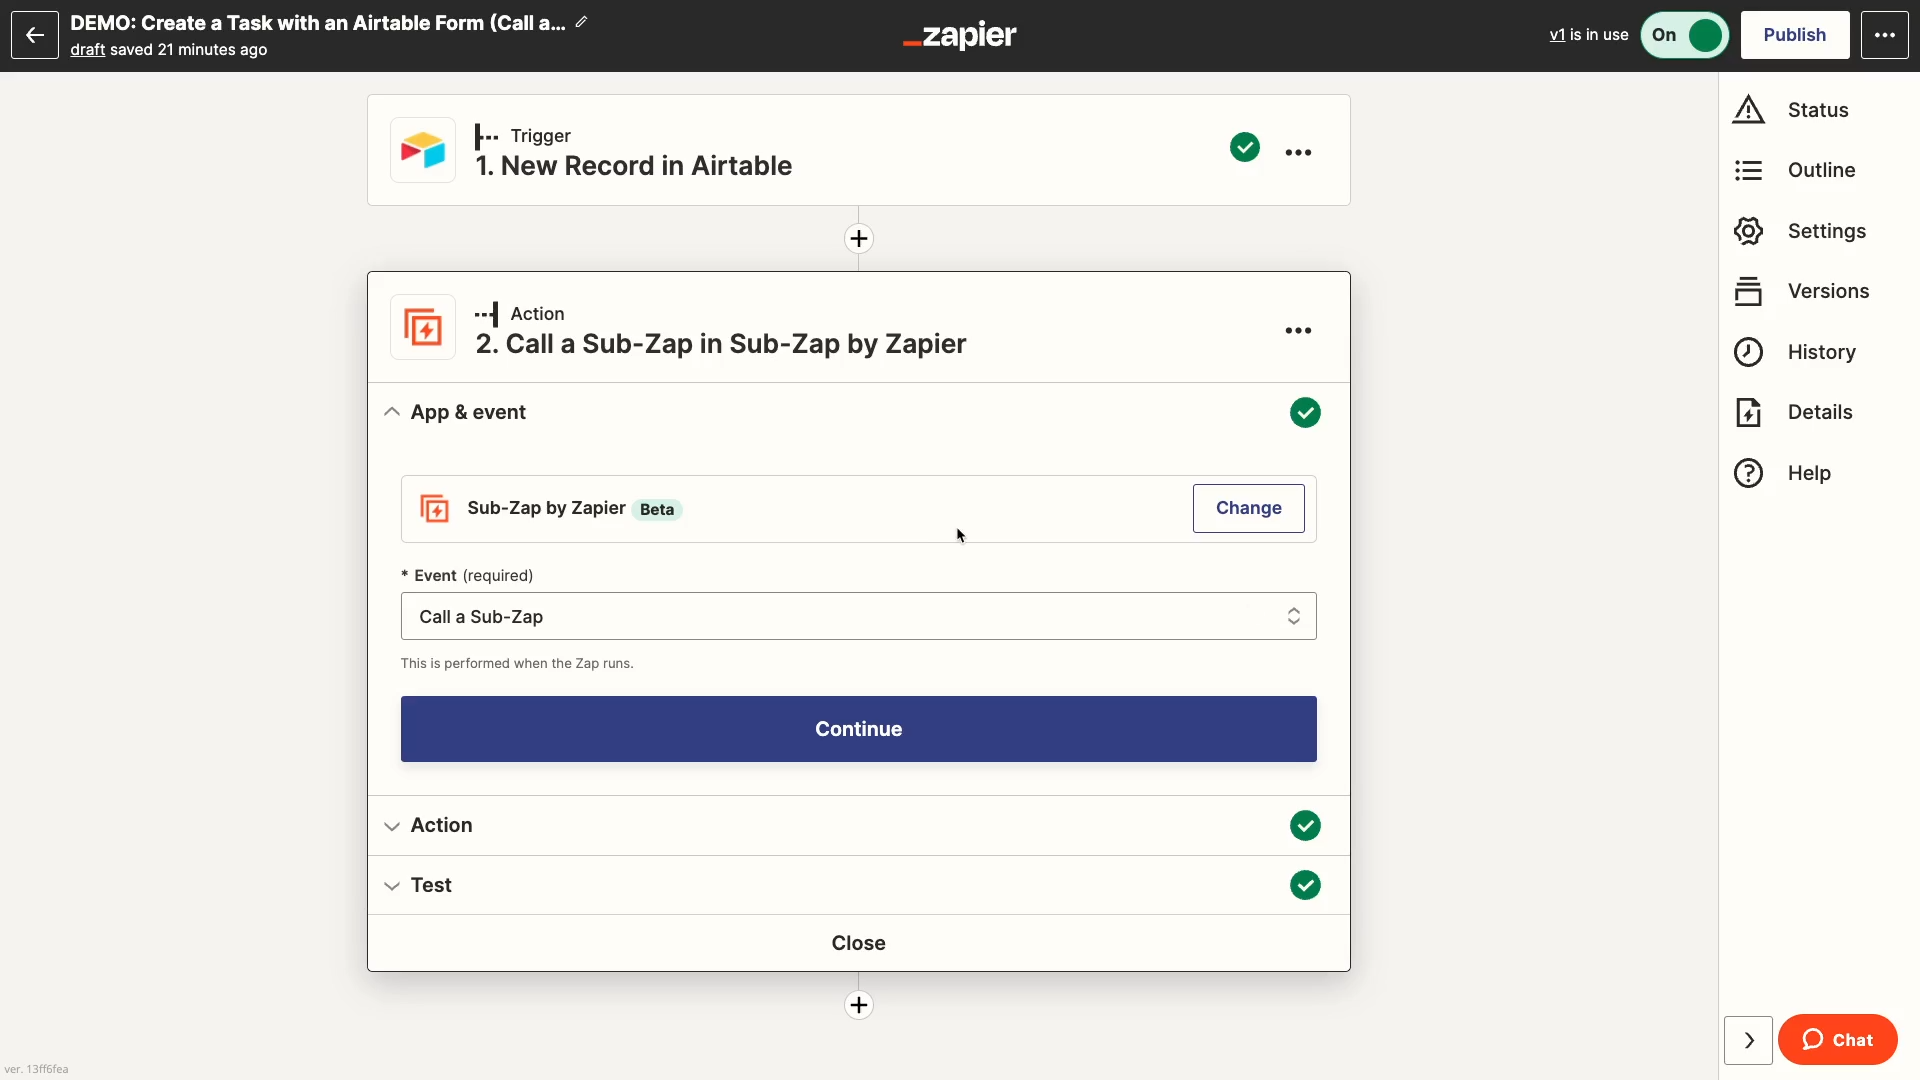
Once your trigger is configured, add a new action, and search for “Sub Zap”.
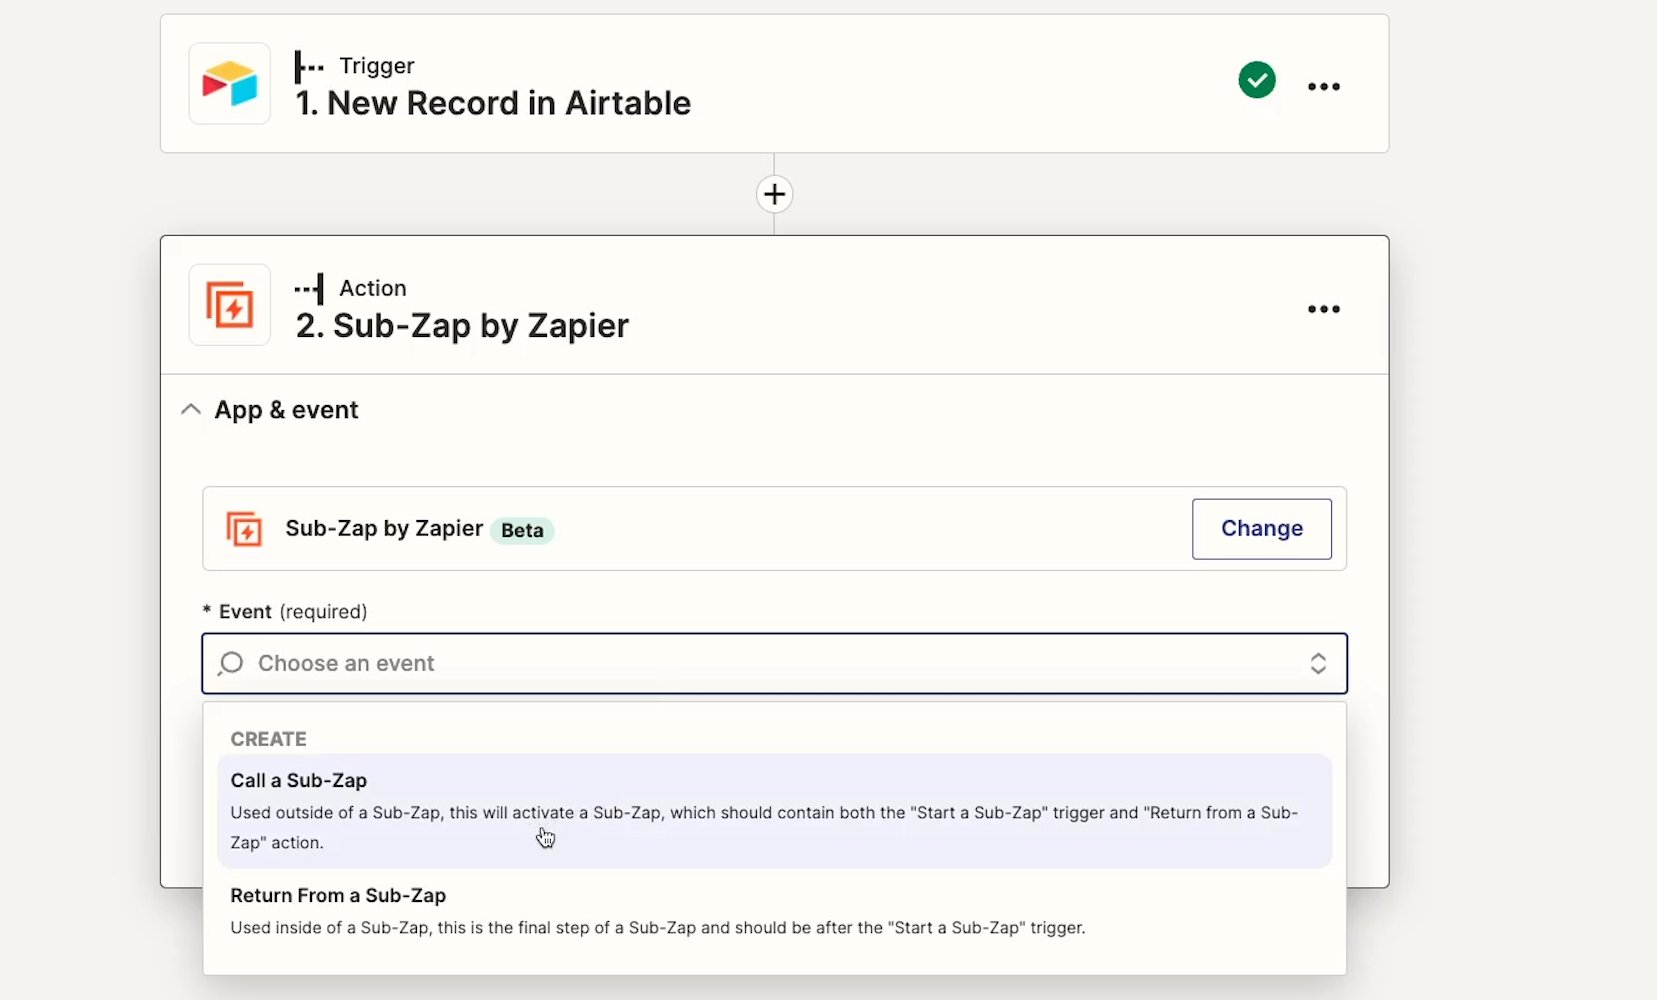
Choose “Call a Sub Zap” as the event, and select the Sub-Zap you created earlier.

Next, you can fill out all of the inputs that you configured in your Sub-Zap. Make sure to use dynamic data from your parent Zap wherever appropriate. In our example, we’ll fill out all of our inputs with data from the retrieved Airtable record.

After providing data for all of your inputs, you can test the “Call a Sub-Zap” step.
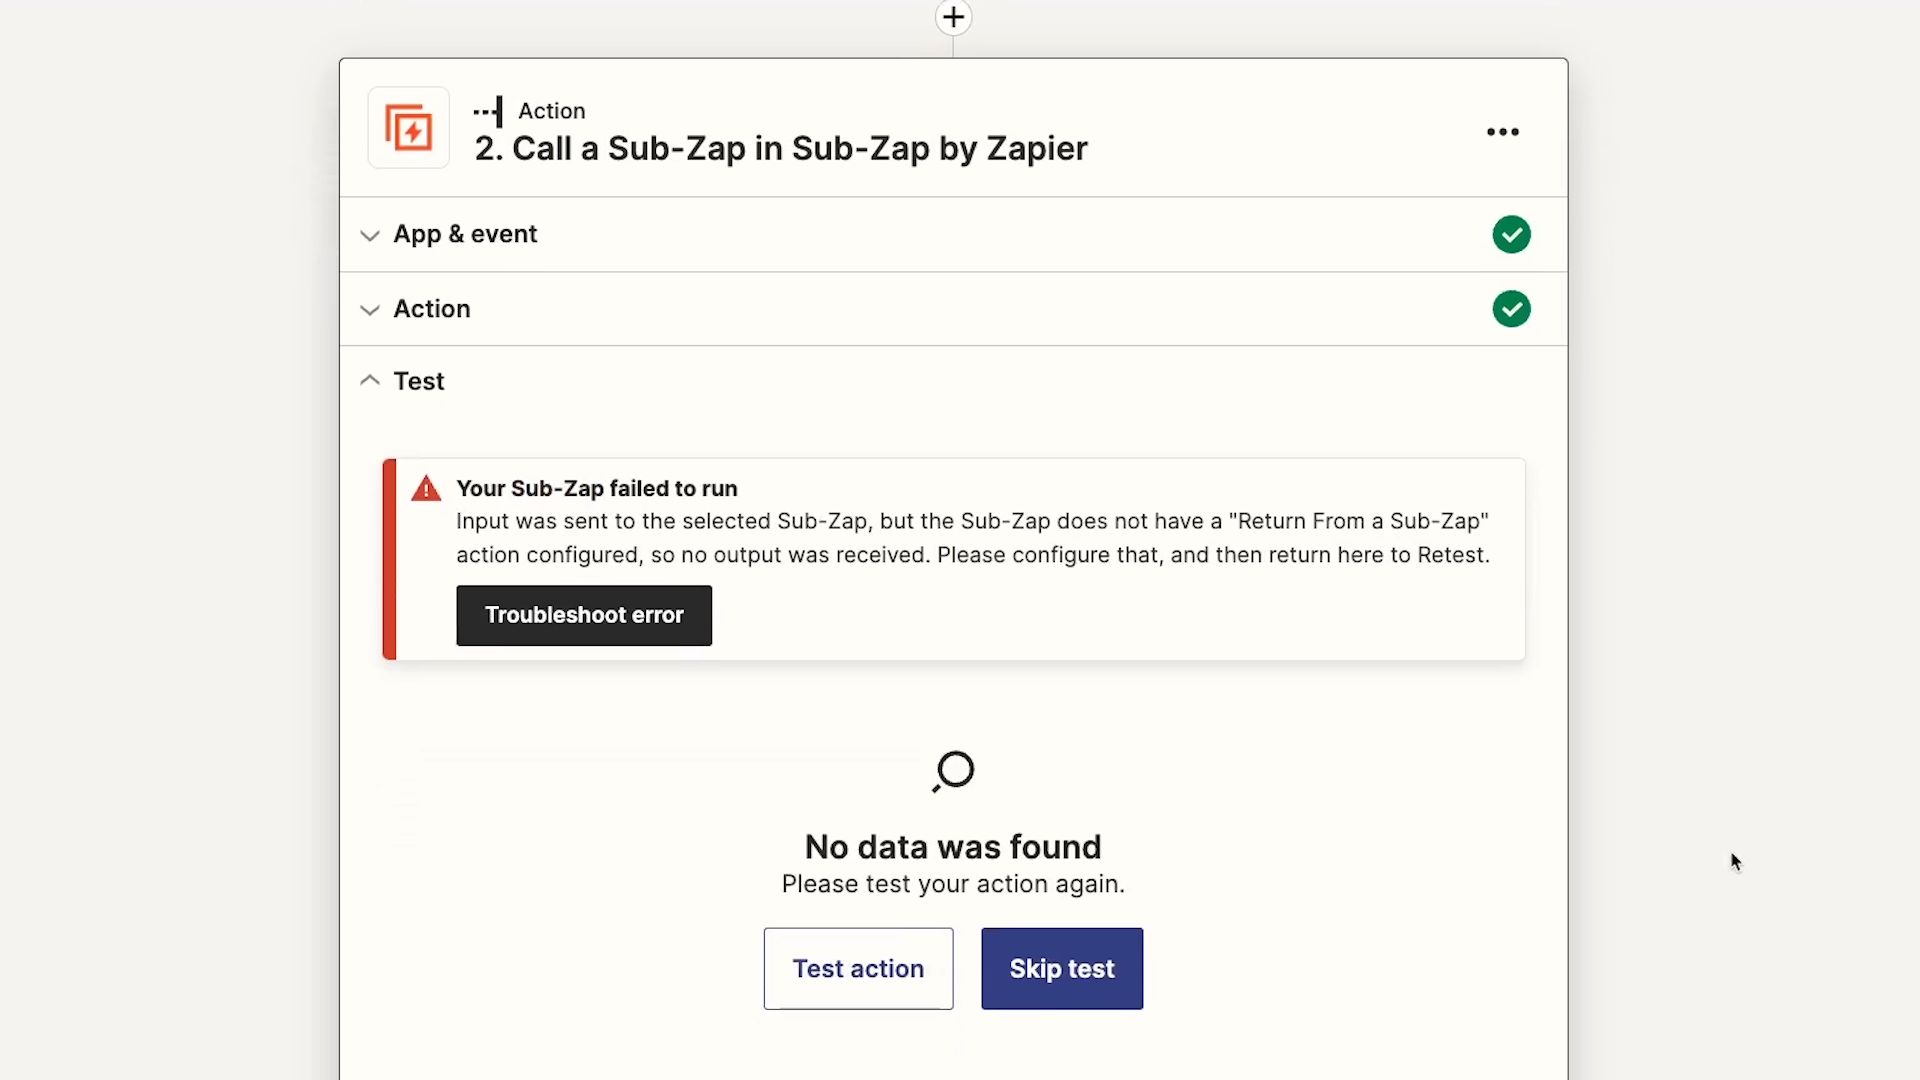
When you test the step, you’ll get an error because you haven’t added a “Return” step to our Sub-Zap yet, but this is fine. You can fix that later.
Your sub-Zap received the call from the parent Zap anyway, so you’ll have the test data you need to build the rest of the Sub-Zap.
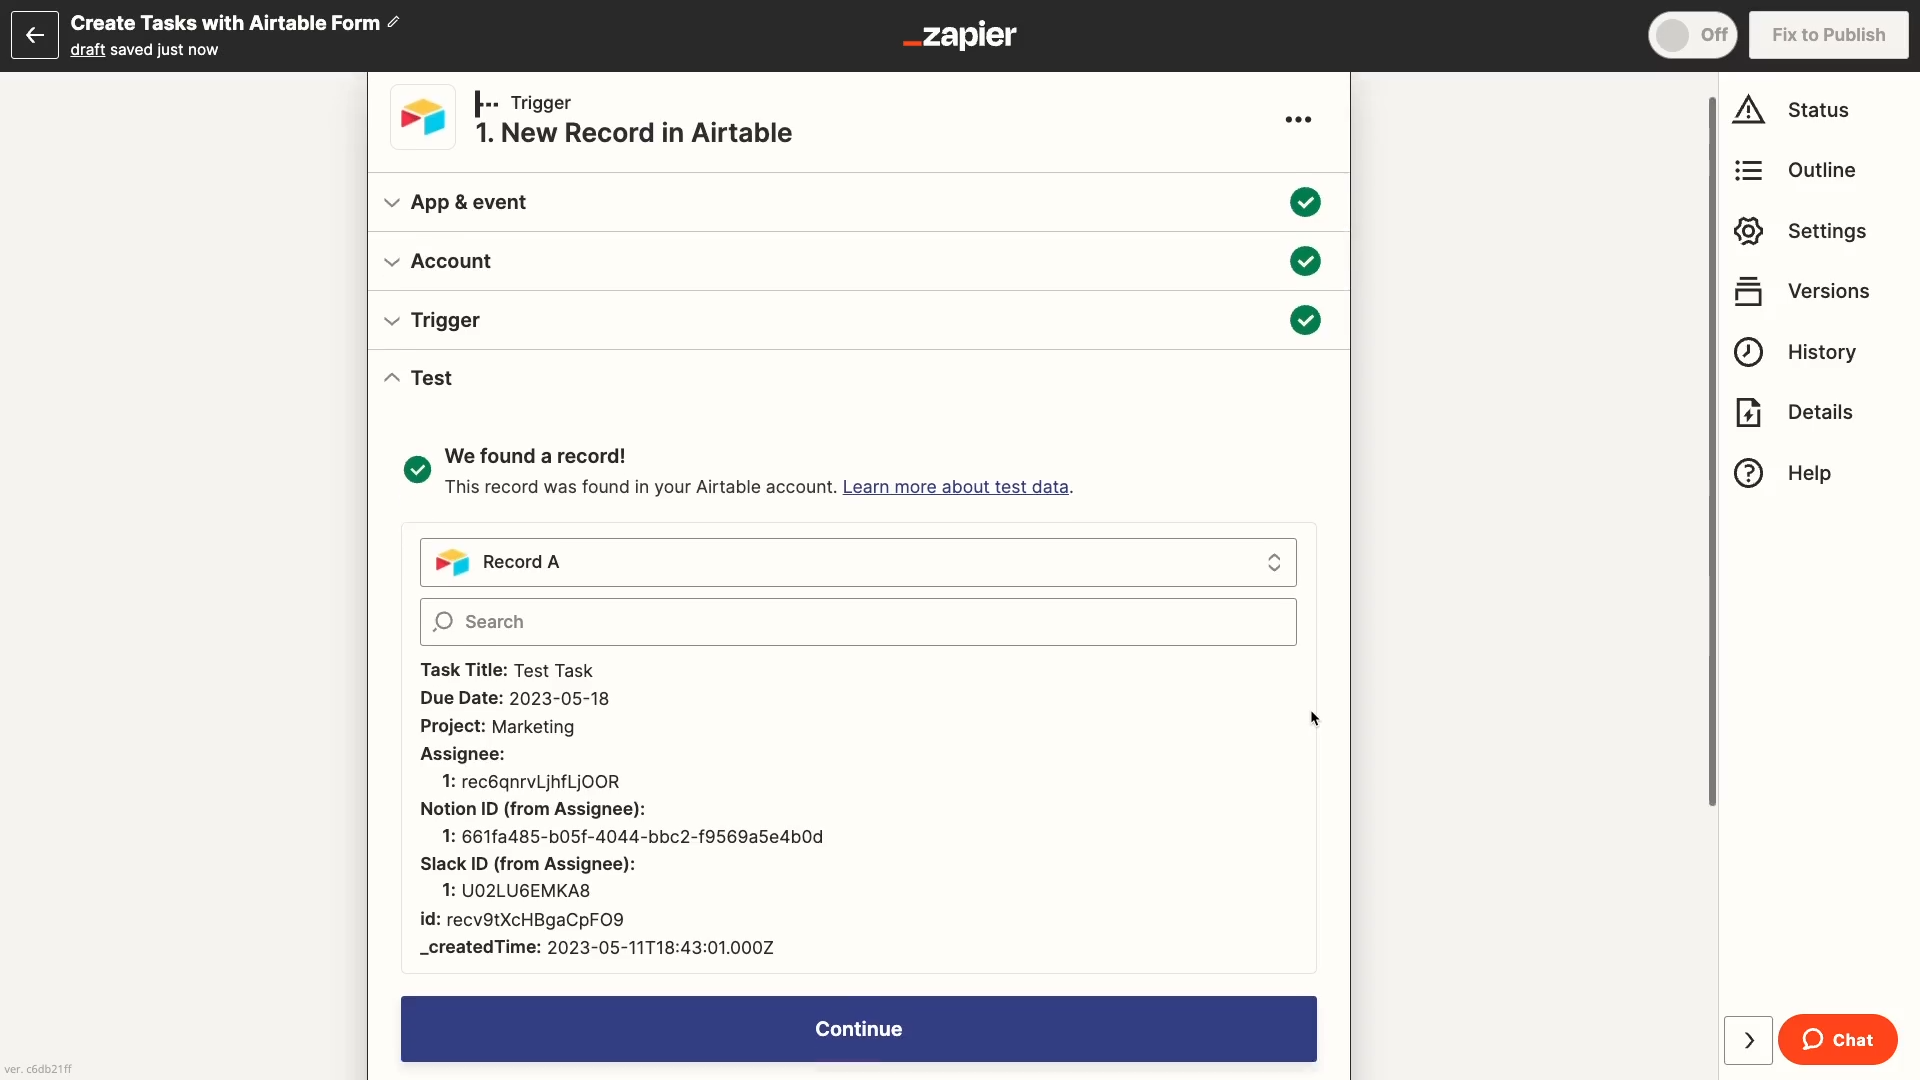
Now you can switch back to the Sub-Zap and test the trigger again.
This time, you should be able to see the call you just made from the parent Zap, and it should include all of the data you entered into the inputs.

You can now add the actions that you want to include in your Sub-Zap. Adding actions in a Sub-Zap will be exactly the same as adding actions to any other Zap. Just make sure to only include the actions that you want to repeat every time you call on the Sub-Zap.
In our example, we’ll add a Notion step to create a new database item in our “Tasks” database. We’ll fill in the fields with the data sent by the parent Zap.

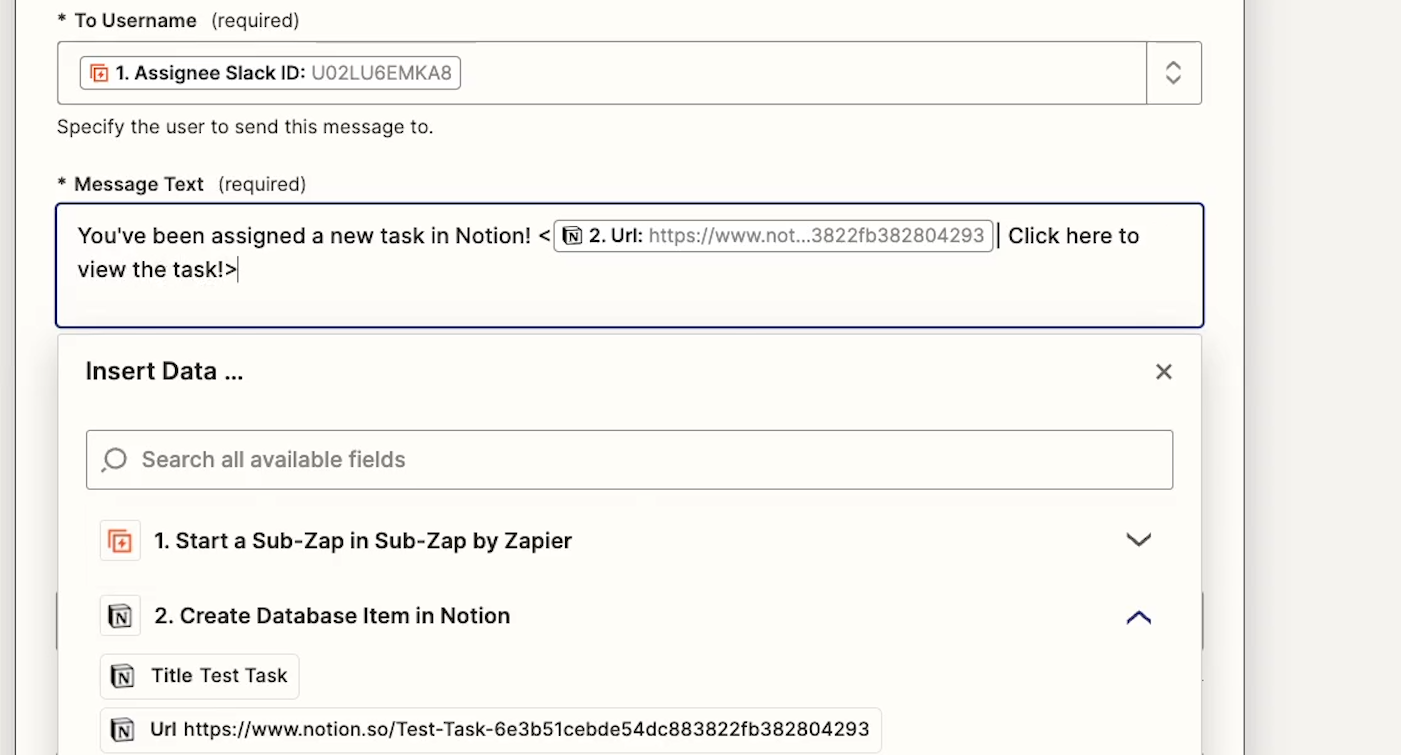
We also want to send a Slack message to the task’s assignee, so we’ll add a Slack action and choose “Direct message” as the event. We’ll fill out the message and include the Notion URL where the assignee can see their new task.
Just like building any other Zap, you’ll want to test each step as you add them to your Sub-Zap.
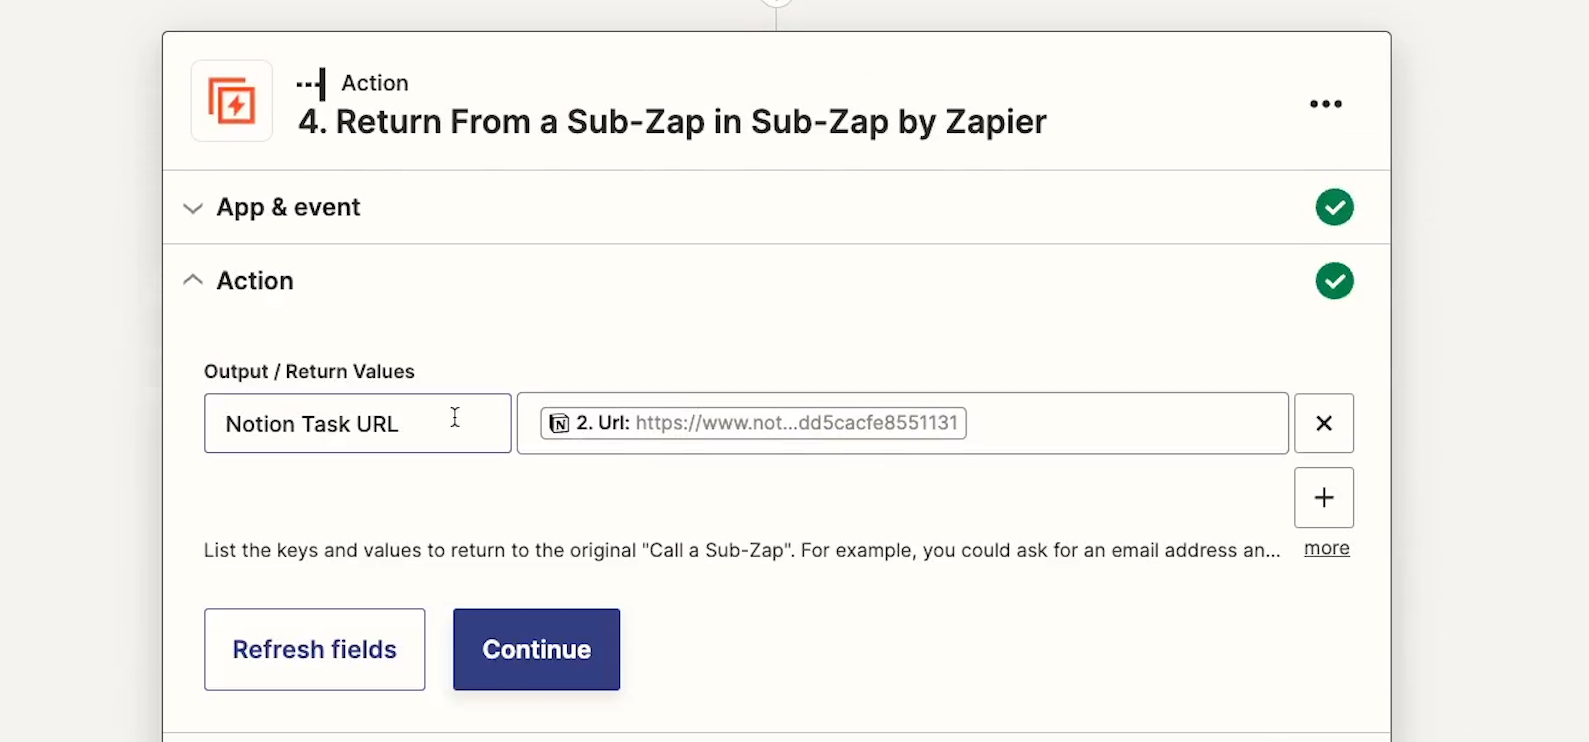
Once you’ve added and tested all of the actions you want your Sub-Zap to perform, you just need to add a “Return” action so that Zapier knows that the Sub-Zap is complete.
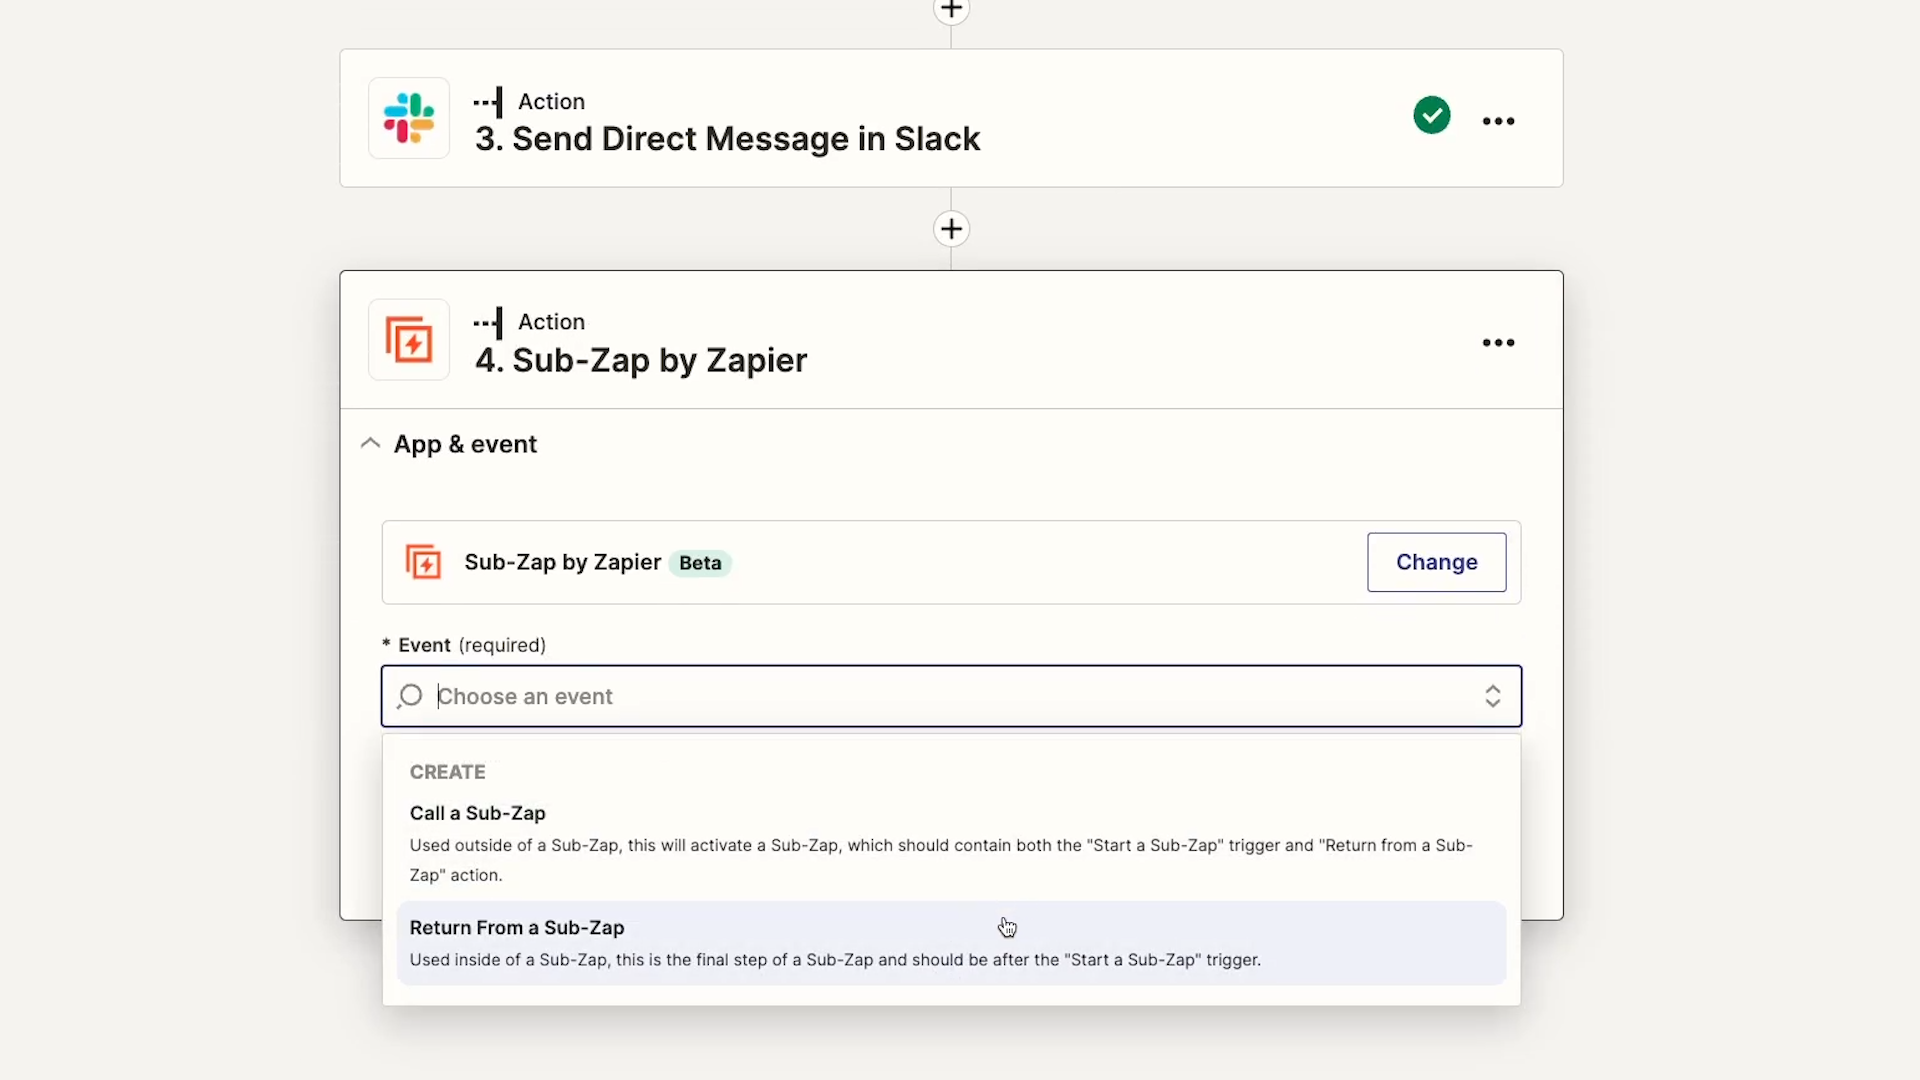
Add an action, search for “Sub-Zap”, and choose “Return from a Sub-Zap” as the event.
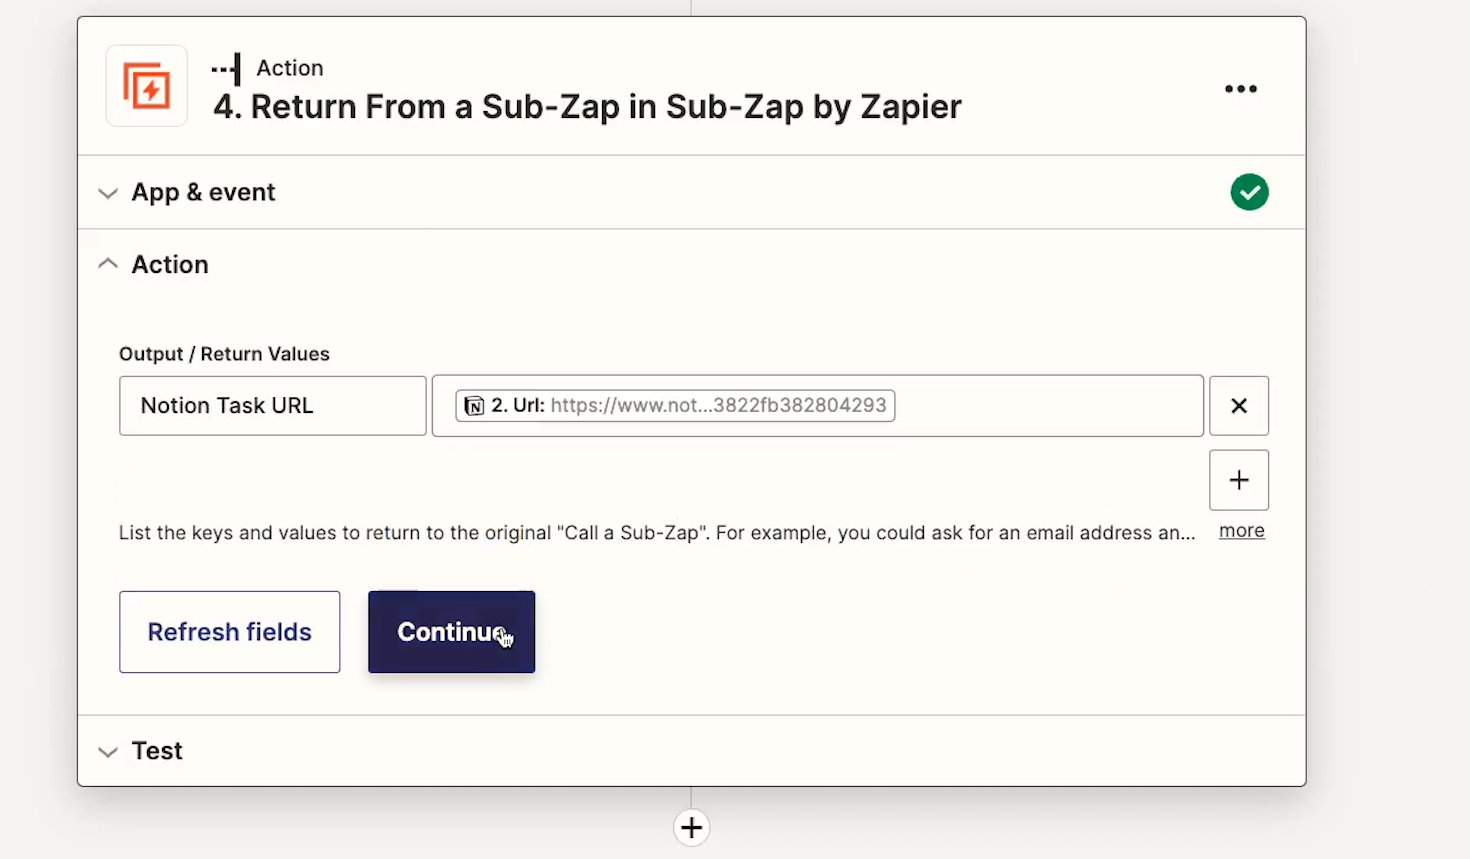
In the “Output/Return values” fields, you can include any data that you’d like to send from your Sub-Zap to any parent Zap that calls on it. We’ll just include the Notion task URL in our example.
Test your return step, then publish the Sub-Zap and turn it on.
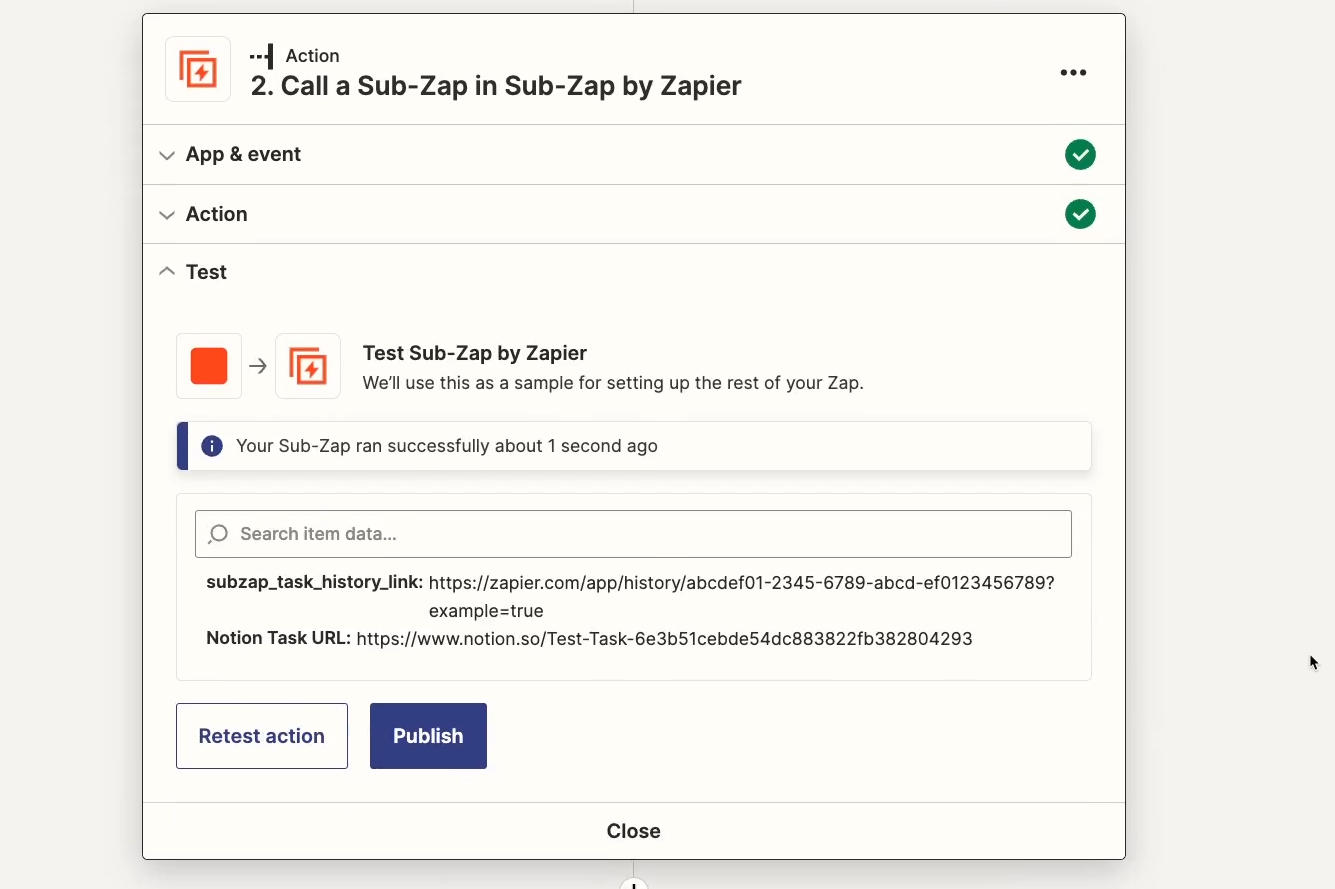
Now, you can go back to your parent Zap and test the “Call a Sub-Zap” action again. This time, the test should succeed.
However, when you test a Sub-Zap call from the Parent Zap, the Sub-Zap won’t actually run any of its actions. Like we mentioned before, testing your work with Sub-Zaps is clunky.
To make sure that the whole setup works, ensure that both the parent Zap and the sub-Zap are on, and run a live test.
For our example, that means we’ll have to fill out the Airtable form to trigger the Parent Zap, which should in turn call on the Sub-Zap, which will create a Notion task, and send a Slack message.
First we fill out the form.

Then, after we wait a few minutes for the Zap to trigger, we see a new Slack message.

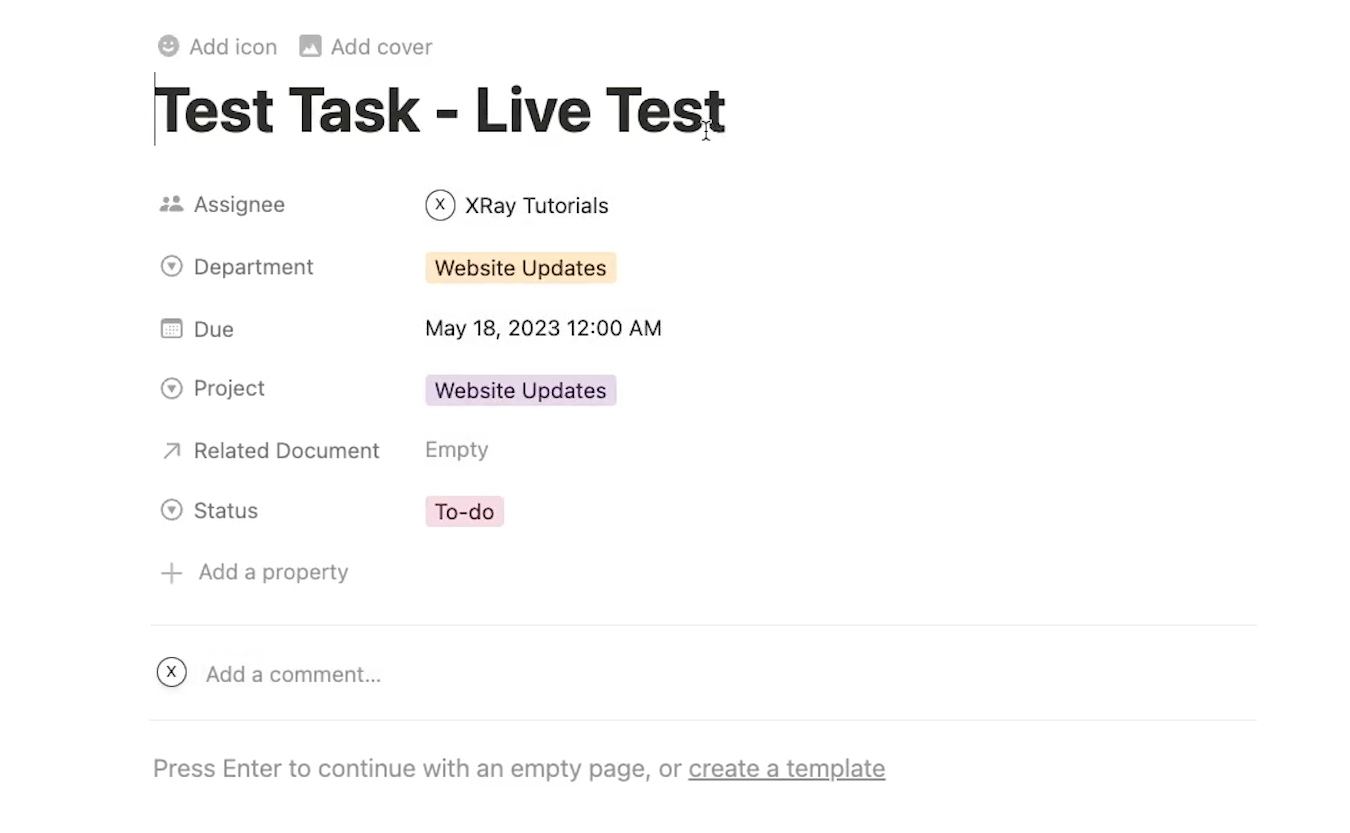
The link takes us to the newly created task in Notion.
So to sum it up, here’s how you can create a new Sub-Zap:
1. Create a new Zap
2. Choose “Start a Sub-Zap” as the trigger
3. Add the inputs you want your Sub-Zap to collect
4. The first time you test the trigger, you won’t see any sample data
5. Create a new Zap to send the data (a “parent Zap”)
6. In your parent Zap, add a “Sub-Zap” action and choose “Call a Sub-Zap”. Call on the Sub-Zap you created earlier, filling in all of your inputs
7. Return to your Sub-Zap. Test the trigger again, and load the recent call from your parent Zap.
8. Add actions to your Sub-Zap, using data from your parent Zap as needed
9. Add a “Return from Sub-Zap” action to complete your Sub-Zap.
10. Test your Sub-Zap, turn it on, and publish it.
11. Return to your parent Zap, and test the sub-Zap again.
12. Publish and turn your parent Zap on.
13. Run a live test of your parent Zap. It should run all of its own steps, as well as the Sub-Zap.
Then, you can just call the Sub-Zap from any other Zap by adding a “Sub-Zap” step and choosing “Call a Sub-Zap”.
Sub-Zaps are a useful tool for building more efficient, easily maintainable Zaps. Since it’s still in beta, there’s still lots of room for improvement, but it’s well worth the effort if you’re building for a team and find yourself constantly duplicating your automations for each team member.
Give it a shot today, and start saving some time while you’re building! If you’d like to see more tips about no-code automation and productivity, be sure to check out our blog or our YouTube channel. You can also follow XRAY on Twitter, Facebook, or LinkedIn.


.pptx.png)
.pptx.png)