
Frequently used templates are a great opportunity for automation. Instead of manually entering data into your regular reports or presentations, you could automated that process with a simple form.
In this post, we'll show you how you can automatically create a Google Slides presentation from a template with a simple Zapier automation. This Zap will let you create any frequently used presentation in seconds, such as reports, kickoff decks, or, as in our example for this post, meeting agendas.
This might not sound like much, but when we combine this automation with other actions like creating a Google doc and an email that sends links to both of our documents, you’ll see how quickly automation can amplify your work.
But we’ll cover those steps in our next posts. For now, let’s just look at how you can automatically generate Google slides presentations from a template.
Steps:
1. Create a presentation in Google Slides
2. Add {{variables}} to your presentation in curly braces
3. Create an Airtable base with columns that correspond to your variables
4. Create a Form view and fill it out to create test data
5. Build your automation in Zapier
A. Trigger: New record in view (form view)
B. Create a presentation from template
C. Match your data to your variables
6. Test your automation
To build this automation, you’ll need Zapier, Google Slides, and Airtable.
You could build a similar automation using alternative software if you’d prefer, as the same basic concepts will generally apply to other applications. If you’d like to trigger this automation with a survey from Typeform instead of Airtable, that will work just fine.
However, if you want to follow along step by step, we’d recommend using the same programs.
Create a new Google Slides deck, and fill it in with all the content and styling that you want to see in the final product. You can also copy and paste an existing Slides presentation that you’re using as a template.
Note that you don’t need to save this slide deck as a template in Google Drive. Zapier can’t access Google’s template system, so the automation will be set up to just create a copy of a regular Slides file updated with custom data.
Once your presentation is ready, identify the text that you want to update each time you create and send out the deck, such as the client’s name, the date of the meeting, your progress updates - anything that needs to be dynamic.
To replace that text with variables that Zapier will recognize, just give your variable a simple name and enclose it in curly braces. For instance, you’d replace the meeting date with something like this:
{{meetingDate}}
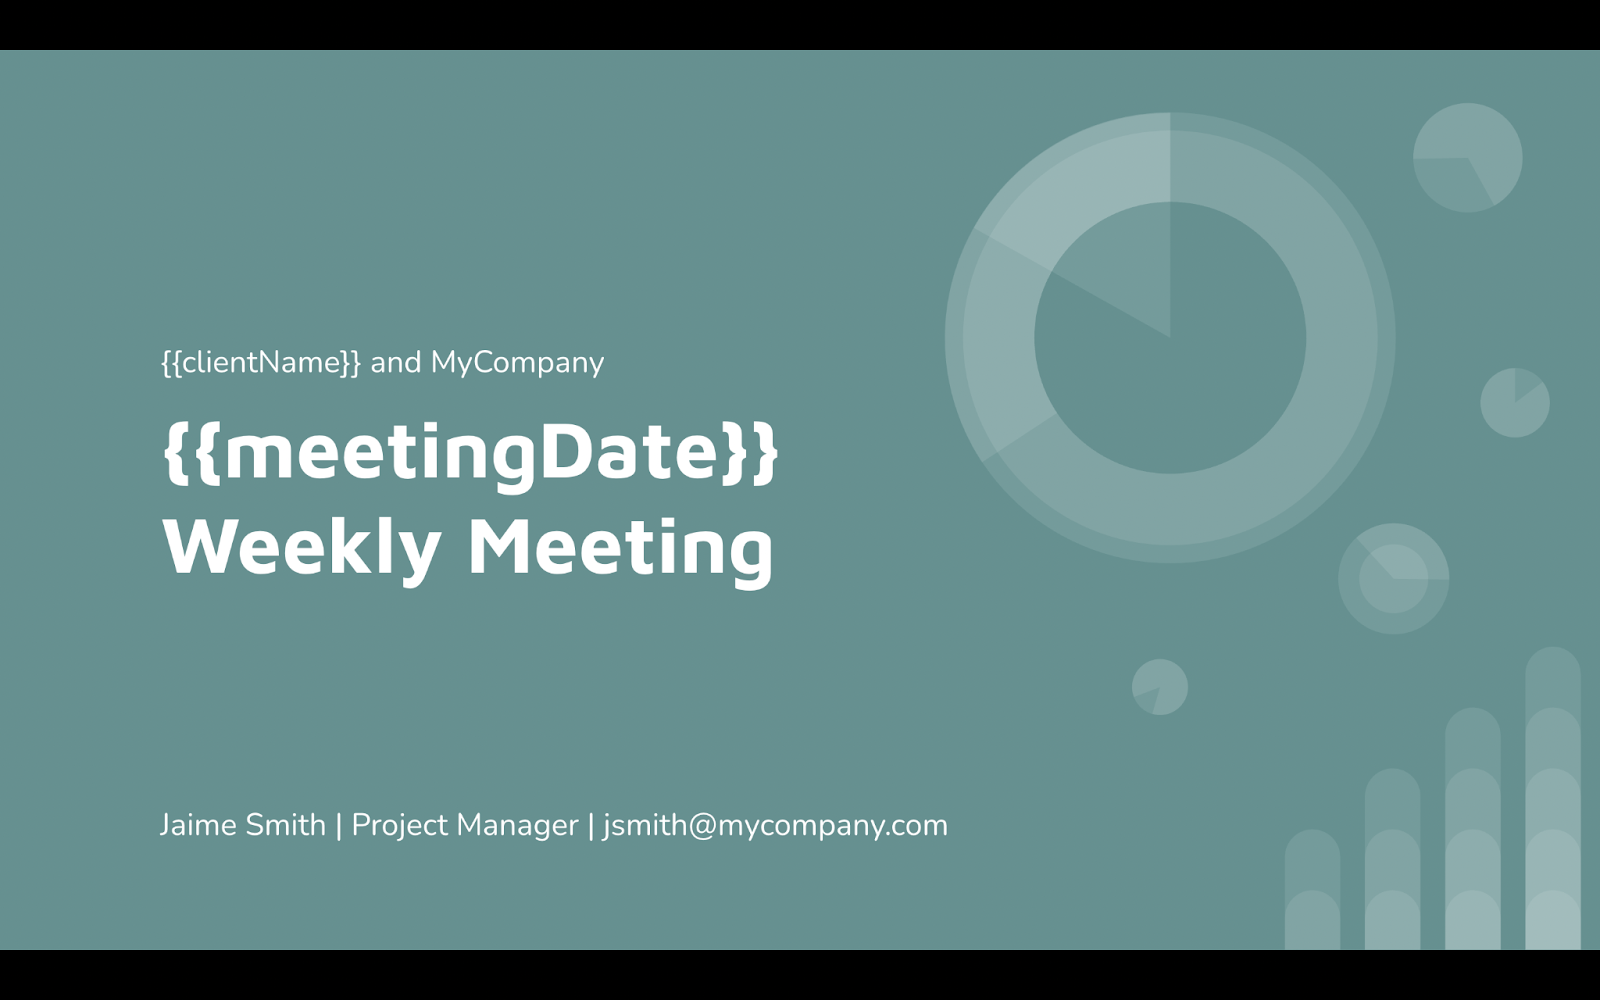
You can use underscores or capital letters in your variable names, but it’s best to avoid using spaces. While Zapier can recognize Google Slides variables with spaces, it can’t do the same for Google Docs, so it’s easier to just avoid spaces altogether when working with G Suite.
In the finished automation, your inserted text will adopt the style, size, and placement of your variables, so make sure that your design and layout is set up the way you want it.
You can also replace a variable with an image in Google Slides to add some rich visual content. Just because you’re automating this process doesn’t mean you need to sacrifice the quality of your presentations.
Next, head into Airtable and create a new base from scratch.
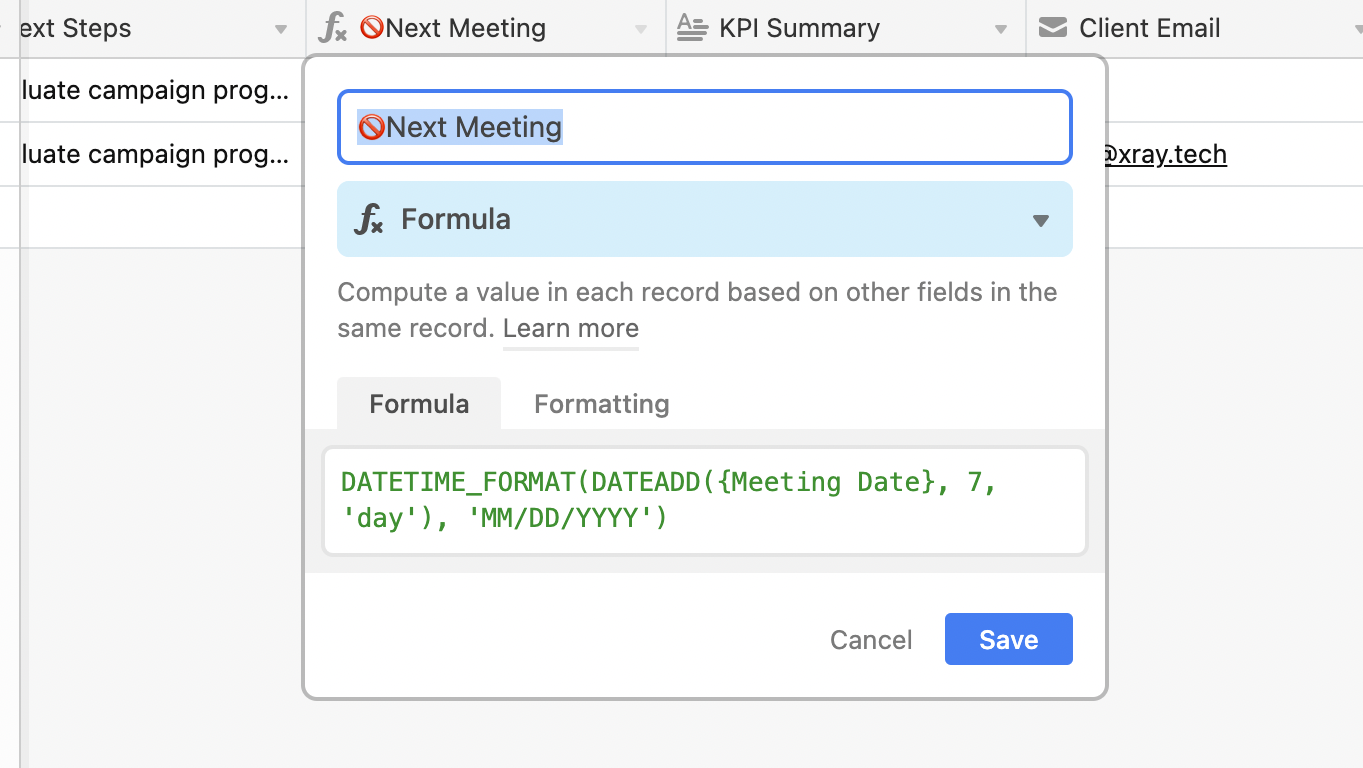
Populate this base with a column that corresponds to each of the variables you just created in your Slides presentation. For instance, you can see that our Airtable base has a field called “Client Name” for the {{clientName}} variable, a “Meeting Date” column for the {{meetingDate}} variable, etc.

Be sure to set each column to an appropriate type, and make use of Airtable’s functions to perform calculations. For example, we’ve set up a simple function in the “Next Meeting” column to add seven days to the date stored in “Meeting Date”. Adding automated calculations like this makes it even faster to fill out the form and create the deck.
In your Airtable base, use the “views” menu in the bottom left hand corner to create a form view.
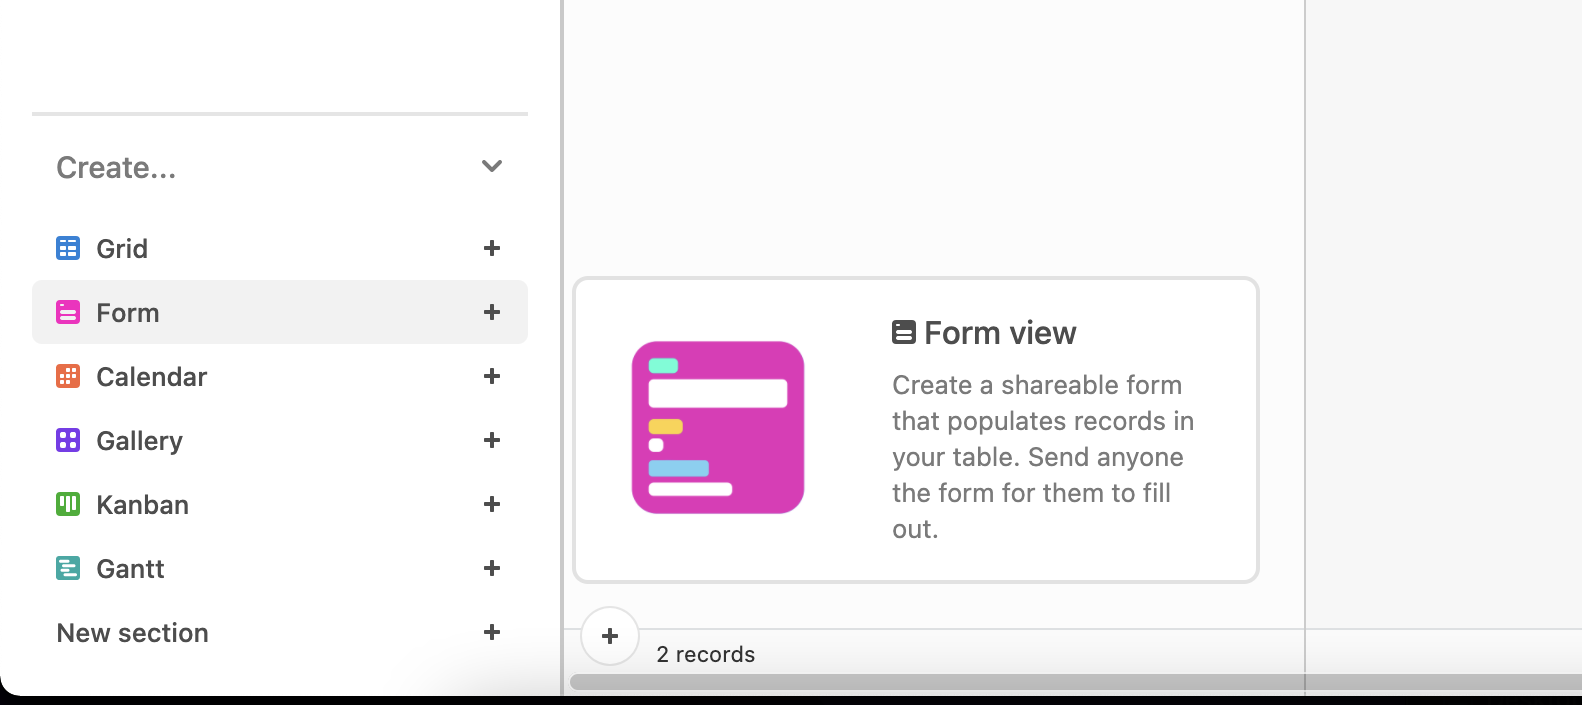
This will create an editable form that you can use to add records to your base one field at a time. You can add descriptions to each question or prompt, and then click on “open form” to actually enter a response.
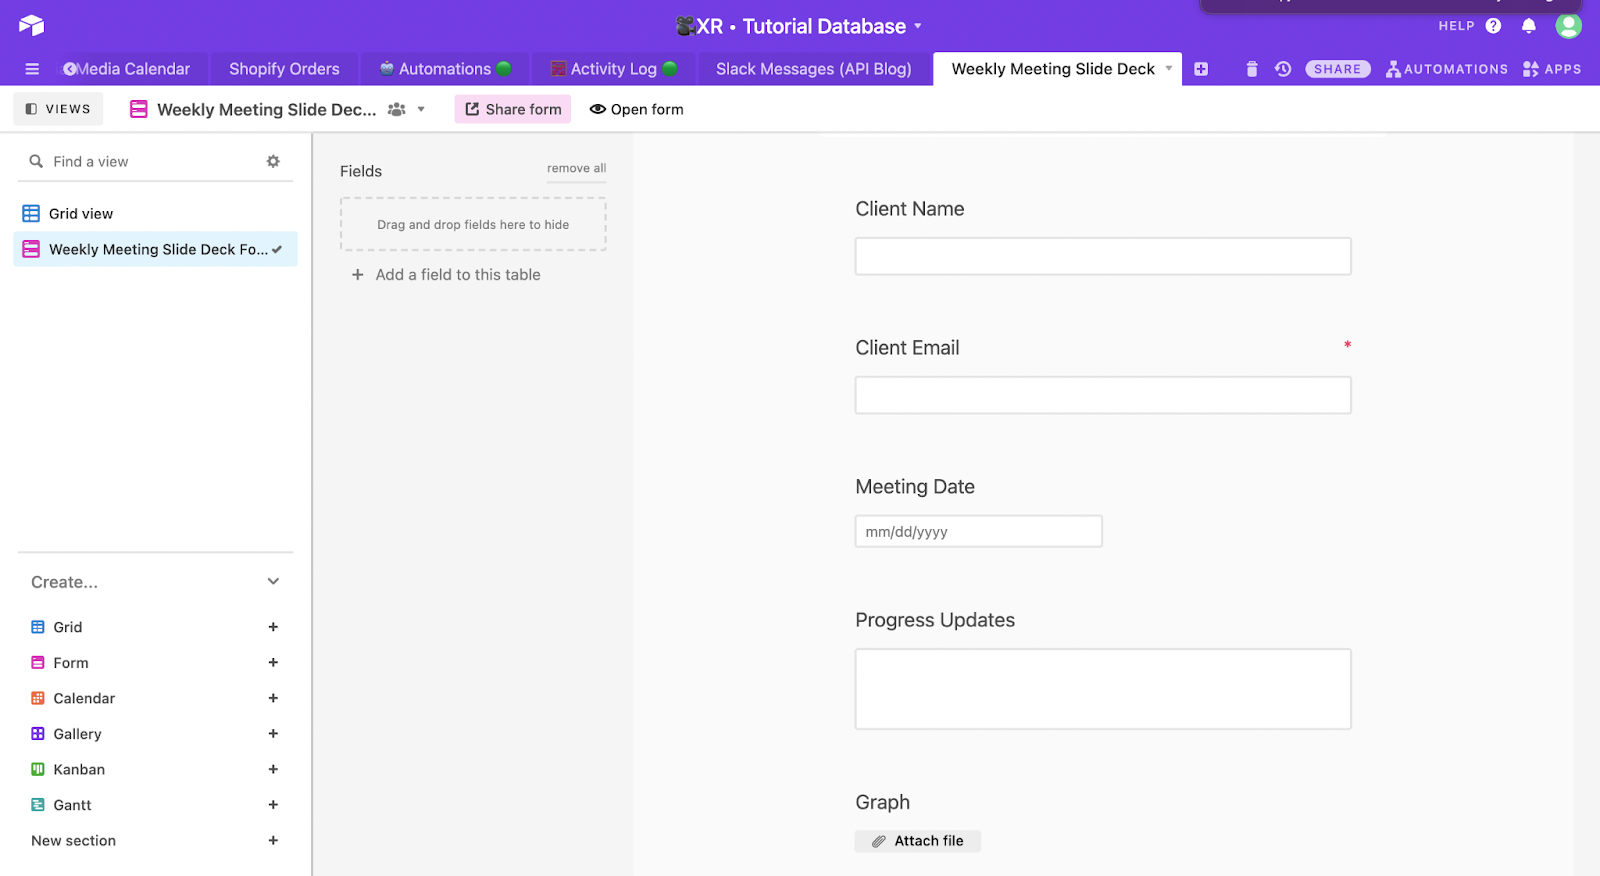
Fill out the form with test data and submit it. With our presentation, database, and test data all set, it’s time to build the automation in Zapier.
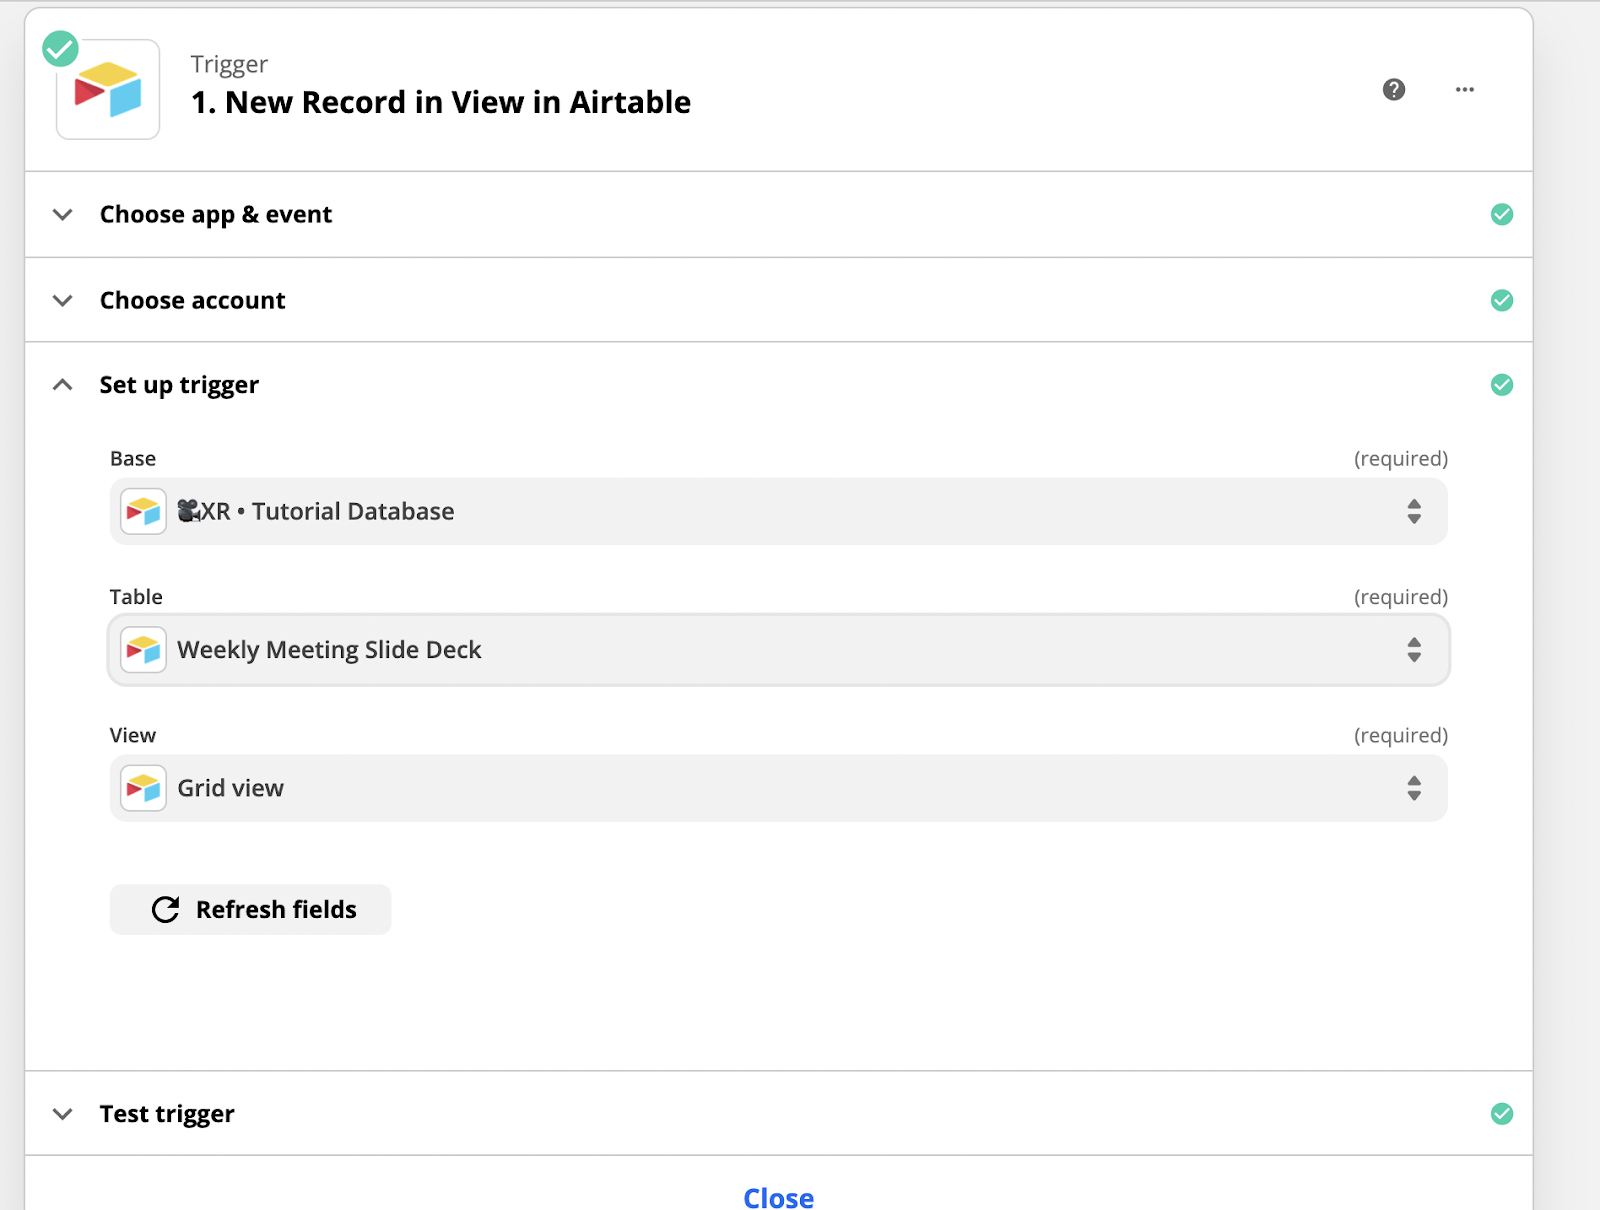
To start the automation, choose Airtable as your app, and select ‘New record in view’ as your trigger.
Pick the main grid view and continue.
For the first and only action of this automation (for now), select Google Slides as your app and choose ‘create a presentation from template’ as the action.
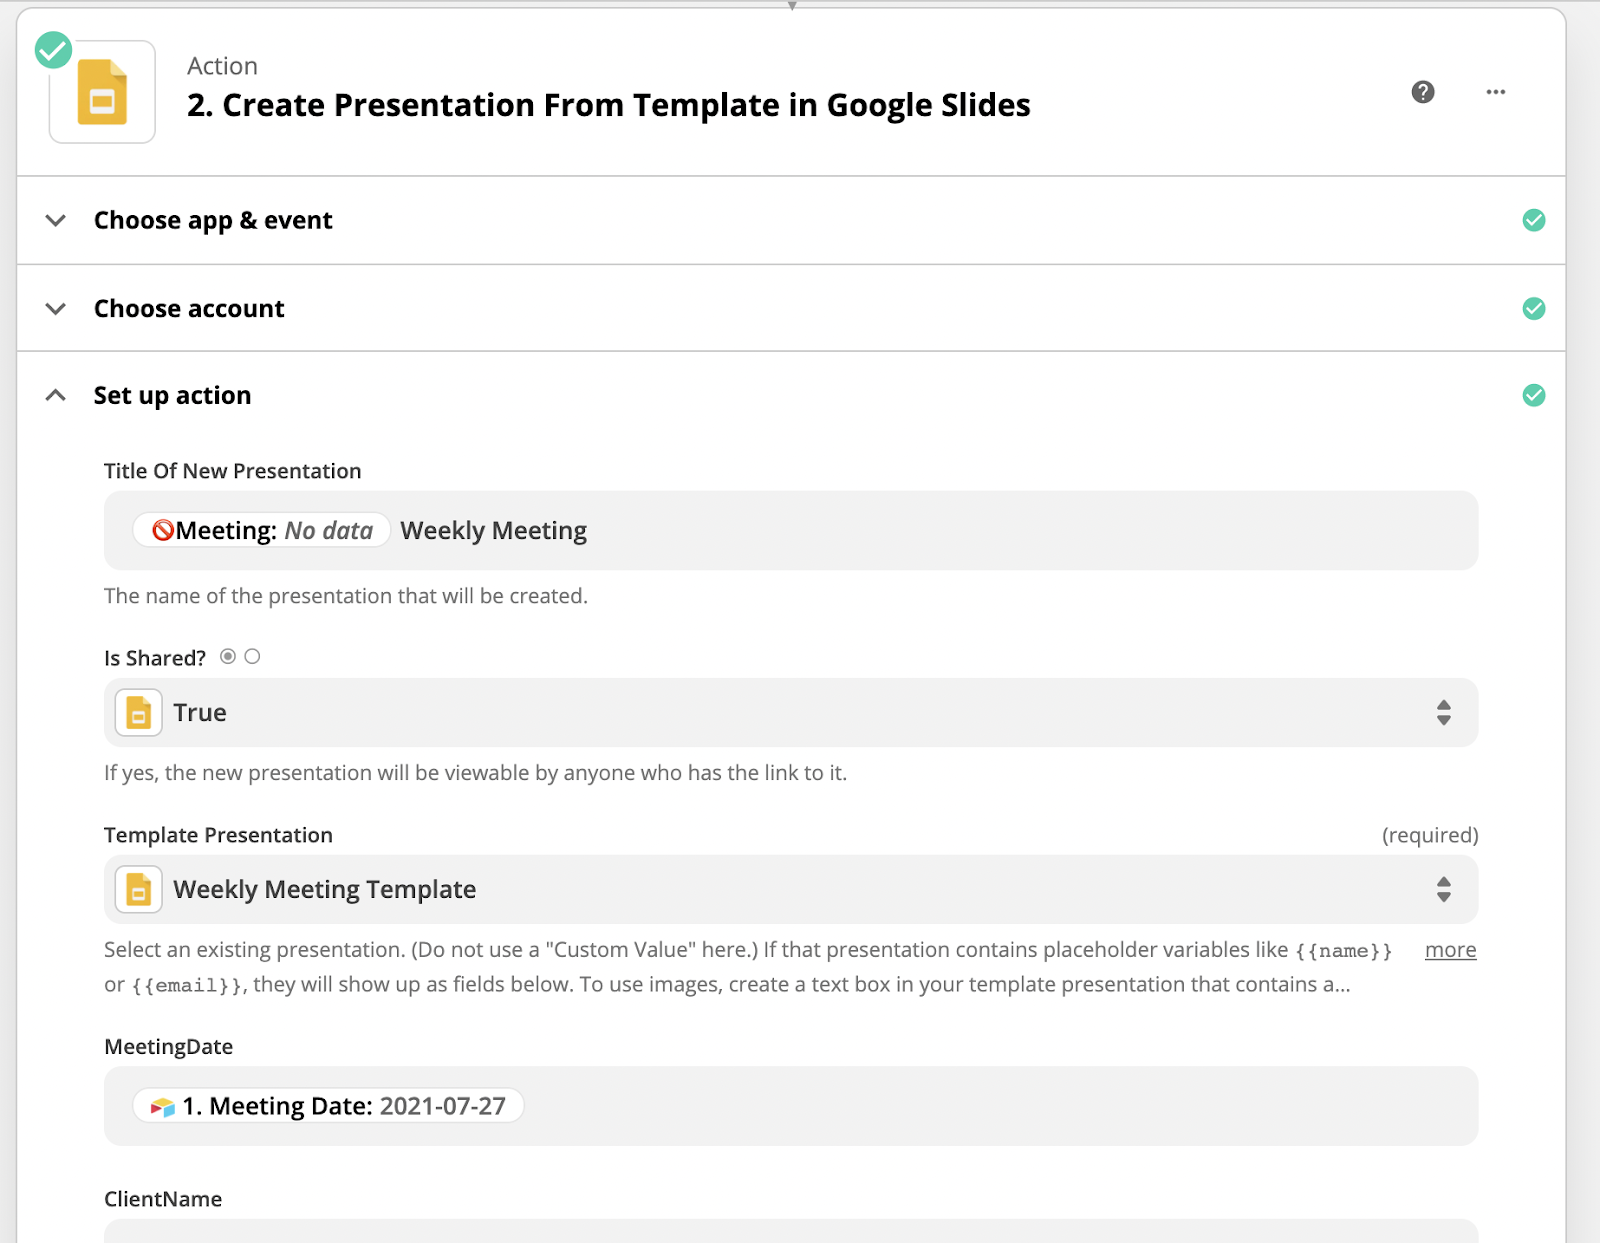
Pick the presentation you created in the first step of this tutorial, and match up all of your data from Airtable to the appropriate variables.
If some of your expected variables are missing, go back and make sure you didn’t use any hyphens in the variable names.
Test your automation. It should create a Google Slides presentation with the data you submitted and the styling laid out in the template.
With this automation complete, now you can make your frequently used presentations in seconds. In our next posts, we’ll build on this automation by creating a step for an automatically-generated Google Doc, and an email that sends both assets to our client.
Get a copy of this Zap from Zapier here.
To learn more about XRAY and how we create more time for mindful work with automations, check out our blog or our YouTube channel. You can also follow XRAY on Twitter, Facebook, or LinkedIn.

.pptx.png)
.pptx.png)
