
While Zoom’s recording feature is a great way to temporarily save calls, we at XRAY wanted to create a more permanent way to archive our meetings for future reference.
With this simple Zapier automation, you can save your Zoom recordings and share them with anyone without having to take up precious space on your hard drive or pay for a higher-priced tier of Zoom with unlimited cloud storage.
You’ll just need accounts for Zoom, Zapier, Google Drive and YouTube to get started. You can also follow along with our video tutorial.
Before you start building the automation, you’ll need to make sure you have a recorded call to use as test data. If you don’t already have a recording in your Zoom account, make one now.
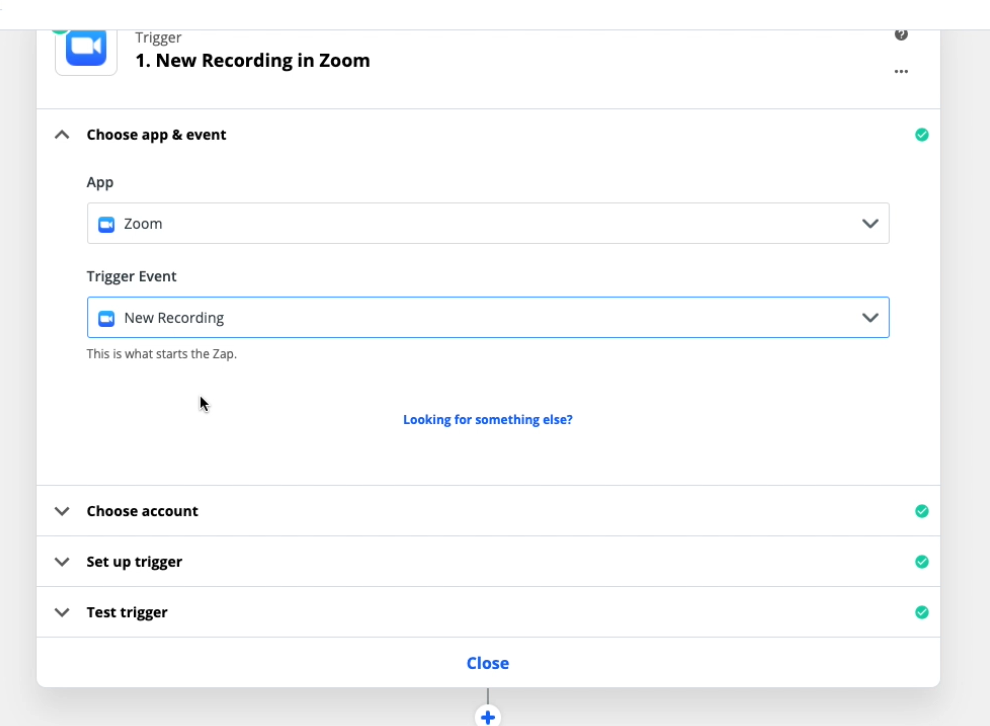
Create a new Zap in Zapier, and choose Zoom as your trigger app. Then, select “New Recording” as the trigger event.
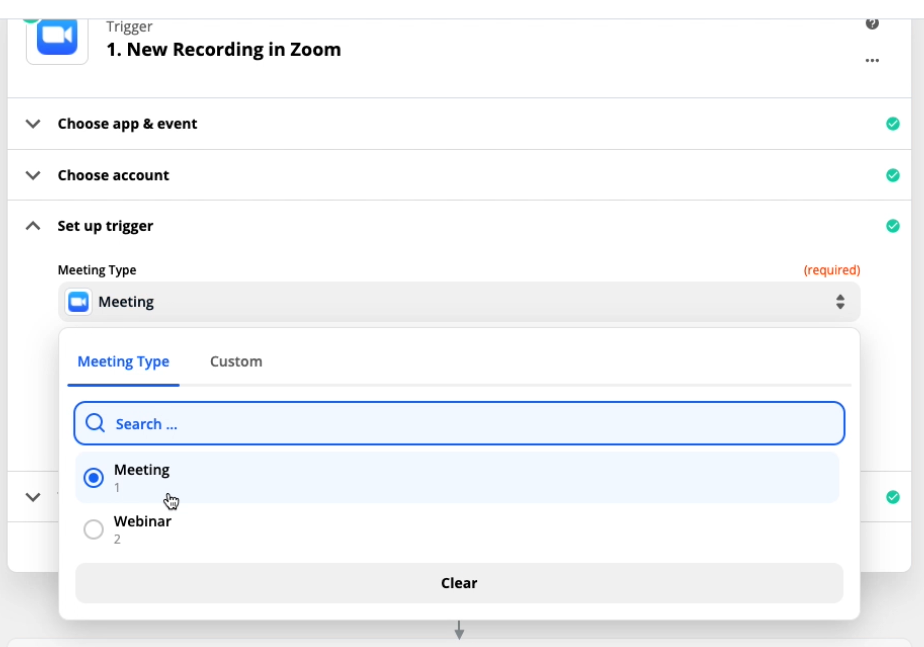
Under “Set up trigger”, choose whether your recordings will be Meetings or Webinars.
If you record both on Zoom, you’ll need to make two separate Zaps to capture them: one with “Meetings” selected, and one with “Webinars” selected.
Next, test your trigger. It should find your most recent Zoom recordings, but you may have to click “Load more” to refresh if you’ve just made a new recording that you want to test.
Note: With certain plans, Zoom only holds your cloud recordings for 7 days.
You’ll see that Zapier’s pulled in all sorts of data from Zoom, but the main thing we’ll be concerned with is the variable called “download_url”.

Before we can upload your file to YouTube, we need to save it to Drive first. This is because YouTube can’t upload a video from a download link, which is all that Zoom gives us to access our recordings.
Add an action step to your Zap, and choose Google Drive as the app. Then, select “Upload File” as your Action Event

Under Action setup, select your Google Drive account (you’ll need to connect it with Zapier if you haven’t already) and choose the folder you want to save your recordings to.
Then, in the “File” field, use the download URL retrieved in the first step: “1. Video Files Download URL.”
Leave “Convert to Document?” blank, and name your file whatever you want. To give each file a unique name, just select any of the variables that Zapier pulled in: Start Time, Topic, etc.
Lastly, enter “.mp4” as the File Extension to make sure Drive will process the file as a video.
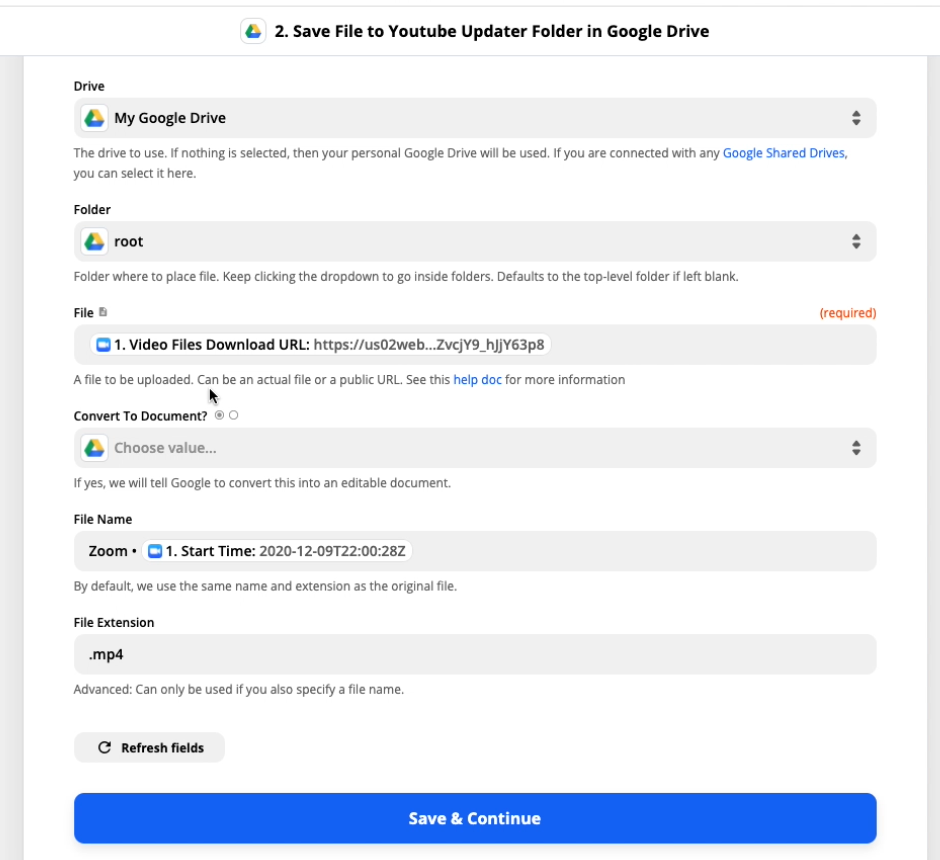
Test this step, then continue if everything worked properly.
Finally, it’s time to actually upload your video to YouTube.
Add another action step, choosing YouTube as your App and Upload Video as your Action Event.
Fill in the title and description fields with whichever variables you’d like. We’ve chosen the recording Topic for the title and the Start Time for the description.
For the “Video” field, select the variable that says “2. File (Exists but not shown)”. This is the video file itself, and that “exists but not shown” message just means that Zapier can’t show a preview of the video file.

Next, select whether you want the video to Public, Private, or Unlisted. You can ignore the Publish At field, and add any tags you want to the video (but there’s no need to add tags if your video isn’t public). Choose whether or not you want to notify your subscribers, and then click “Save and Continue” to test the step.
If you set up the Zap correctly, you should now see the video getting uploaded to YouTube. You can turn your Zap on, and now you’ll be able to save all of your Zoom recordings without having to pay more for Zoom.
If you’d like to learn more about how automation can support your workflows, be sure to check out our blog or our YouTube channel. You can also follow XRAY on Twitter, Facebook, or LinkedIn.

.pptx.png)

