
The repeater module in Make (formerly Integromat) lets you repeat actions in your scenario as many times as you specify.
Essentially, it’s a tool for building loops within your scenarios. This could be useful for sending out repeated reminders, creating several similar pieces of data, or any other situation where you need to repeat an action multiple times.
If you’re looking to loop through the contents of an array or list, you’ll probably want to use the iterator instead. Check out our tutorial on using the iterator in Make here.
Before you add a repeater, you’ll want to build a scenario that has a trigger module and at least one action module.
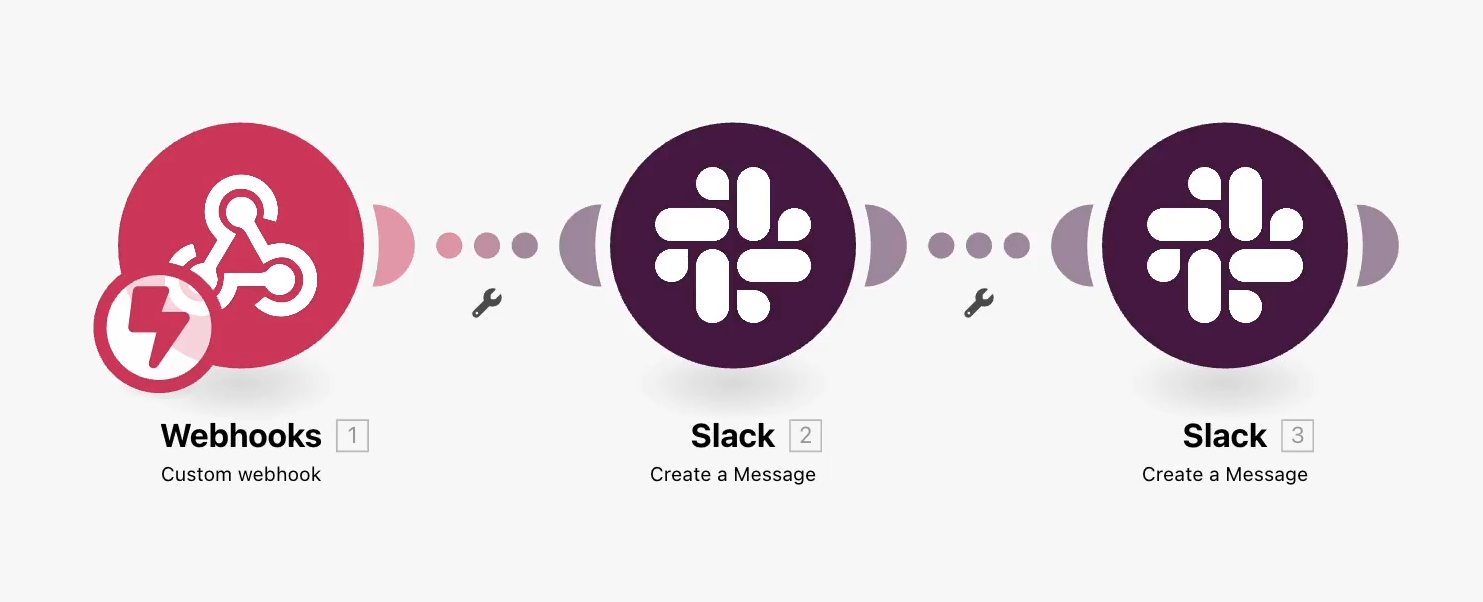
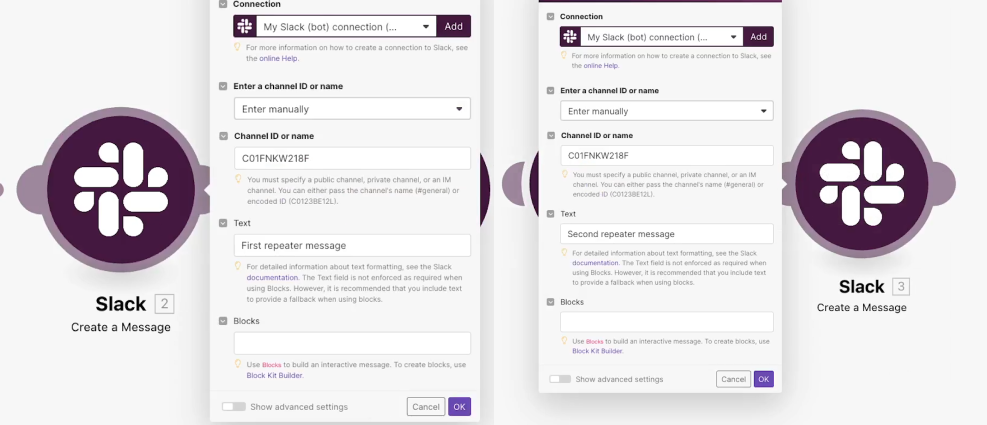
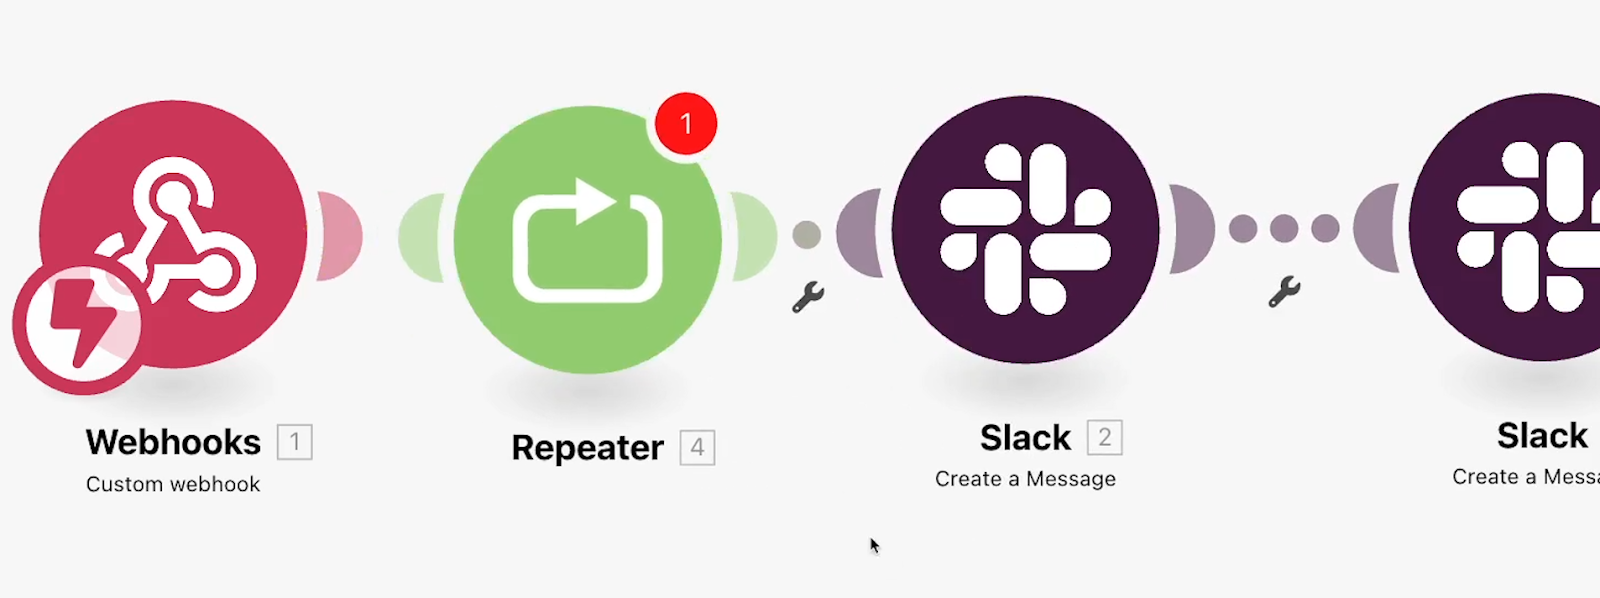
In our example, our scenario will run whenever it receives a webhook, and will send two Slack messages. The first will say “First repeater message”, while the second will say “Second repeater message”.
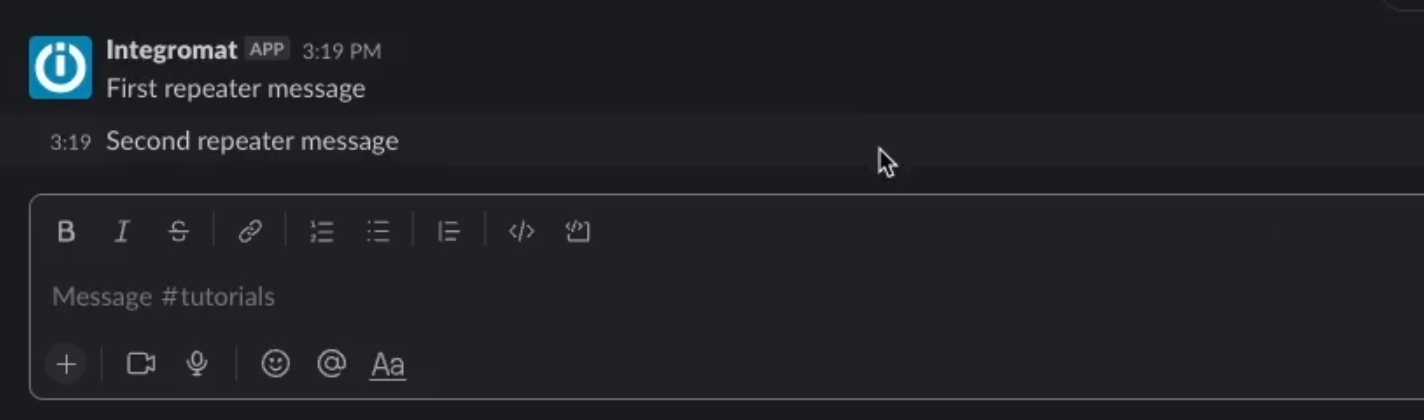
If we run it now, we’ll see both of those messages appear in Slack - just one time each.
To add a Repeater module, click on the green “Flow control” icon and select “Repeater” from the list.
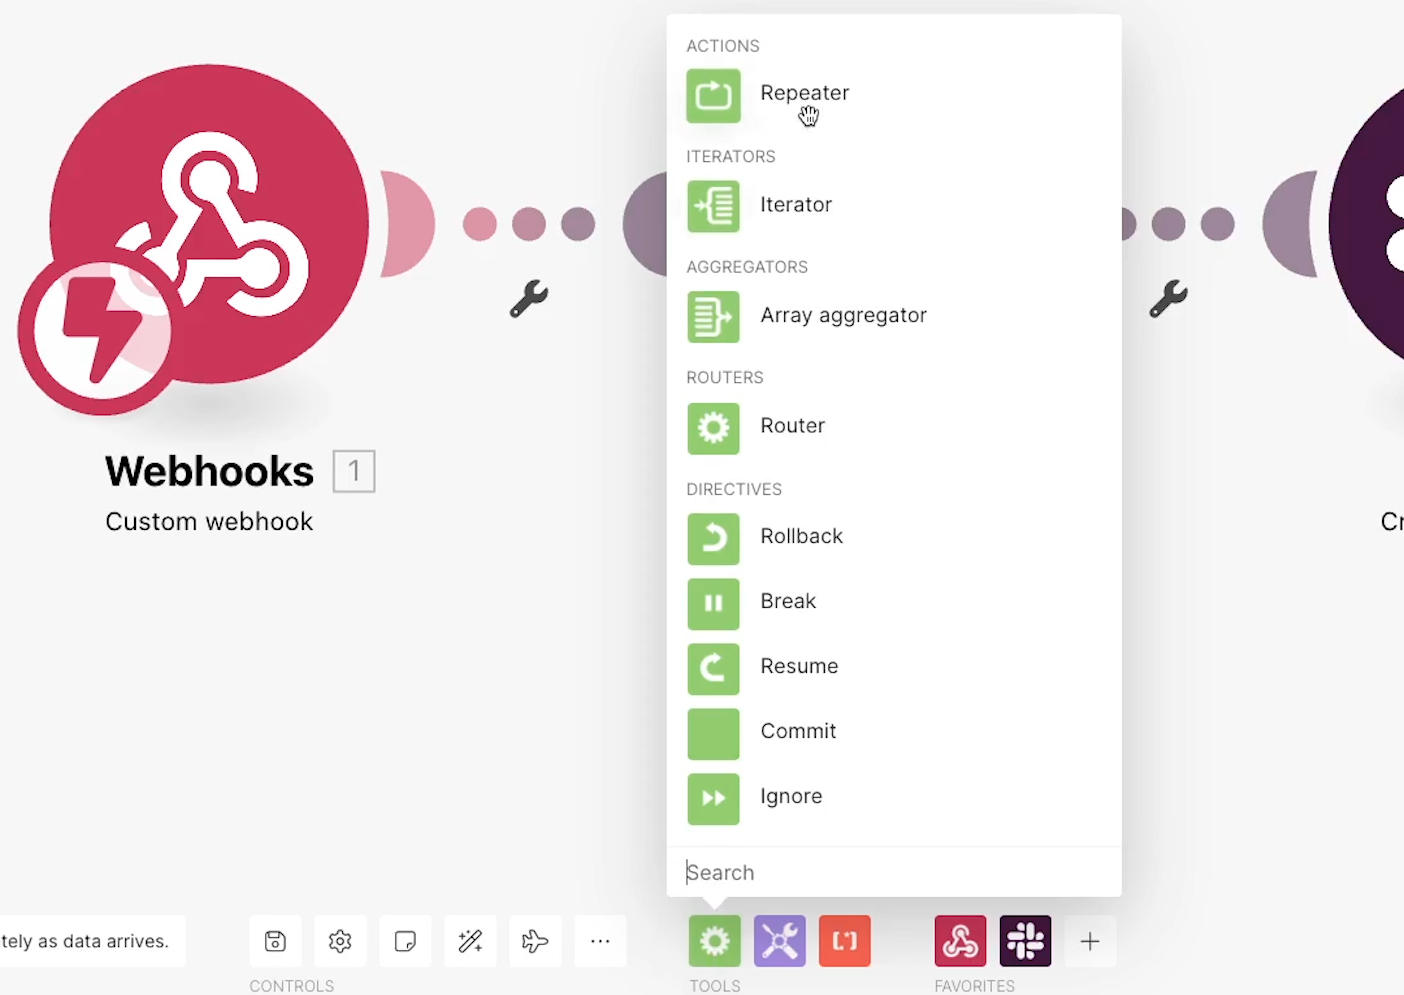
Place your repeater module before all of the actions that you want to repeat. We’ll place ours before both of the Slack modules, so they will both be part of the loop.
Click on your repeater module to configure it. You’ll see two options: “Initial value”, and “Repeats”.
“Initial value” is the number the repeater will start at. This defaults to 1, which is what you’ll usually want to use.
In the “Repeats” field, you can set how many times the loop will repeat. The default is 3, but you can choose any number you’d like.
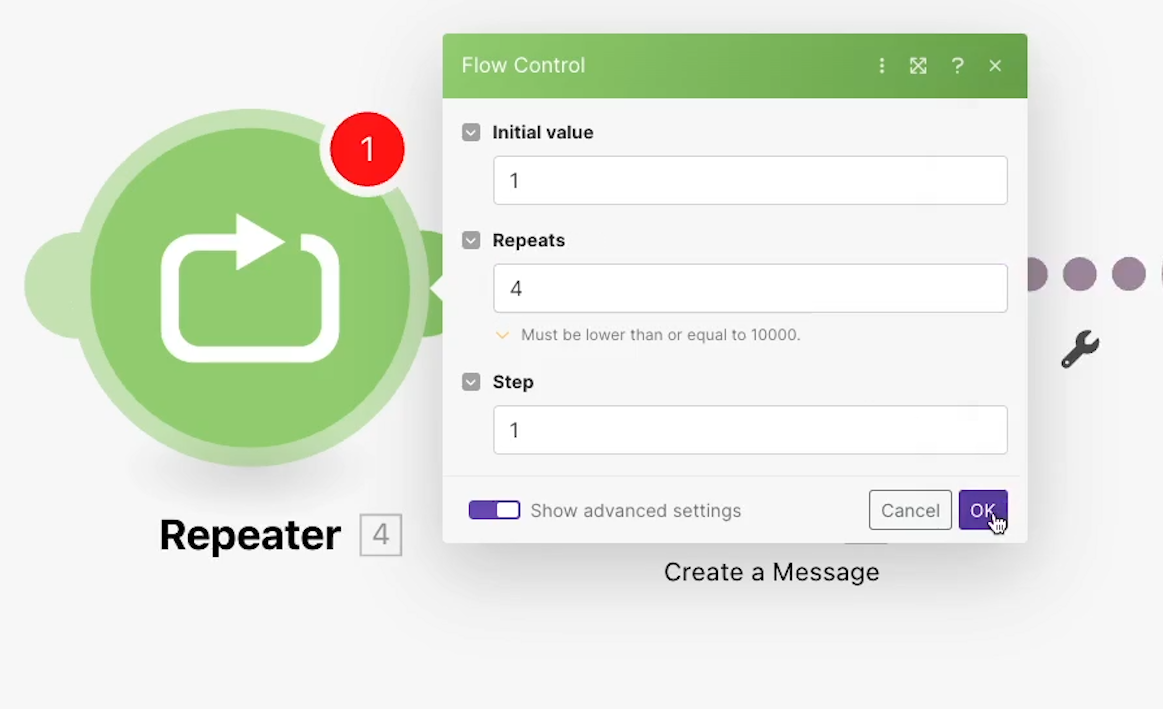
There’s also one more option that you can access by clicking on “Show Advanced Settings”.
The “Steps” field lets you determine how much your initial value will increase each time the loop runs.
If you leave your “Steps” value at the default of 1, then the repeater will generate the number 1 with your first repetition, the number 2 with your second, three with your third, and so on.
But by changing the value, you could have the number increase by any amount you want. You could even use negative numbers to subtract from your initial value with each repetition.
For instance, you might want to send out reminders at 5 minute intervals. So you could set the initial value to 15, then set the step to -5, and send a message every 5 minutes using those values.
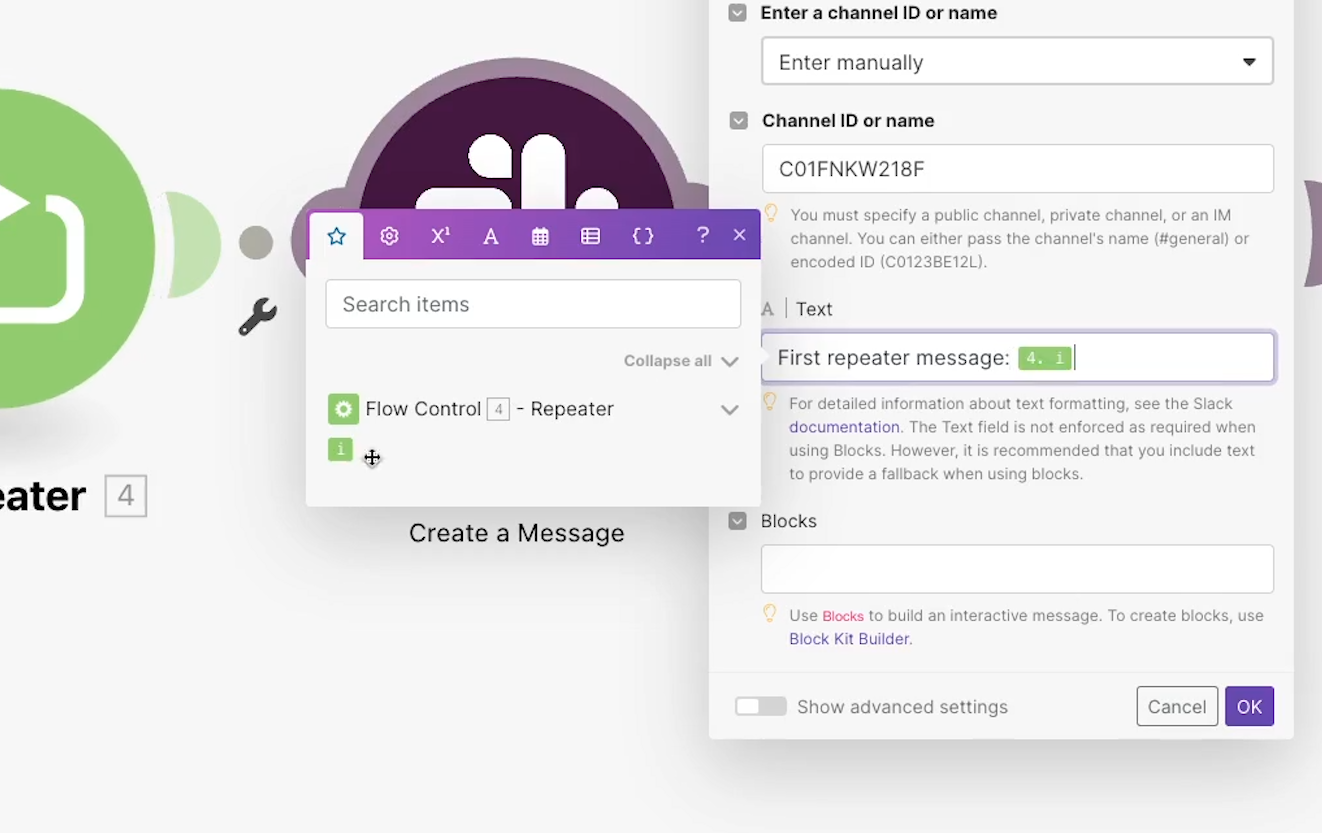
For now, we’ll just keep things simple. We’ll start at 1, and increase by 1 each time, with 4 total repetitions. We’ll also add the “i” value from each repetition into our Slack message, just so we can see how it increases each time.
When we run the scenario, we see 8 messages. Both of the Slack messages got sent 4 times, with the ‘i’ value increasing by 1 in each loop iteration of two messages.

That covers all the basic info you need to know about the repeater module itself. But what if you want to include an action in this scenario that doesn’t get repeated?
In many scenarios with a repeater, you may also want to include actions that only run once. There are two simple ways to add actions that only execute a single time.
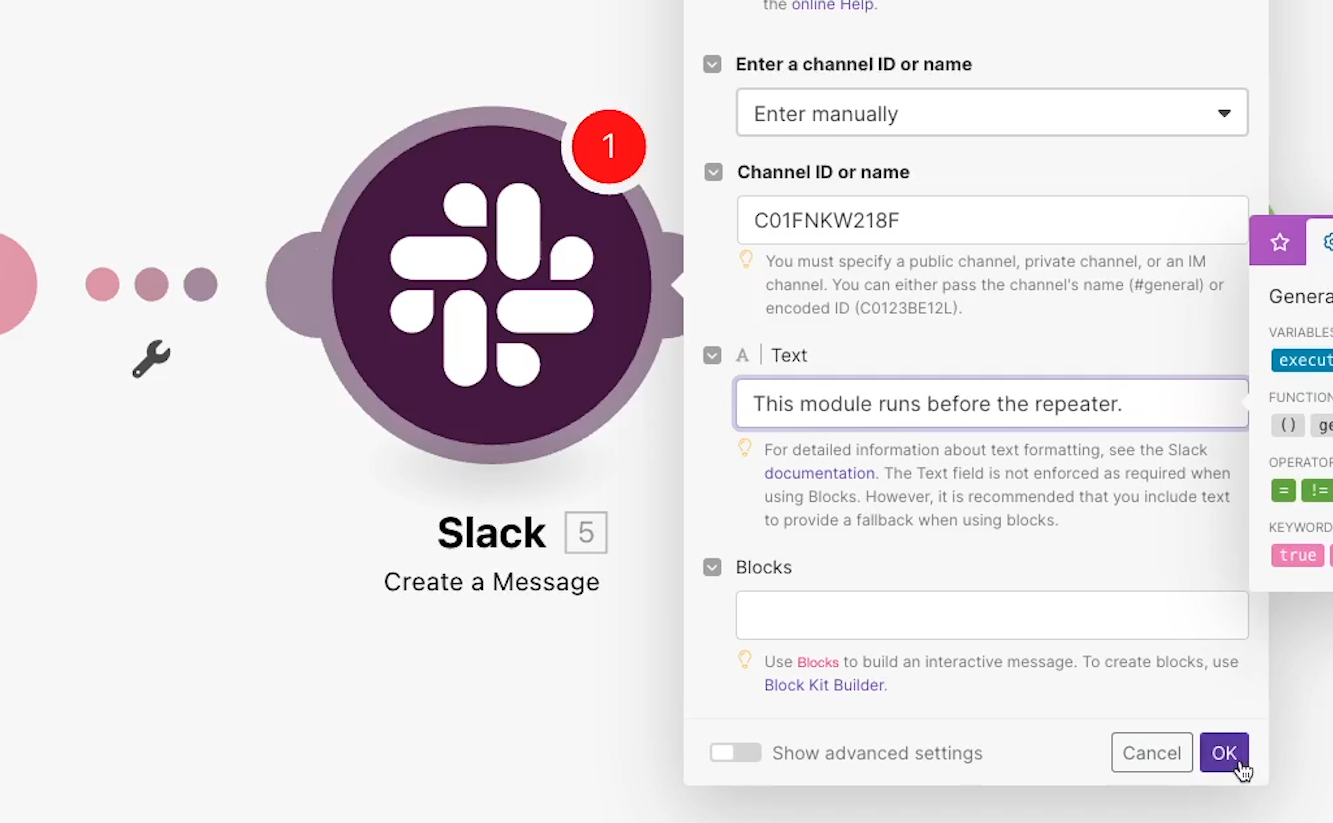
First, you can just add the actions before the Repeater module. Anything that’s placed before the Repeater in your diagram will only run once.
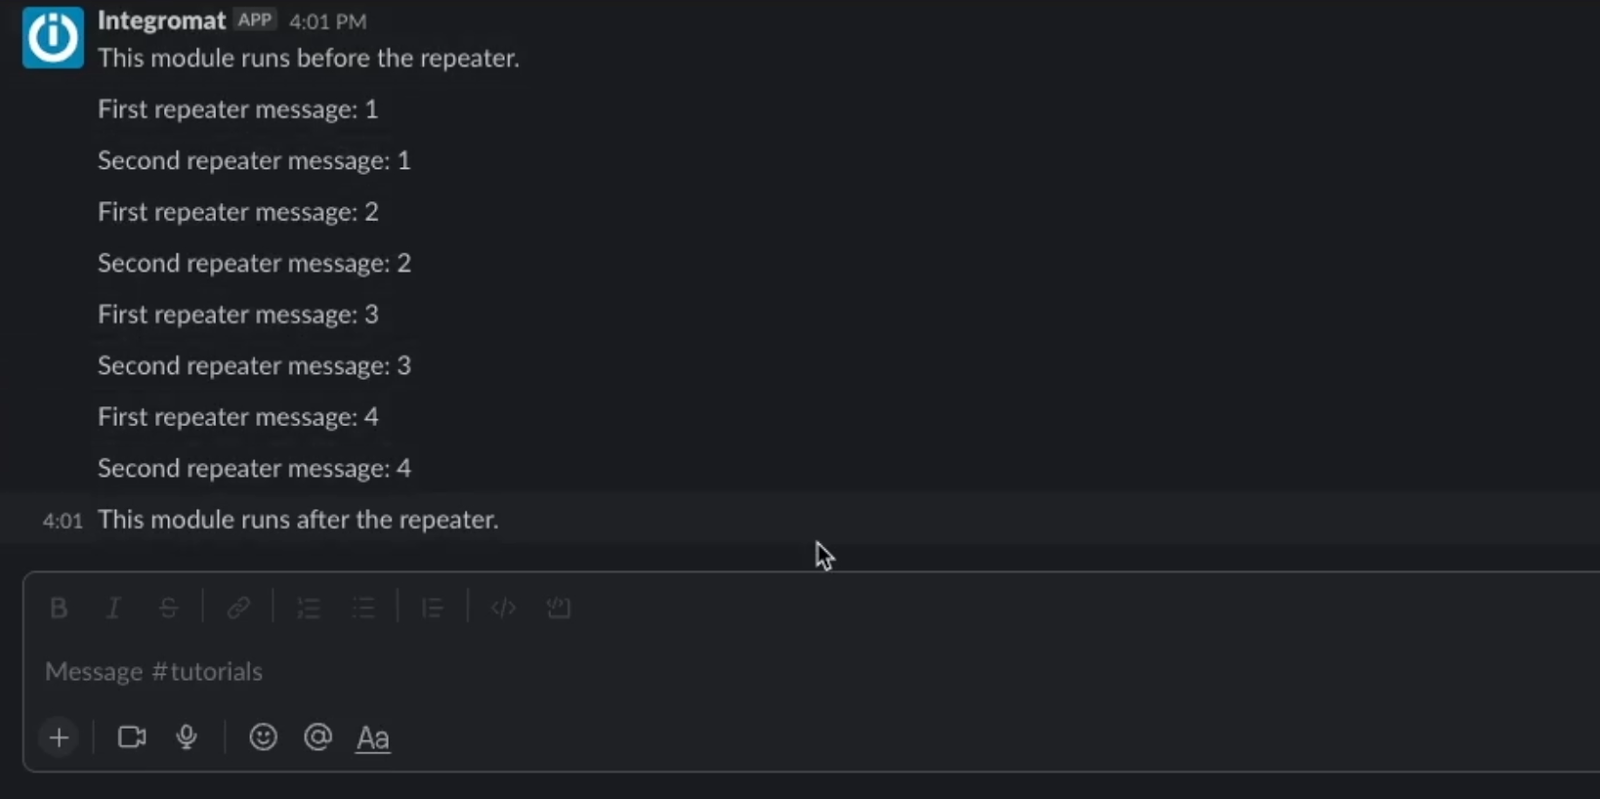
For example, we’ll add another Slack message before the repeater that sends the message “This module runs before the repeater”.
When we run the automation, we can see that we got our “before’ message only once, while the subsequent messages still repeated as intended.

Your second option is to place the action after your repeated modules, and use a filter to prevent the scenario from executing the action until the repeater has completed. You can check the screenshots below for an example.
We’ll add one last Slack module at the end of the scenario, and the message will simply read “This module runs after the repeater”.

Then, we’ll add a filter right before this module. We’ll give it a label that says “Repeater Finished”. In the “Condition” section, we’ll specify that the i value from the repeater must be equal to 4 for the scenario to continue.

In other words, the scenario will only continue past this filter if the repeater has run 4 times, raising the initial value (or i) up to 4.
Note: If you’ve changed the initial value or the step value, make sure to consider that when you’re setting up a filter like this.
We’ll run the scenario one more time, and we can see one “before” message, 4 repeated pairs of messages, and just one “after” message.
Now you should be all set to start adding repeaters to your Make or Integromat scenarios. They’re easy to implement, and they’re a simple way to add useful loops to any of your automations.
If you’d like to learn more about building no-code automations, check out our blog or our YouTube channel. You can also follow XRAY on Twitter, Facebook, or LinkedIn.

.pptx.png)

