
Templates are a wonderful time saver at work, making it quicker and easier to whip up a presentation deck or meeting agenda on the fly.
Apps like Google Docs and Slides have easy tools for saving any of your documents as a template that you can reuse whenever you’d like, so you don’t have to start from scratch every time.
But what if we told you there’s an even better way to handle your templates? What if you could automate the entire process of creating docs and presentations from templates, so that all you had to do was fill in a quick form?
It’s true, and the answer is simple: automation.
Automating your templates with Zapier (and a little help from Airtable) will:
In this post, we’ll show you how you can build a Zap to automatically create a Google Slides presentation from a template. Just follow along, and customize your own presentation however you’d like.
Everything we show you in this tutorial will also work for Google Docs, so you can make a text document instead if you’d prefer.
What you’ll need for this tutorial:
Don’t worry; Zapier and Airtable both offer free accounts which will work just fine for creating this automation.
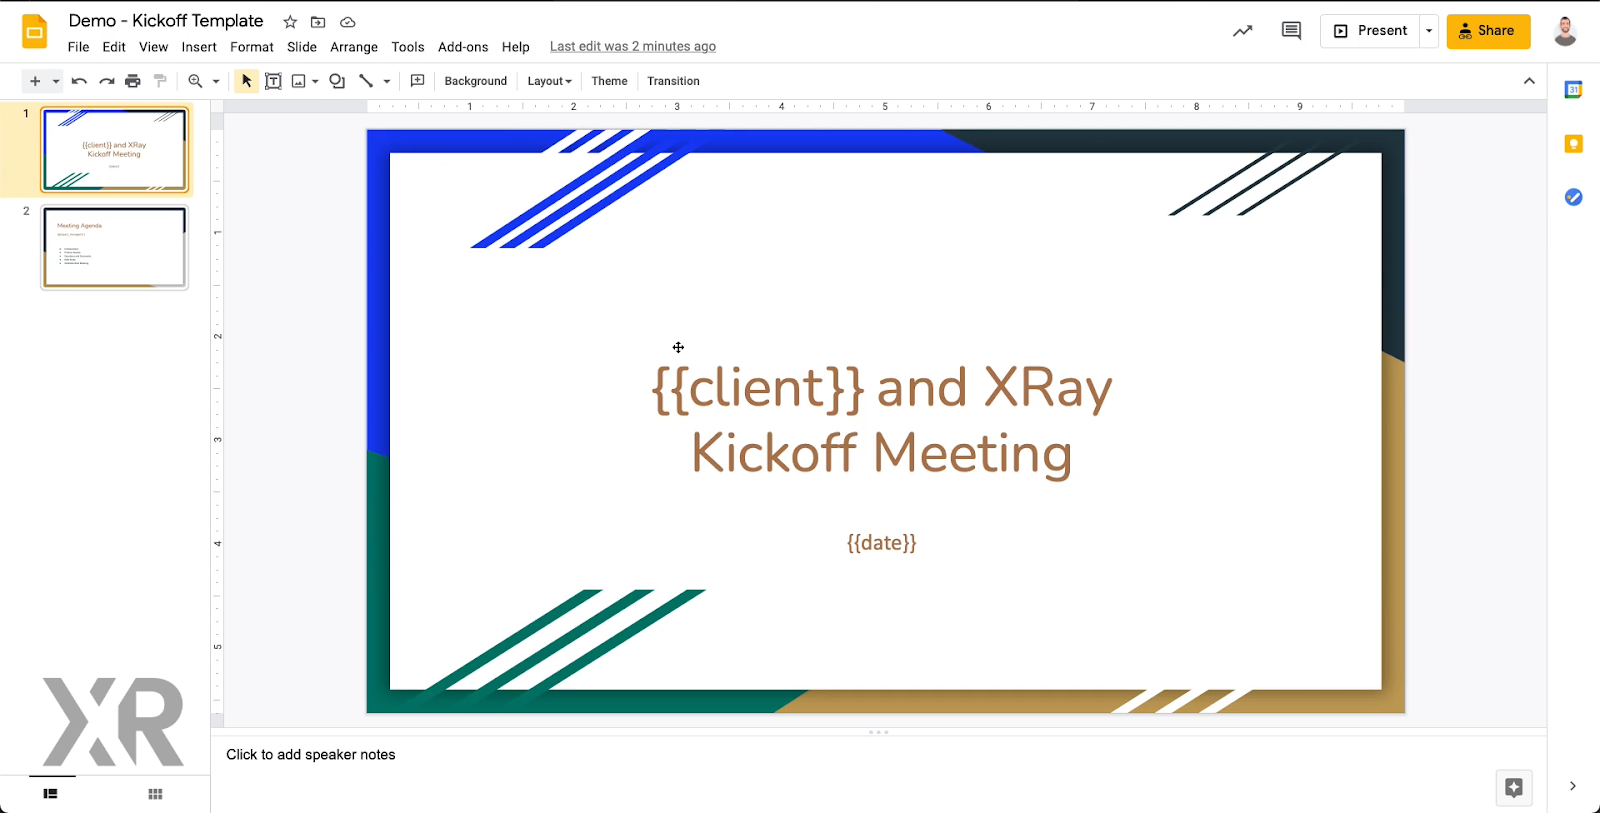
First, you’ll need to make your presentation. For this tutorial, we’ll just make a simple deck with only two slides, but your presentation can be any length that you want.
Now, you need to identify the information that will be replaced and filled in each time you use the template. For instance, the client company’s name, your project manager’s name, or the date. These are your variables, and you’ll need to format them a specific way for the automation to work.
Here, we have our client’s name: “NotRealCo”. We’ll replace that with {{client_name}}
You can call you variables whatever you want, but curly braces are essential. Using them will signal to Zapier that you want to use that bit of text as a variable.
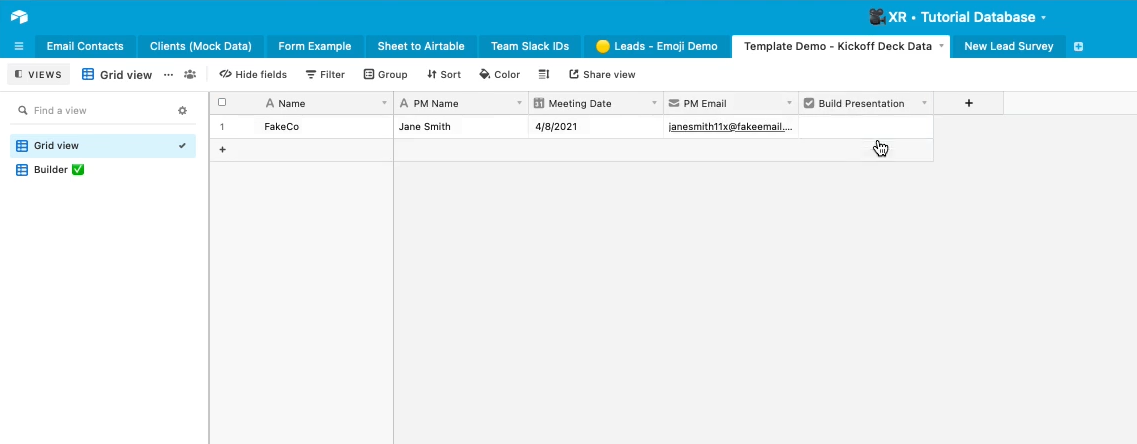
For this step, we’ll move over to Airtable. Create a new base, and make a new table from scratch within that base.
In your new table, create a column for each of your variables. You can use emojis to indicate which variables you’ll enter manually and which will be the result of a calculation or formula. You can read more about how to use emojis in Airtable here.
Then, add a final column called “Build Presentation”, and make the field type a checkbox. Once you’ve made your automation, you’ll trigger it by checking this box.
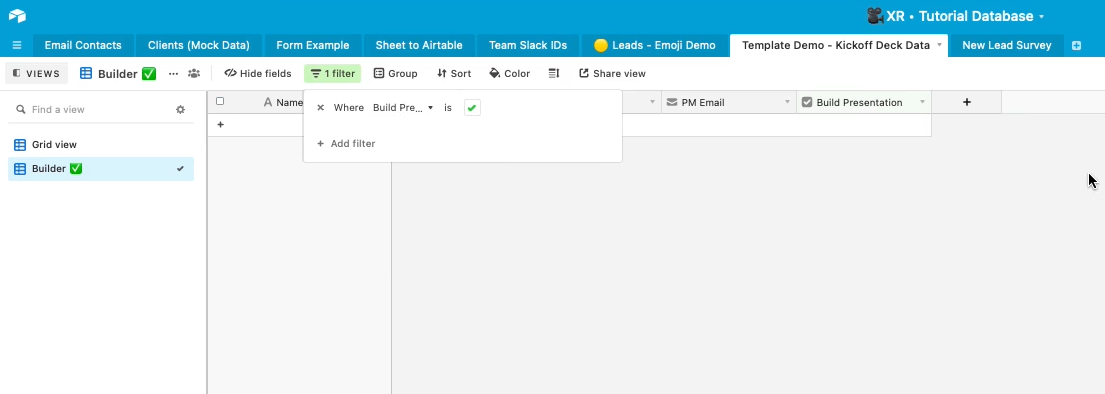
In the same base, create a new Grid view. Click on the “Filters” button to add a new filter: where “Build Presentation” is Checked ✔. Go back to the original grid view, enter some test data into each column, and click on the check mark once it’s all set.
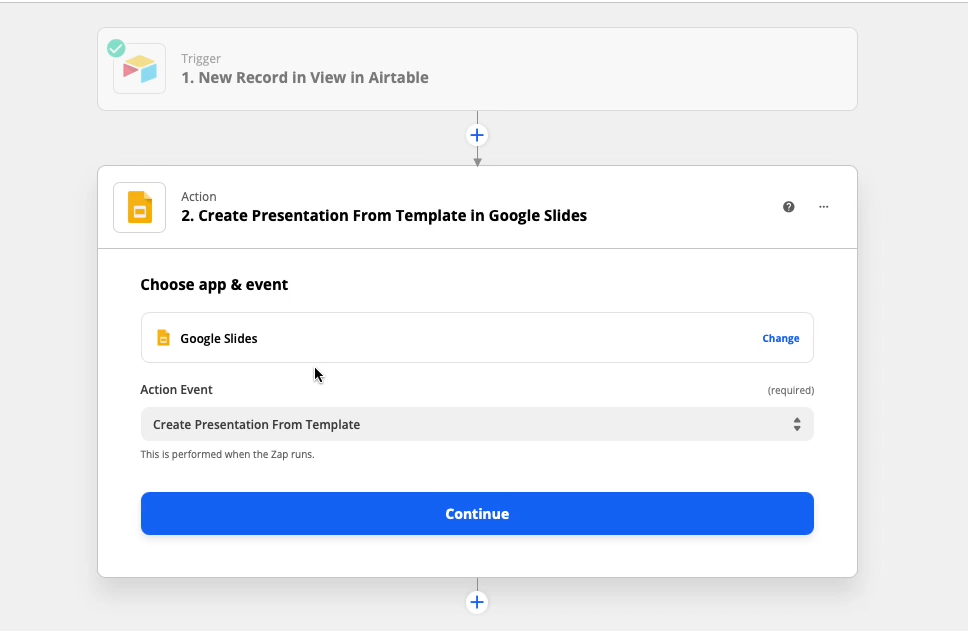
Now it’s time to bring it all together in Zapier. Create a new Zap, and start with Airtable as your trigger app. Then, choose “New Record in View” as your trigger, and select the base and table, and “Builder” view that you made earlier.
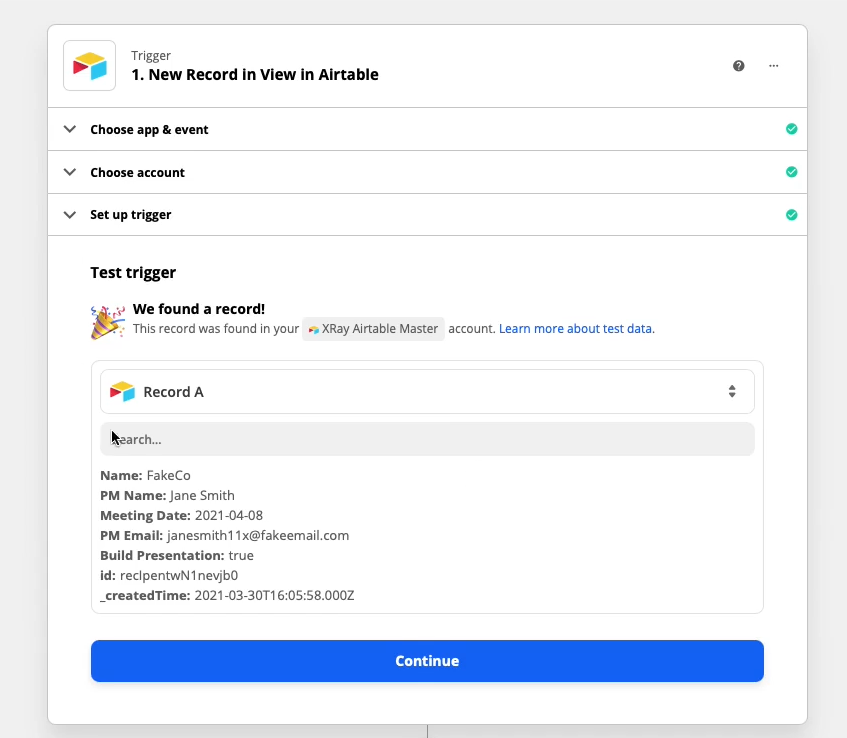
Test your trigger. It should find the data you just added.
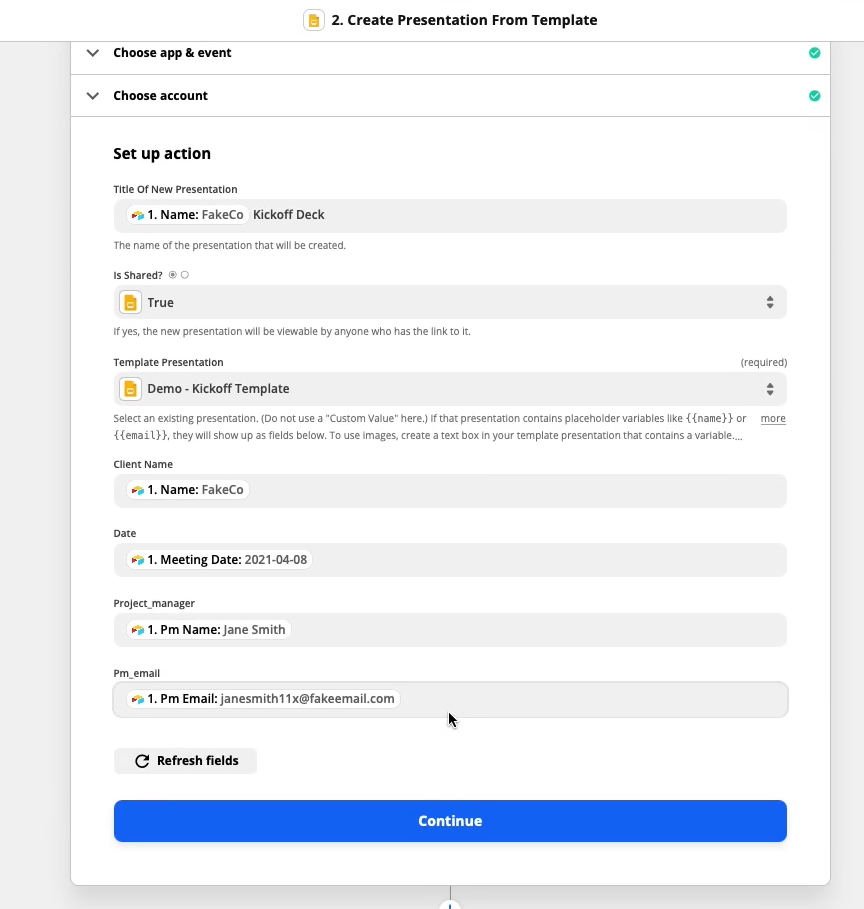
For the Zap’s first action, choose Google Slides and select “Create Presentation from Template”. Choose the deck you made as your template.
In the following steps, match each variable to the data pulled in from Airtable. {{date}} should be filled in with Meeting Date, {{pm_name}} should be filled in with Pm Name, etc.
You can use this form whenever you want to make a presentation. Fast, easy, and anyone can do it.
Lastly, you can add one more step to your Zap to update your Airtable database with a link to the newly created presentation.
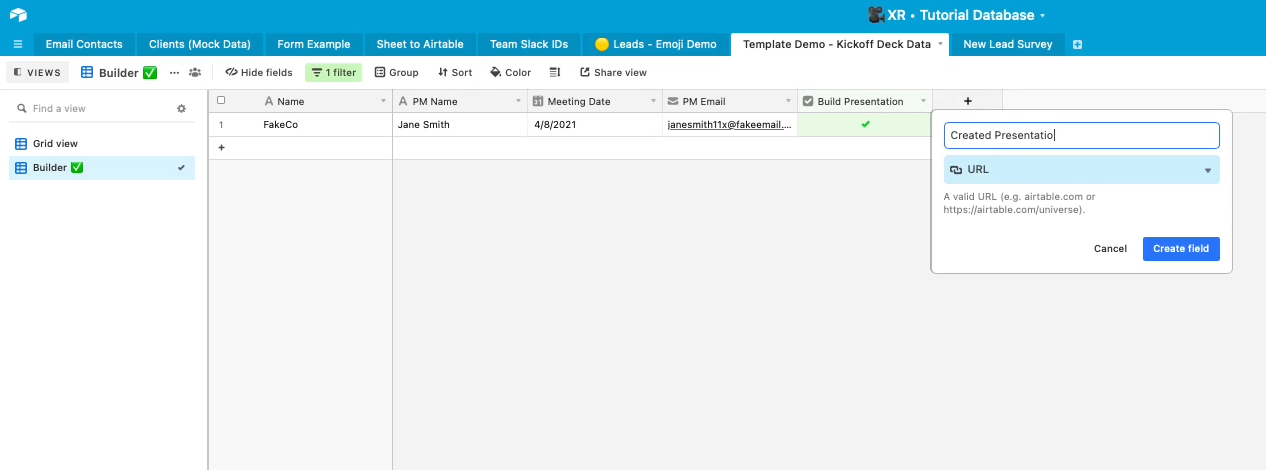
Go back into Airtable, and add one more column called “Created Presentation” and make the field type “URL”.
Add another action in Zapier, choose Airtable as the app, and select “Update Record”. Choose your database and view (the original Grid view, not the builder view). To find the record that corresponds with the deck that the Zap just created, click in the “Record” field and select “Custom”. Then, choose “1. Record id” to pull the record’s Airtable ID from Step 1 of your Zap.

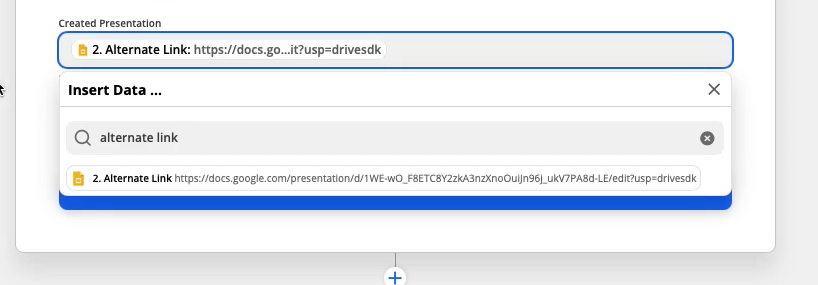
Fill in the “Created Presentation” field with the “Alternate Link” from Step 2. This is the presentation’s URL.
Linking it here isn’t strictly necessary, but it’s a great way to keep track of the decks you made from this template.
Automations like this aren’t going to save you hours every single day, but they will shave minutes off of a robotic task that you might have to do several times a week.
What’s more, using automations for your robotic tasks will help you to maintain focus by reducing context-switching. Instead of going back and forth from one app to another, you can enter everything into one simple form and get a complete presentation in seconds.
Enhancing your workflow with automations, no matter how small, will ultimately help you to work quicker and more effectively.
If you'd like to learn more about no-code workflow automation, check out our blog or our YouTube channel. You can also follow XRAY on Twitter, Facebook, or LinkedIn.

.pptx.png)
.pptx.png)
