
If you’ve spent any time at all exploring the no-code automation space, then you probably already know that Zapier is an extremely useful tool for automating your daily menial tasks and saving time at work.
While ease-of-use is one of Zapier’s strengths, it’s always helpful to have some pointers to get started. If you’re new to Zapier, this post will help you to begin understanding and using Zapier from square one.
We’ll explain what Zapier is for, give you a quick overview of the available plans, and walk you through building your first Zap. You’ll see firsthand how the no-code platform lets you easily send data from one app to another to perform automated actions.
After reading and following along with this guide, you’ll be equipped with all the knowledge you need to dive into Zapier and start building your own time-saving automations.
First, let’s cover the basics of what Zapier is, and how it works.
Zapier is a no-code automation platform. It lets you build automations by connecting different pieces of software together and sending data from one app to another.
With Zapier, you can build automations that perform a certain set of actions whenever your specified trigger conditions are met. For example:
• Whenever I get an email from a specific client, send me a copy of that email as a direct message in Slack
• Whenever a deal is marked as Closed/Won in Hubspot, create an invoice in Quickbooks
• Whenever I get a Zoom invitation in my email inbox, create a “Meeting Notes” document in Google Drive
As you can see in the examples above, every Zap has a trigger event that prompts it to run, and at least one action that it performs.
One of the key things to know about Zapier is that every step can share its data with future steps. In the CRM -> Quickbooks automation example, Zapier will use the data it retrieves in the trigger step to create the invoice in Quickbooks, dynamically filling in fields with the customer’s name, the billing amount, etc.
The flow of data is what makes Zapier save time. It handles data entry for you, so you don’t have to do it manually or copy and paste. Not only does this reduce the time you spend on tedious tasks, but it also makes your work more consistent as it prevents human error.
Like most SaaS tools, Zapier offers several different subscription options which you can view on their pricing page. For the sake of following along with this tutorial, you can use the Free plan.
If you’re interested in building automations to support your daily workflows, you’ll probably want to look into the Starter and Professional plans for more Zaps and features.
If you’re building automations to support your entire company, you’ll probably need to use the Professional Plus plan or a higher tier.
But for now, just making a free account will be fine.
For your first Zap, we’ll show you how to build a simple automation that connects Google Calendar to Google Sheets. Whenever you get a Calendar invite, data about the invitation will automatically be logged in a Google Sheet.
While this automation won’t have a lot of practical applications, it will be a helpful way for you to see how you can manage the flow of data between apps in Zapier.
In addition to a free Zapier account, you’ll also need a free Google account to create this automation.
Before you can make any Zap, you’ll need to have some test data to work with.
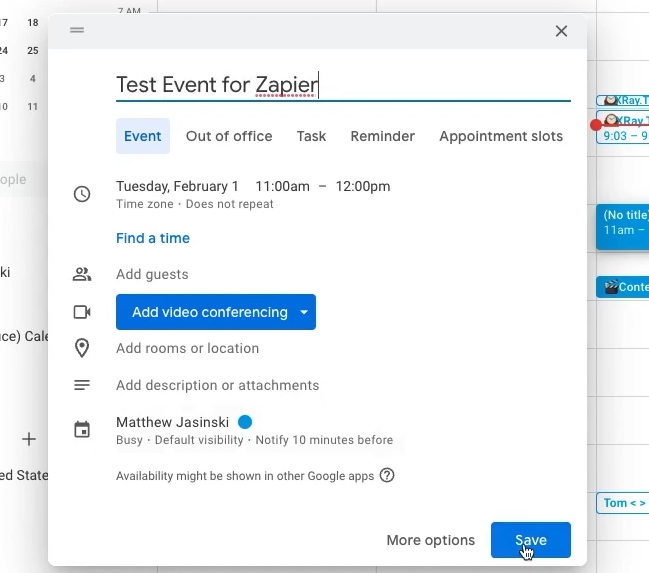
Create a calendar event on any day and at any time to use as test data. If you can, add one of your other email addresses as a guest.
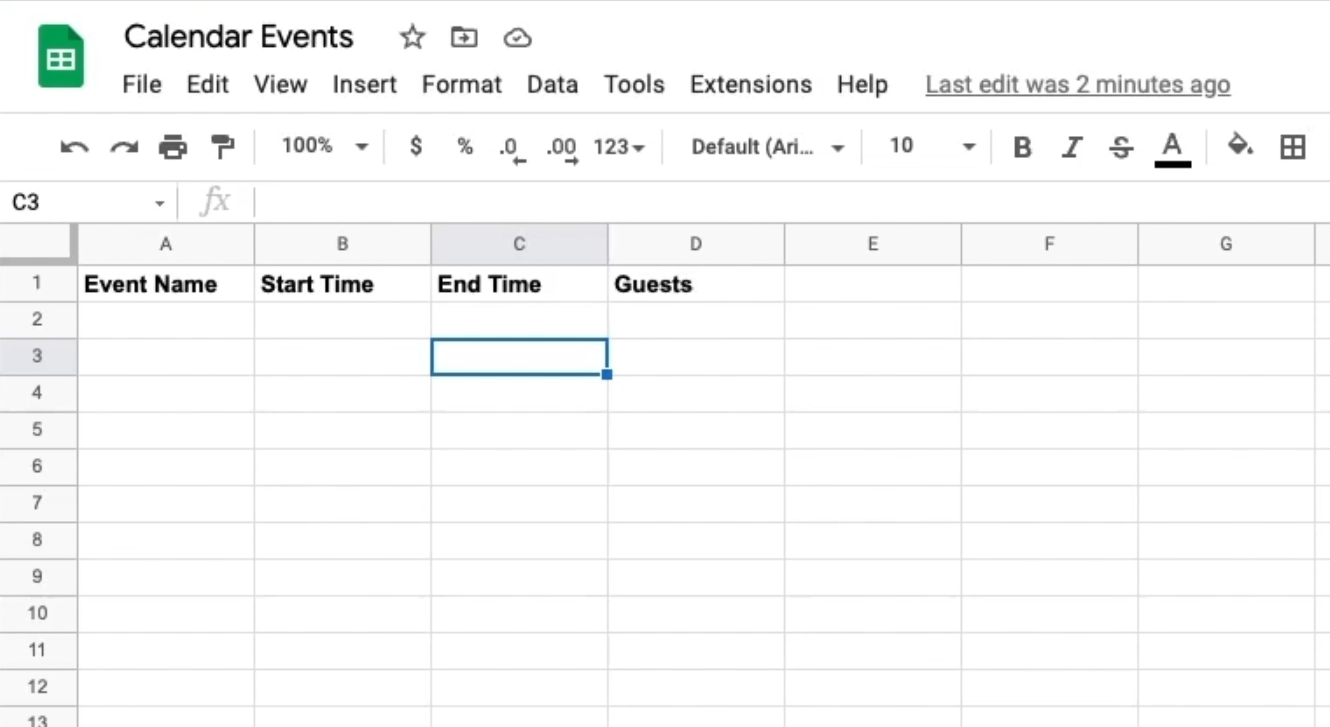
You’ll also need to create a Google Sheet to store Calendar information in. Make a new sheet and a few fields to the top row like Event Name, Start Time, End Time, and Guests.
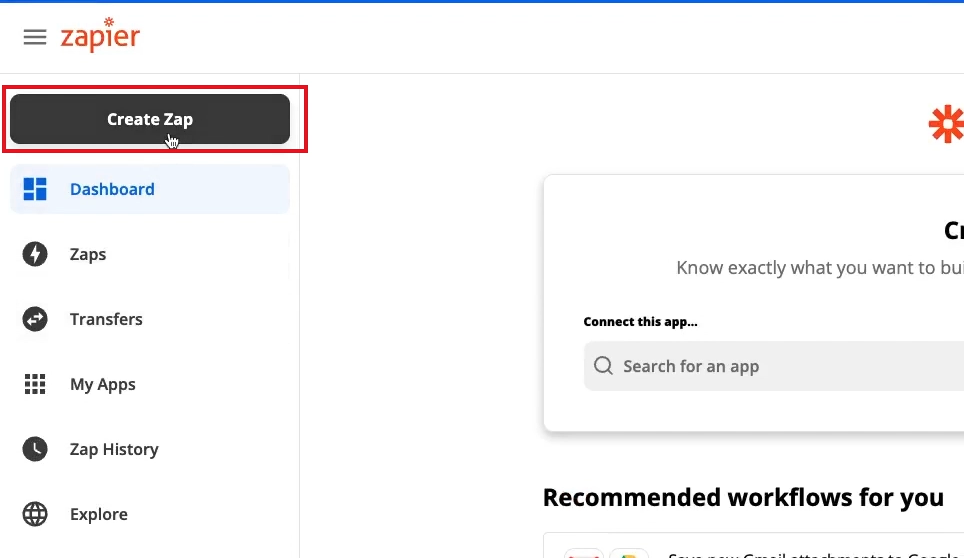
Log in to Zapier and click on the “Create Zap” button.
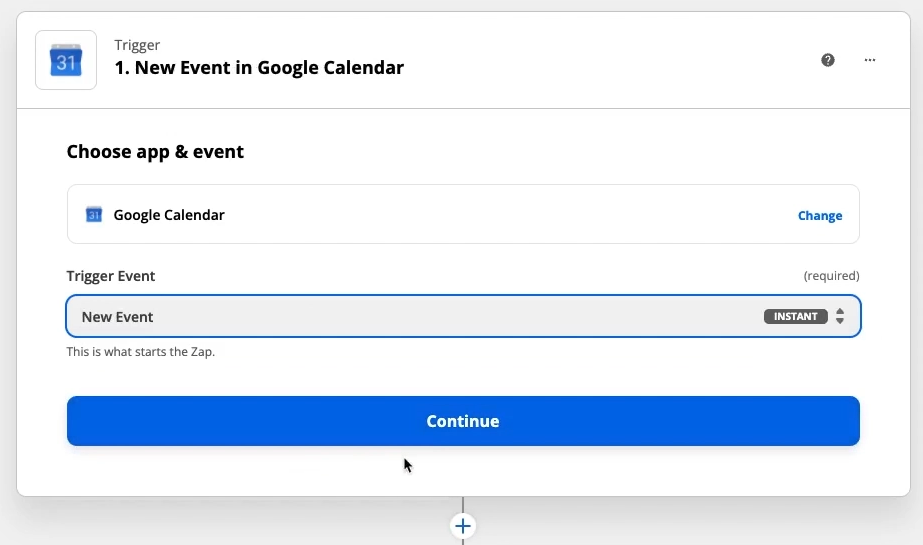
First, you’ll be prompted to create a trigger. Every Zap needs to have a trigger; whenever the conditions for the trigger are met, the Zap will run.
For this Zap, our trigger will be the creation of a new event in Google Calendar. Select Google Calendar as your app, and choose “New Event” as the Trigger Event.
Click continue, and sign in to your Google account. Grant the permissions that Zapier needs, and click on continue again.
Then, you’ll need to specify which calendar you want Zapier to check for new events. This will probably be your main calendar, which will simply be called [youremail]@gmail.com. Once you’ve set your calendar, click continue.
Click on “Test Trigger” to retrieve your first set of test data. You should see the event that you just created.
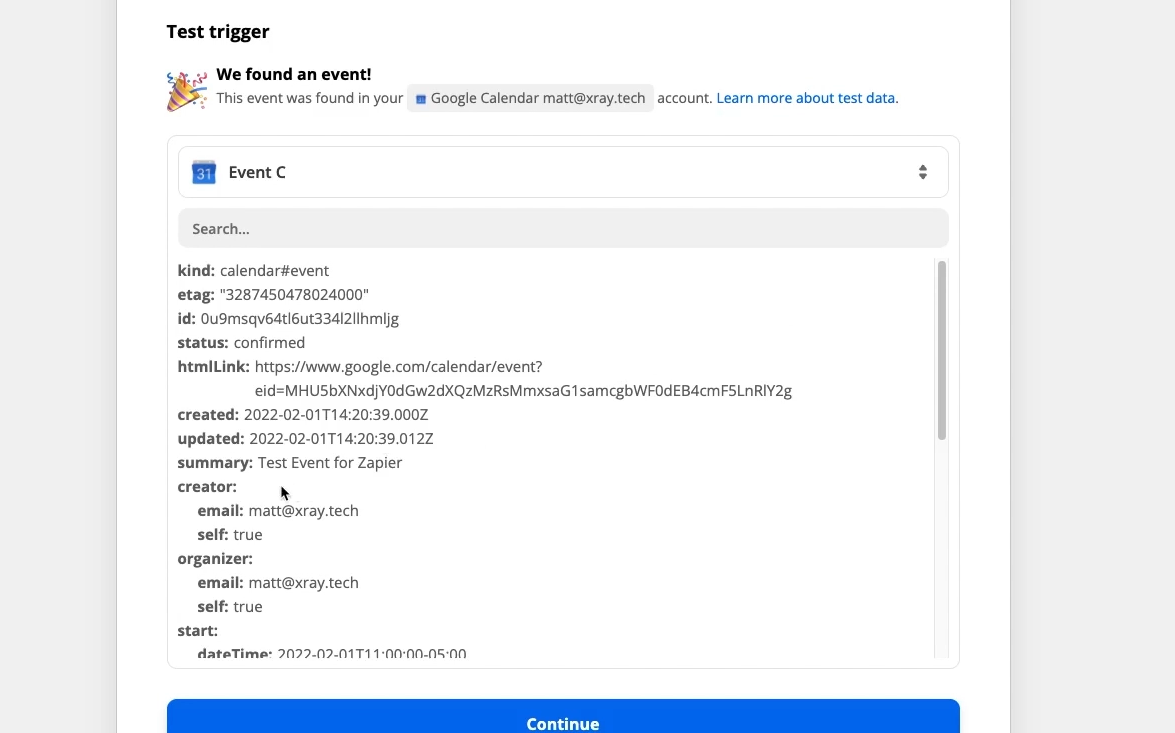
Notice that Zapier has tons of data and metadata related to the event. The wealth of information that Zapier gathers from trigger events lets you do all sorts of things with your automations.
But for now, you’re just going to add some data to your spreadsheet.
Click on continue, and add a new step.
Choose Google Sheets as your app, and pick “Create Spreadsheet Row” as your action event.

Sign in to Google Sheets and grant Zapier access.
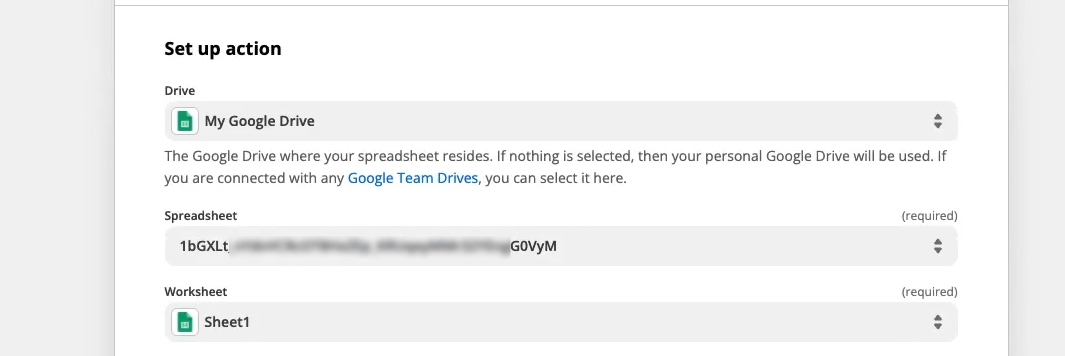
Now, you’ll need to point Zapier to the Google Sheet you want to use. Select the Google Drive where the Sheet is stored (probably “My Drive”). Next, specify the sheet itself.
The most reliable way to specify a Google Sheet or Doc in Zapier is to use its ID. To find the ID, open up the Sheet and drive and copy the string of characters between /d/ and /edit in the address bar.

Paste the ID directly into the “Spreadsheet” field. Pick the worksheet that you want to use in your Sheets document, and wait for Zapier to find your spreadsheet’s fields.
Zapier lets you fill in each field in your spreadsheet from your trigger. As you click on each field, you’ll see a menu to select data from the trigger, so you can map the “1. Event Begins (Pretty)” to the Start Time, “1. Summary” to the Event name, etc.
Note that the “1.” just indicates the data you’re using comes from Step 1.
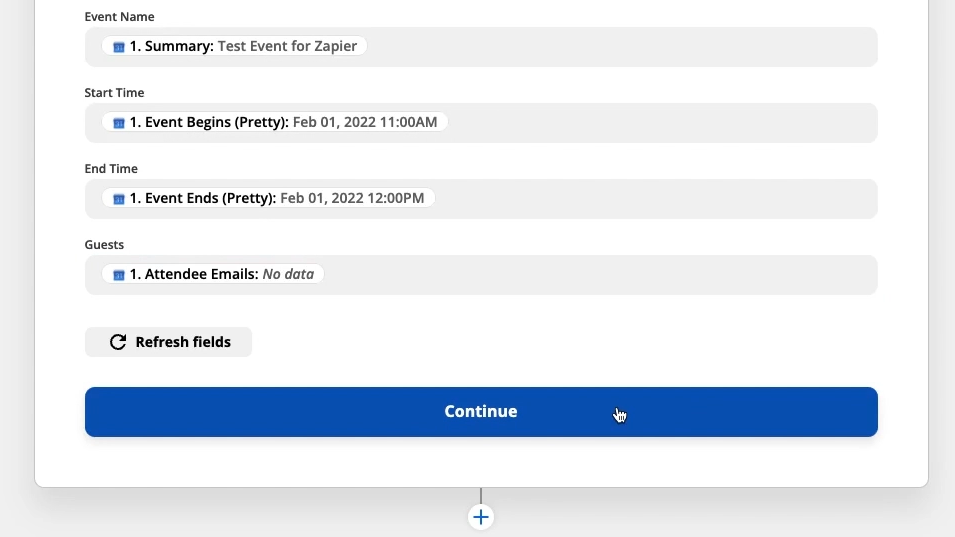
Once you’ve mapped all your fields, click on Continue.
With all your fields mapped, it’s time to test your Zap.
Note: testing an action step in Zapier will actually perform that step. Always use appropriate test data when building a Zap. In other words, use your own email addresses and other accounts that you have access to instead of a client’s.
Click on “Test & Review”, and you should get a success message.
Head over to Google Sheets to confirm that a new row was added.
If you’re satisfied with your Zap, turn it on. You can also give it a live test now by adding a new event to Calendar. Just note that it may take several minutes for Zapier to run your Zap if you’re using the free plan.
We hope this tutorial gave you a solid introduction to Zapier as an automation platform. It’s one of many no-code apps available that can help to build useful automations or other tools.
At XRAY, we strongly believe that you don’t need to be a coder to work with tech and build workflows that save you time.
If you’d like to learn more about no-code and low-code, check out our blog or our YouTube channel. You can also follow XRAY on Twitter, Facebook, or LinkedIn.


.pptx.png)
.pptx.png)