
Automatically creating projects, tasks, and clients in a time-tracking app like Harvest is a great addition to any onboarding workflow. It will help you to save some time and make your onboarding process much more consistent, as clients and projects are created instantly.
In this post, we’ll give you an overview of what you can automate in Harvest with Make, and show you an example of a scenario you could build.
Nearly anything you can do in Harvest can be automated in Make.
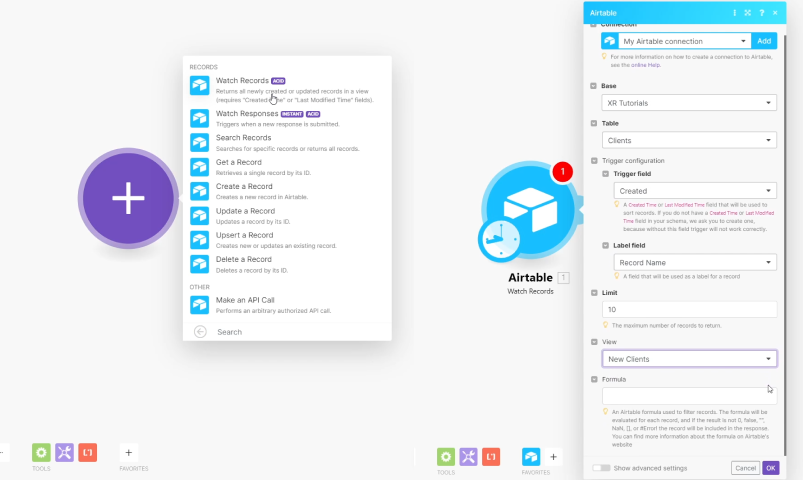
If you open up Make and create a Harvest module, you can see a huge list of options for creating and editing data.

You can work with clients, contacts, projects, invoices, expenses, time entries, and users.
And if the action you want to automate isn’t listed here, it’s most likely covered by the last option in the list: make an API call.
With an API call module, you can query Harvest’s API to perform any action that it allows. It takes a little more work than using the prebuilt modules, but you can easily find the information you need to set up this module in Harvest’s API docs.
And in the rare case that your actions aren’t supported by the API call module either, you can always create an HTTP request to automate an action.
But for the vast majority of cases, the prebuilt modules and API calls will be all that you need.
Now, we’ll walk you through building an example scenario that automates some Harvest actions in Make.
This scenario will take data from Airtable and use it to create a new client and a new project associated with that client. Then, we’ll add a little conditional logic to the scenario so it can either find an existing client, or create a new one as needed.
First, you need to get some data for your scenario to work with. In our example, we’ll use an Airtable base, but you could also use a CRM or any other data source you prefer.
This Airtable view shows new Projects recently added to the base. Make will watch this view and run whenever there’s a new entry.

You just need to indicate the base, table, and view you want to use. Test this initial step by selecting ‘Choose where to start’, ‘choose manually’, and picking a record.
Then, click run once, and you should see that Make found a record. Throughout this tutorial, you can keep using this same method to test the scenario.
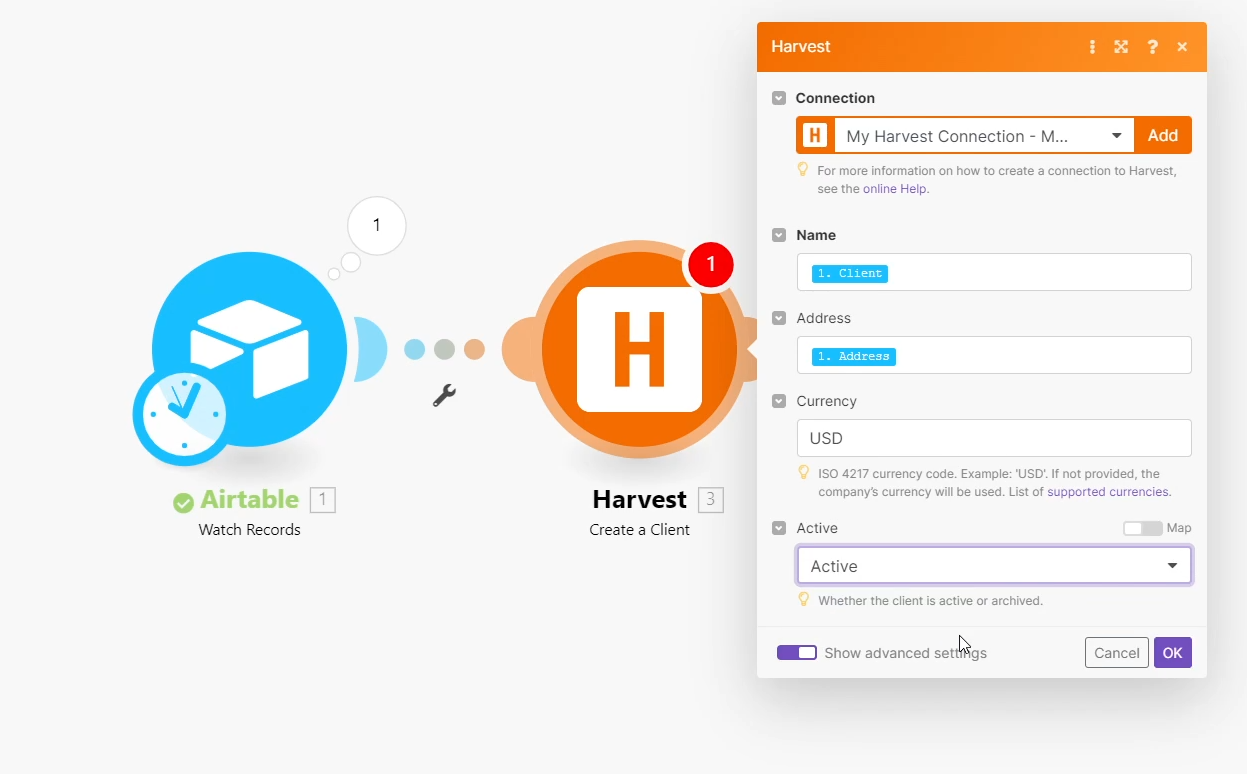
Next, create a new Harvest module, and select “Create a Client”. There are only three options we need to fill out here: Name, Address, and Currency.
Fill in Name and Address with Data from Airtable, andl set currency to always be USD by typing “USD” into the field.
There’s one more option hidden behind “show advanced settings”. You can set the client as Active, Archived, or Empty.
Once this step is configured, test again. Open up Harvest, and you can confirm that the new client is there.
Before you proceed to the next step, delete the client to avoid any duplicates or errors.
Next, we’re going to have our scenario create a new project. We could use the “Create a Project” module, but we might want to set some projects to Fixed Fee.
In the pre-built “Create a Project” module, there’s no option for that. So instead, we’re going to select “Make an API call”.
Whenever making an API call or using the HTTP module, refer to the relevant docs to find out what information you need to provide. You can find Harvest’s API docs here, and you can generally find API docs for any app with a quick Google search.
With the documentation handy, you can start filling in the API call module. You can also refer to the screenshot below for an example of a completed module.
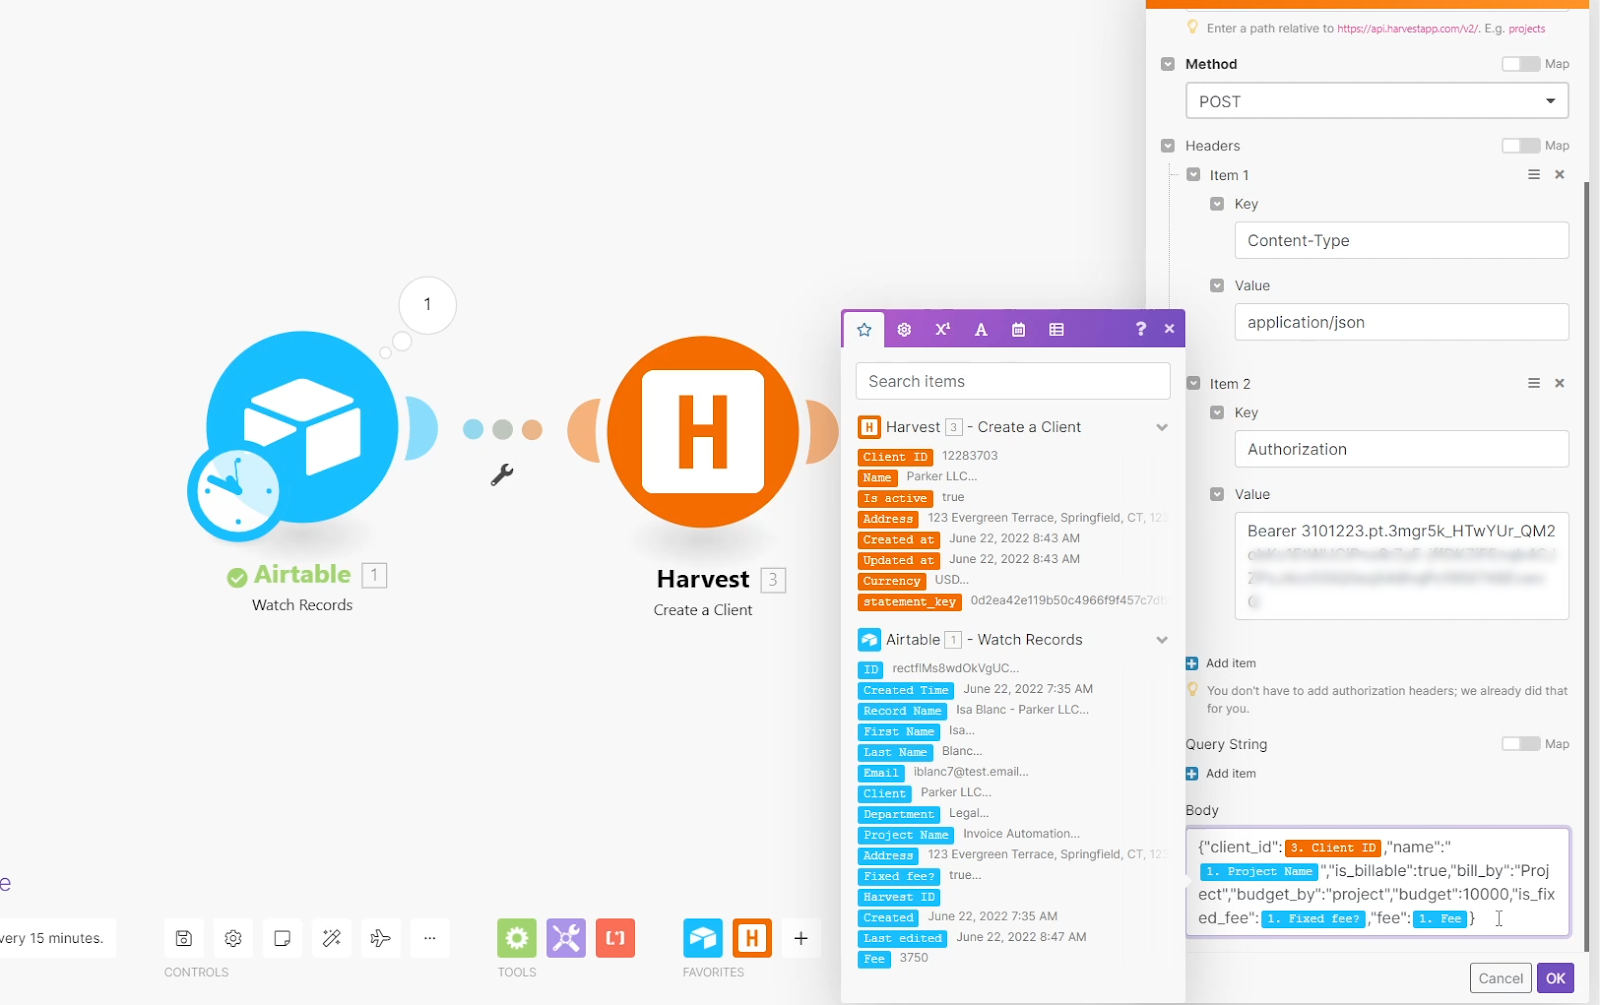
As the helper text in Make indicates, you just need to add a relative path in the URL field, rather than a full URL. Enter “projects”, and select POST as the method.
In the headers, you should see that a key-value pair for “Content Type” is already filled in. You can leave that as-is, and add a new key-value pair for authorization.
The key will be “Authorization”, and the value will be “Bearer”, followed by an access token. To get your harvest access token, go to the “Developers” section of your Harvest account, create a new token, and copy it.
Then paste it in after “Bearer”. Just be sure to leave one space between “Bearer” and the start of your token.
If we were making a GET request, we could use a Query String to filter the results, but we can just leave it blank in this POST request. So we’ll skip that for now and fill out the body of our request.
The text here needs to follow JSON formatting, and include every required attribute. To see which fields are required for the “Project” object, we can check Harvest’s API docs.
As you’re filling out the body, you can use data from previous steps for dynamic content. So in this case, our Scenario will fill in the unique Client ID and project name each time it runs, rather than using a static value.
Finally, we’ll add the two optional attributes that we couldn’t access in the prebuilt module: “Is_fixed_fee” , and “fee”. We’ll fill in both of those with data from Airtable. Test the scenario again to make sure everything looks good.
Over in Harvest, we should see that the project was created, and it’s already set to “fixed fee”.
This scenario is a good start, but it’s not very flexible. What happens if we add a new project to this Airtable base for an existing client?
The automation will try to create the client again, and encounter an error. We need to add logic to handle likely use cases, and there’s a very easy way to do this.
After the “create a client” step, add a module to update the Airtable record that triggered the automation to run. Then, add the Harvest ID into this “Harvest ID” column.
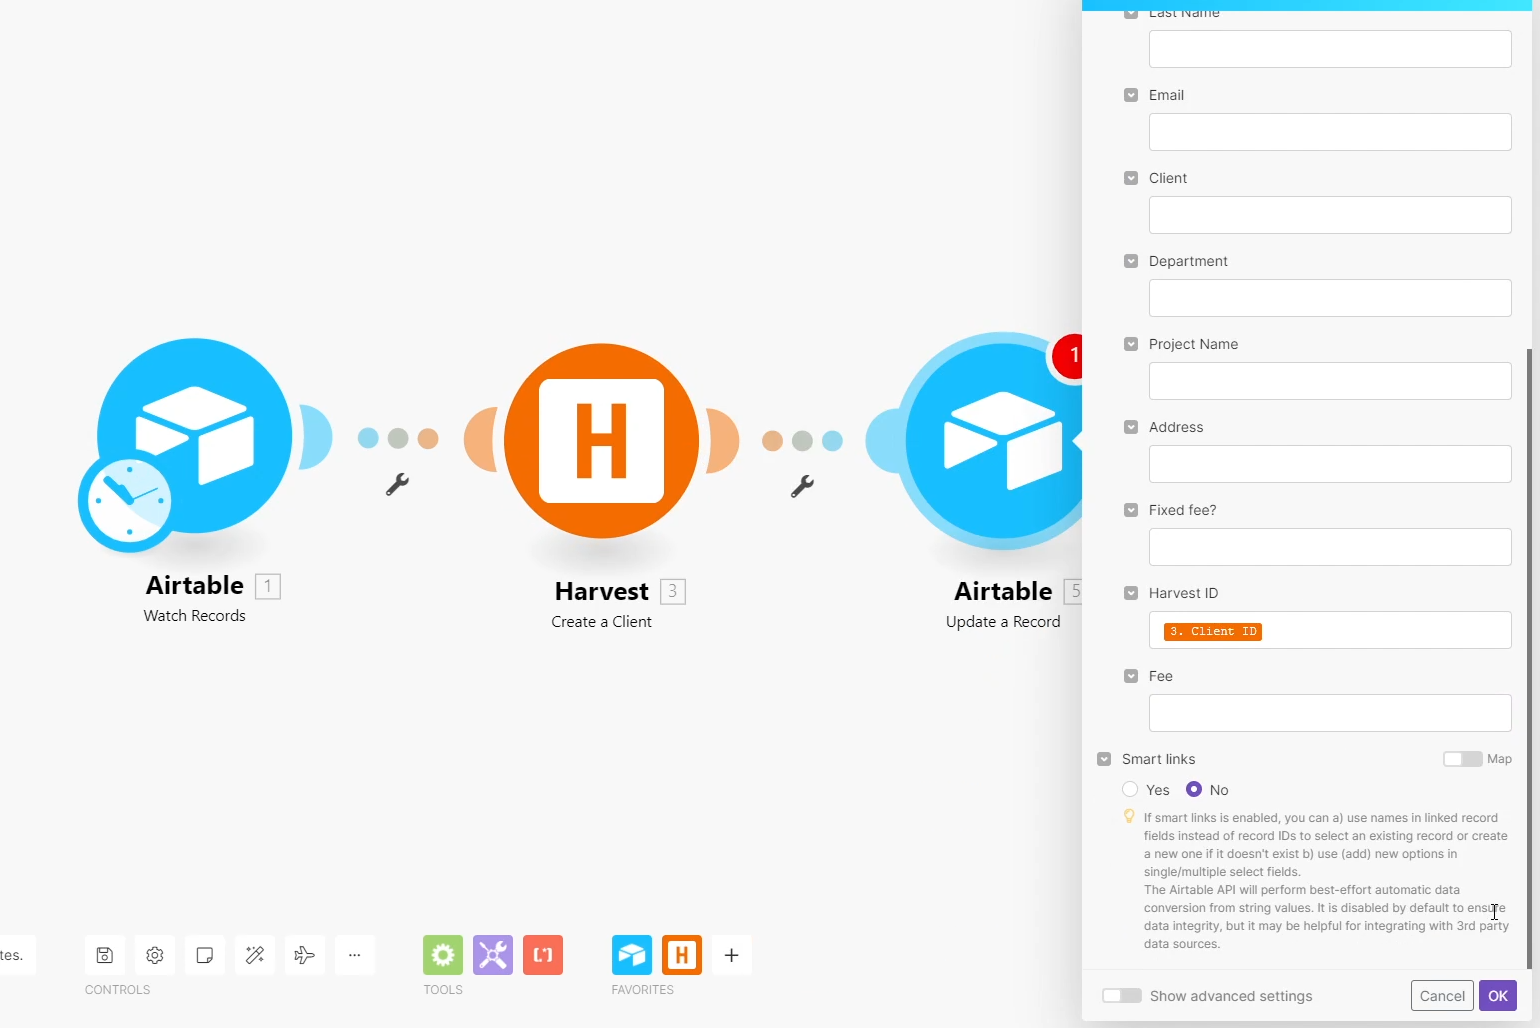
Then, add a router from the “flow control” menu. Set one path to run if the Harvest ID field in Airtable is blank, and have it create a new client accordingly.
If the ID field is not empty, then the automation should run the second path, using the provided ID to find the correct client.
Conditional logic like this can be a little tedious to set up, but it makes your automations much more useful in the real world.
Now you’re all set to start automating your Harvest projects in Make. Between Make’s pre-built modules and customizable API calls, you can automate nearly any workflow you want.
If you’d like to learn more about building no-code and low-code automations, check out our blog or our YouTube channel. You can also follow XRAY on Twitter, Facebook, or LinkedIn.

.pptx.png)

