
Airtable is a great application for managing complex and dynamic databases. It integrates perfectly with automation platforms like Zapier and Make, and it also includes some native automation capabilities of its own.
With Airtable automations, you can add or update records in your databases, send emails, and connect to popular apps like Google Docs or Slack.
In this post, we’ll show you how to trigger Airtable automations with webhooks.
Webhook triggers give you versatile control over when and how your automations run, and they let you trigger the same automation from totally different sources.
You can set up webhook-triggered automations with just a few steps in Airtable. Just follow along with this tutorial and you’ll have your automation set up in minutes.
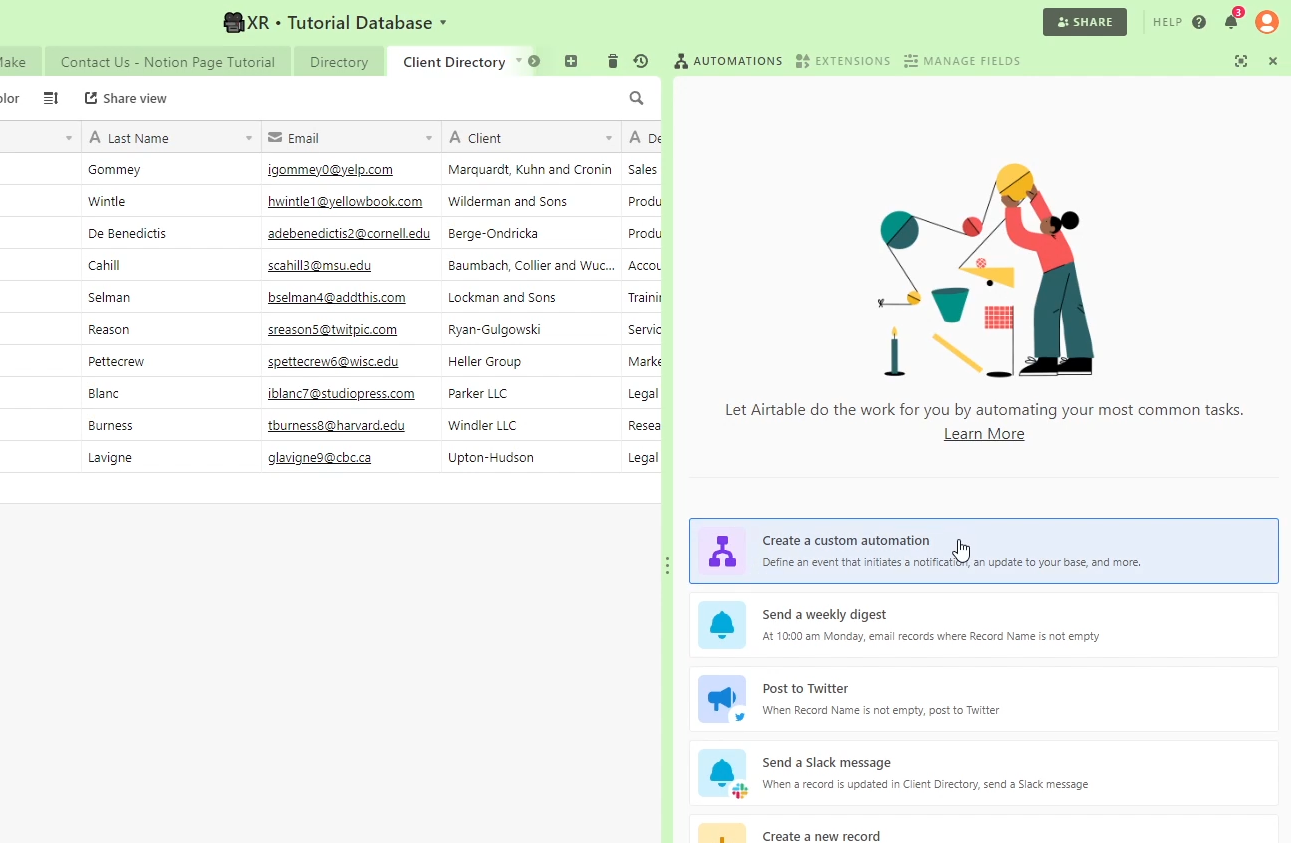
Start by creating an automation in the Airtable base that you’d like to use. In our example, we’ll use a “Client directory” table in our tutorials base.
Click on “Automations”, then, click “Create Custom Automation”.
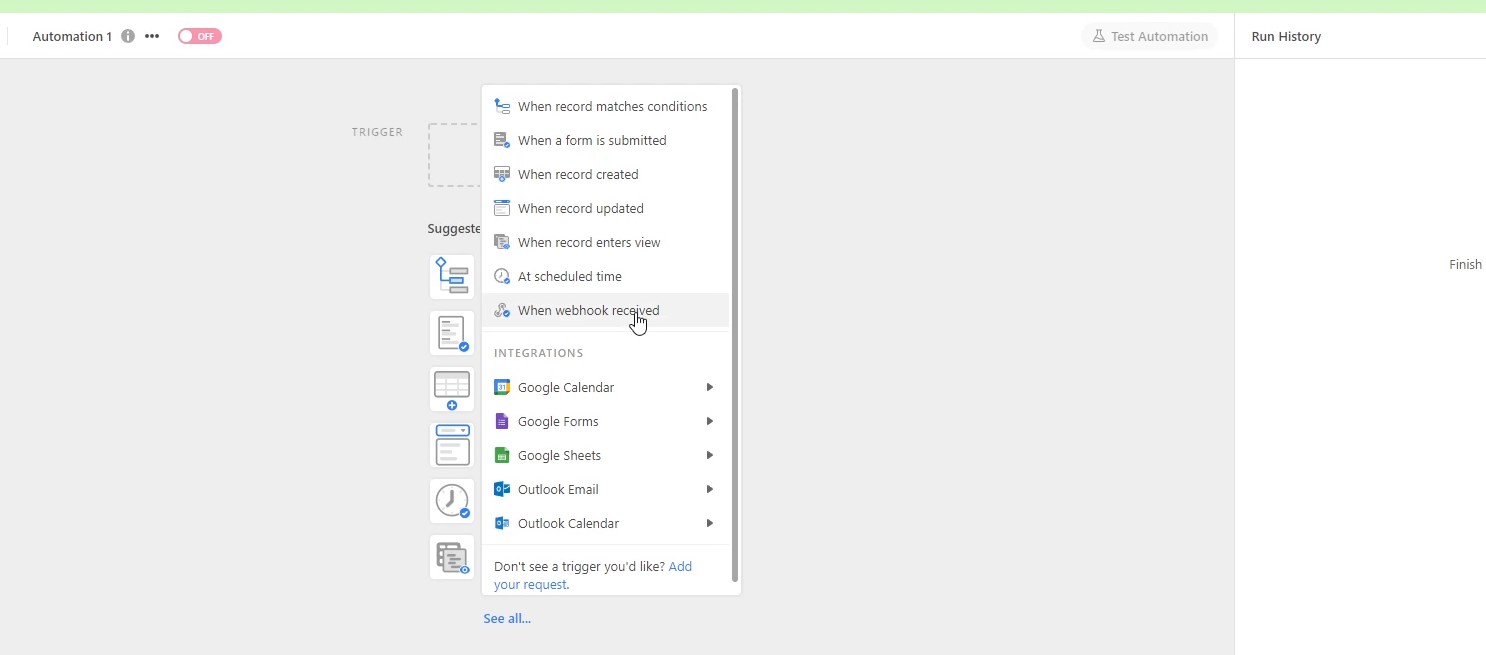
You’ll see a list of triggers here, but to find Webhooks, you’ll need to click on “See all”. From this menu, select “When webhook received”.
In the “Properties” panel on the right, you’ll see a URL under “Configuration”. This is the URL that you’ll send your webhook to. Copy the URL, and save it for our next step.

Now, you’ll need to send a webhook from any app. In our example, we’ll use a simple Zapier automation. Note that you’ll need a premium Zapier account to use its webhooks steps.
Our Zap gets data from a Google sheets trigger, which we’ll send over to Airtable by adding a Webhooks step.
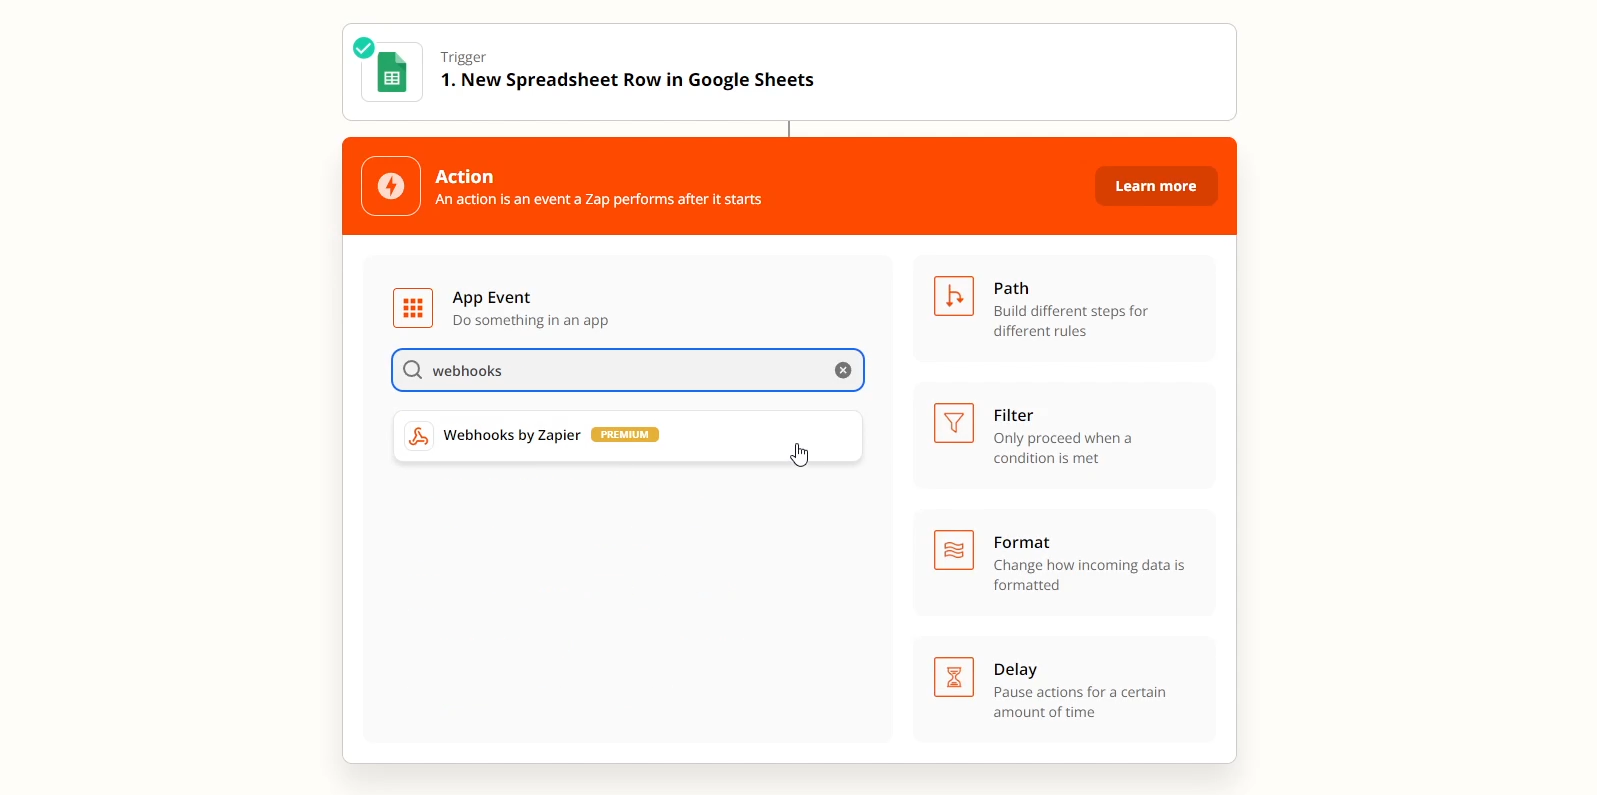
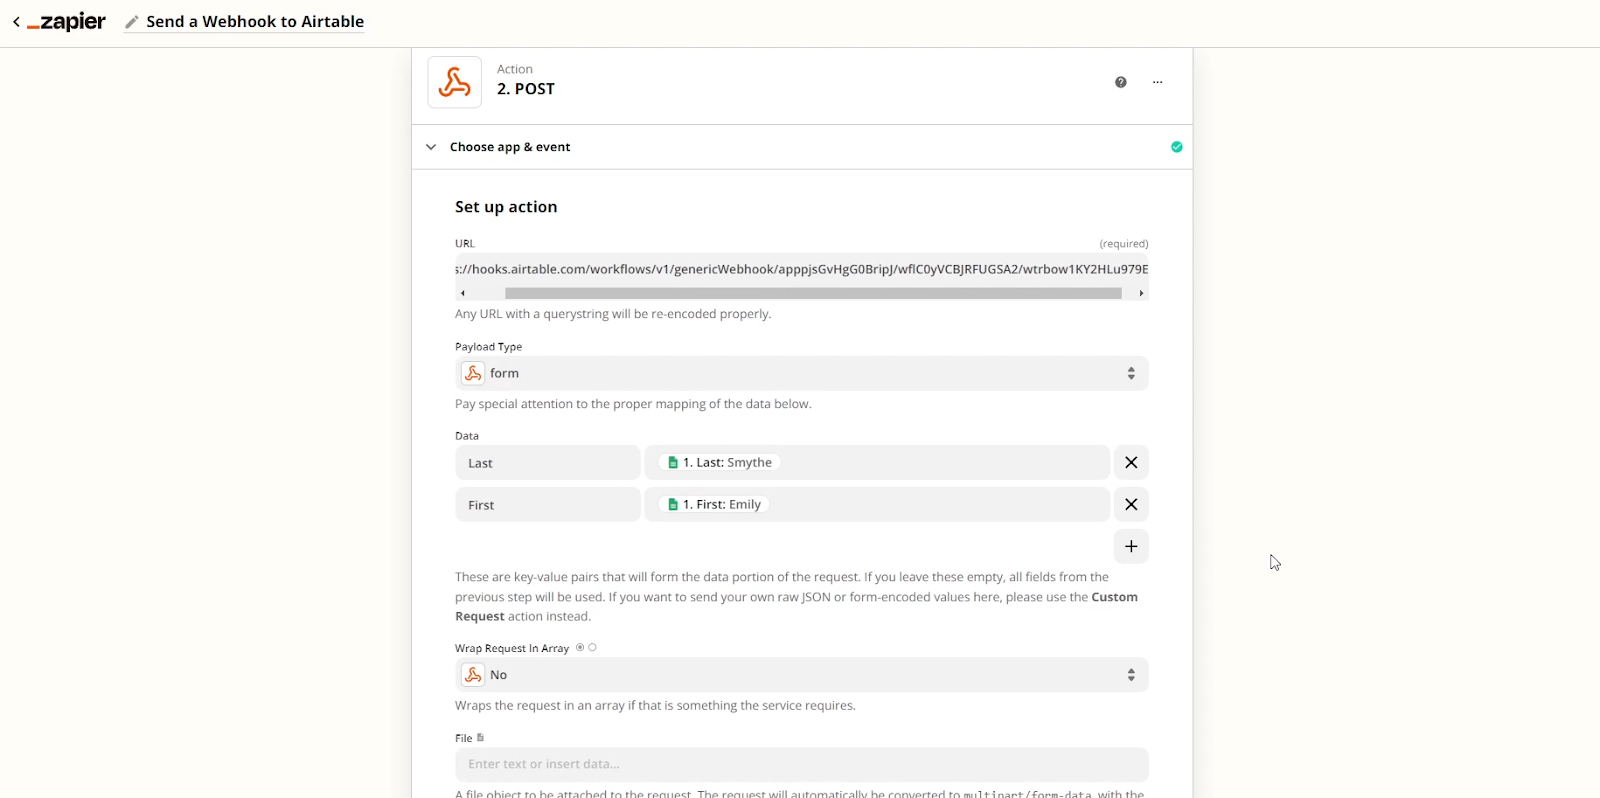
To configure the step, you just need to paste the URL we got from Airtable, choose a method, and provide some data.
The method will be POST, since you’re creating new data.
Then, configure the data as key-value pairs. Each “key” will be the title of the piece of data, while the value will be the data itself.
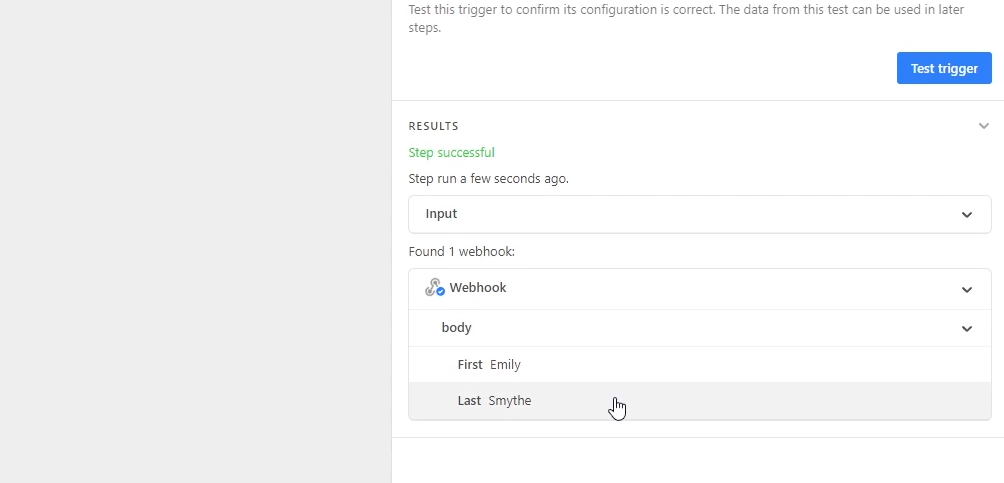
Once you’ve filled in all of our data, you can test the automation to send the webhook, and check Airtable to confirm that everything worked correctly.
You should see all of the data that you sent with your webhook as Key-value pairs.
Now you can add steps to your Airtable automation to perform actions with the data you sent via webhook. You can add any steps that you’d like, or follow along with our example to see how Airtable can grab dynamic data from the webhook trigger.
In our automation, we’ll create a new Airtable record with the data sent over. To do this, you just need to click on “Add action”, choose “Create Record”, and select the table you want to use.
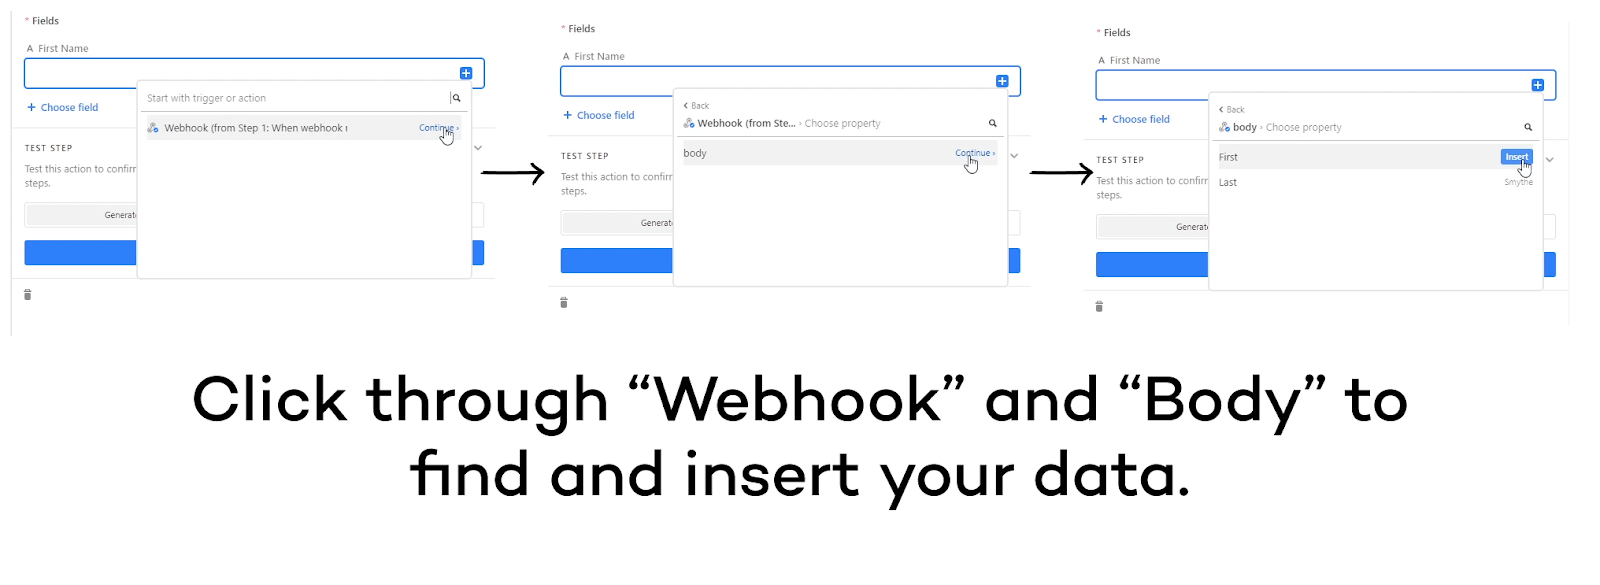
To create a new record with the webhook data, we’ll map each piece of data to the appropriate field. To do this, click on the blue plus sign. then choose “Webhook”. Click on “body” and then select the data you want to use.
Repeat that process for every field that you want to fill in.
Finally, we’ll send a Slack message to make sure we’re notified of the new record.
Click on “Add action”, and choose Slack under “Integrations”. Select “Send message”, and sign in to the Slack account you want to use.
Pick the user or channel that you want to send the message to, and compose the message.
Most of this message will be static text, but we’ll fill in some data from the webhook as well, using the same process as before.
Click on the blue plus, choose webhook, then body, and insert the data you want to use.
Then test the whole automation by clicking on “Test Automation”, and “run automation”.
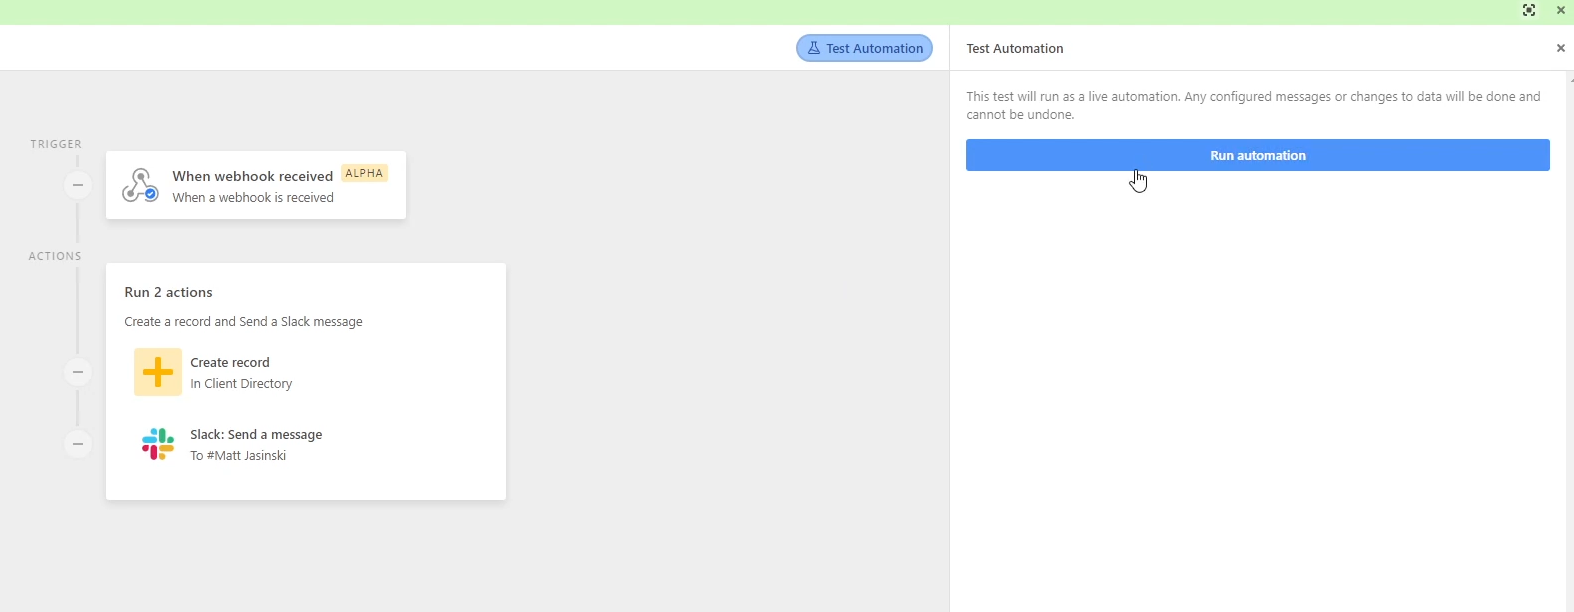
You should see a Slack notification pop up, and if you check Airtable, there should be a new record with the data from your webhook.
Now you’re all set to start building Airtable Automations with webhooks. Triggering your automations with webhooks is a great way to build versatile workflows that you can launch from any data source.
If you’d like to learn more about building no-code automations, check out our blog or our YouTube channel. You can also follow XRAY on Twitter, Facebook, or LinkedIn.


.pptx.png)
.pptx.png)